2023 Jun 11 - AEK Table

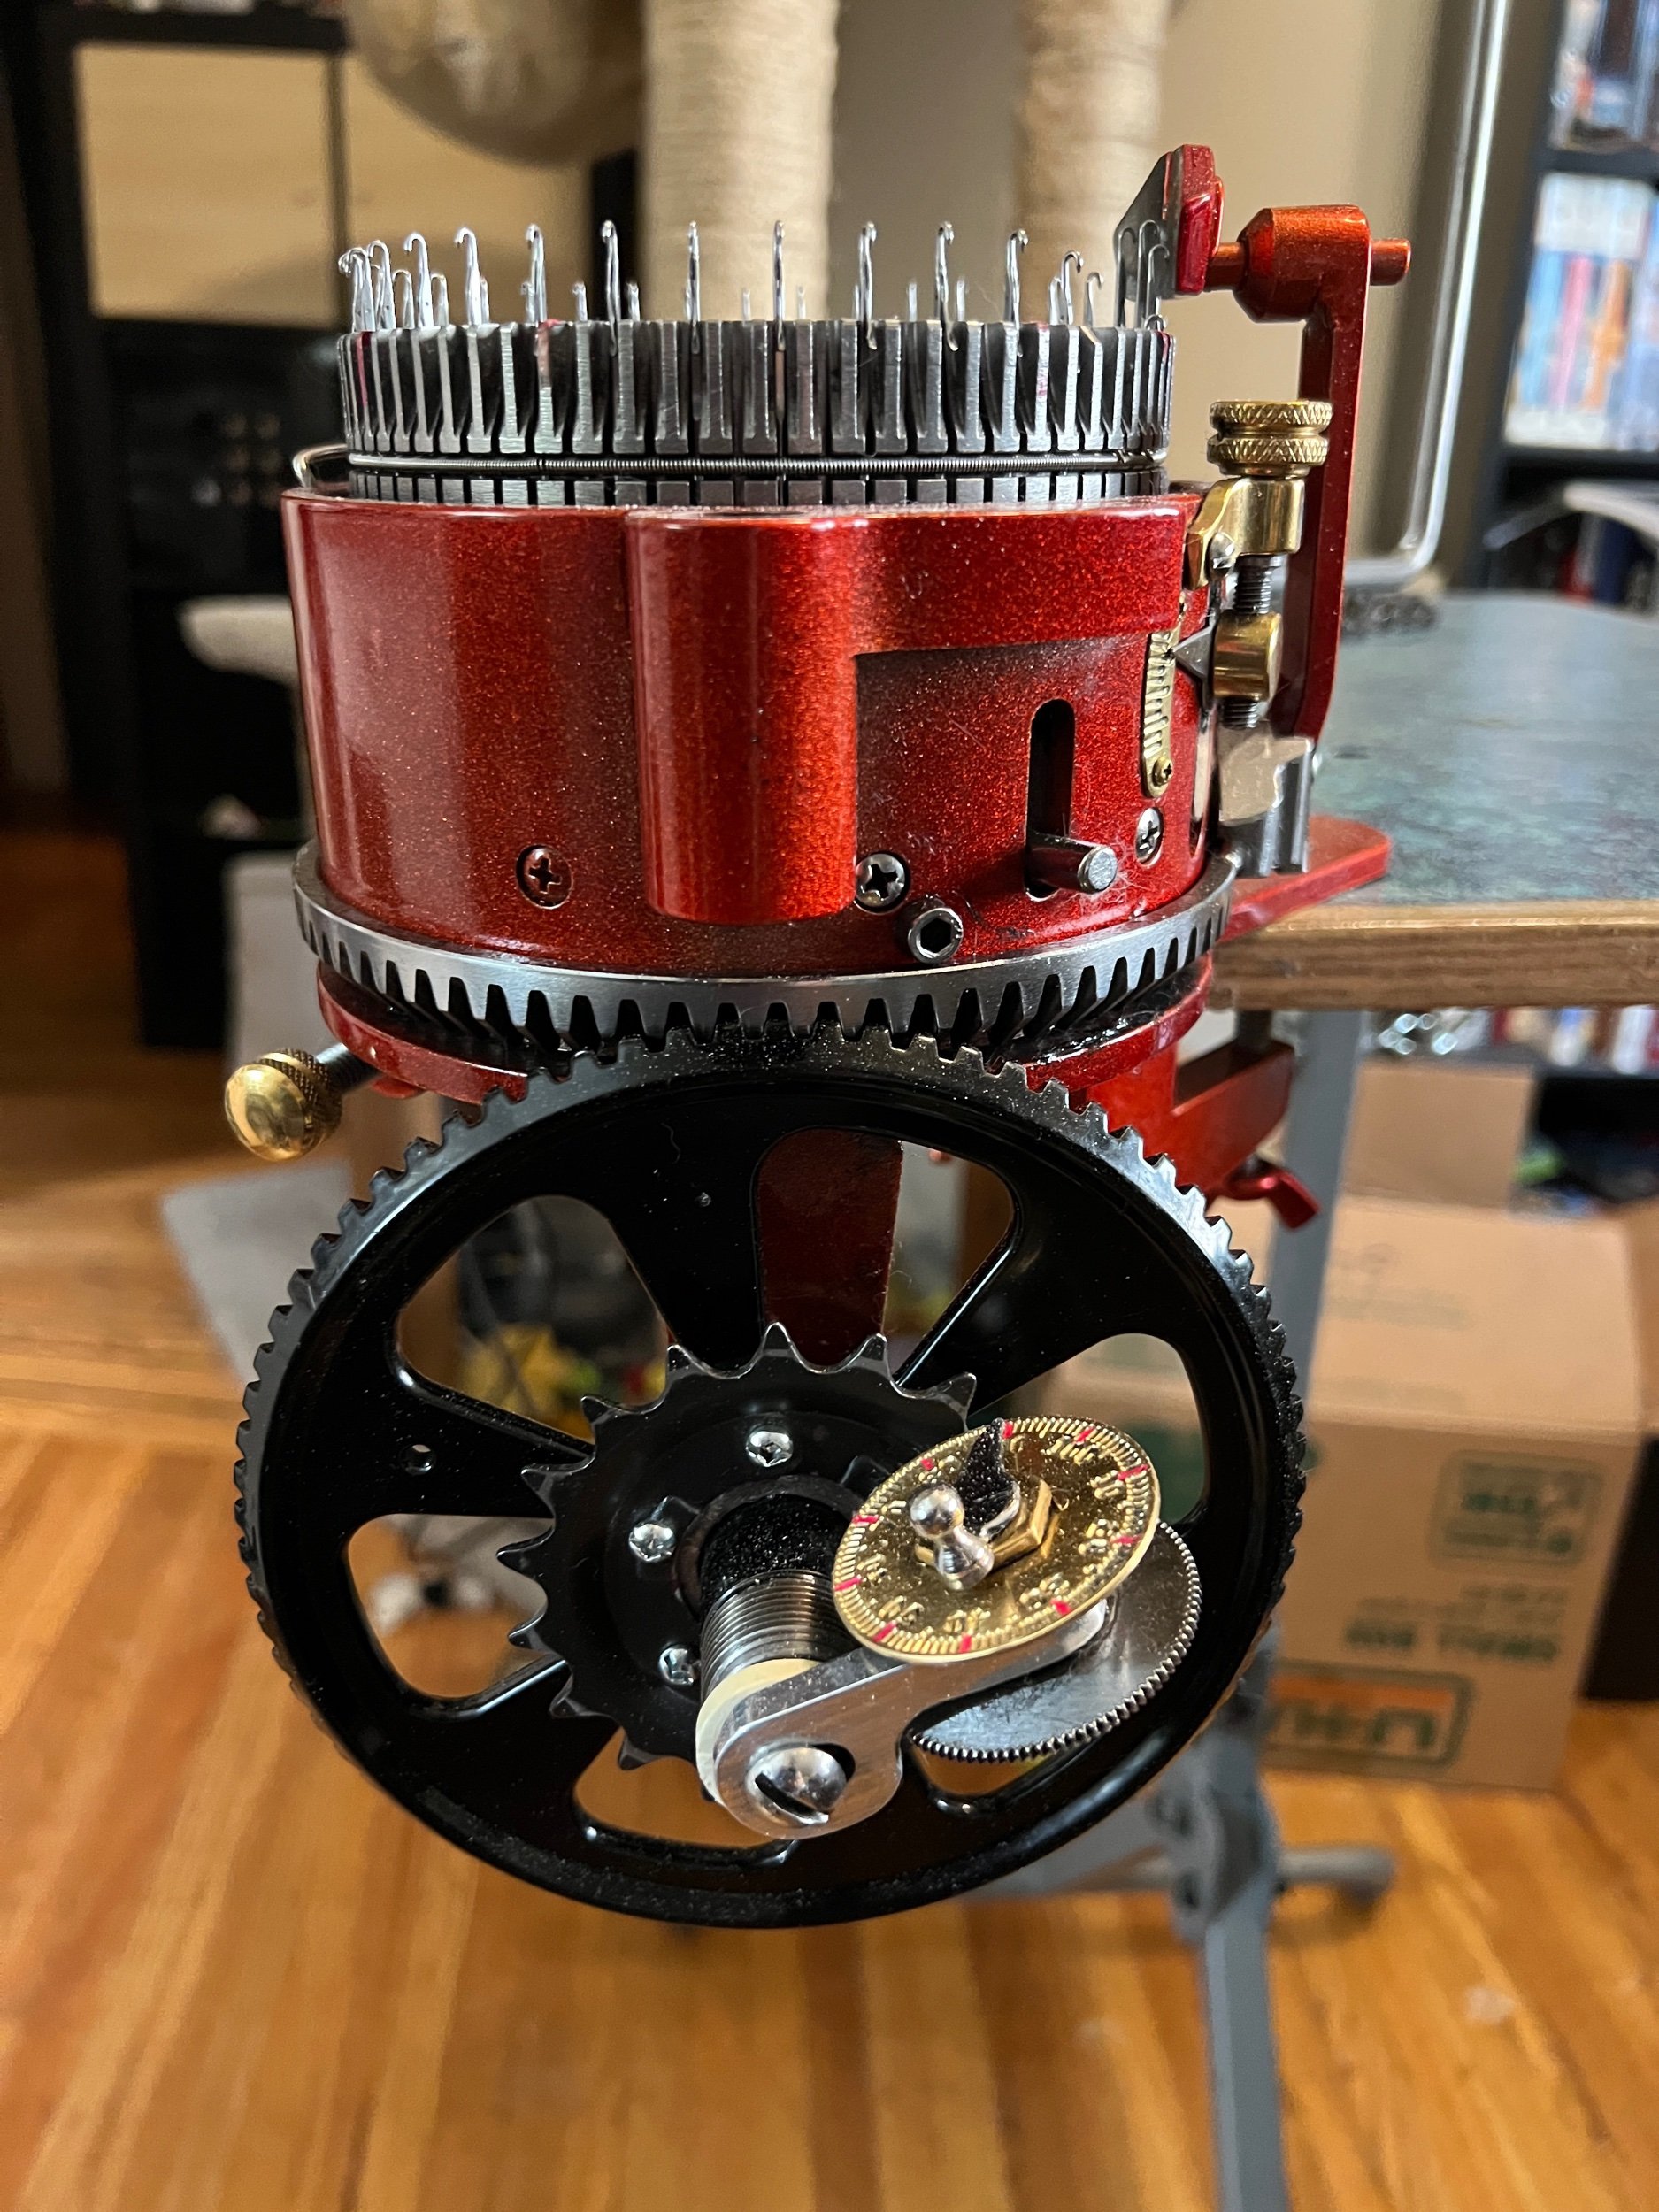
(Addi-Express Kingsize Table)

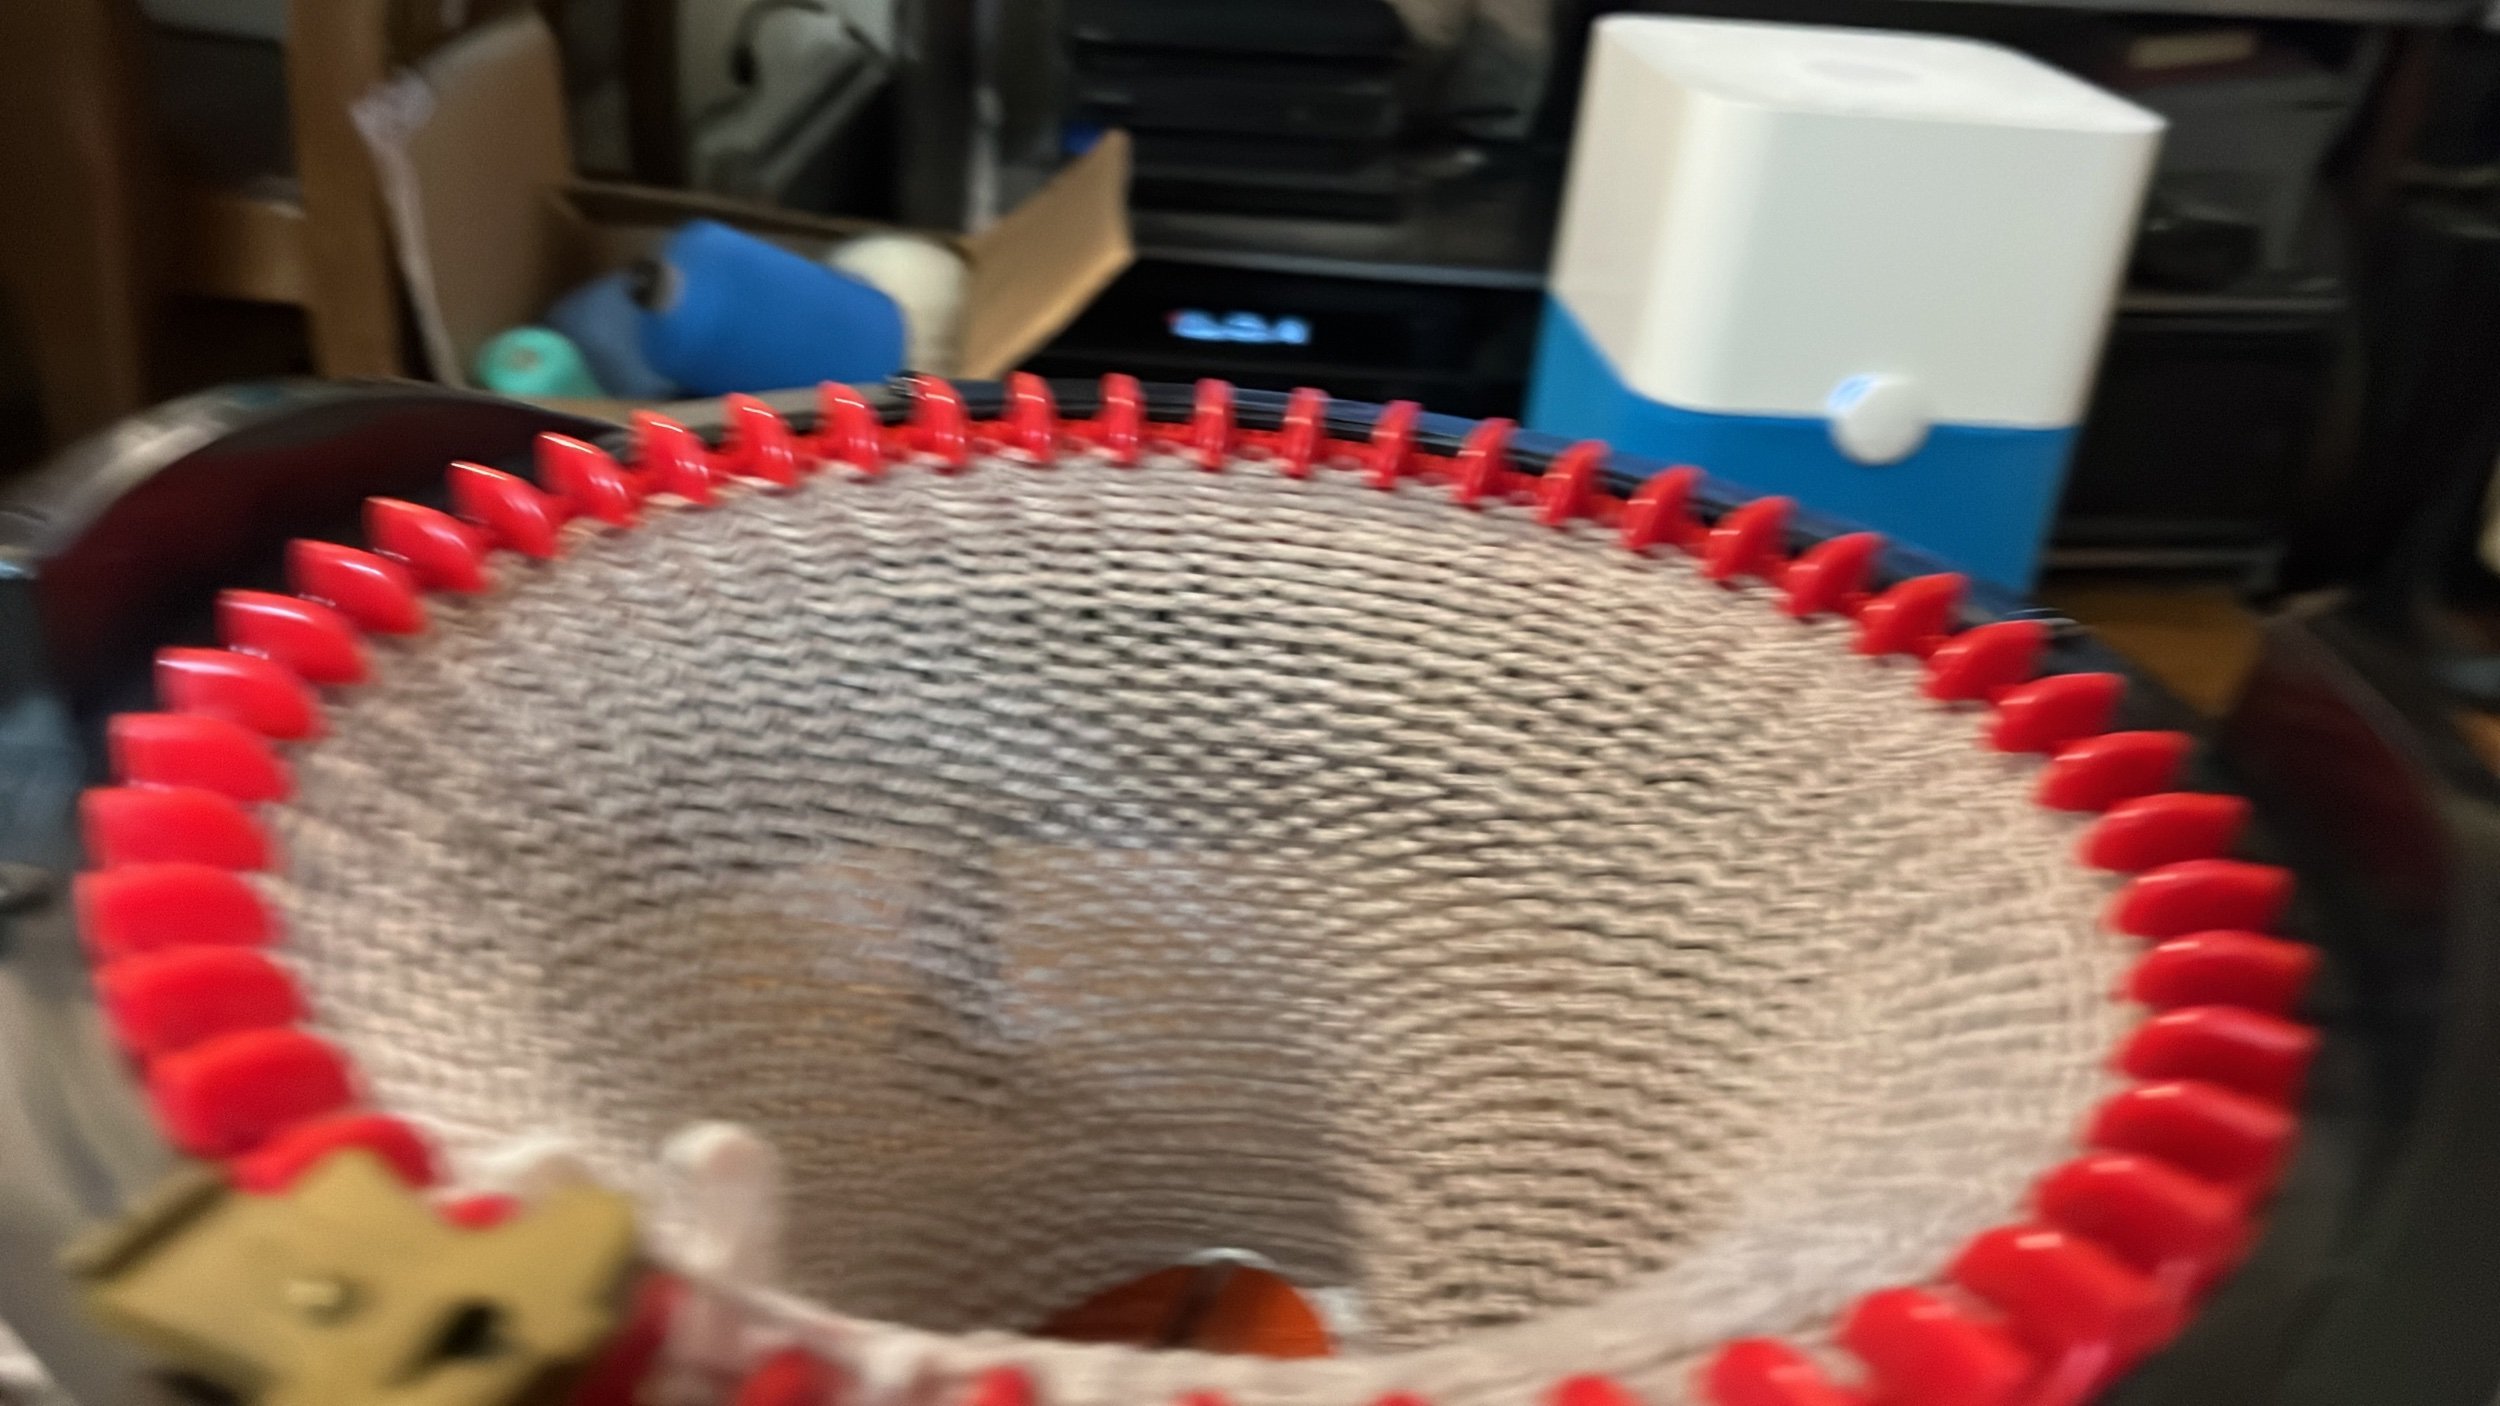
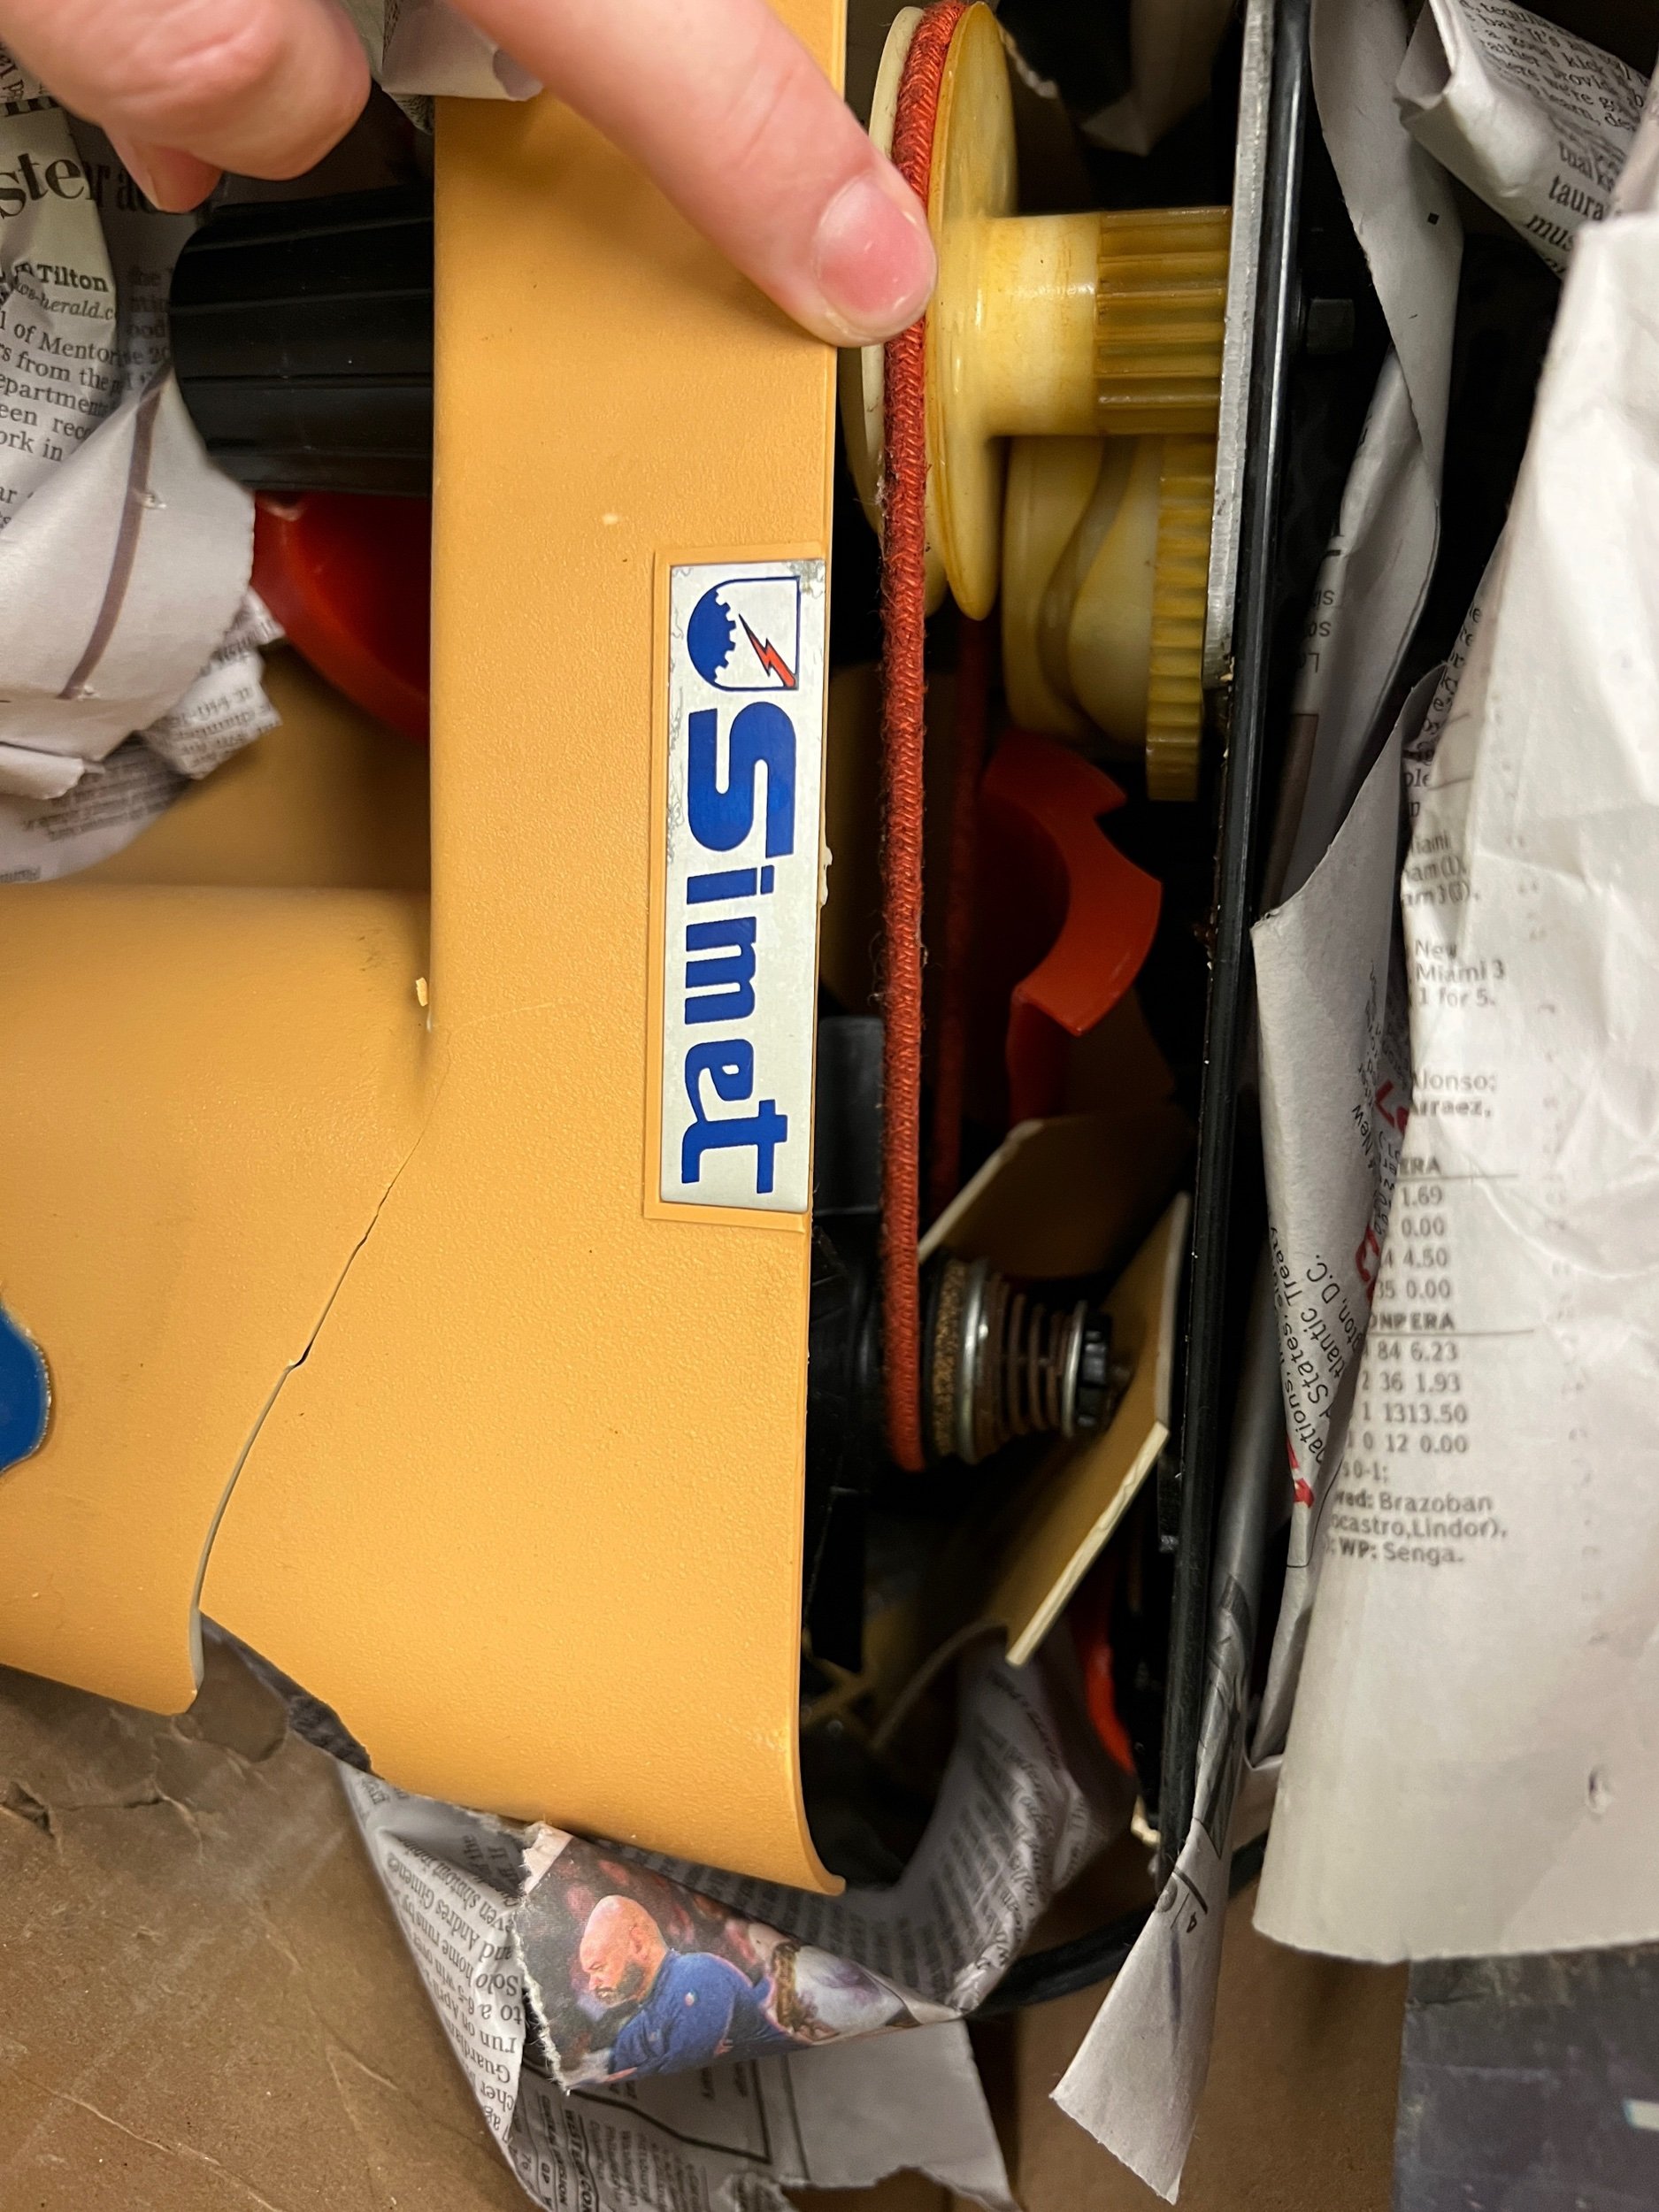
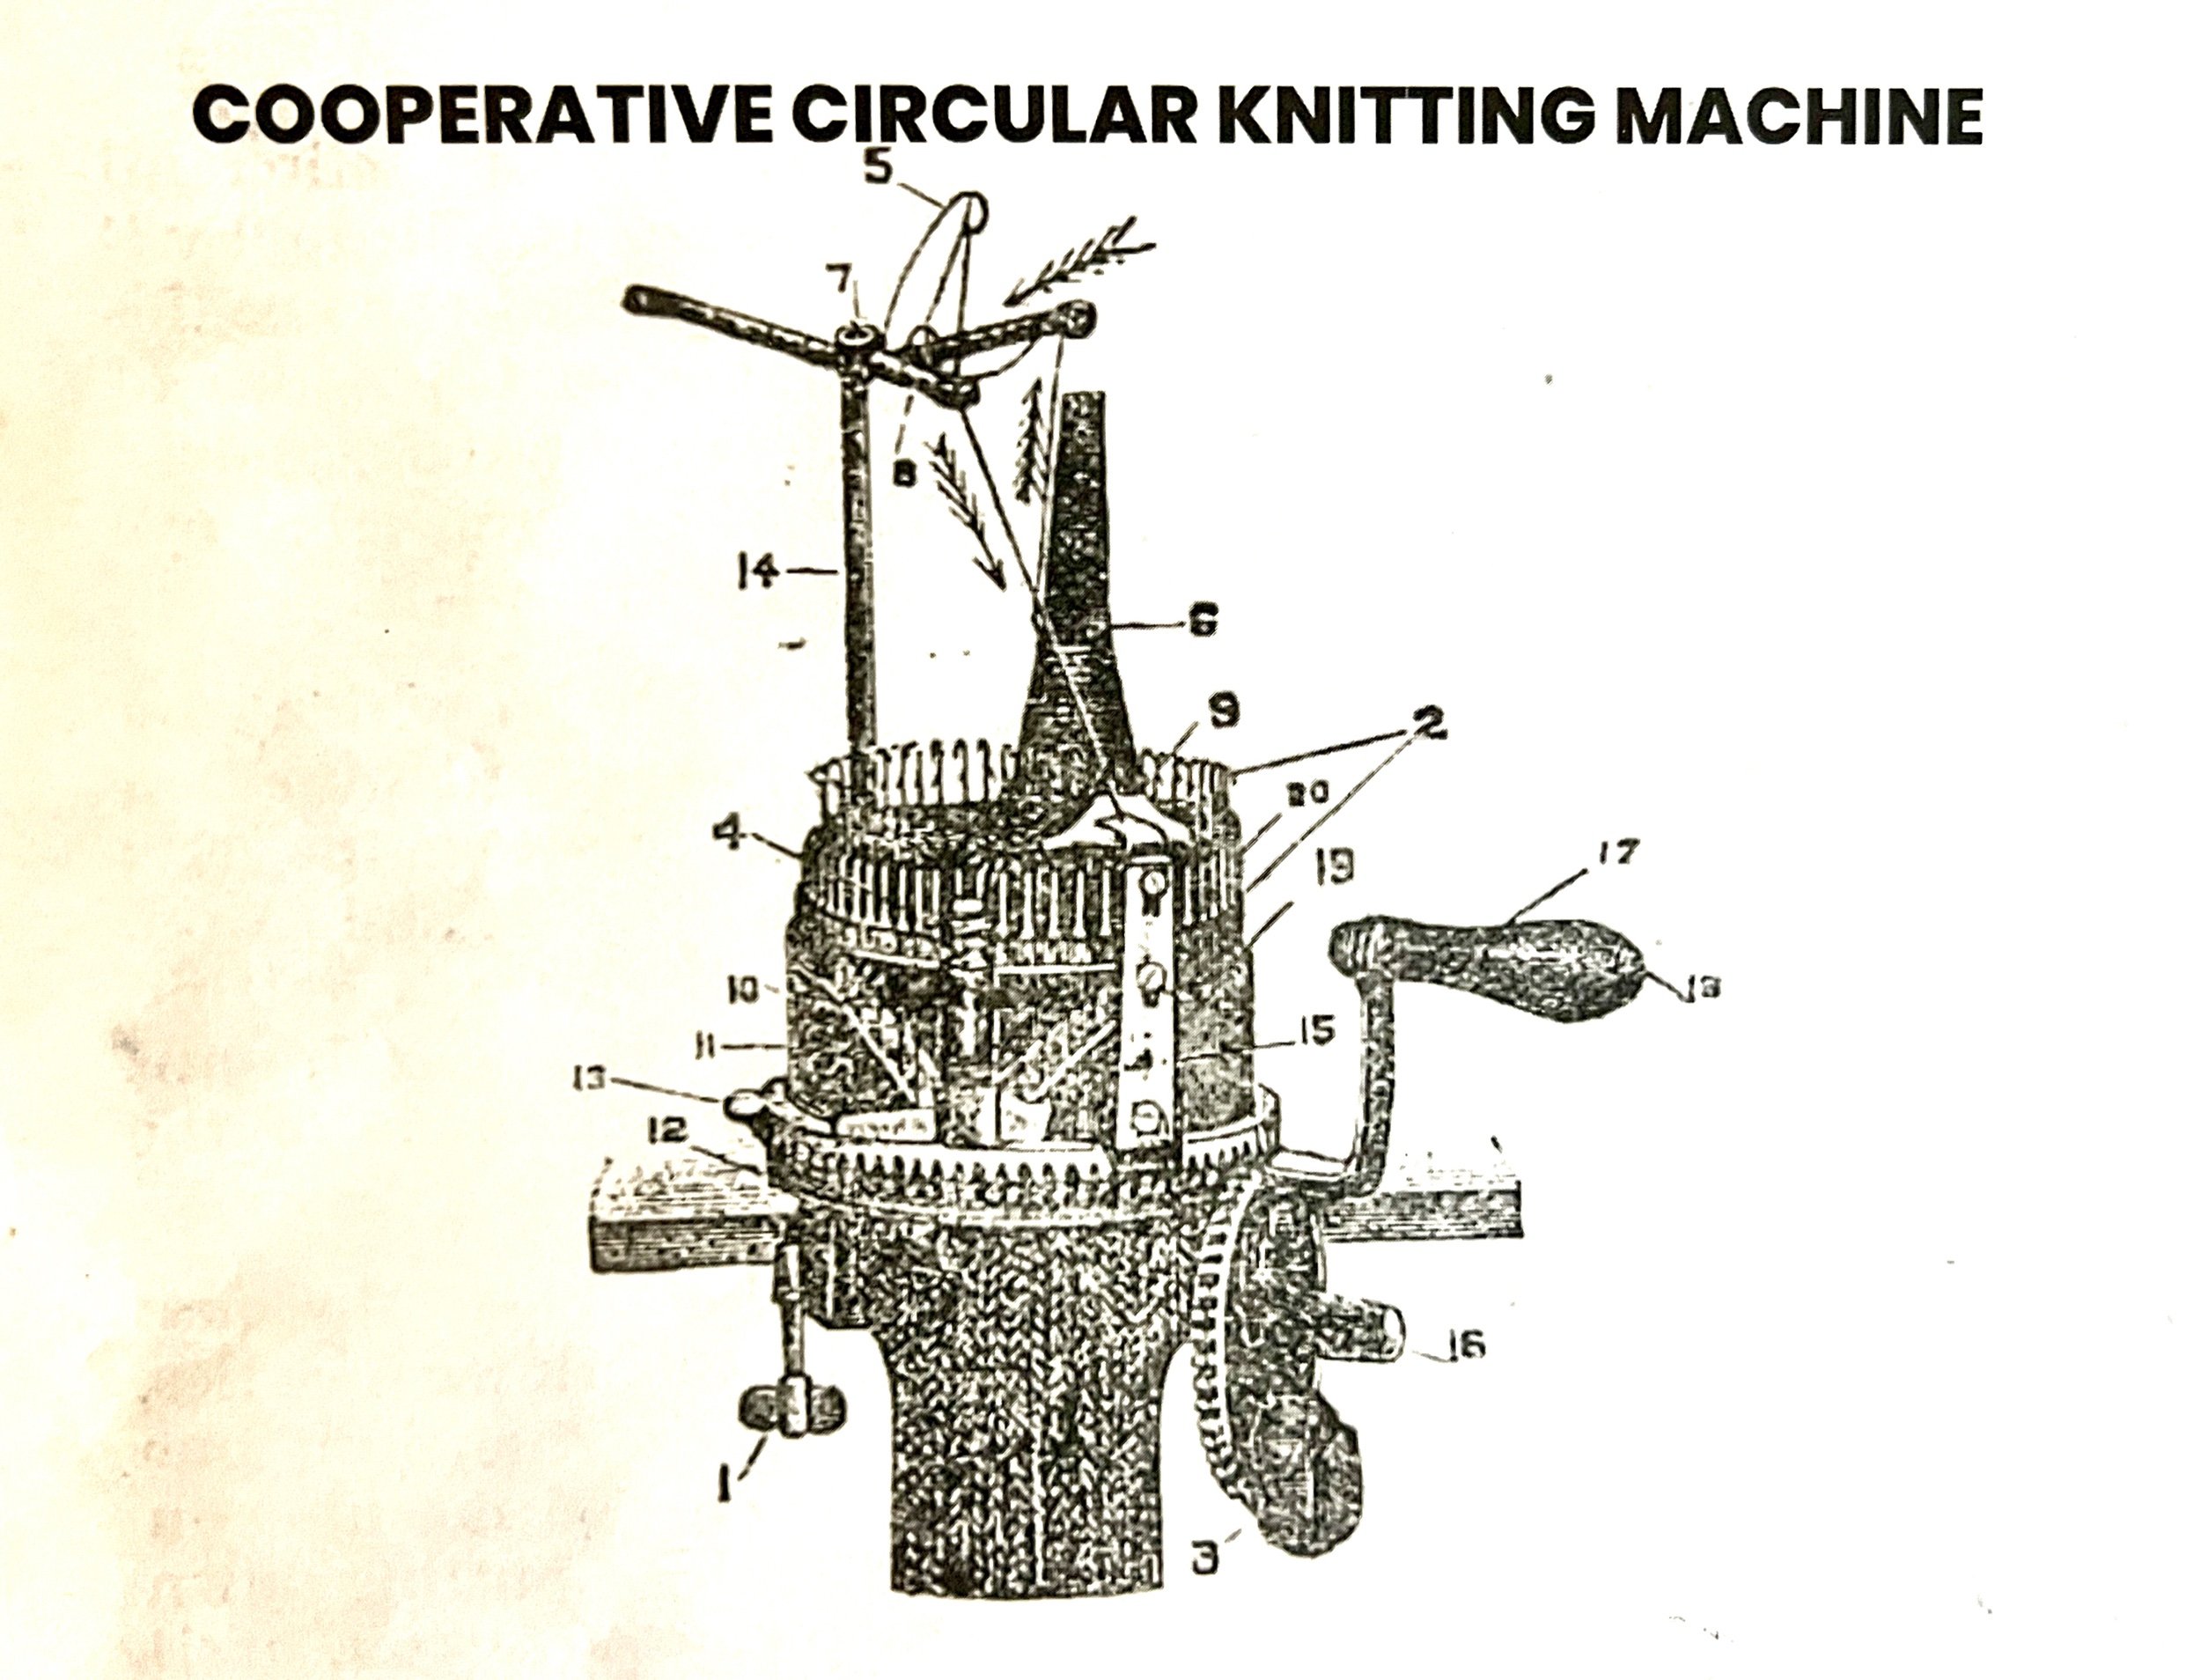
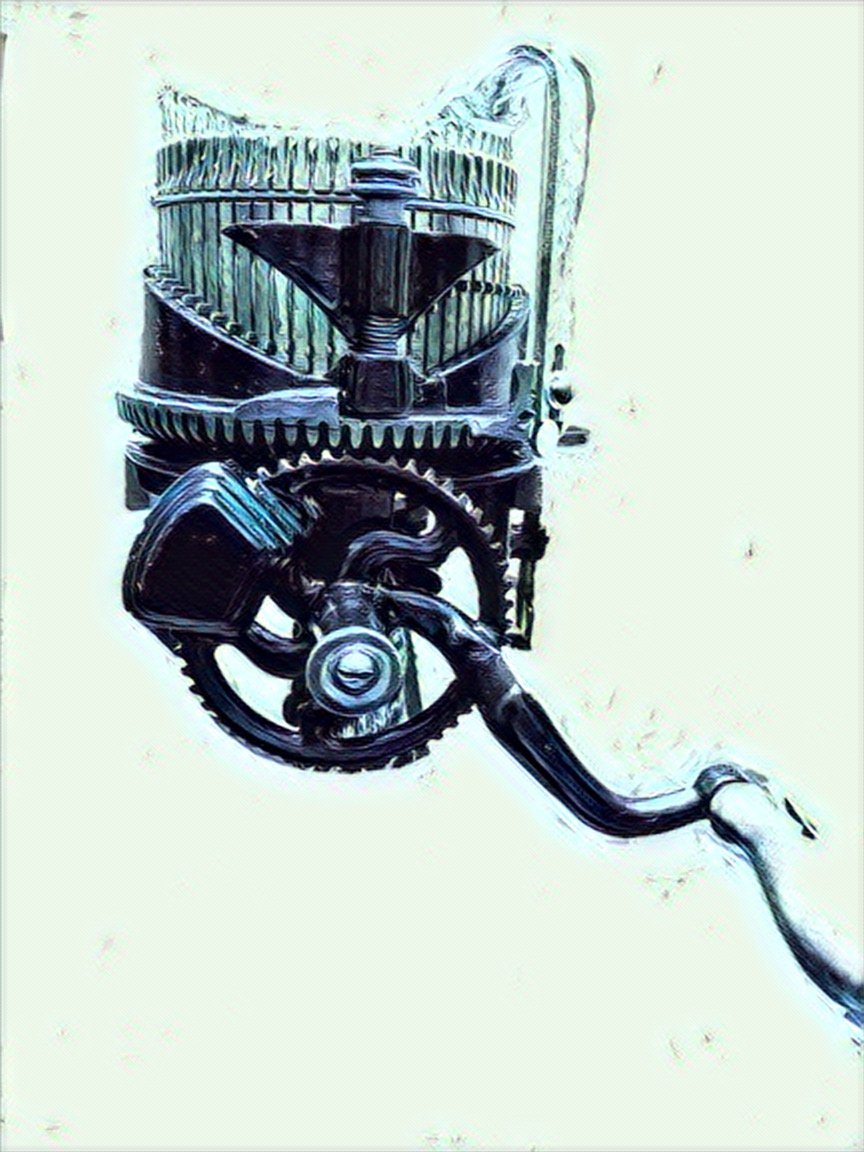
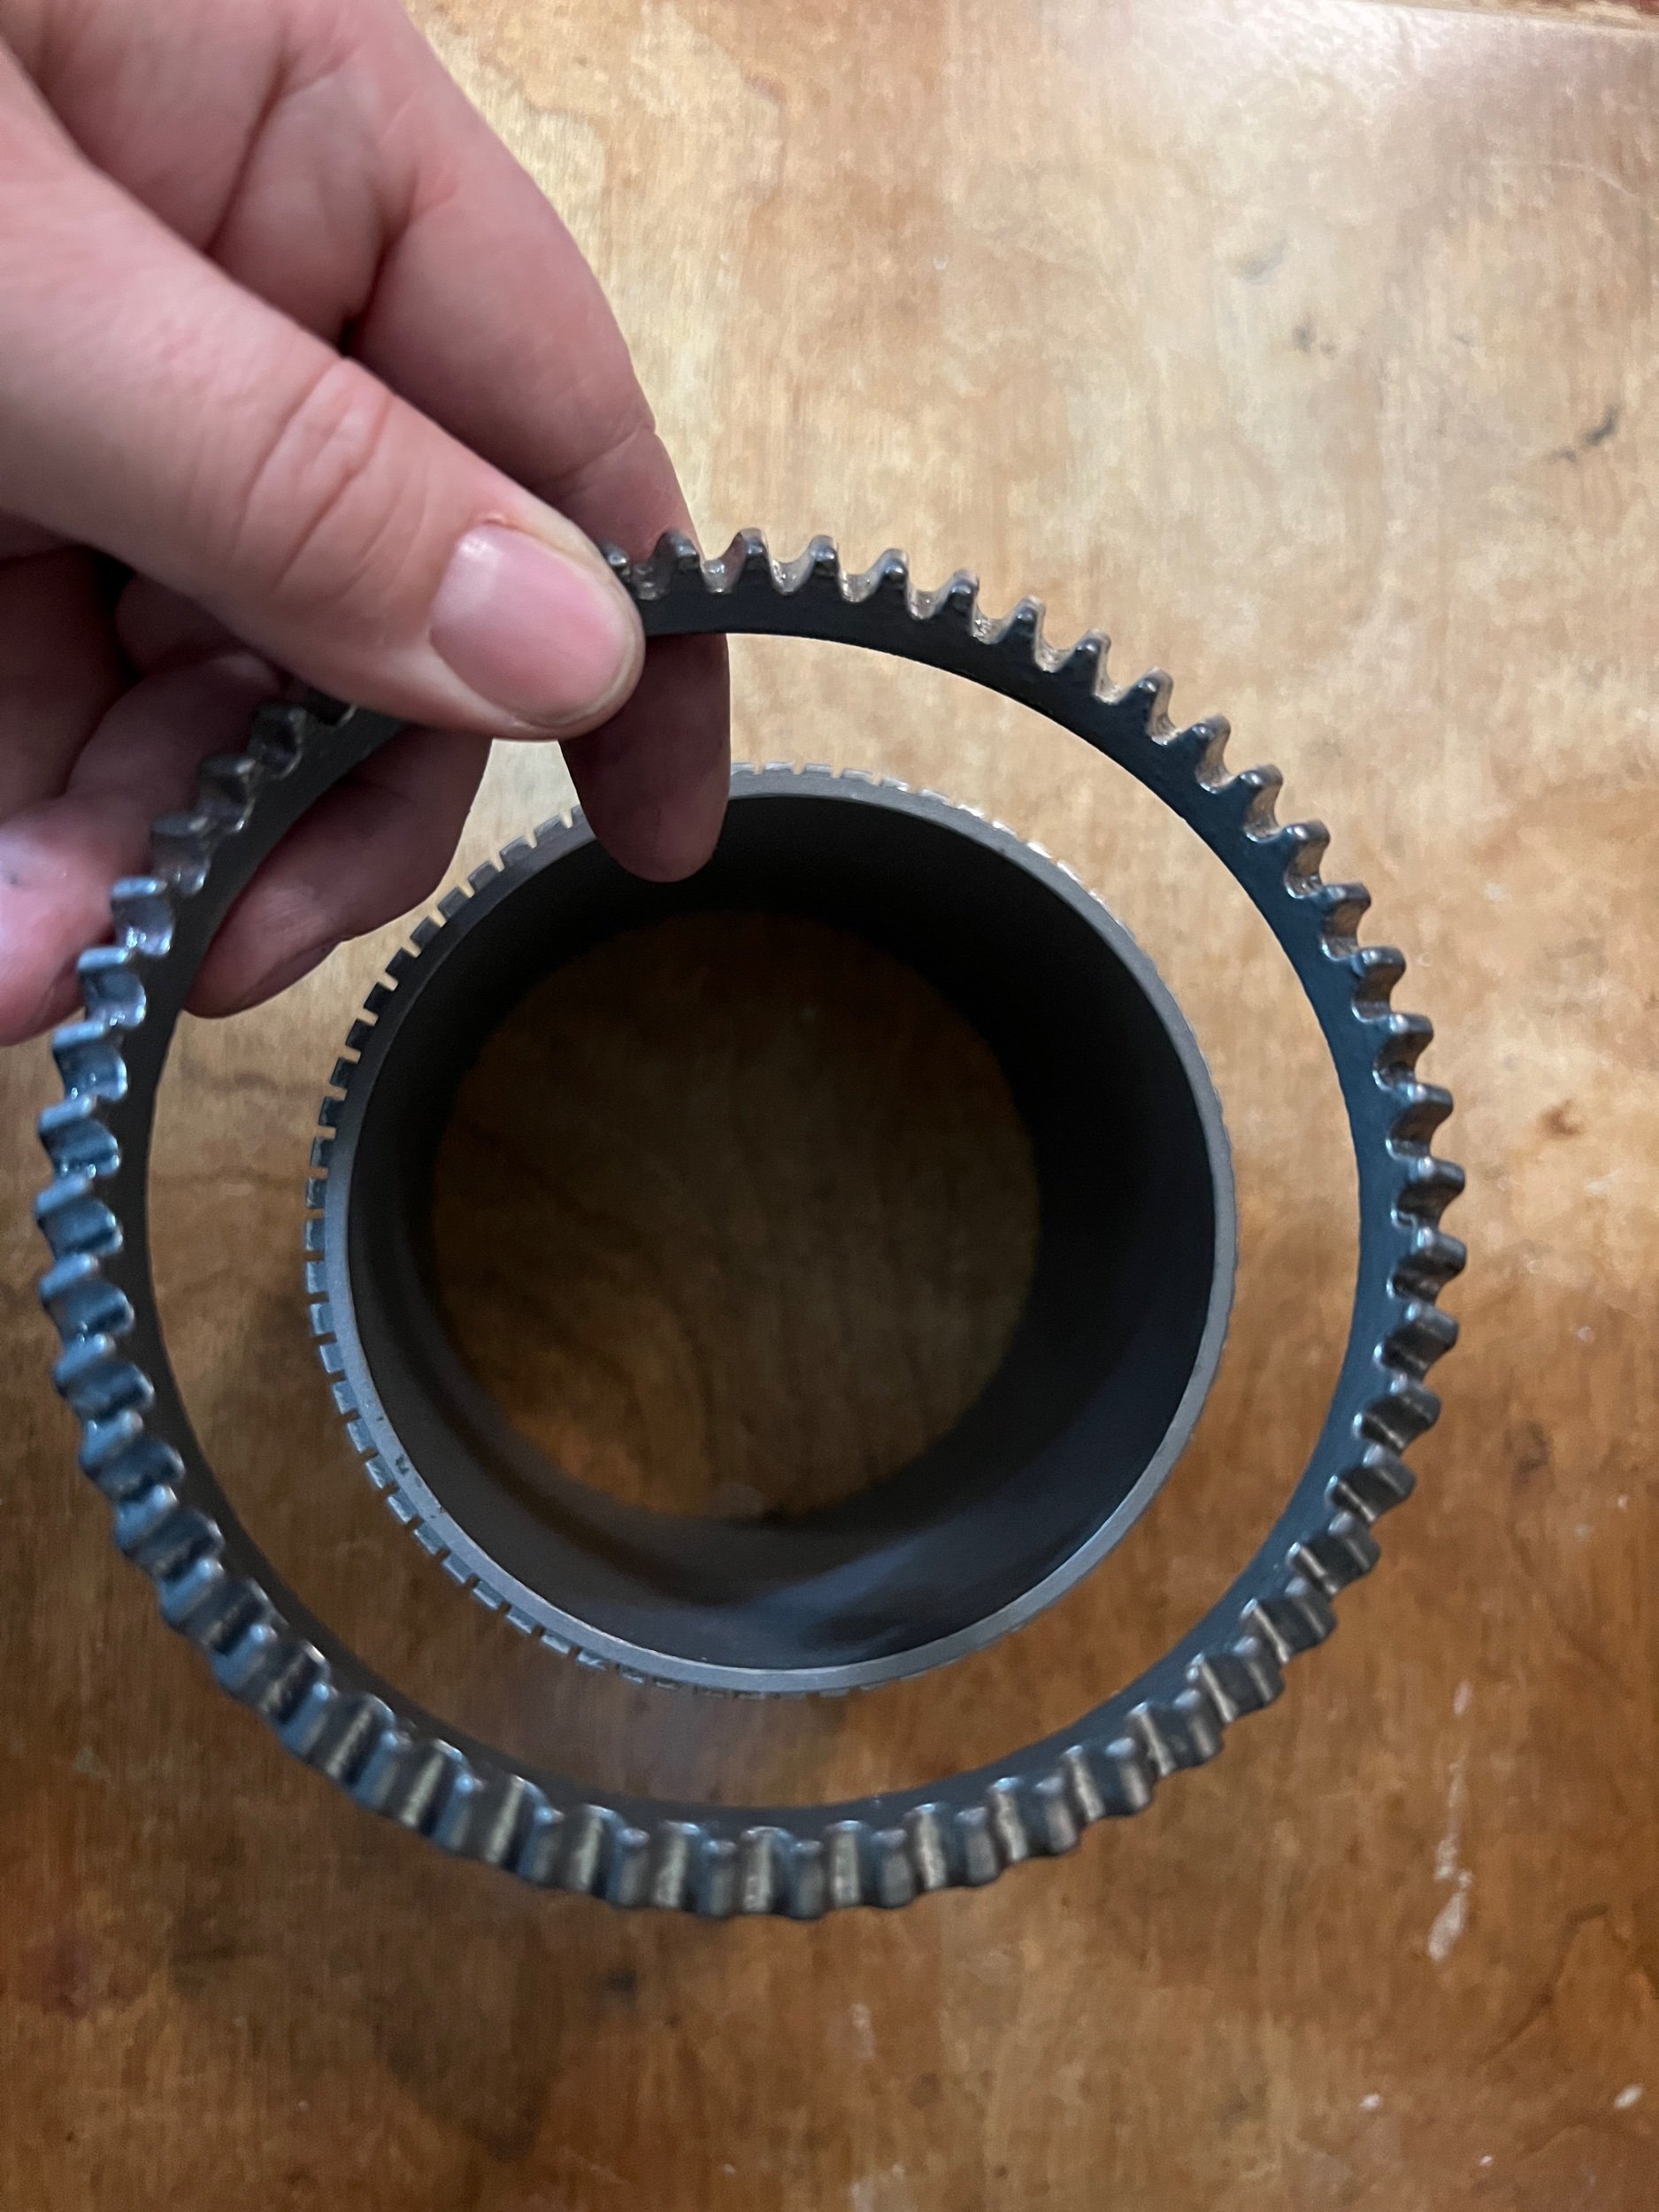
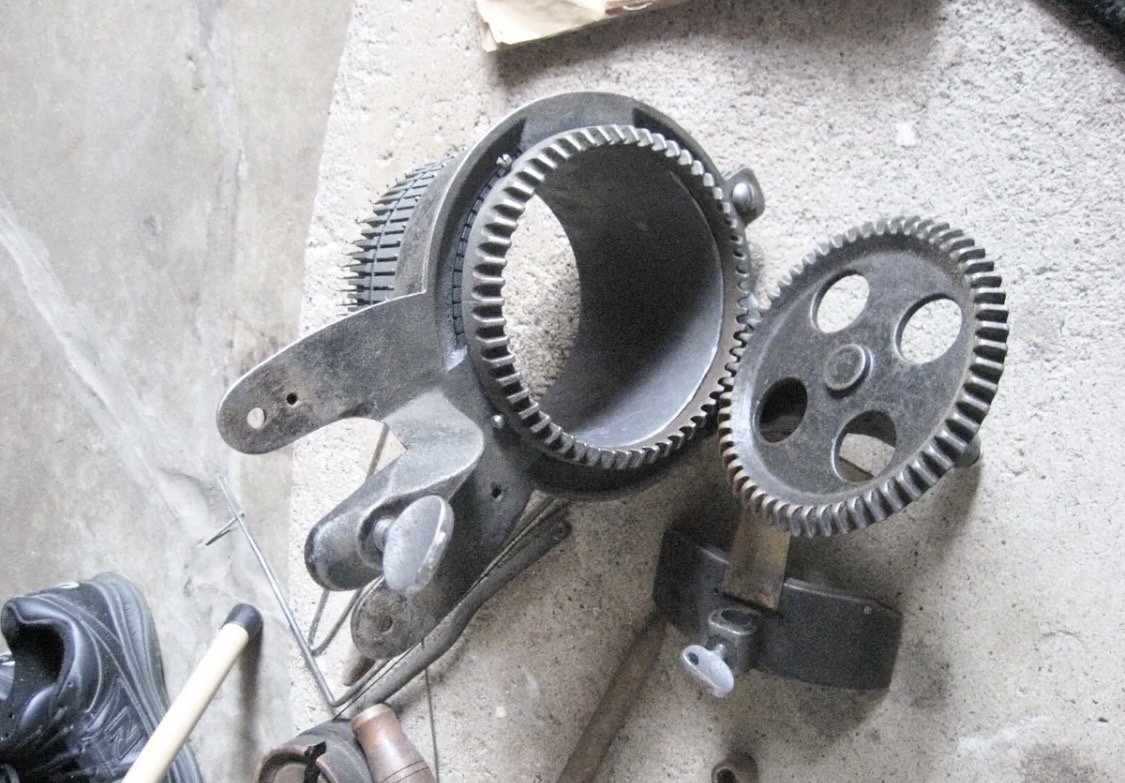
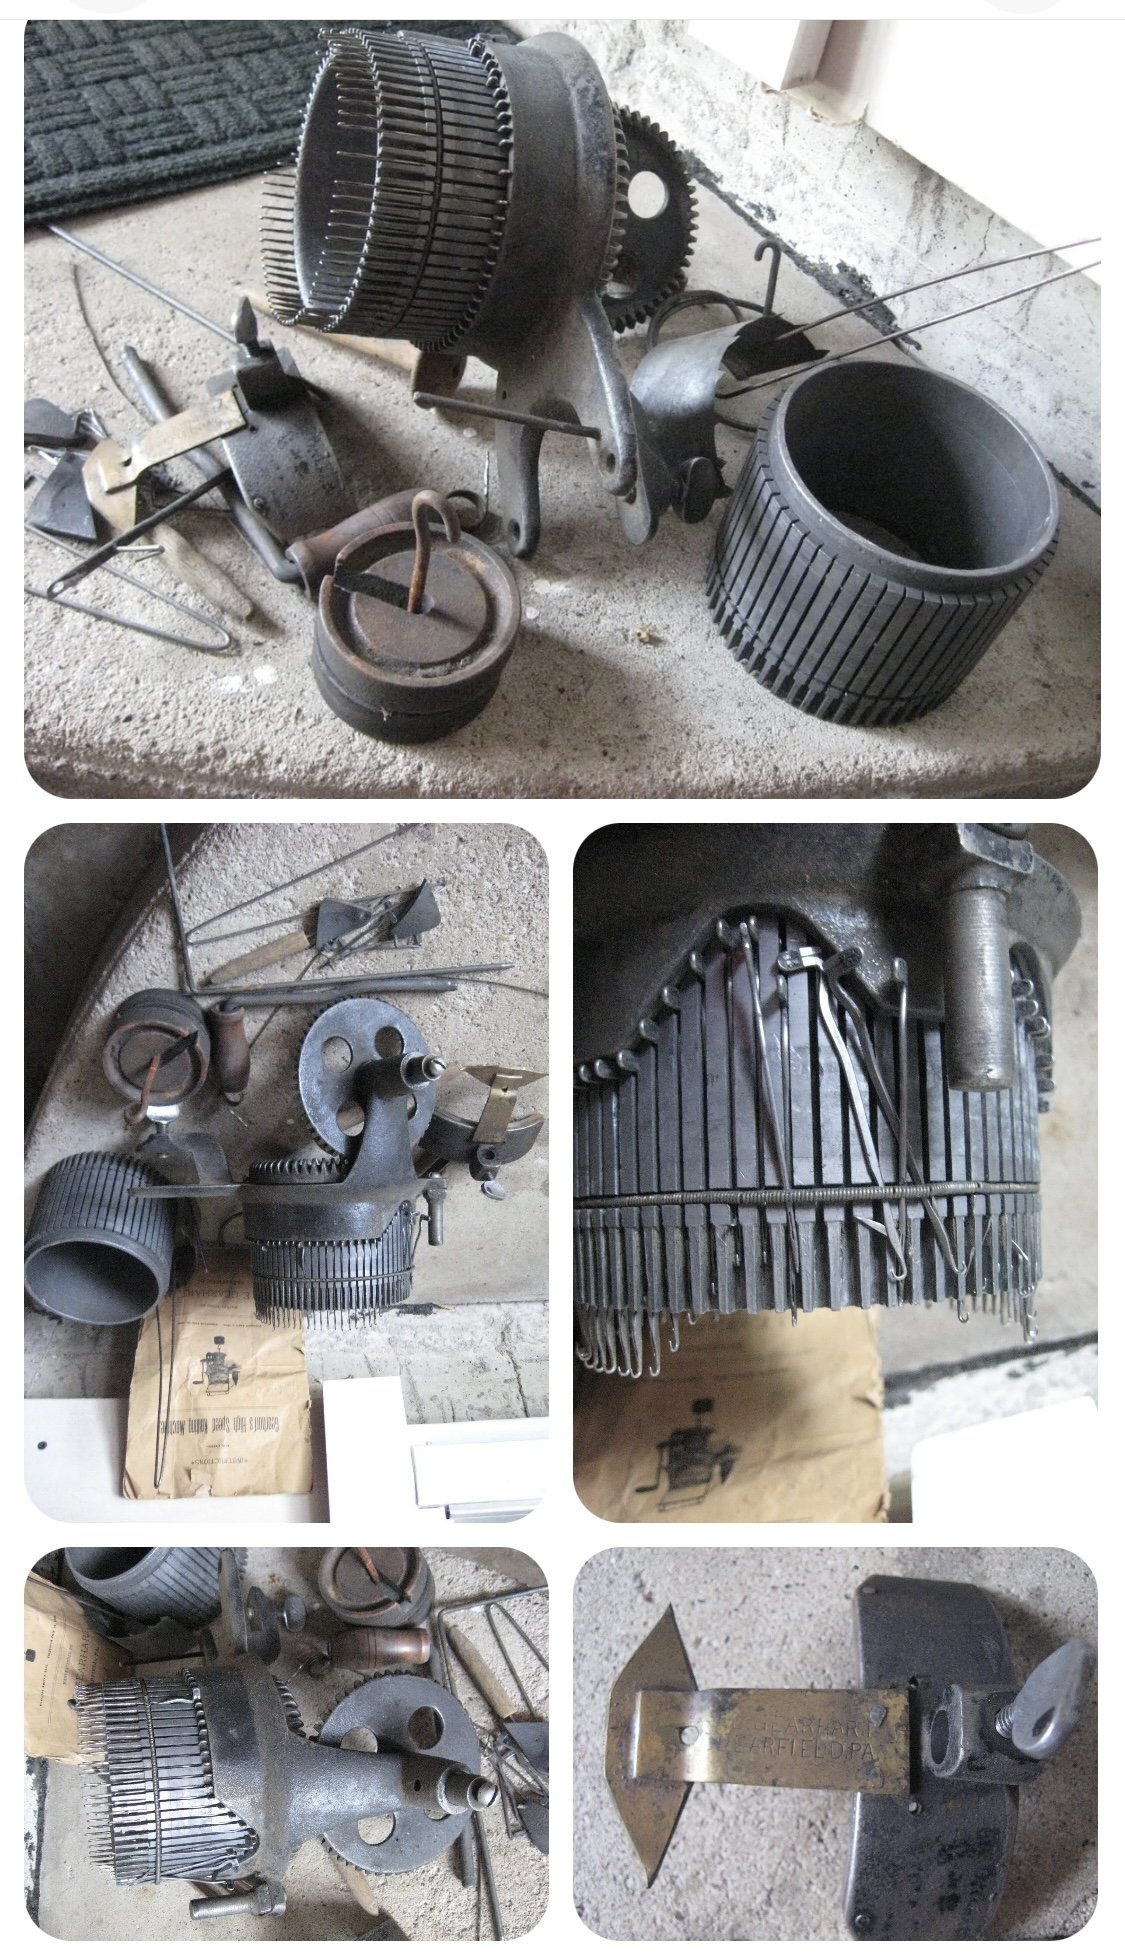
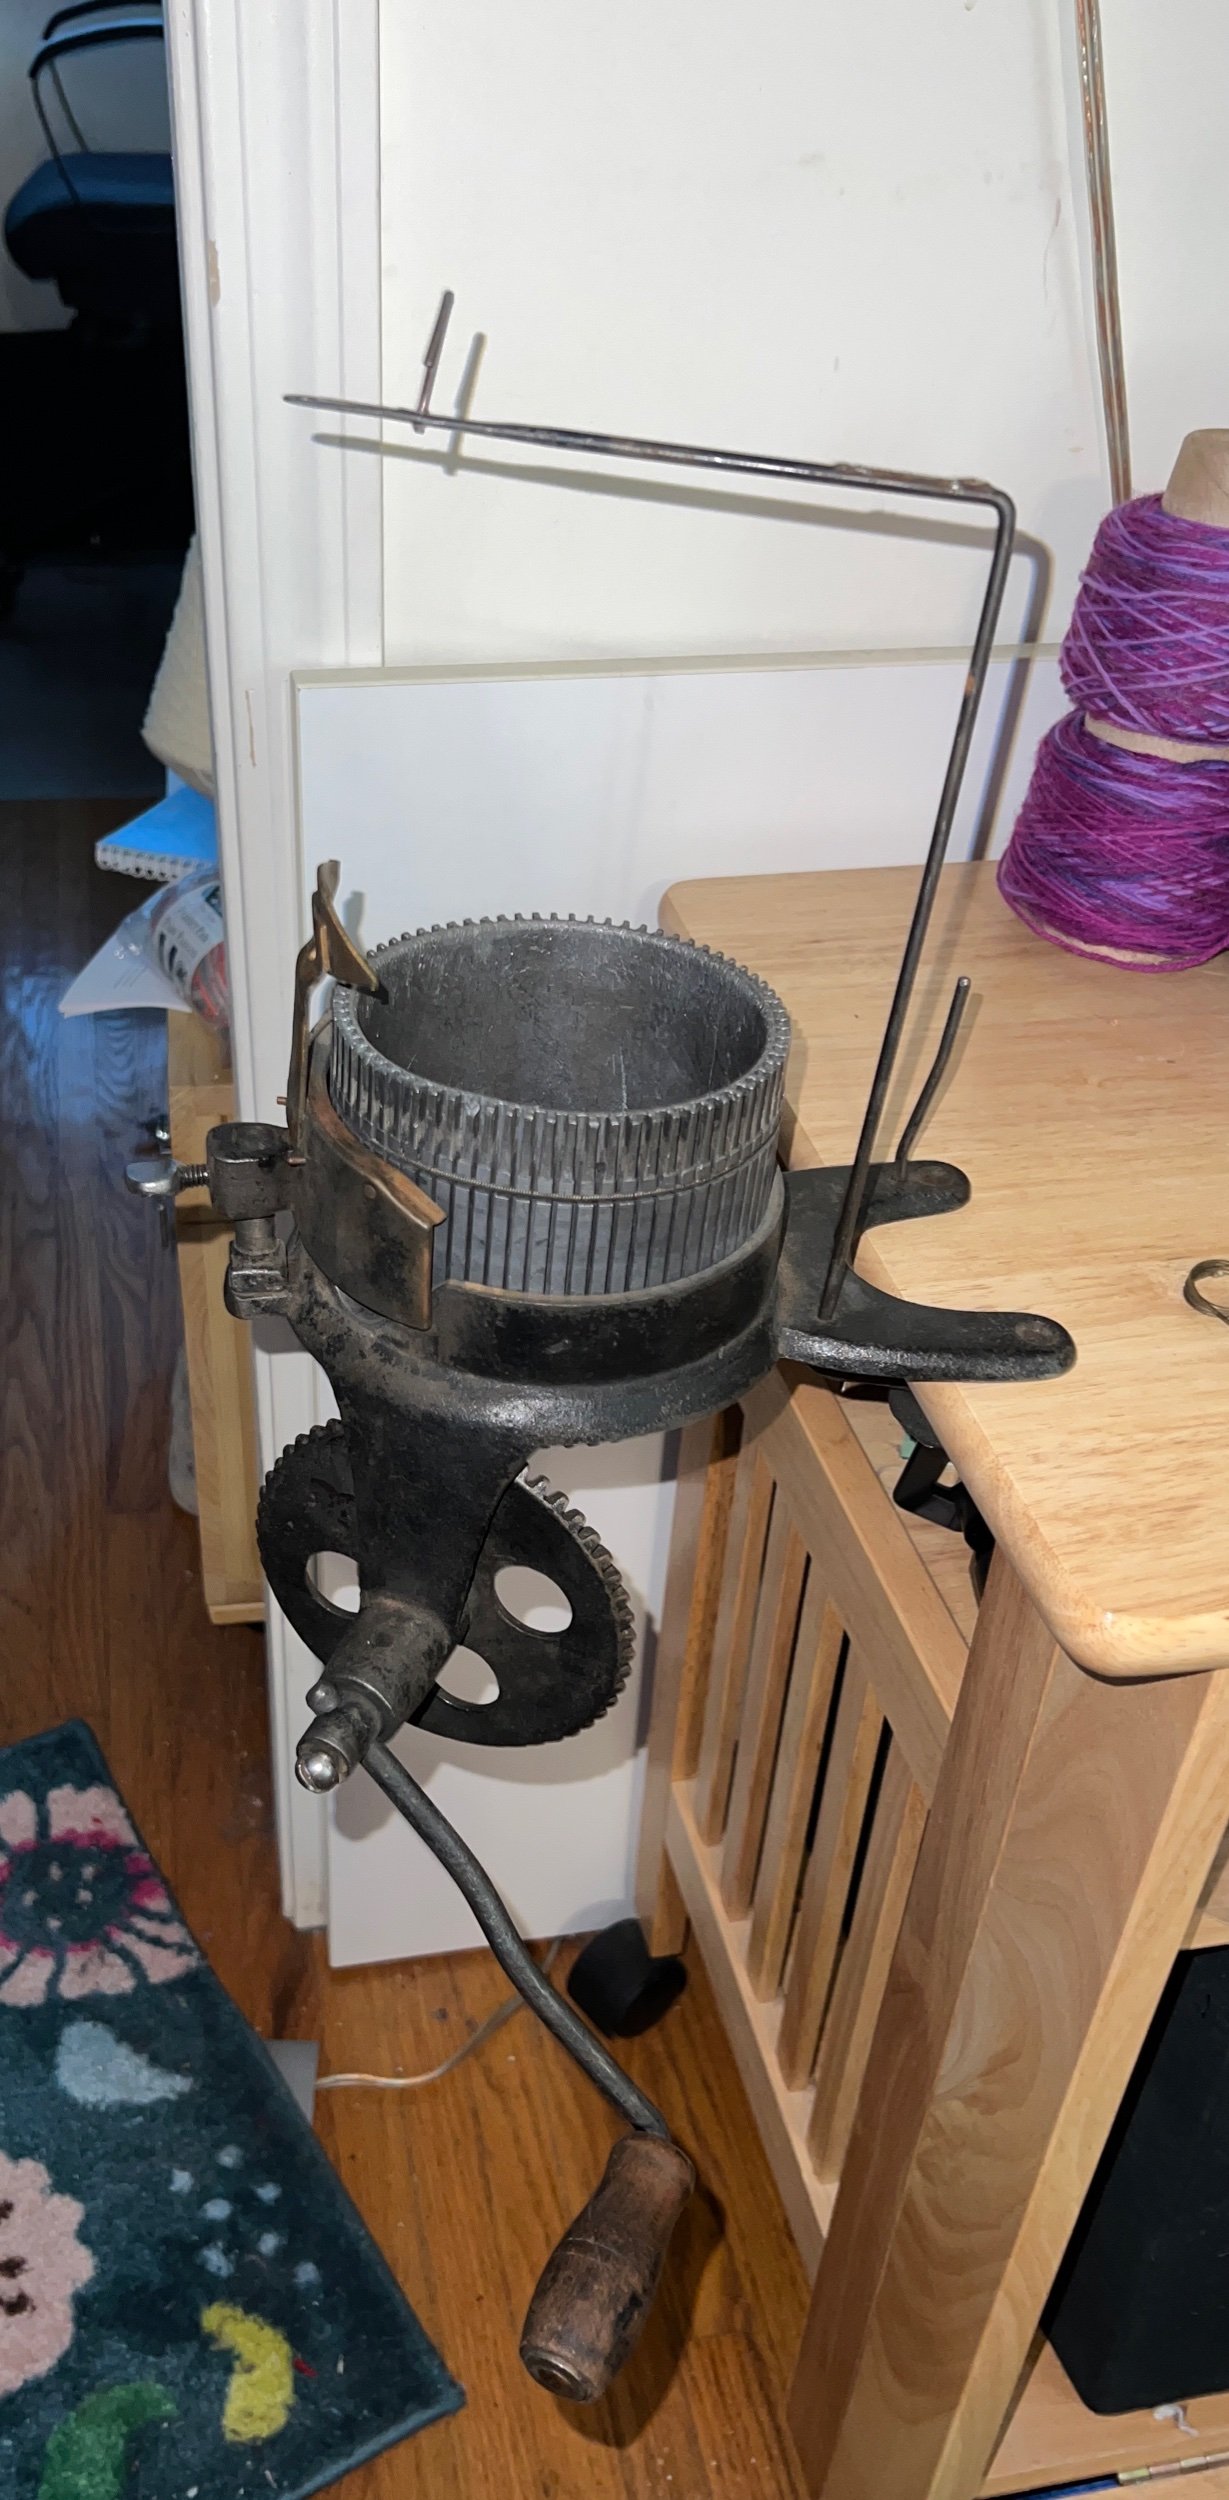
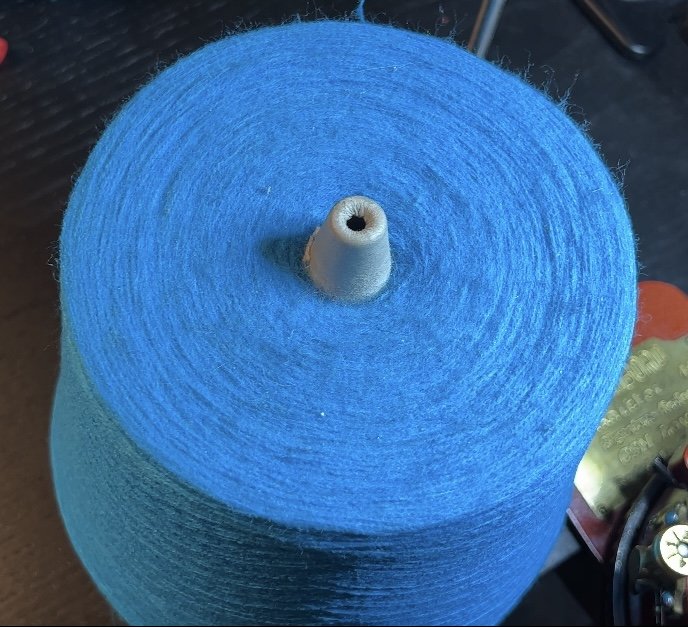
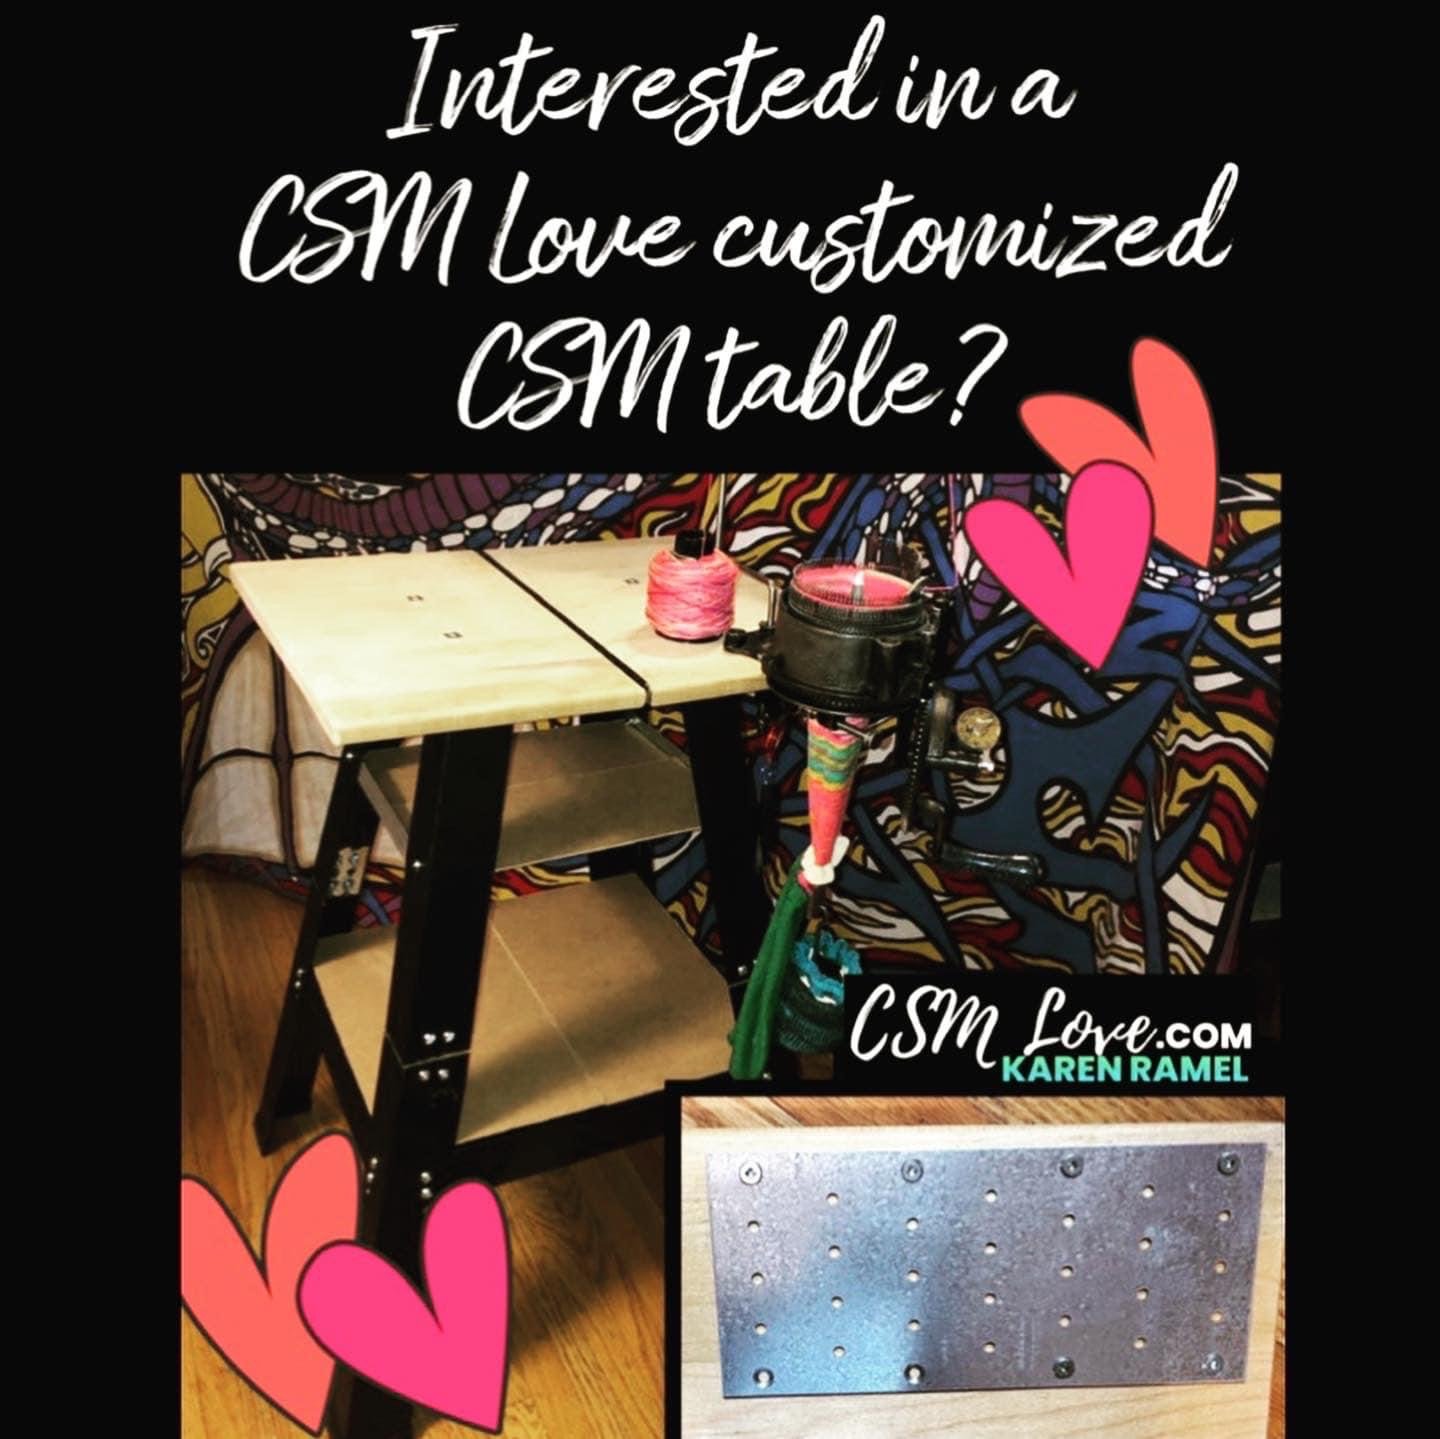
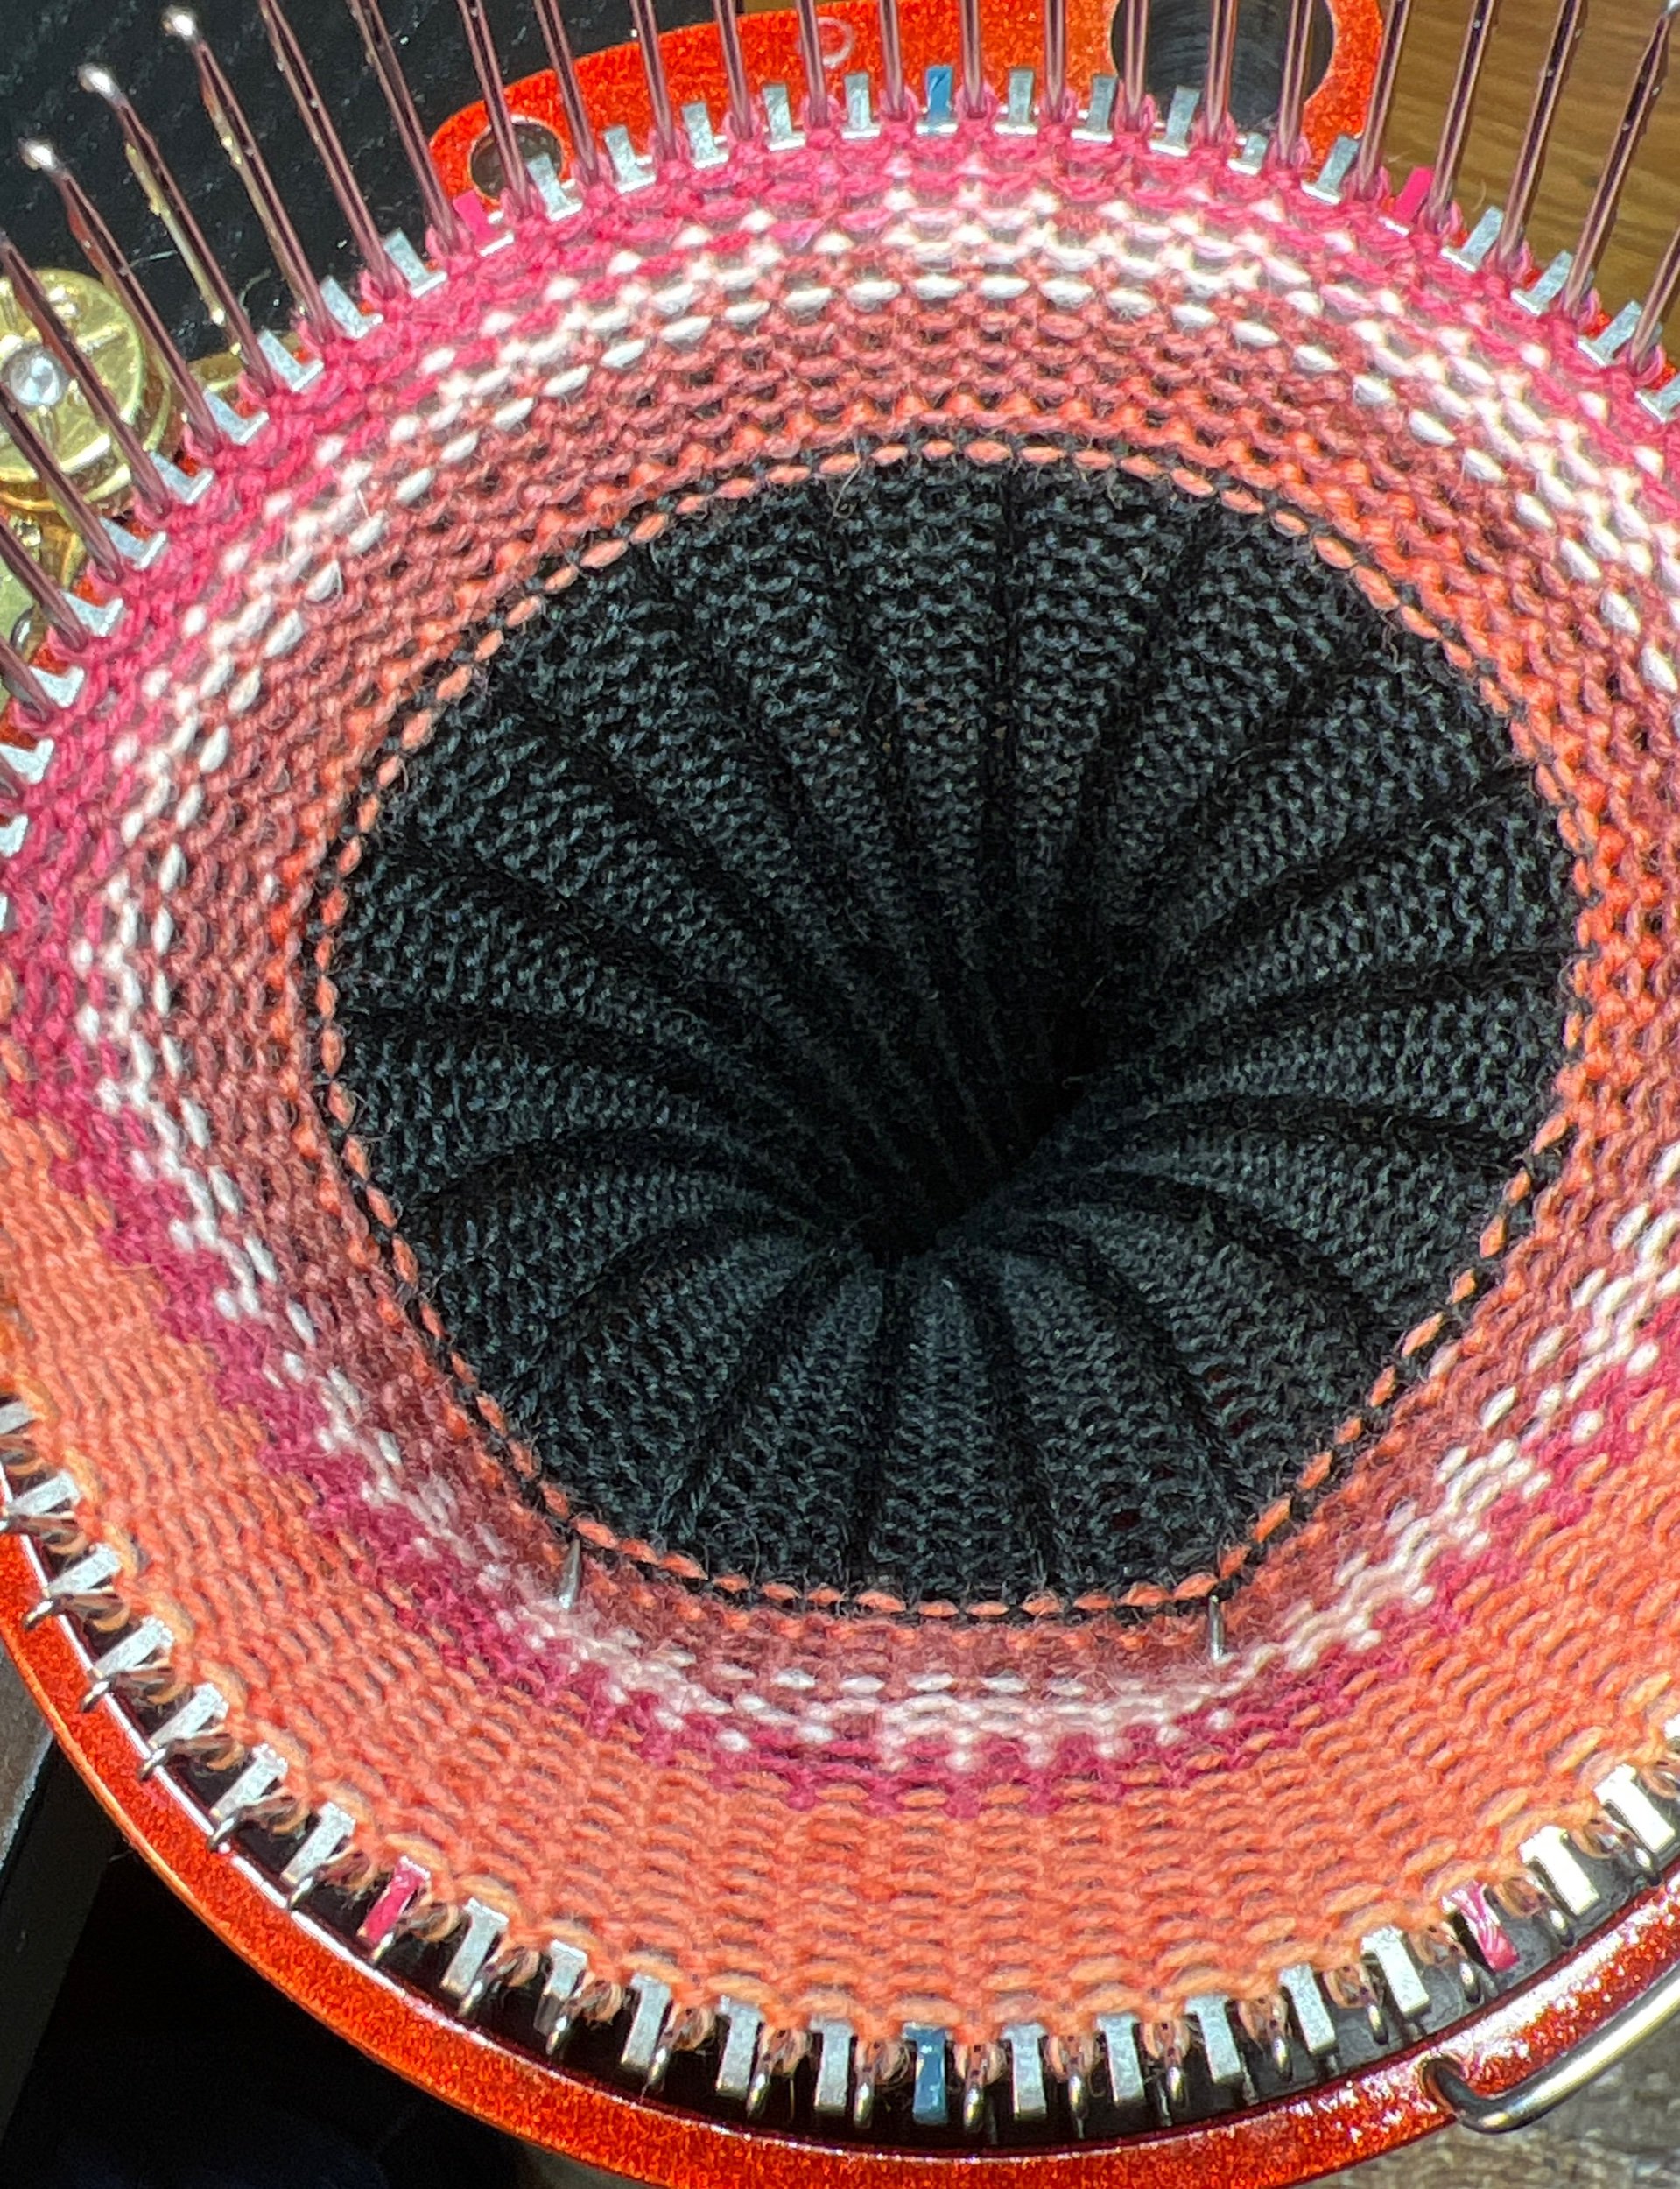
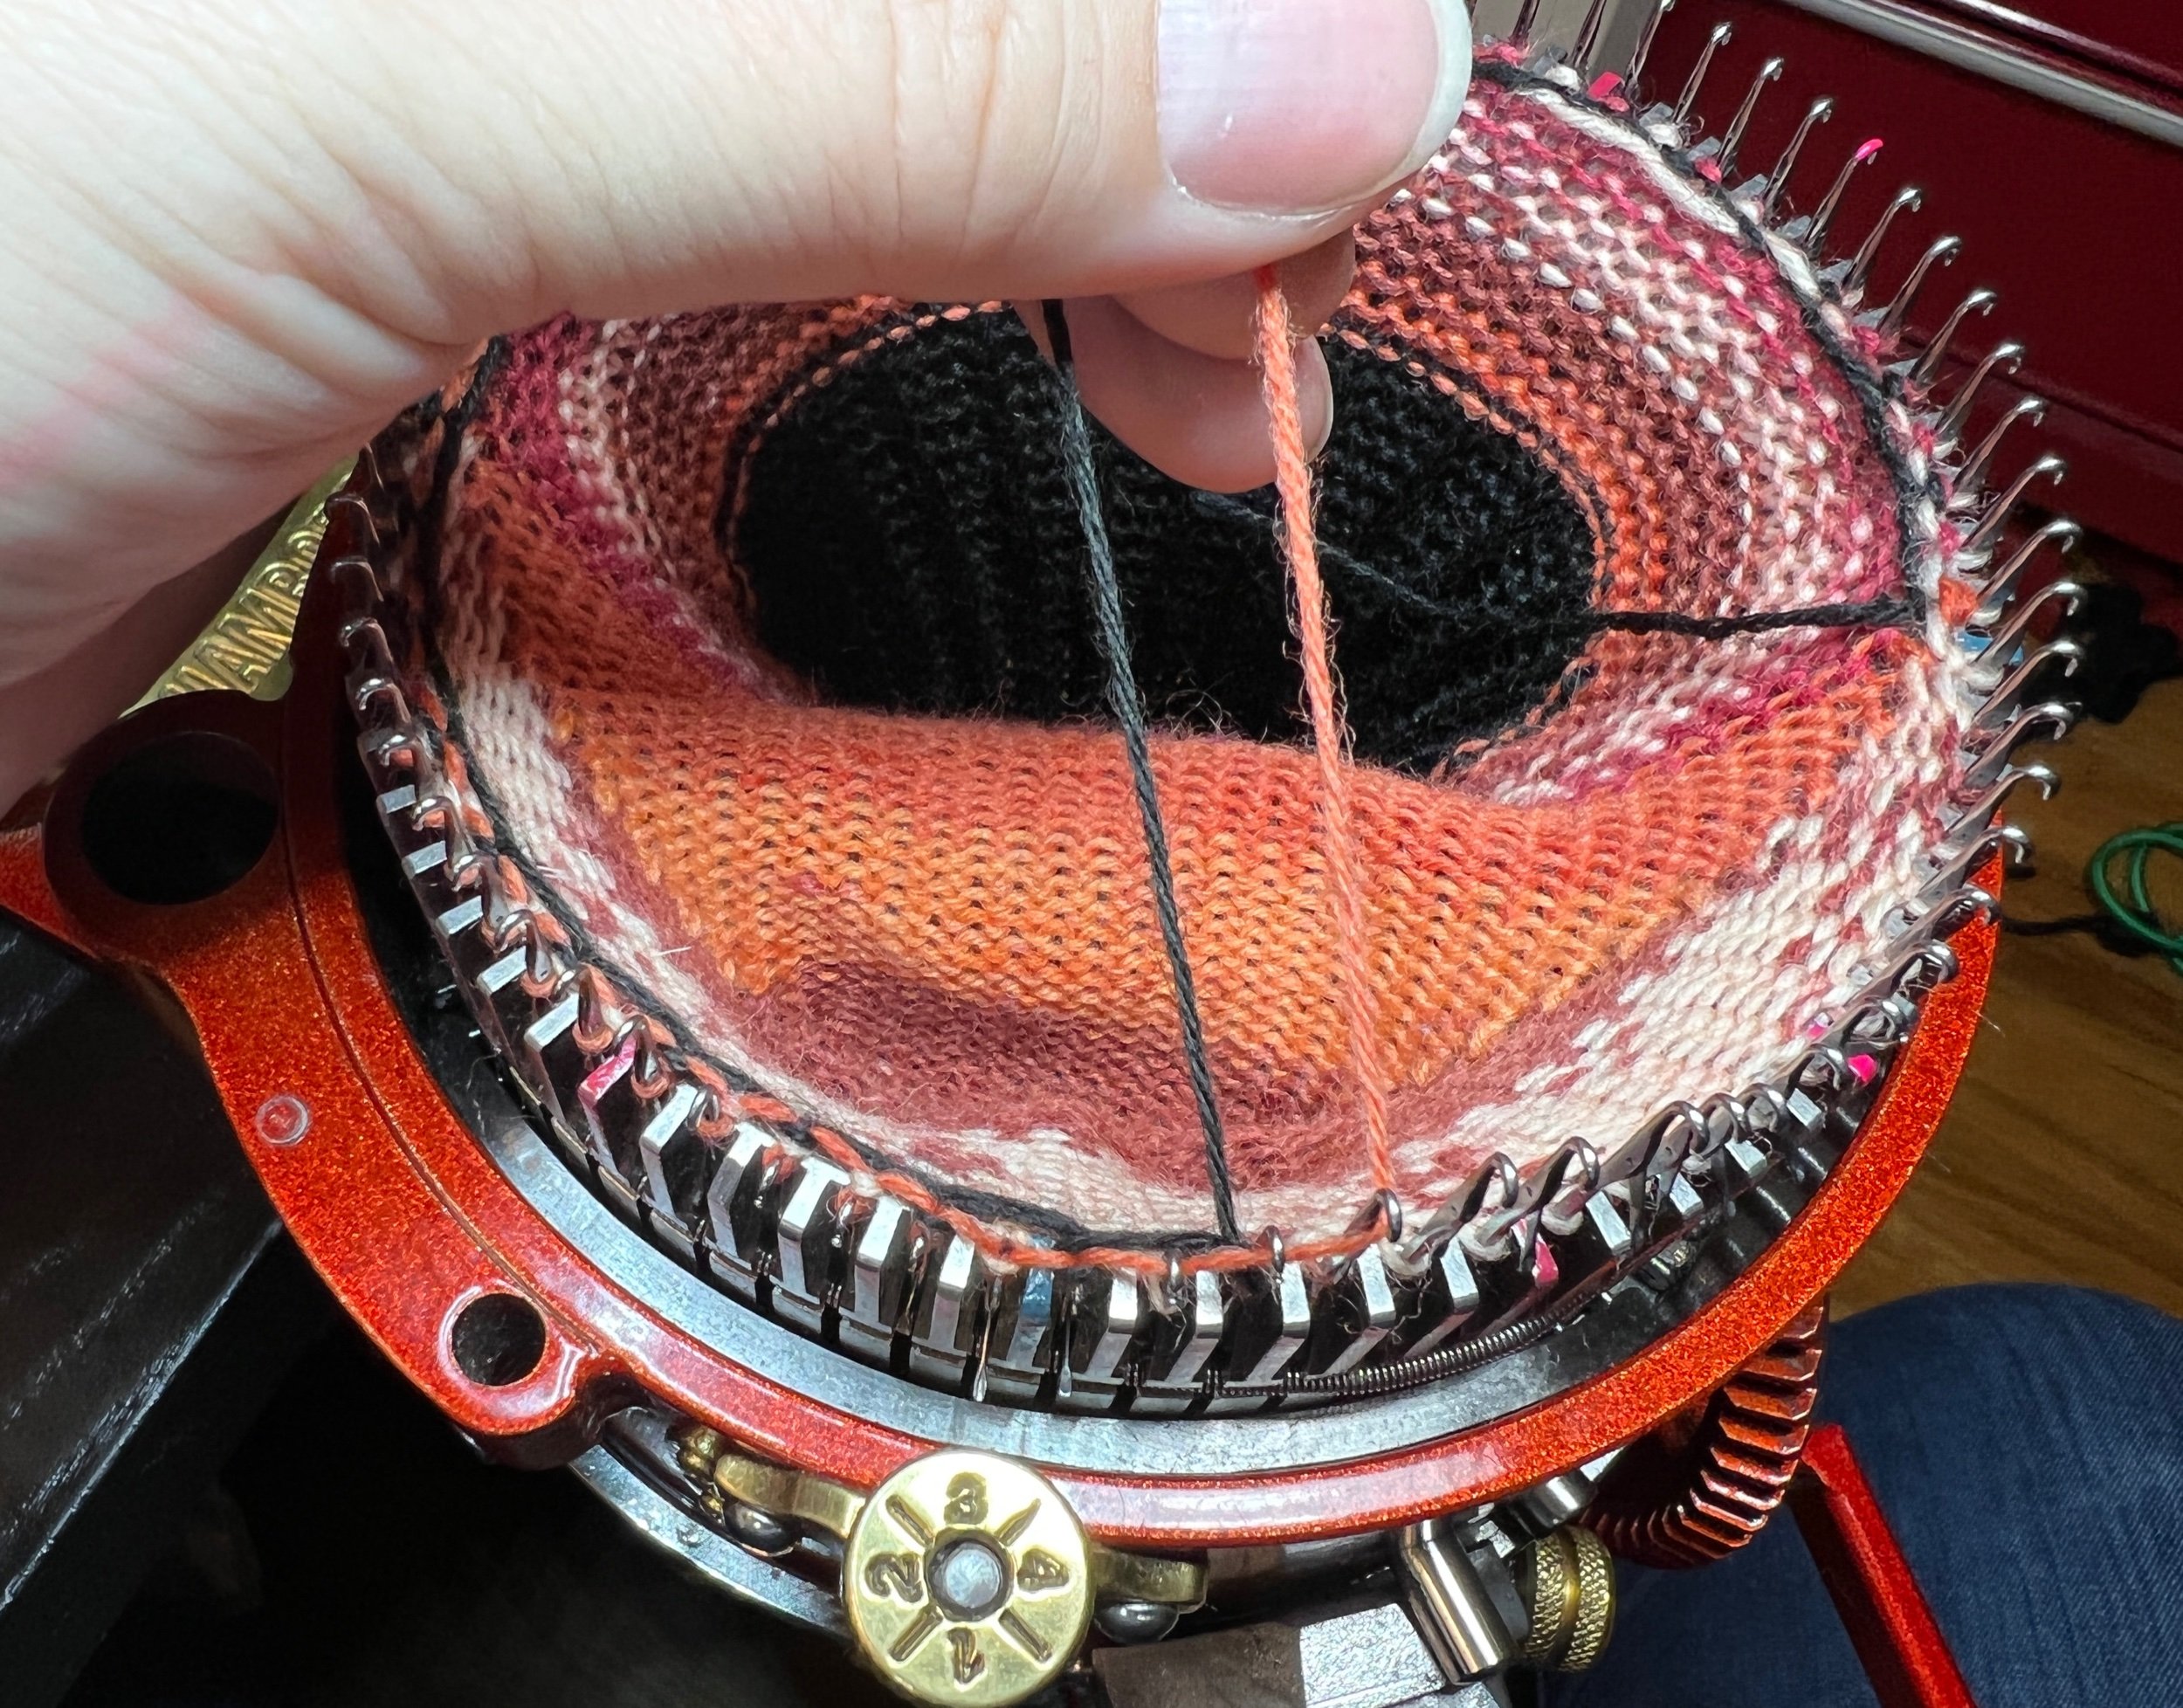
Many years ago I had this plastic 44 needle knitting machine, at the time I created a custom table to make using it much easier. I’m remaking that table today.

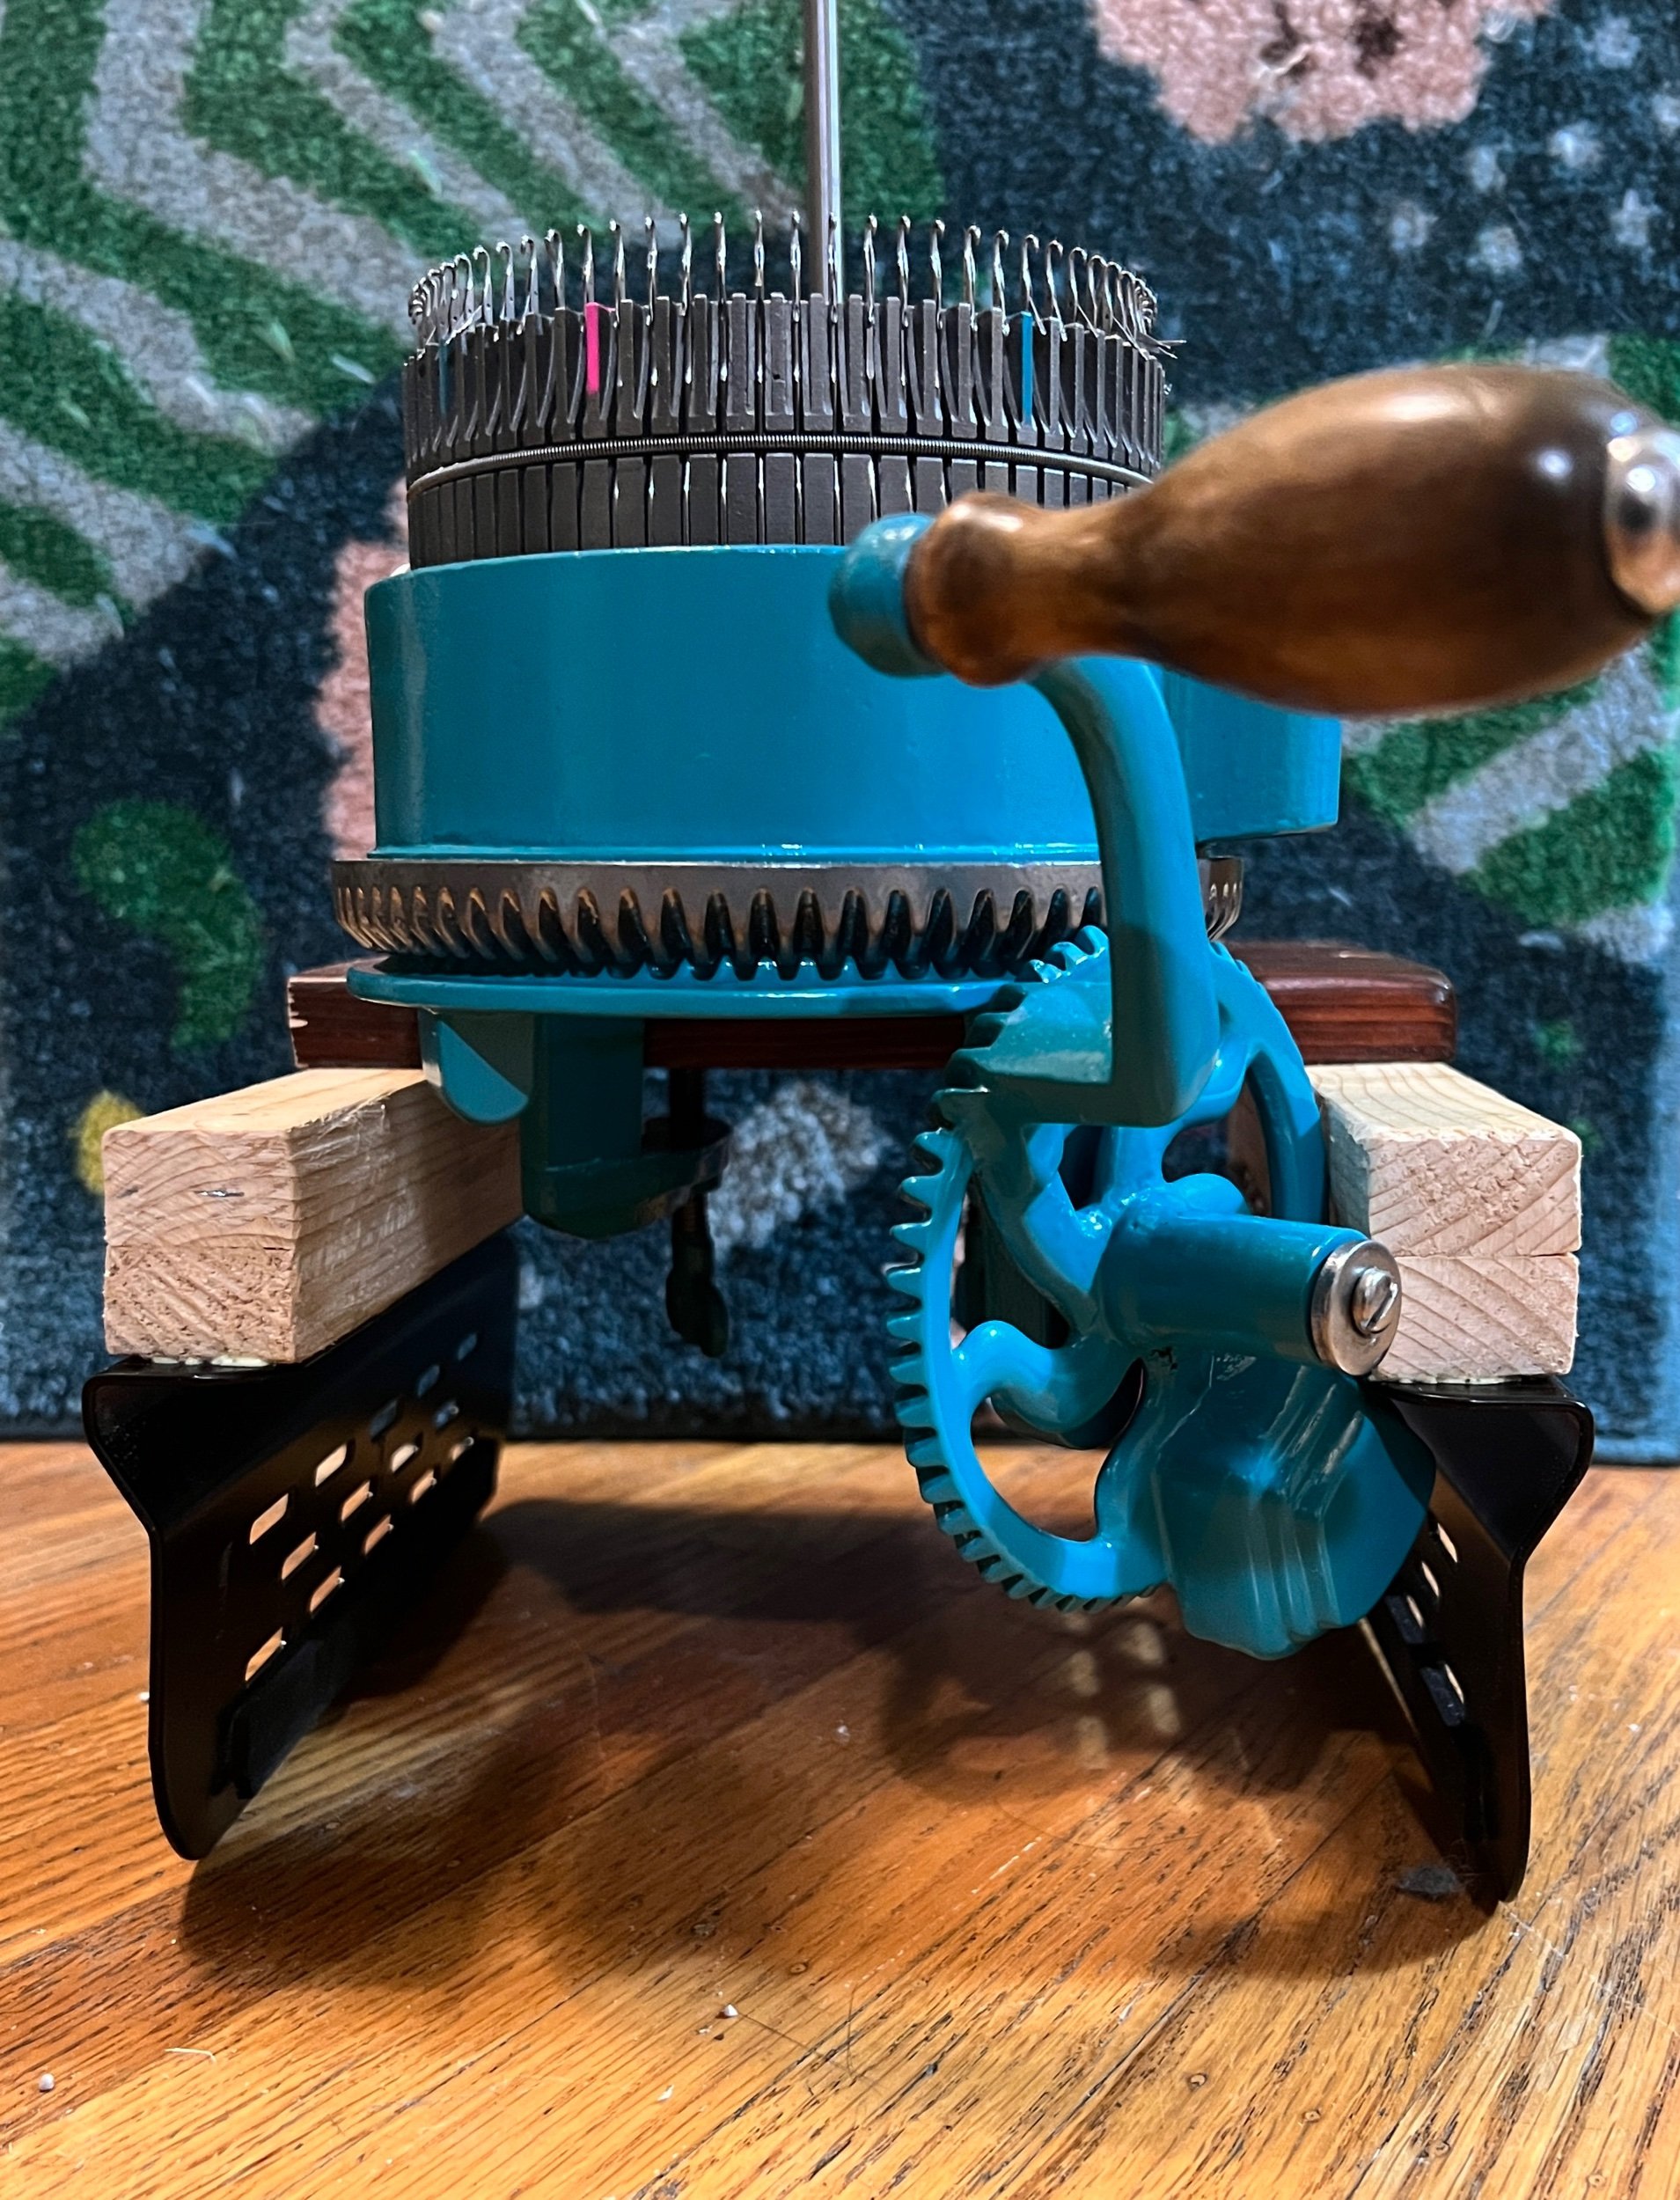
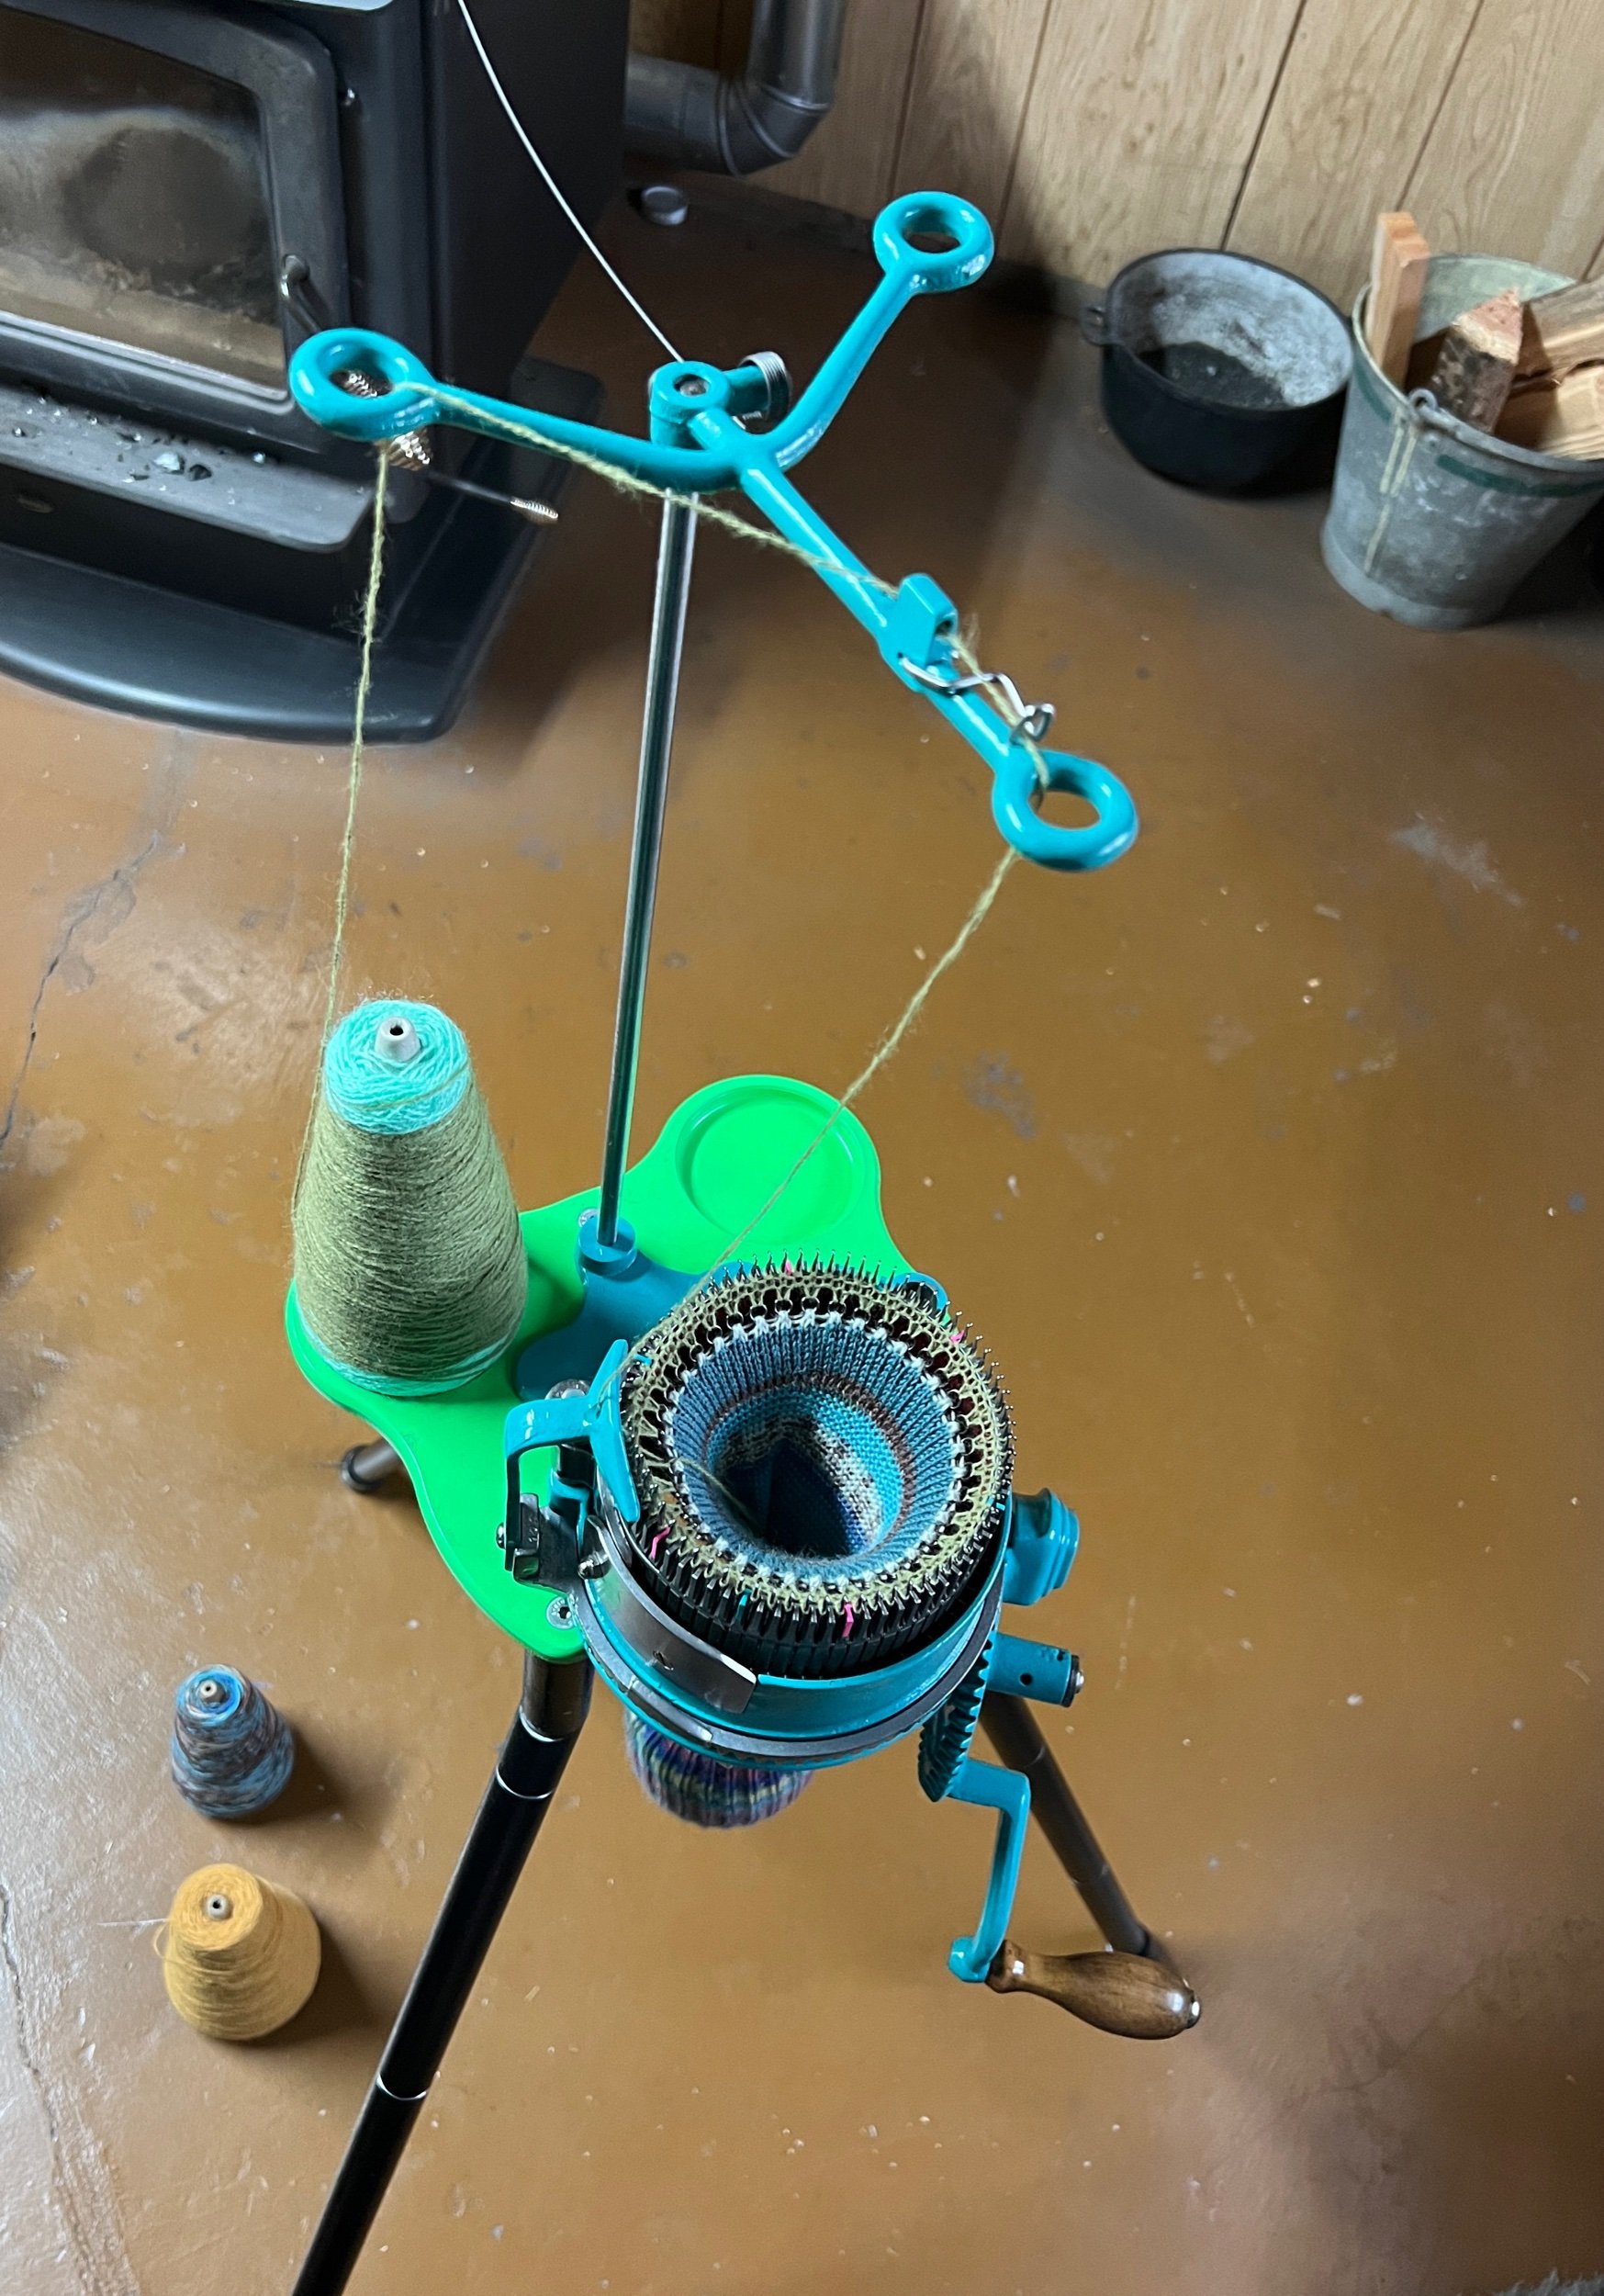
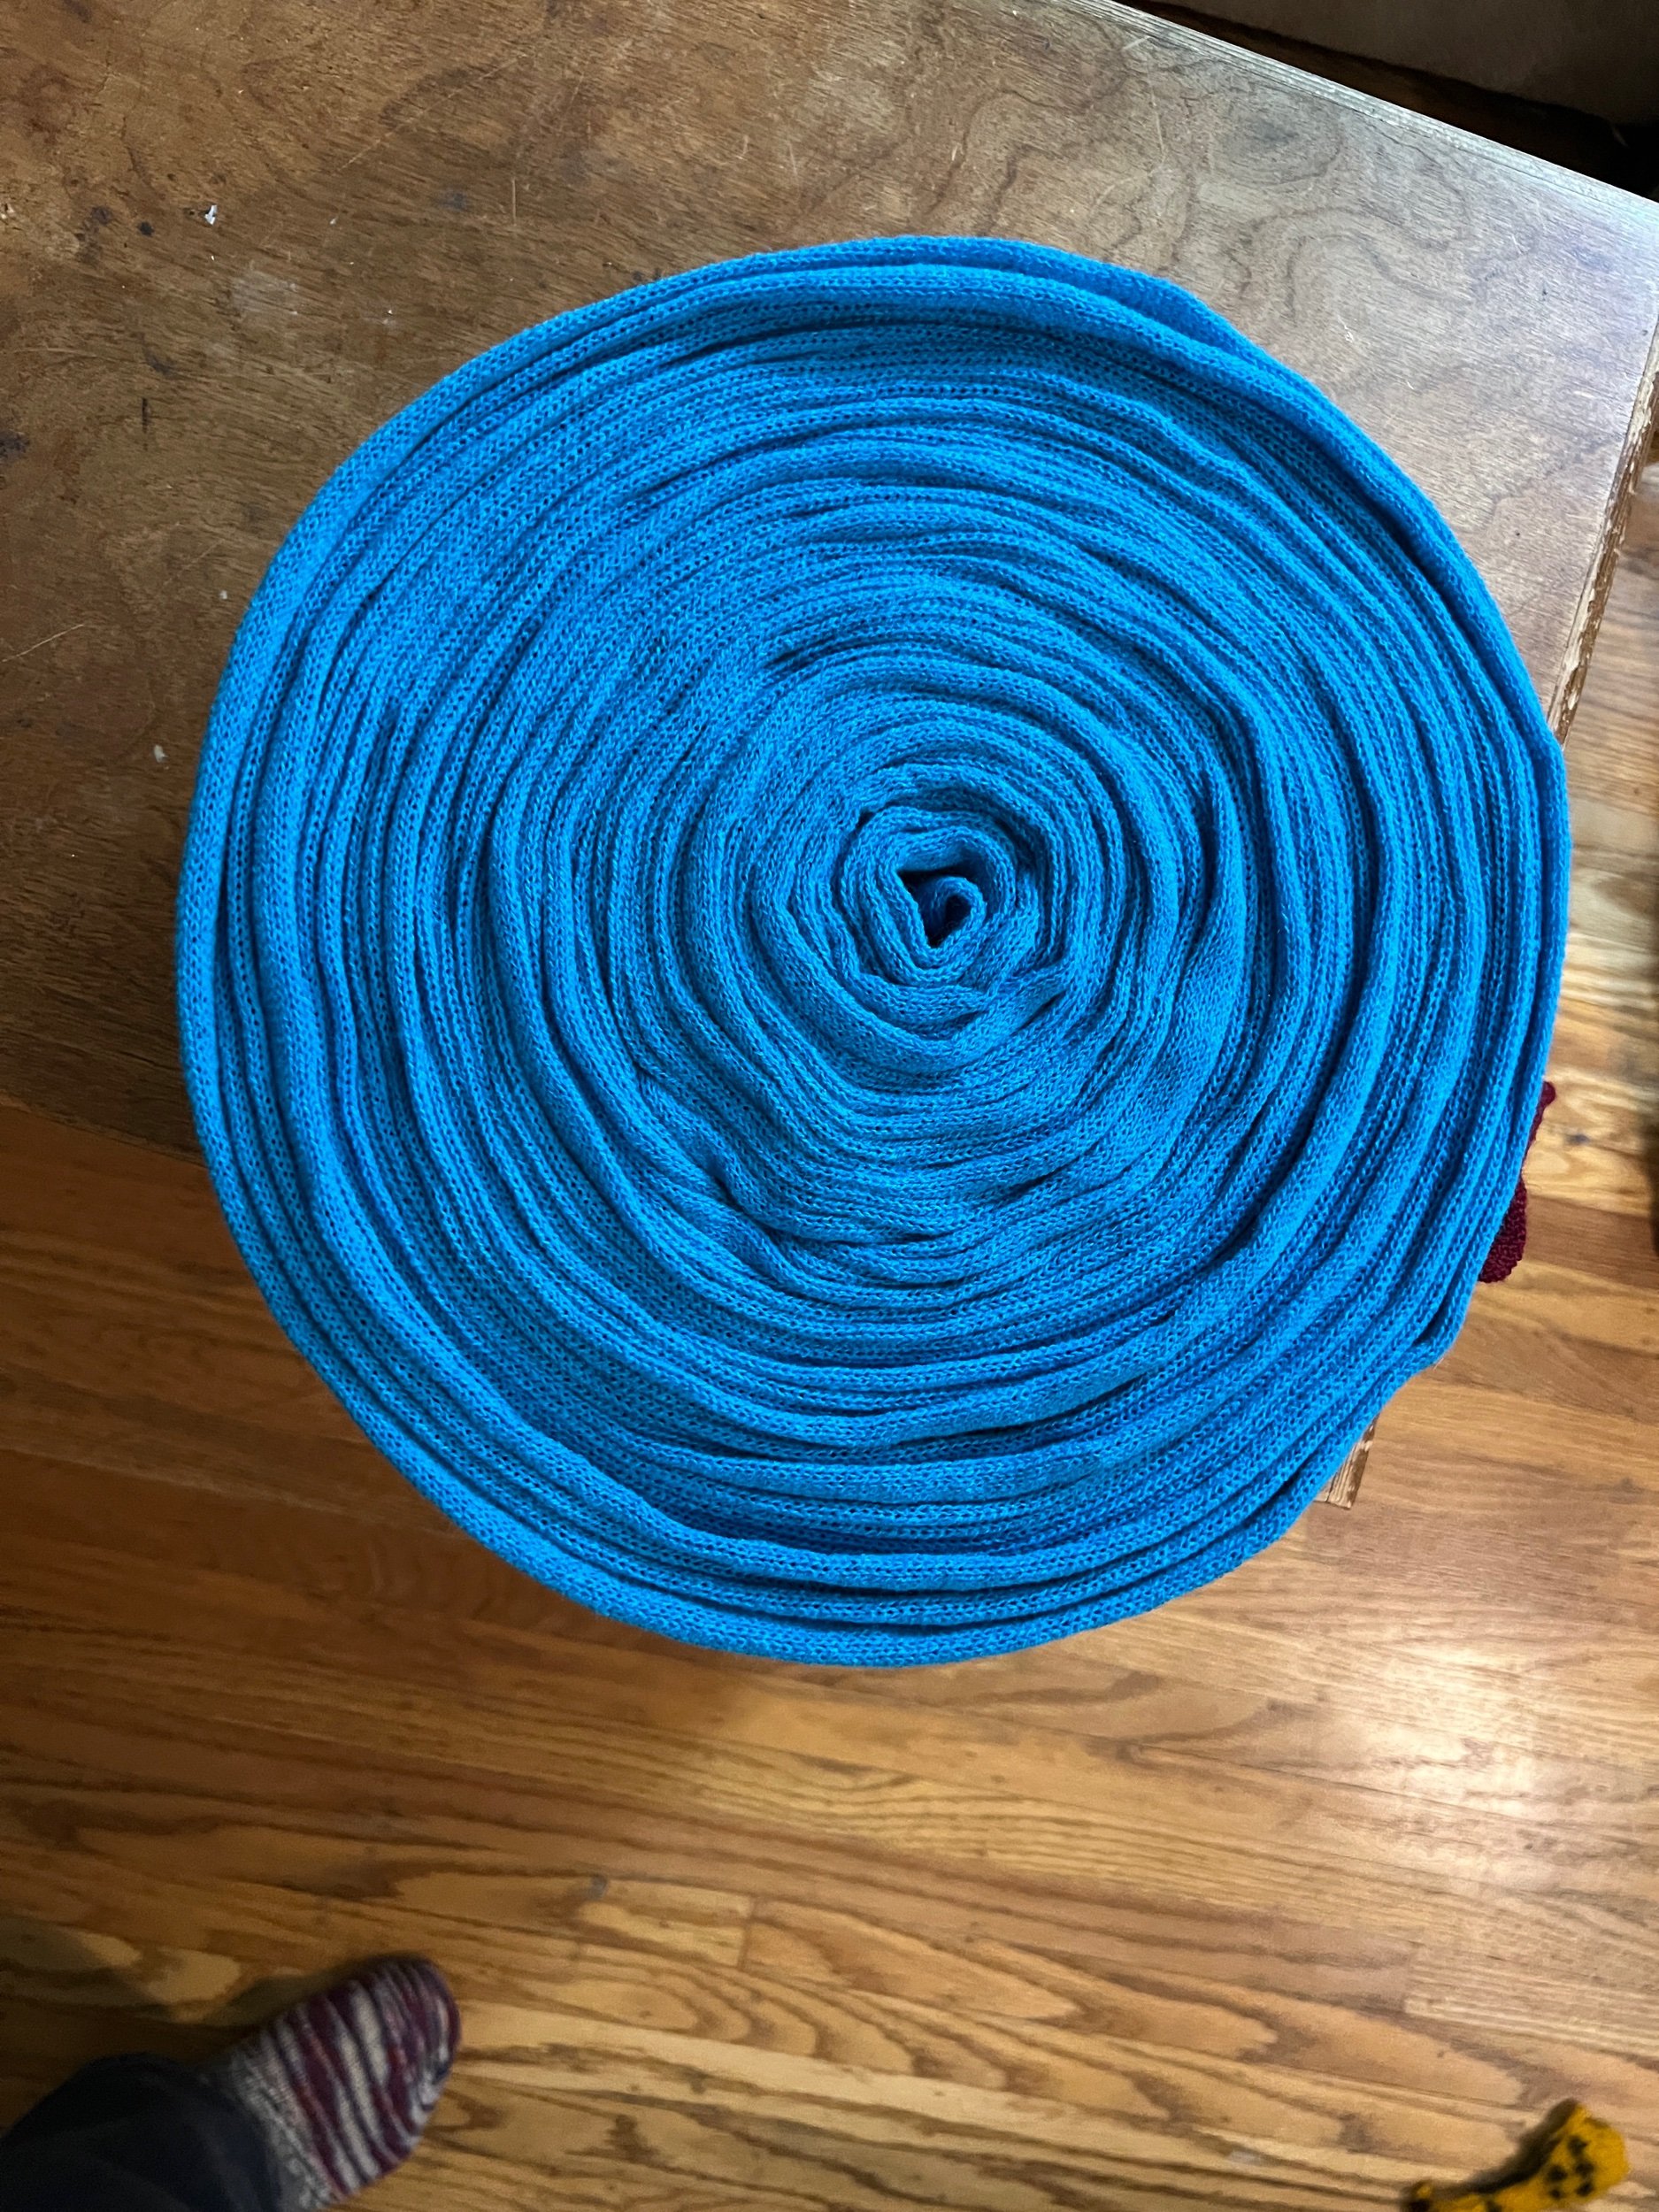
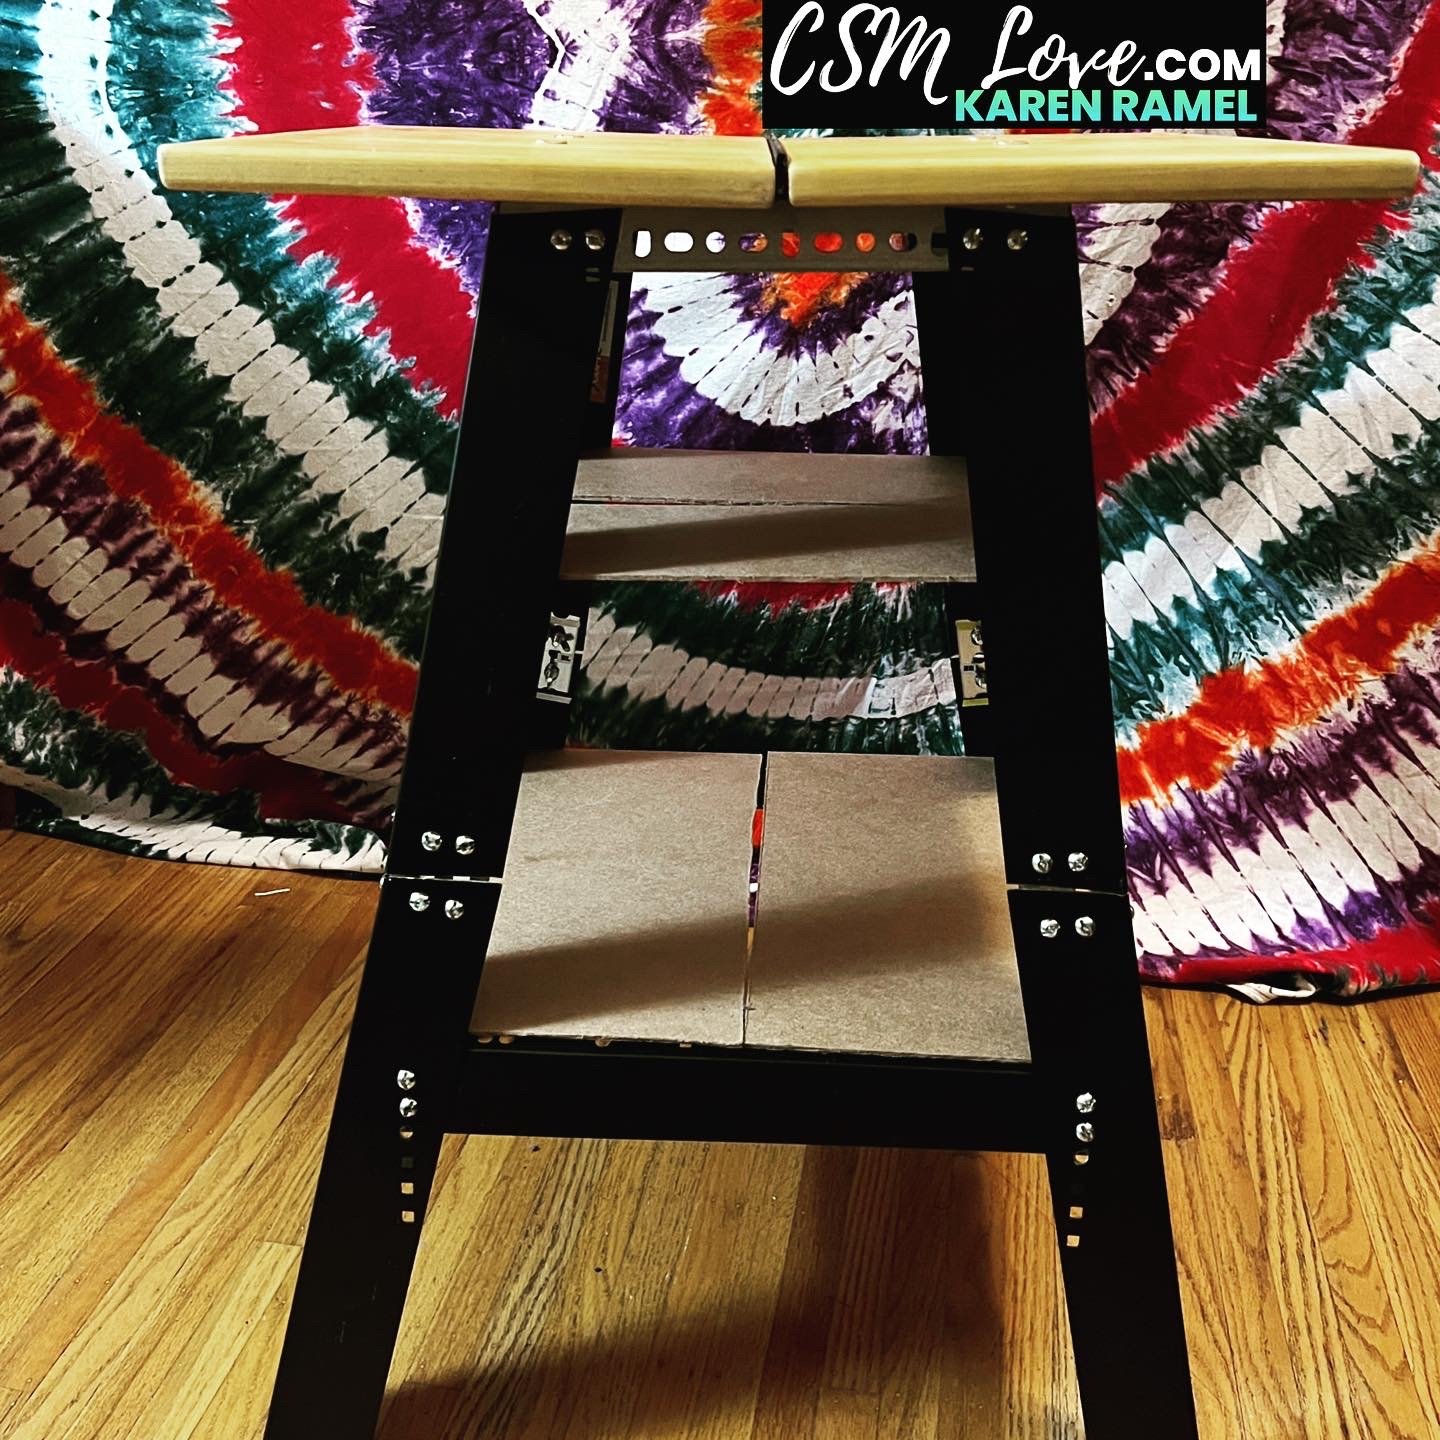
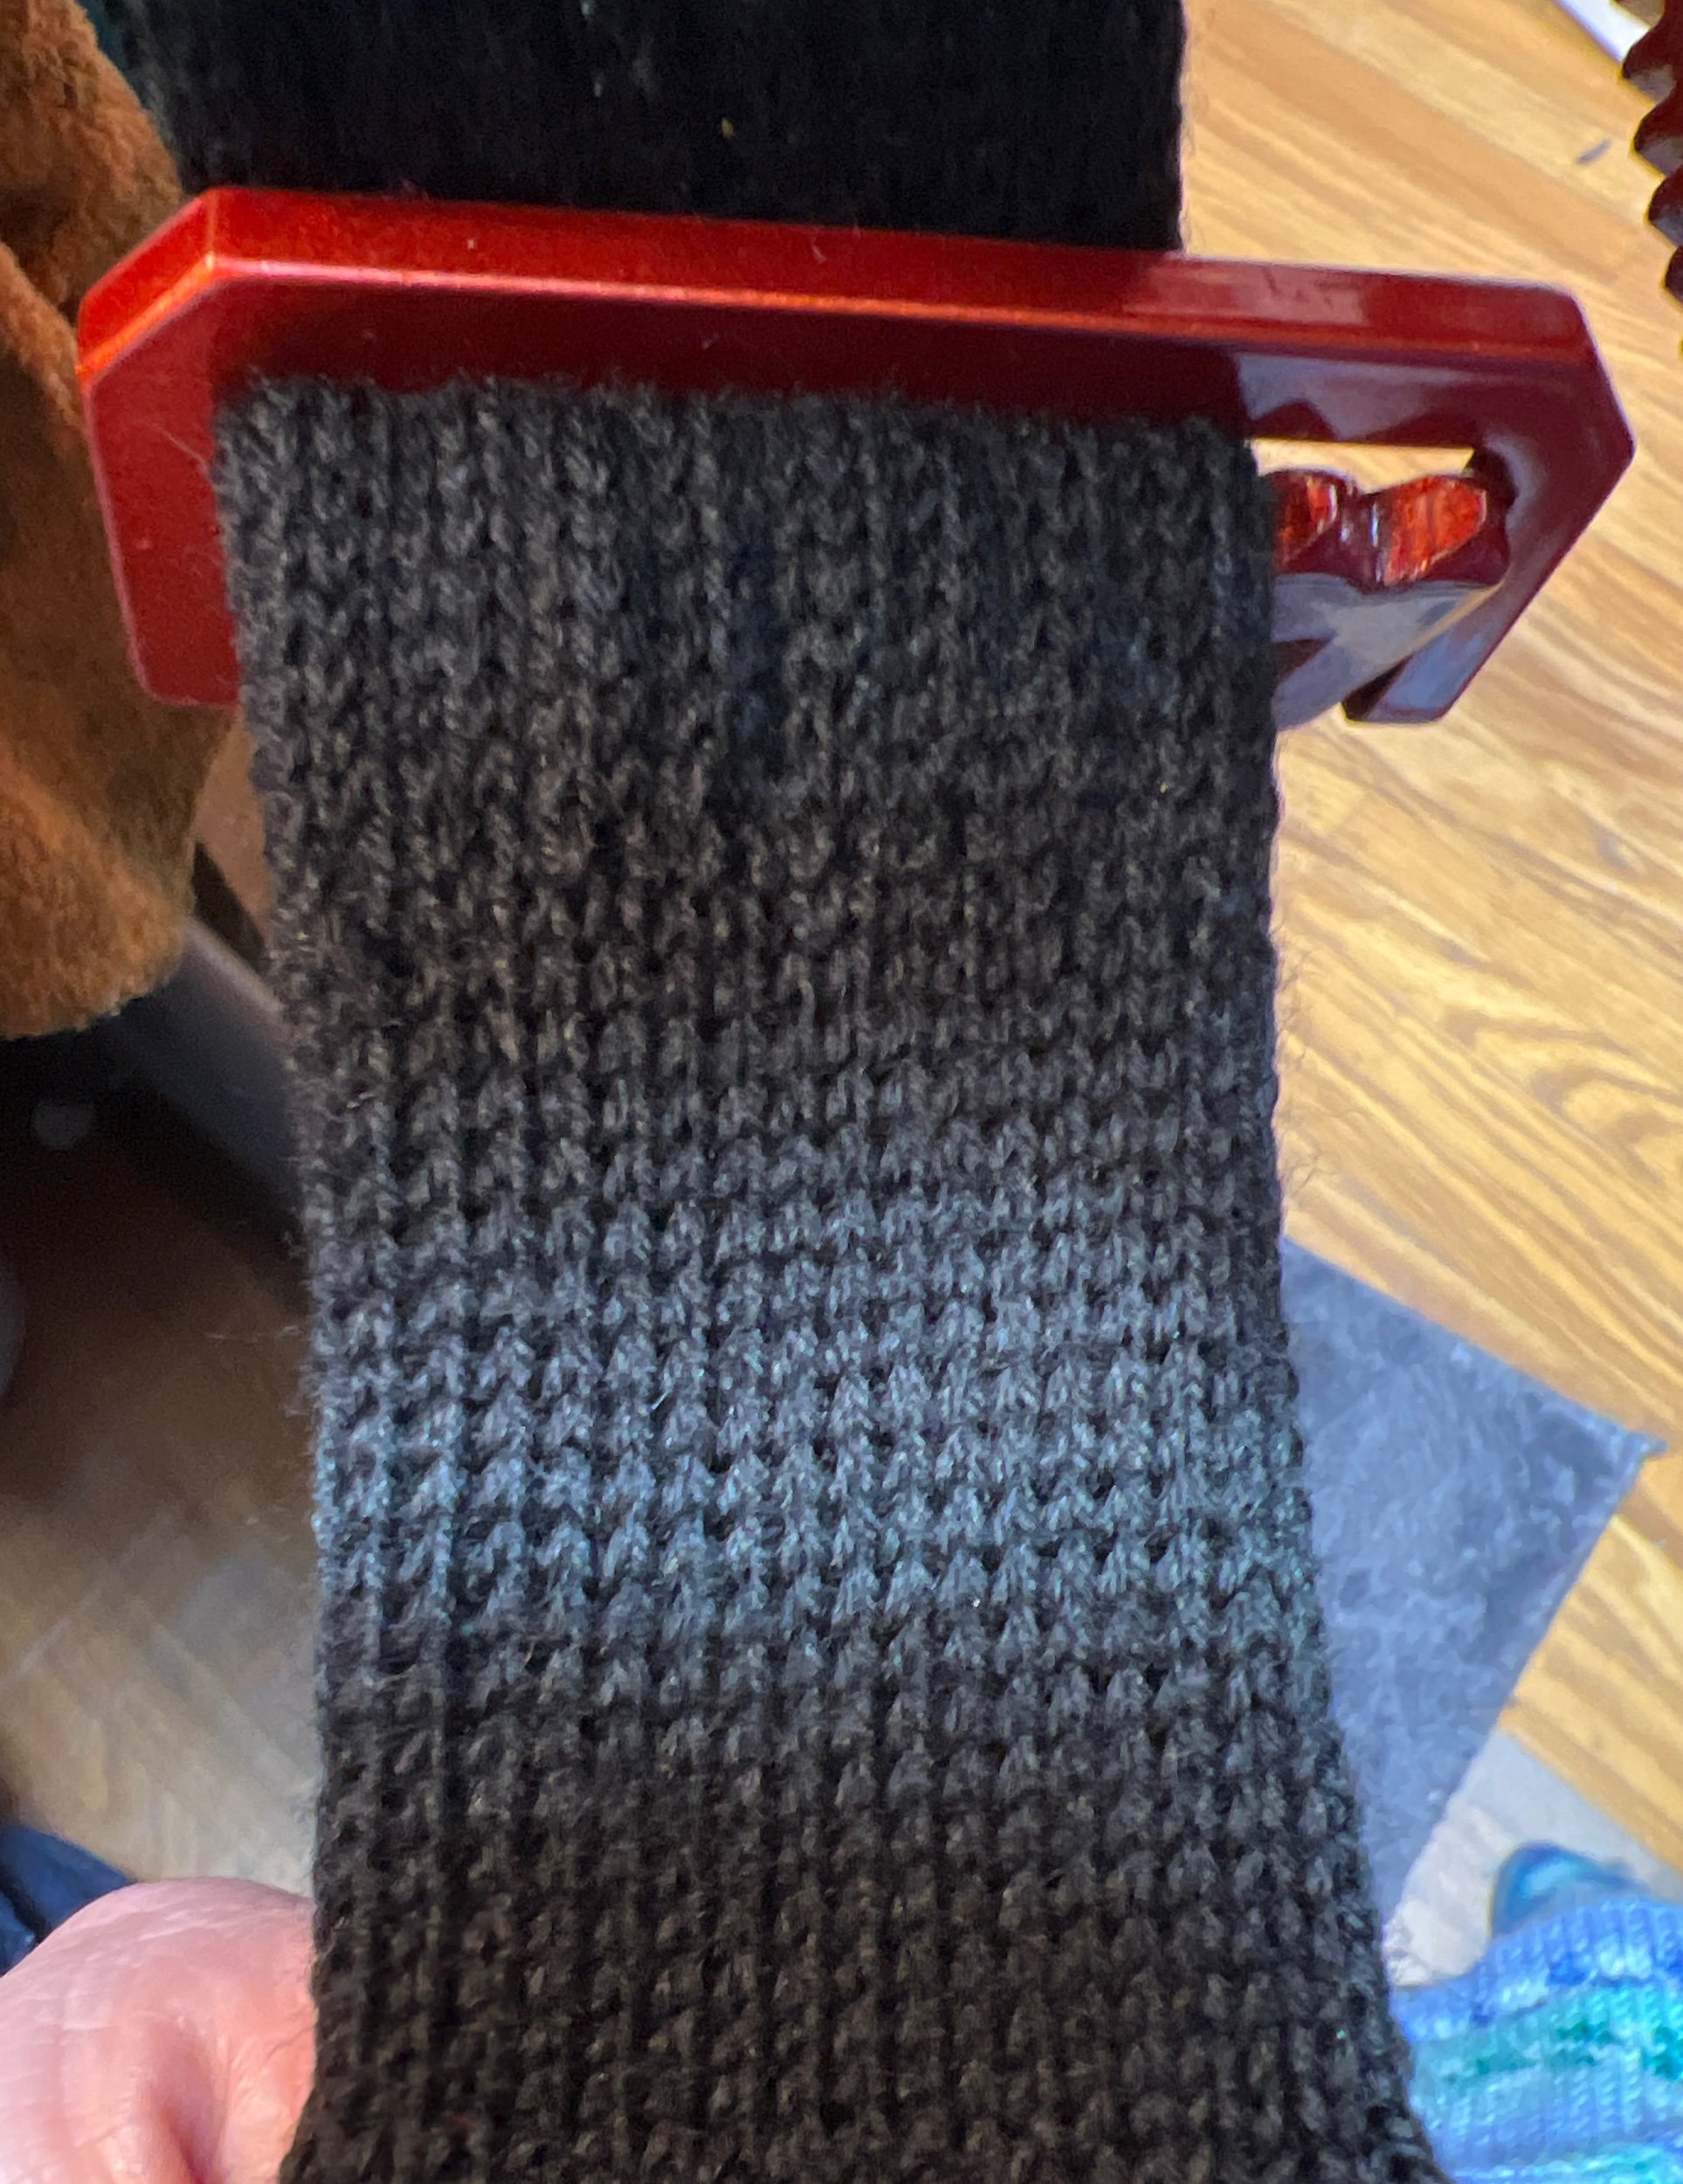
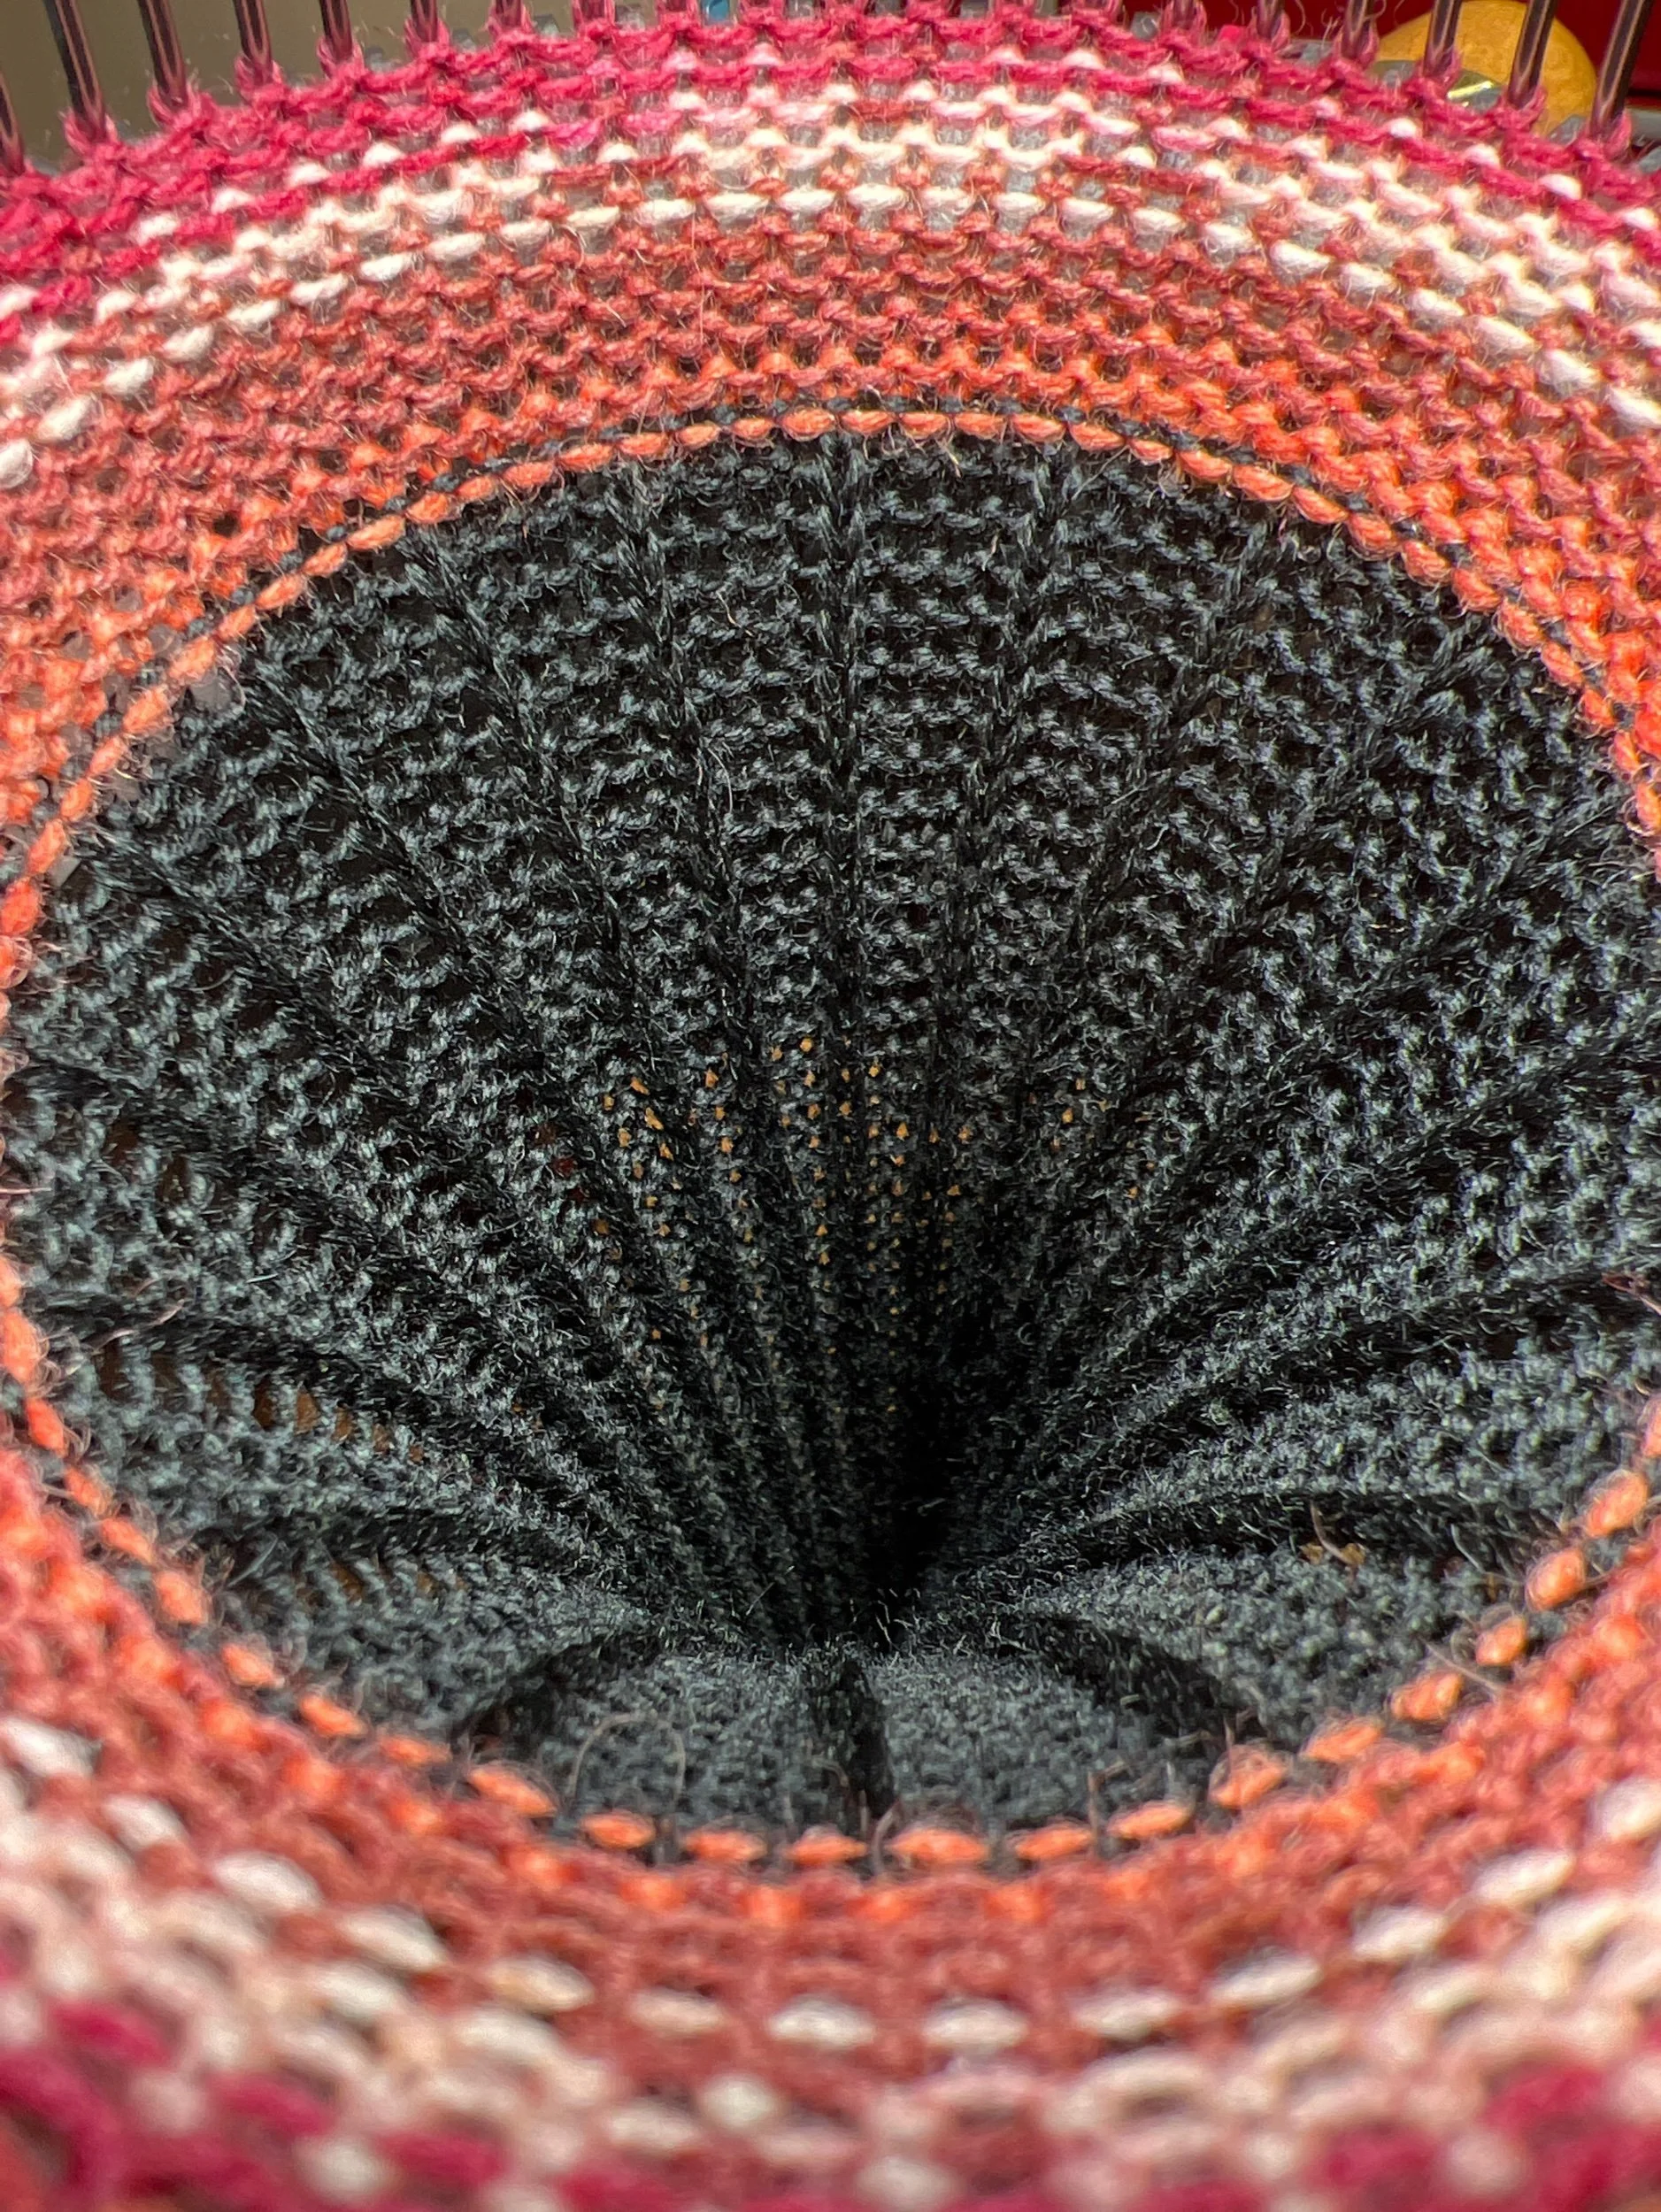
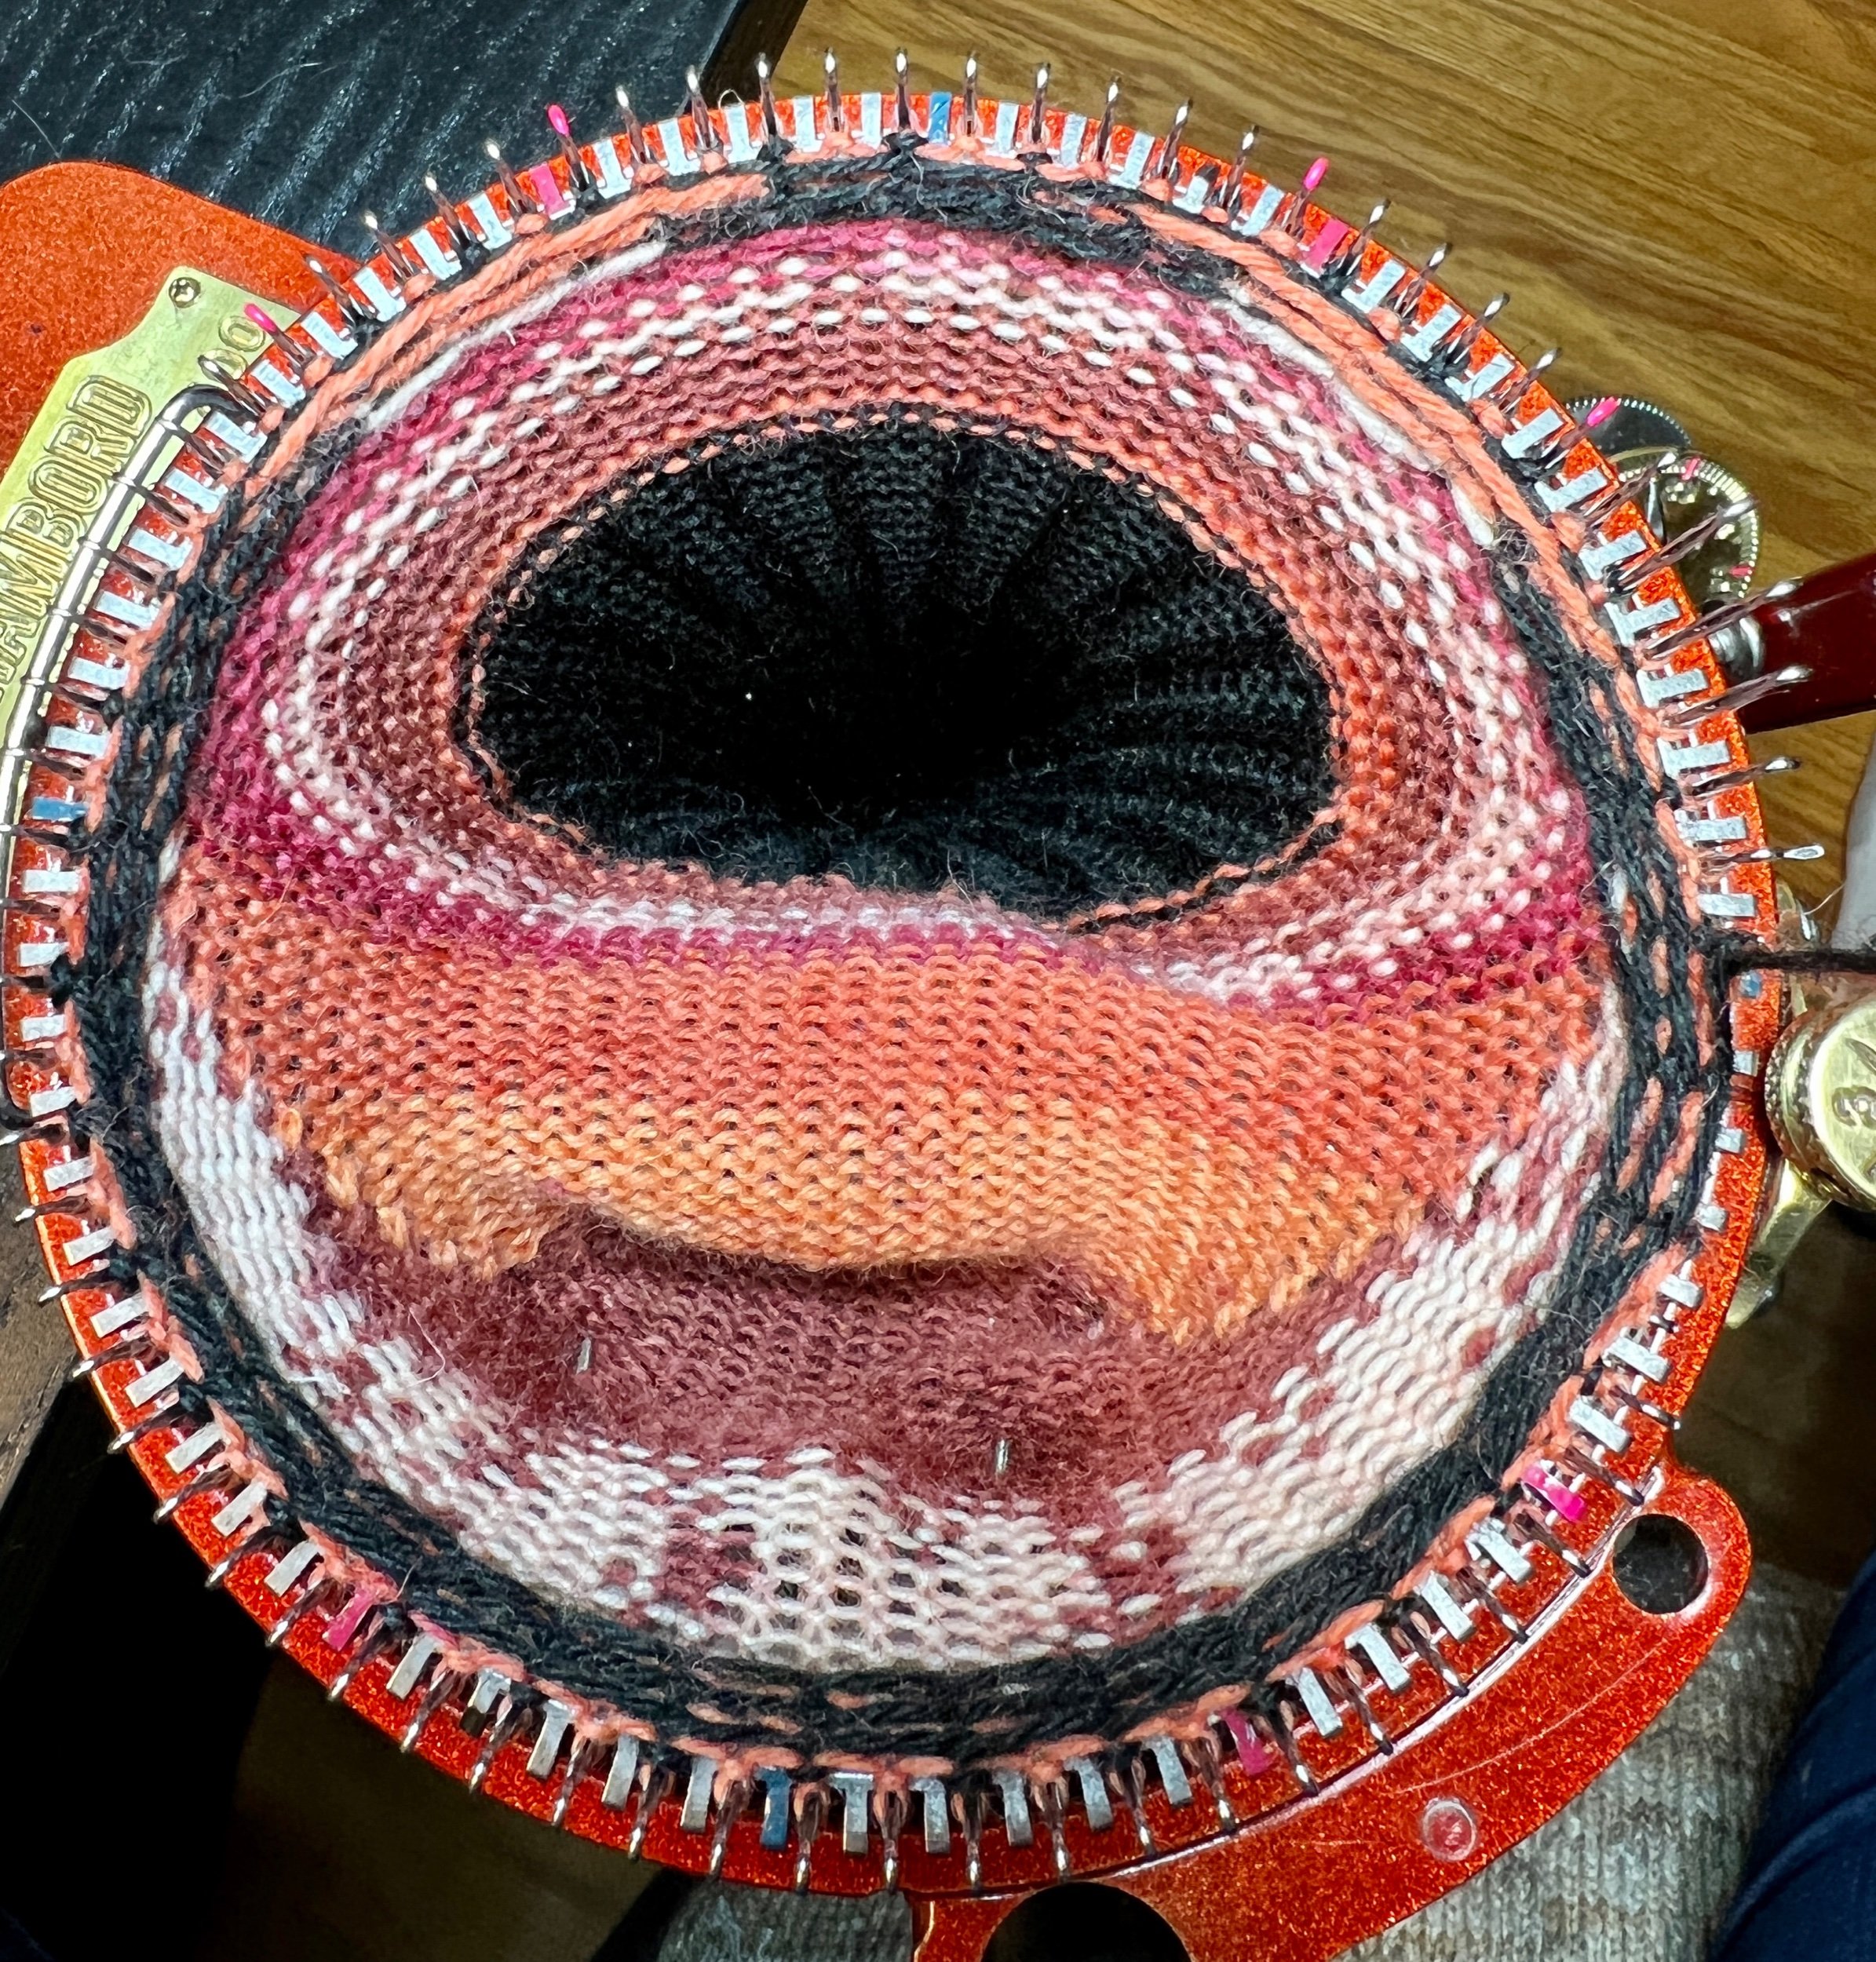
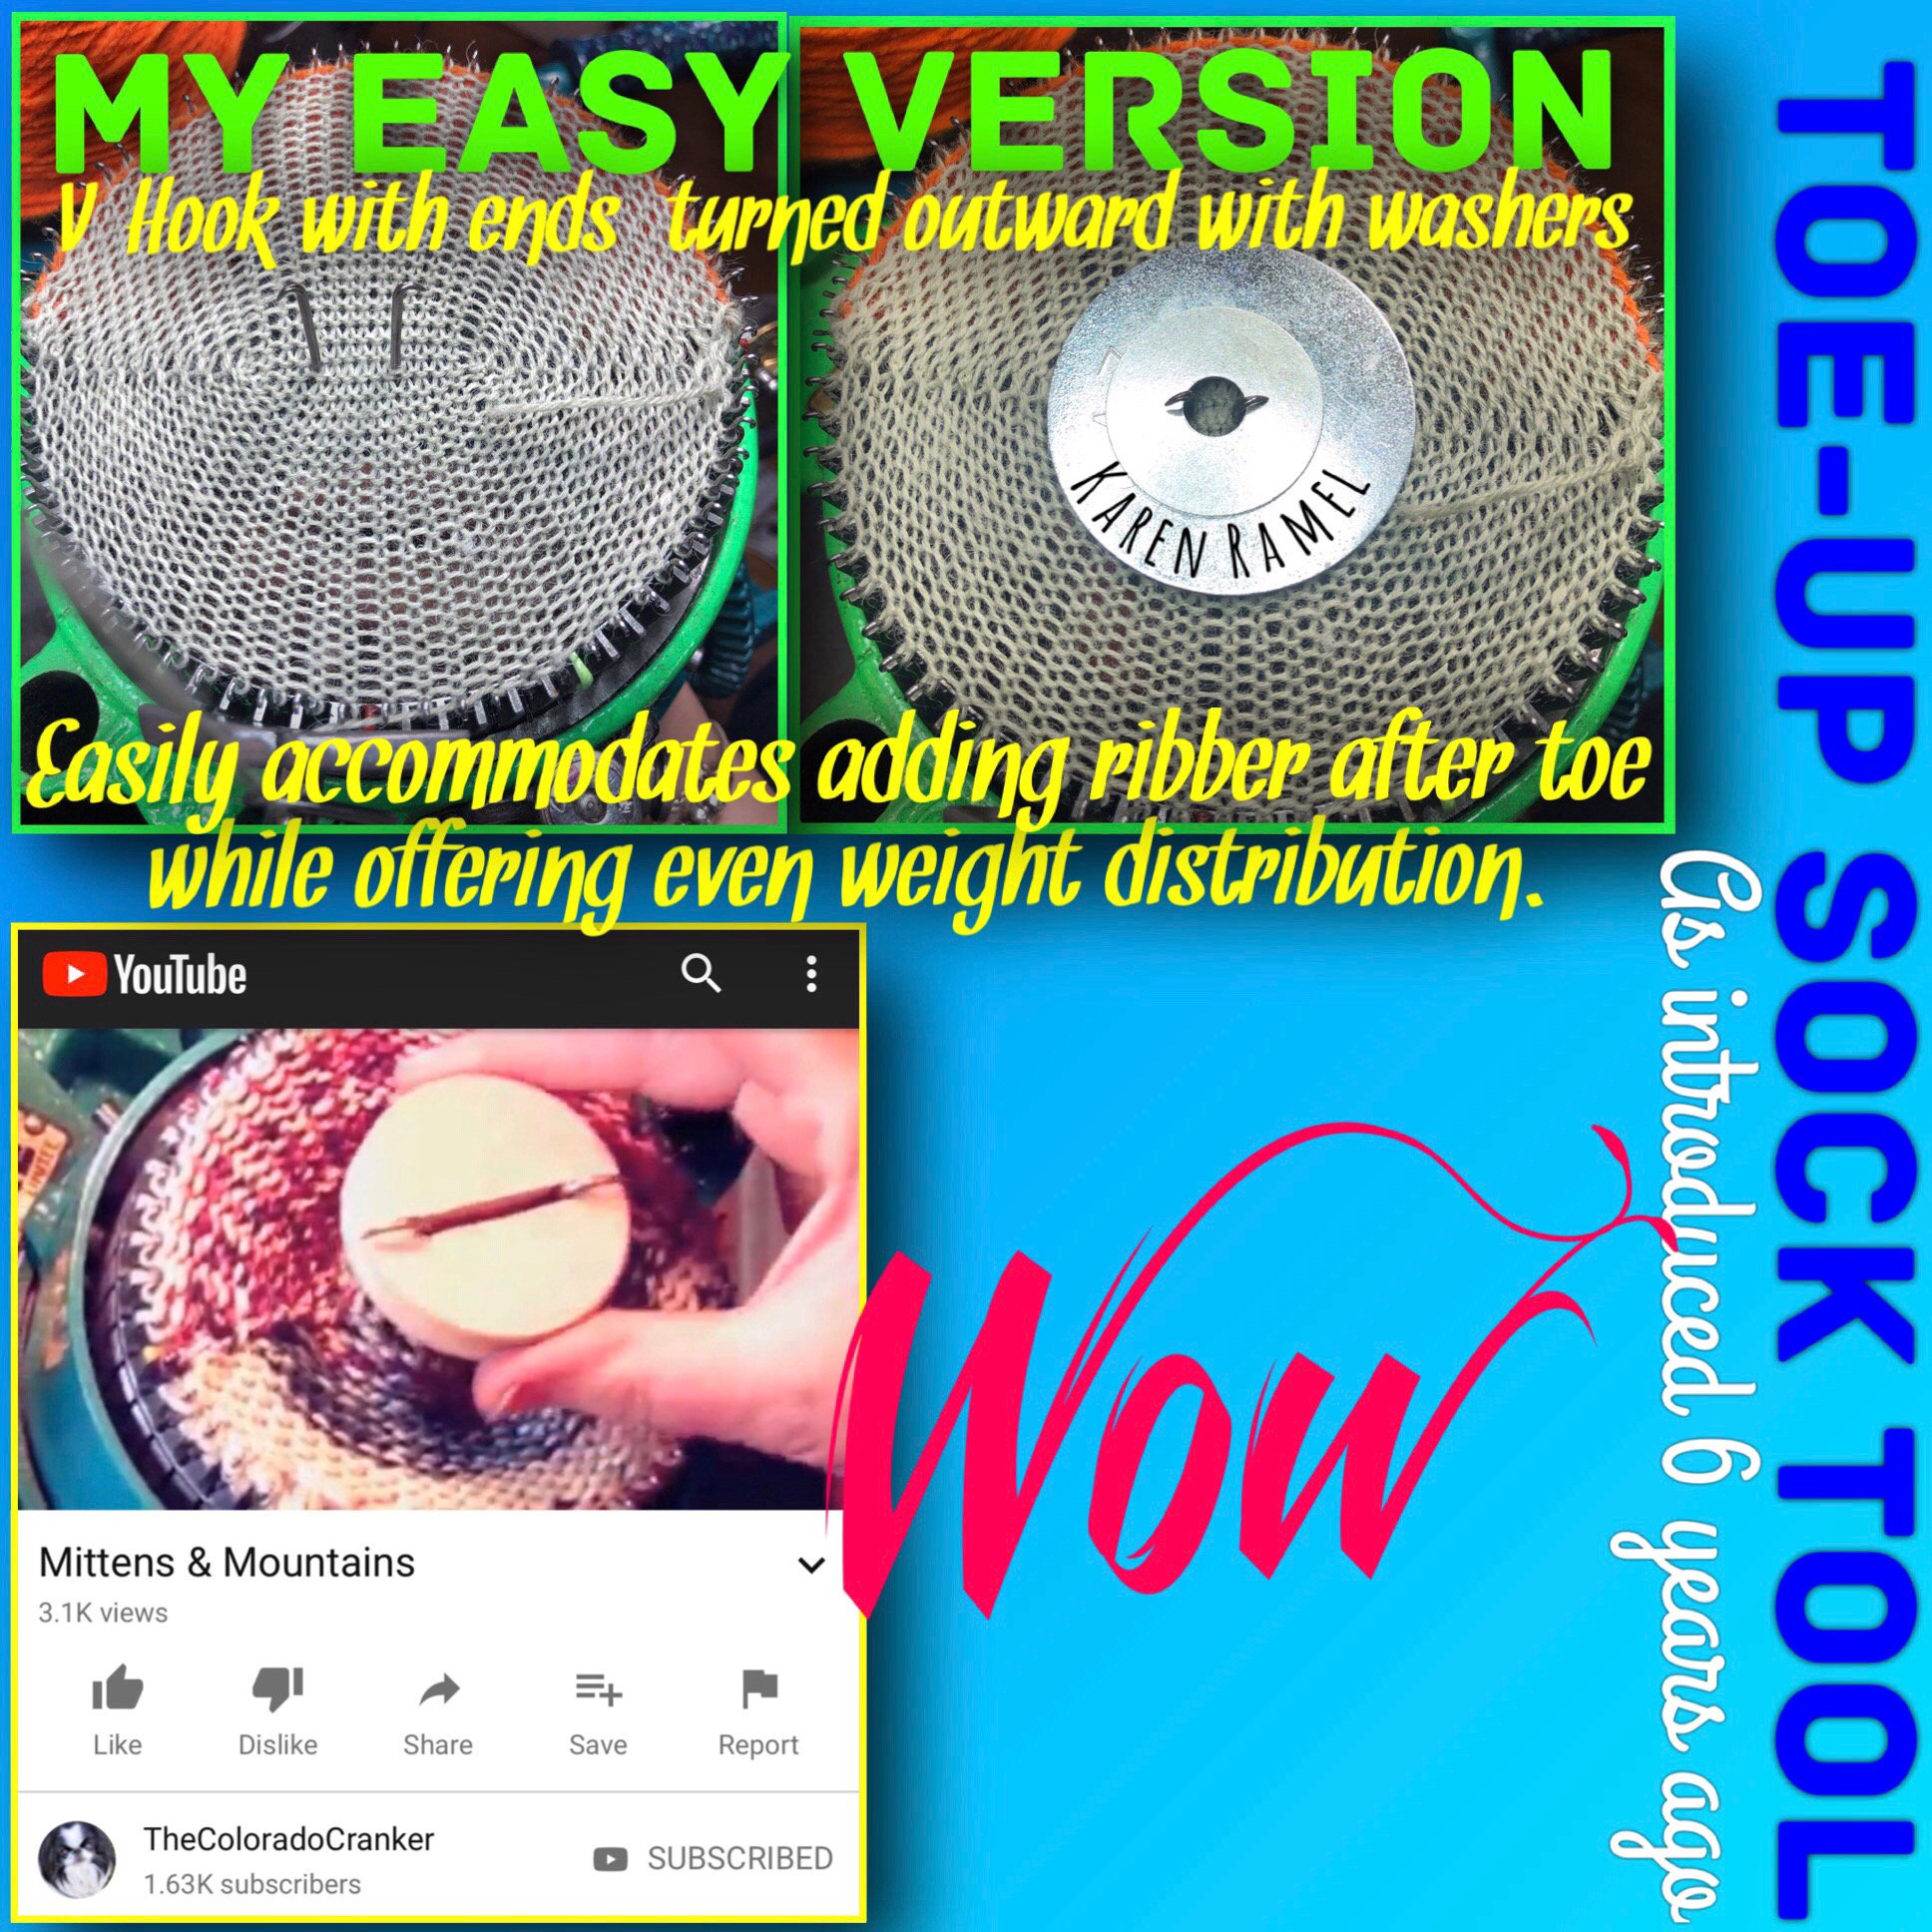
Having the easy space under the machine for the project to hang reduces twisting however more importantly being able to do so creates reliable stitches produced at an ideal working height - work doesn't get bunched up - like how machines like circular sock machines function.

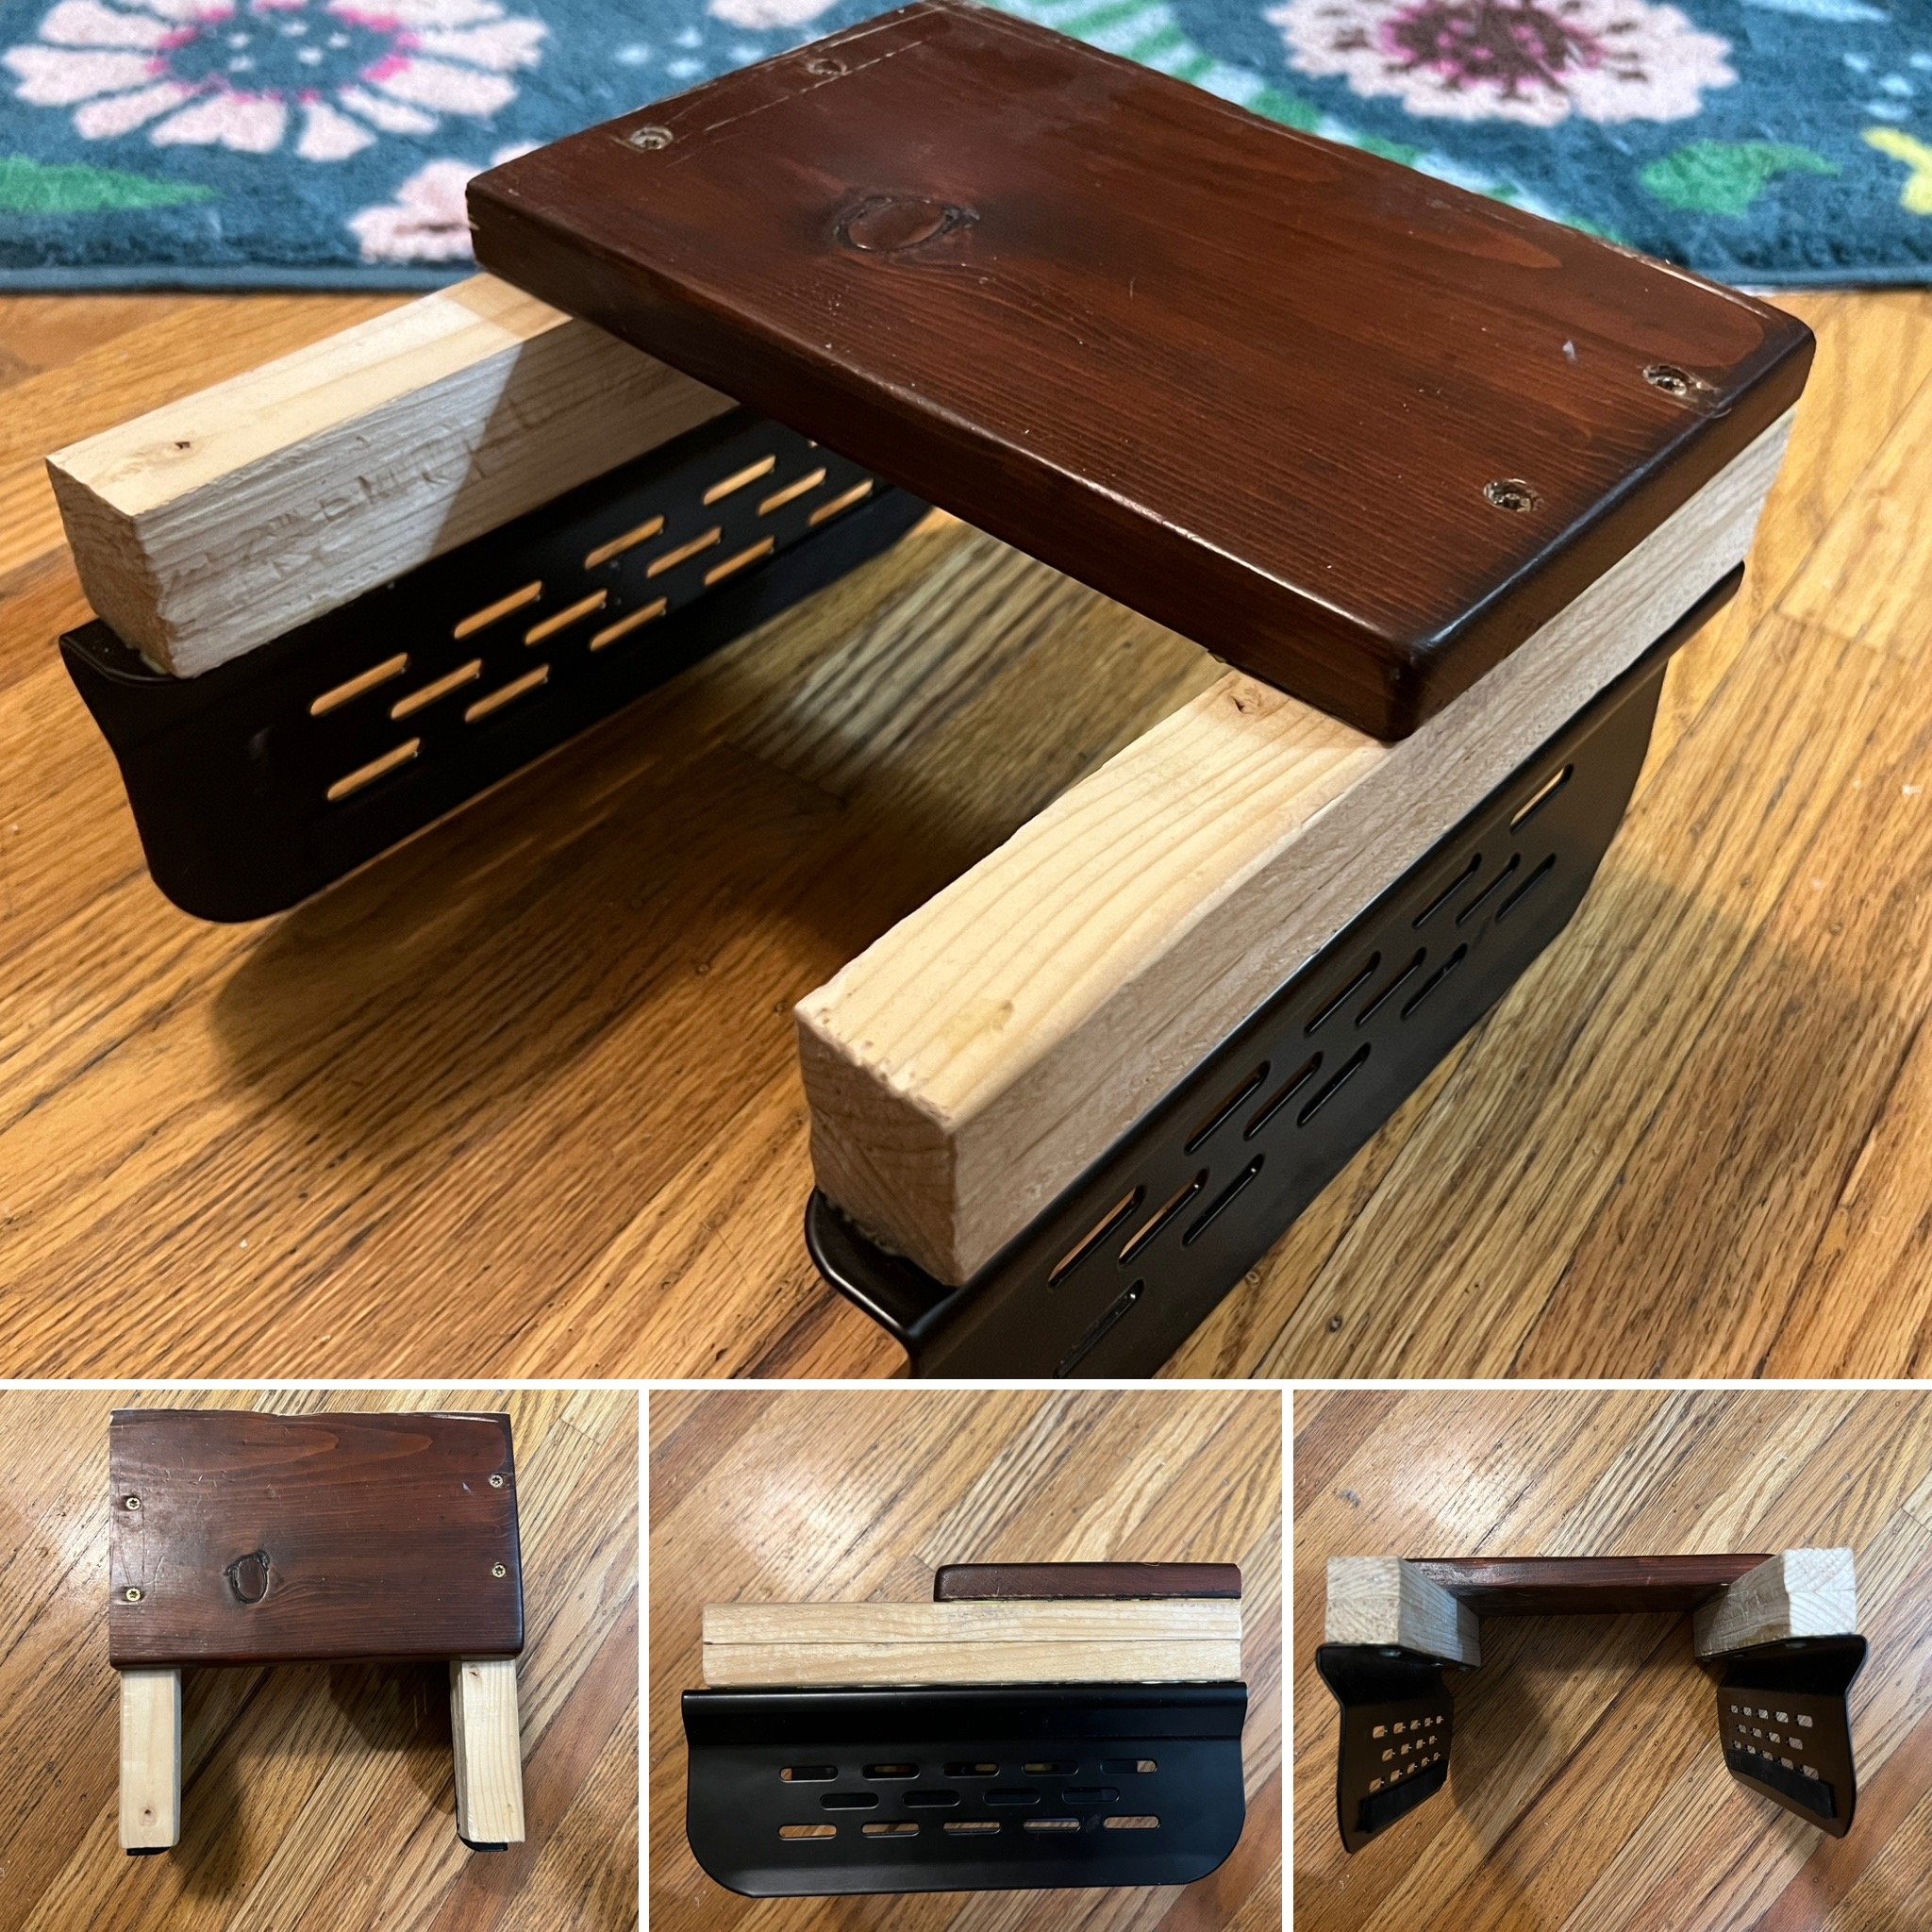
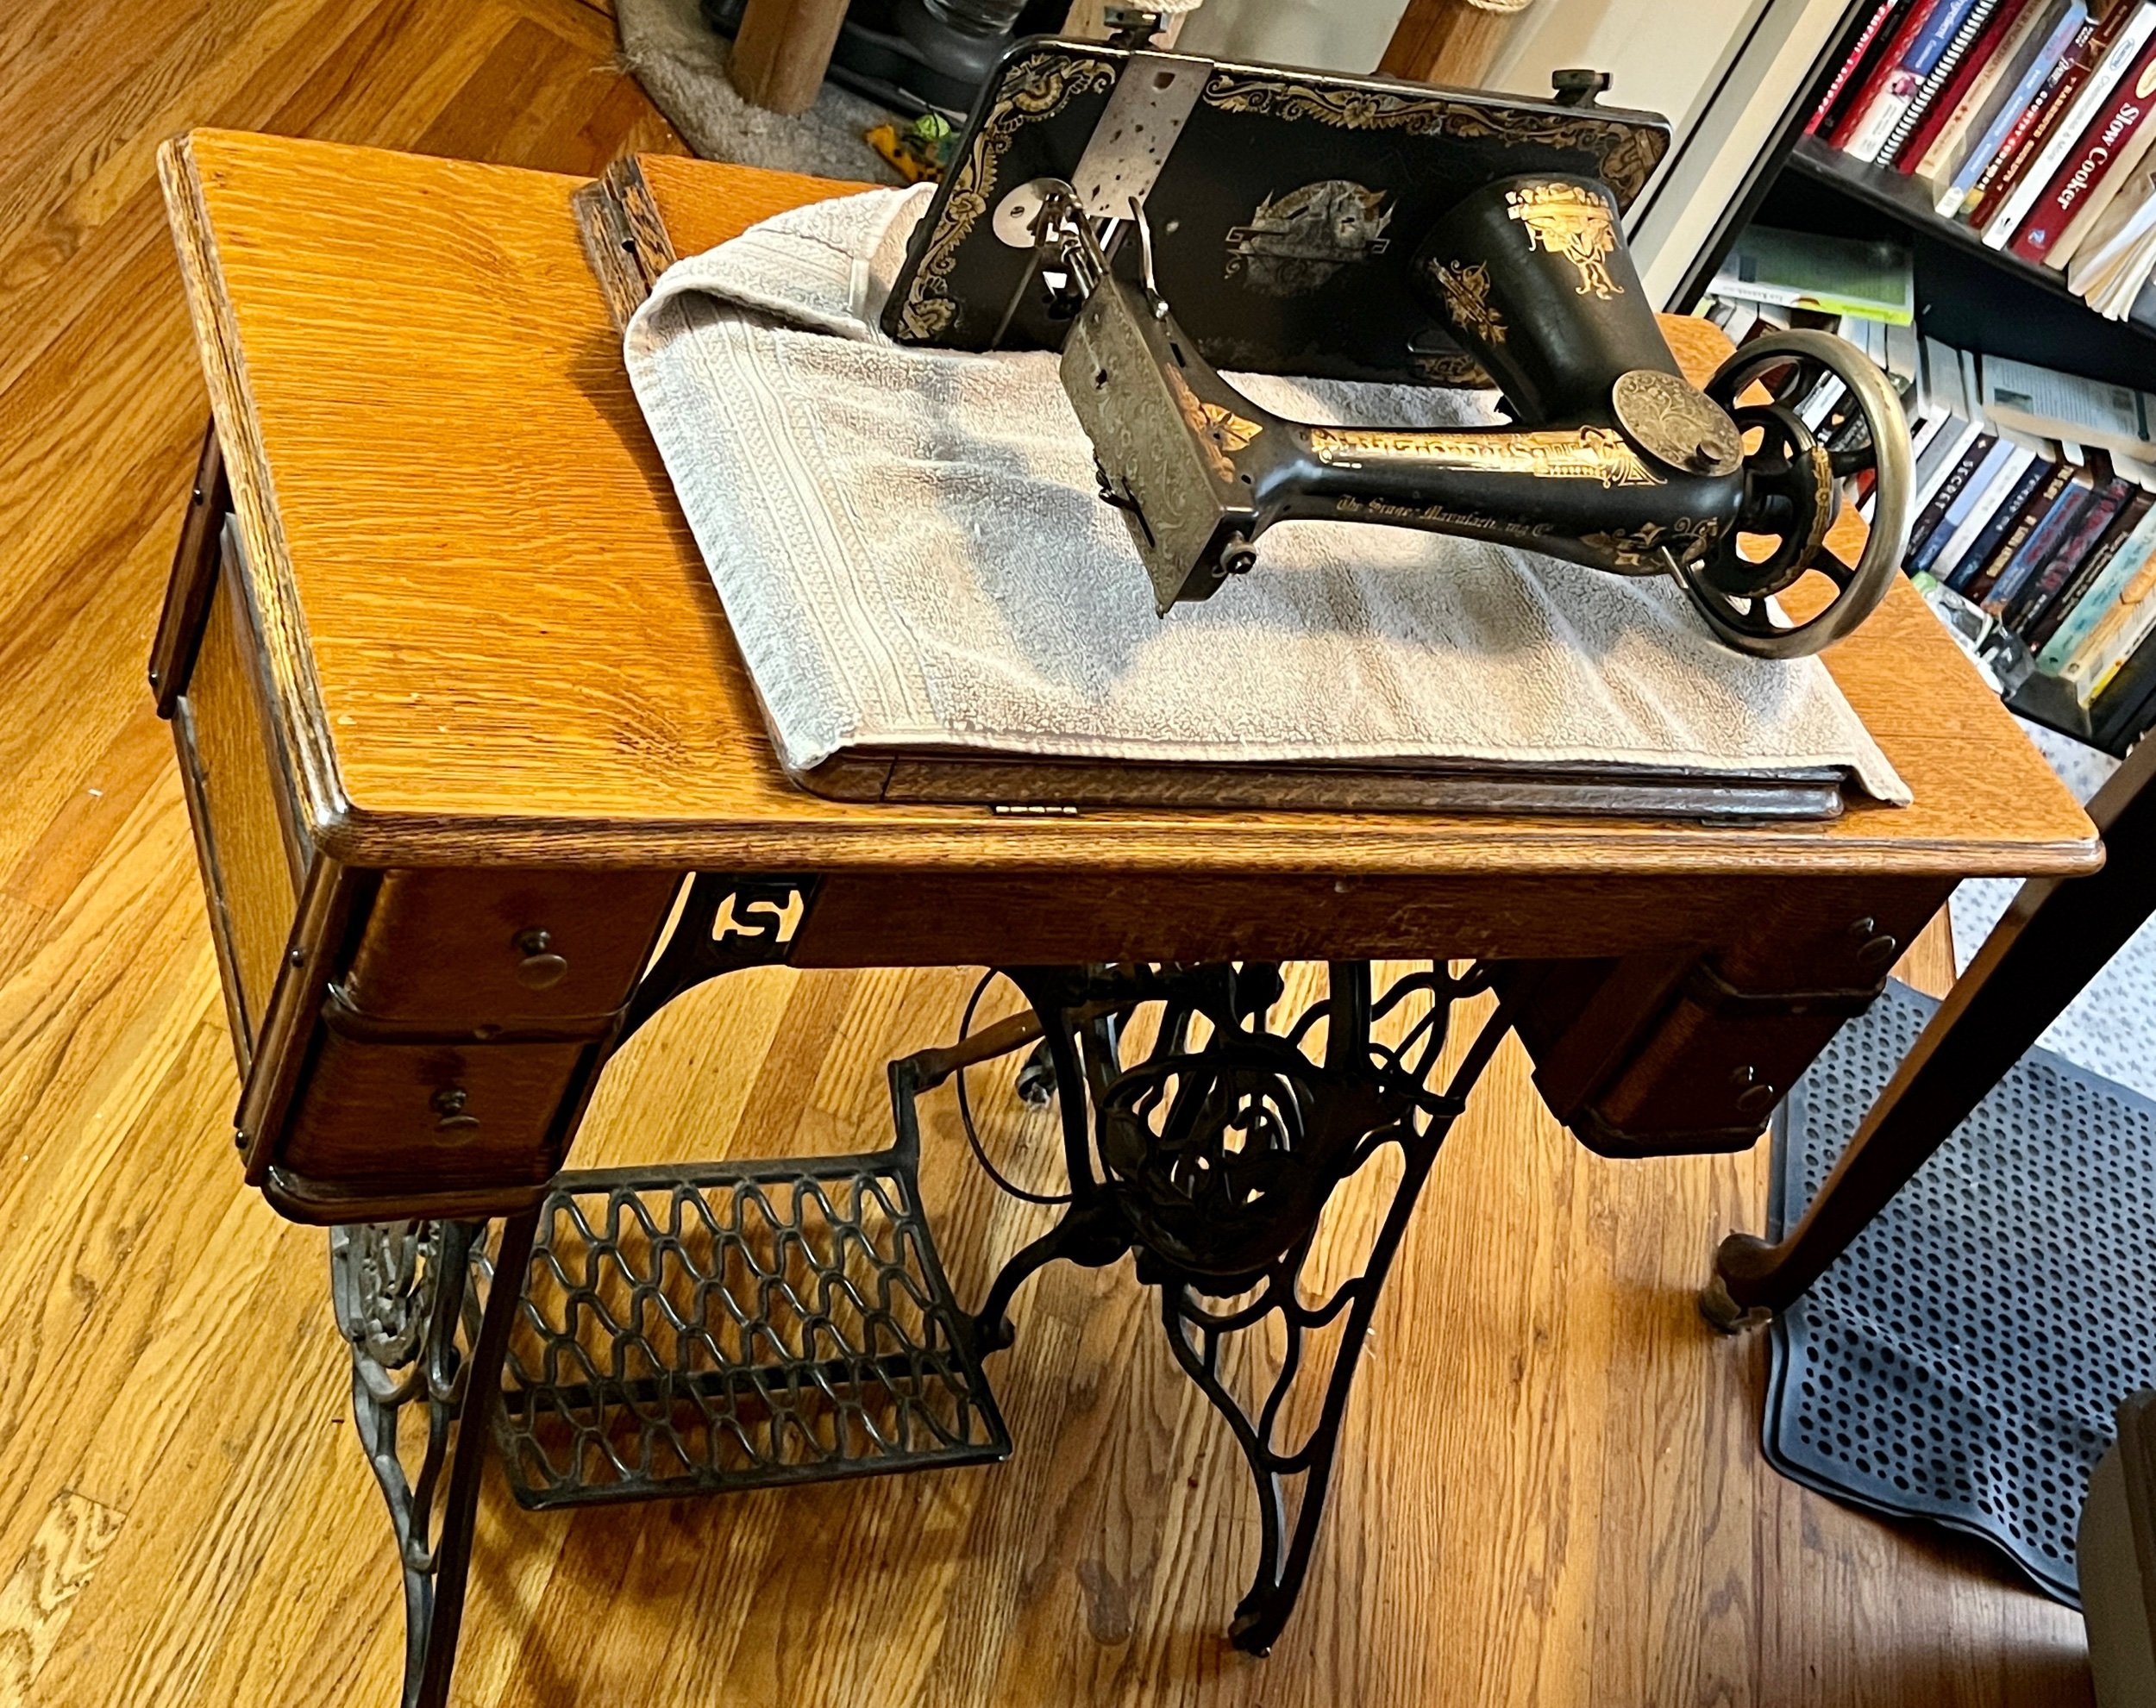
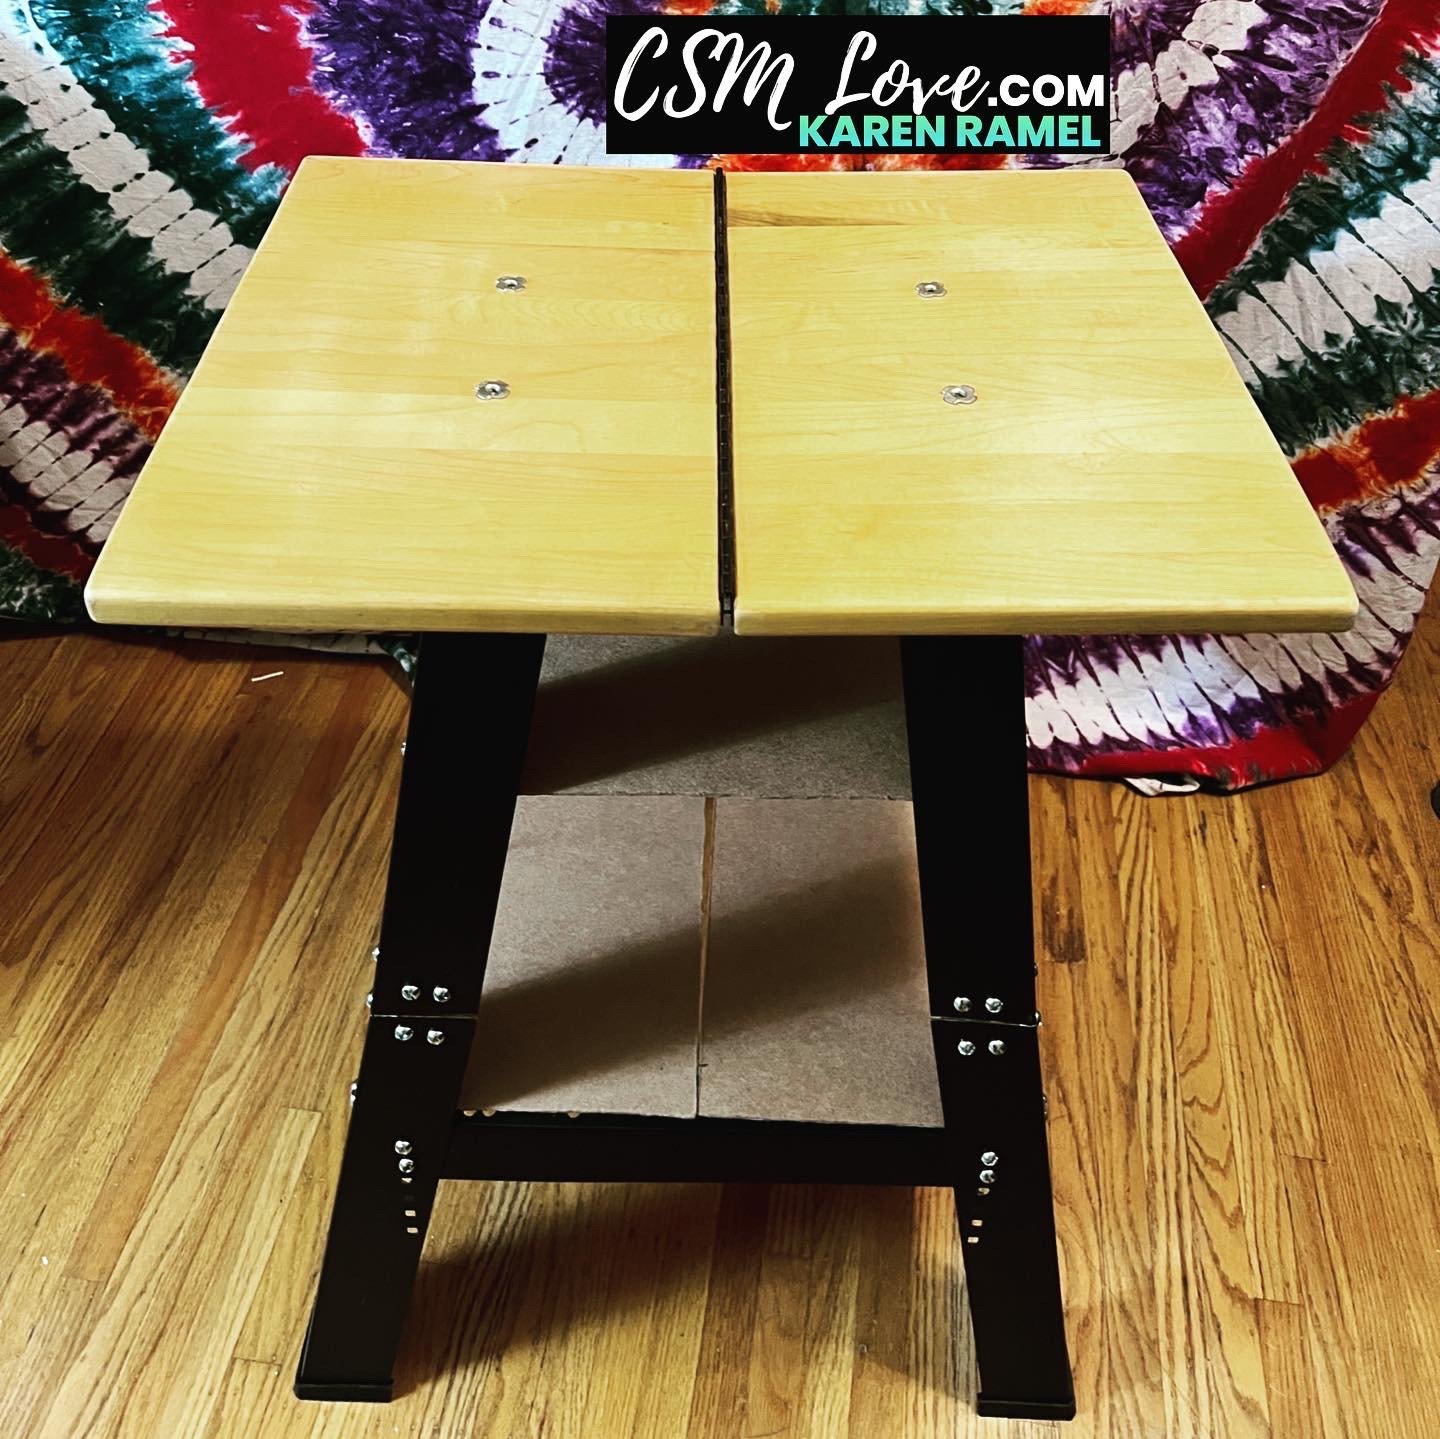
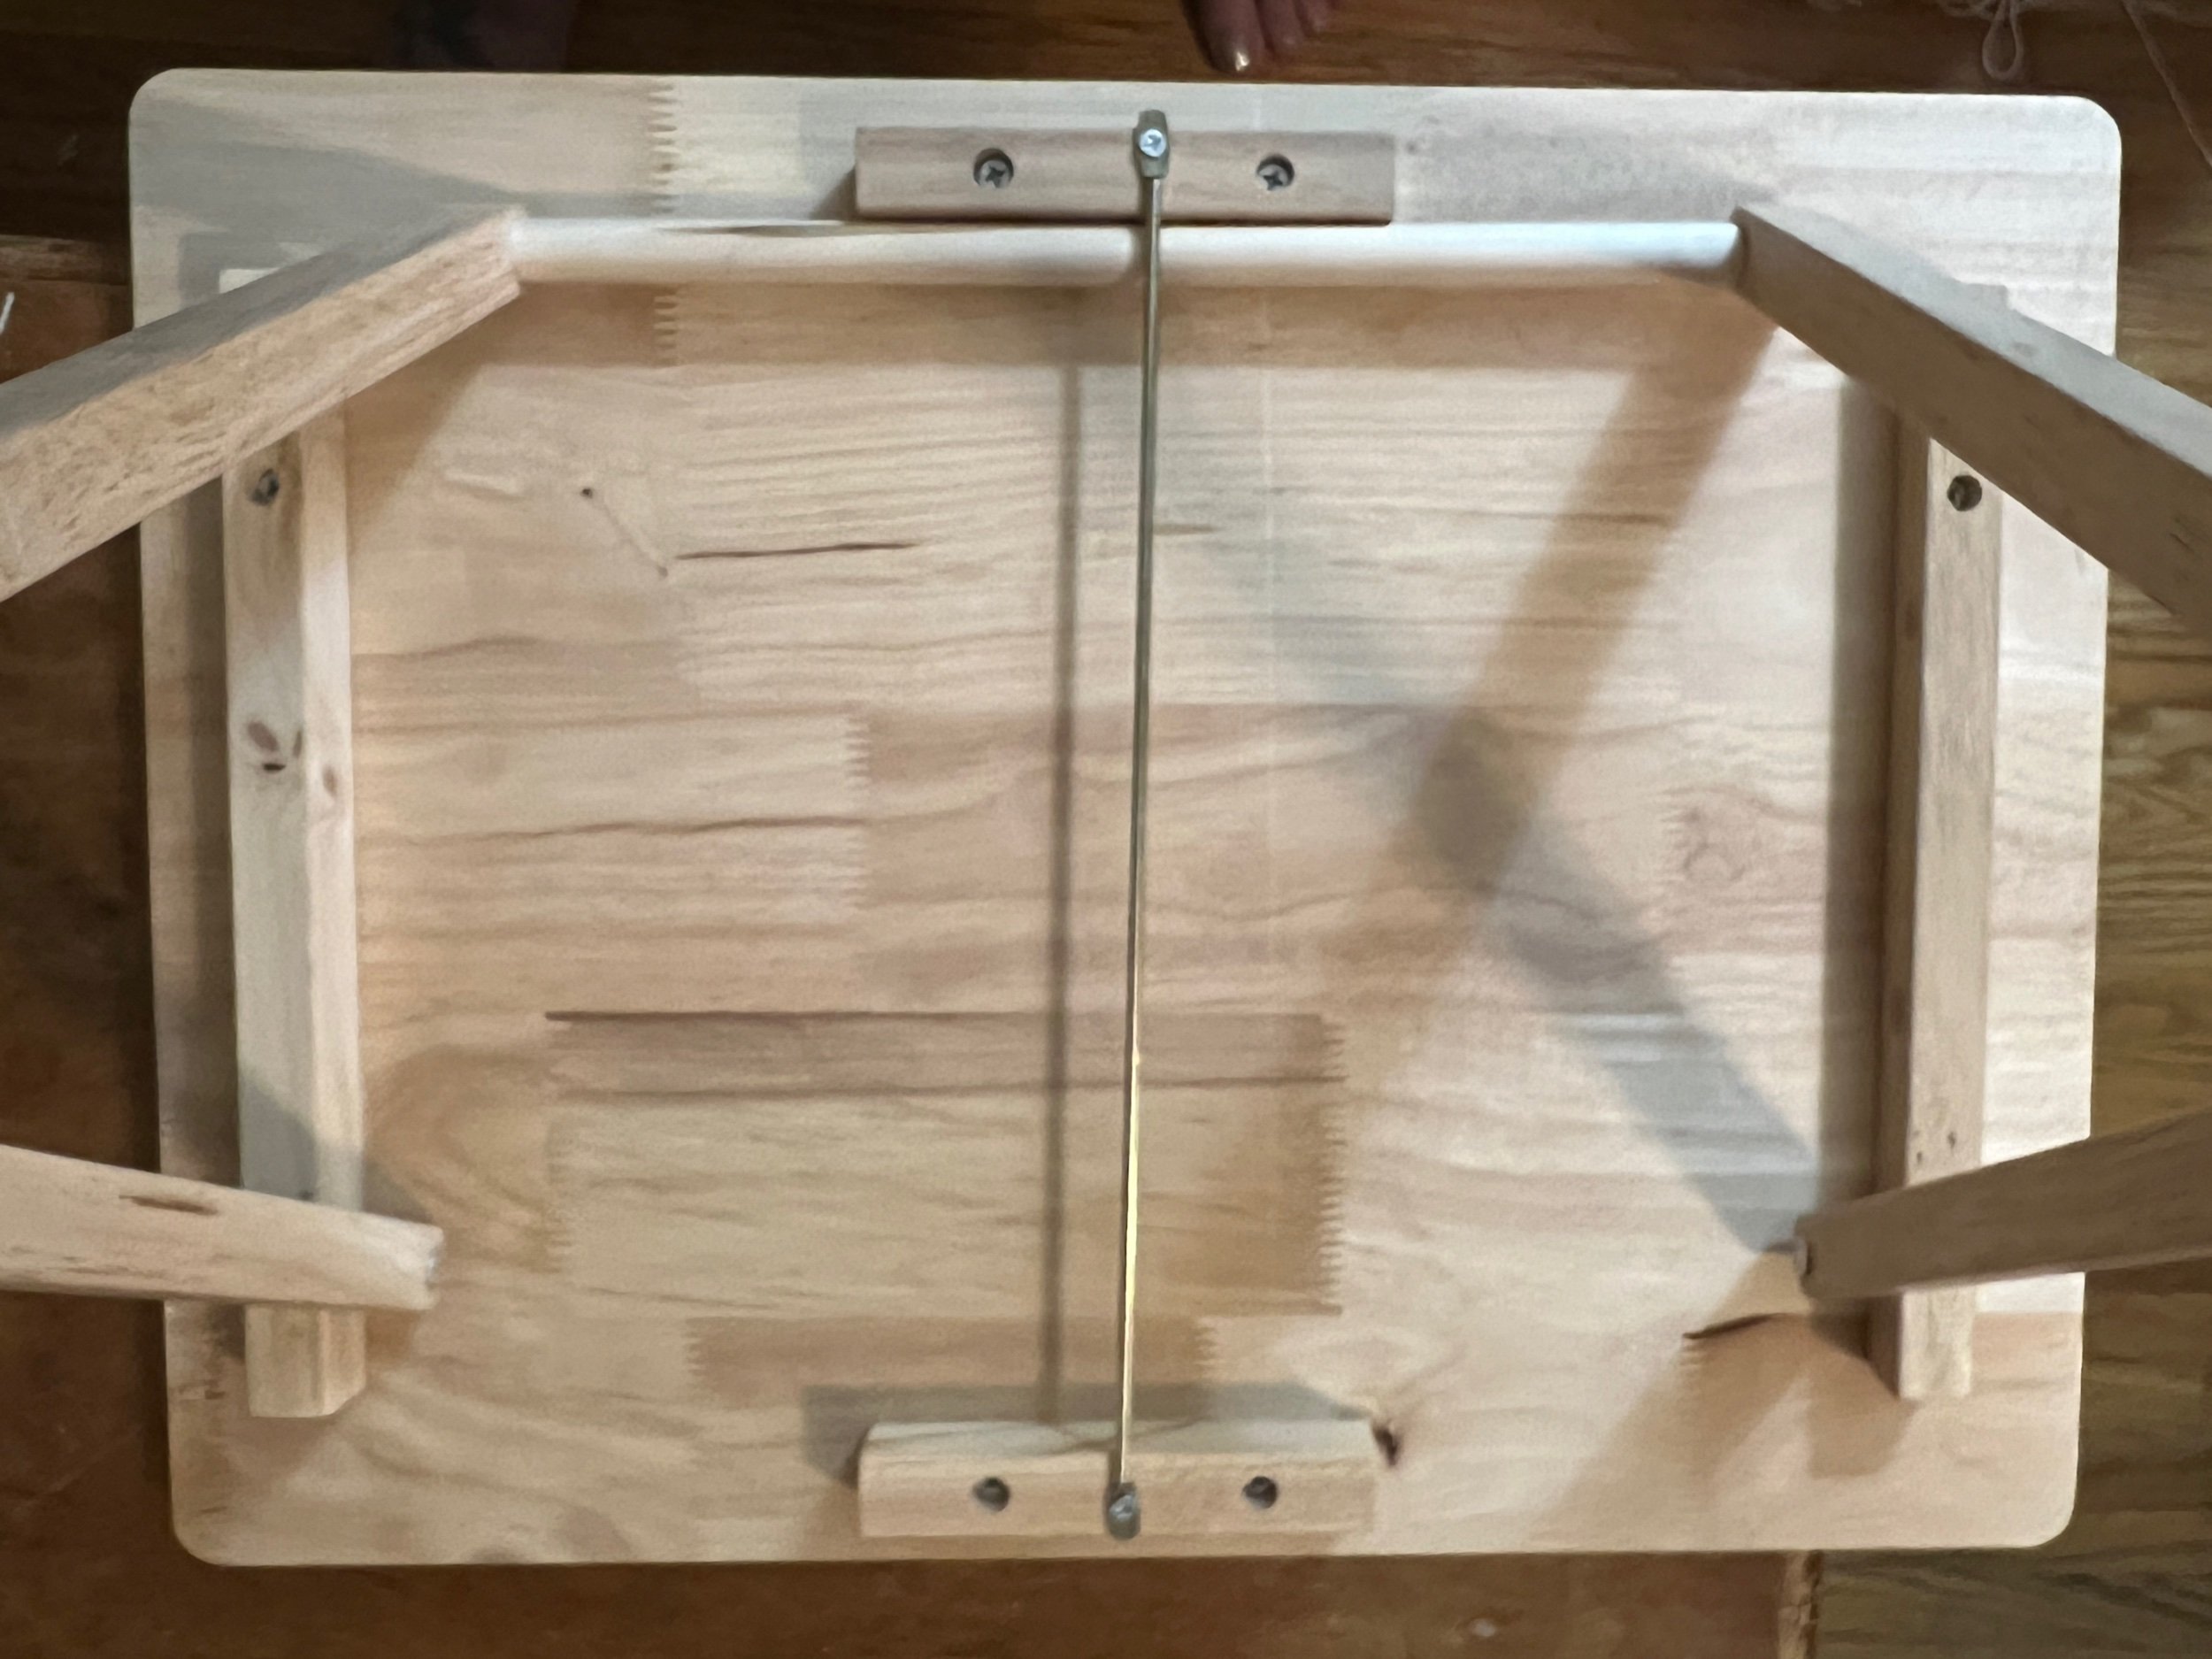
First we went to Canadian Tire (hardware store) and picked up this wooden table for $20. Tonight I reconfigured the support bracket - moving it from the middle underside of the table to the edge. The bracket has two wood supports and a bar that provide a basic slide for storage and setup.

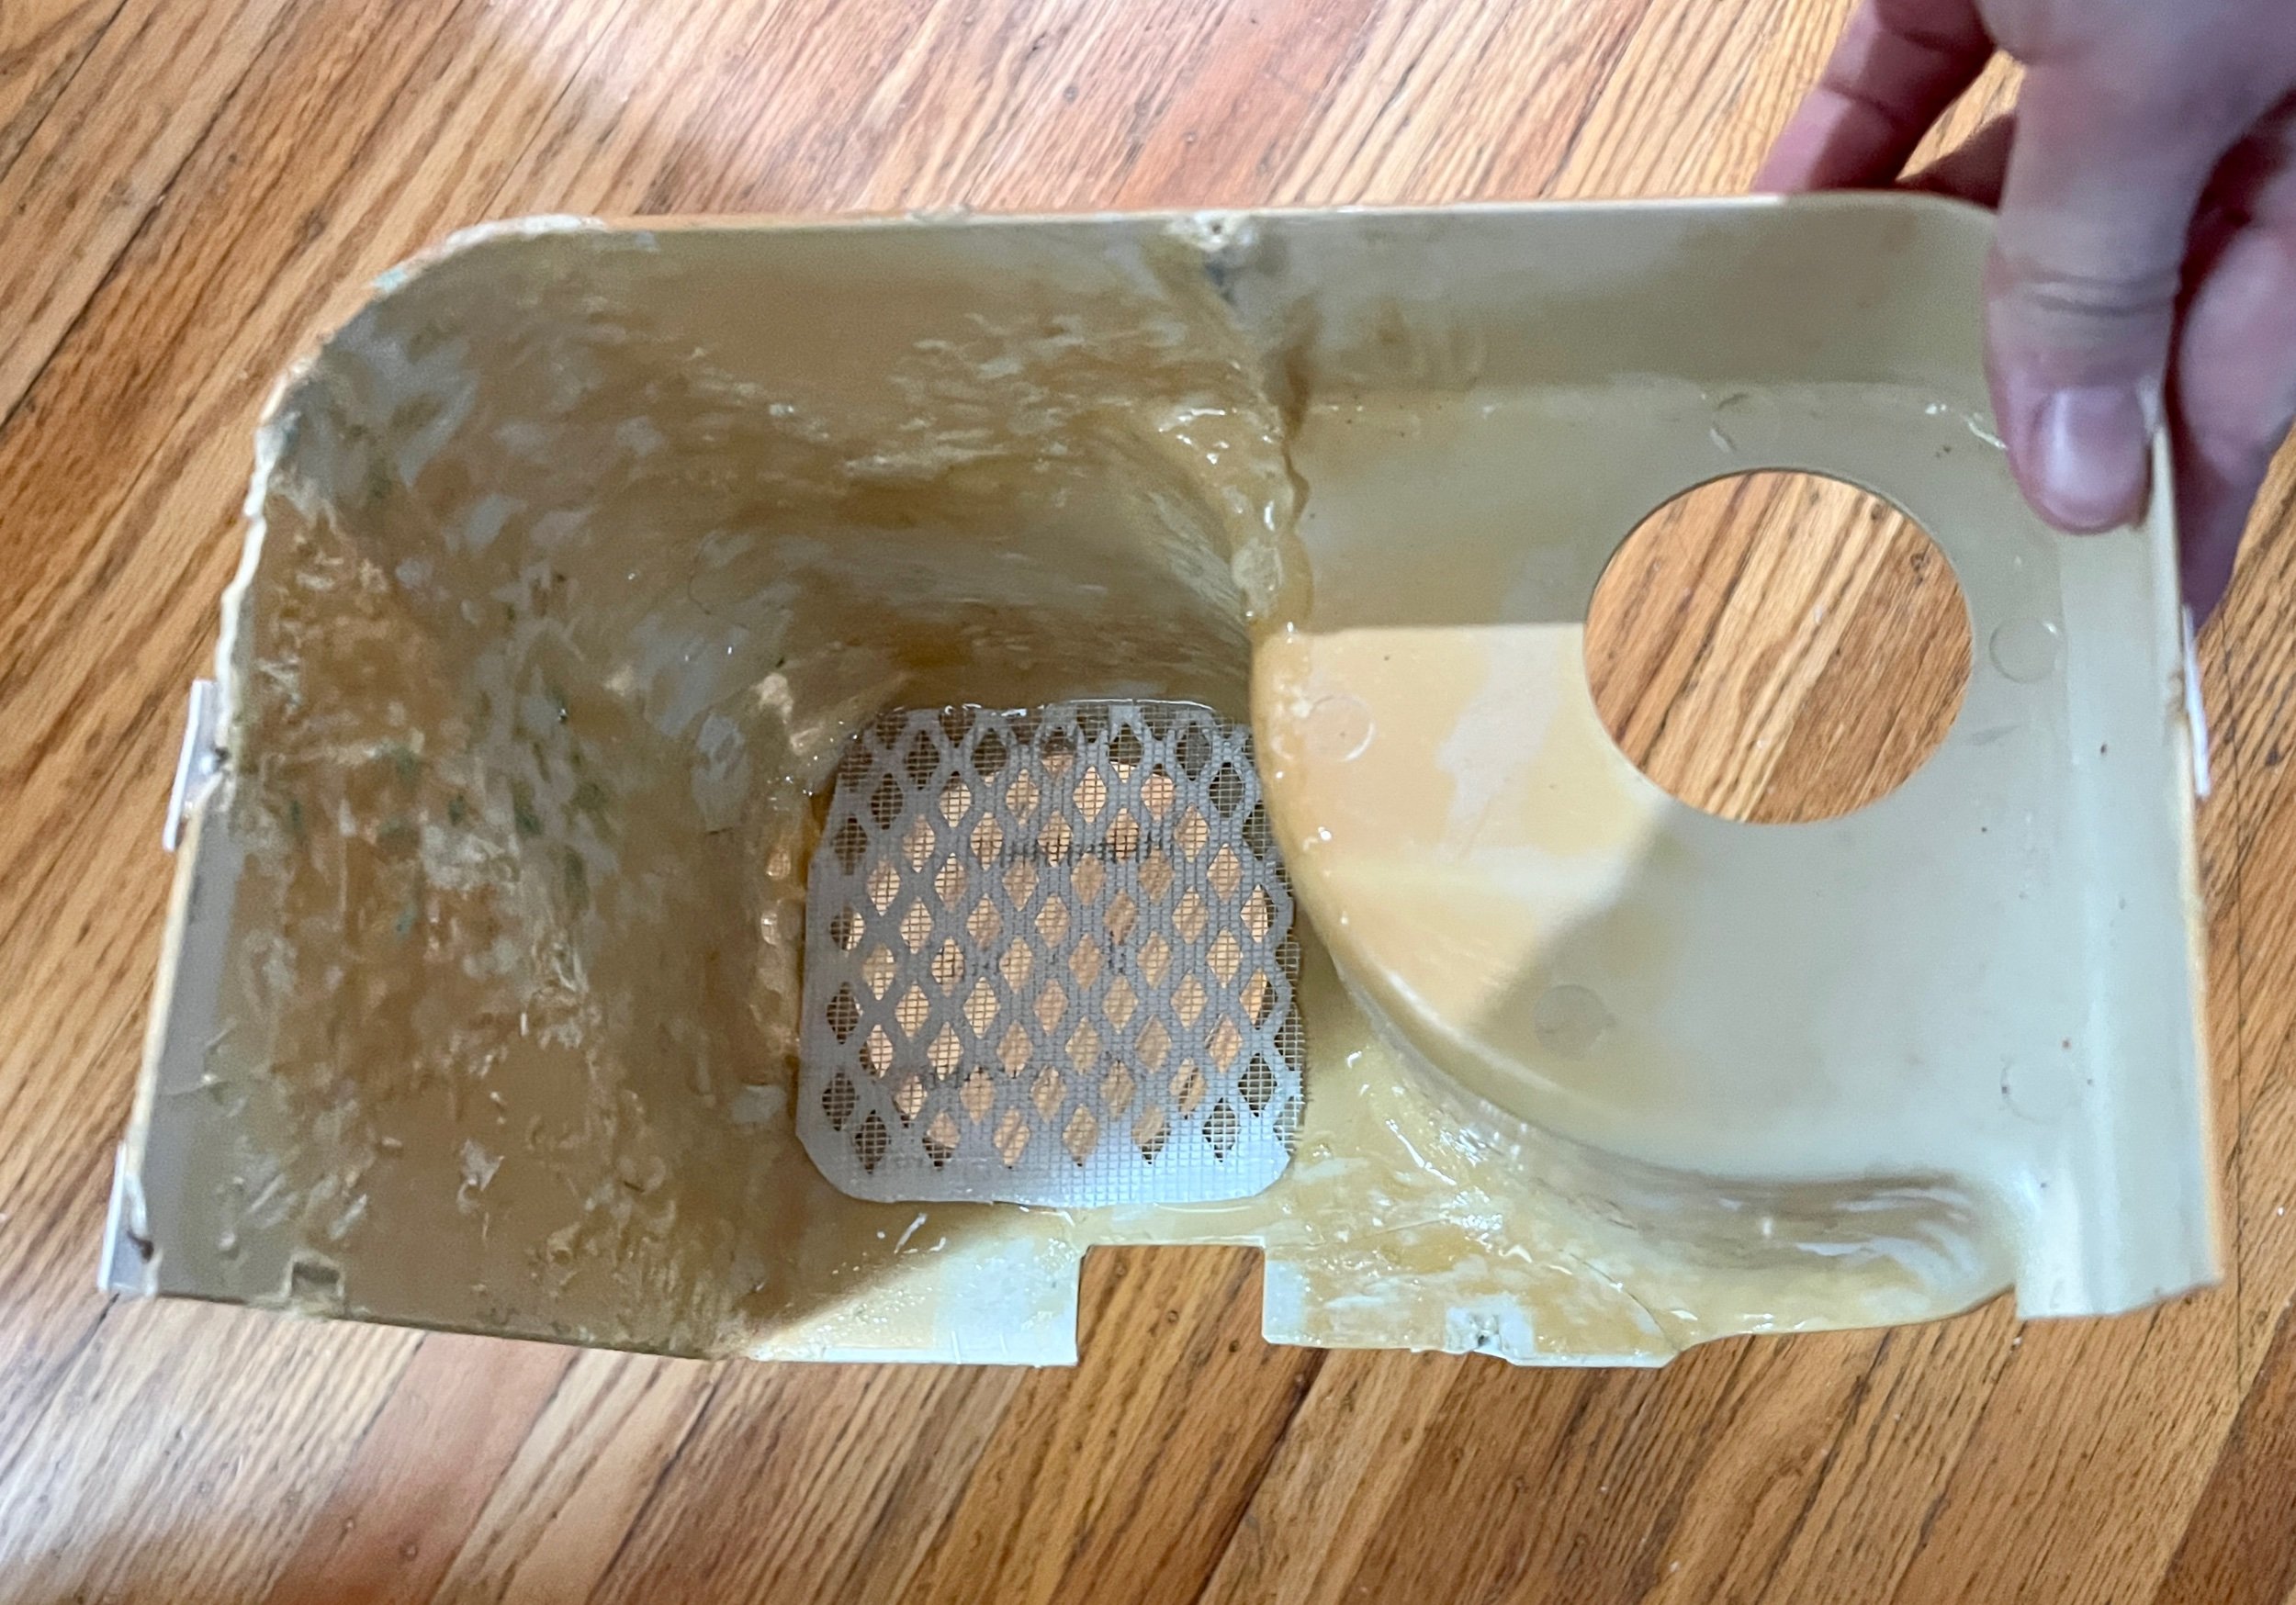
Next I outlined the machine footprint and will need to plot where it will sit on the table.

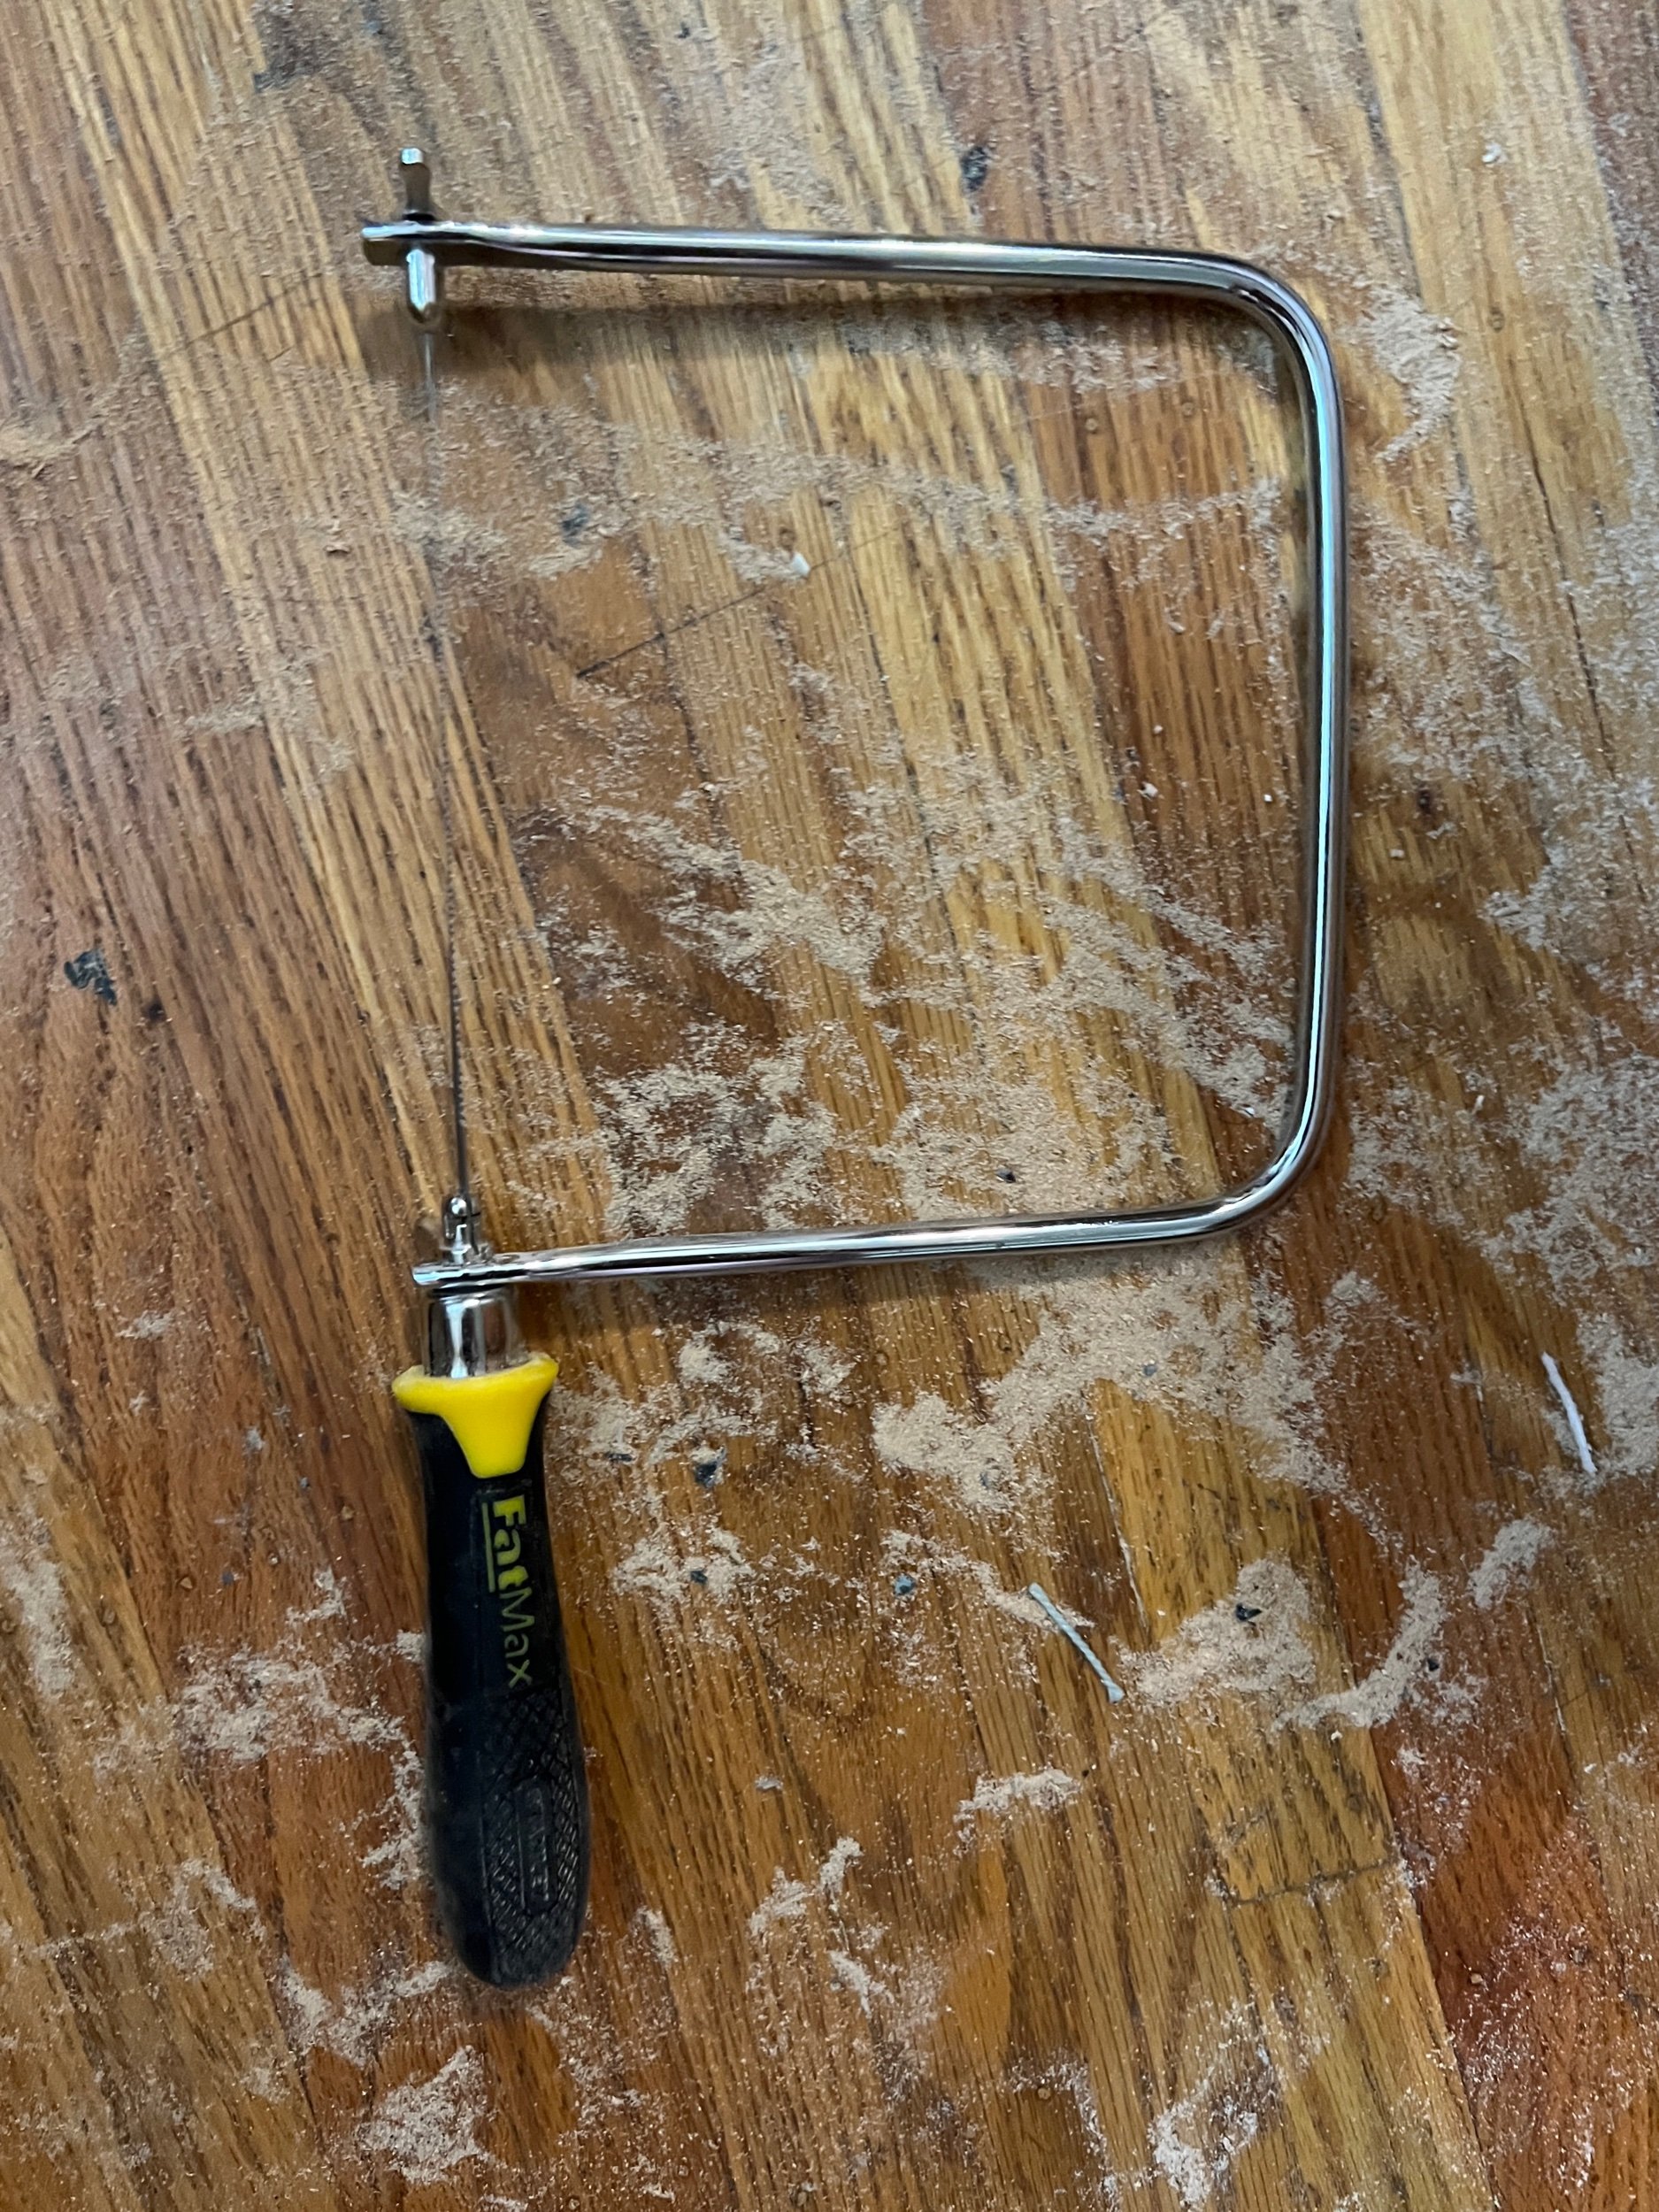
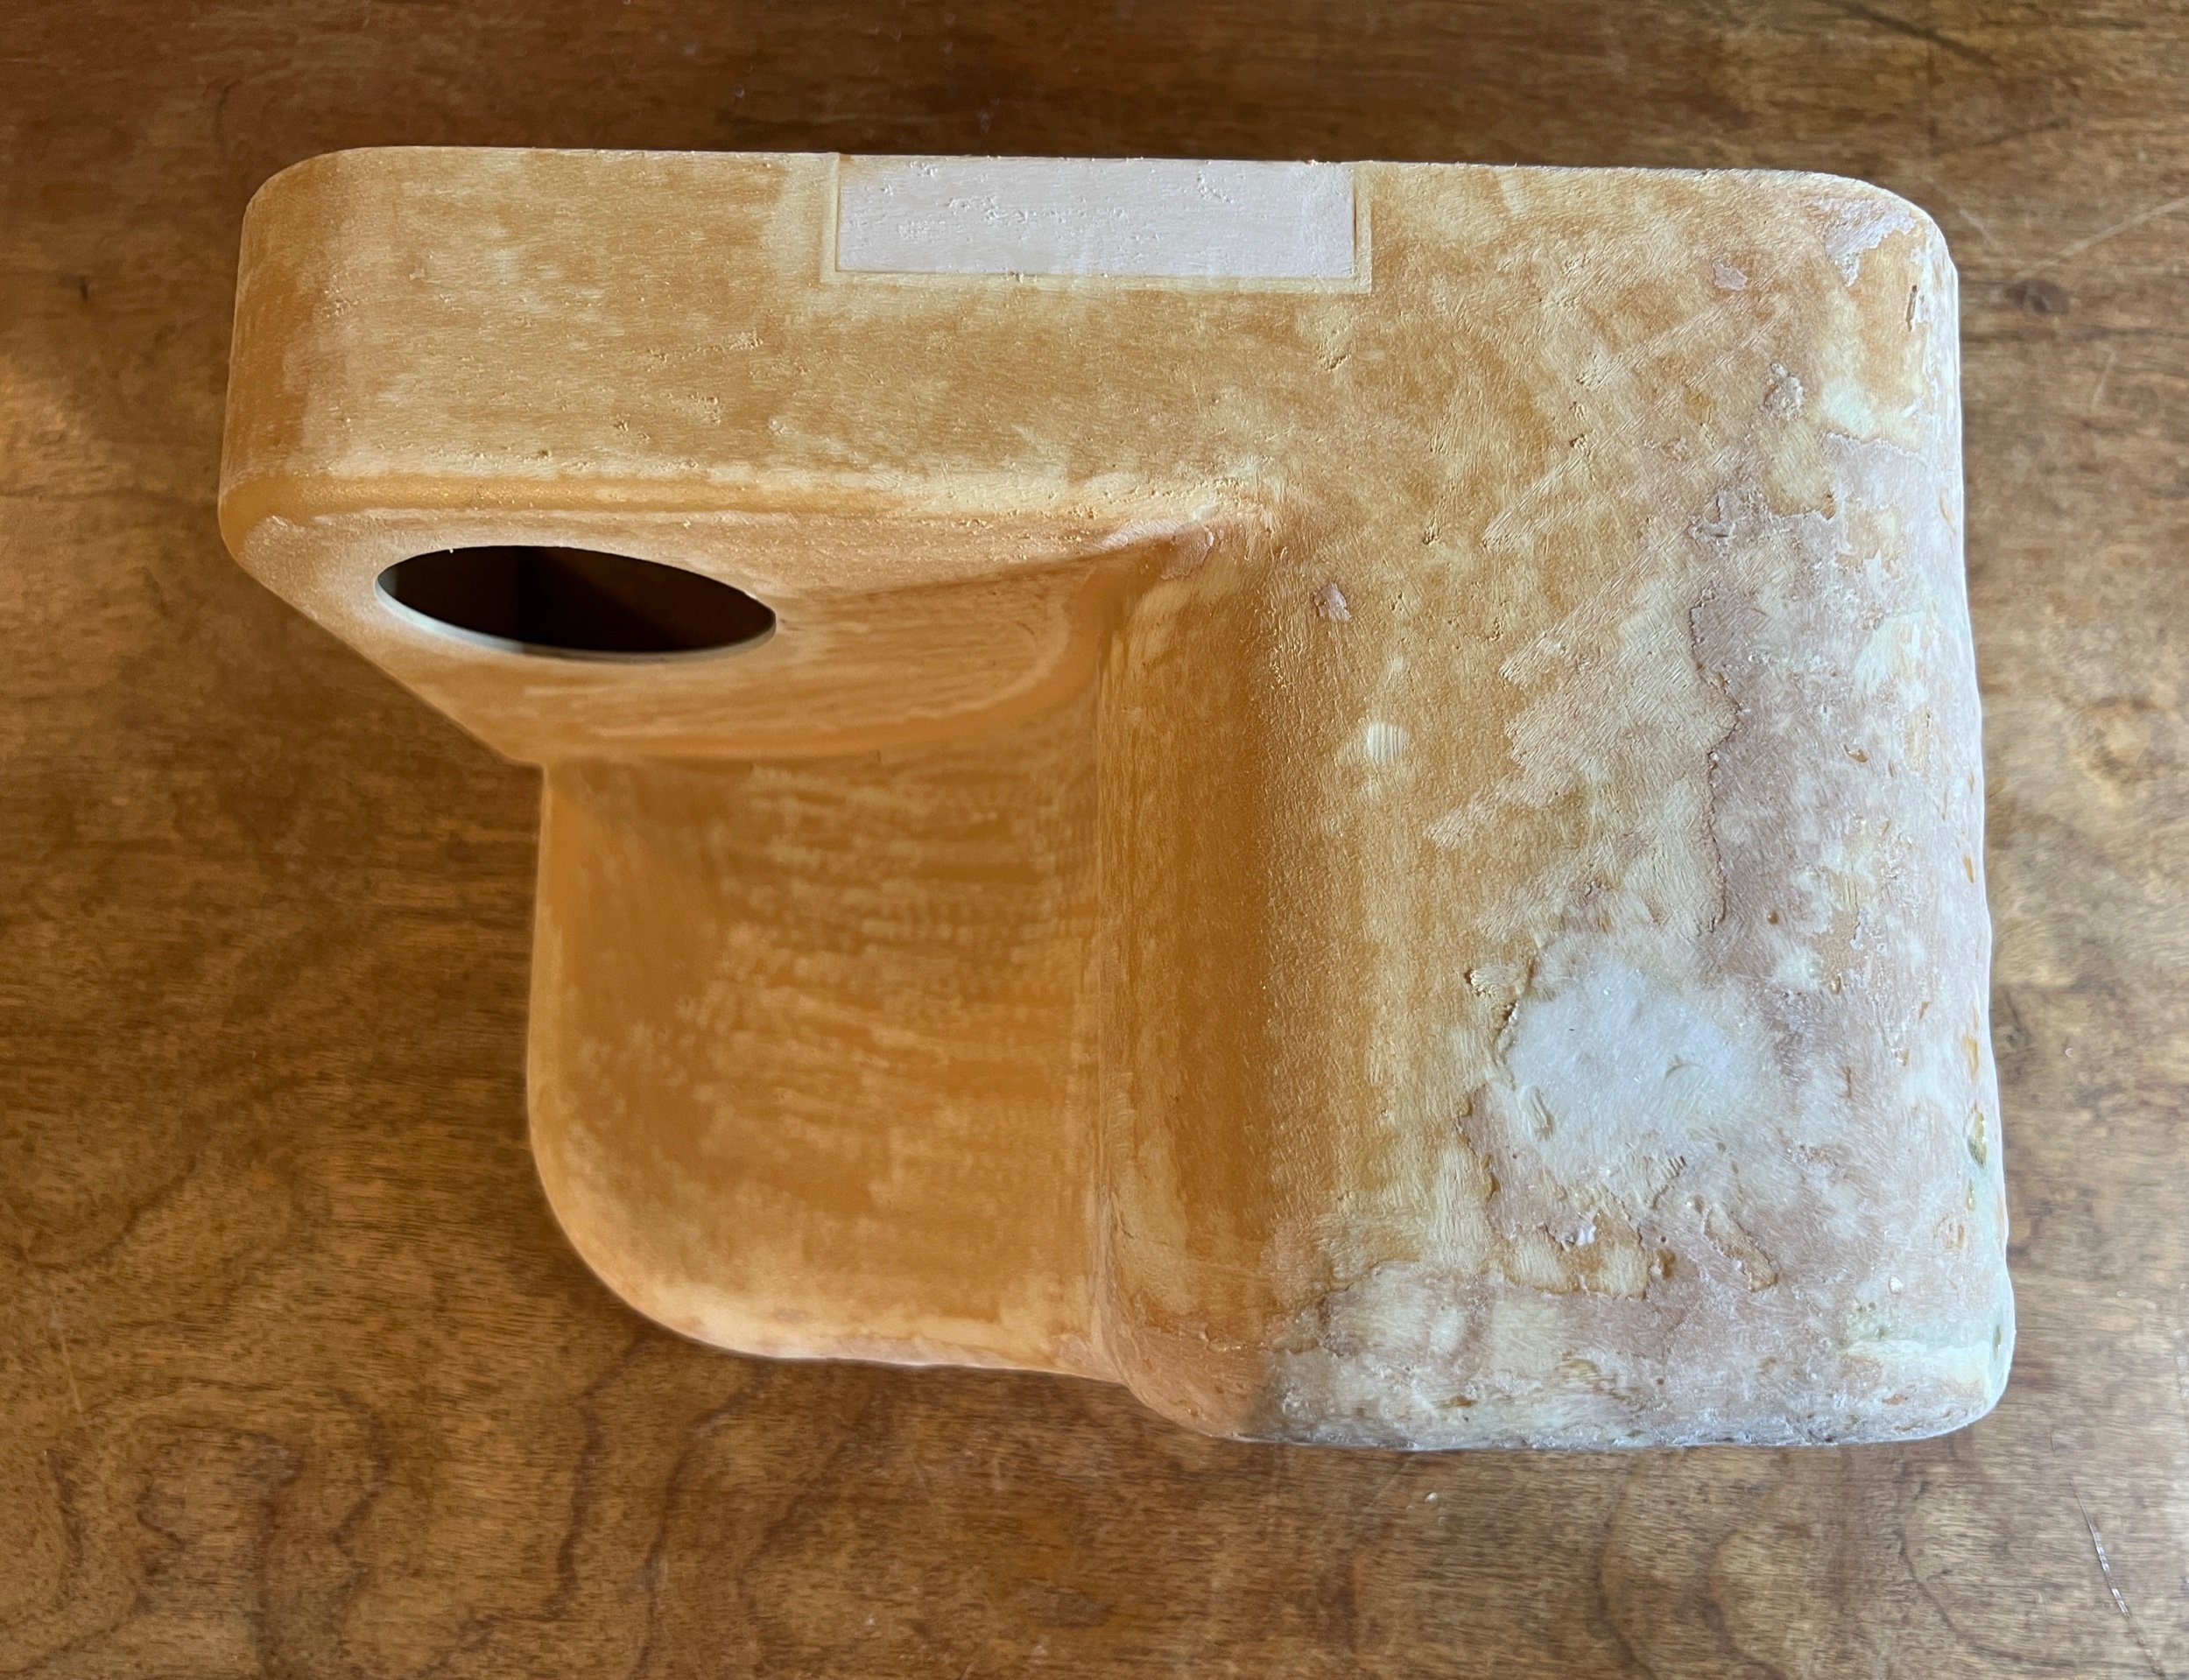
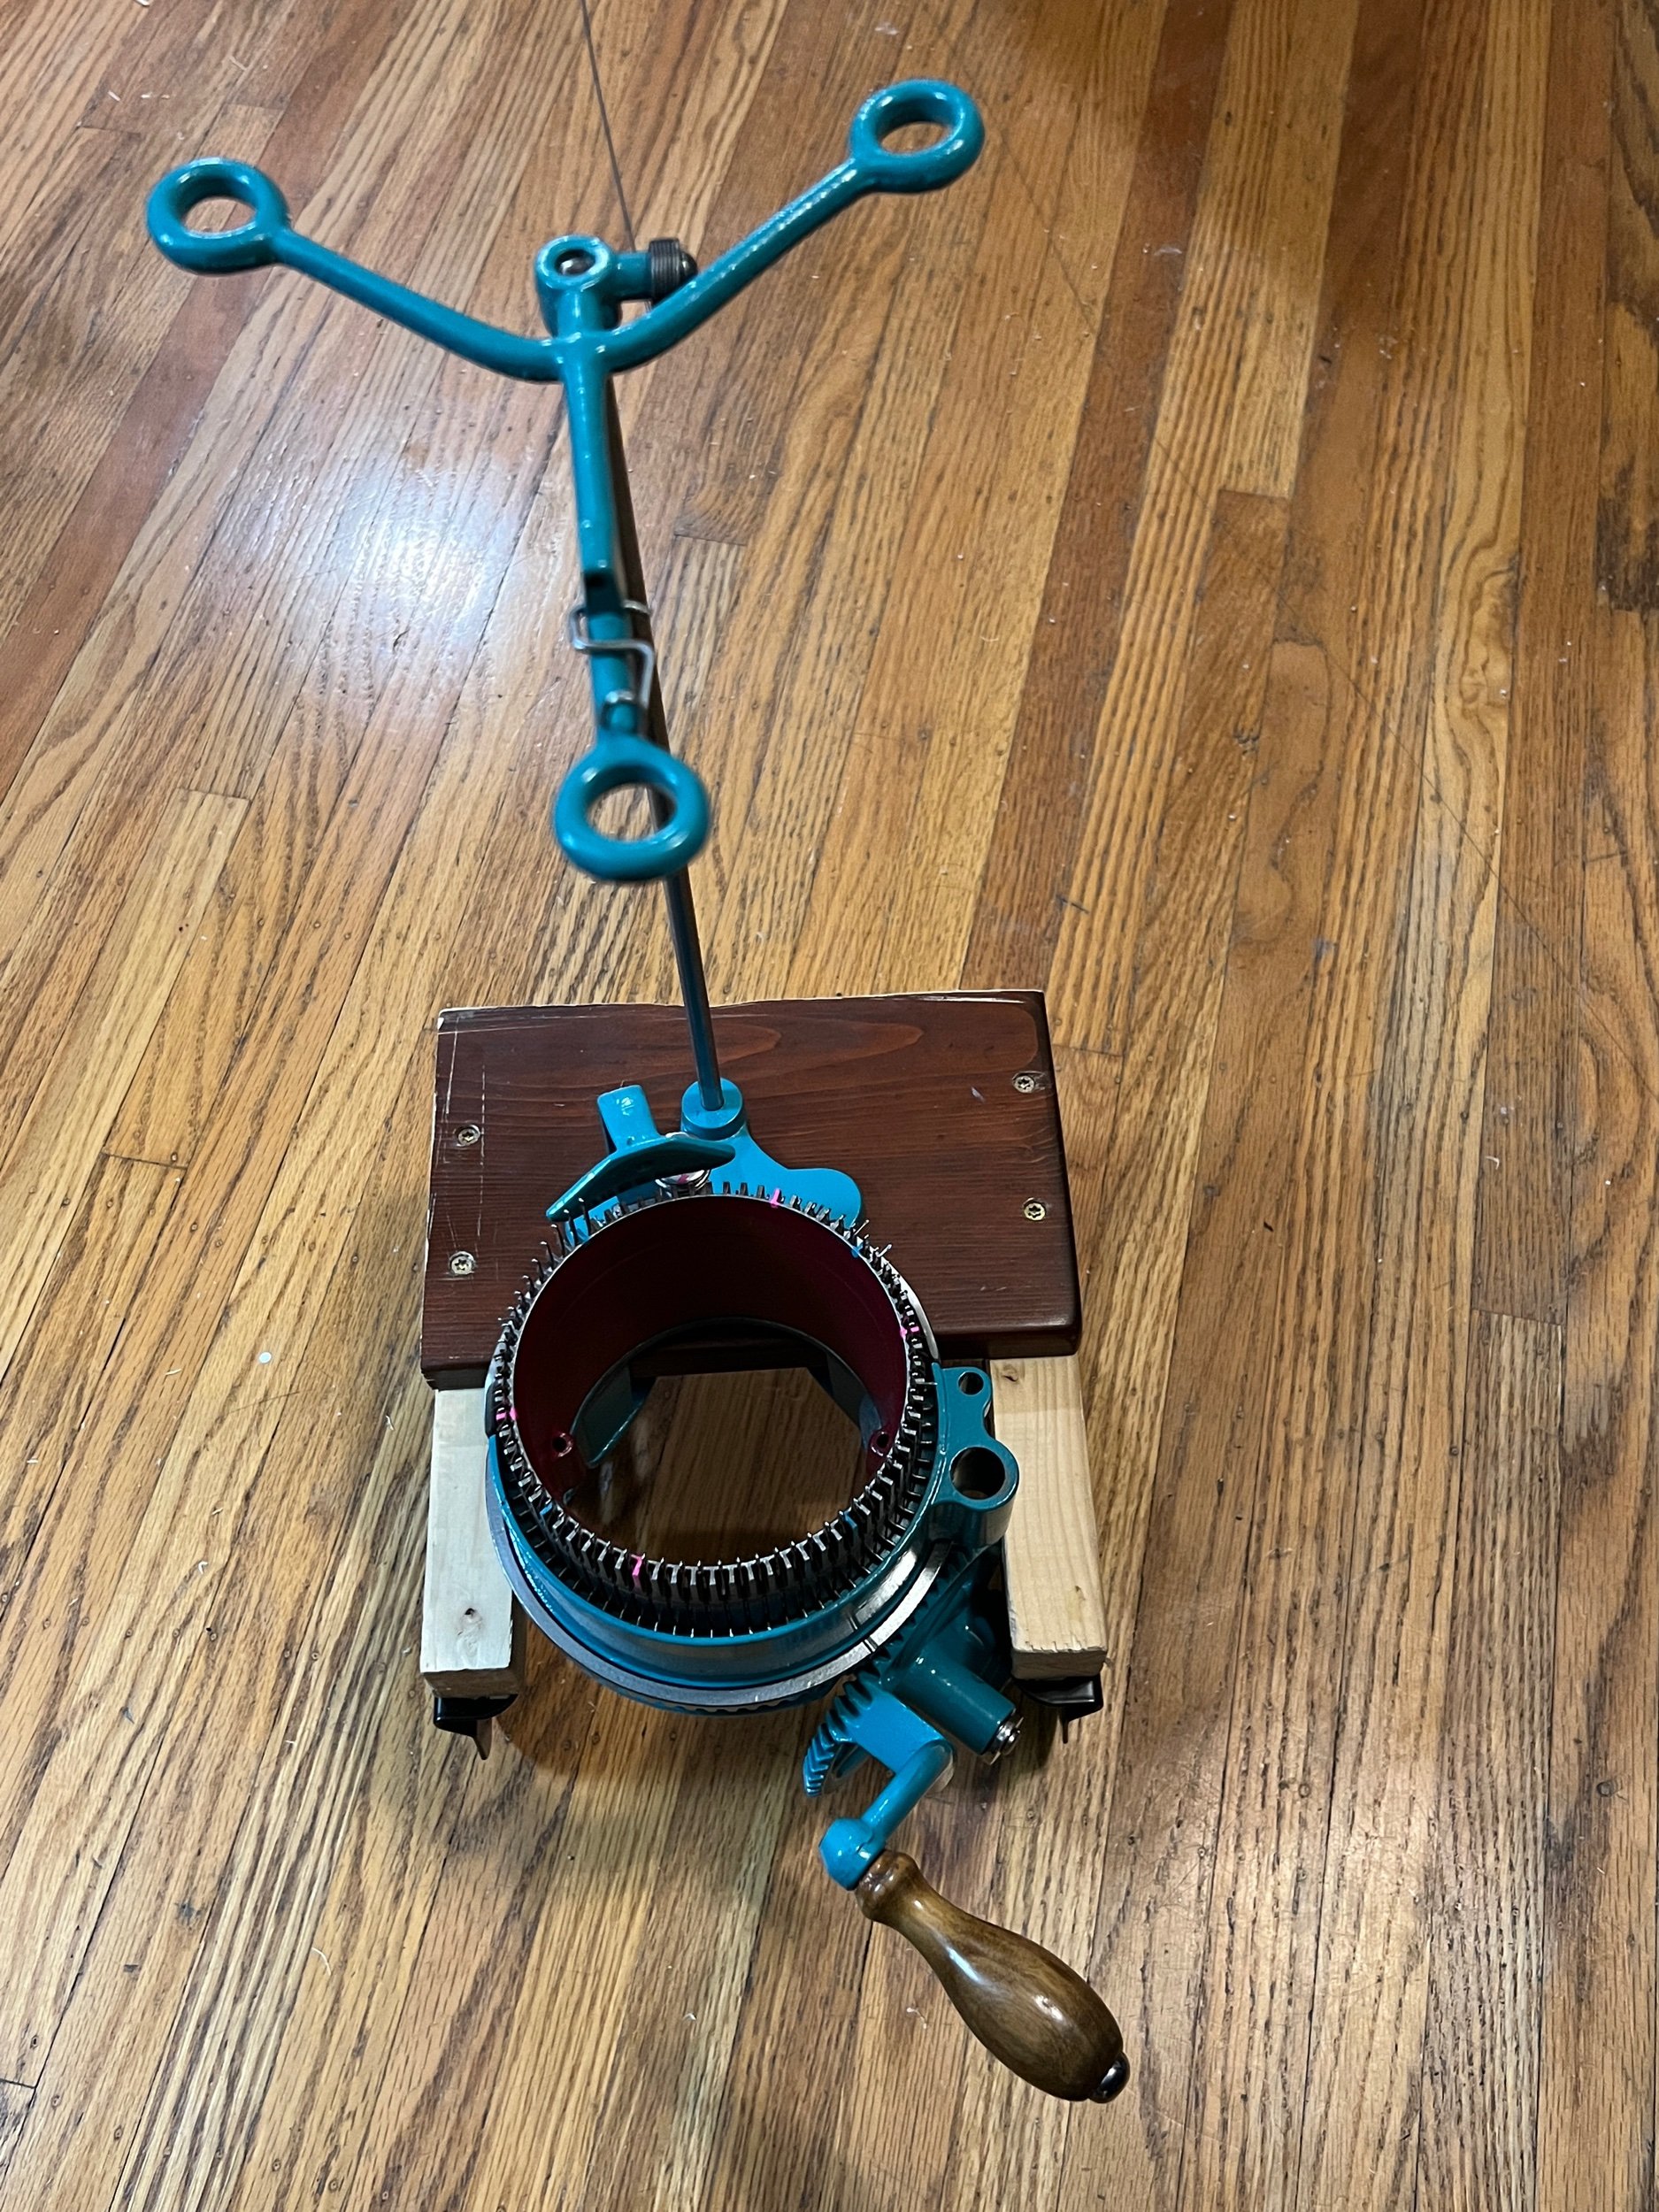
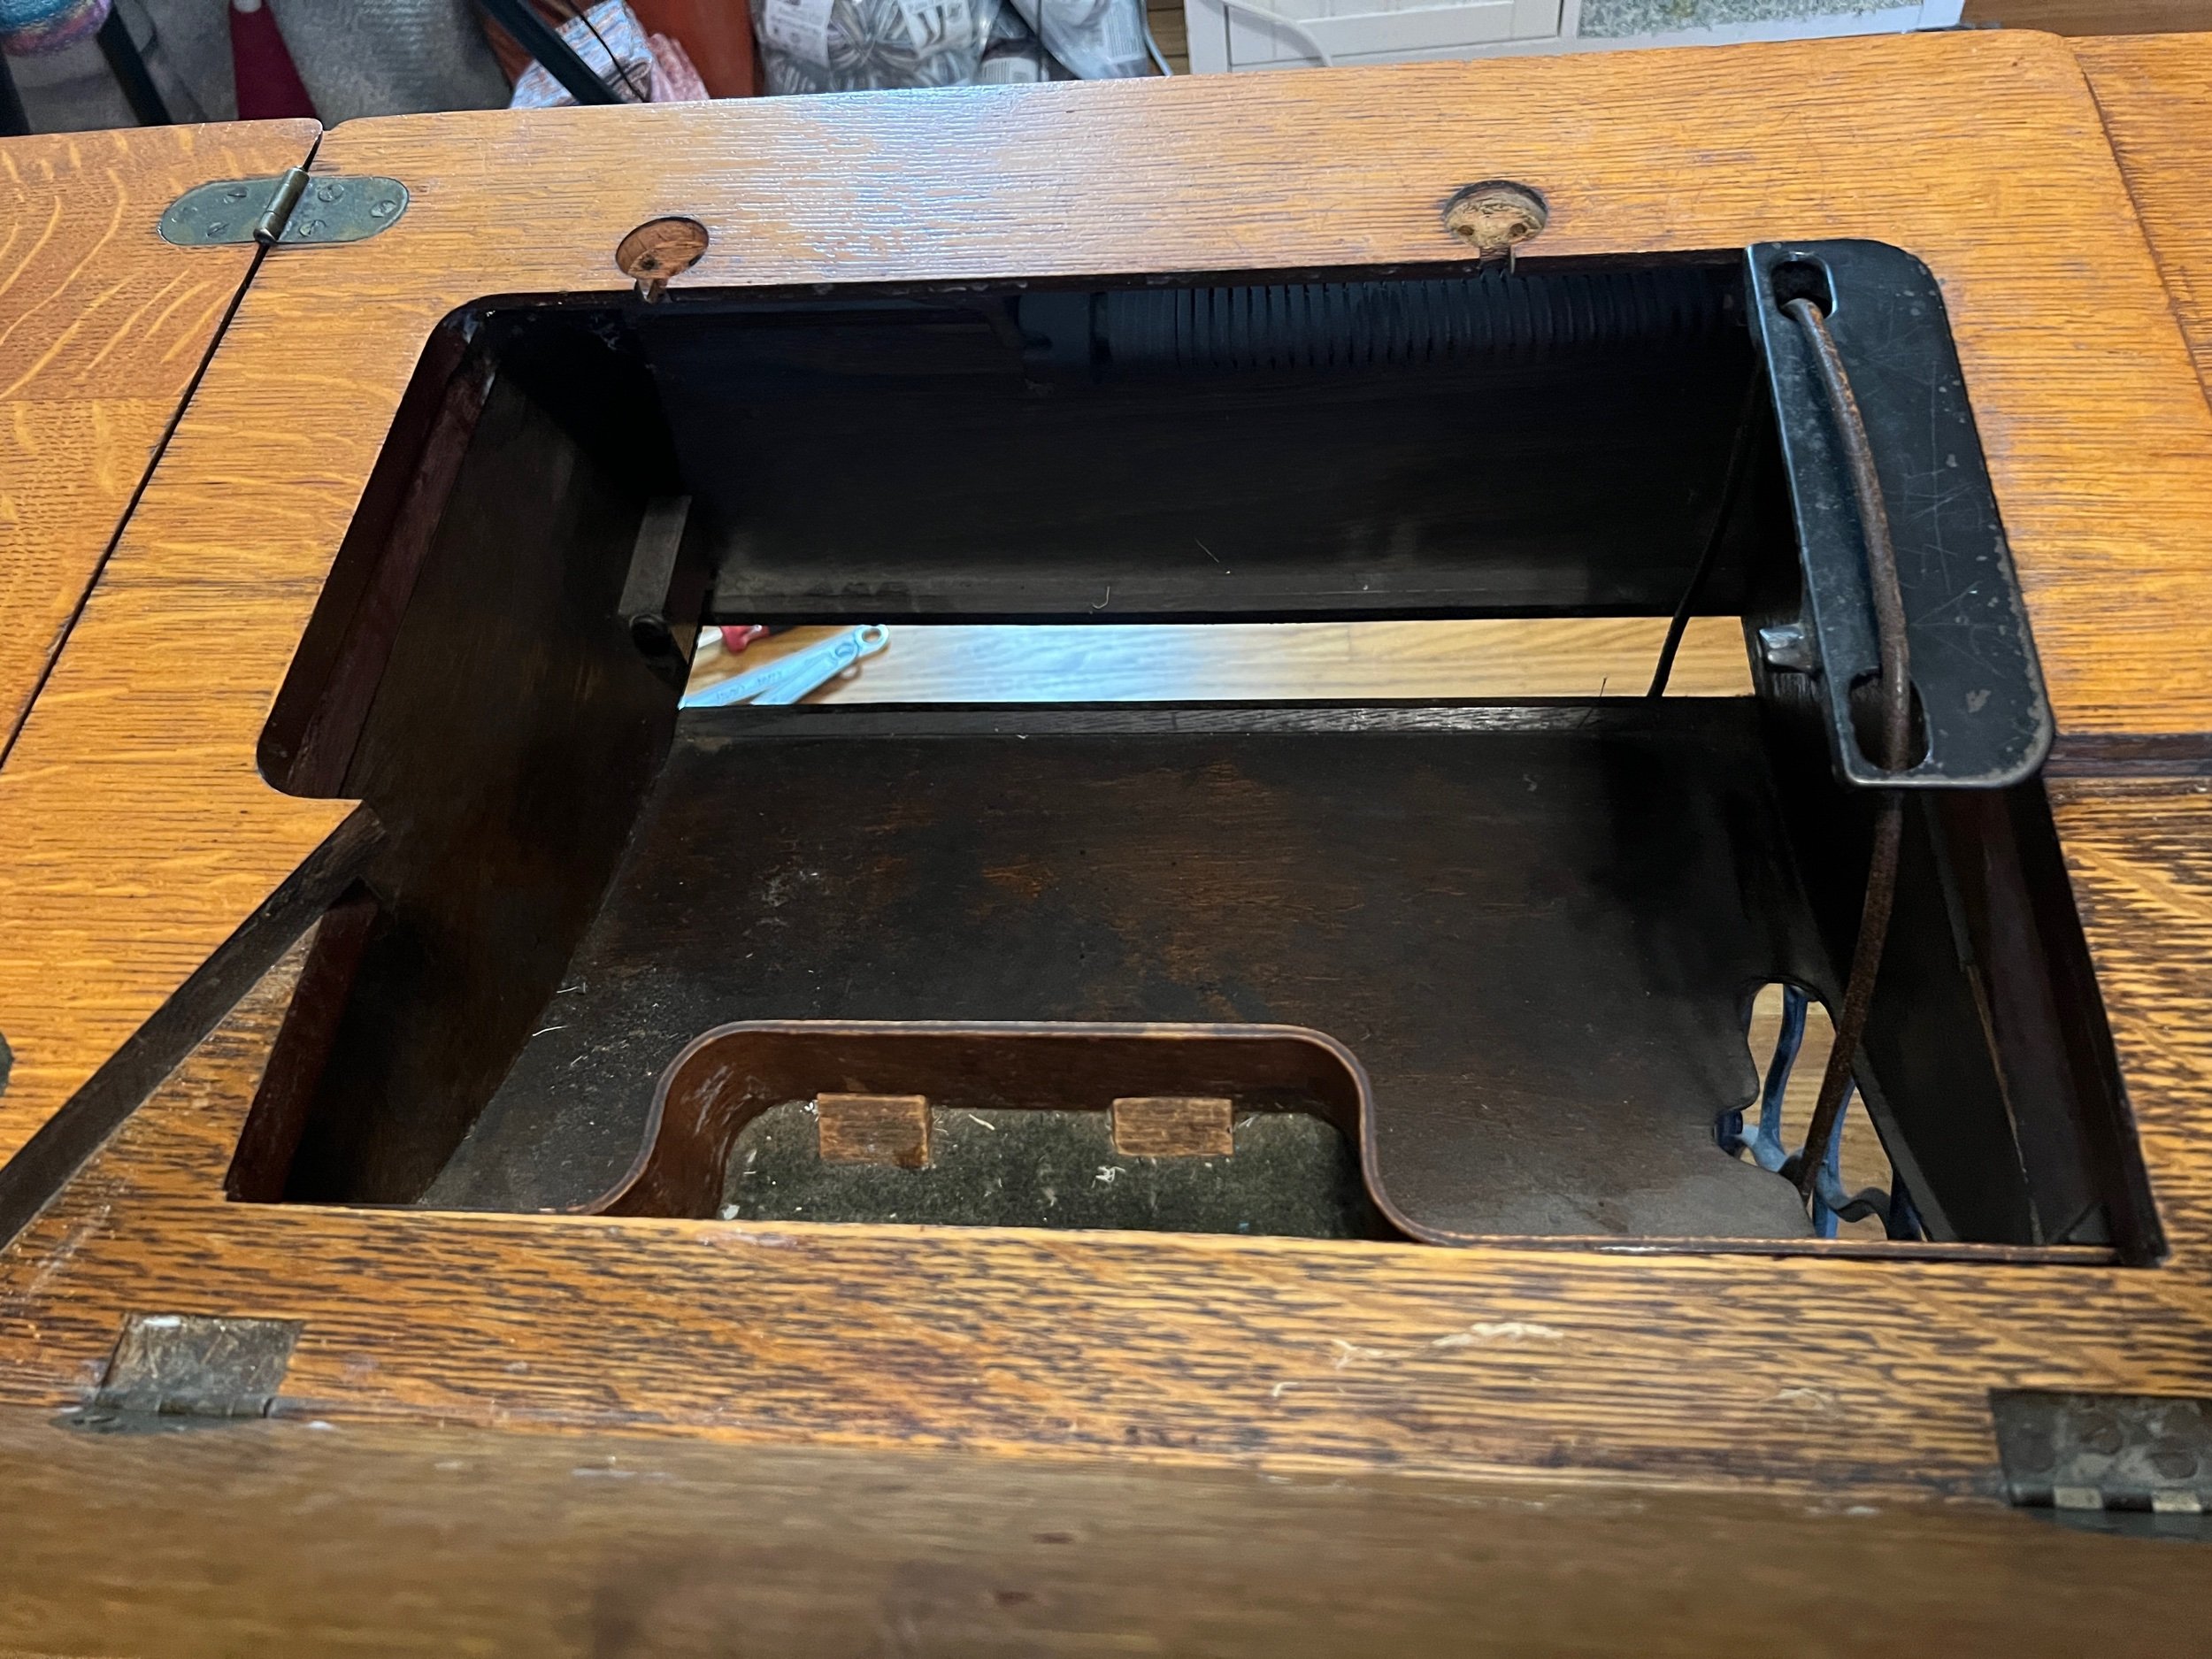
After conferring with my spouse we decided to turn the table sideways and have the extra support under the table closest to me when using the machine (for most support when using the table). I’ve now traced a circle into the wood and drilled a pilot hole to see if my hand tool with a thin saw blade will work.

The hole wasn’t big enough so I asked our friendly neighbour with their jigsaw (electric saw) the to cut the new pencil outline

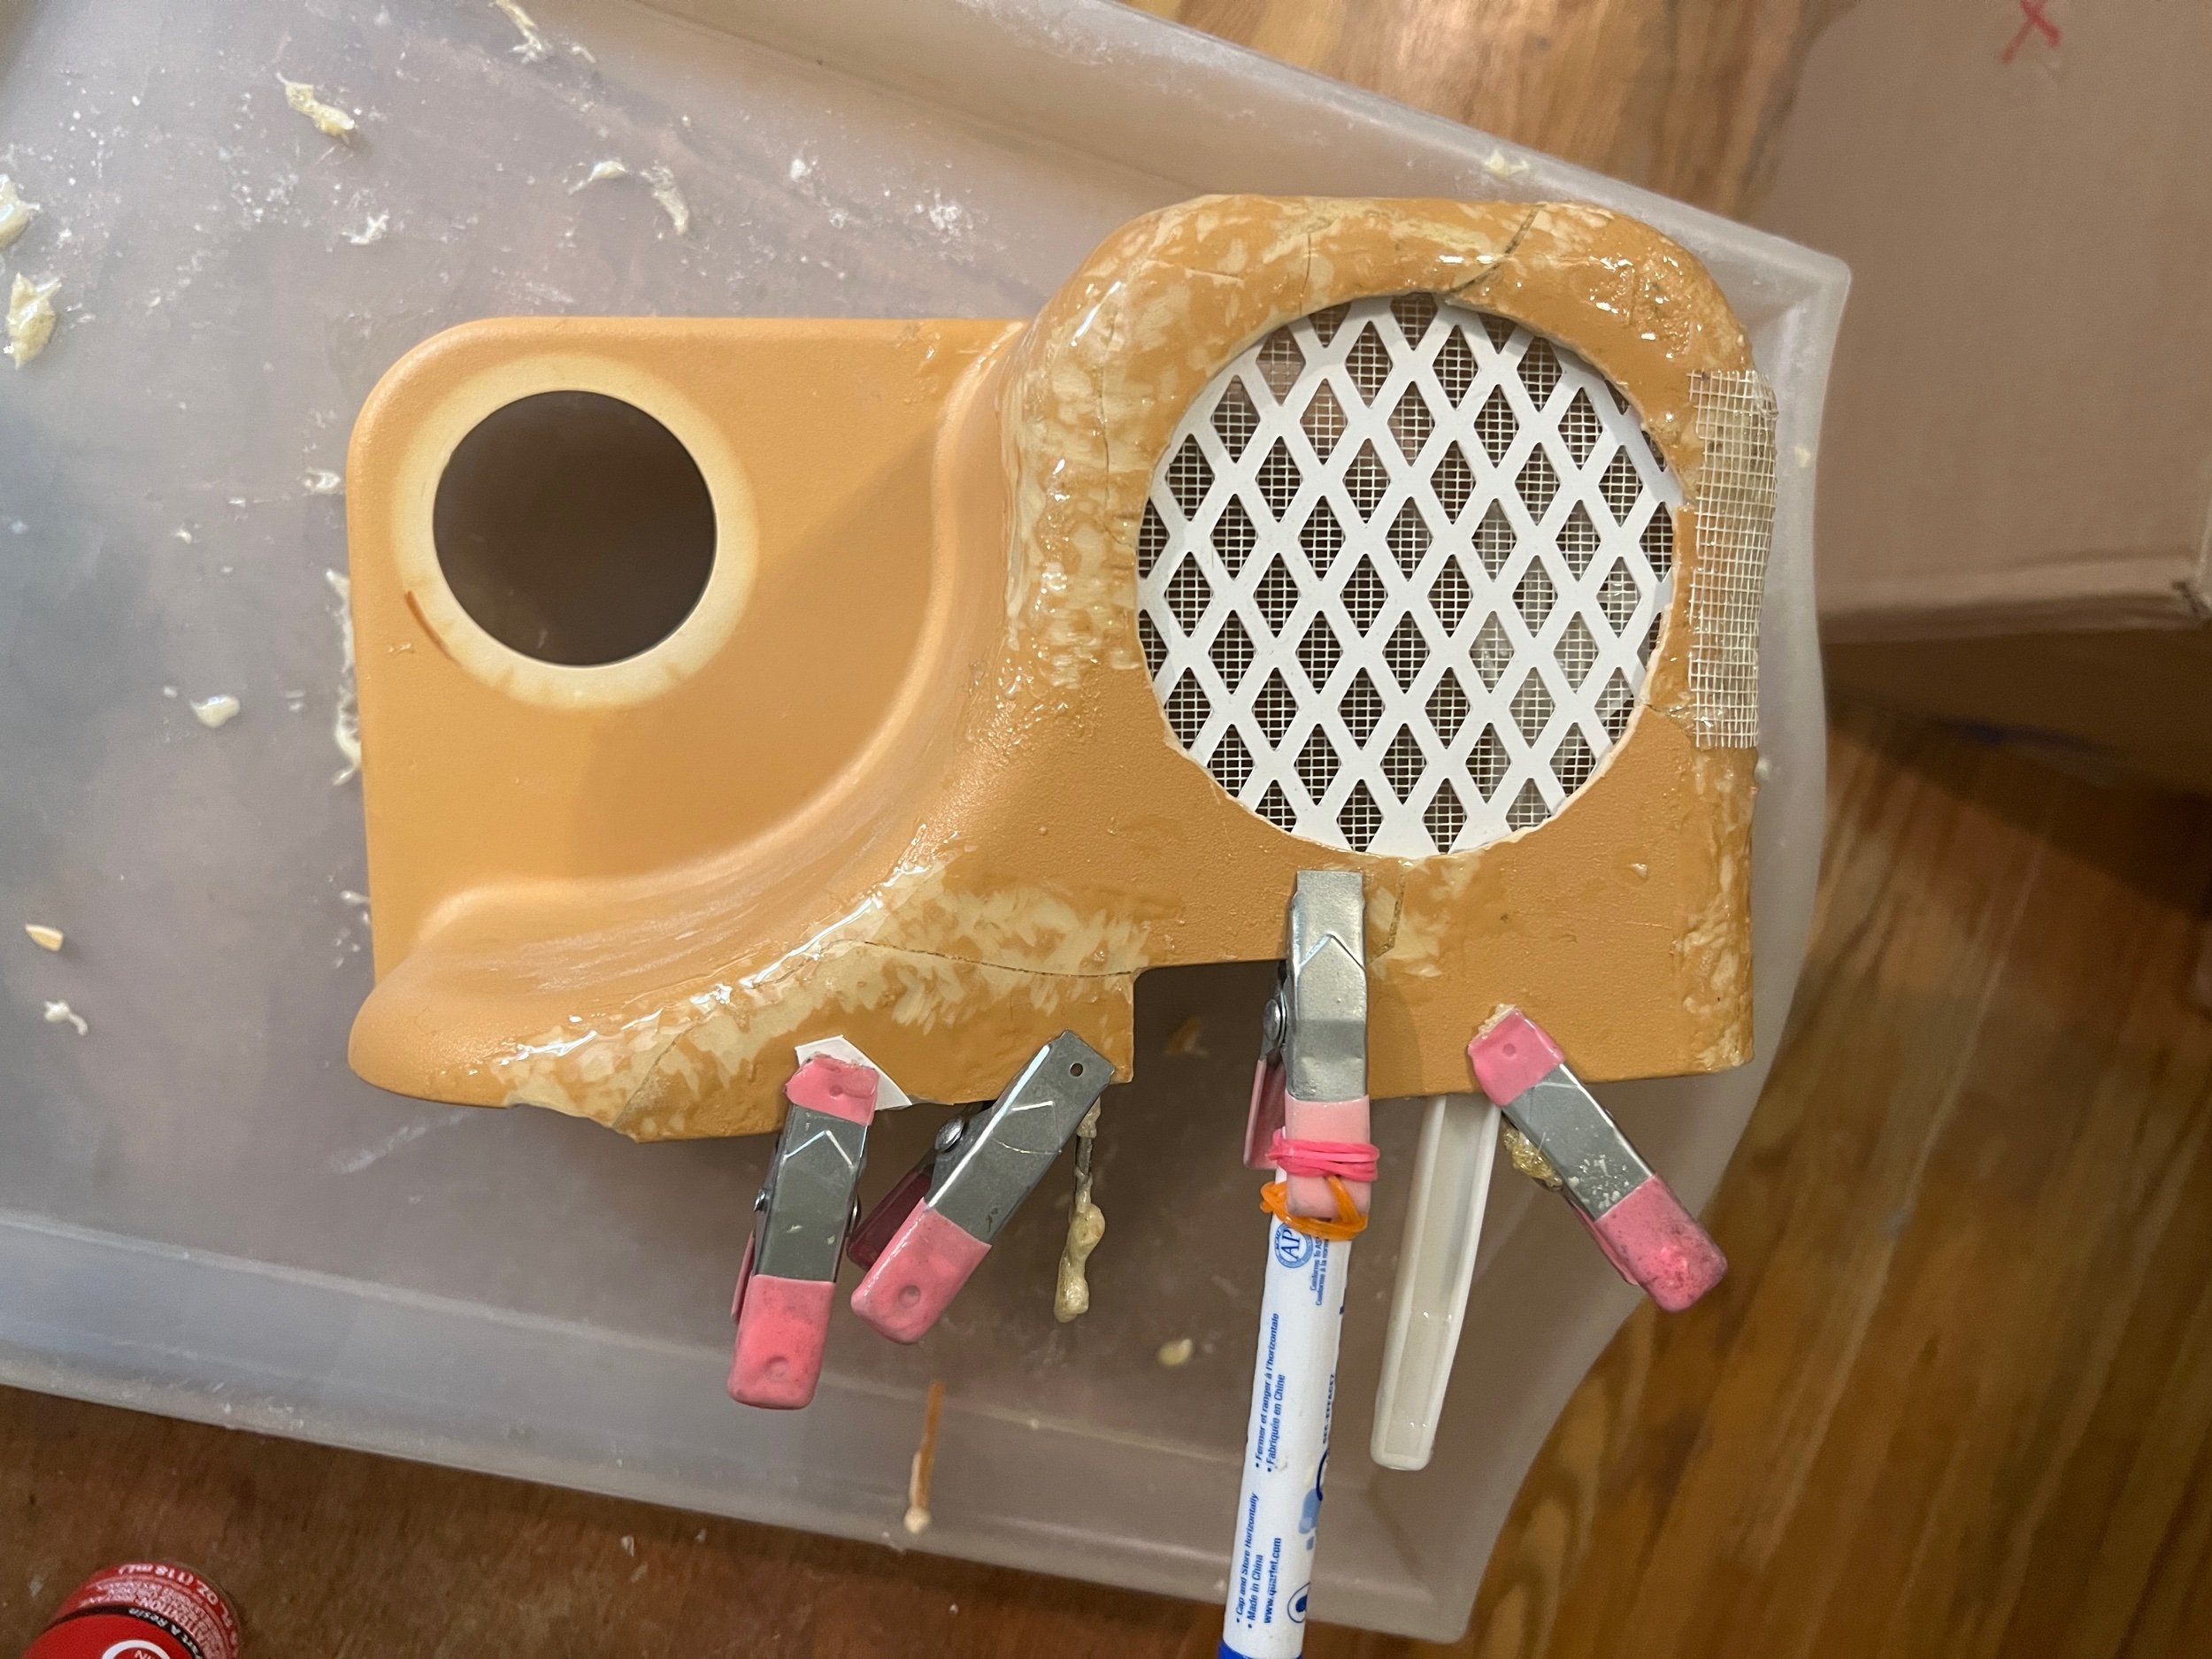
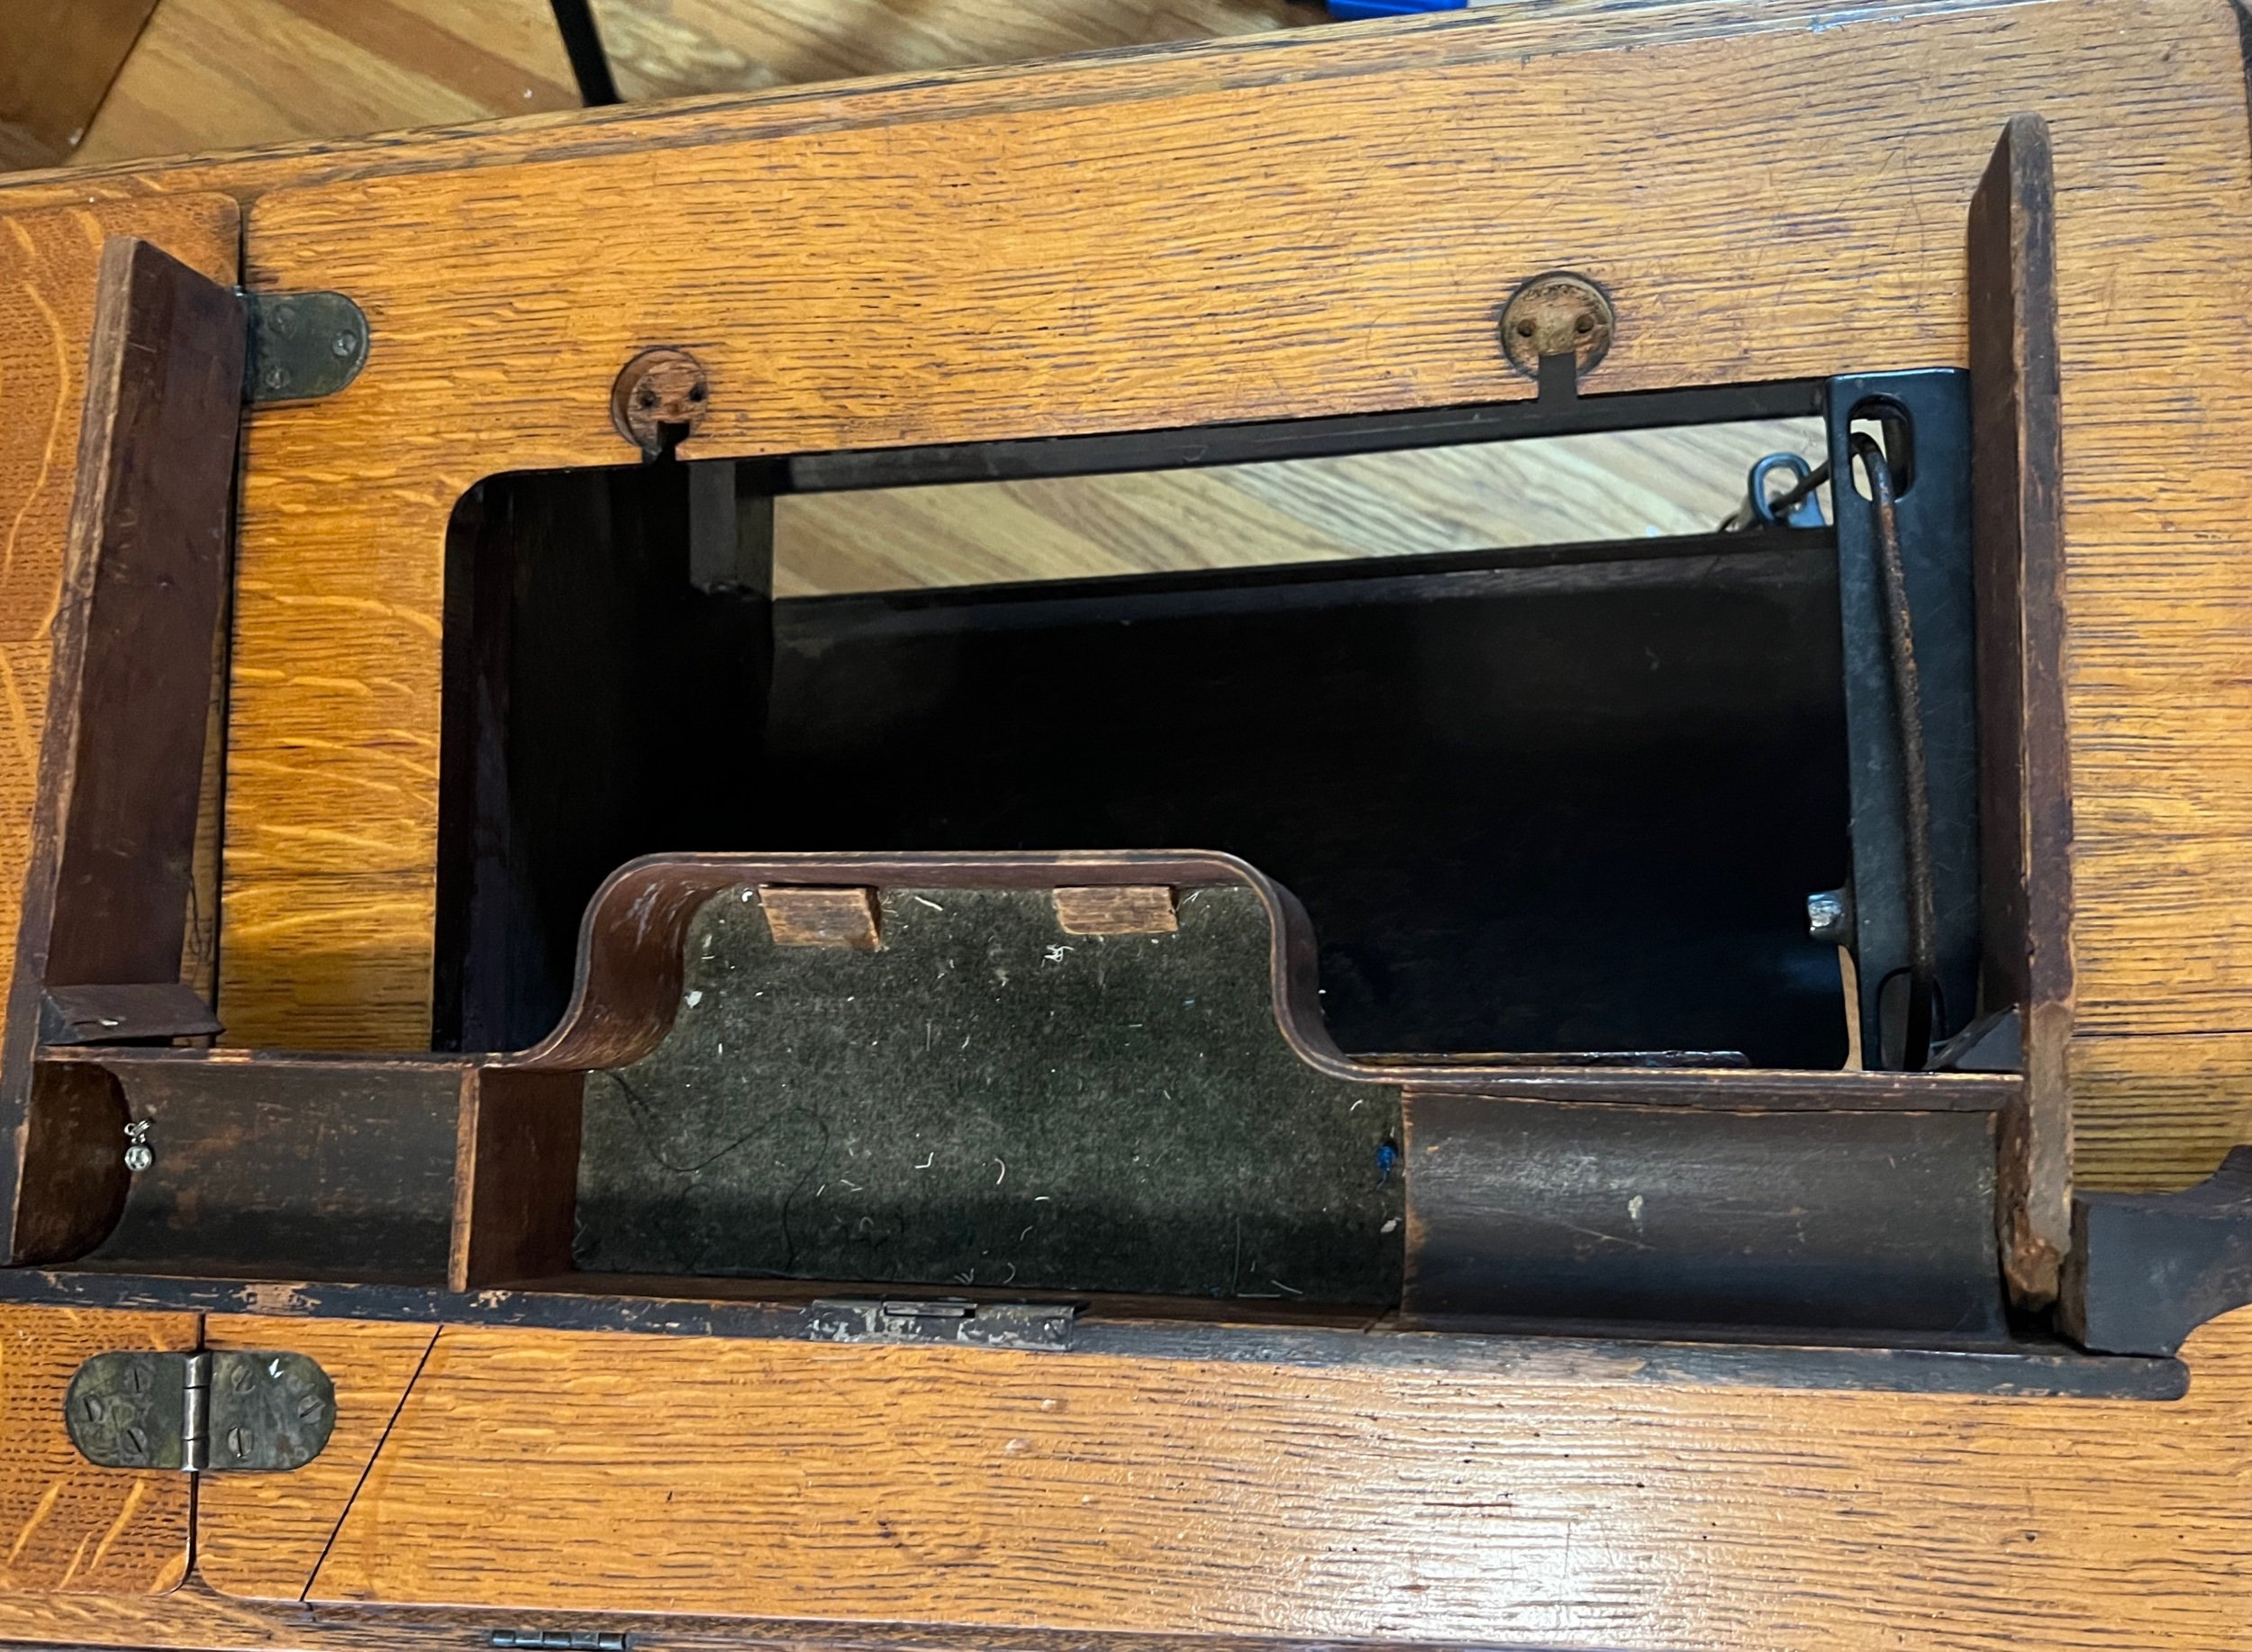
Tonight (June 14/23) this final cut was done. The circle needs to be exactly to the inner edge of each of the feet. I smoothed the surfaces with my Dremel and now it’s perfect .

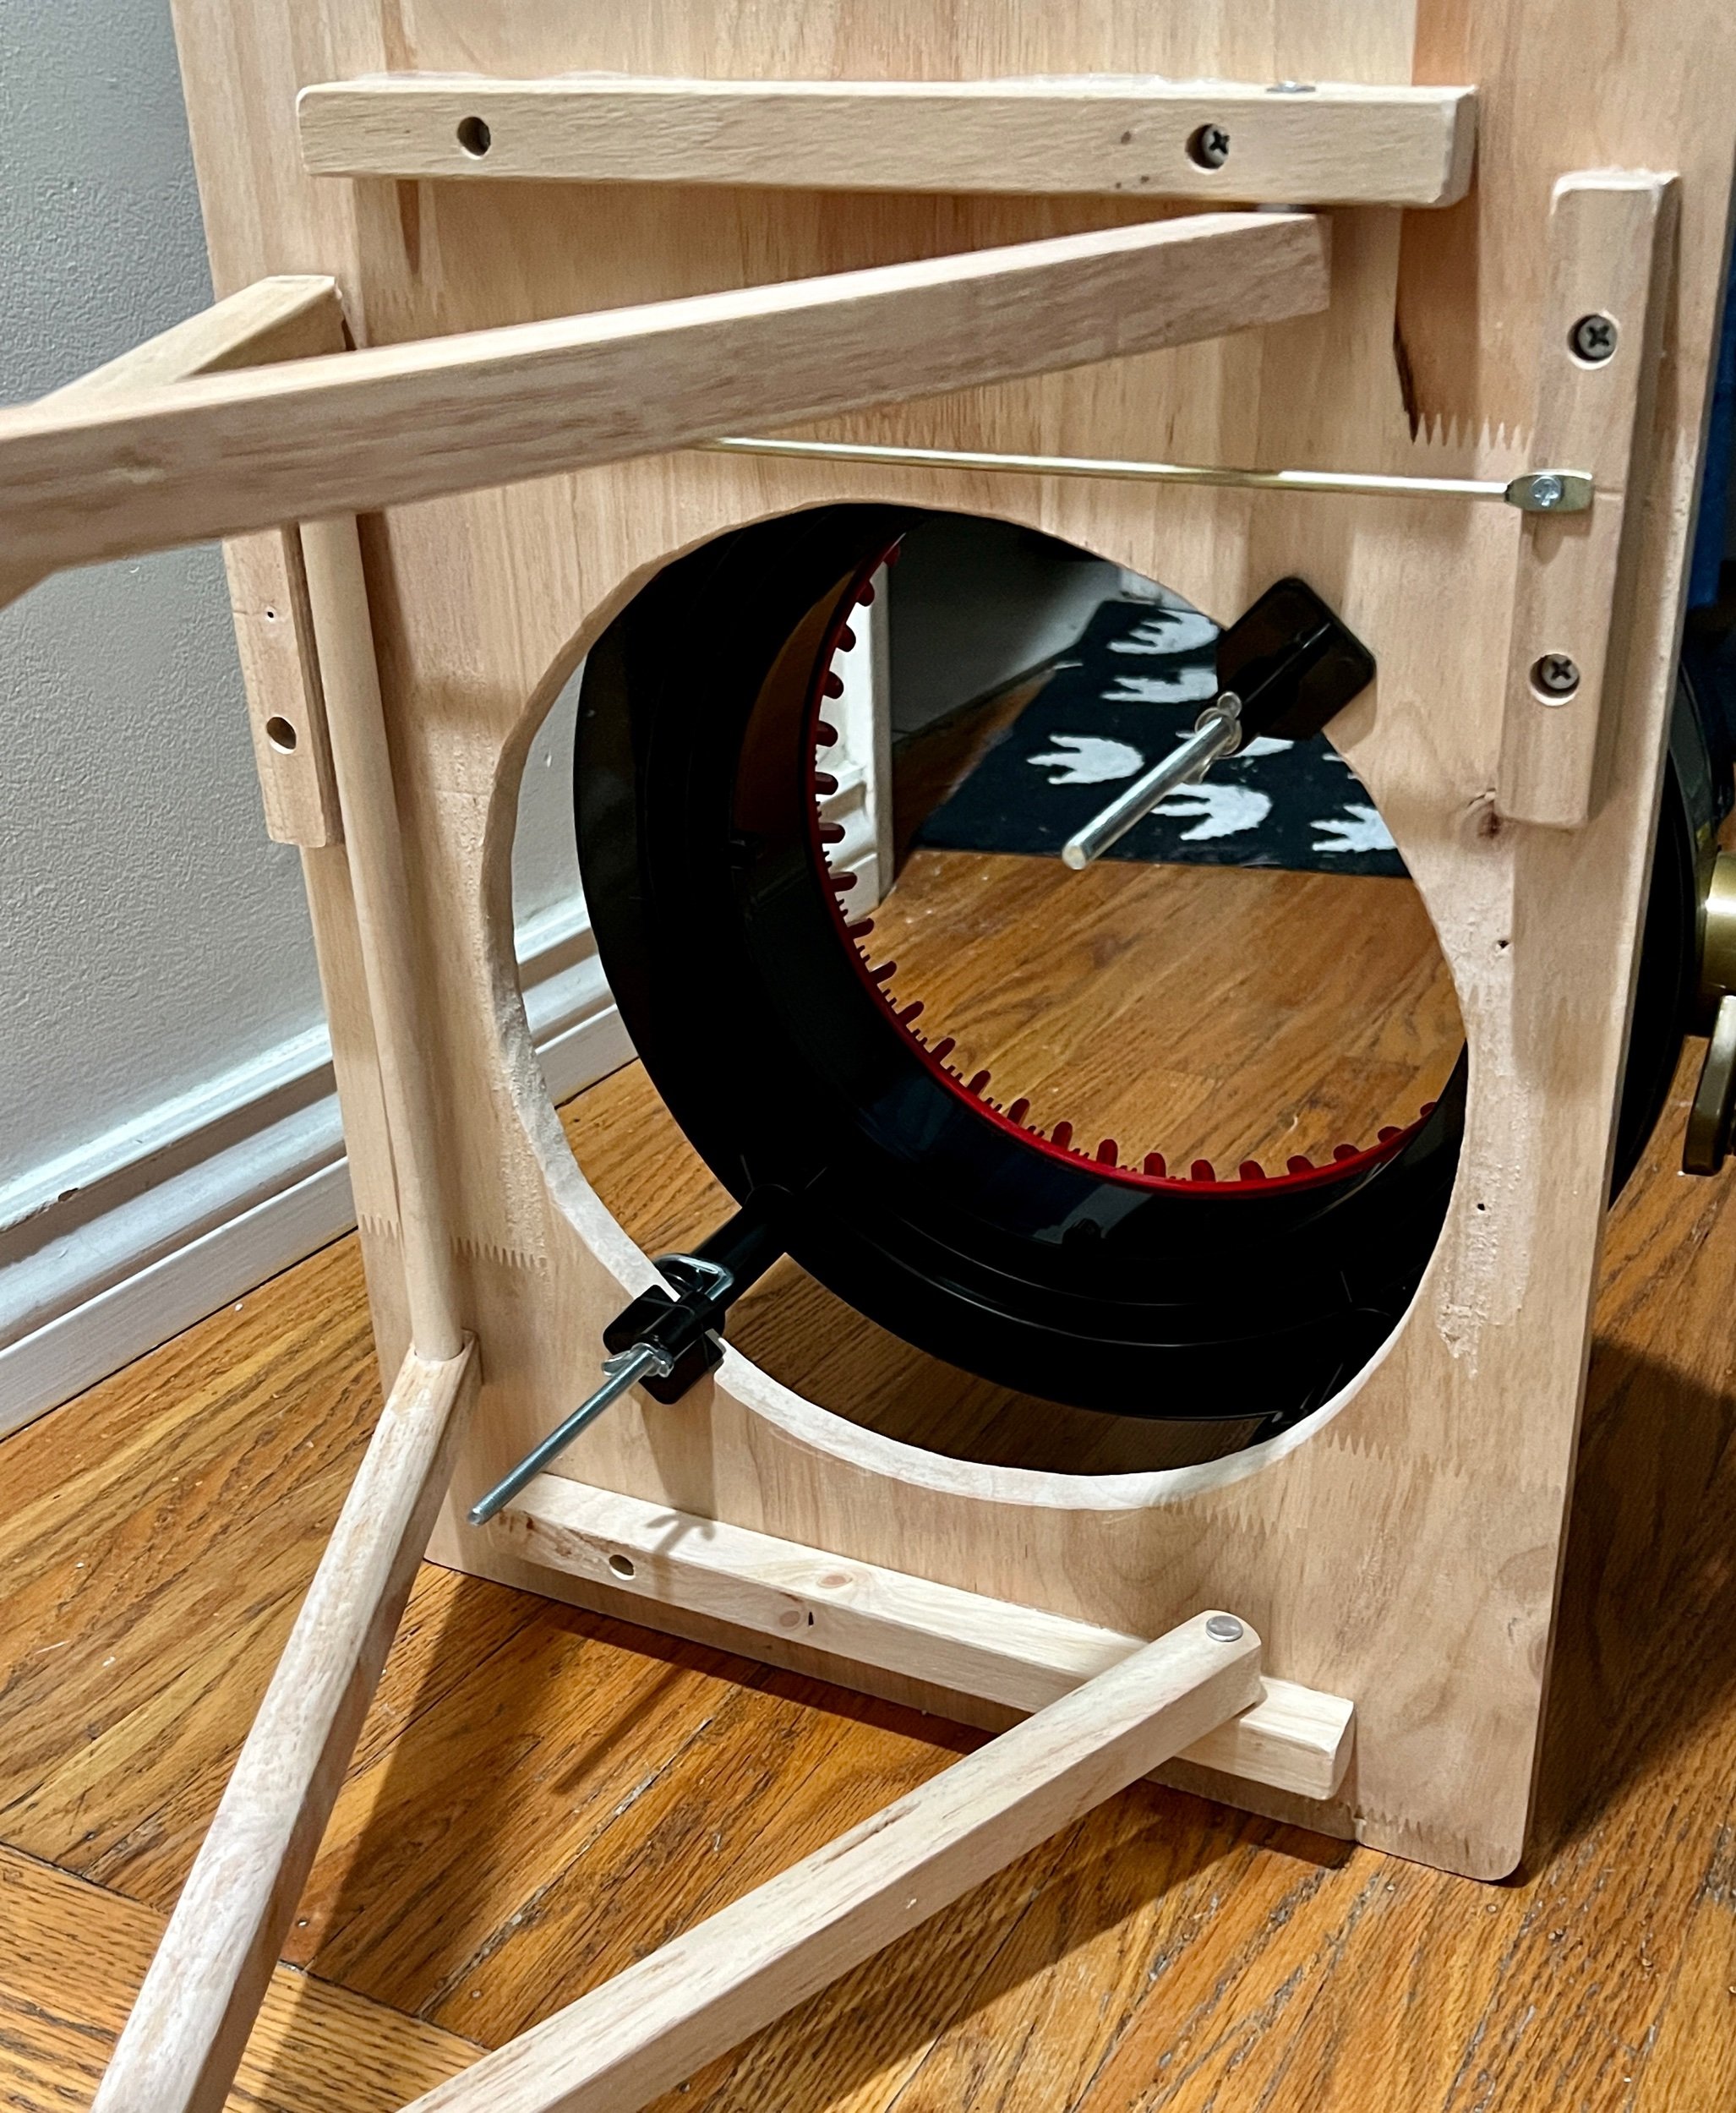
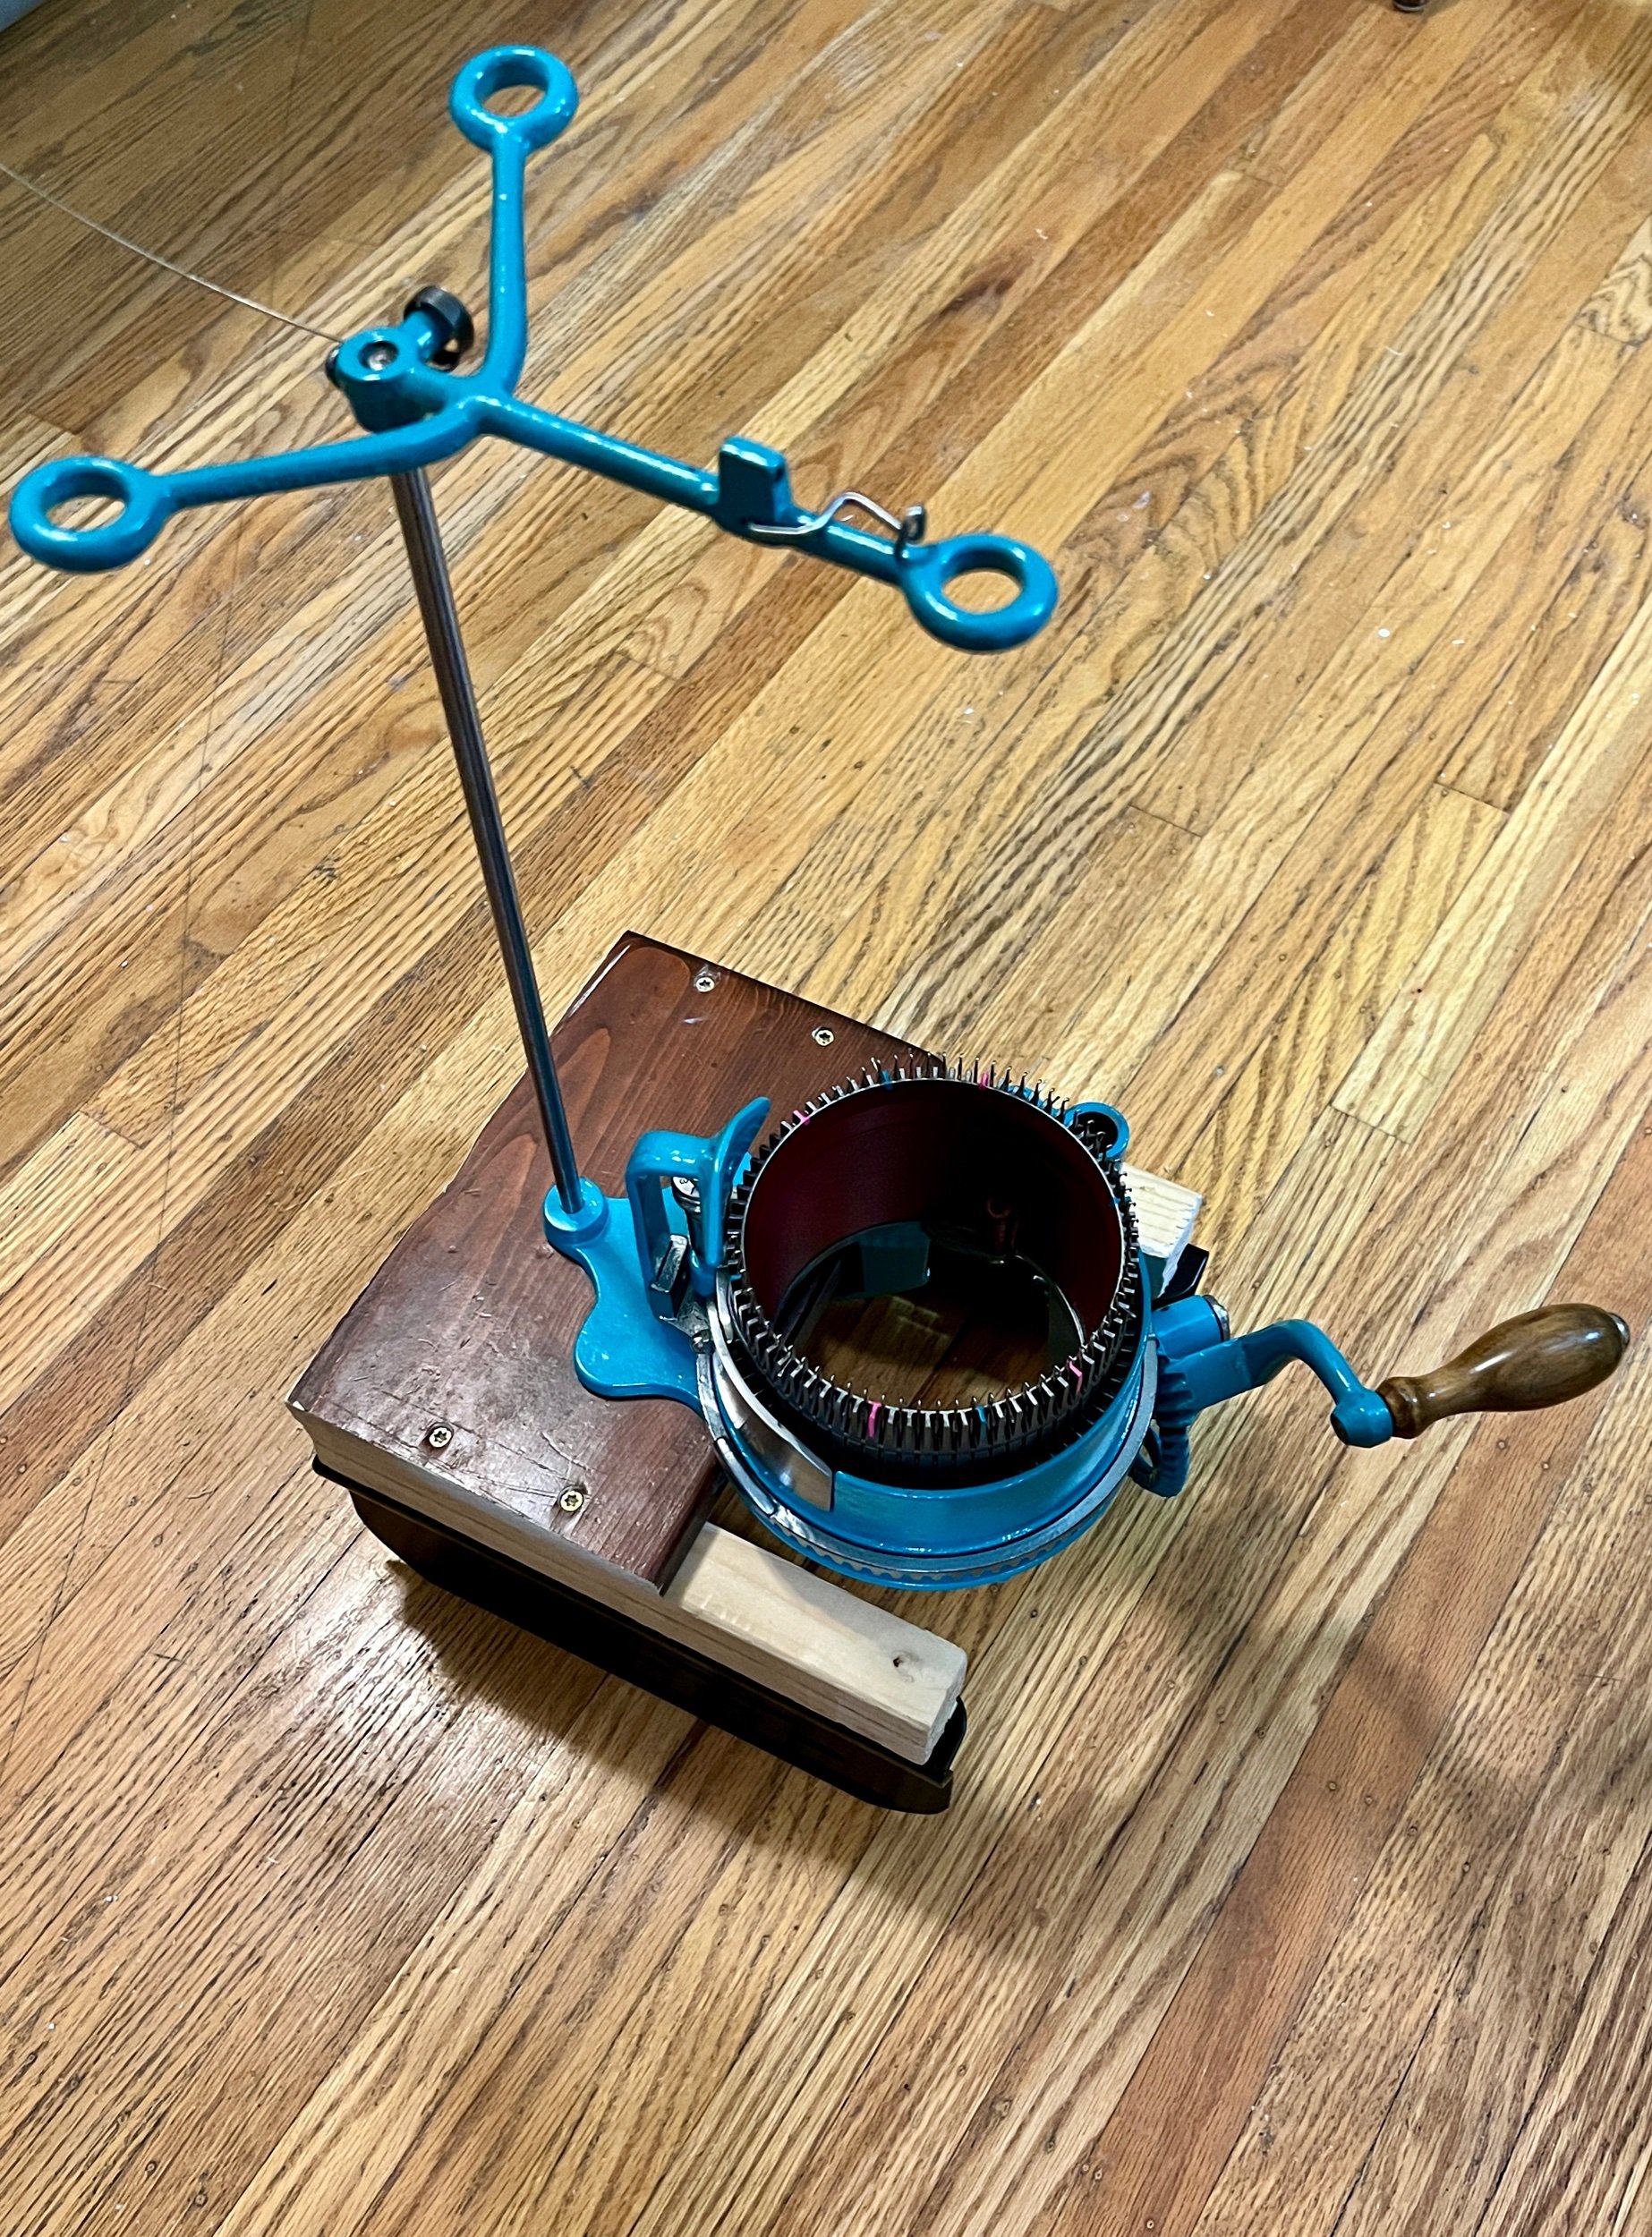
I found rubber feet for the table and they work great. The setting up of the table has the inner table legs come very close to the outer legs so I trimmed the rubber feet where they slightly collide. It’s still a bit close with the feet and it does fight a bit to fully collapse the table when done (but it still works).

The table is now perfect and ready for easier use of this plastic knitting machine!

Instagram posts: one | two |


SEE ALL BLOG ENTRIES ON THE BLOG INDEX PAGE | Follow us on a variety of social sites see TAPLINK | Interested in Circular Sock Machines? See the CSM START Menu first page. | Seek something specific? Checkout the Index page.


2023 Jun 11 - Brave Bunny

I was searching the internet and came across a simple bunny project that can be assembled from a knitted square.

From a basic image outline I created this on my addi-express kingsize 44 needle machine:

Cast on with scrap - work 5 rows. Switch to project yarn using the first of three black needles.

Project yarn is beige unlabelled yarn (suspected worsted and weight). Work 34 rows then switch to scrap for 5 more rows. Remove from machine.

Finish ends of the tube with a crochet hook and work in the yarn tail. Now with your square created we will count out 12 rows from one end and mark the left and right sides. Fold the square vertically to mark the middle top stitch of this piece.

Now with three points marked with stitch markers, take a darning needle and go through both layers of knitting to start to form a draw string area that will be stuffed and form the bunny head and corners - the ears.

I added stuffing to the head and finished by reinforcing the neck and the ears. Working down the back I used mattress stitch to close the spine are to the edge. I then have a body tube that I stuffed and brought the open edge of the tube together with a drawstring closure. Once closed I created a basic Pom Pom with 60 wraps of white yarn around three fingers. I finished with yarn the same color as the body to secure the Pom Pom and then attach it to the bunny butt.

This is brave bunny. This can be made on any machine as long as the knitting is a square. I made this to consider donating them to children needing an emotional hug.

I made a complete video! See https://youtu.be/DMyxAOMB9ck

Ravelry project

Instagram posts: one |


SEE ALL BLOG ENTRIES ON THE BLOG INDEX PAGE | Follow us on a variety of social sites see TAPLINK | Interested in Circular Sock Machines? See the CSM START Menu first page. | Seek something specific? Checkout the Index page.


2023 Apr 23 - Simet Winder

Ever since discovering this Italian discontinued electric winder online in 2018 I’ve been trying to find one to buy. This is a fantastic cone winder - an amazing electric version of the unrelated Royal cone winder. See YARN WINDERS

Then on a Facebook group I won the bid for a winder in the states. When it arrived disappointedly poorly packed and decimated, I contacted the seller on Facebook messenger who feigned worry and promised a refund that evening. Even though I later emailed as well, she chose to not contact me any further. I wish bad karma to the seller - saying your husband poorly packed it is not acceptable (neither is three pieces of newspaper and a box too small to protect anything). Bygones. Nothing more could be done - PayPal and my credit card declined helping - non-email promises don’t count as communication, UPS said I didn’t ship it myself so I couldn’t do anything.


The base itself (without the broken shell) does seem to work/power up so I laid all the pieces out on a tray and spent most of the day Saturday April 22 Gorilla Gluing them together. The gel glue I used has an hour setting time so I couldn’t go too quickly. It also is the kind that expands on cure. Which made a mess but perhaps offered more support? This took the greater part of that day.

Sunday Apr 23 I used my Dremel rotary tool to reduce the excess expanded glue, and after a hardware store walk, I placed a layer of epoxy to further strengthen the shell. Once dried/cured, I repeated layers as needed.

I problem solved a new screen for the motor area and rebuilt the shell areas where the shell connects to the main base. Once all is cured and set I will reevaluate and see if it needs more epoxy or whether I can proceed with beautifying.

What this version of a Simet winder looks like (can differ in color).

The winder housing is better than new structurally (but not aesthetically). Next week I will beautify it - we are getting married tomorrow Friday May 5, 2023. :) Stay tuned.


Sept 3, 2023: Time has flown but now it’s time to finish this beautification. First I used my Dremel and sanded the outside surfaces, both to add a porous paint-sticking surface, and to slightly even out some of the gobs of cured glue. That made a mess. Then I used the last cab of grey primer paint and did a base coat. It says it needs four hours to fully dry.

Tomorrow if the primer is happy I’ll see if the paint I used in the past will work for the next step. This paint is called “Unicorn Spit” and I first used it to custom decorate a lovely circular sock machine table that was later stolen by Grace - who I lent it for her free use at a csm event we both attended in the states. She damaged it slightly at the event with her vintage lamp and never returned the table. :(

Monday Sep 4, 2024

I’ve painted the Simet winder housing with Unicorn Spit. It’s a versatile paint medium allowing for almost unlimited potential. I chose this paint (not only because I still have leftovers) because applying it as I have will disguise some of the uneven glued surfaces.

Now to allow this to dry and self cure for a couple days (just in case). Much later I will topcoat cover it with a non-water based glaze coat.

I’ve done two layers of gloss. I’ve decided now to upgrade the feet on the winder to something rubbery with better grip. I prepped the surfaces, applies gorilla gel glue (and the rubber feet) then applied a heavy board to allow the feet and glue to cure and set evenly. By gluing the feet with the winder upside down I can better manage any glue spill without worrying about the winder flying itself to the table.

I am thrilled with how the winder turned out! I wish the white feet were black but not enough to go find replacements.

In the future I will add more gloss to the two coats there but will wait until after the upcoming event so that off-gasing will be minimal to none (the gloss is oil based and has an aroma while it cures).

Instagram: one | two | three


SEE ALL BLOG ENTRIES ON THE BLOG INDEX PAGE | Follow us on a variety of social sites see TAPLINK | Interested in Circular Sock Machines? See the CSM START Menu first page. | Seek something specific? Checkout the Index page.


2023 Mar 4 - CSM Stand

Today I threw together a stand for a machine being delivered in about two weeks.

An CSM is a heavy, robust, yet delicate thing which should never be stored on its side amongst a jumble of other things. It’s essential to keep a machine safe when not in use. A stand can keep it safely upright when not in use. Securing a stand within a box of some sort would be best if driving from one place to another. This stand was cobbled together using leftover wood segments and two unused metal parts. Usually I would further beautify something I create but in this case time is short and I still have many things to do.


SEE ALL BLOG ENTRIES ON THE BLOG INDEX PAGE | Follow us on a variety of social sites see TAPLINK | Interested in Circular Sock Machines? See the CSM START Menu first page. | Seek something specific? Checkout the Index page.


2023 Mar 2 - Upgraded Hybrid Cooperative

An exciting share! The impressive Chambord CSM has done it again! Check out this totally refurbished machine!

Dave Lord later shared that the machine came to him as a hybrid and that they did a full refurbish.

This very vintage circular sock machine (known by its name “Cooperative”) was built in its time, without upthrow cams (instead featuring a slope in the cam shell which sometimes meant needles would drop down at the wrong time, creating dropped stitches). Unhappy face.

Issues now solved with a creative addition which included two teardrop configured upthrow cams! Happy face!!

This exciting masterpiece is going to be hand delivered to its new csmer in under two weeks with a hands on demo! In addition to all that I created a YouTube Cooperative machine video as well! VIDEO

MARCH 13, 2023

This morning I made a sample sock on the machine using two dial turns from the tightest setting with the heel spring in place the foot has 60 rows with the finished sock (not long after coming off the machine) gauge on this yarn at 13 rows/9 stitches per inch. Certainly a sock can be made at a looser gauge but this worked out well for my US8.5 women’s sized foot.

Instagram Posts: March 2/23 | March 4/23 | March 5/23 | March 13/23 |


SEE ALL BLOG ENTRIES ON THE BLOG INDEX PAGE | Follow us on a variety of social sites see TAPLINK | Interested in Circular Sock Machines? See the CSM START Menu first page. | Seek something specific? Checkout the Index page.


2022 Nov 12 - Vintage Gearhart CSM with rotating cylinder

Close up images of the parts

New YOUTUBE VIDEO

Introducing the 1893* Vintage Gearhart Circular Sock machine.

The vintage Gearhart machines went through many versions in features and machine design from the end of the 1800’s through 1924. This video focuses on an this version which didn’t have a ribber, featured lead rotating cylinders and a simplified top yarn setup with heel (take-up) spring.

This video covers the difference in applying the cast-on bonnet and assembling a machine like this.

This is an open CAM machine.

BELOW: The machine on eBay and when it arrived here in Canada from the US.

INSTAGRAM POSTS: Mar 16/23 | Nov 12/22 | July 29/22 |


SEE ALL BLOG ENTRIES ON THE BLOG INDEX PAGE | Follow us on a variety of social sites see TAPLINK | Interested in Circular Sock Machines? See the CSM START Menu first page. | Seek something specific? Checkout the Index page.


2022 Oct 29 - CSM Pumpkin with I-Cord Stem

The full detailed video is now online: Video

For future written pdf pattern please see this project on the PROJECTS page under the menu “My patterns and videos”


SEE ALL BLOG ENTRIES ON THE BLOG INDEX PAGE | Follow us on a variety of social sites see TAPLINK | Interested in Circular Sock Machines? See the CSM START Menu first page. | Seek something specific? Checkout the Index page.


2022 Oct 14 - Money Maker Vintage CSM

This Canadian CSM arrived from abroad this summer. This machine is pre-uplift cams which the version after (the Improved Money Maker) had. A noted issue with the MM is that needles will sometime drop just because - others have shared they believe it’s because of the lack of uplift cams, while others have shared they believe it’s because of the needle design with lack of friction in the slot with the cylinder spring to stay put.

This post is my adventure into testing for a more reliable needle stitch creation. One suggestion from those online has been to switch from regular cylinder needles to another brand Gearhart needle.

As a Open Cam style machine, this machine uses the same 12 gauge needles that Autoknitters and the Legare CSMs use. For more info see AngoraValley.

Note how high above the cylinder that the regular needles sit on the MM compared to the Legare 400 (Chambord CSM AccuKnitter is identical to the Legare at this view) - and how low they come to form the stitch. That unlike the Legare, the cylinder spring does not rest smoothly in the cylinder spring divet on the cylinder (due to the curve of the needles).

Now we are going to cast on with the MM using regular needles. I was going to share an image of that but there’s no point in showing you dropped stitches here and there. So let’s change gears.

Things I see:

  • cylinder needle is maybe 4mm too tall in the slot. The lowest position in the slot is that far from the cylinder needle. Perhaps this is why the belly of the needle pushes the cylinder spring out of its resting place?

Others have suggested going for a flatter belly Gearhart needle, noting it sits a bit taller than the autoknitter needle so that the recommendation is to lengthen the cylinder slots by slightly raising the cylinder in its mount.

This Money Maker CSM is special. How is it different than an Autoknitter? This machine was made before the teardrop upthrow cams were added. (They did also later make a Improved Money Maker with those pieces). Not having these little pieces drastically changes how this machine reliably knits.

So one of the main issues with this machine is a needle can suddenly drop. Perhaps with a needle with a flatter belly - the tension is more even and thus the needle further supported - reduced needle drop.

I appreciate the work of art - any CSM is - but note this one isn’t symmetrical at the tension dial - by design?

The screws on this machine are all original - which is great BUT not. Original screws feature a super thin flat head screw and these are very different than screws for the same purpose on other machines. They are also pretty worn - I found two similar thread (but better screwdriver access).

CYLINDER

I tried my Legare 400 52 slot cylinder on the machine. With a very slight machine adjustment the cylinder fit great however it seems the slots on it aren’t as deep as the original 80 slot cylinder the machine had. I noted the needle butts therefore also had less clearance in the cam shell and experienced some needle to machine collisions near the bottom of the tension dial with tension changes. Changing to the Gearhart needles meant raising the cylinder from its mount position - ideally use a shim (a piece of something that covers the complete contact to the thickness to provide even support) but I tested this by using solid half washers which secured the cylinder evenly once evenly tightened.

I tried also a slotted two way adjustable yarn carrier to aid in best yarn path to help reduce stitch drops but found the experiment left the actual knitting range much less than I’m happy with. I ended up switching back as this machine has a shorter profile yarn carrier which maybe works better?

Final thoughts: Even without any changes the machine is unreliable - benchmarked to my Legare - this machine is a let down. I am not happy with this machine. I will be donating it.


SEE ALL BLOG ENTRIES ON THE BLOG INDEX PAGE | Follow us on a variety of social sites see TAPLINK | Interested in Circular Sock Machines? See the CSM START Menu first page. | Seek something specific? Checkout the Index page.


2022 Sep 24 & 25 Knit City Vancouver

This was our first POST COVID demoing at Knit City. It was wonderful to be able to provide a mostly three circular sock machine experience for event visitors.

INSTAGRAM: one | two | three | four | five | six | seven | eight |


SEE ALL BLOG ENTRIES ON THE BLOG INDEX PAGE | Follow us on a variety of social sites see TAPLINK | Interested in Circular Sock Machines? See the CSM START Menu first page. | Seek something specific? Checkout the Index page.


2022 Sep 14 - CSM Bog Jacket 1.0

This project inspiration has come from the simple construction of a sewing project I stumbled across.

Link #1 | Link #2 |

I started this project by adding my highest slot count cylinder to my Chambord AccuKnitter CSM - this is a 120 needle count cylinder (you certainly could use any cylinder you have - narrower tubes would require more strips to connect). I then worked the whole cone into a long tube and before ending the blue project yarn, allowed two stitches to run - one on each half of the tube - to be used later to join the tubes. It’s easier to do the stitch drop on the machine than needing to count the small stitches in the project tube itself.

I didn’t HAVE to work the whole cone - I wanted too. Also if you’re following along yourself with this project, use fiber you enjoy to feel on your skin or you won’t like your finished project as much and plan your join ahead of working a huge tube over leaving the stitch dropping afterwards - it takes forever off the machine.

Note: this cone is a vintage cone without a label so I am unable to quote that - I suspect it’s lace weight.

Instagram: Post 1 | Post 2 | Post 3 |

TUBE JOIN DIRECTION: The next step is determininge whether I build my project with vertical tubes or horizontal. I’m thinking horizontal to aim to make sleeves align with the seam of the sleeve - which seems more sensible than doing this the other way.

JOINING THE TUBES: I had worked a short sample at a different stitch setting before so I used this sample to test out how I wanted to join the tubes (and also how the fiber reacts in the wash).

But first about tube joining: I considered leaving the tubes as is and hand joining the edge with my linker or mattress stitching but that creates a ridge that I didn’t want to “feel”. I decided to try a join I’ve done before with the CSM Blanket 1.0 project where on the tube a column/stitch is dropped to create a vertical row of bars/ladders that using a crochet hook can join - created a two sided fairly flat appealing join. I decided a single dropped stitch created enough of a ladder when connecting another tube.

Fri Sep 16, 2022: I’ve finished dropping the halfway single rows of stitches. Now to begin assembling tubes to make the fabric. I’ve brought the two very long ends together and will now use my crochet hook to do a gorgeous two sided join creating two joined tubes the width of the fingertip to fingertip portion of this garment (with extra for cuff).

WASHING THE SAMPLE: I had hoped to secure the live stitches and wash the sample to see how to launders/shrinks before determining the width of the fabric needed but perhaps I will do that but after I setup the fabric needed with excess in case of shrinkage.

Sep 17, 2022 - two tubes are now joined and their approximate fingertip to fingertip fabric length plus extra for the cuff has been determined. Note: ensure to overestimate on the long side the length fingertip to fingertip as once worn, length is reduced by the fabric drape over the shoulders. I placed a stitch marker on the last joined bar and am now running a piece of scrap yarn on the live stitches so that nothing unravels.

This current step is creating the fabric at the very top that is the shoulder and sleeves.

As this is my prototype this is going to be a much slower process than I’d like. Instead of knowing in advance how many rows to work and end with scrap yarn, the extensive tube is being connected and edge prepped as I go.

We now have three tubes joined and the cut tube edges “live stitch secured”. This segment is made slightly wider than needed so that a cuff can be created. I’ve folded the three tube segment to determine the neck which instructions state can be added 2-2.5” from the halfway fold. This fold vertically separates this garment for reference only. I marked the two rows in the fold and outlined the neckline at rows 29/30.

For reference I counted the rows of this fiber and knitted gauge from midpoint to fingertip fabric edge as 383 rows. So that’s 2x383+2=768 rows of fabric fingertip to fingertip.

Now to make things easier I am attaching half length tubes for the front of this coat from midpoint to fingertip so that the neck edges have their live stitches taken care of.

I am now at the point that I can connect the underarm areas on the sleeves - as laid out to accomplish on the last image above.

Joining segments goes much faster if I don’t try to also watch TV - last night I started an audiobook.

I’ve finished joining the bottom of each sleeve. Now I started joining a new panel which starts in the front, goes to the armpit and then will go over the back, other armpit then front on the opposite side. Before approaching the back segment I chose to plan out fabric increases which will appear as a fold so that the back will continue to be loose and drapey.

Ok so at this point all the tubes have been added and the next step is closing open tube joins.

I am planning to wear this Sat/Sun Sep 24/25, 2022 at the circular sock machine demo I organized at the awesome Knit City

I probably won’t be adding to this post until after the event at this point so here’s a picture of it now.

August 2023 - I had held off finishing this as I felt it was a great visual to see the open tubes - to see it’s construction - (why it’s taken over a year to add further to this project), however all edges are now closed and now the final finishing needs to be planned. Easy shareable link: https://tinyurl.com/Bog-Jacket1


SEE ALL BLOG ENTRIES ON THE BLOG INDEX PAGE | Follow us on a variety of social sites see TAPLINK | Interested in Circular Sock Machines? See the CSM START Menu first page. | Seek something specific? Checkout the Index page.


2022 Sep 4 - Pedal Power

I started with the thought about using a Singer Sewing machine to use Treadle Power to aid in using my Circular Sock Machine, however after much thought we’ve decided to revert to our original plan of pedal powered. For more info see the blog entry TREADLE POWER

On the right we see the used and forgotten free bikes picked up for free from Craigslist a couple weeks ago. They’ve been living on our patio while awaiting their next step. Now it’s time to begin this project.

First I will harvest all the usable parts and clean up what I can. Note that all of these were in very poor shape as bikes.

Our wonderful neighbor Ron helped using his chain tool to open and connect two two chains into one long one (that can be length adjusted another day). He also helped dismantle the pedals to prep for frame cutting and the back wheel gear with teeth.

The gear from one bike had 18 teeth while the other had 17. Holes had hoped to reuse and mount onto the crankwheel to have the chain turn the crankwheel but now realize I have no easy way to connect the two pieces.

These are the two pieces (one from each back wheel on the two children’s bikes).

So I measured my crankwheel where the gear would mount and went onto Amazon for a gear I could install myself. No success.

Our neighbor Ron dismantled the pedal areas of each of the two bikes - good thing too as both lacked ball bearing grease and one set ended up uneven when one of the two broke. (See photo)

I went onto Amazon to buy ball bearing replacements (no luck for now but that’s okay as the ball bearing part is for the extra setup not the main one I prefer. In the future I will look for that if needed). I bought grease to reinstall the pedals after the frames are cut down.

Tomorrow I will use my Dremel and trim each bike frame so that each can separately self support the pedal part.

Mon Sept 5, 2022 - Today using a Dremel, I cut off the unneeded bicycle components and did a bulk finish of the edges. We now have ONE (currently blue/green) setup plus a BACKUP version (currently pink).

These each will hold their pedals and once finished, each will connect to chain that will attach to the component on the crankwheel.

I didn’t cut all of the proposed metal off each part yet, choosing minimal alterations at this time. If during trial use it turns out I don’t need such a robust bike frame design I may then remove the excess as per the plan previously shared.

Now we wait for the new specialty ball bearing things for inside the pedal mount, the lubricant and the gear part that hopefully will connect to the extra crankwheel I have. These parts are ordered from Amazon.ca and are due to arrive Fri Sept 9, 2022. I have additionally ordered two other gear components from eBay but their delivery is estimated at the end of the month.


Sat Sept 10, 2022 - This morning I reviewed options and outcomes. Next step is to attach the gear from the inside of the back wheel to the crankwheel in such a way so that the row counter can still be used. ;)

After running an errand we stopped at the hardware store for these supplies.

I originally considered drilling holes and making them threaded but I decided to keep things simple after the hand driven tap tool broke off in the hole. Nothing I tried helped so I settled on leaving that screw hole empty (or hiding that with a fake screw head).

The first screws I tried were 5/8 long and too short so back to the hardware store for the two shown. I found while initially assembling it was easier to use the longer screws however once assembled I switched to the 3/4” length (opting to not use the tension washer and extra washer).

Sun Sept 11, 2022 - today I realized I probably do want to trim down the remaining bike extra segments (but that this is not happening today) so instead I focused on using what I have to stabilize the pedal segment as by itself it’s tippy. I noted further that best chain alignment requires the pedal segment to be exactly stationary without movement. I didn’t have the wood and didn’t want to go find some so I used a shelf from one of my tables - rationalizing that it could do double duty. After much work on that shelf as a stationary mount - it just isn’t the right solution to this setup. Our neighbor Ron brought over his chain tool and joined the ends of the chain for testing.

We picked up a lovely height adjustable bar style chair to aid in using the machine with the pedal setup

Today I also realize that it would be a benefit to further adjust the large washer on the crank-wheel connecting the gear -the washer isn’t seated 100% parallel causing a slight uneven seating of the chain. As these components are attached with five screws, it would be easy to dismantle, readjust and reassemble - perhaps with a better clearance for the row counter. Below are two mock up images as it is right now.

I’ve outlined current thoughts on chain alignment and board layout with cutouts for the table legs to sit through. The board might end of more of a triangle than a rectangle.

Next step: another hardware store visit for a board

I have some things on my calendar in the next two weeks that might mean putting this project on hold. Will see.


SEE ALL BLOG ENTRIES ON THE BLOG INDEX PAGE | Follow us on a variety of social sites see TAPLINK | Interested in Circular Sock Machines? See the CSM START Menu first page. | Seek something specific? Checkout the Index page.


2022 Sep 3 - Treadle Power

This morning I woke with this on my mind so today I checked Craigslist for a local Singer Sewing Machine Cabinet. By early evening we drove over and picked this up.

I will be working on this in my upcoming free time (when I can).

To bring this home we removed the four screws attaching the sewing machine from the table itself - this reduced it’s overall weight during table relocation and reduced the chance anything was damaged. Once home Wyatt and I walked it up our stairwell (we don’t have an elevator) and moved it into our living-room for the next step.

Sun Sep 4, 2022 - today I will start modifying the table.

All the excess material is removed from the machine. The table is now on hold while I try to modify the crankwheel to marry it with the sewing machine belt attachment.

After much more thought on this and research, having spoken with a machinist etc. We’ve decided to scrap the idea of using the Treadle System to power the CSM and instead follow up with a pedal powered version. See our next blog post PEDAL POWER

Persons who have pedal upgraded their circular sock machines:

Posted on the 2.0 facebook group

-Hilly Jacklin in 2018? - a vintage gearhart mounted on a singer table frame with tricycle pedals and chain system. I learned afterwards that she noted online she first used her pedal system setup with a treadle. Facebook post

-Jenny Gibson - an Erlbacher using a reduced ratio modified crankwheel mounted on a taller table and perhaps adult pedal setup. Facebook post

-Connie Reeves - an Erlbacher used the same as Jenny. Facebook post


Instagram post: One |


SEE ALL BLOG ENTRIES ON THE BLOG INDEX PAGE | Follow us on a variety of social sites see TAPLINK | Interested in Circular Sock Machines? See the CSM START Menu first page. | Seek something specific? Checkout the Index page.


2022 Aug 27 - Table Donation

The lovely Karen P held a wonderful Maple Ridge, BC Circular Sock Machine event in her home 10am - 4pm.

As I have a few table options, we chose to donate our CSM and GO Table - won by Jude but gifted to Donna at the event. (Donna had just purchased her Autoknitter and didn’t have a perfect table yet).

Read more about this history of this table prior to today: 2019 Jul 6 Harbor Freight Table


SEE ALL BLOG ENTRIES ON THE BLOG INDEX PAGE | Follow us on a variety of social sites see TAPLINK | Interested in Circular Sock Machines? See the CSM START Menu first page. | Seek something specific? Checkout the Index page.


2022 Aug 24 - SPA Cloth

An easy mock rib project that can be done on any cylinder and mock rib pattern.

The SPA CLOTH - A perfect and universally handy giftable item for new and experienced circular sock machine users alike.

Written pattern coming - once posted this will be found on https://www.csmlove.com/projects

See the HOW TO VIDEO

This video shows all the finishing of both ends off the machine - certainly you can start the project with an “on machine hung hem” to save off machine finishing. All of my detailed videos and free matched written patterns can be found on my website under the menu “My Patterns and Videos” Need help with a technique? See https://www.csmlove.com/techniques Have a question? See my quick lookup page https://www.csmlove.com/index Have a question? Email me at csmloveinfo @ gmail.com My name is Karen Taylor (formerly Ramel). Quick link - https://taplink.cc/csmlove


SEE ALL BLOG ENTRIES ON THE BLOG INDEX PAGE | Follow us on a variety of social sites see TAPLINK | Interested in Circular Sock Machines? See the CSM START Menu first page. | Seek something specific? Checkout the Index page.


2022 Aug 7 - CSM Washcloth

I have more than a few vintage cones of cotton and have been wanting to do something with them for some time…. Today I created something I rather love after a few prototypes and design changes.

Introducing the 96 needle slot cylinder cotton washclothes!

Worked at a machine tension and 110 rows, these 8.5cm/7.25 inch long project (measured before finishing the live stitch ends. Designed using the highest slot count that best accommodates this fiber - the 96 slot count - using a 1 empty slot by 5 cylinder needle pattern setup.

This pattern will be posted on Ravelry later, however here are the related photos.

FINAL VERSION:

I really like this version.

PRIOR VERSION:

Worked on the same 96 needle slot cylinder with the same mock rib pattern, this version I worked flat. Working flat makes a much nicer edged project but is very slow on the CSM.

FIRST VERSION:

Worked on the same 96 needle slot cylinder with a 48 needle slot ribber dial in the same rib pattern (but with actual ribbing not mock ribbing). This version was worked in the round and off the machine, the project tube was cut to make it flat. Using a crochet hook the cut seam edges were folded and crochet chain (single stich) seam. I then used a crochet stitch simple bind off on the live stitches. I imagine this edge would look better if folded over and secured. Working the prototype took too long to want to work more than one even if I love the rib.


SEE ALL BLOG ENTRIES ON THE BLOG INDEX PAGE | Follow us on a variety of social sites see TAPLINK | Interested in Circular Sock Machines? See the CSM START Menu first page. | Seek something specific? Checkout the Index page.


2022 Jul 25 - Not a Knot Tool

It was asked to demonstrate how this works. Here’s a quick and silent example of the recently shared finding. The video is on the Instagram post and CSM Facebook post.

Knot today! Check out this fantastic eBay purchased vintage flatbed accessory I now use! Mounted on my CSM mast, the bell rings if a knot passes through. I LOVE it because I don’t love surprise knots. Another useful tip - see many others on https://www.csmlove.com/my-ideas-and-upgrades found on my website under the menu “My Patterns and Videos” - see the page “My Ideas and Upgrades”

Instagram: Post one |

CSM Love Facebook: post one | post two |


SEE ALL BLOG ENTRIES ON THE BLOG INDEX PAGE | Follow us on a variety of social sites see TAPLINK | Interested in Circular Sock Machines? See the CSM START Menu first page. | Seek something specific? Checkout the Index page.


2022 Mar 12 - Sock Donation

We Stand With Ukraine Update

Paula of BAAAD Anna’s is a fantastic community organizer and bringer of all things fiber PLUS local or long distance causes. This post is to share my own contribution to the current cause notably concerning the Ukraine. Today my boyfriend and I will drive over and drop off 12 pairs of knitted socks in a variety of sizes, that I’ve made on my Circular Sock Machine.

See their INSTAGRAM post. My previous charity knitting sock donation.

Twelve pairs of knitted socks


SEE ALL BLOG ENTRIES ON THE BLOG INDEX PAGE | Follow us on a variety of social sites see TAPLINK | Interested in Circular Sock Machines? See the CSM START Menu first page. | Seek something specific? Checkout the Index page.


2022 Feb 4 - SweetGeorgia Waiting for a CSM

How wonderful! Felicia of SweetGeorgia Yarns has just shared a lovely video blog entry on YouTube about her CSM current journey. Felicia had been in touch in January and we arranged a in person info session on January 21.

Let’s be clear - Circular Sock Machines - while they have SOCK in their name - aren’t a machine limited to just making socks. They just make socks EASIER.

Some of the items you can make with this style of machine (starting with some of the non-sock items I’ve done myself)


Indeed often a new craft involves and investment that at first might seem a mountain and something outside of one’s considerations, however when it comes right down to it, aren’t you worth it? Waiting until you retire is often one choice but wouldn’t you want to use it now?

COSTS: Most of us cannot buy a car with the current funds in our wallet - it stands to reason that something as well engineered as a Circular Sock Machine will require more than a cup of coffee - however these don’t depreciate in value so if it isn’t up your alley you can usually sell it for what you paid.

SweetGeorgia website post

The easy shortcut url of this video is https://tinyurl.com/SweetGeorgiaCSM


Shareable link: https://youtu.be/utLAB7xU_kk


SEE ALL BLOG ENTRIES ON THE BLOG INDEX PAGE | Follow us on a variety of social sites see TAPLINK | Interested in Circular Sock Machines? See the CSM START Menu first page. | Seek something specific? Checkout the Index page.


2022 Jan 30 - Valentine's Day Colorwork Socks

When making any project on a CSM that involves multiple yarn in some kind of pattern, we refer to this as Fair Isle or Colorwork. Working any color combinations on a circular sock machine requires manual yarn placement (which makes this a slower project to complete).

Happy Early Valentine’s Day!

I wanted a pair of socks where one of the socks could have a non-rib interrupted heart colorwork pattern so I chose to try socks with cuff and leg ribbing only. The foot is definitely more roomy but I haven’t decided if I prefer that over the form fitted feel of my other fully ribbed socks.

In case they inspire you to try something new here are my socks - they are a women’s US 8.5 sized socks with one sock featuring the Ravelry free “Medieval Heart Chart” from Crystal Guistinello. I enlarged it for prominence. 😉

This project inspired reinforcing the sock bottom as needed in a different way (see the last image). More to come.

I’ve added the photos to this post however a silent video can also be viewed at https://youtu.be/pszjlcVT2pw

To see the project details etc on please see Ravelry under my nickname “Karenramel” for this sock project - https://ravel.me/karenramel/s2cc77

This project also has a blog entry viewable on my website under the “Misc” menu - https://www.csmlove.com/blog/2022-jan-30-valentines-day-colorwork-socks

For tips on colorwork see the heading Minimast on my “Techniques” page on my website under “My Patterns and Videos” - https://www.csmlove.com/techniques (no accessory was used for this colorwork)

——

Sock with motif=total 70 row foot.

Sock without motif=total 45 row foot.

The reason is because thee motif stitch tension ends up being a bit tighter which caused the size of this sock to be at least 25 rows smaller than it would have been without the motif..

The motif used was a free version available on Ravelry https://ravel.me/medieval-heart-chart

Ravelry https://ravel.me/karenramel/s2cc77

Ravelry Sock project #224


SEE ALL BLOG ENTRIES ON THE BLOG INDEX PAGE | Follow us on a variety of social sites see TAPLINK | Interested in Circular Sock Machines? See the CSM START Menu first page. | Seek something specific? Checkout the Index page.


2021 Nov 30 - CSM Weights

What kind and how heavy are weights?

For more info see Supplies I like

Stem weights/weight stack

Dave Lord’s Chambord CSM “Set of Main Weights CHA224” as shown on the left are a total weight of 1663grams or 3.6lbs. These style weights hang under the machine usually from a buckle.

ABOVE: Shown here on the left is a vintage version of the weight stack shown with a pulley style top. I’ve included a detailed image on how it was used - it’s used for the TOE - not as a standard full machine weight. On the right the same V Hook was used for the Heel/Toe but with a regular stem weight as shown.

BELOW: My vintage Legare 400 came with two weight stacks which included pucks of two different thickness and weight (to be used above on the right). With todays fiber and method we use what is shown below. Having a fully weighted stem weight now seems excessive for the Heel/Toe.


Soft Weights

These can be used on Toe Up or Cuff Down Socks.

The lovely Dean & Bean 3D printed machines suggest using soft weights placed on the inside of the cylinder. A soft weight is basically a weighted bean bag style of weight. There are many videos on making soft weights - google search “CSM soft weights”. See their contact info on the NEW CSM Machines page.

PRO: a benefit to having weight(s) placed on the inside of the cylinder (instead of under the machine) is that the clearance under the machine doesn’t have to be as big.

CON: Weights need to be completely centred and ensure during use that they’re not snagging or being hung up on the inside of the cylinder itself. Also the soft weights are bulky so working a toe up sock with a soft weight on the inside means you don’t have the clearance on the inside of the cylinder to add the ribber (if you wanted to start rubbing on the sock there).

My personal preferred weights remain the stem weights/weight stack using a buckle.


Heel and Toe weights


The Chambord CSM SweetSpot V Hook and Weight

The modern and upgraded V Hook Heel/Toe system is used under the machine. The V Hook is applied and the weight hung. The weight itself is 1002grams=2.2lbs

This is my preferred system See how they’re used or order one yourself by checking out my info page on Chambord CSM and contacting them via email to order.

See the picture at the top of this page for how it looks with this weight in use.

The newer company Dean & Bean created a TOE UP weight they call the V-Hook (not to be confused with the vintage V-Hook weight). A Toe-Up weight can only be used if using a cast on bonnet that has a closed bottom section (or ring) or if having cast on, one is working a Toe up sock. See further down this page for a visual example of that weight system.


Heel Forks

Generally a three piece system used to add specific weight to the project at specific parts (like making a heel or toe). Each weight is about a pound each.

Personally these are great but more pieces to manage means more work with more items meaning less room to apply under the machine. Before using the V Hook and Weight mentioned above, I created these which made them easier to place with their minimum hook design and easy way to tell which way the hooks are without needing to see them. See more cool Ideas and Upgrades.


This next section isn’t about the amount of weight but rather how one can add weight in this specific scenario/project.

Toe Up Weights or Weight Systems

Next let’s review some cool ways to add weight to a Toe Up project allowing for easy ribber clearance install (for when we want to add the ribber on your sock after the toe).

The benefit of a hard shaped weight placed inside the machine (like a soft weight) is that it generally won’t get caught up on the inside of the machine.

However having weight applied from UNDER the Toe Up Sock seems to be the BEST way in my opinion. Here are some examples and ways to do that. Vintage Circular Sock Machines came with a reverse umbrella like item named the “Start Up Device” which was used to cast on. There are modern reproductions of that start up sold even now from some suppliers. (Click on any smaller image to view full size).

See my Jan 12, 2020 instagram post

I then noted a wood disk version (the wood disk from a piggy bank project) in a video and decided to create my own metal version which was lower and more minimal in the project. For more Ideas and Upgrades. The above image shows the video screen shot and my initial version. I then asked the lovely Dave Lord of Chambord CSM to create a metal version (shown on the right).

The benefit of hanging weight like this is you can add your Ribber immediately and rib up the foot without having to worry about the bulky weight on the inside of the machine of which the ribber would fight for space with.

Dean and Bean fairly recently modelled their version after the fact. With their closed bottom cast on bonnets, this style of weight can offer under project downward weight that won’t get hindered on the inside of the cylinder. This style wright offers an easy toe up weight (after cast on and having worked the toe) allowing for easy clearance if wanting to then add a ribber for a ribbed sock

See other useful images and links: My Ideas and Upgrades | Supplies I Like


SEE ALL BLOG ENTRIES ON THE BLOG INDEX PAGE | Follow us on a variety of social sites see TAPLINK | Interested in Circular Sock Machines? See the CSM START Menu first page. | Seek something specific? Checkout the Index page.