2023 Dec 21 - Caron InsideOut Hat

I recently made my first flat bed knitted hat. This is a revised attempt of that hat. See the blog entry. As I am using the same yarn and settings, the prior gauge swatch should be enough for this purpose with my adjustments 22 stitches by 34 rows over a 4” measured gauge.

Adult Woman hat generic measurements seem to be 28cm from total top middle to the bottom edge of the hat. 57.5 diameter with a planned 8cm brim. This pattern requires 124 needles on the bed.


Hat summary: this project creates a double layer hat that in the basic shape of a rectangle without decreases until the very top of the hat (after hanging the hem). Making the top easier to gather later, a row of knit 2 together across the row and two more knitted rows done. A yarn tail and a darning needle takes all the stitches off the machine. A separate longer yarn tail is used to mattress stitch seam together the sides of the panel on the inner and outer layer then joined the initial yarn tail for a double yarn tail layer to cinch in between he top of the hat. Embellishment optional.

Tip: placing stitch markers regularly on edge stitches (every 20-50 stitches) can ensure mattress stitch joining is done evenly.

Mast Tension 0, Carriage tension 10. Yarn: Caron Cloud Cakes

CREATE MAIN PART OF HAT: Cast On 120 stitches with scrap and open cast on with project yarn. Knit 186 rows of plain knitting.

CREATE DOUBLE LAYER PART: Hang the first worked row of stitches on the current needles. Knit 1 row to join layers.

CREATE A SIMPLE TOP OF HAT GATHER: For this next row, transfer every second stitch to its neighbors needle (and move all empty needles out of work). Knit 3 rows.

TAKE PROJECT OFF THE MACHINE: With a six or inch yarn tail, cut your project yarn and with darning needle, thread long tail through open stitches to take each stitch off each needle.

FINISHING THE HAT: Cut a much longer yarn tail and use it to mattress stitch close the knitted panels. Once at the top of the hat again after seaming, reinforce the top gather with the needle, securing hidden knots and reinforcing the top of the hat. Thread in any loose yarn ends.


See all Blog Entries on the BLOG INDEX page

2023 Dec 19 - Caron Mobius Scarf

I wanted to make a scarf to somewhat match the hat already made so I determined to scrap cast on with 35 needles on both sides of zero (70 needles). This project is plain knitting.

The project will be taken off the machine after using more scrap and the ends kitchenered joined for a hidden join. I worked 350 rows. The joined ends after trimming about 6 inches (60 rows) of knitting to avoid a worked knot. Pre-steamed after sitting overnight this project laid flat was 48cm and is tighter than I’d like. After steaming it’s now 52.5cm long (laid flat). This project was about 290 rows and 120.8 grams of yarn.

I decided to attempt to make another version using the remaining yarn I have (158 grams of this color-way).

Cast on with scrap yarn using 70 needles but this time using every second needle. Open cast on the project yarn and work all the remaining color-way.


See all Blog Entries on the BLOG INDEX page

2023 Dec 17 - Caron InsideOut Hat

Recently my husband and I found ourselves at Michaels Craftstore and while there I walked past a display of super soft cuddly Caron Cloud Cakes skeins offering “Buy Two get Third free”. So. Yes. We found three similar skeins and bought them with the thought to attempt a hat on the flat bed (and maybe a scarf to match). But is this fiber too thick for my 4.5mm standard gauge machine? We’ll see.

Not having ever yet made a hat on the flat bed, I chose to check out my KNIT IT NOW membership access for what “knitables” they have in terms of patterns etc.

SWATCH/STITCH GAUGE (this is for a 10cm/4” stitch gauge test):
Cast on with 70 needles (scrap). Switch to project yarn. Note mast and dial settings.
Mast 1. Dial 10.
Knit 10 rows project yarn.
Knit 2 contrast stockinet rows
Knit 30 rows project yarn
Push both 21st needles from zero and place contrast yarn on those hooks. Push those needles back into B position by hand
Knit 30 rows project yarn
Knit 2 contrast stockinet rows
Knit 10 rows project yarn.
Scrap yarn

That done I shared a photo of the swatch directly off the machine - following the manual the standard green gauge says we have 22 stitches by 34 rows over a 4” measured gauge. I totally understand the swatch directly off the machine isn’t the final but I’m okay with taking the reading now - now I will undo the swatch and reuse the yarn :)


Now I know how many stitches and rows for my ideal gauge to attempt to plan a hat that might fit.

Knit it now Adult Woman hat generic measurements seem to be 28cm from total top middle to the bottom edge of the hat. 57.5 diameter with a planned 8cm brim. Knit it now took my 22 stitches and 34 rows and suggests this pattern requires 124 needles on the bed (which is fine - I have 200).

A finished project note: the knit it now pattern used my gauge for stitch and row counts however finished hat is easily 50 rows too long but otherwise fits width-wise. The fiber is wonderful and cozy.

Below is my edited and corrected version of the approximate method I followed (images above are the resulting project from the followed knit it now project) - personally I felt the customized hat pattern needed more info and images to make this first ever pattern easier to follow so I am providing my own version for my own future use below.


Hat summary: this project creates a double layer hat that in the basic shape of a rectangle without decreases until the very top of the hat (after hanging the hem). Making the top easier to gather later, a row of knit 2 together across the row and two more knitted rows done. A yarn tail and a darning needle takes all the stitches off the machine. A separate longer yarn tail is used to mattress stitch seam together the sides of the panel on the inner and outer layer then joined the initial yarn tail for a double yarn tail layer to cinch in between he top of the hat. Embellishment optional.

Tip: placing stitch markers regularly on edge stitches (every 20-50 stitches) can ensure mattress stitch joining is done evenly.

Mast Tension 0, Carriage tension 10. Yarn: Caron Cloud Cakes

CREATE MAIN PART OF HAT: Cast On 125 stitches with scrap and open cast on with project yarn. Knit 186 rows of plain knitting.

CREATE DOUBLE LAYER PART: Hang the first worked row of stitches on the current needles. Knit 1 row to join layers.

CREATE A SIMPLE TOP OF HAT GATHER: For this next row, transfer every second stitch to its neighbour needle (and move all empty needles out of work). Knit 3 rows.

TAKE PROJECT OFF THE MACHINE: With a six or inch yarn tail, cut your project yarn and with darning needle, thread long tail through open stitches to take each stitch off each needle.

FINISHING THE HAT: Cut a much longer yarn tail and use it to mattress stitch close the knitted panels. Once at the top of the hat again after seaming, reinforce the top gather with the needle, securing hidden knots and reinforcing the top of the hat. Thread in any loose yarn ends.

INSTAGRAM POSTS: one |


See all Blog Entries on the BLOG INDEX page

2023 Oct 29 - Checking Your Needles

Neil on one of the Facebook groups recently shared this fantastically helpful info:

Here is a very useful guide on checking your machine needles for a Japanese machine

The full needle test is as follows and hope this helps as most of the issues with a machine can be the needles

Remove the sponge bar and bring all the needles forward to the hold position and then pushing down at the latch end so the butt of the needles lifts up run you finger slowly across the who bed so every needle lifts up and returns down, any that dont drop bsck down or look bent remove these as they are faulty.

Then put all the remaining needles back and replace the sponge bar.

Now you bring all the needles forward into hold position and look for any that are not straight any needles you see that are not return to out of work position ready to remove them when this testing is finished

Then use a piece of paper to run across the machine and open every latch

Place your finger on the open latches and run it across the whole needle bed applying slight pressure to force the latch open.

Then using the paper close every latch, if a latch wont close or is stiff return in to the non working position ready to be removed.

Then push all the remaining good needles back only as far as the sinker posts, so you can then bring the fauly needles to the hold position, you can now put the good needles all the way back to non working position and remove the sponge bar again and now replace the faulty needles.

The two most important parts of any Japanese machine are the needles and the sponge bar, considering the cost of a needle why would you not replace faulty ones.

2023 Oct 25 - Tea Towel

The internet says Tea towels tend to vary from widths of 16-20 inches (40-51 cm) and lengths of 25-30 inches (63-76 cm).

So the plan for this is to create something of these approximate dimensions with turned hem (hung hem) ends (hung hems to be done later off the machine).

Plan: 45cm x 71cm - Using 45 needles on the left and right of zero point. Open cast on with scrap maybe 10 rows. Add project yarn with the carriage on the right and a tuck punch card. Unlock the punch card by lowering the left switch and move the carriage to the left and right. Lock the card and begin the pattern with enough rows for the desired dimensions.

This project used a total of 90 needles worked in tuck carriage tension 7, mast tension 5 with a total of 450 rows. Open cast on and off. Scrap and another created next.

Finished dishcloth after steaming is 39cm x 67cm

LEARNING MOMENT: Leaving both ends with unfinished ends (tuck right to the edges) made finishing a challenge. I am NOT pleased with the ends of the project (that I made two of - perhaps I’ll use them myself and more more - better). :)

OPTION 1) A better plan might be a row of non-patterning (just knitting) as a hung hem finish - maybe 20 rows for this project.

2) Patterning then two plain knitted rows then back to patterning with the last row or two plain knitting.

Upgraded Tea Towel Version

Carriage tension 10, mast tension 1

Using 45 needles on the left and right of zero point (90 needles). Open cast on with scrap and load the punch card (Tuck No. 3) so that its ready when time to use it. With scrap work maybe 30 rows.

HUNG HEM: Add two strands of project yarn with the carriage on the right and work a Hung Hem by working 10 rows then hang the beginning row. TIP: Some people work a larger stitch size on the edge of the hung hem turn to allow it to better sit flat - I haven’t really found this necessary. As I hang each stitch and work from the left to the right where the carriage is (and the start yarn tail), I pause first and thread the yarn tail into the work where it will be hidden.

MAIN BODY OF THE PROJECT: Now we begin the main body of the towel by reading the tuck punch card by lowering the left switch and move the carriage to the left and right. Lock the card and begin the pattern with enough rows for the desired dimensions. This project has a total of 300 rows.

HUNG HEM: Turning off the punch card (lowering the side levers and changing the carriage dial from Tuck back to regular knitting, work the same number of rows as done for the first HUNG HEM. Add scrap and continue making more towels as needed. The final hung hem will be manually finished off the machine with a darning needle.


SEE ALL BLOG ENTRIES ON THE BLOG INDEX PAGE


2023 Oct 24 - Dishcloth

The Zoom course I signed up for at Grossmont presented an upgraded short-row Pumpkin version and also a Anna Haferman Dishcloth pattern on YouTube.

The cotton on cone that I have is VERY thin (maybe laceweight) - a muted lime green and purple.

LEARNING MOMENTS - Initially I tried an E-Wrap with both yarn strands but when attempting row one I found them incredibly twisted so I redid the E-Wrap with only ONE strand when initially using the YC6 and considering one color then the other however this attempt also didn’t work out as the knitting was too fine to reliably knit on this standard gauge machine (and on one pass I’d made a mistake and ran the carriage without yarn causing all to fall). Thin cotton even when worked at tension 1.25 is still too fine. Restarted a couple more times before choosing dual yarn without swapping rows without the YC6 THIS TIME.

DISH CLOTH - what I did on my Singer Standard 4.5mm gauge machine with a Tuck Punch Card added to the machine:

I used thirty needles on the left and thirty on the right, bringing every second needle into work with the rest out of work. Carriage tension 7 with mast tension 4.

CAST ON: Run the carriage from the right to the left and then hung the cast on comb with some claw weights. I worked 5 rows of scrap yarn, found my 1x1 tuck punch card (photo) and after inserted the punch card into the machine, lowered the left punch card lever to read the card (moving the carriage from the right to the left and back). SEE PRIOR PUNCH CARD category on the FBL BLOG INDEX page for step by step punch card activation/settings.

PROJECT START: Carriage on the right, I added Ravel Cord from the Left to the Right and with the carriage still on the right I used both thin yarns (double strand) to do a Left to Right E-Wrap on the extended (all the way out) D position needles.

Some shared photos were taken during the initial knitting and may not represent the final approach to this project.

I found that at 30 needles the knitting is 10cm on the machine so I worked to create a project of the same length which needed 126 rows. I chose to make this much longer at 252 rows. This has inspired me to make tea towels for my mother in law for Christmas.


Extra shares

WHEN I TRIED USING THE YC6 I worked the carriage from the right to the left - as the carriage moves towards the YC6 I ensured the yarn used on the E-wrap and first row (and in the B position on the mast) is transferred to the B position while the next row/fiber to be used will be that in the A position on the yarn changer.

With the alternate yarn now in the carriage with the automatic change, work the row from left to right. The punch card is now read and will now be locked so raise the left lever up and change the settings on the carriage to Tuck with side levers also up for patterning.

TIP: When using the YC6 with just the two yarns it will automatically swap between A and B yarns with each fully worked row. :)

Ready to work (carriage on the right). At this point the row counter reads 2.


TRYING ANOTHER VERSION COMPLETELY:

Using 19 needles on the left and right (38 total needles) with the carriage at tension 9 and the cotton project yarn threaded into the machine (after working scrap yarn), on plain knitting work 10 rows and hang the hem. With the punch card No. 1 in the punch card reader and the carriage on the right, set the reader to read the card (left switch down), work left then right then lock the card. Set the carriage to tuck and raise the carriage side levers both up. Work Tuck for 50 rows. Switch to plain knitting for 10 rows, add extra yarn tail then switch to scrap yarn (to finish off the machine later).

Finished item is 19cm wide and 12cm long.

Perfect hand fit for dishes.

LEARNING POINTS: Next version to be at least 75 rows long as this tension/fiber shrunk slightly on use. :)


YOUTUBE VIDEO STEPS:

An actual pattern wasn’t presented in the class so I watched Anna’s video and wrote out what her steps were:

Recommend two color-ways with high contrast.

Waste yarn cast on - Bring out 20 on both sides of zero plus ONE on one side - need an add count. Ensure only every second needle is in work with the remaining out of work. Run the carriage from right to left and hang your cast on comb with the hooks facing you. Then bring all the out of work needles within the range into work. Work a couple rows and cut the waste yarn - carriage on the right.

Anna says her book says to hang the comb hooks away but she found it sat better with the claw weight facing this way.

Example used pink and white cotton yarn. Bring all working needles all the way out into D postion and white cotton ewrap all the way across with the yarn tail on the far left. Put the settings on the carriage into HOLD. (On the singer the Russell levers need to be in ONE position on the left and right so that the extended D position needles do not get knitted).

  1. Push all working needles into B then every second into D position. With the carriage on the right work two rows. Park the white worked yarn out of the carriage.

  2. Now push all stiches in D (all the way out) to the B position and those that were in the B position are pushed all the way out into D position. Knit one row to the left - the second to last needle knitted - manually take the yarn path around the unknitted last needle - from under on the right to the left and over) and then work the last row to the right. Park the Pink worked yarn out of the carriage.

Now repeat STEP 2 swapping yarns and working the two rows.

Recommended rows: 120 rows. HINT: recognizing what last happened helps when loosing one’s point in the yarn change. If there are two stands of one color you know its time to switch to the other color.

When the final contrast yarn rows is knitted cut that yarn (pink). Do the yarn swap. Now for a back stitch bind off using a long piece of yarn.

Into the front of the first stitch then into the back of the second stitch. Then go into the first one then to the third one.

BETTER BACK STITCH BIND OFF - By Love your Knitting Machine |

Darning needle - Make your yarn three times the length of your project.

Bring needles out slightly making it easier to see where you need to work the needle.

  1. Run needle from first stitch on the far right to the second.

  2. Run that same needle back into the first stitch, behind the second and over to the third from the right and through.

  3. Run the needle into the second stitch from the right, behind the third and over to the fourth from the right and through.

  4. Repeat.

  5. How to end the bind off: WHERE ARE WE? We are four machine needles from the far left we go through this needle, behind the third needle from the left and into the second machine needle on the left. Then run the darning needle into the third machine needle from the left and behind the second machine needle from the left and over to the first needle on the left. Final pass goes from the second machine needle from the left then through the last and furthest left machine needle holding stitches. Run the darning needle again into that last stitch. HOW TO REMOVE FROM MACHINE: Extend all working needles into D position. Gently pull knitting off machine - will go over closed latches.

*Ensure when going through the stitches on the machine needle that you are on top of all yarn bars behind the work.


Pattern can be used for anything.


The photos below are my testing and findings prior to working the item I wanted to keep.


SEE ALL BLOG ENTRIES ON THE BLOG INDEX PAGE


2023 Oct 21 - Shrug (or Hug) Reversible

I saw a Bat bit of knitting and loved what I saw so I worked out what the punch card might look like. Then the idea of this was born. See my punch card collection.

I will create a reversible item using two panels of the same number of needles/stitches. One panel will be Halloween themed and the other panel Christmas themed.


The first panel:

I open cast on with 120 stitches using scrap yarn then setup the punch card with the mast

Machine settings: Tension 1 on the overhead mast, carriage tension dial at 1.25.

Punch card review: Dark Blue acrylic yarn in yarn position 1 (non-punched holes) and Grey acrylic yarn in yarn position 2 (punched holes). The result is a grey bat with blue background.

I worked 920 rows in Fair-Isle with scrap before and after this project.

The second panel:

With a bit of scrap between this project and the last I will then switch to the project yarn of this new panel.


Machine settings: Tension 1 on the overhead mast, carriage tension dial at 1.25.

Punch card review: Black acrylic yarn in yarn position 1 (non-punched holes) and Mustard Yellow acrylic yarn in yarn position 2 (punched holes). The result is a background of black with golden yellow flower outlines.

The plan:

First confirm that both panels are the same length/width. These two panels folded are 106cm (x2) long and 34cm wide.

Summary of project: I will create the garment using one of the panels by joining a long edge a minimum 6 inches from both ends (room for arms). Then with the second panel I did the same. Finally I will seam the two projects together so that the purl sides are facing (will hid the floats).

Overview: Each panel is a long rectangle folded in half so that the joins are mid project. One long side is joined with space open for human arms. This version is still in progress.

Each panel has ended up being at least a hand-width shorter than the desired panel width (after steaming) so now I am adding a all black worked segment at least two hand-widths wide (and a bit more).

Nov 19, 2023 Today I am back on this project to accomplish the black panel addition.

BLACK ADDENDUM PANEL: Upper mast tension 1, carriage tension 1.25 using plain knitting. Scrap open cast on using 45 right and 45 left needles (90 needles). Switch to black thin acrylic yarn and then I worked 1200 rows after approximating the length I needed comparing to the two prior panels. Using the sewing machine I sewed one long edge of the black panel over one long edge of the bat panel then snowflake panel. All panels are now assembled to resemble one end joined rectangle, the black edge is the front outer edge, one grey/blue bat panel and one gold/black snowflake panel. I marked the back edge 11 inches / 28 cm from both back edges - these will be the arm holes later. Between the stitch markers I will panel join each panel separately so this is the next step using mattress stitch on each color panel separately.

First I will finish the arm holes using the sewing machine. Now with both arm holes done I used clips to hold the knit sides together of the bat panel long edges between each arm hole and used the sewing machine (removing the temporary clips). Then I put the sewing machine aside and used those same clips to align the gold/black snowflake long edge between the arm holes. Now I threaded a darning needle with black acrylic double strand yarn and hand mattress stitch joined the edges together.

This project is done! I will measure its dimensions when I can. The black panel looks intentional and awesome!

Total garment weight: 399grams.

Laid as it sits this total vertical width top and bottom comes to 44 cm (x 2). The horizontal length left and right is 109 cm (full panel x2). The inside snowflake panel is on the garment inside and therefore matches these finished dimensions.

See the FIRST version I made April 9, 2023


INSTAGRAM: ONE | TWO | THREE | FOUR |


SEE ALL BLOG ENTRIES ON THE BLOG INDEX PAGE


2023 Oct 17 - Pumpkin

The Zoom course I signed up for at Grossmont presented a Pumpkin project by Anna Haferman - Anna’s YouTube video: LK150 (Mid-gauge) YouTube Video - This blog entry is my explorations using my SK700 4.5mm Standard Gauge Flat Bed. I found the pattern presented as a bit hard to decipher on my own in advance to the class so I used the supplied reference video linked above to work this project (prior to the actual zoom class).

Select 80 needles (40 on both sides of zero) and then push every second needle back into A position (out of work. Open cast on, add cast on comb/weight and then bring the out of work needles into work so that a complete couple rows in scrap are worked with all needles used.

With the Carriage on the Right - prep the needle bed from the right side:

7 - 12 - EN - 12 - EN - 12 - EN - 12 - EN - 12 - EN - 8

EN=Extended Needle into D postion

NOTE: When the Russel levers are in the II position they knit needles in the D position. When they are in the I position they HOLD any needles in D position (meaning they don’t knit them). This pattern is going to manual tuck stitch the pumpkin seams by toggling the Russel levers in an easy pattern.

The pumpkin is assembled. I will need to make a stem and maybe leaves but that won’t happen anytime soon. :)


SEE ALL BLOG ENTRIES ON THE BLOG INDEX PAGE

2023 Oct 10 - What Machine is right for you?

Often a question we see online for those interested in purchasing a flat bed is for machine recommendations however the first question really should be what fiber will I most often be wanting to work with so Incan choose a gauge machine that works best.

I started my machine knitting journey with a circular sock knitting machine which works best with light to fingering weight sock yarn - therefore this is the fiber I have the most of.

Therefore for me and what I will want to make - the standard gauge machines work best.

See this fantastic site for a guide on what yarn weights to use

I was extremely fortunate in being given a stash of supplies along with a flat bed - even though after machine servicing it was deemed a write off - all the bits were still very usable so I found another machine online and was lucky to have it arrive in one piece undamaged. See the stash.

So once you’ve decided what gauge machine you need to consider whether you wish a plain Jane model that is completely manual or one with accessories like a punch card and then again whether you want an electric model.

Then once you’ve given yourself a short list consider if your game for the risk of a used machine (not what it’s said to be, poorly shipped etc) or a new machine.

Used isn’t bad and either way you go you will need to consider becoming familiar with care and machine part names etc.

My Singer SK700 has long since been discontinued however it was made in 1986 and isn’t electronic so other than maintenance-the real issue is plastic durability through time.

In my opinion why get a super simple basic manually run machine when you can get one with a few options you can learn to use later?


SEE ALL BLOG ENTRIES ON THE BLOG INDEX PAGE

2023 Oct 5 - Knitting with the Ribbing Attachment

These notes follow this VIDEO. Other sections of information can be found in the KNIT CONTOUR blog entry and the TENSION SWATCH blog entry.

(TIME MARK 50:30) Demo noted if using the ribber to create the Knit Contour sweater using the ribber (not the manually manipulated rib that was demonstrated). Knit ONE Purl ONE

Set the half pitch lever to P for Knit ONE Purl ONE. And the Swing Indicator to P5

First push the required number of needles to the D position on the knitting bed and then push every other needle back to the A position. Next push the ribber needles to the D position, arranging them so that they alternate with the knitters needles. Set both carriage set dials to the zero stitch setting. And then move the carriages once or twice to align the needles into the B position. Making sure to complete the movement with the carriage on the left side. Next thread the yarn through the yarn feeder between the two carriages. Temporarily secure the yarn tail as needed under the machine. Knit one row from left to right. Using the ribber cast on comb remove the wire and hold it from under the machine up into the needles - add the wire back into the comb to hang it there. Add weights. Now set both carriages according to the instructions in the manual and knit three rows:

(Without explaining it): visual demo showed ribber carriage left front lever beside dial in the up position with carriage on right moving to the left. On the left the main carriage cam ring was moved to SLIP (from knitting) and the carriage was moved from left to right. The cam ring was moved from SLIP back to knitting with the carriage moved from the right to the left.

With this cast on is complete.

Reset the carriages. (Without explaining it the front left lever beside the ribber dial was lowered and the stitch setting adjusted). Now you can begin knitting in Knit ONE Purl ONE rib.

You never have to cast on with waste yarn and you never have to reform stitches by hand.

DEMO: If we were wanting to knit the back of the demo sweater noted in the KNIT CONTOUR blog entry we of course would need to start with a tension swatch.

The demo stitch and row settings measured should be the same stitch scales. The row numbers will be reflected in the swatch. The next step is to arrange the needed needles for the K1P1 rib followed by casting on the main yarn and knitting the required number of rows for the welt. (TIME MARK 55:43) Using the double eye transfer needle transfer each ribber stitch to the corresponding knitting needle on the main bed.

Release the ribber carriage from the ribber arm using the switch on the metal component near the yarn feeder between both carriages. The ribber carriage will lean towards you. By depressing the drop levers twice that hold the ribber bed beneath the ribber, the ribber will lower the ribber to the lowest position. Then remove the weights and cast on comb from the fabric. Next we exchange the ribber arm on the main carriage back to the main carriage sinker plate. Thread the carriage. Reset the row number and stitch dial.


SEE ALL BLOG ENTRIES ON THE BLOG INDEX PAGE

2023 Oct 5 - Baseline Setup

This entry is to help identify all the basic settings needed to successful working on the machine - extremely helpful as most techniques just say “as per the manual” without clarification on a lever or button orientation sometime

The first thing I recommend is to use a label maker and name all the parts on your machine because simply calling something a thingamajig isn’t going to cut it if you need to ask a question online. My first blog entry covered all the accessories that my setup came with.

Settings: CAM LEVER: stockinet/Cast on (upside down V) | SIDE LEVERS on stockinet (circle - down position) | RUSSELL LEVERS: 2 | STITCH DIAL/SIZE: 3 | WEAVING BRUSHES at circle setting (up-not weaving). | | INTARSIA LEVERS: 1 | TENSION GUIDE: 1 (higher the number the tighter the tension) | STITCH DIAL: 3

Question - on this video - after the cast on they recommend raising the side levers to knit stockinette (which is not my understanding prior to seeing the video

I note all the carriage settings on the CAST ON page

Lace carriage and sinker plate - these parts only work together like this - the unpainted metal part does not attach on any other carriage. The underside of this sinker place controls the needle movement without careful handling the two screws on the underside edge can come out of alignment and causing failure of the needle movement. However there are YouTube maintenance videos - my original lace carriage needs servicing.

SEE ALL BLOG ENTRIES ON THE BLOG INDEX PAGE

2023 Oct 4 - Knit Contour

This post is to help provide a quick look up on this topic going forward. I covered using the Knit Contour (Knit Radar) when using it to create the Cat Hammock covers and the Teddy Bear.

BLOG ENTRIES

2023 May 14 - Cat Hammock

2023 May 22 - Teddy Bear

I am reviewing this topic today while watching this YouTube VIDEO. (12:17 time mark).

The video reviews choosing a pattern paper and setting the knit contour - Choose your favorite style from the 17 different styles. They chose the pullover pattern and chose size C.

Measure yourself. Should your measurements be significantly different you can adjust the pattern.

These instructions use the tension swatch noted earlier. Example 30 stitches and 41 rows

Set up the knit contour by setting the correct reference ruler into the machine.


THREE DIALS TO SET: Set the far left dial to the knit contour to reflect the 41 rows. Depending on whether the pattern is a 1/4 or 1/2 scale (this example is using the half scale) - Ensure the selector above the middle dial is set to the pattern scale (EXAMPLE IS 1/2 scale). The middle dial will help feed in the pattern into the machine. Feed the pattern facing you so that the center pattern vertical line is aligned into the paper feeder. Sure you’ve aligned 0 to the center line of the pattern.


KNITTING THE BACK (14:52 time mark) - Back Front, sleeves, neck band. The ribbing waist “the welt” is knitting afterwards.

Knit 1 Purl 1 rib. The ruler reference tells us how many to use. Start with waste yarn. Knit one row of RAVEL CORD before project yarn. When knitting in WASTE YARN - be sure to lock the paper pattern feeder by turning the far right dial to the 3 o’clock position. When resuming the garment return the setting to reflect the gauge found (this example 30). If working the sweater in stockinette then set side levers up. Knit and note pattern paper movement. Knit from waist to arm hold beginning. Armholes are created by decreasing.

Should you need to decrease more than two stitches you can ONLY do this on the carriage side. (TIME MARK 17:46) METHOD: Transfer tool - two stitches together. Push empty needle to A position. Then bring needle holding two stitches into D position and using yarn path to carriage, wrap into latch from right on top and create manual stitch through other two stitches held on that same needle. Repeat as needed.

(TIME MARK 19:13) When knitting decreases ONE stitch on both sides - transfer outside needle to one in. Be sure to hang claw weight to reduce tight knitting. Bringing decreased stitch to the D position helps things stay in place.

(TIME MARK 20:05) SHAPING THE SWEATER SHOULDERS requires partial knitting while decreasing the stiches while following the contour line up to the back edge. USE this method when the decrease is MORE than the total number of rows knitted. Realize the number of decrease needed. (TIME MARK 20:22) Push the required number of decrease needles to the D position on the OPPOSITE SIDE of the carriage (so in this example here five needles are out completely in D position - on the LEFT - PICTURE). Set BOTH RUSSELL LEVERS TO ONE (PICTURE). Knit one row moving the carriage from the right to left. (TIME MARK 20:46) now on the left the final needles (in this example the final five are in D position still) the last needle knitted was the 6th from the left and the yarn path sits on top of all the left 5 D position needles - redirect yarn path under the far right extended needle and then up and over the far left four D position needles (PICTURE). Prevents the possibility of a hole developing on the left decrease. The carriage is still on the left, now extend the needed number of needles on the right (5 needles moved into D position). Knit from left to right. This completes the first step with partial knitting. Redirect yarn path on the right like we did on the left. Continue decreasing as indicated. Remember to hang the claw weights.

We don’t extend needles into the D position on the side where the carriage is because when the row is knitted there will be a unknitted yarn path across the extended needles.

(TIME MARK 22:02) From the back neckline knit the right and left shoulders separately. If you have the carriage on the right side then knit that side first. To do this move the left needles to the D position and hold the stitches in place to knit the right. While partial knitting the shoulder shape the back neckline by following the contour line, shaping the armhole. After you have finished the right shoulder push the needles for the section to the C position and knit 5-6 rows with waste yarn. Remove weight and section from the machine. Return empty needles to the A position. Now return the pattern paper to the beginning of the back neckline. (TIME MARK 23:55) Reset the change dial (far right dial) to the STOP setting (3 o’clock setting). Put your yarn mark to center zero. Push the needles for the back neckline center straight section to the C position and work 5-6 rows waste yarn. Again remove that section from the machine and push the empty needles back to the A position. (TIME MARK 24:16) Far right change dial back to original setting - knit the left should exactly the same with shaping reversed. Now the back is all completed except for the welt. The welt will be knitted in knit 1 purl one later on.


KNITTING THE FRONT (25:01 time mark) The front of the sweater can now be knitted with stockinette and fair-isle. With fair-isle we use two different yarns at the same time. First select one of the standard machine punch cards. Example uses punch card No. 10. Select a contrast yarn. Start with the punch card loaded in the A alignment. Insert punch card and connect table. Left punch card setting is in the down position to memorize the pattern. (Memorizing is noted with side levers up as we are working in stockinette). CARRIAGE is on the LEFT - move to the right to memorize the pattern. Set carriage for fair-isle, release card (lift the left punch card setting from down to up). Open the yarn holder - change to the white yarn in A feeder and blue yarn in B feeder.

If you have problems getting a proper end stitch - move the end needle on the carriage side to the D position before knitting the row - with the needle out and the cam set to fair-isle only the yarn in feeder two will be knitted. Make sure you’ve fully moved the carriage so each row is noted. (TIME MARK: 27:33). Punch card tip: perforated holes control yarn feeder two, non-perforated holes controlled by yarn feeder one.

We first knit a swatch with 60 rows of fair-isle and a few rows of stockinette then remove from machine to get an idea of the size. Begin by marking your starting pattern position on the paper pattern. on the front. Since the tension gauge is nearly identical for fair-isle as stockinette - same settings.

If using tuck, slip, punch lace or others you must take a separate tension gauge.

Set and lock the paper at the front above the line of the welt just like we did at the back. Now set and lock punch card at row one. Knit to pattern position as we did on the back. Then work fair-isle as planned. After placing yarn in feeders knit fair-isle to the arm holes shaping. To shape the arm hole, decrease the stitches on both sides of the fabric by following the contour line. when decreasing two or more stitches in fair-isle, you must take the end stitch and transfer to the adjacent needle, put the needle into the D position and then (TIME MARK 29) feed the yarn path into the latch to manually make a stitch (two together) continue. After pattern knitting remove both yarns from the yarn feeder, feed the blue yarn as the main yarn and knit up to the front neckline in stockinette. We must knit the right and left sides of the necklines separately. The front, unlike the back must be shaped in sections therefore we must use a different method of holding stitches - the reason for this is that there are two many rows to knit from the beginning of the neckline to the shoulder sections - so the fabric may become askew or even worse - ruined. To avoid this we must remove the sections to be held from the machines with waste knitting and then continue knitting on the carriage side. Your yarn mark should be at the center of the front neckline. Now following the contour line decrease stitches to shape the front neckline and do partial knitting to shape the shoulder. After you’ve finished the first section, knit 5-6 rows of waste yarn and then remove the section from the machine. The next step is to return the pattern paper (TIME MARK 31:41) to the beginning of the front neckline and take the last row of stitches from the other front section being held in place with the waste yarn and load those stitches back onto the needles. When you do this ensure to push the needles with stitches to the B position to stop stitches from falling out. Once all needles are loaded, remove the waste yarn. We knit this section in the same manner except our shaping is done in reverse. This completes the front of our pullover. The welt will be knitted in K2P1 rib later on.

Knitting the sleeves - (Time mark: 32:43) - Now that we have the front and back done we will start with the right sleeve which is knitted in stockinette followed by the left sleeve that is knitted with stockinette and fair-isle. First set the pattern paper for the sleeve into the knit contour and lock it at the line above the cuff. 5-6 rows waste knitting then switch to main yarn again following contour line but increase the stitches to shape the underarm. We will use a fully fashioned increasing method to shape the under arm. This method makes joining easier by blind stitch. Fully fashioned takes the two stitch prong transfer tool and moves the outside two stitches out one needle and a purl bump is hung on the empty needle. The sleeve cap (shoulder top area) is created by decreasing following the contour line. Put your yarn mark at the center of the sleeve cap using contrast yarn (even if not on a stich but a stitch bar). Then cast off the remaining stitches using the same method of transferring on stitch to the neighbor and using the yarn path to make a stitch going through both stitches on that one needle. Remove the cast off piece from the machine. Now we mark our starting pattern position on the pattern sleeve paper page for pattern knitting of the left sleeve. Set and lock punch card at row one. Set the pattern paper and knit up to the pattern knitting position as you did for the right sleeve. Knit fair-isle as you did the front. Once again follow the contour line and shape the contour arm with the fully fashioned increase method. We then shape the sleeve cap by decreasing in the same manner as we did for the other arm hole. Return to stockinette and finish knitting the piece shape. Now both sleeves are done. The cuffs like the welts will be knitted later.


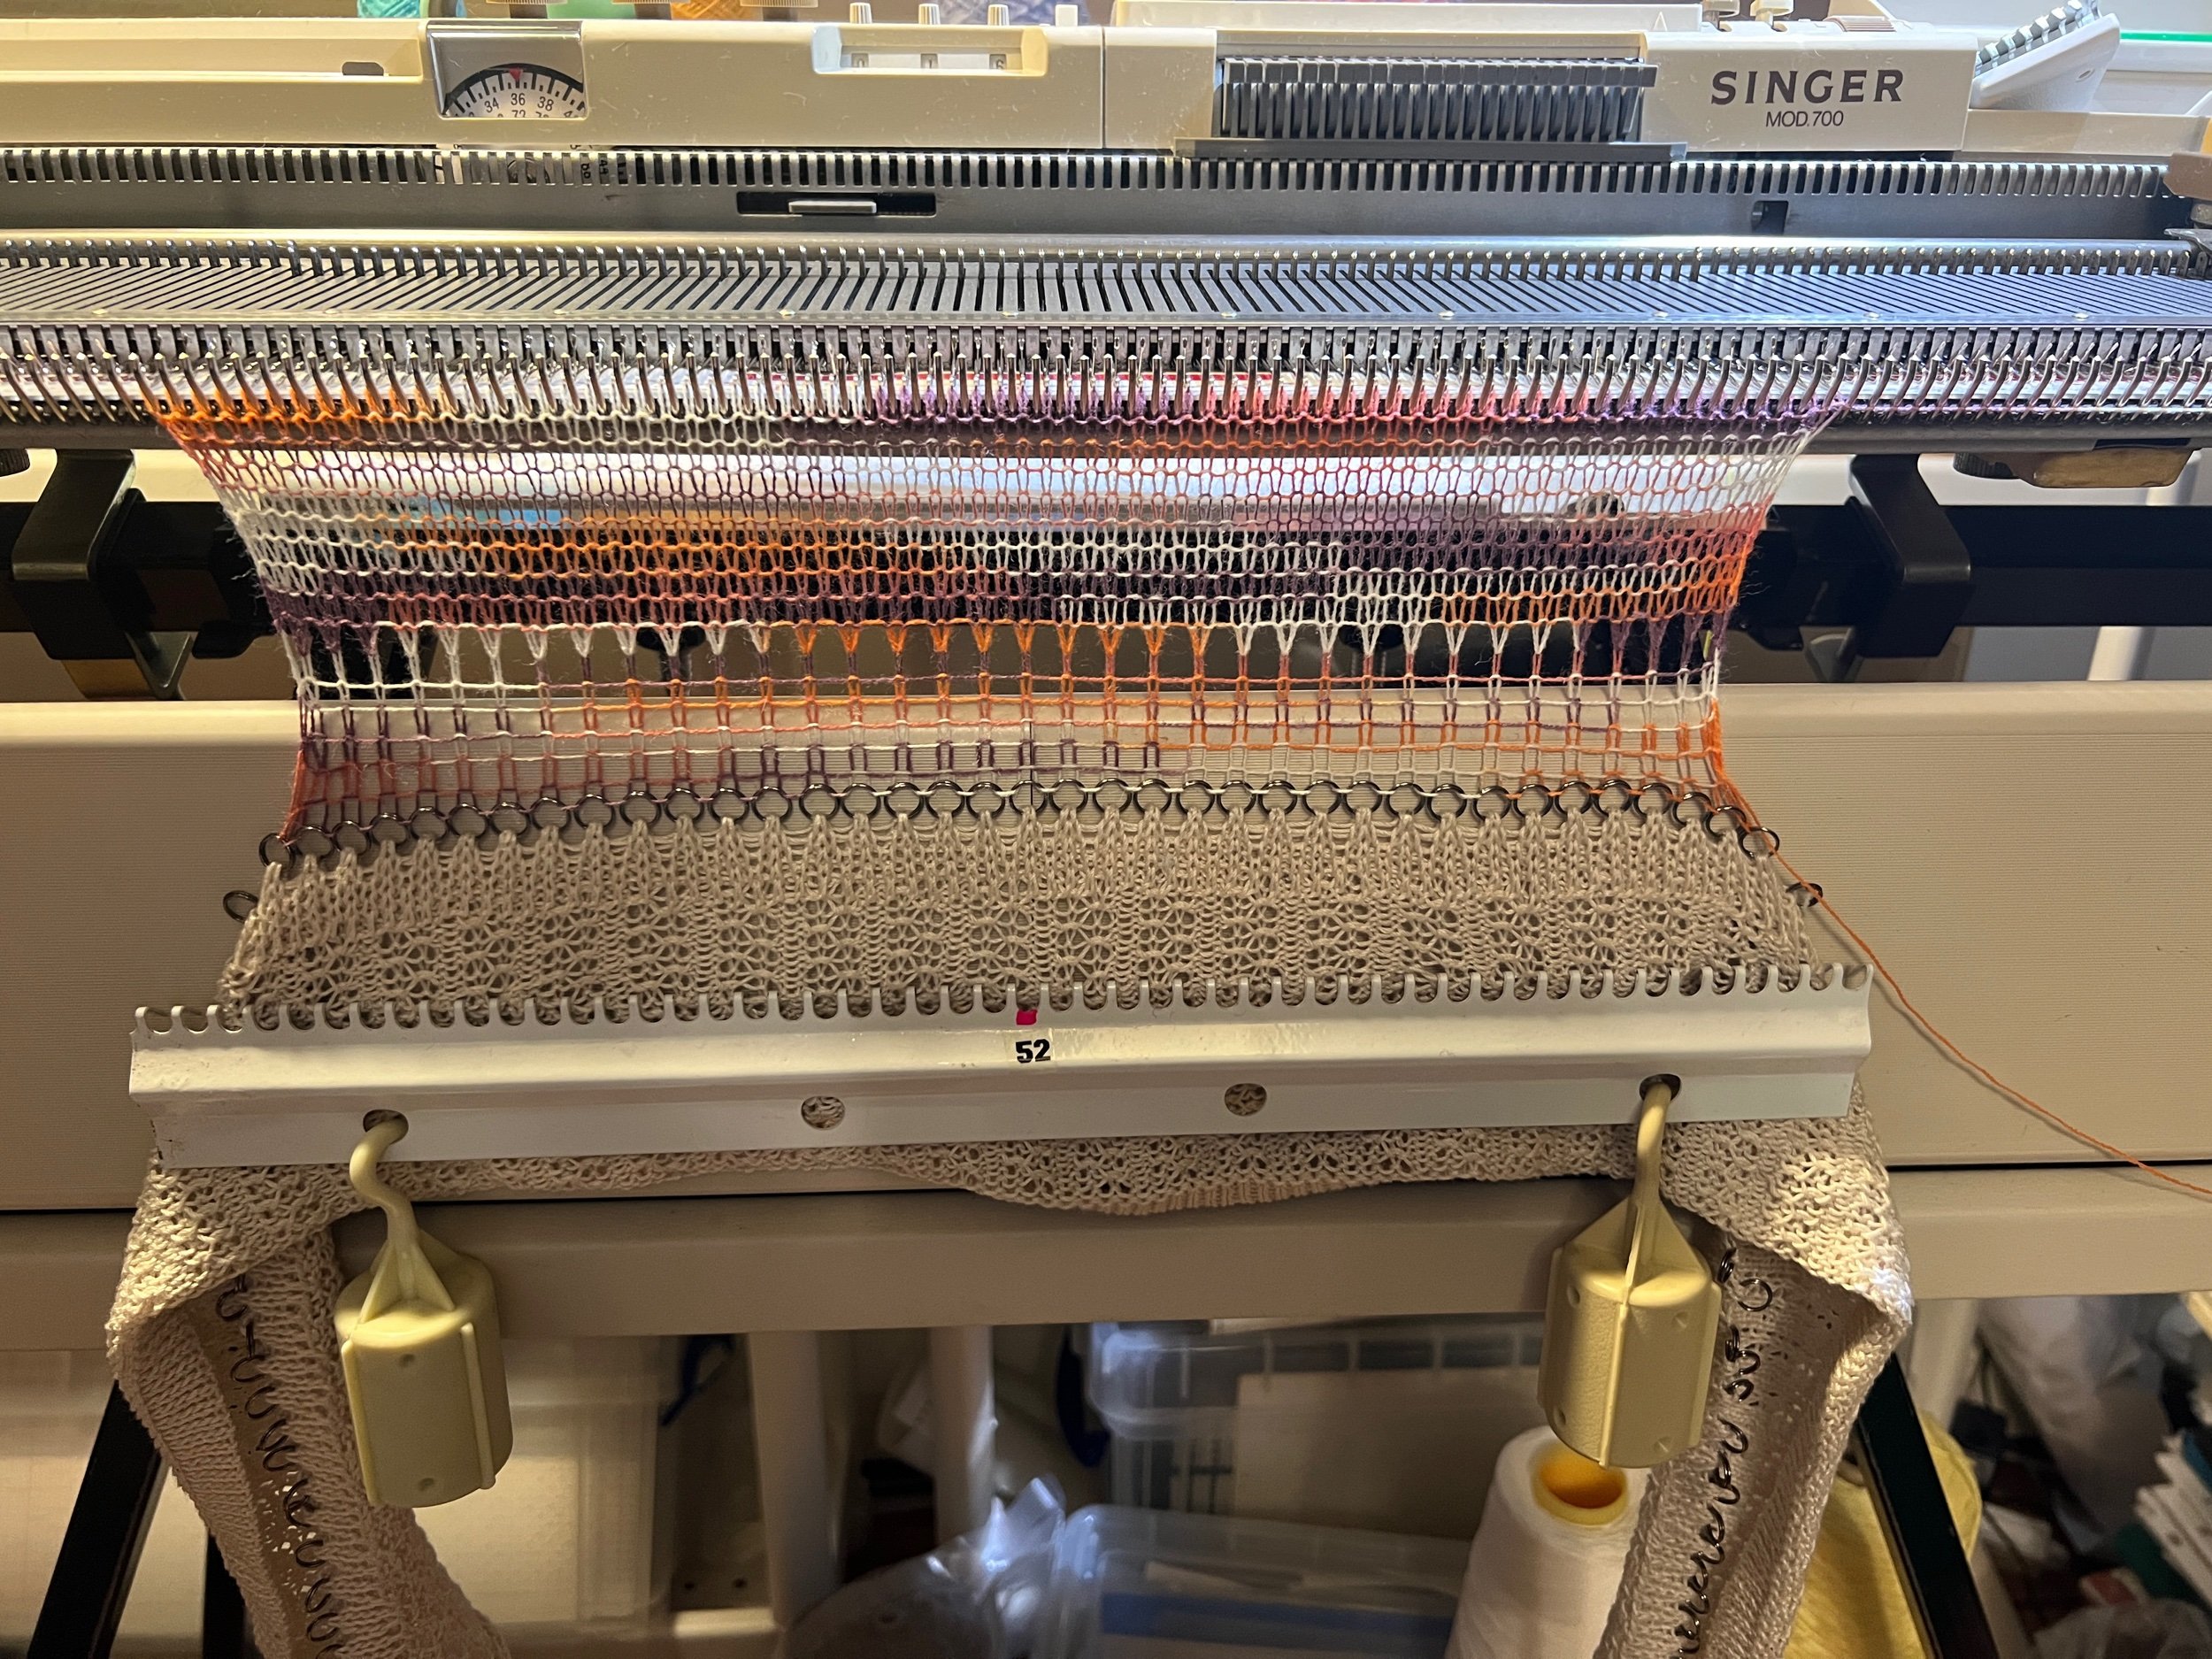
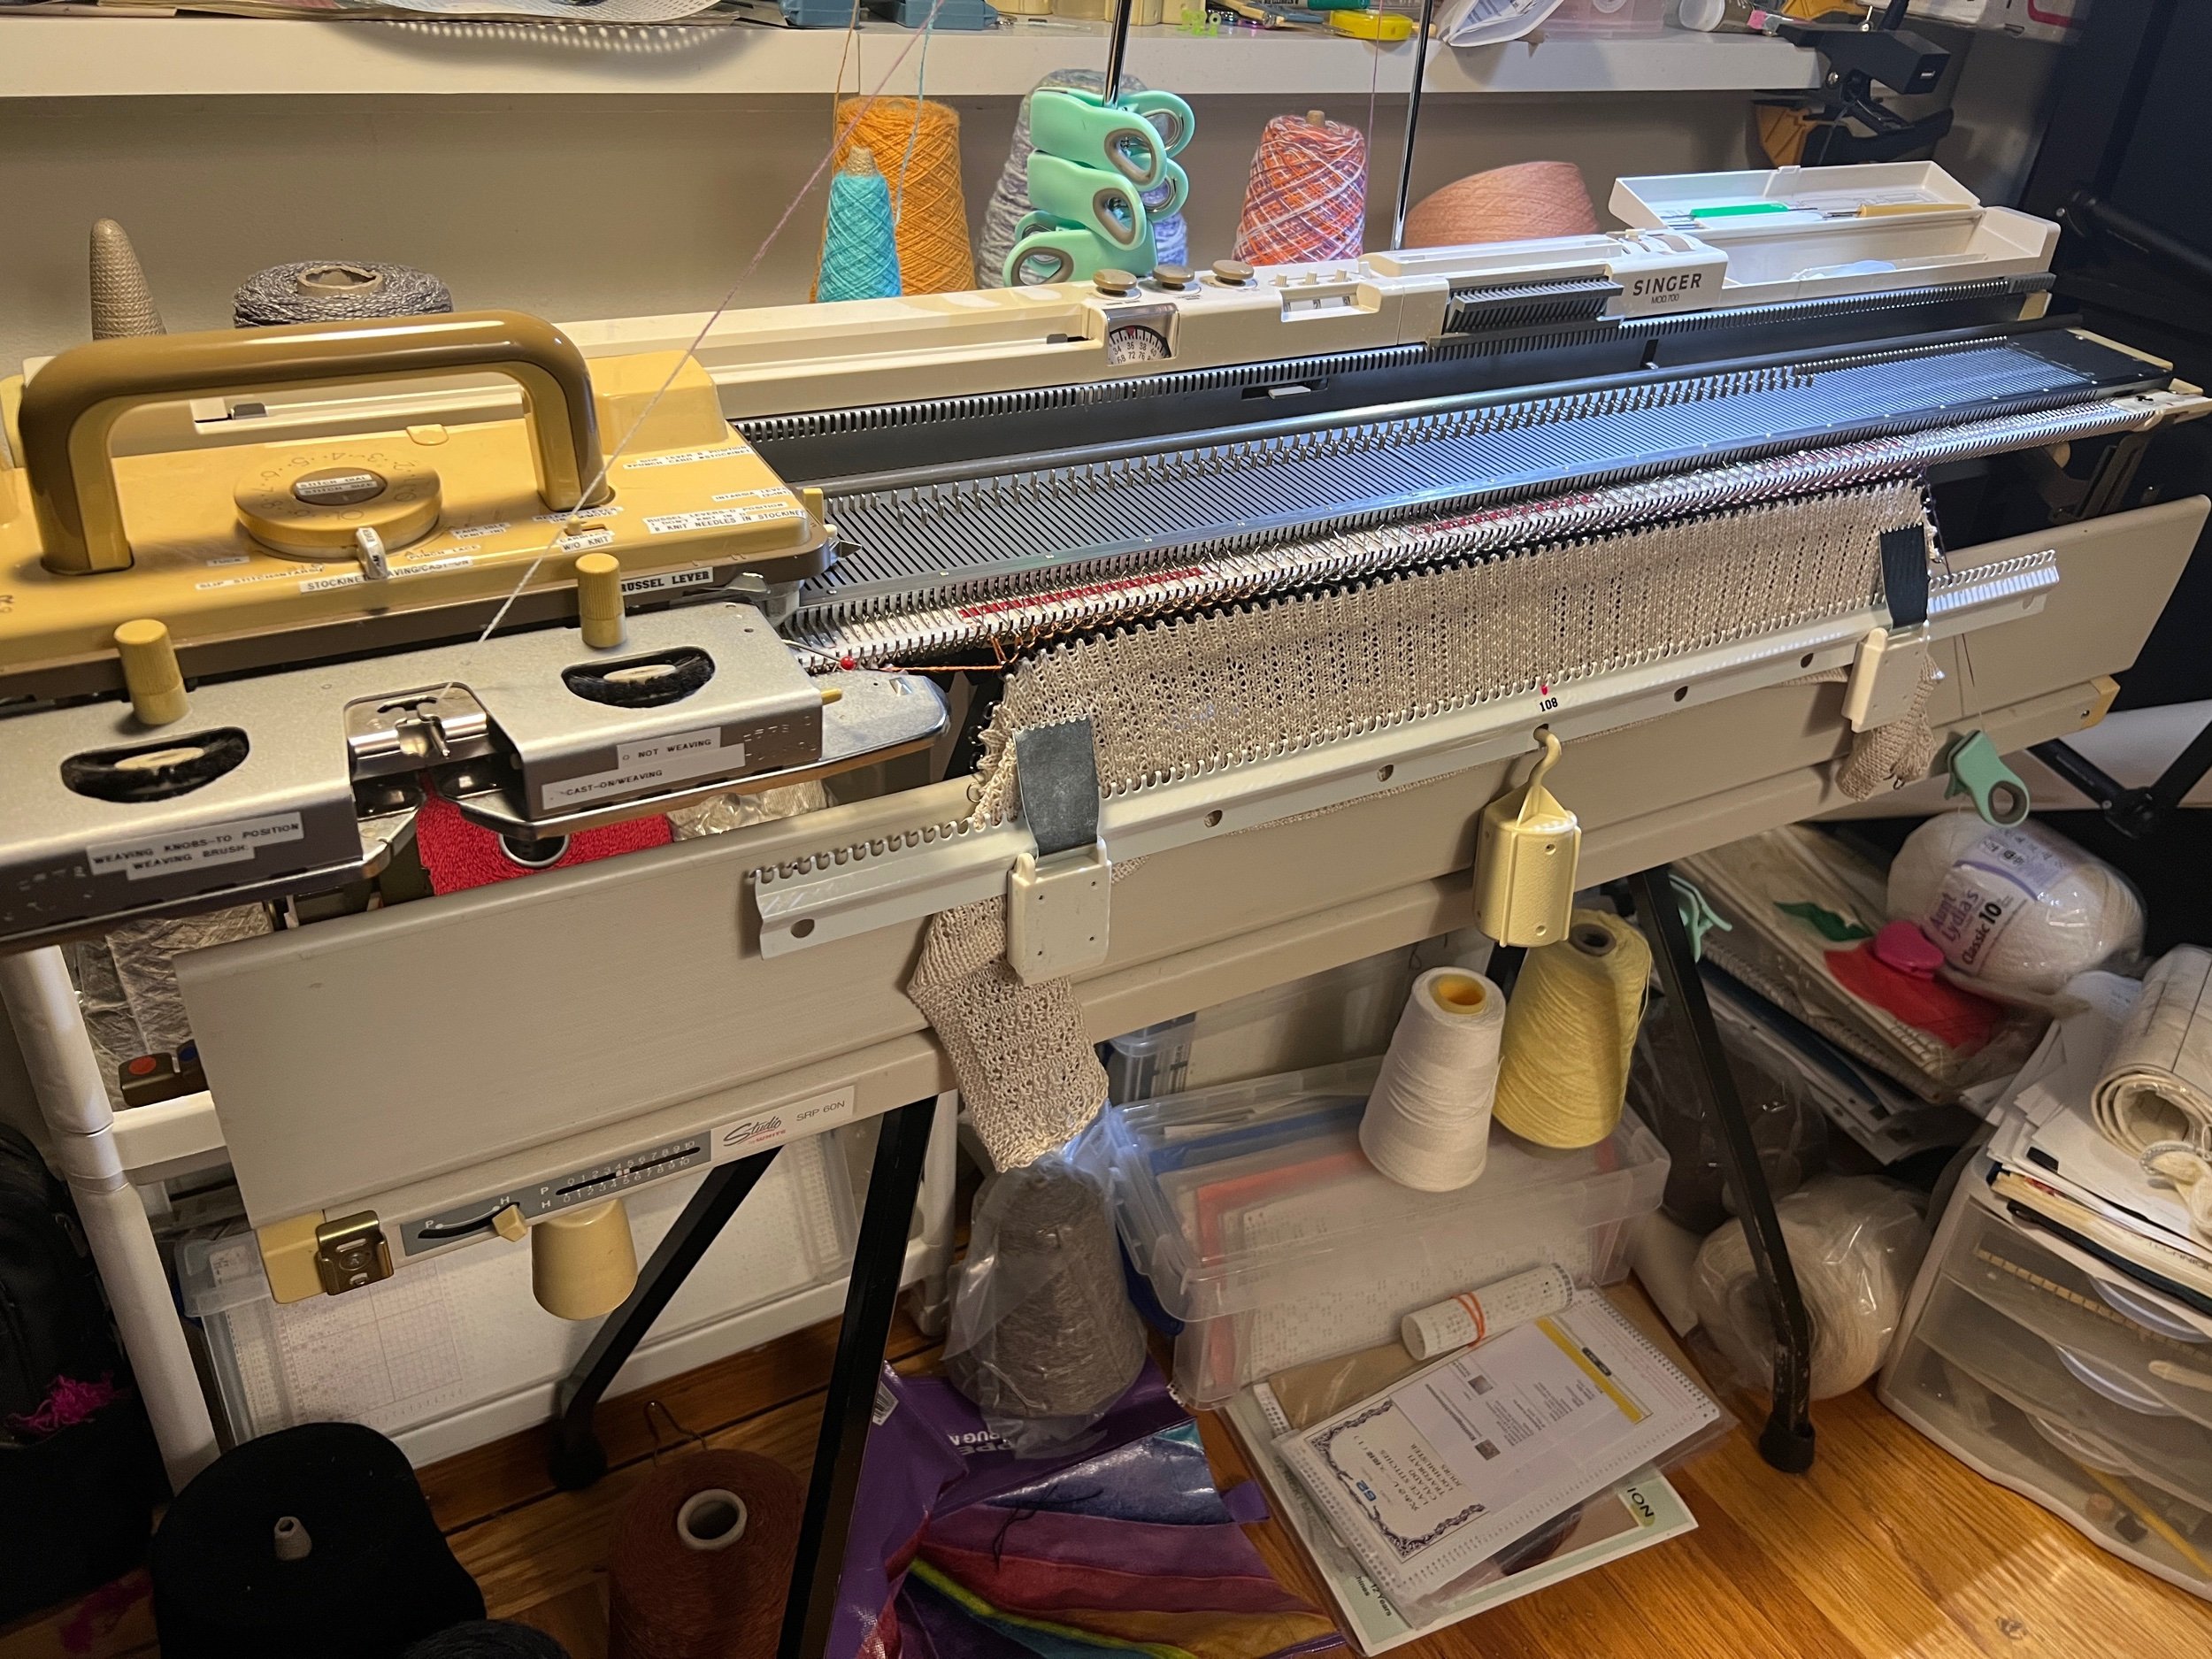
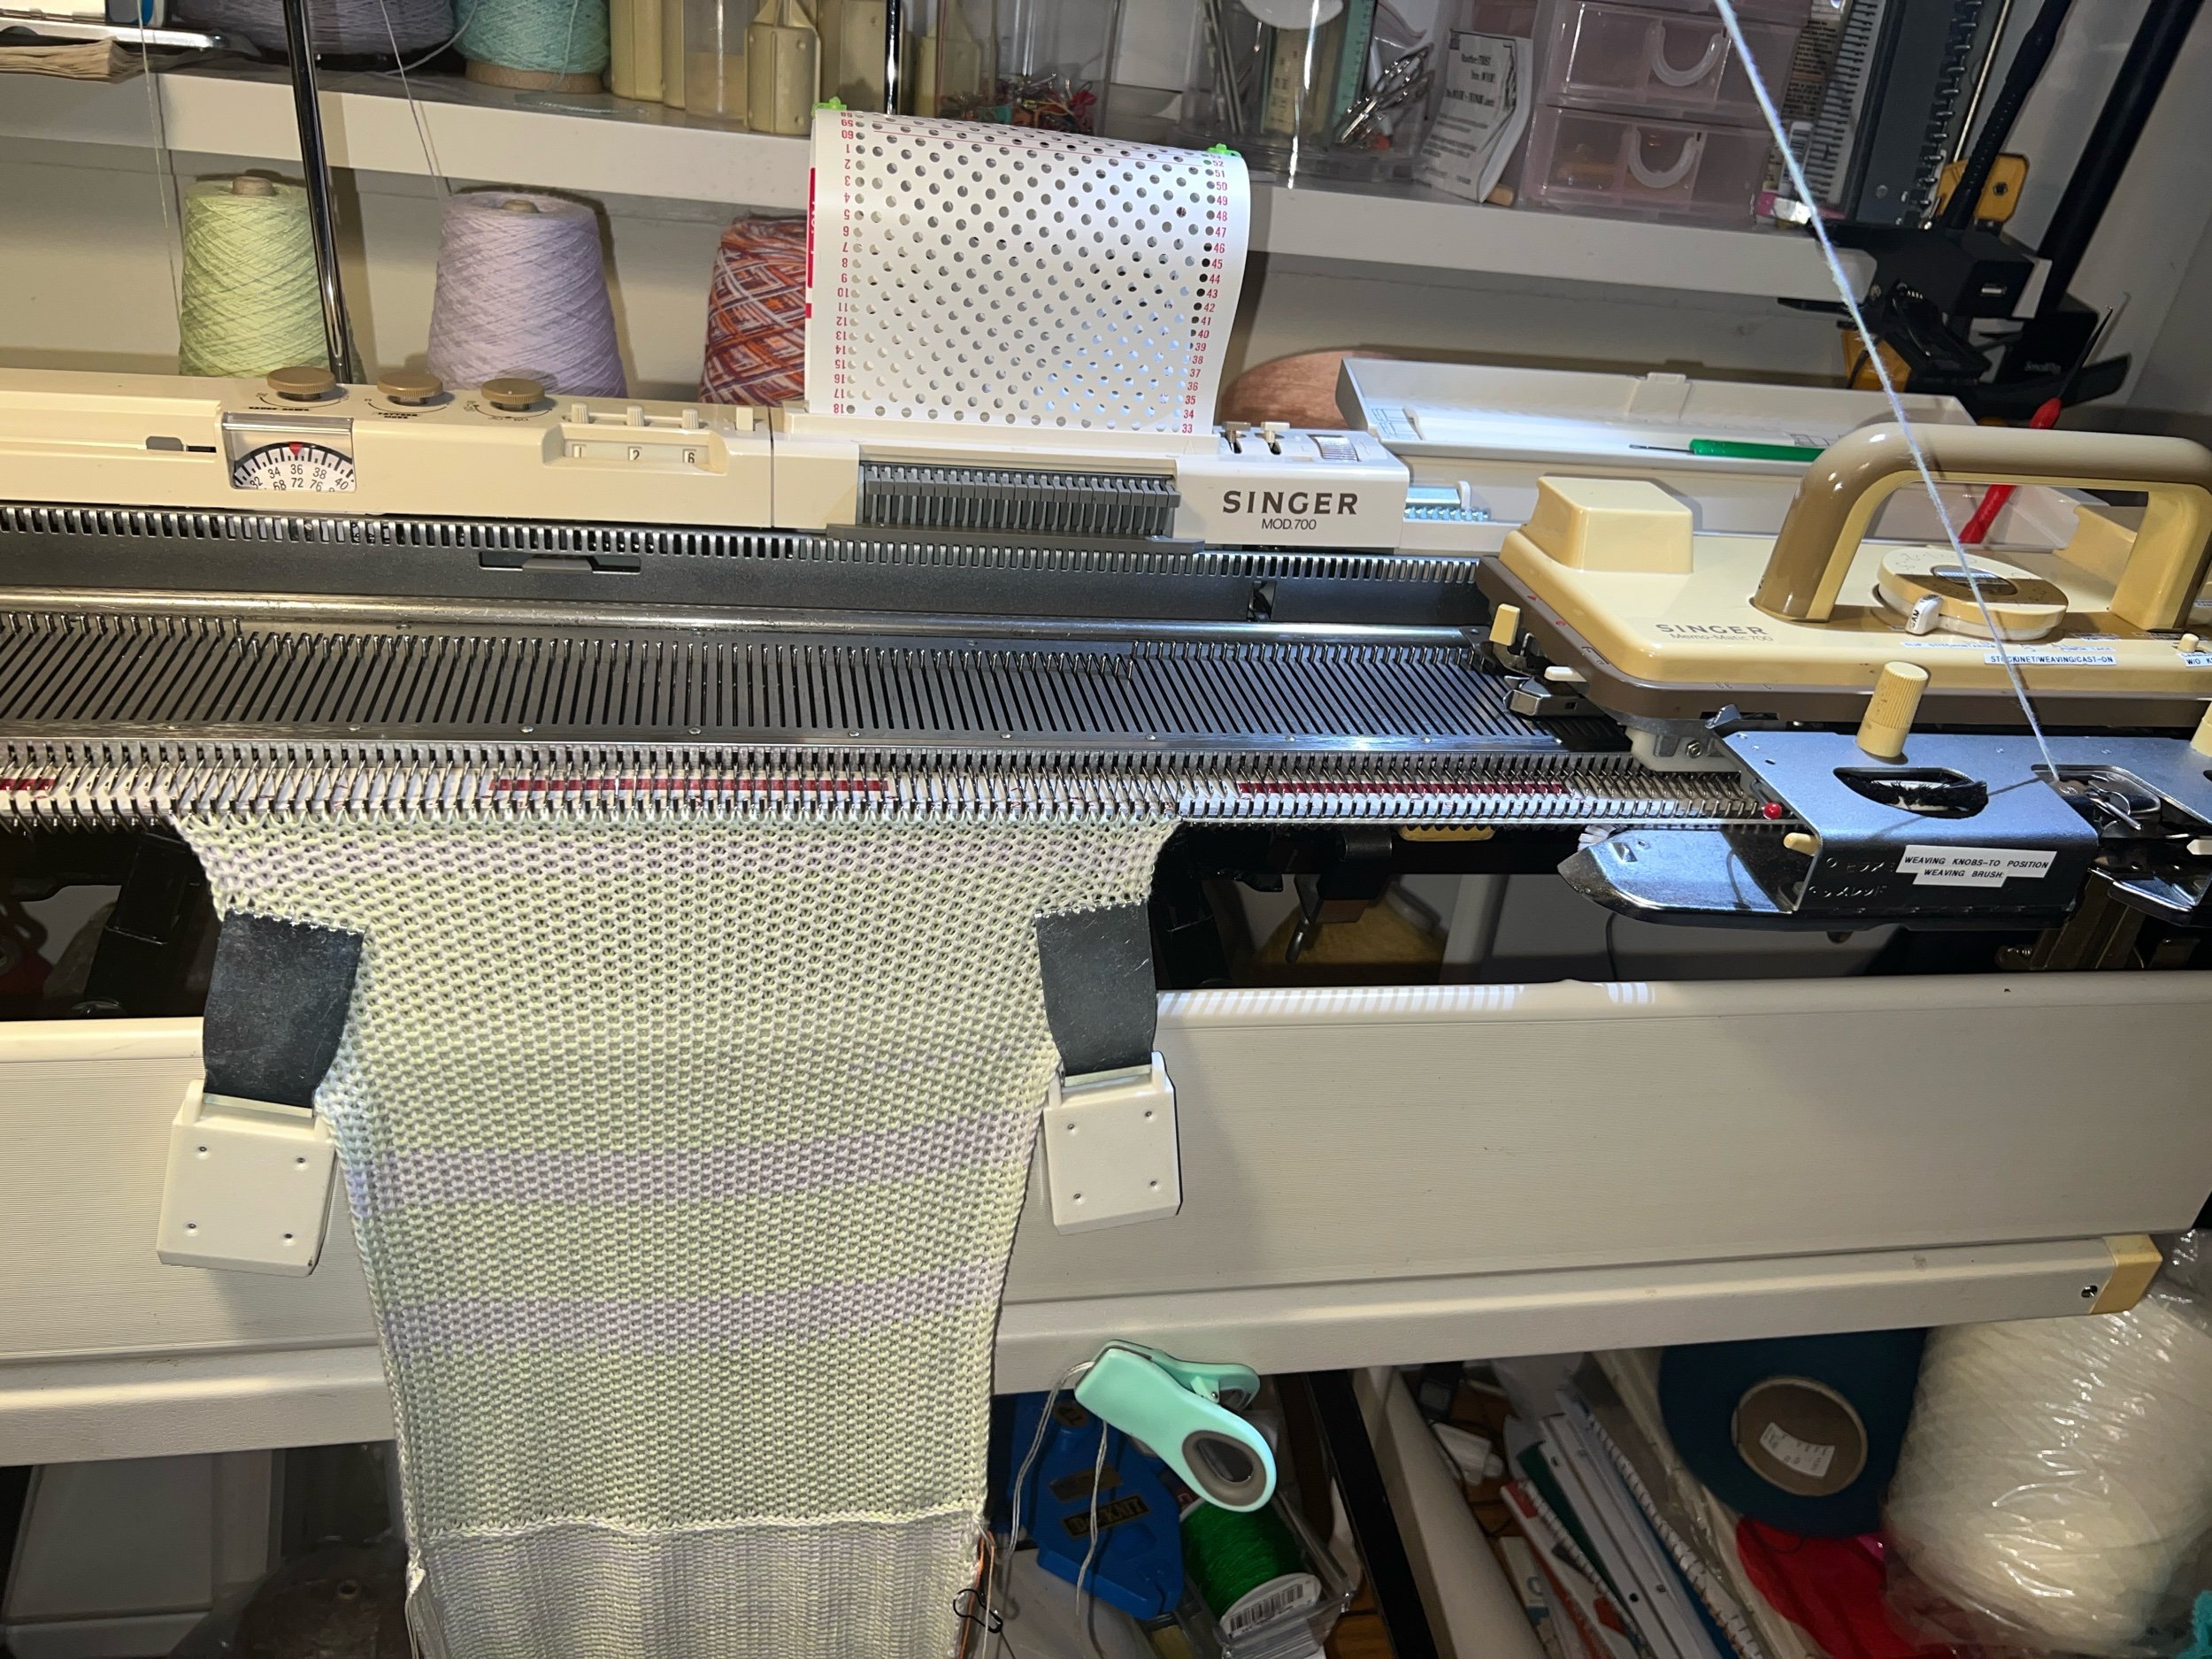
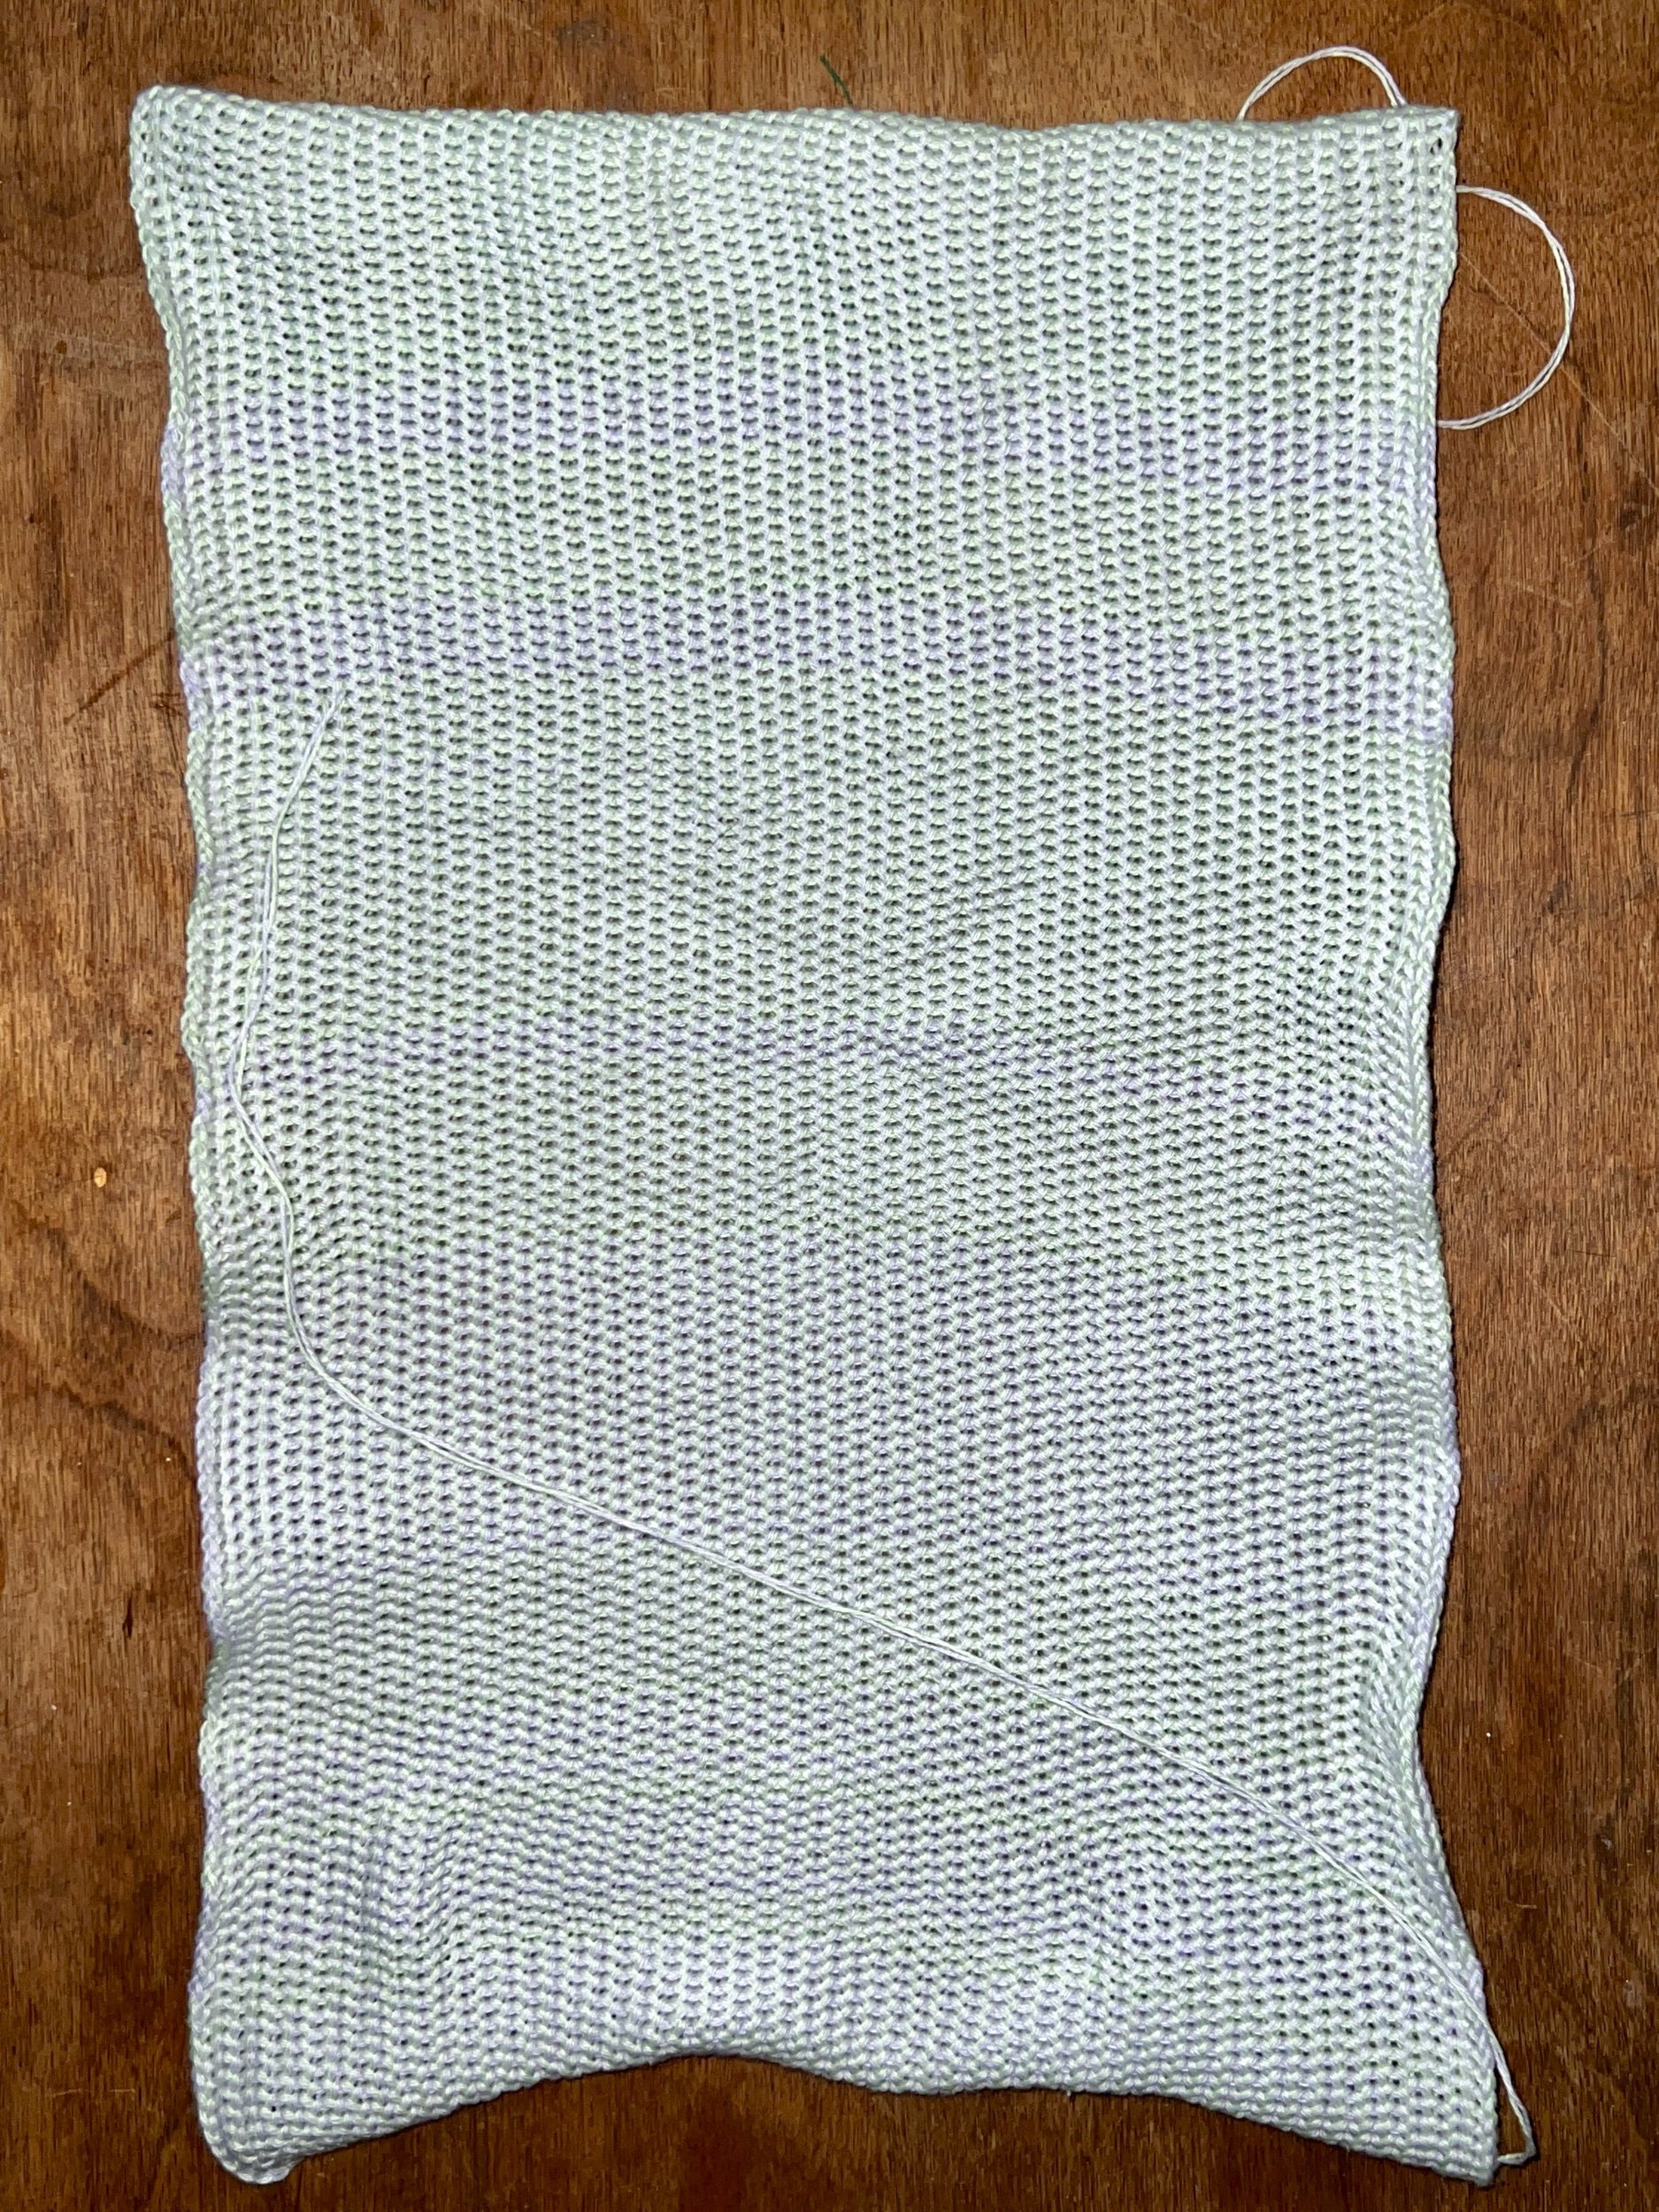
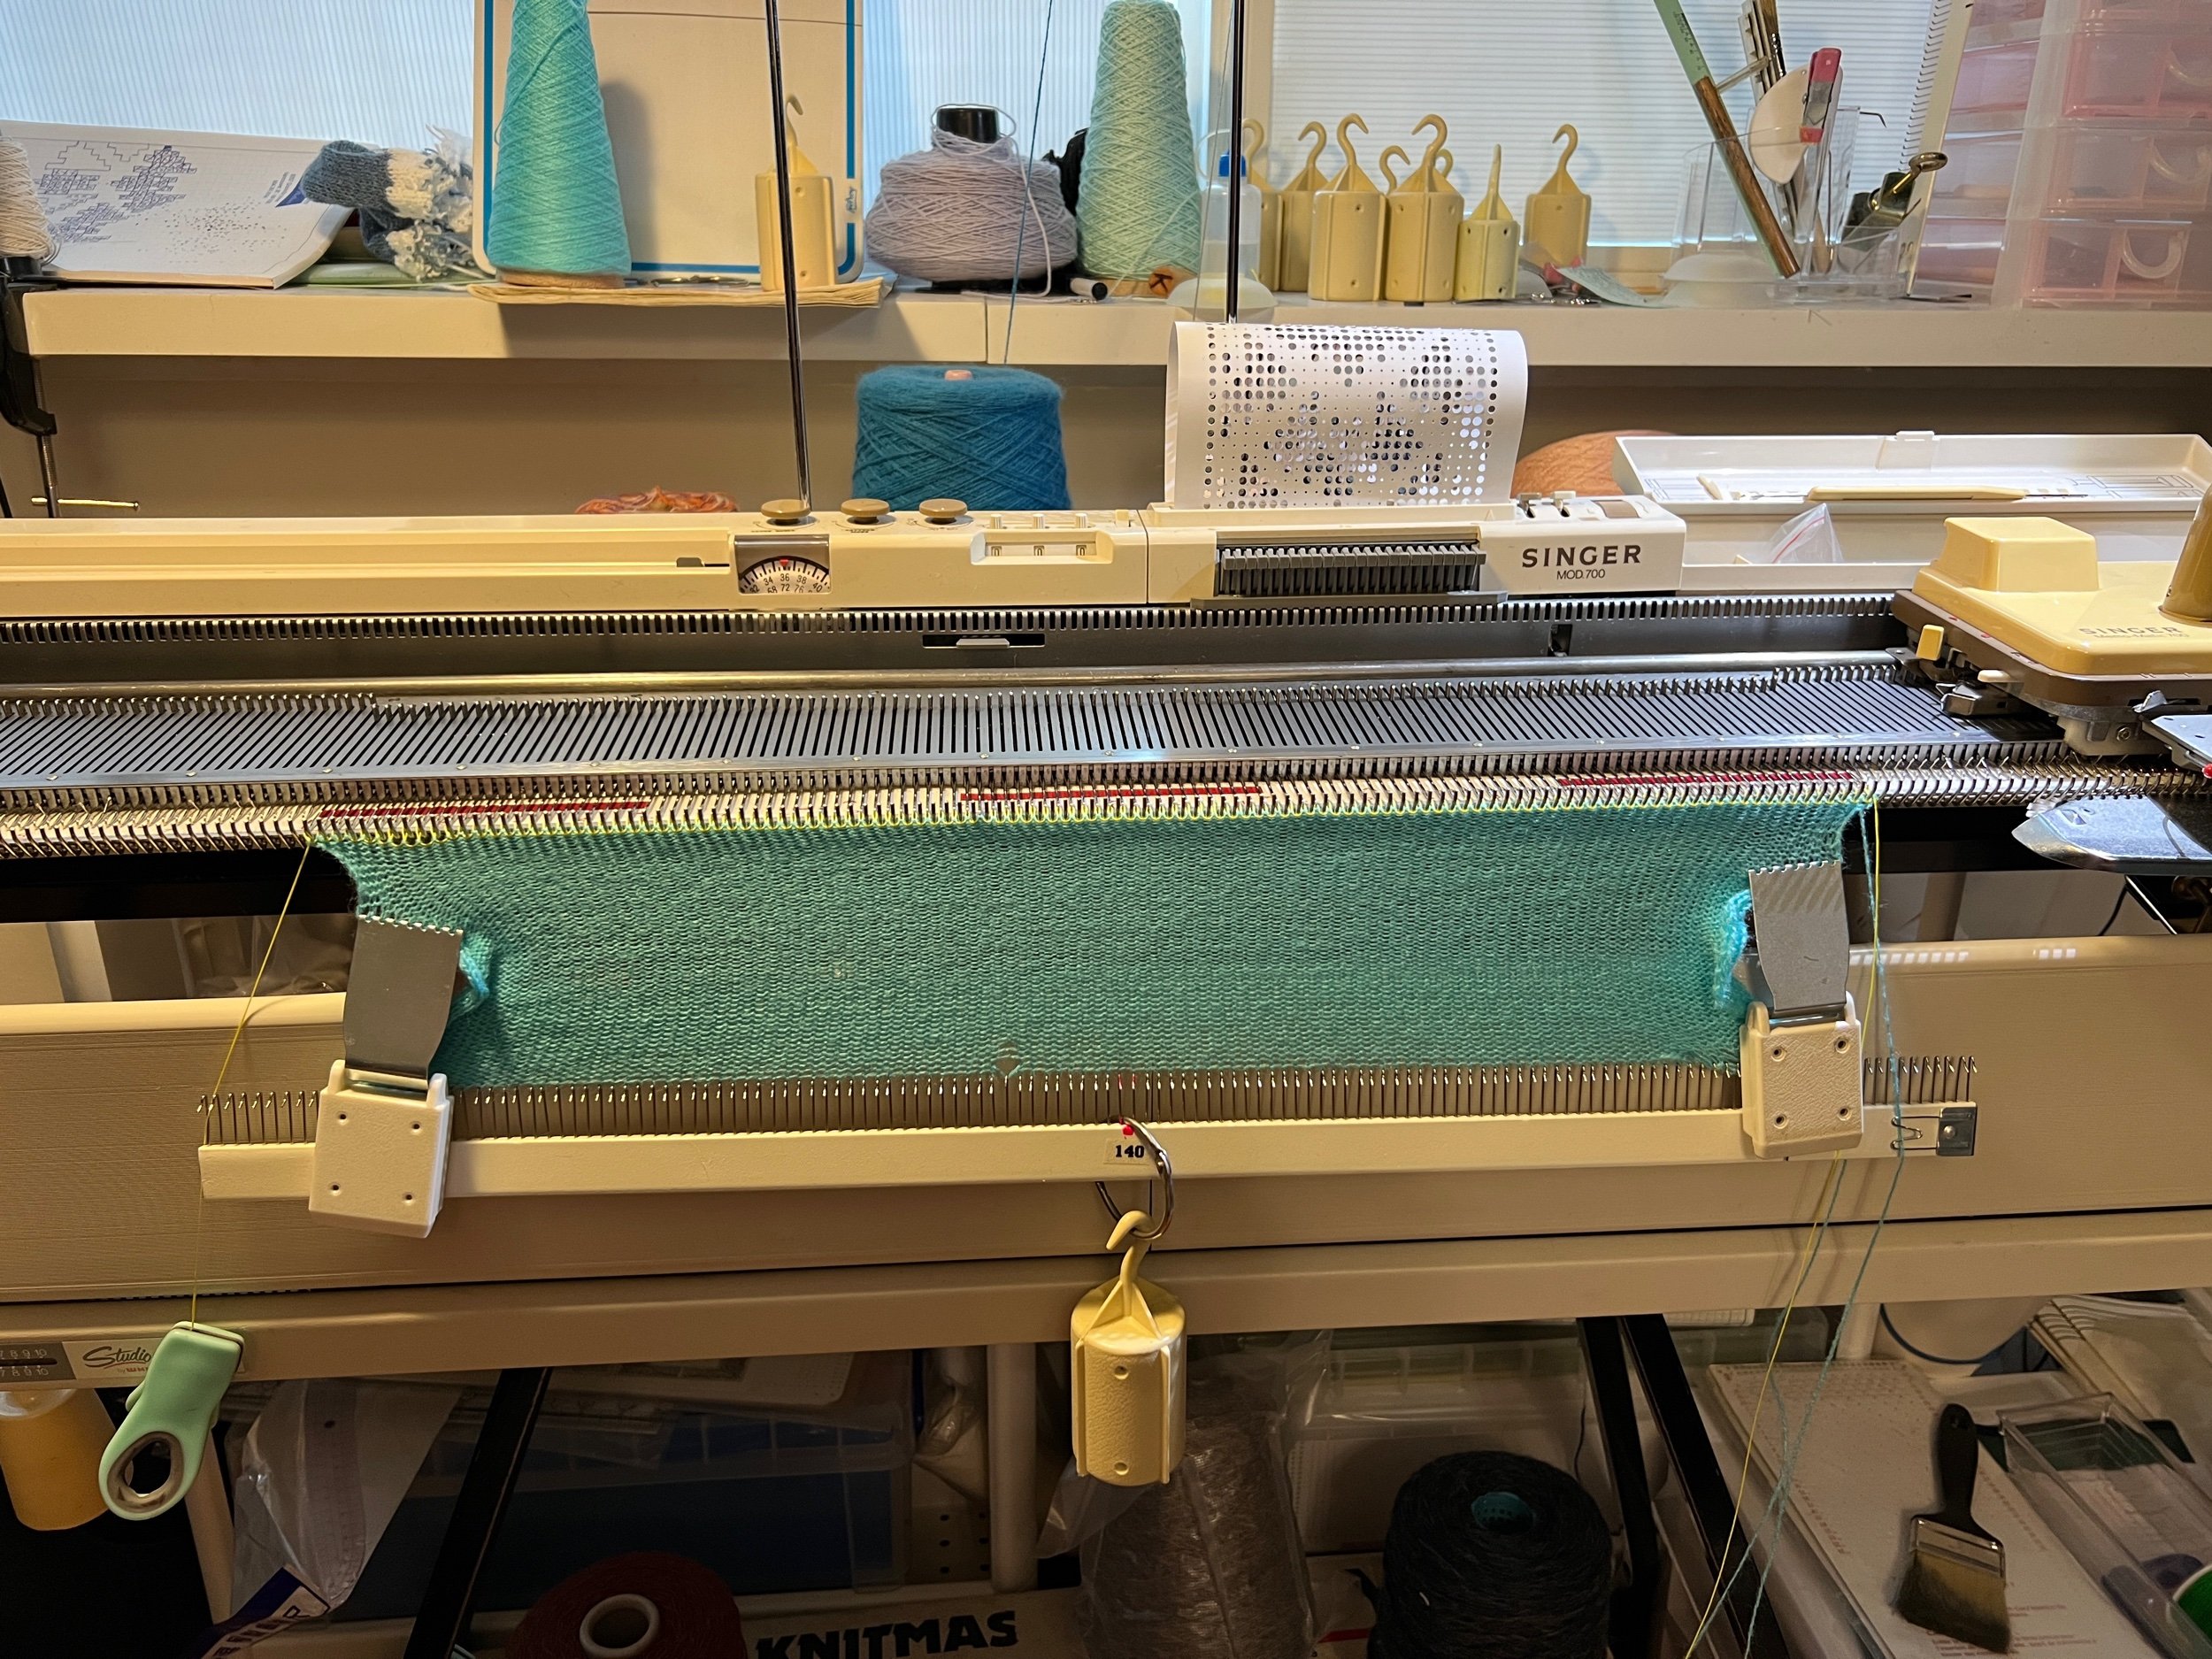
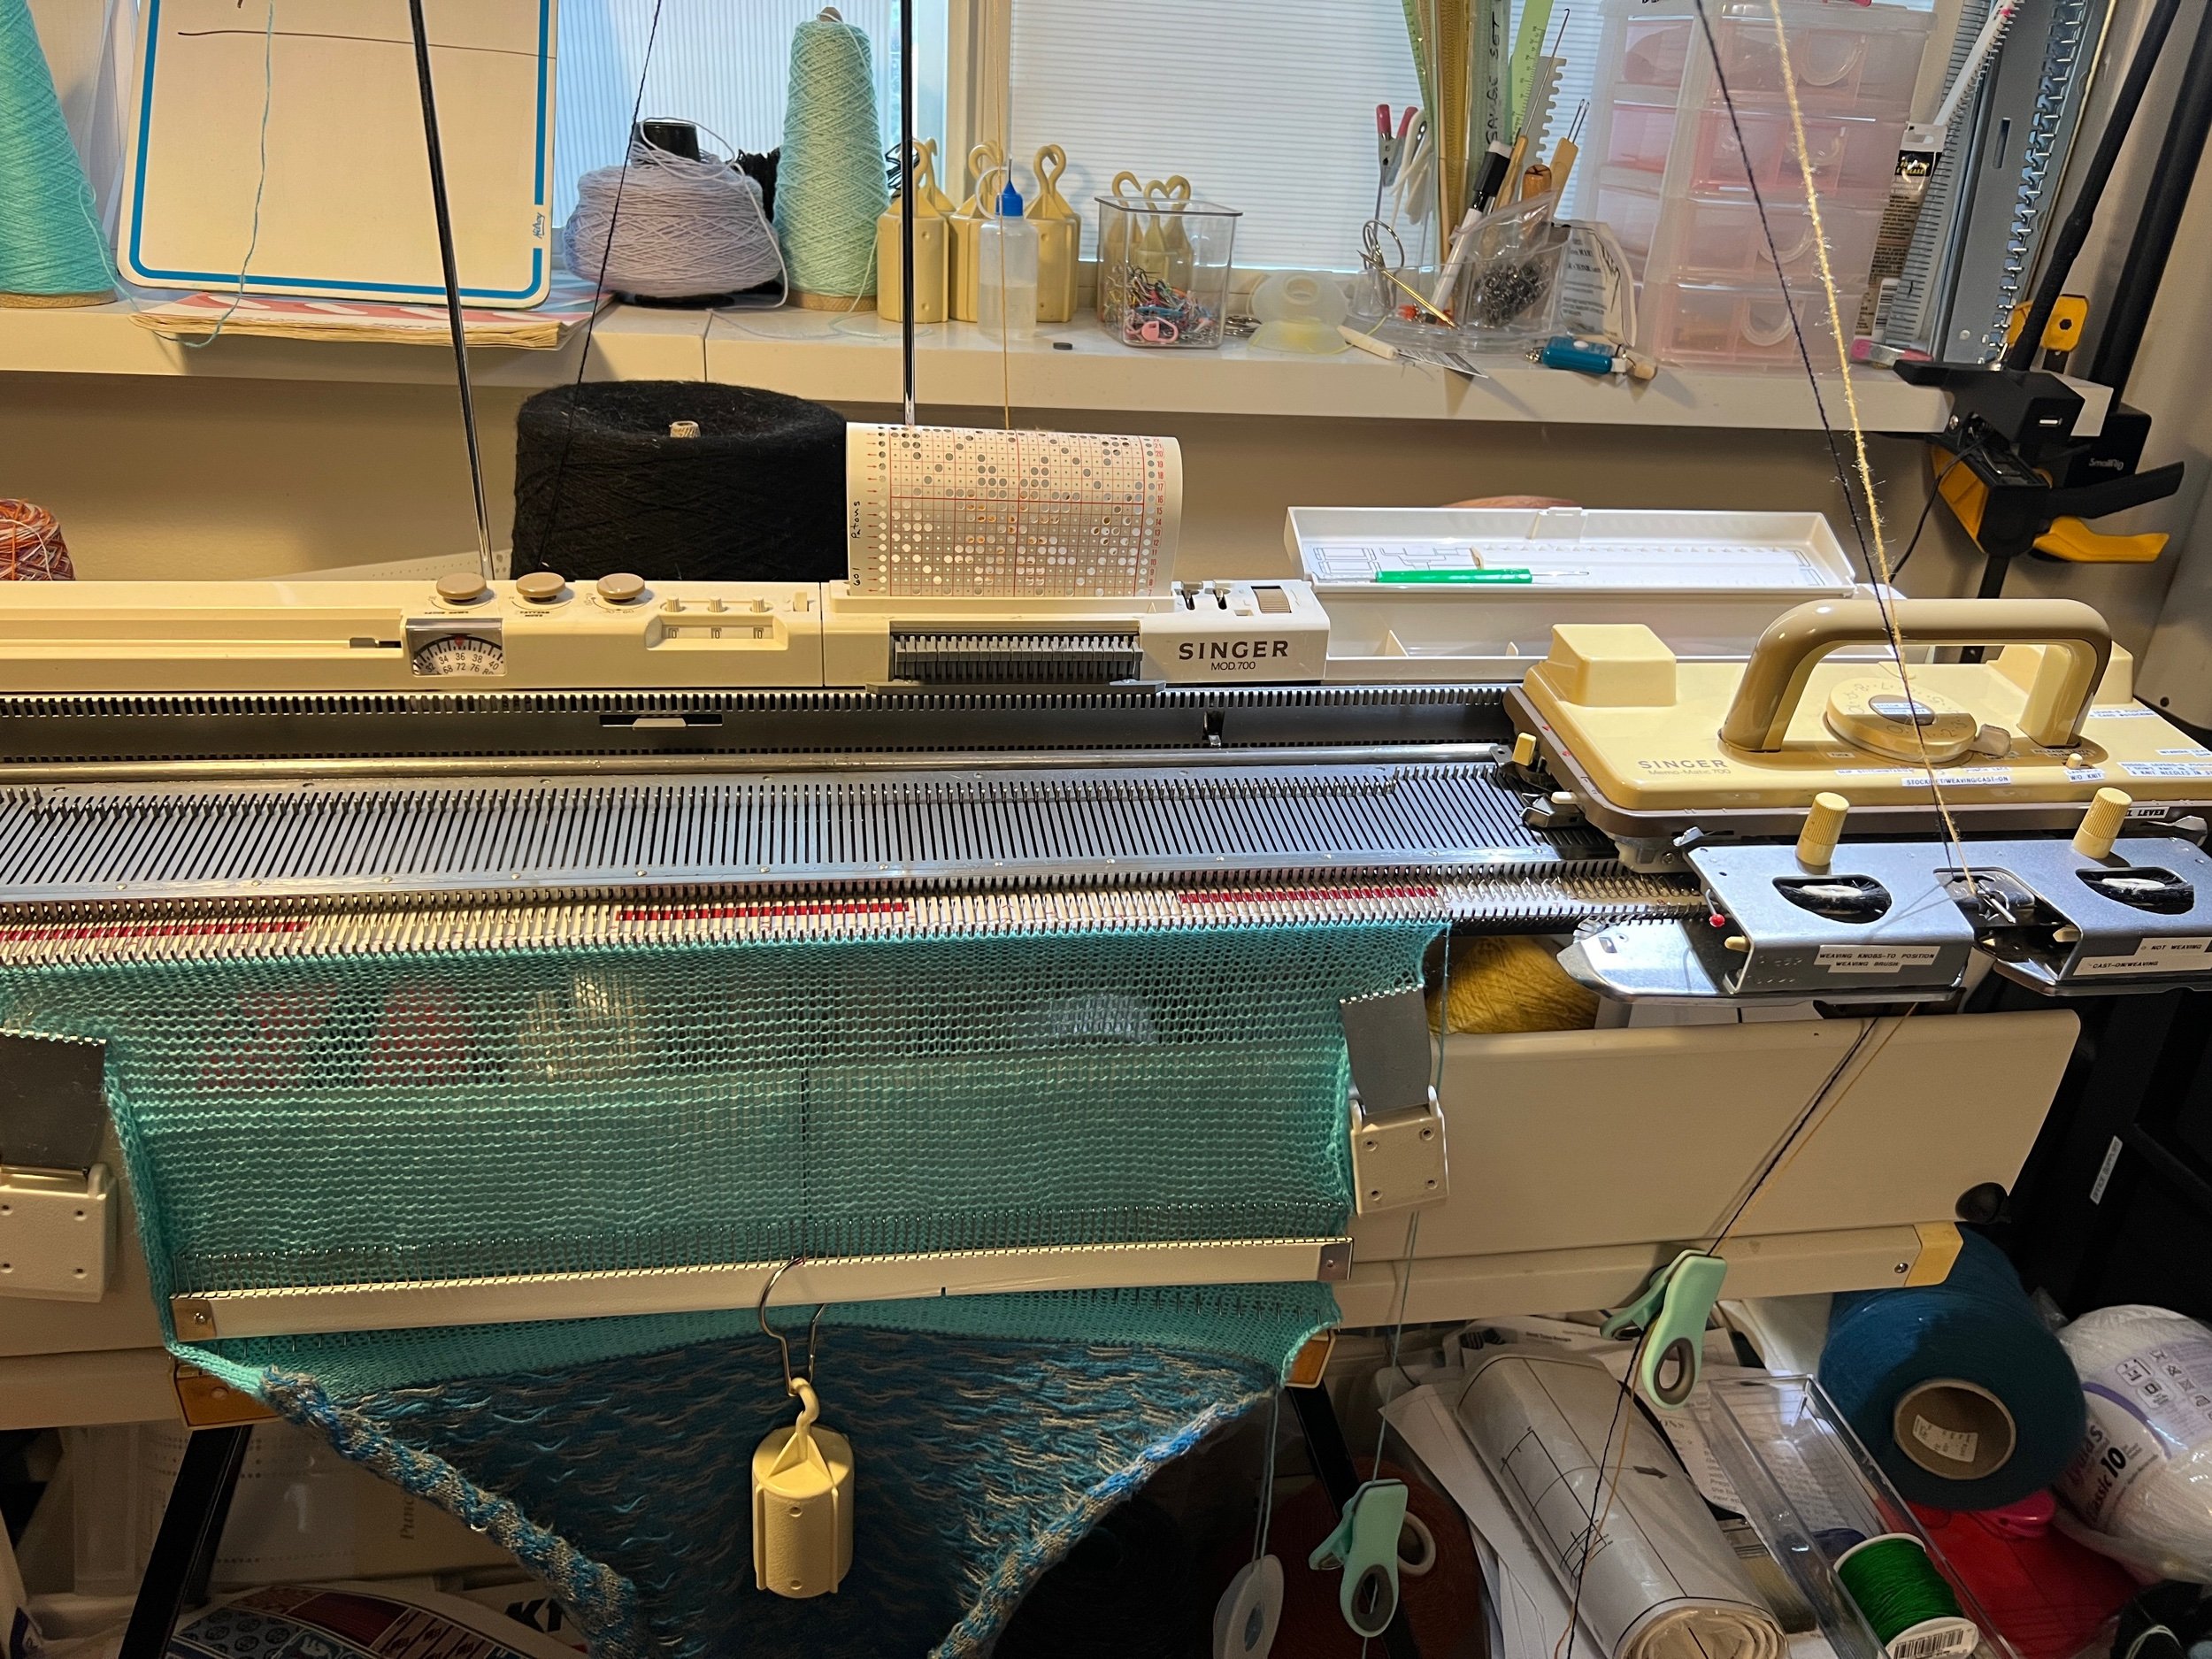
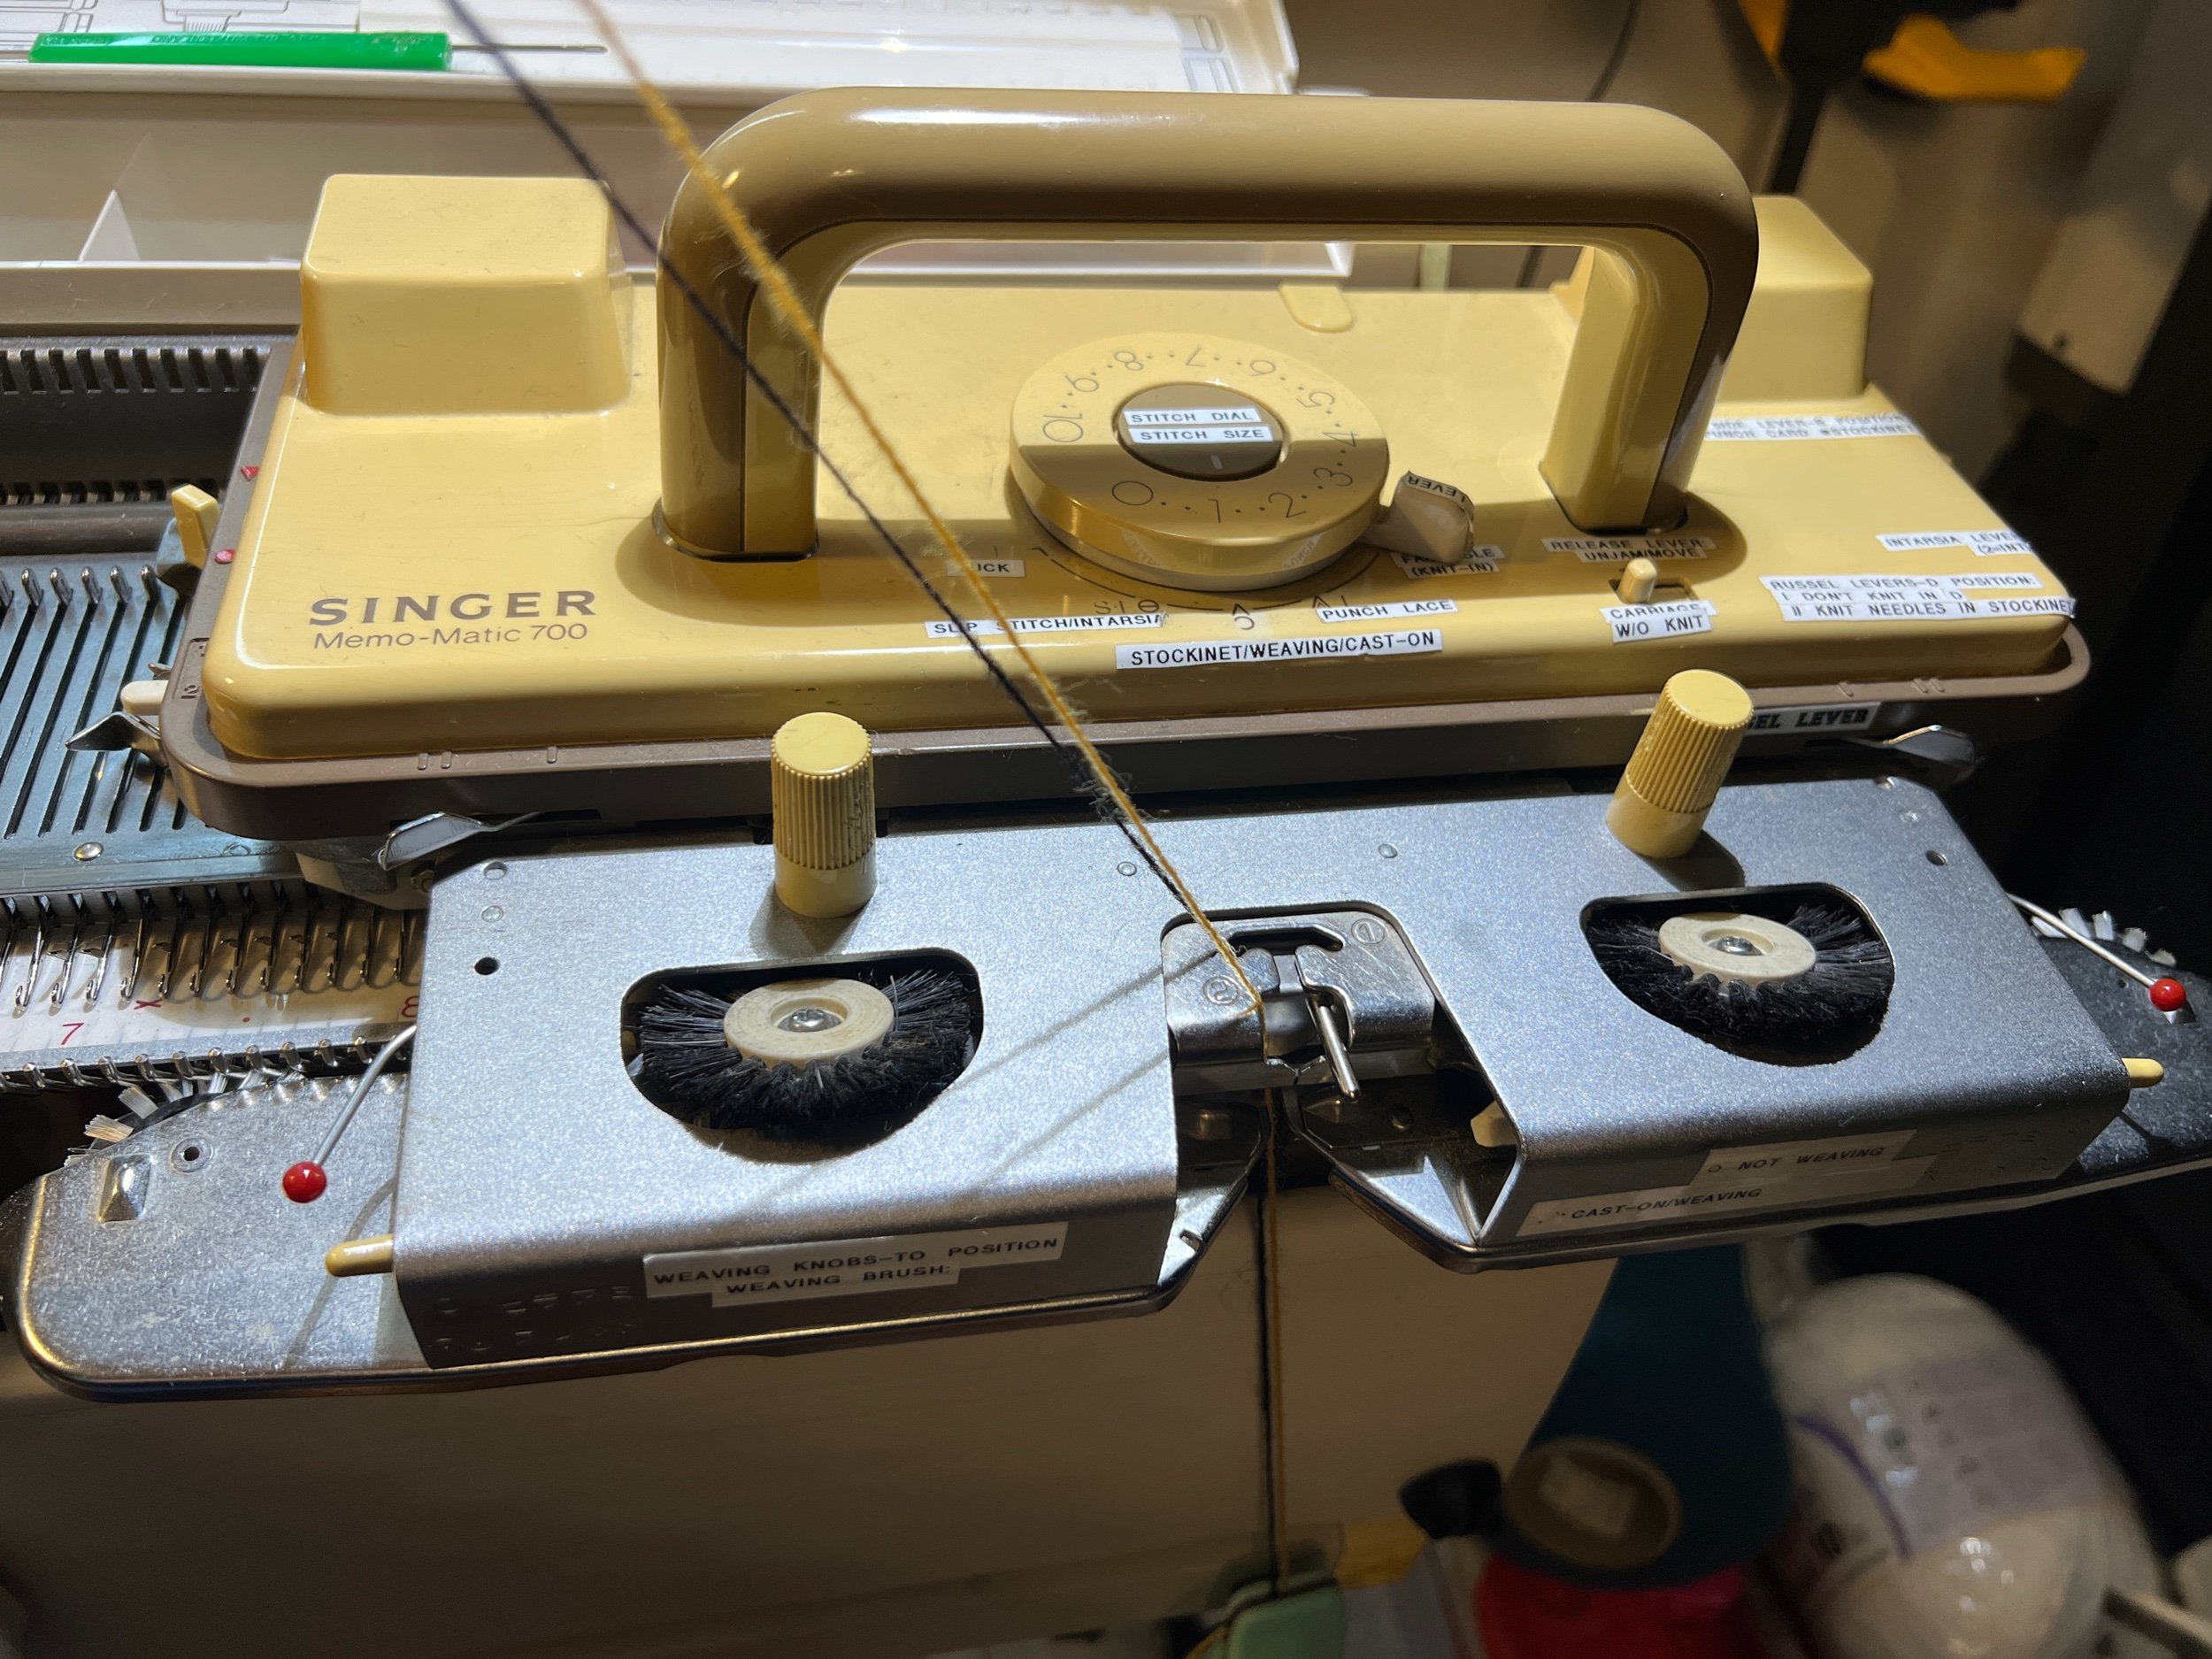
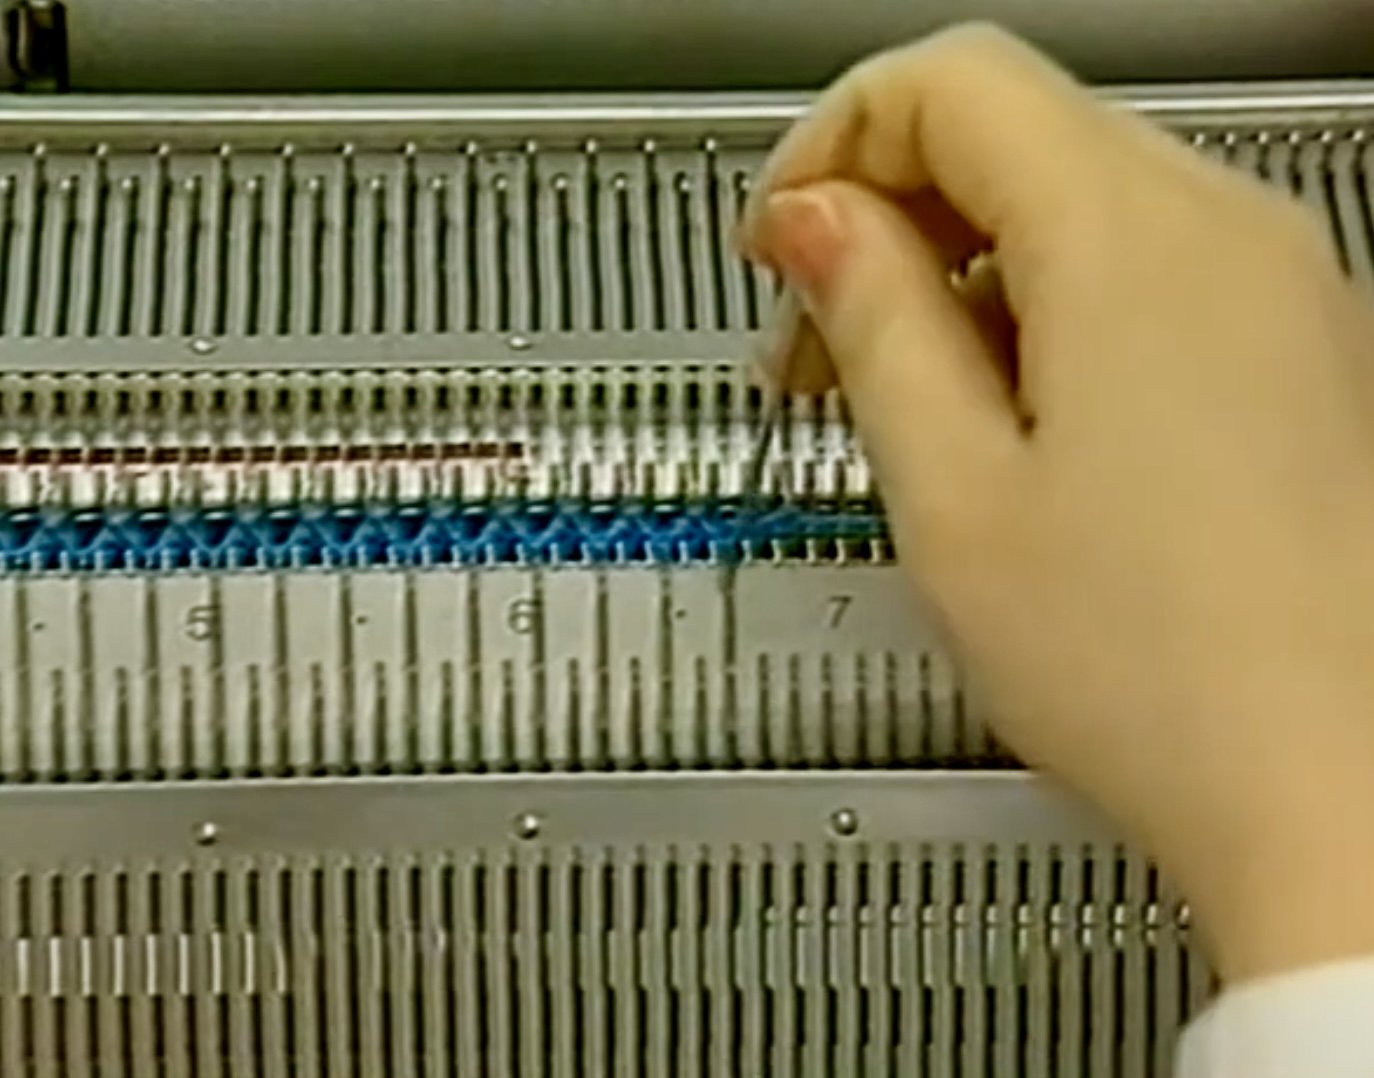
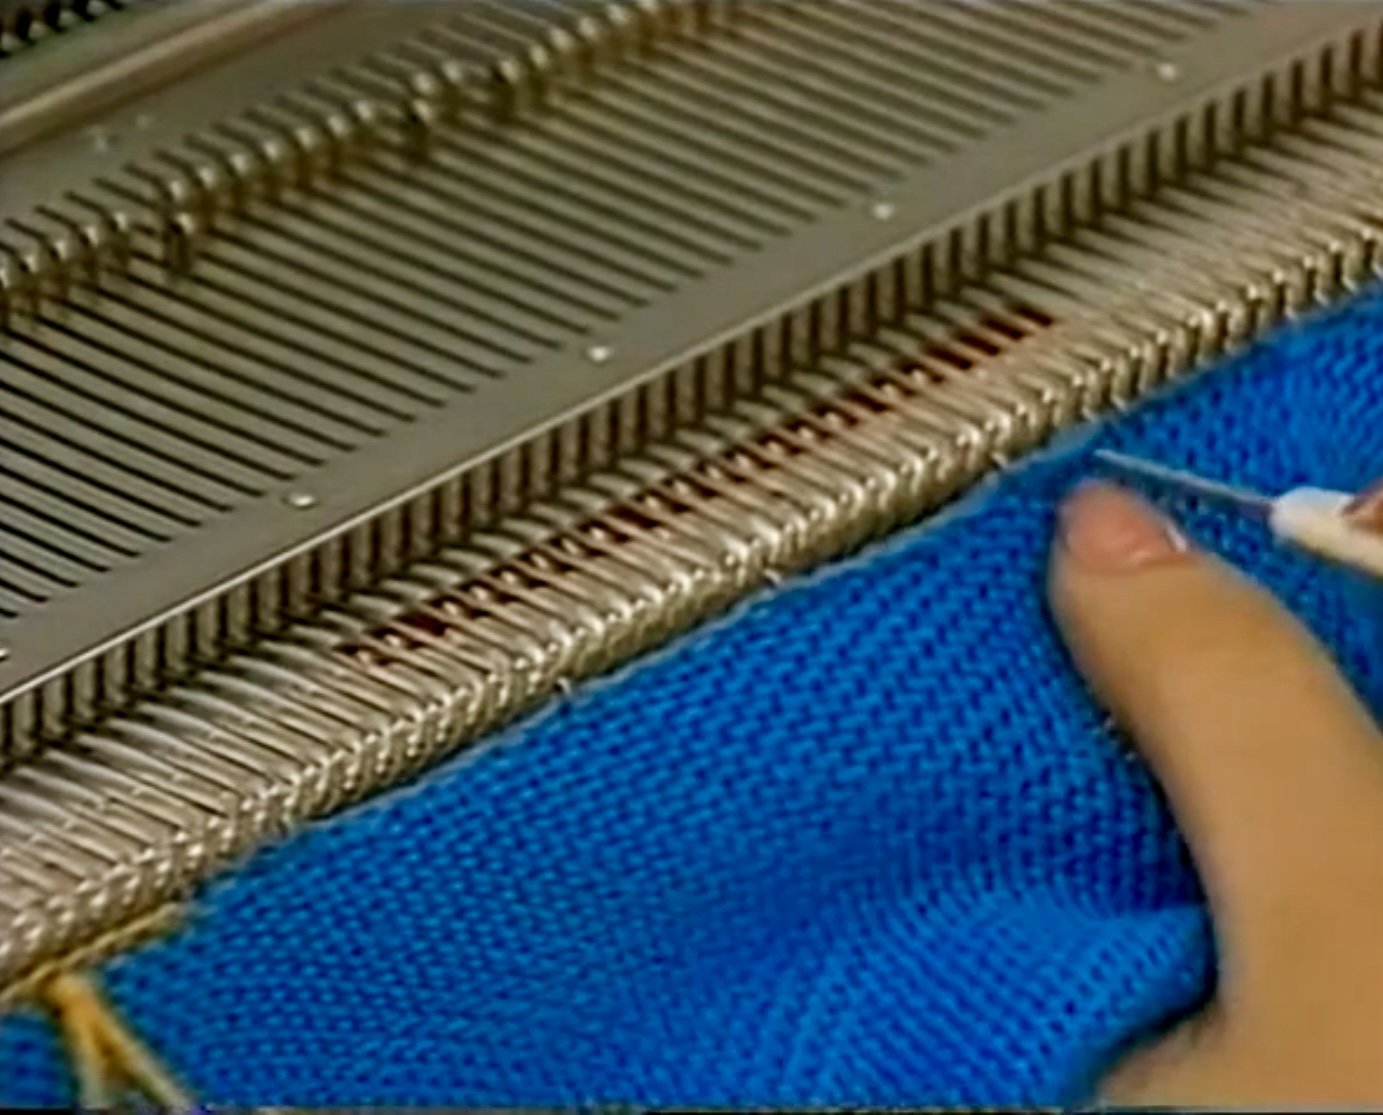
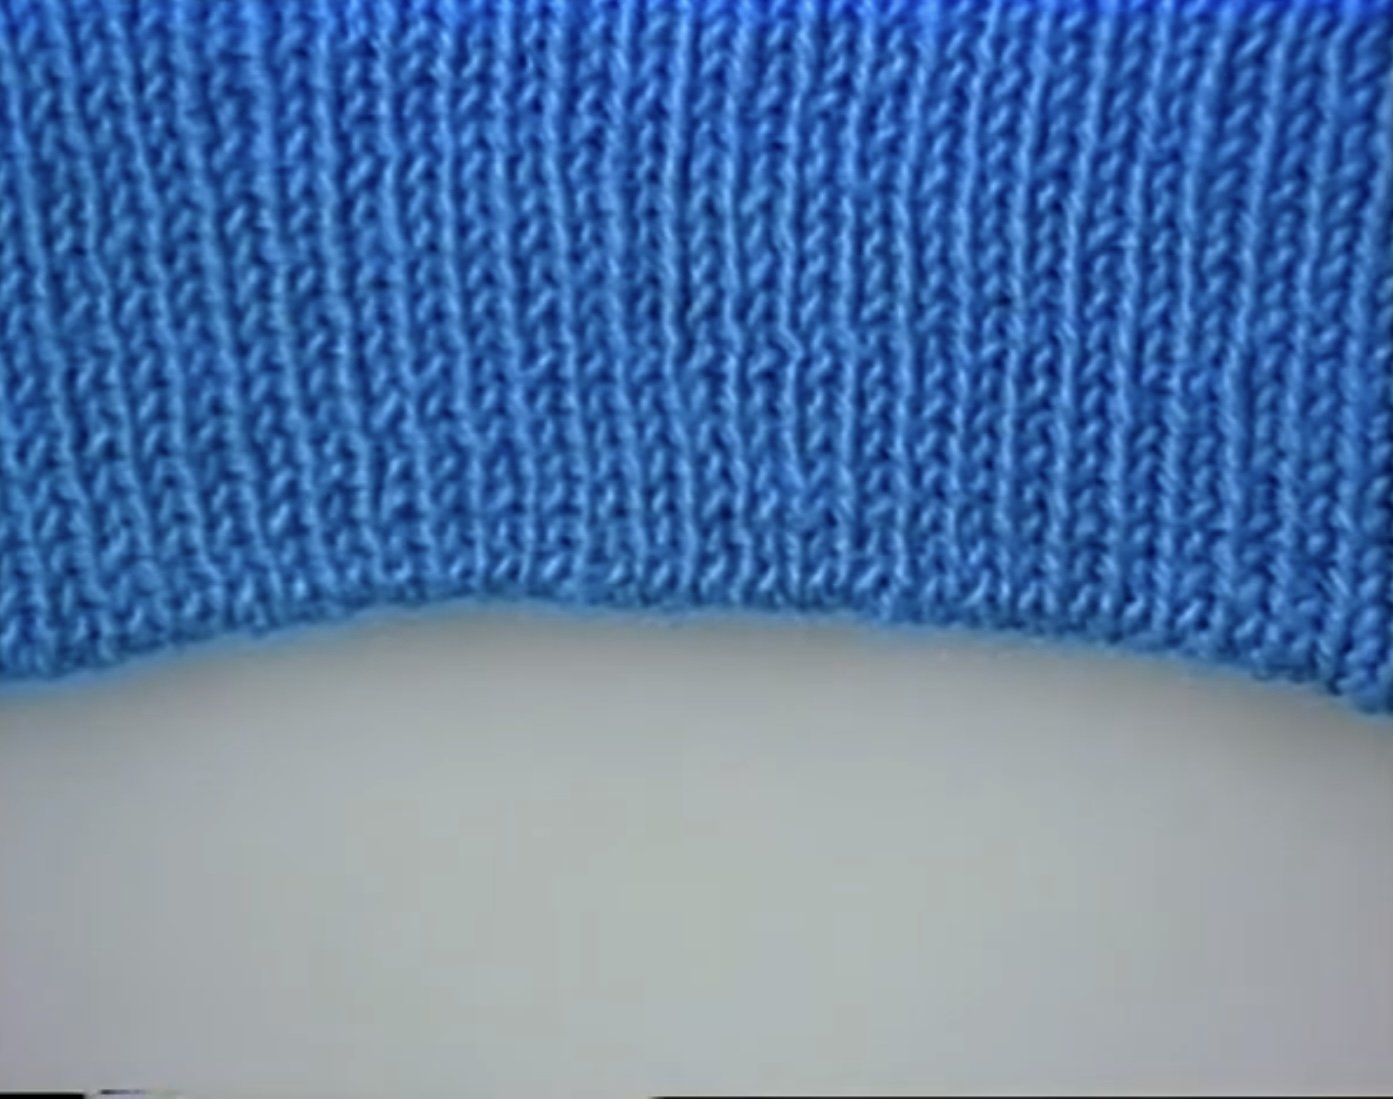
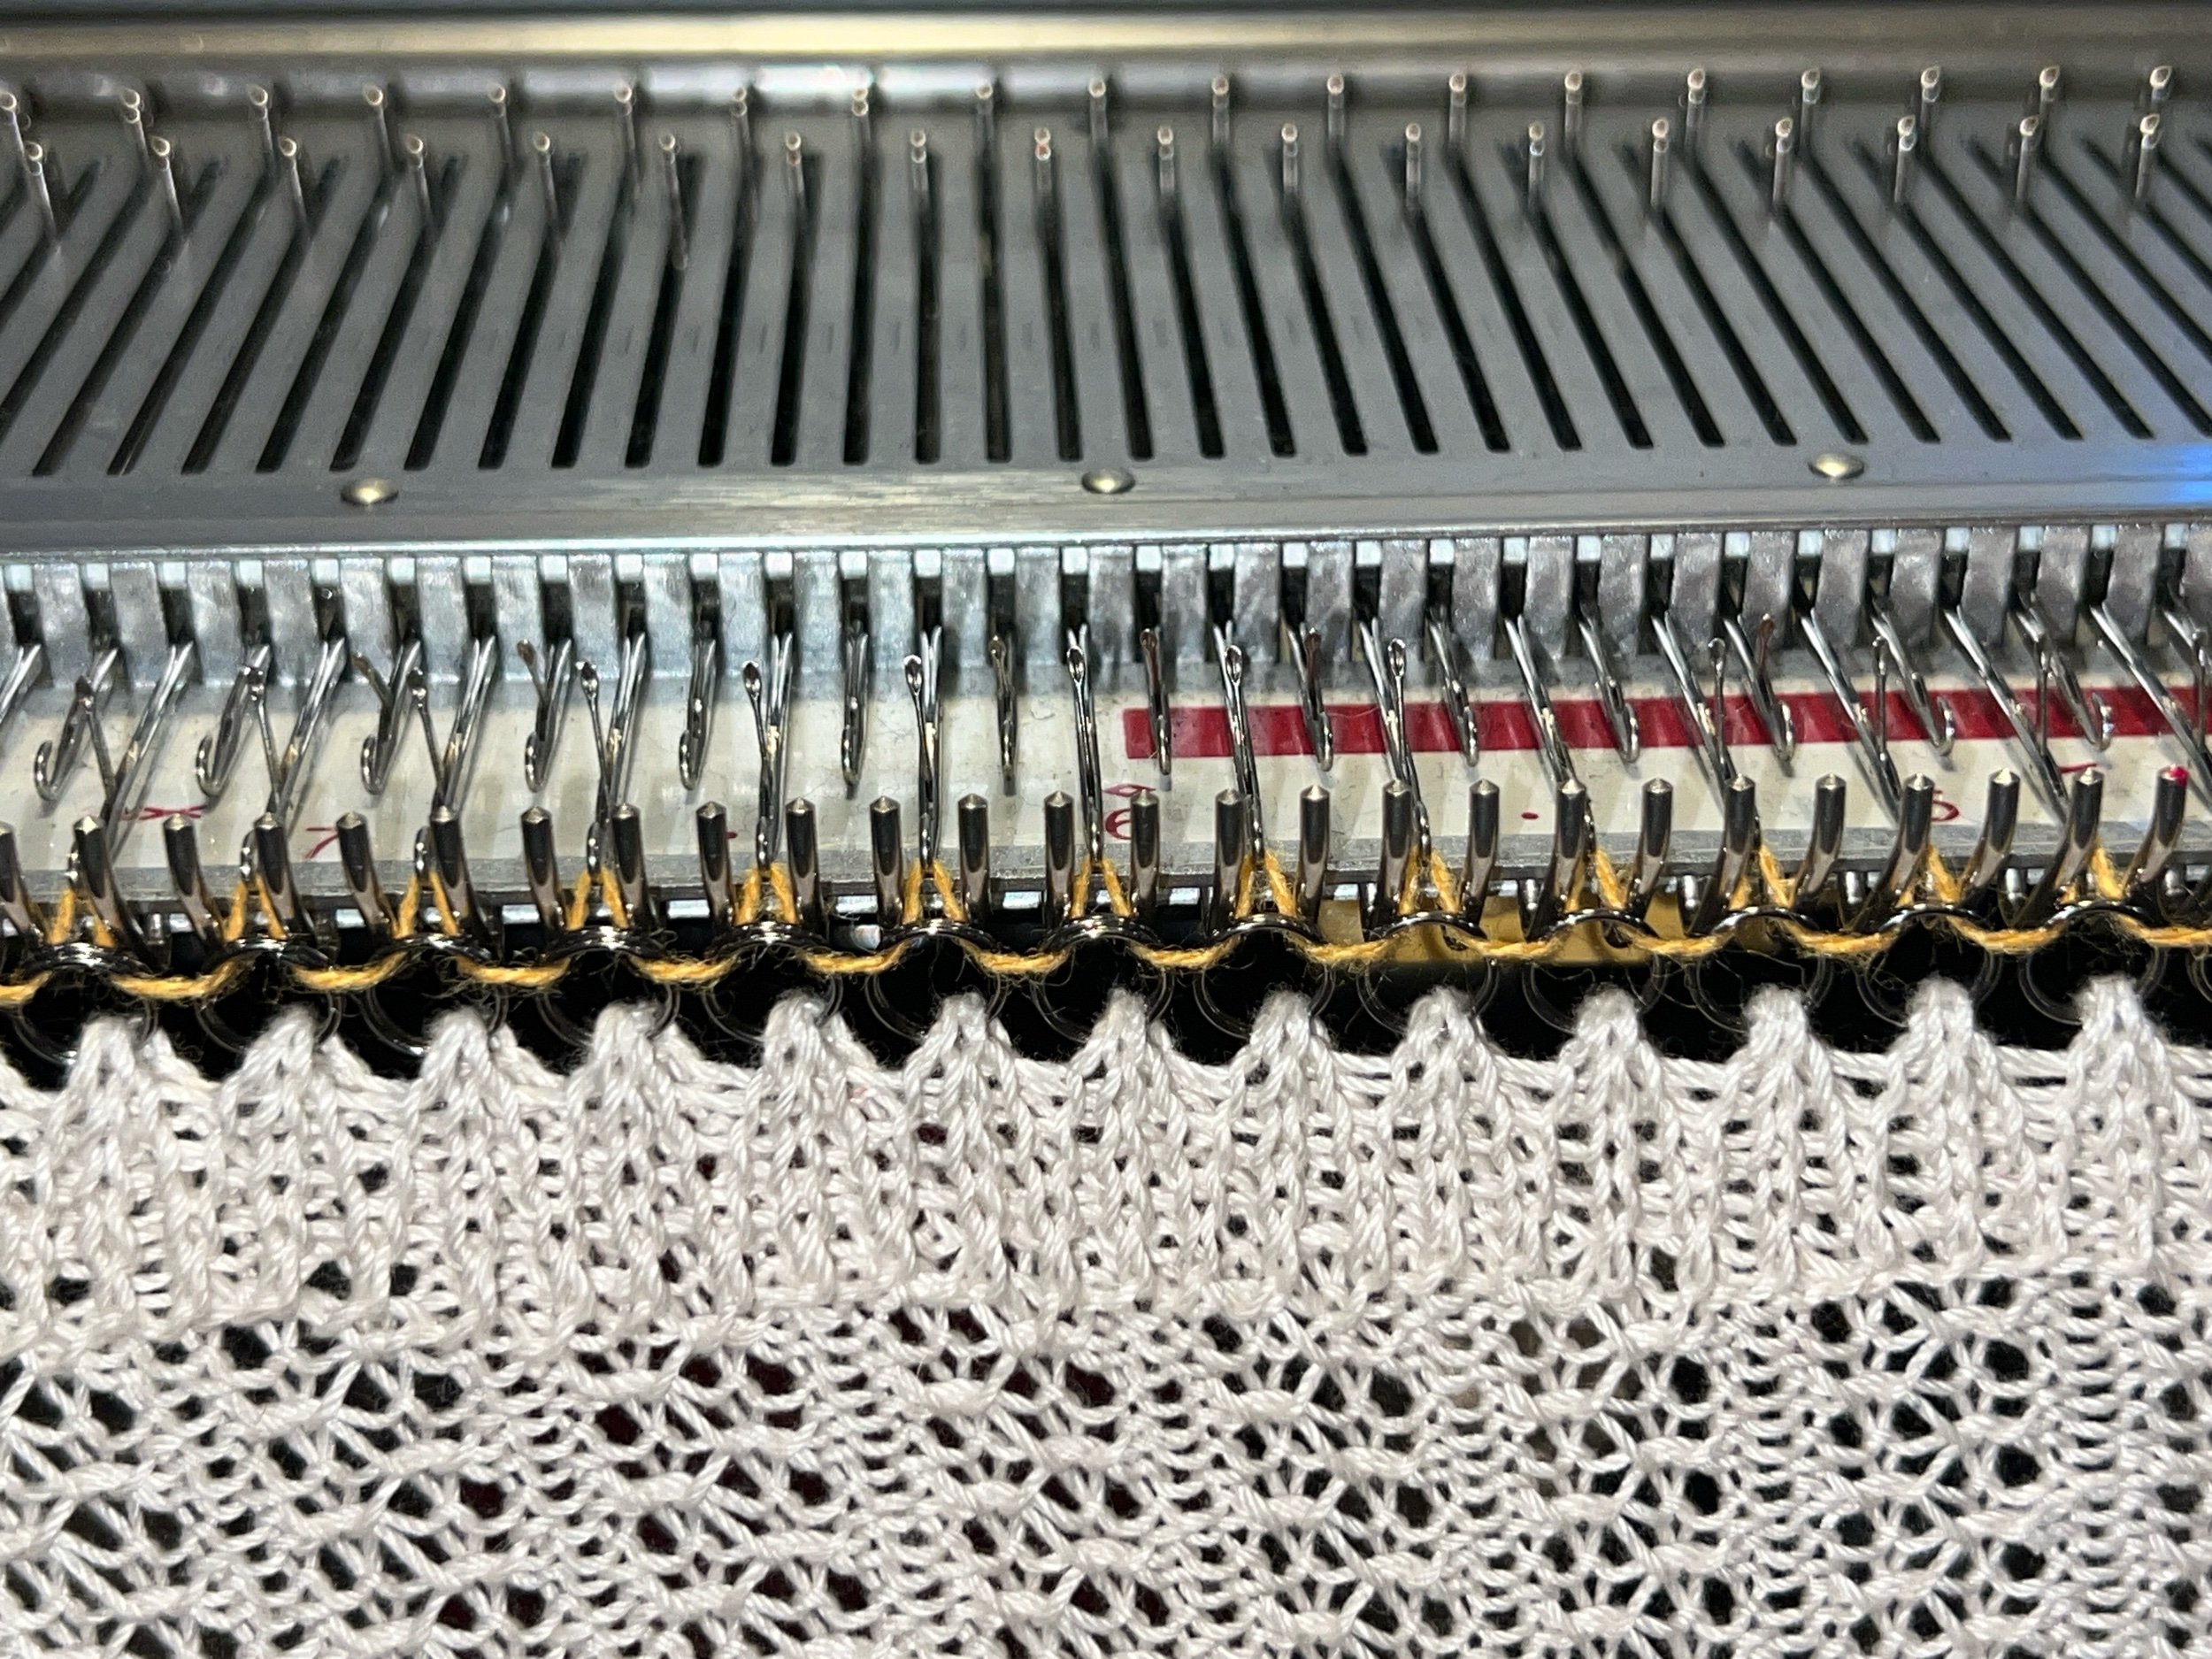
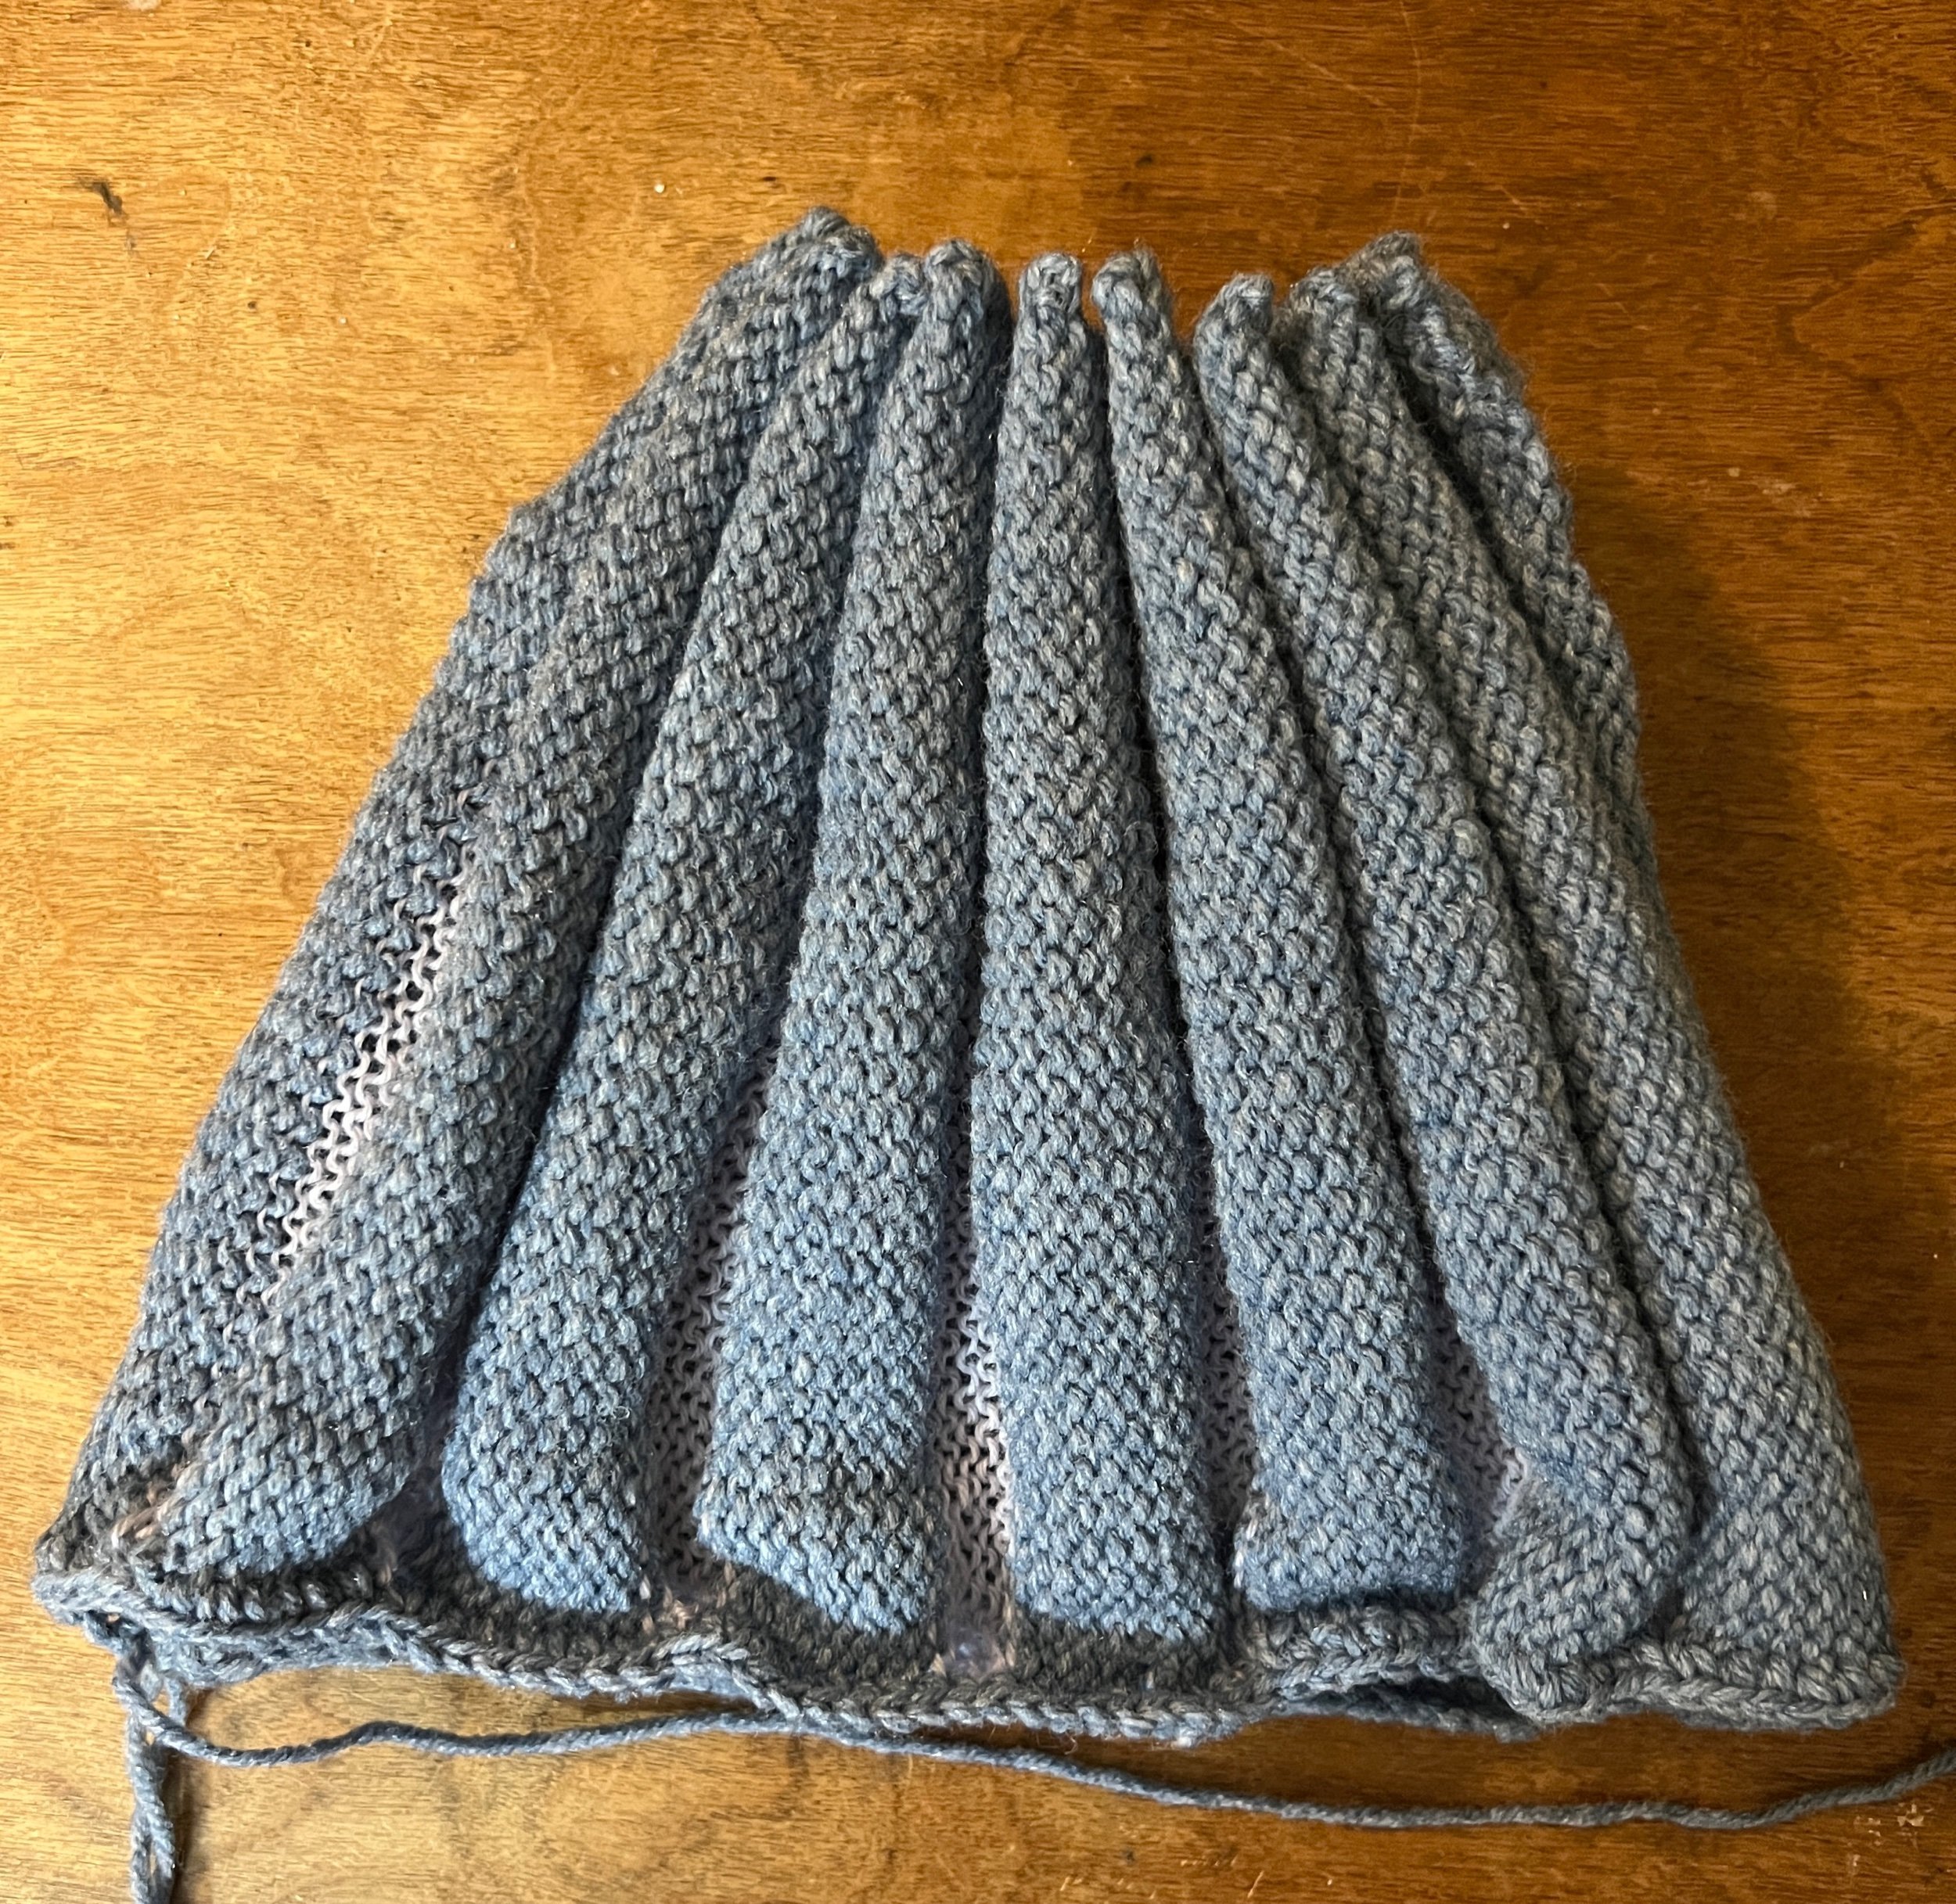
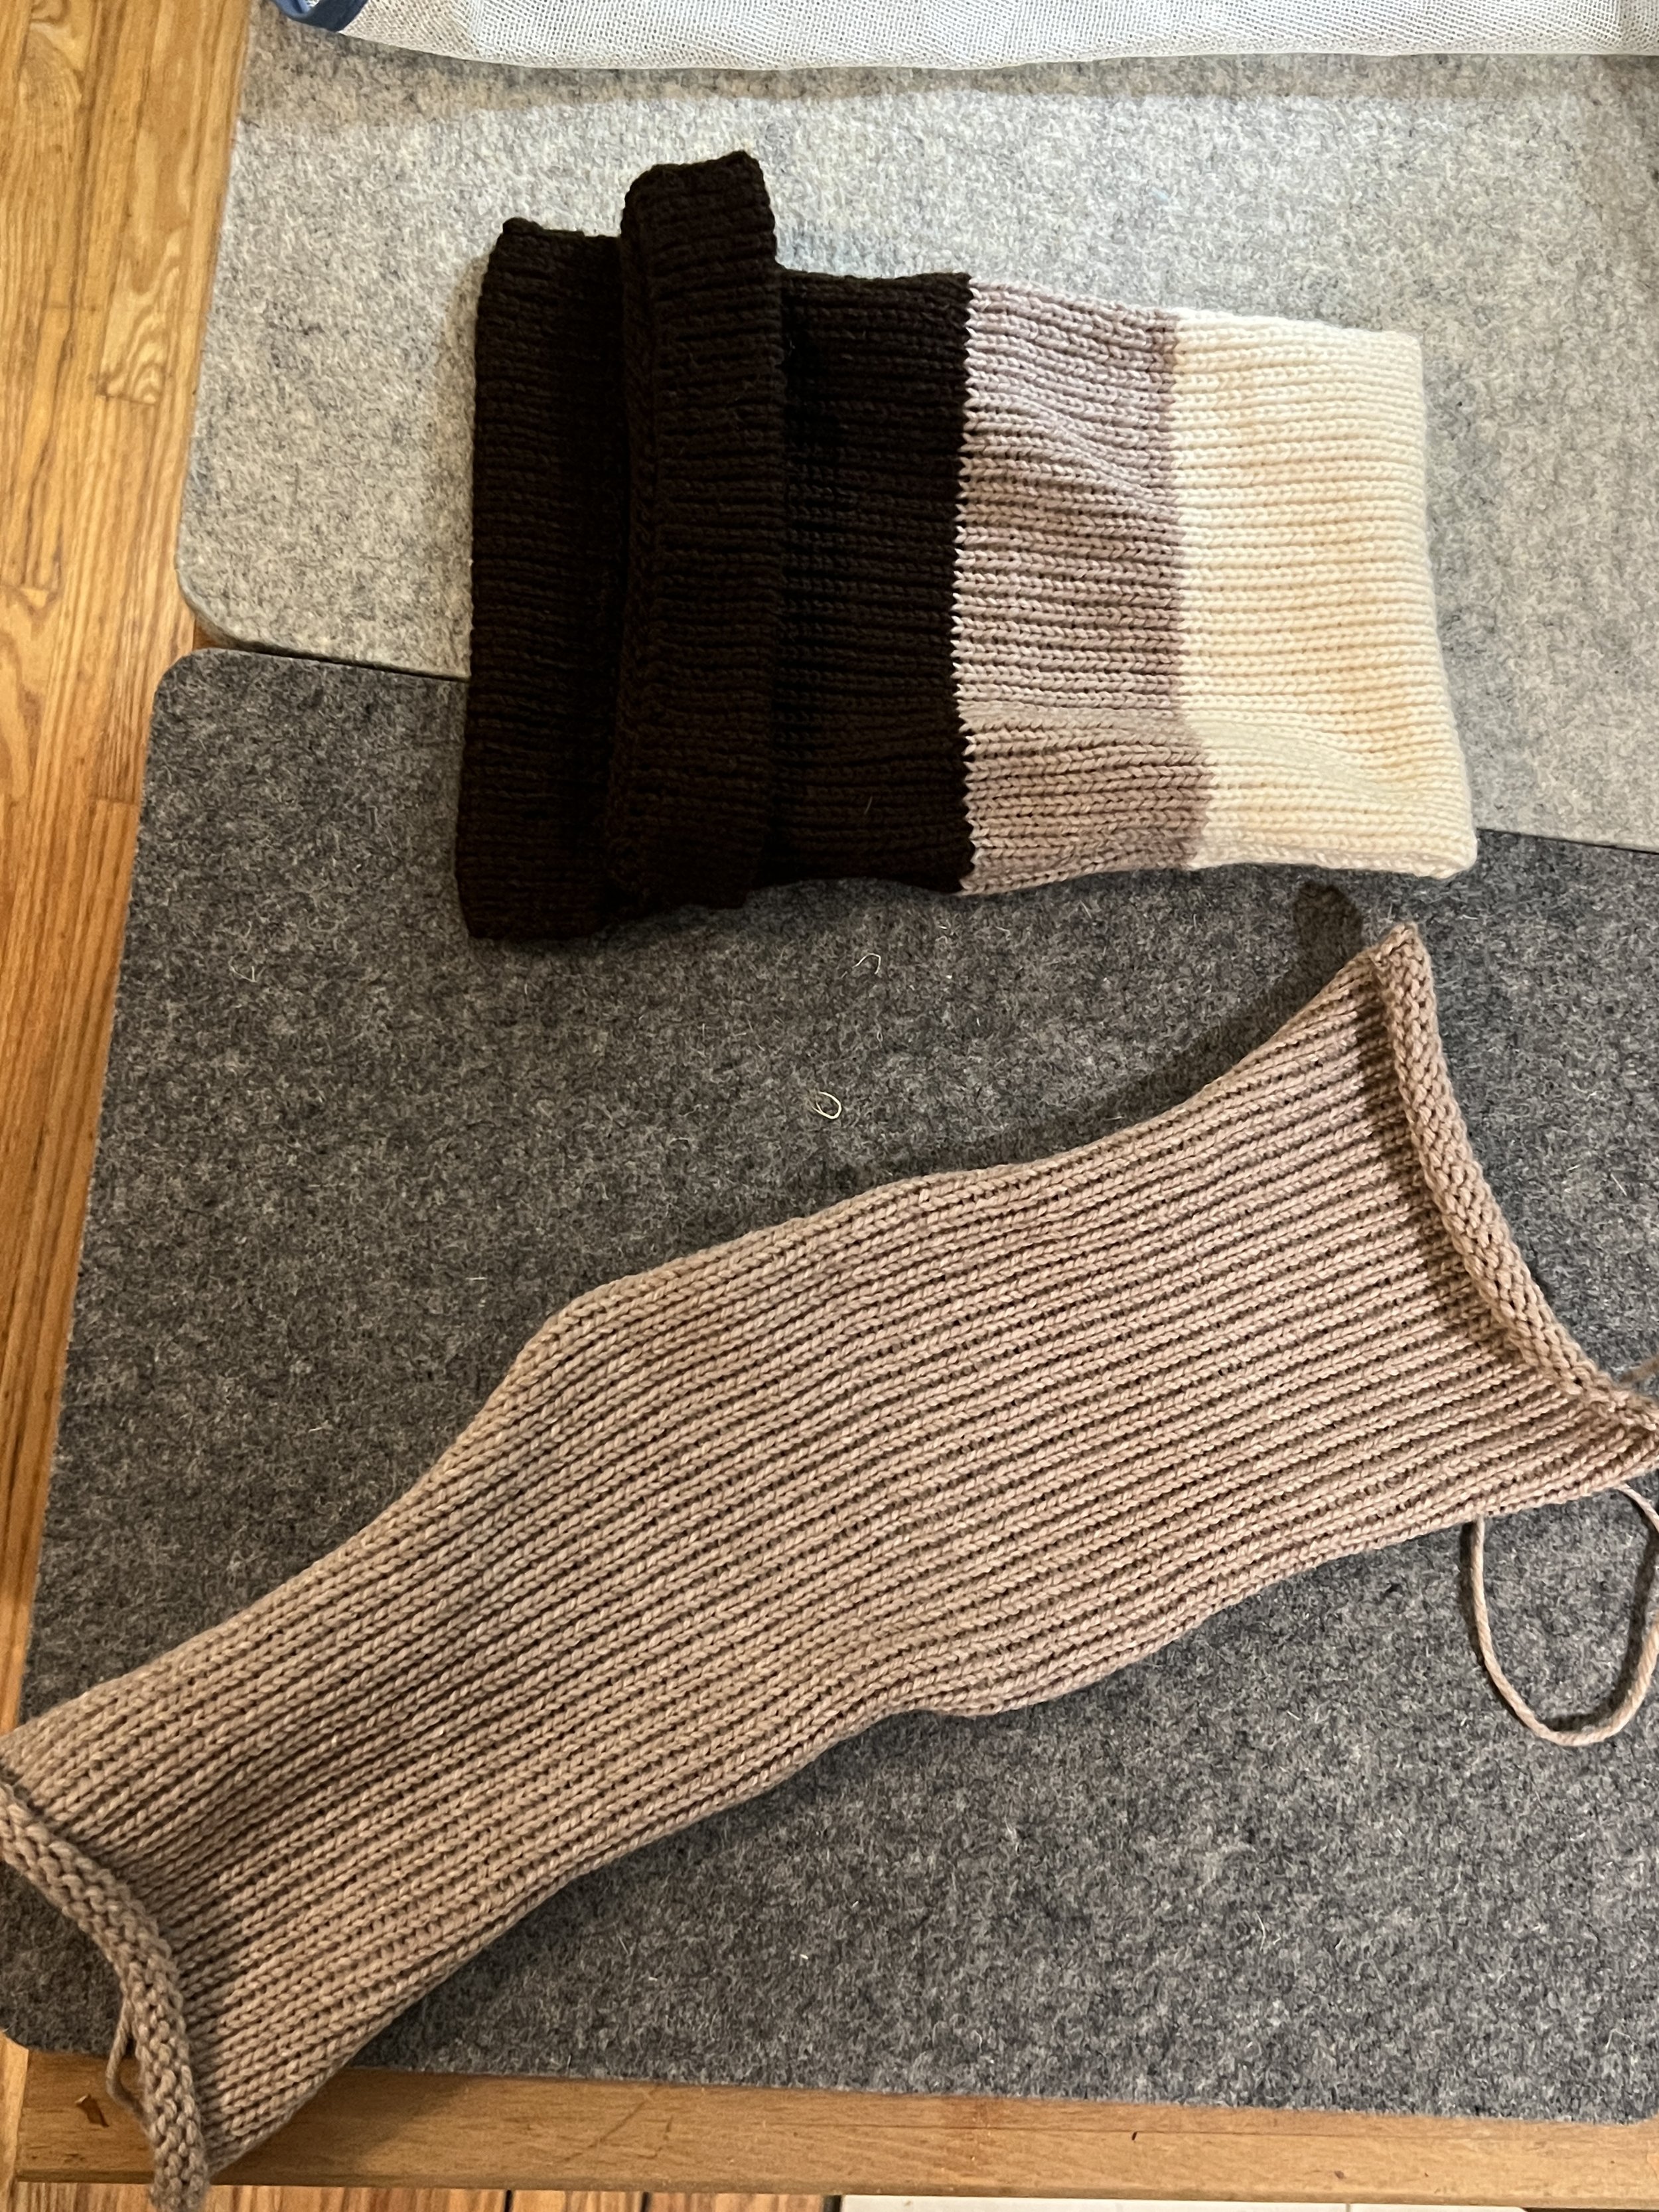
Knitting the Welt - (Time mark 36:35) - Before we start knitting the welts and the cuffs, we must lightly press each piece. This is because the fabric hasn’t settled into its correct sizing. Must be done before joining. Pin and lightly press. Now we knit the back welt in k1p1 rib we start by placing the pattern paper for the back at the starting line of the welt. Push the required number of needles to the B position and pick up the first row of stitches onto the flat bed with the purl side towards you.

Set the stitch dial two numbers lower (ie. from 7 to 5) to make rib stitch tighter. Reset the Knit contour row setting to a 10% higher setting than tension gauge reading for stockinette (ie from 41 to 45). Knit from right to left. Knit the required number of rows. To make the K1P1 rib use the latch hook to form every other stitch in this manner: Enter the hook at the area where we will have the ribbing border the knitting. Now drop that column to that area and then reform all the way back up to the top stitch placing that stitch back on the needle. Repeat as needed. Leave the end of the yarn 3x longer than the width of the back welt for closing up the last stitches.

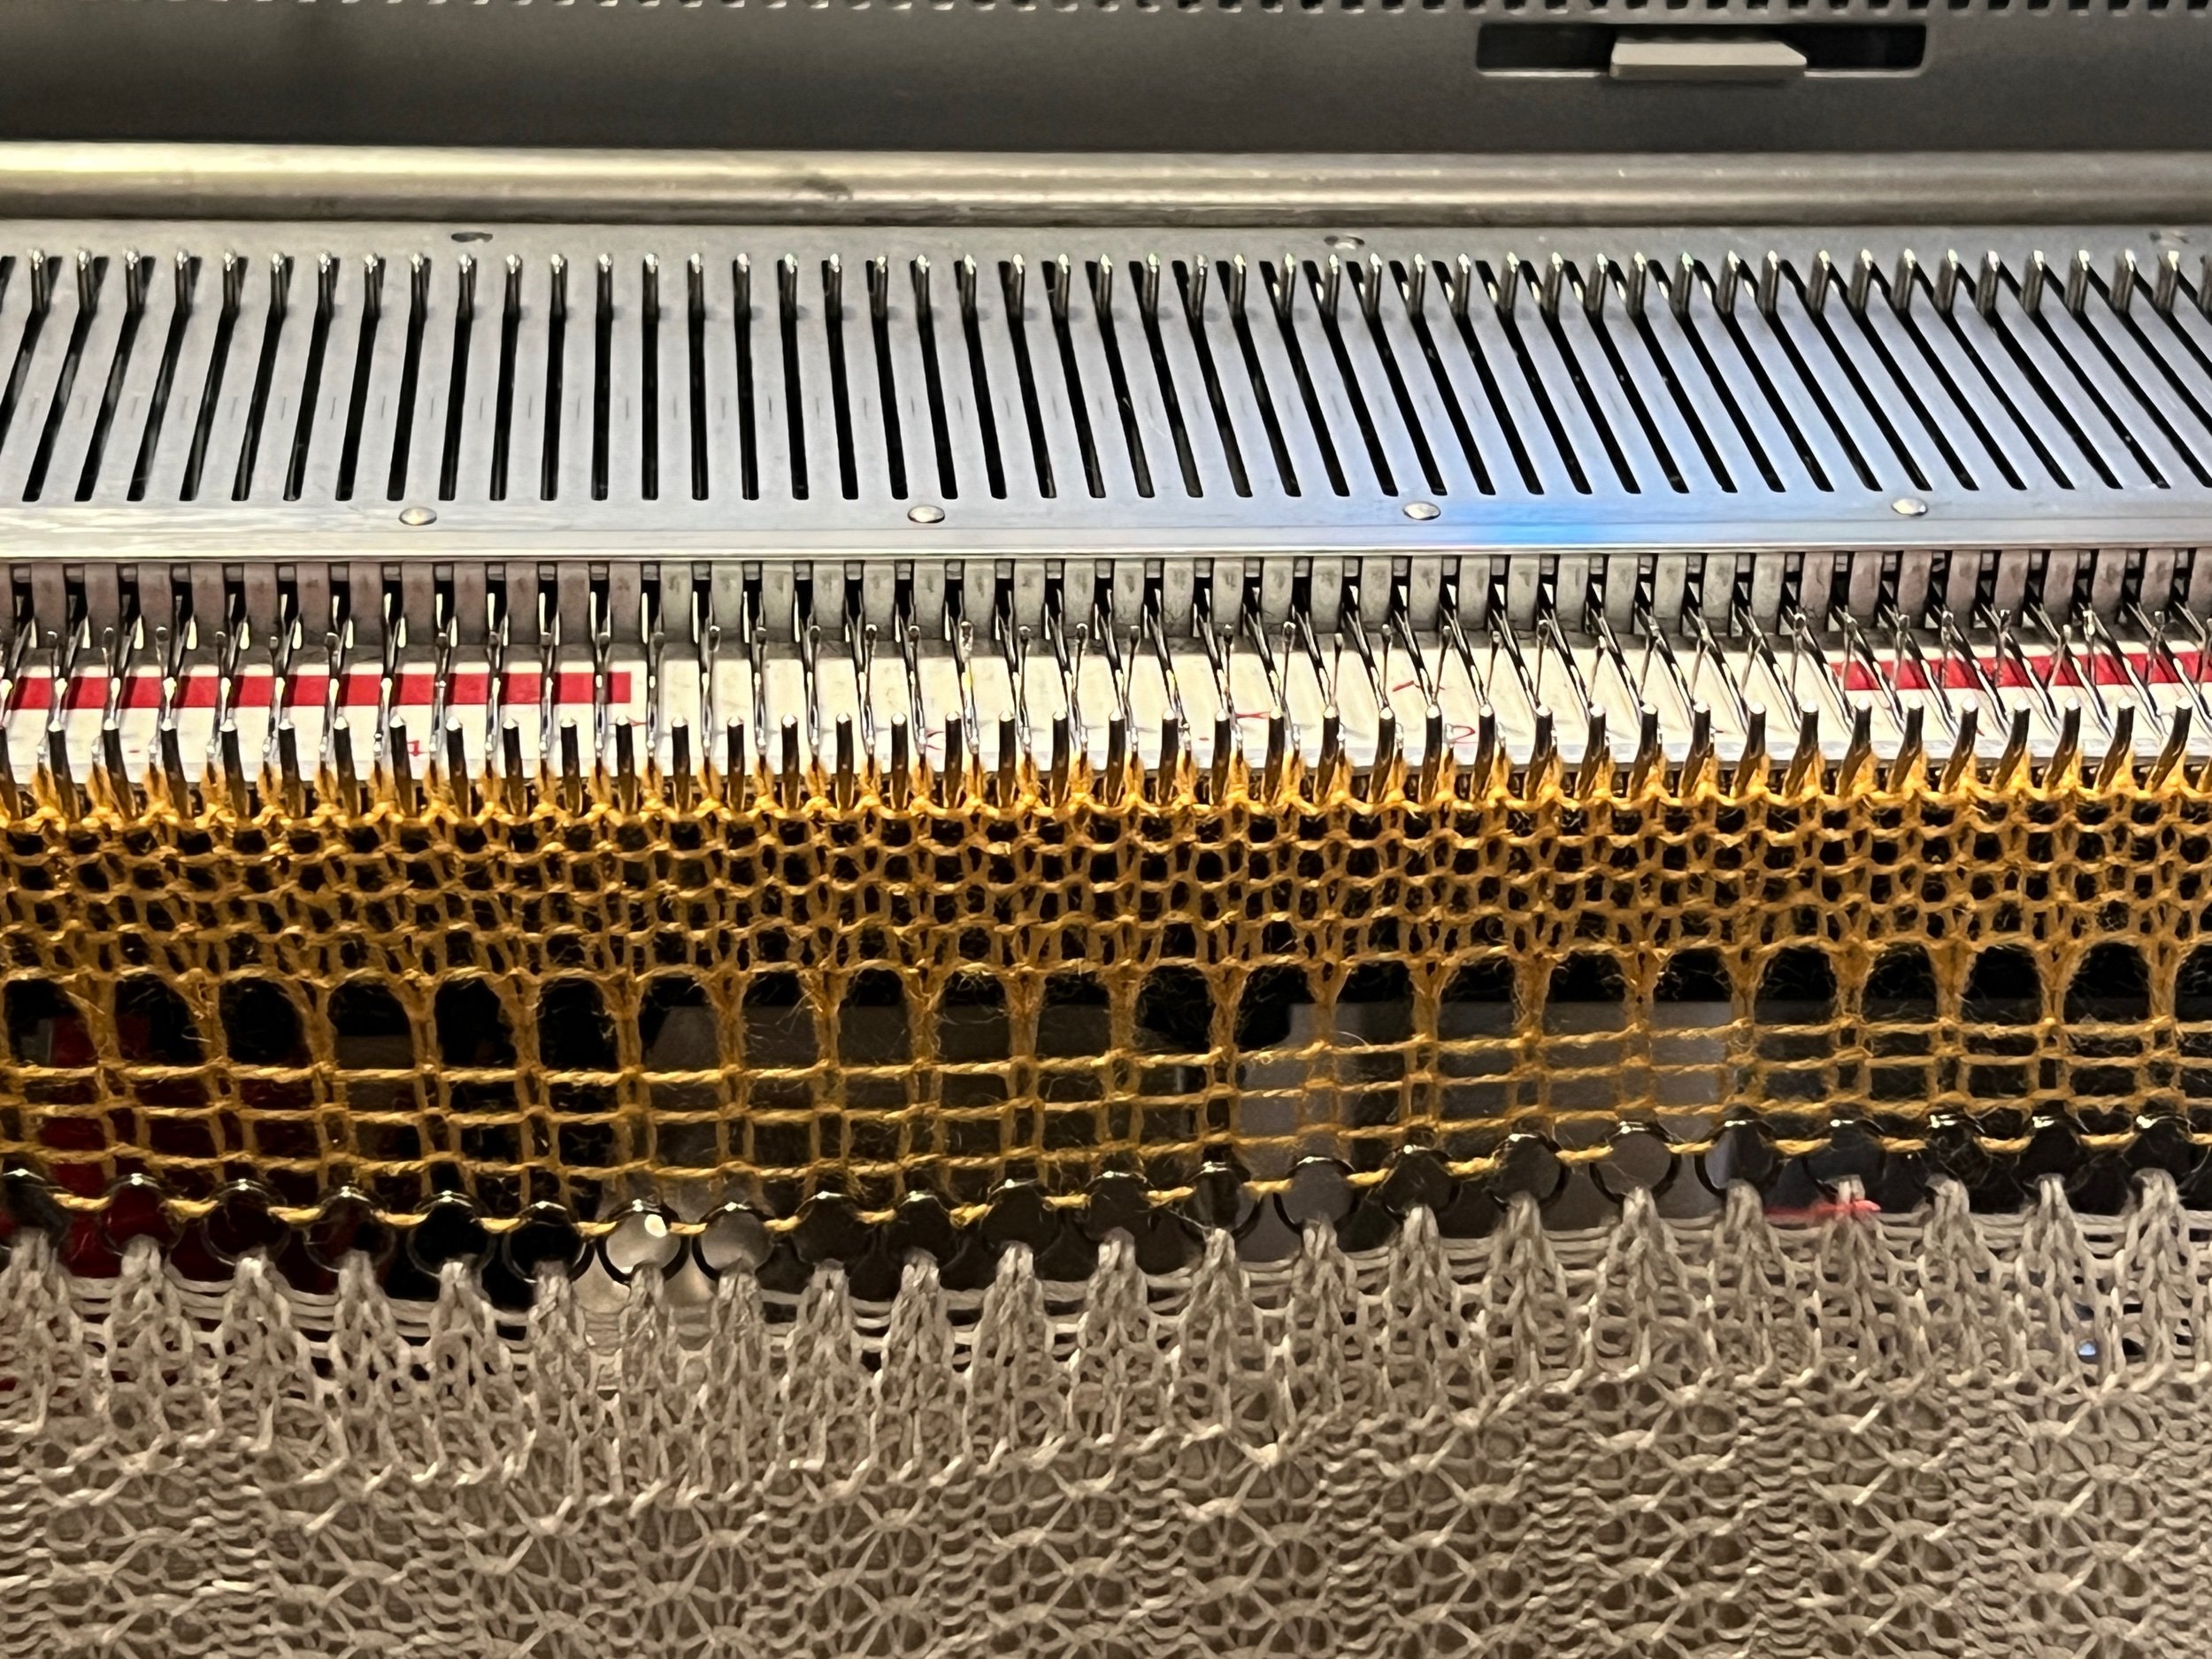
Now setting the carriage: cam lever to SLIP, Side levers to DOWN to the circle icon, Russell levers to II setting. Push needles with reformed stitches to the D position. then knit one row waste yarn. Change cam lever to stockinette work 5-6 rows. Now remove fabric.

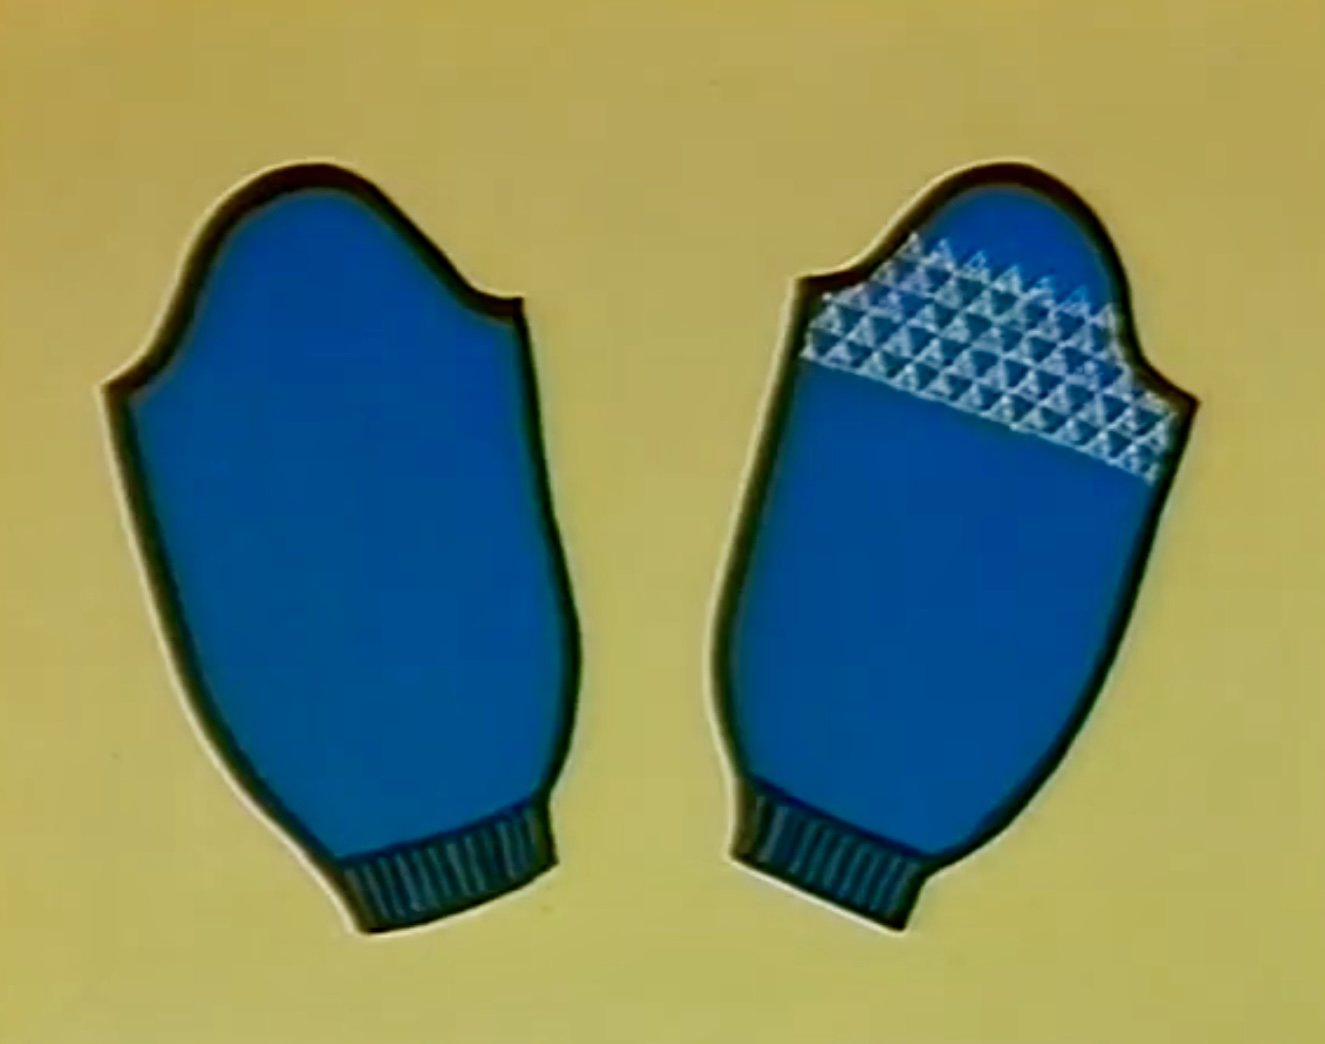
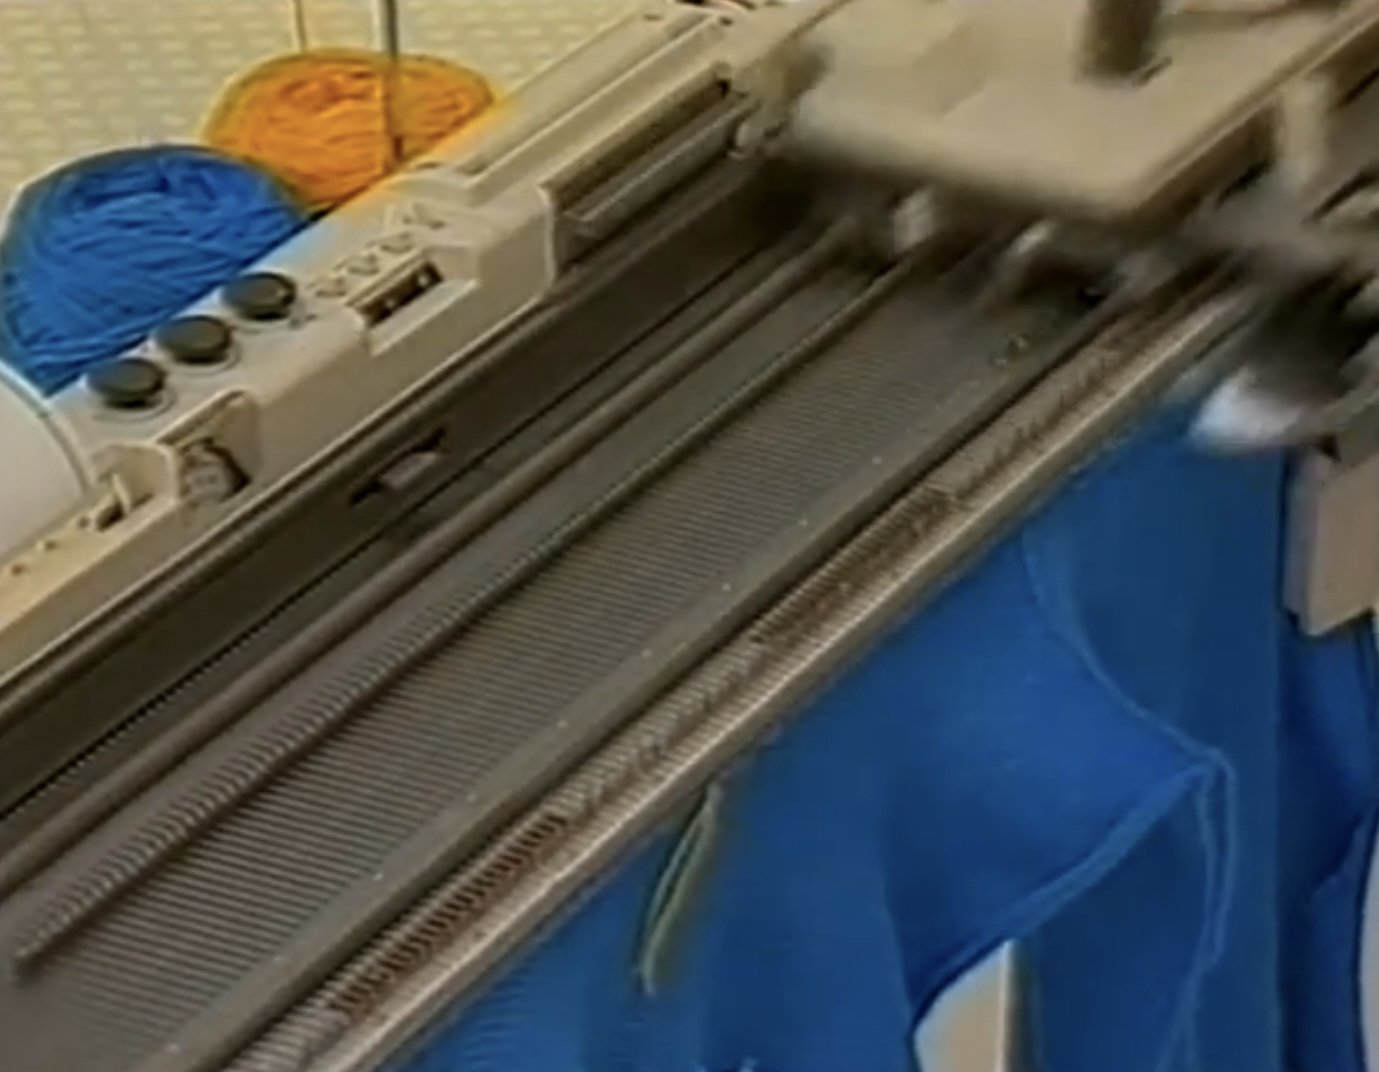
Pull ravel cord out. Knit front welt and cuffs as we manually did already.

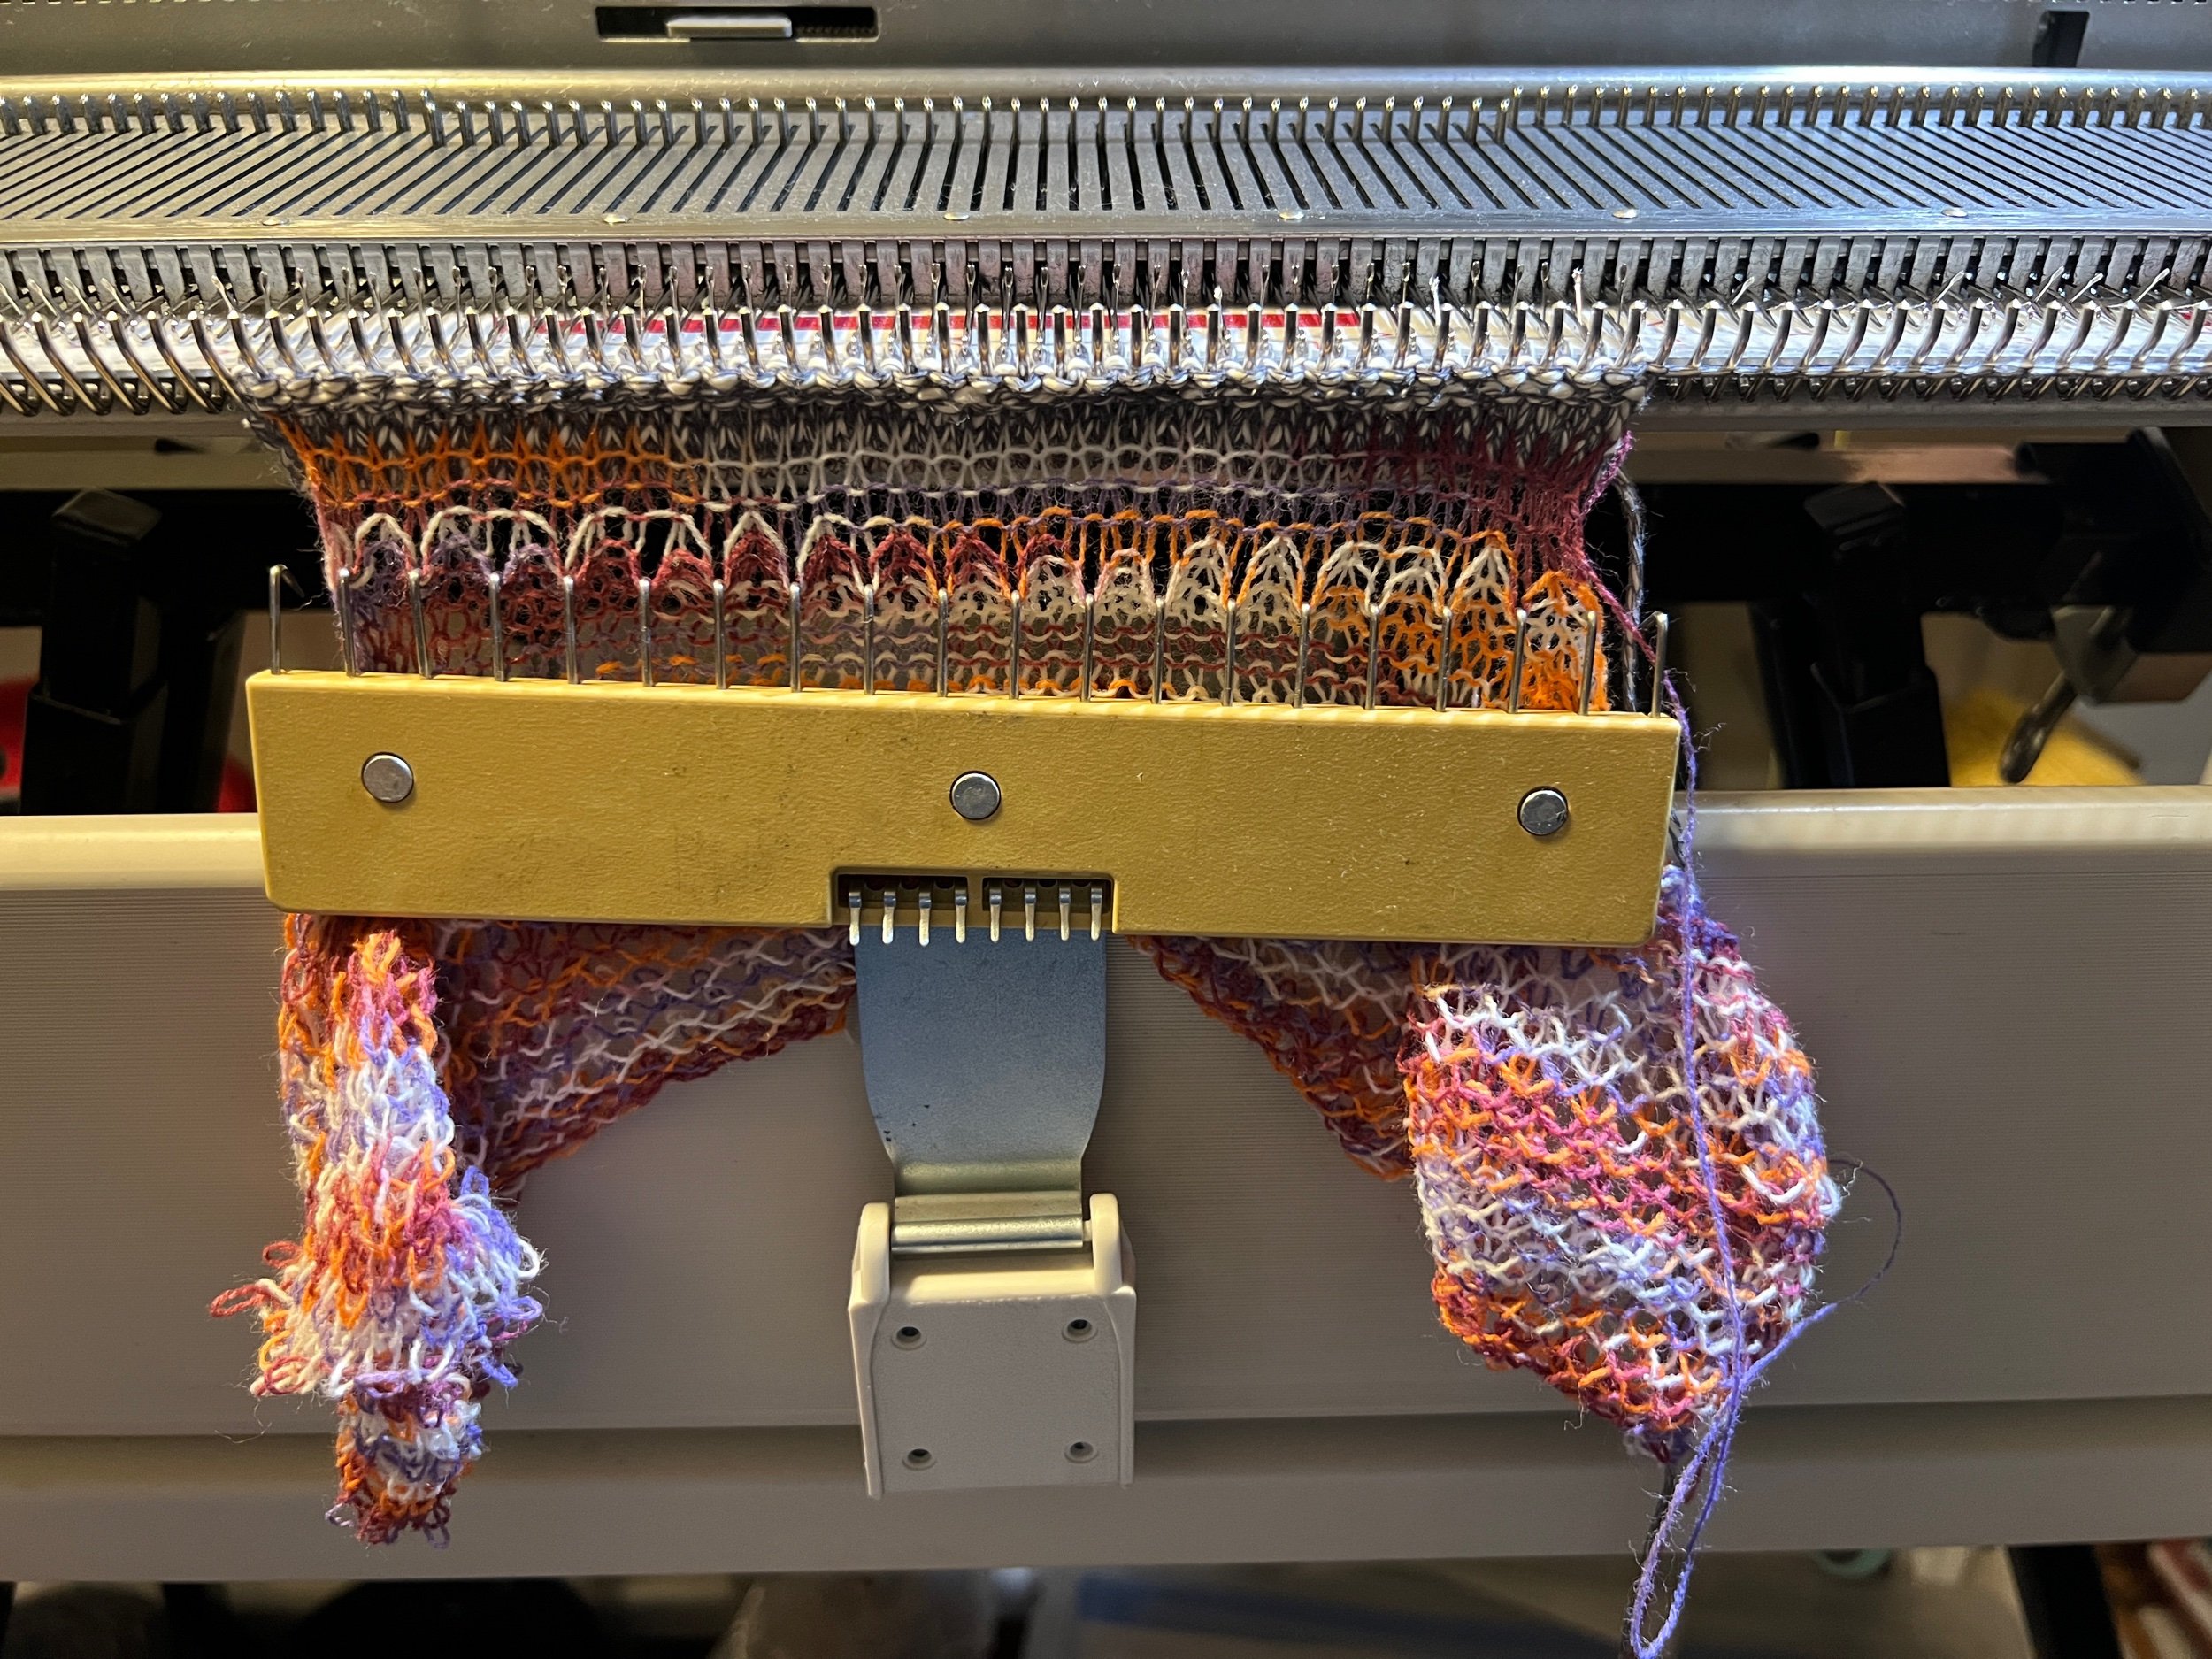
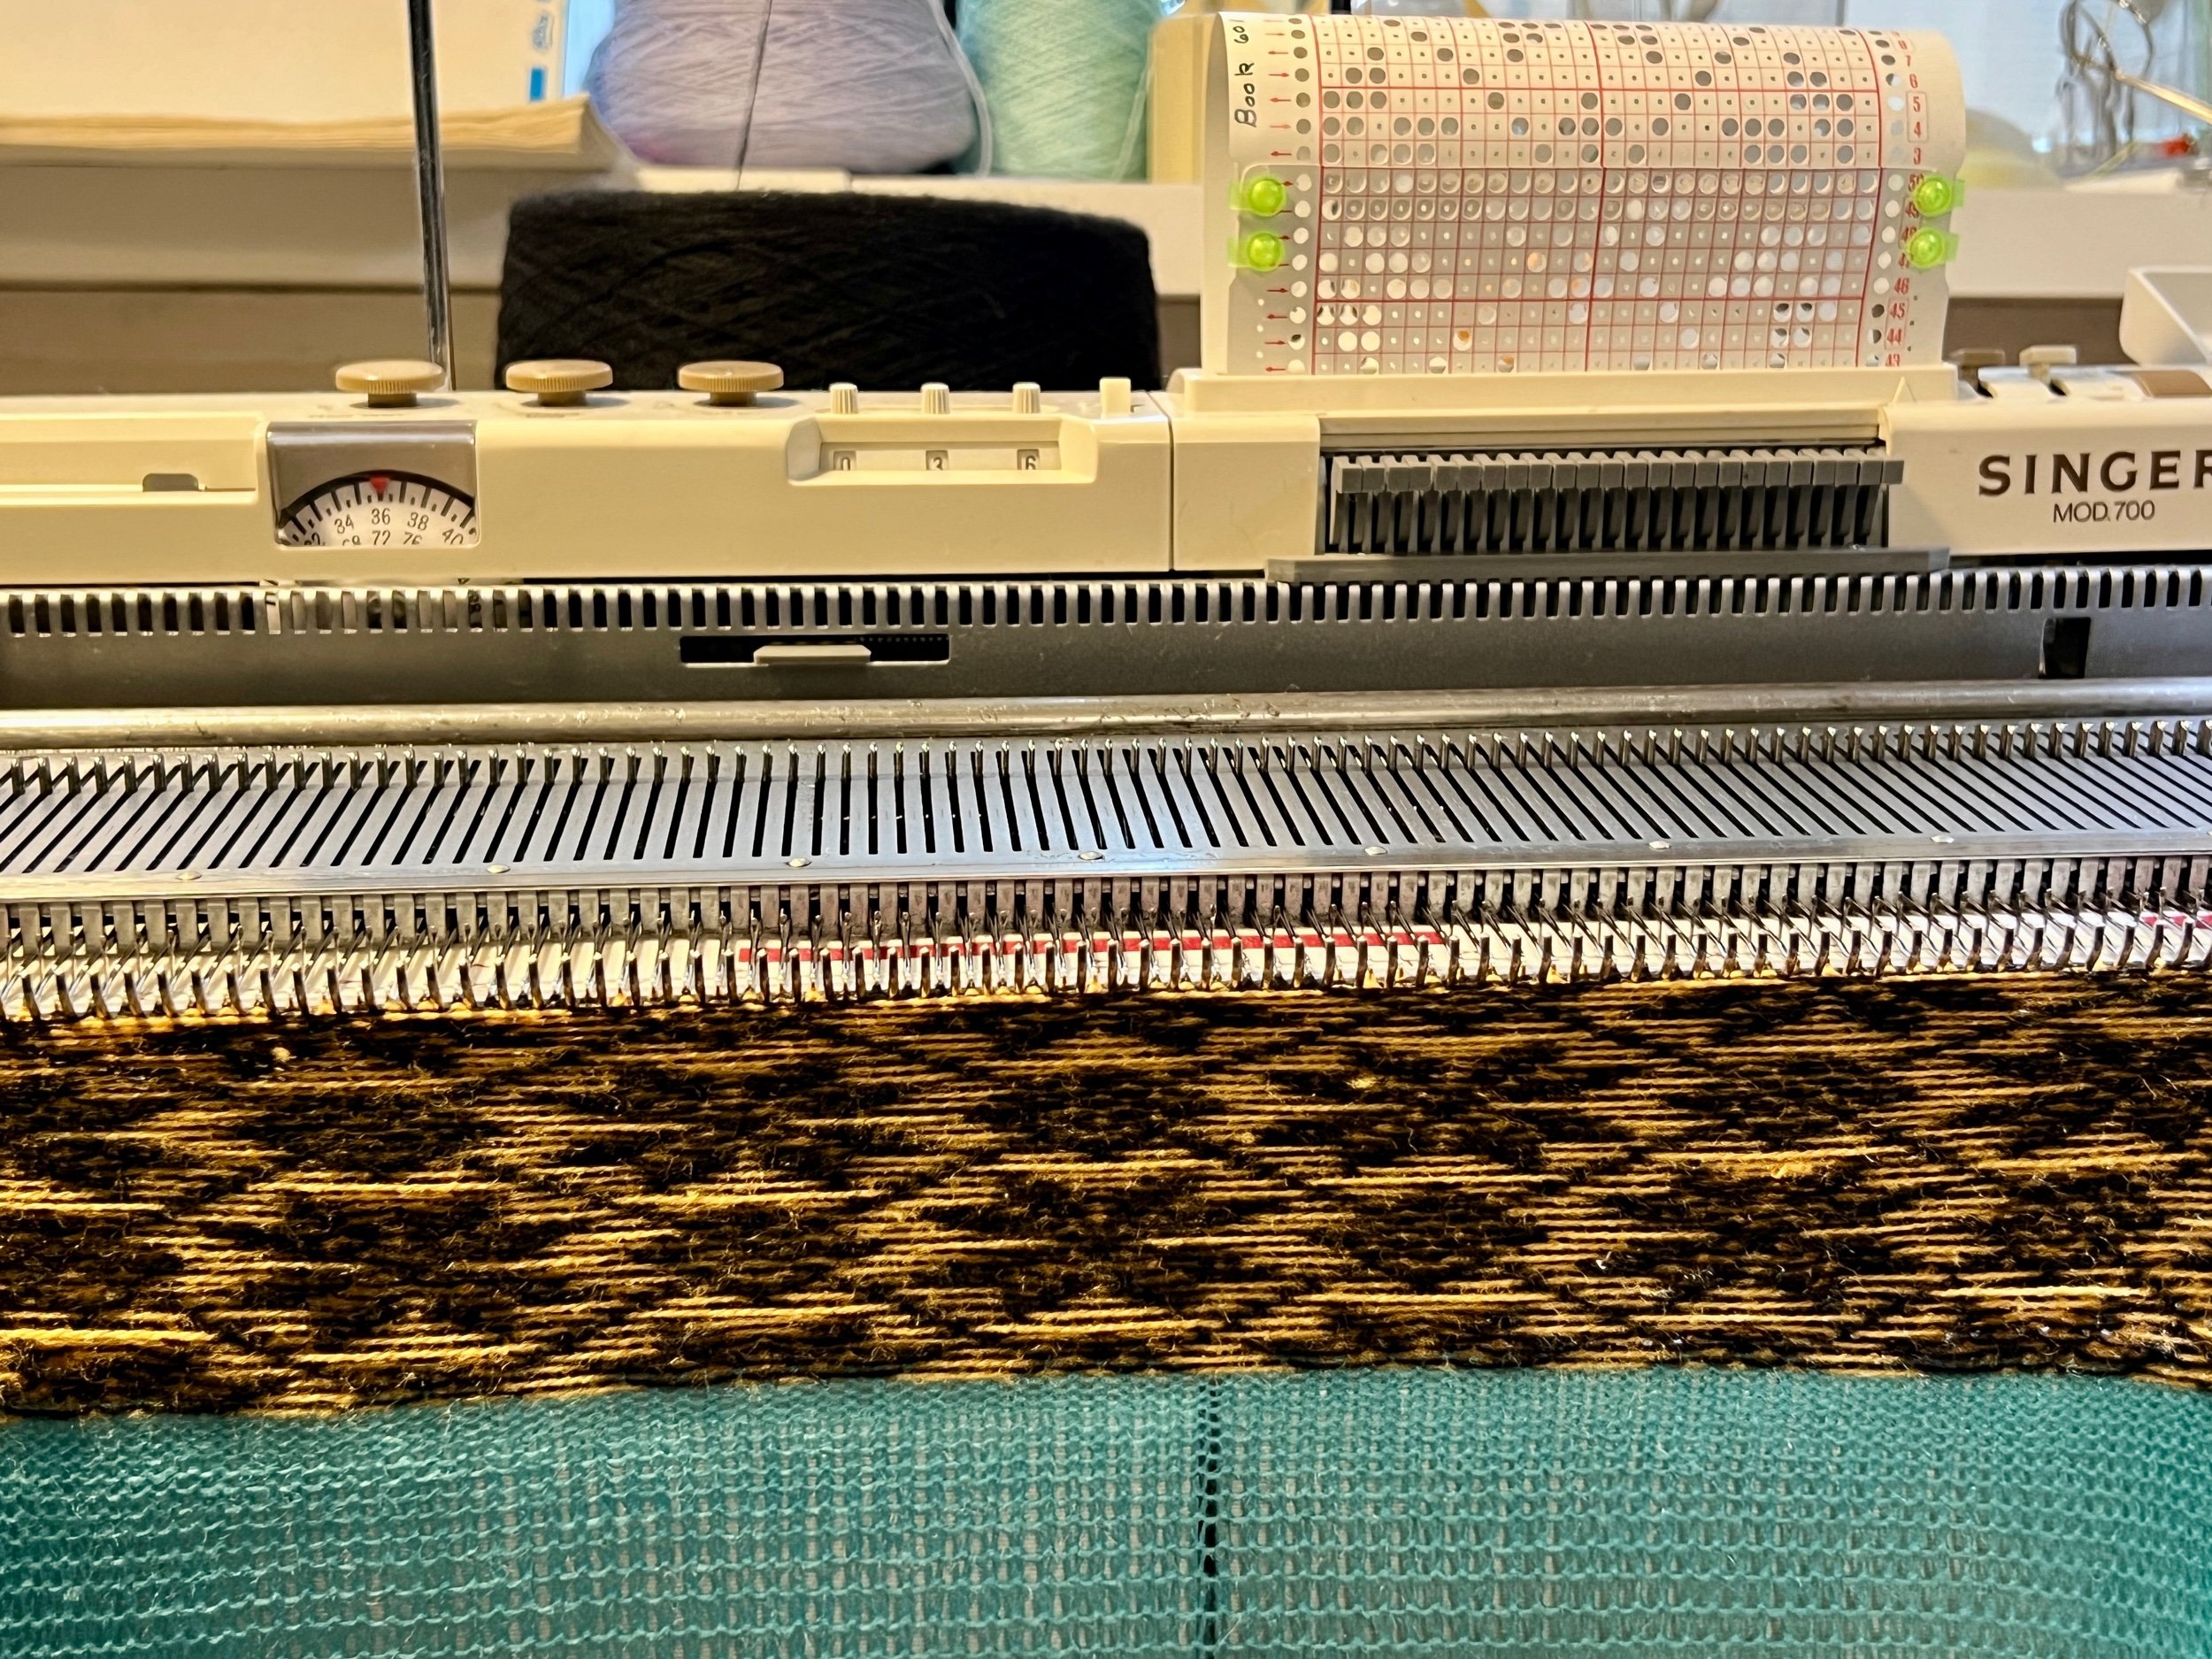
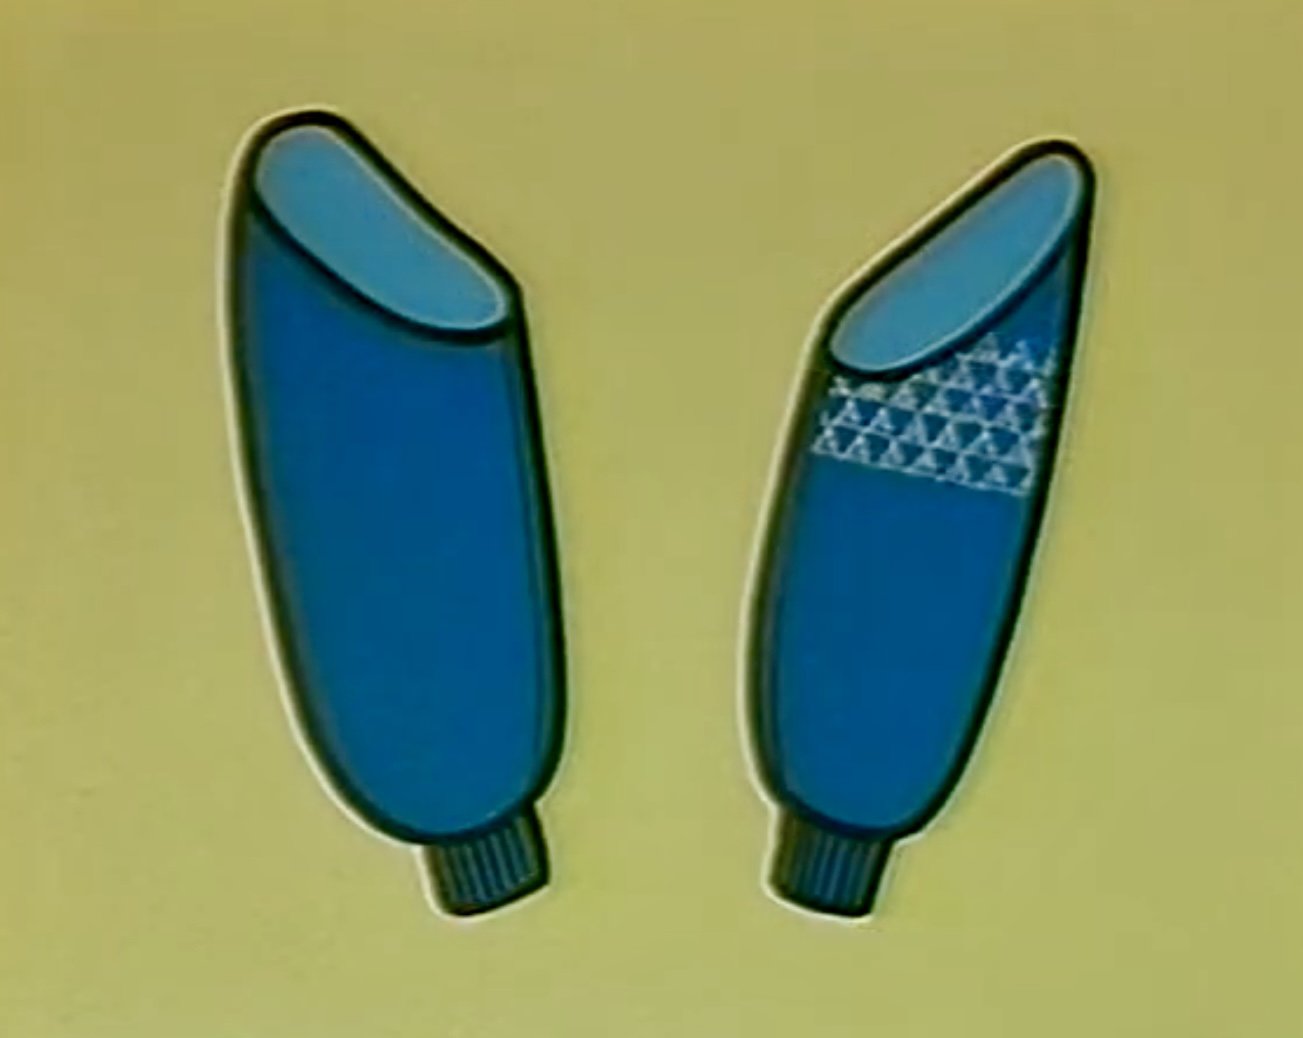
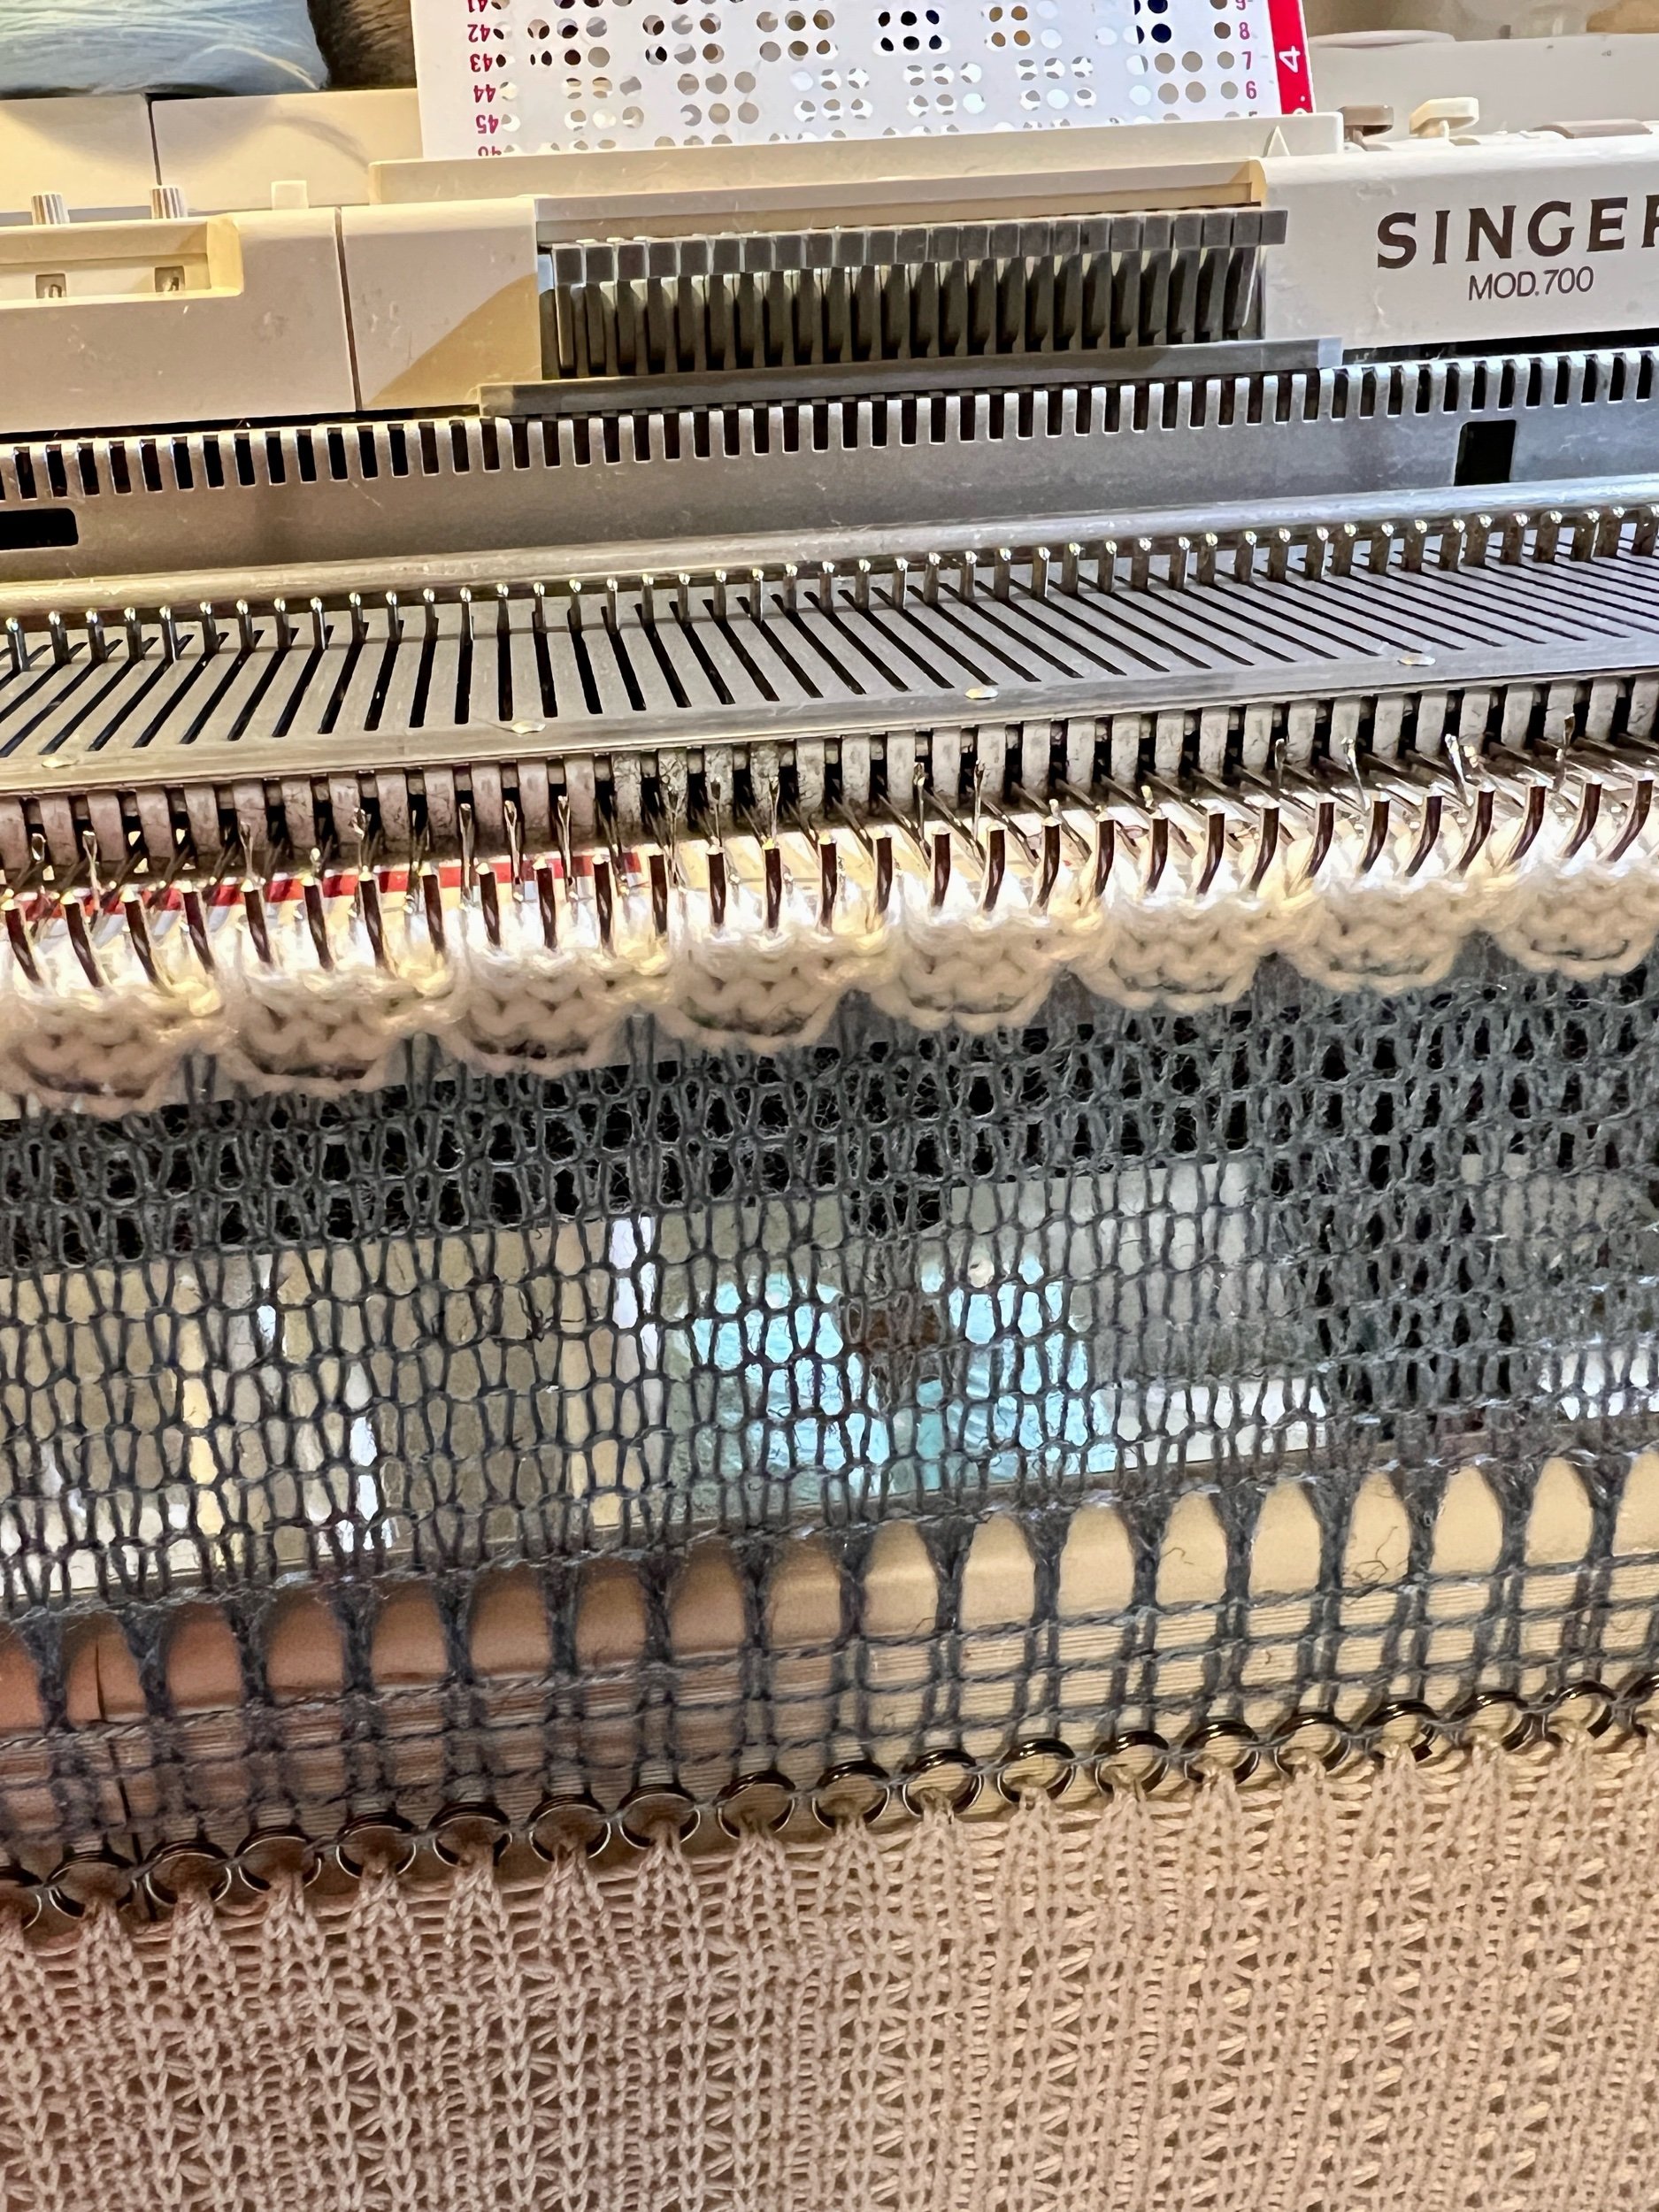
Since the cuff is narrower than the sleeve we must pick up and place the stitches in the following manner. (TIME MARK 40:55) Push the required number of needles to the B position. Then pick up the stitches from the first row of the sleeves main knitting and place them onto the needles in the B position in order to decrease stitching to fit the cuff.

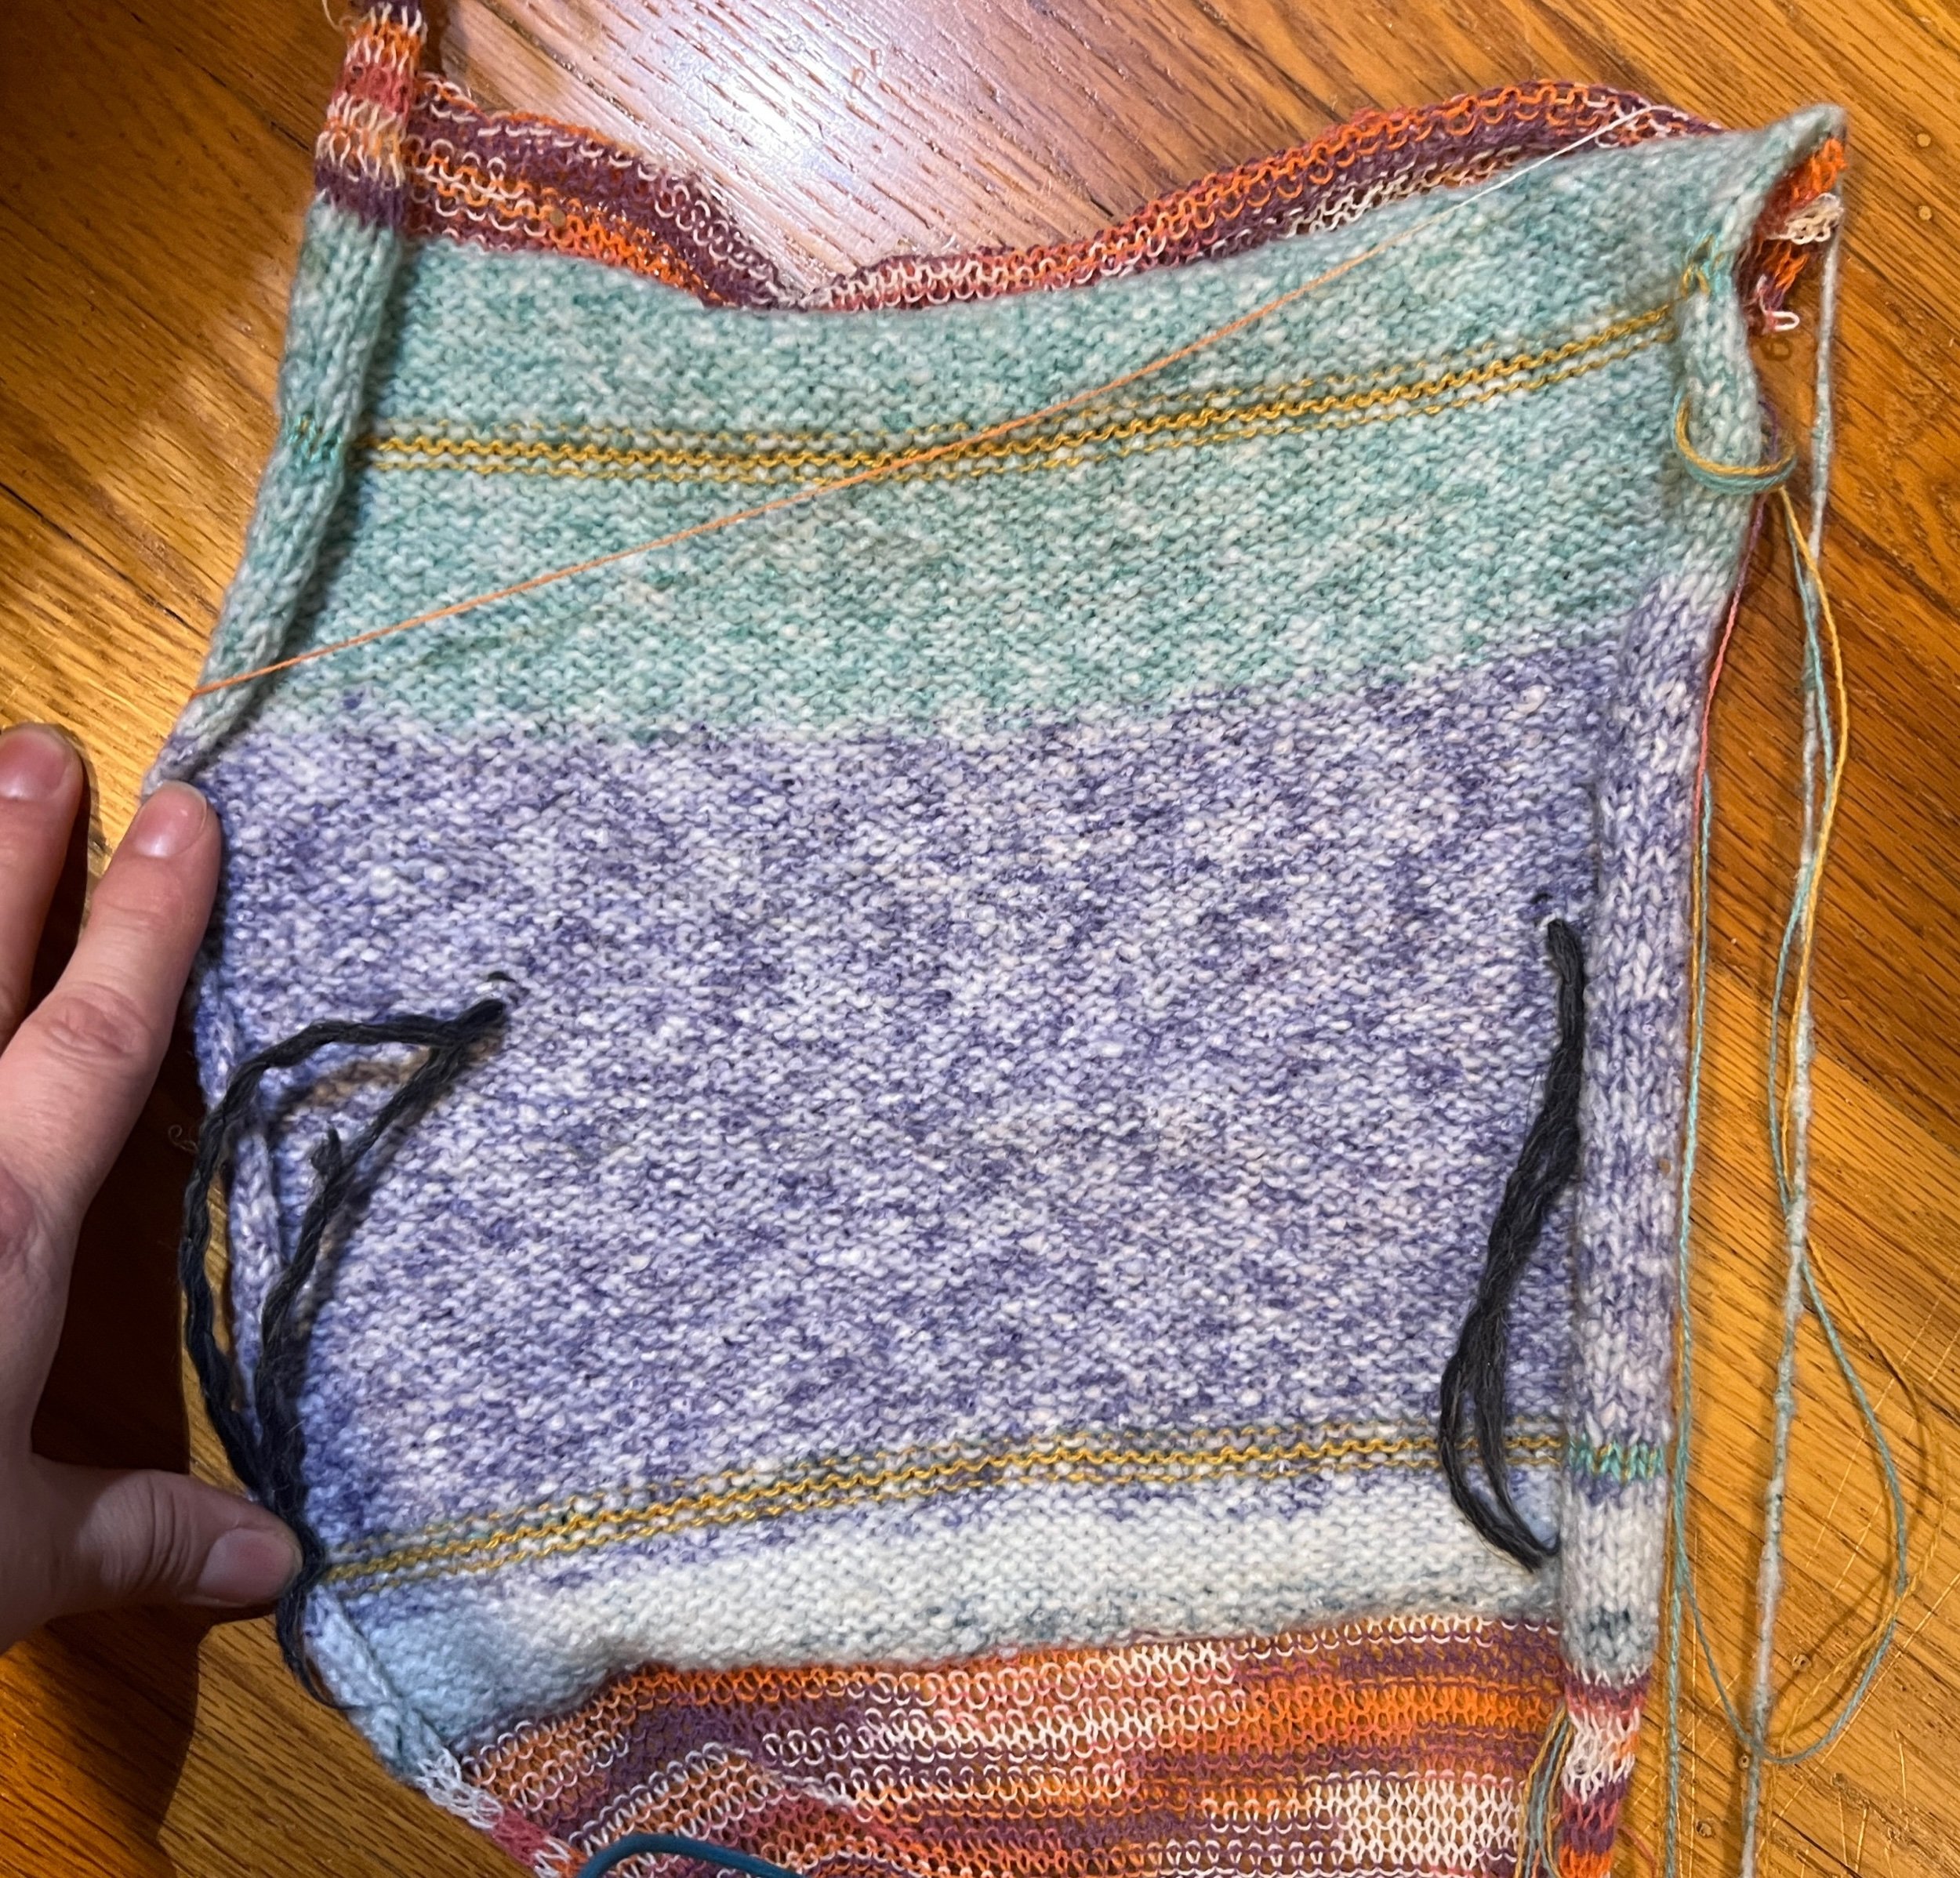
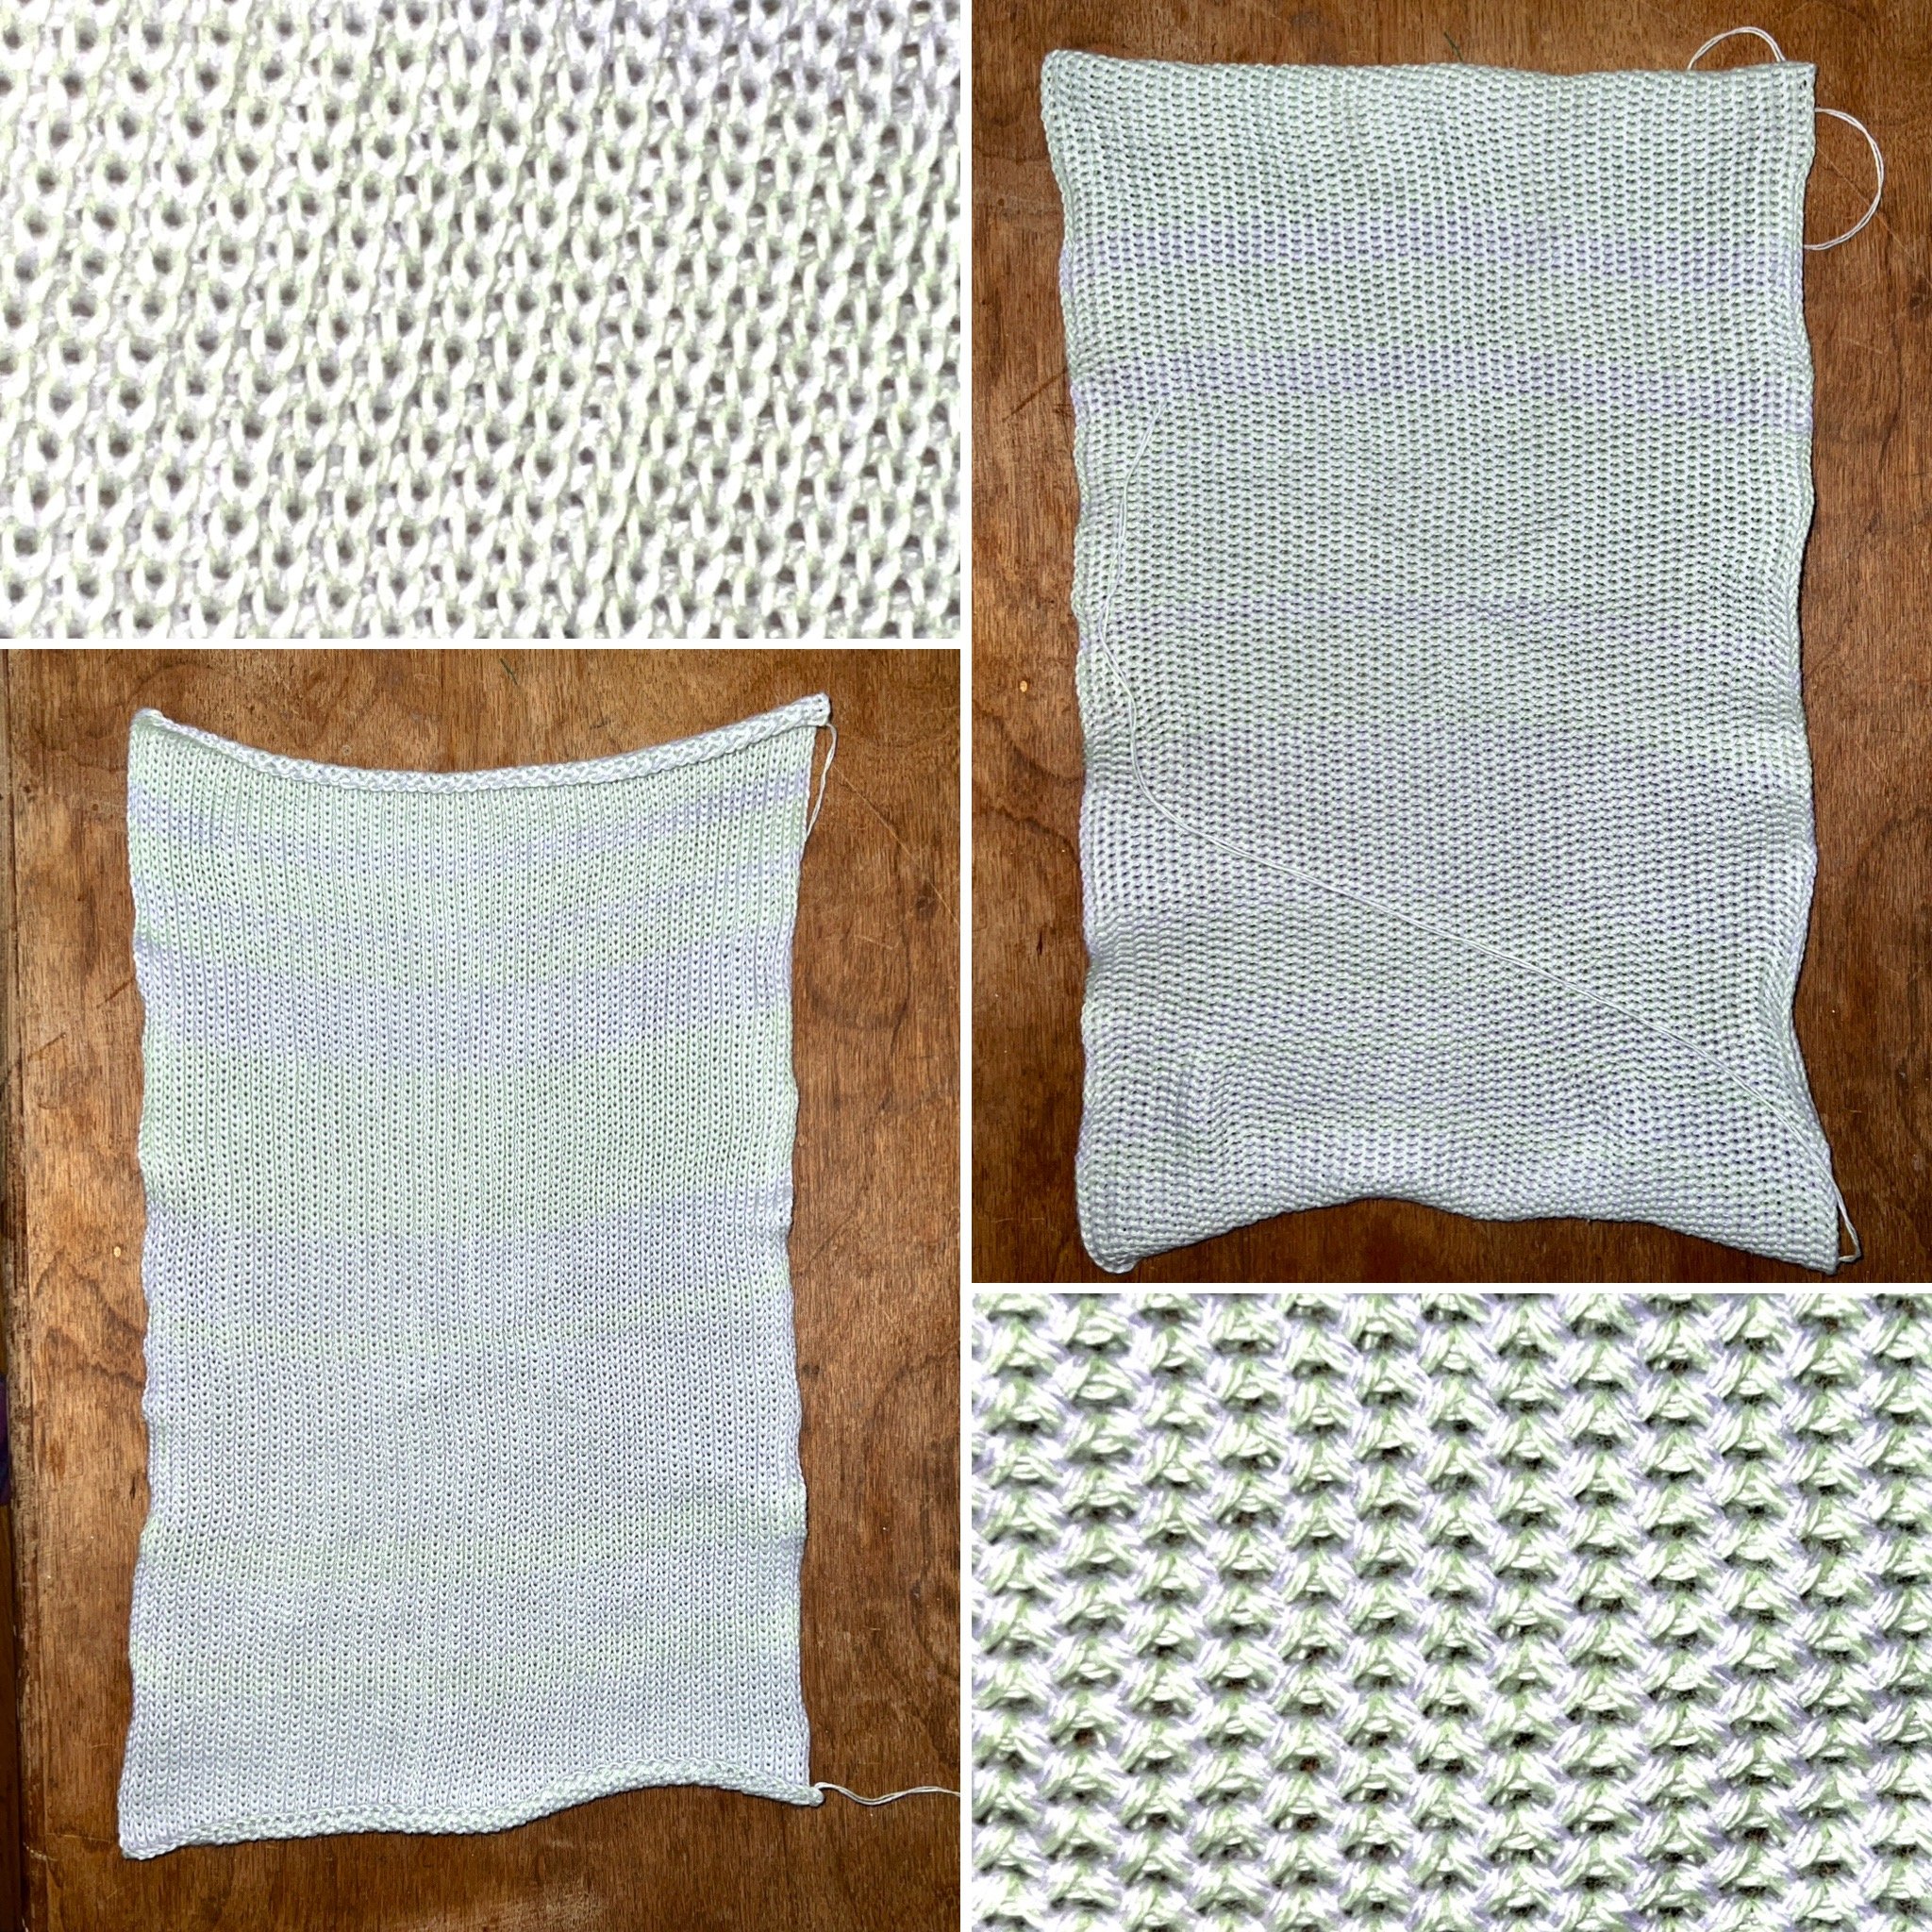
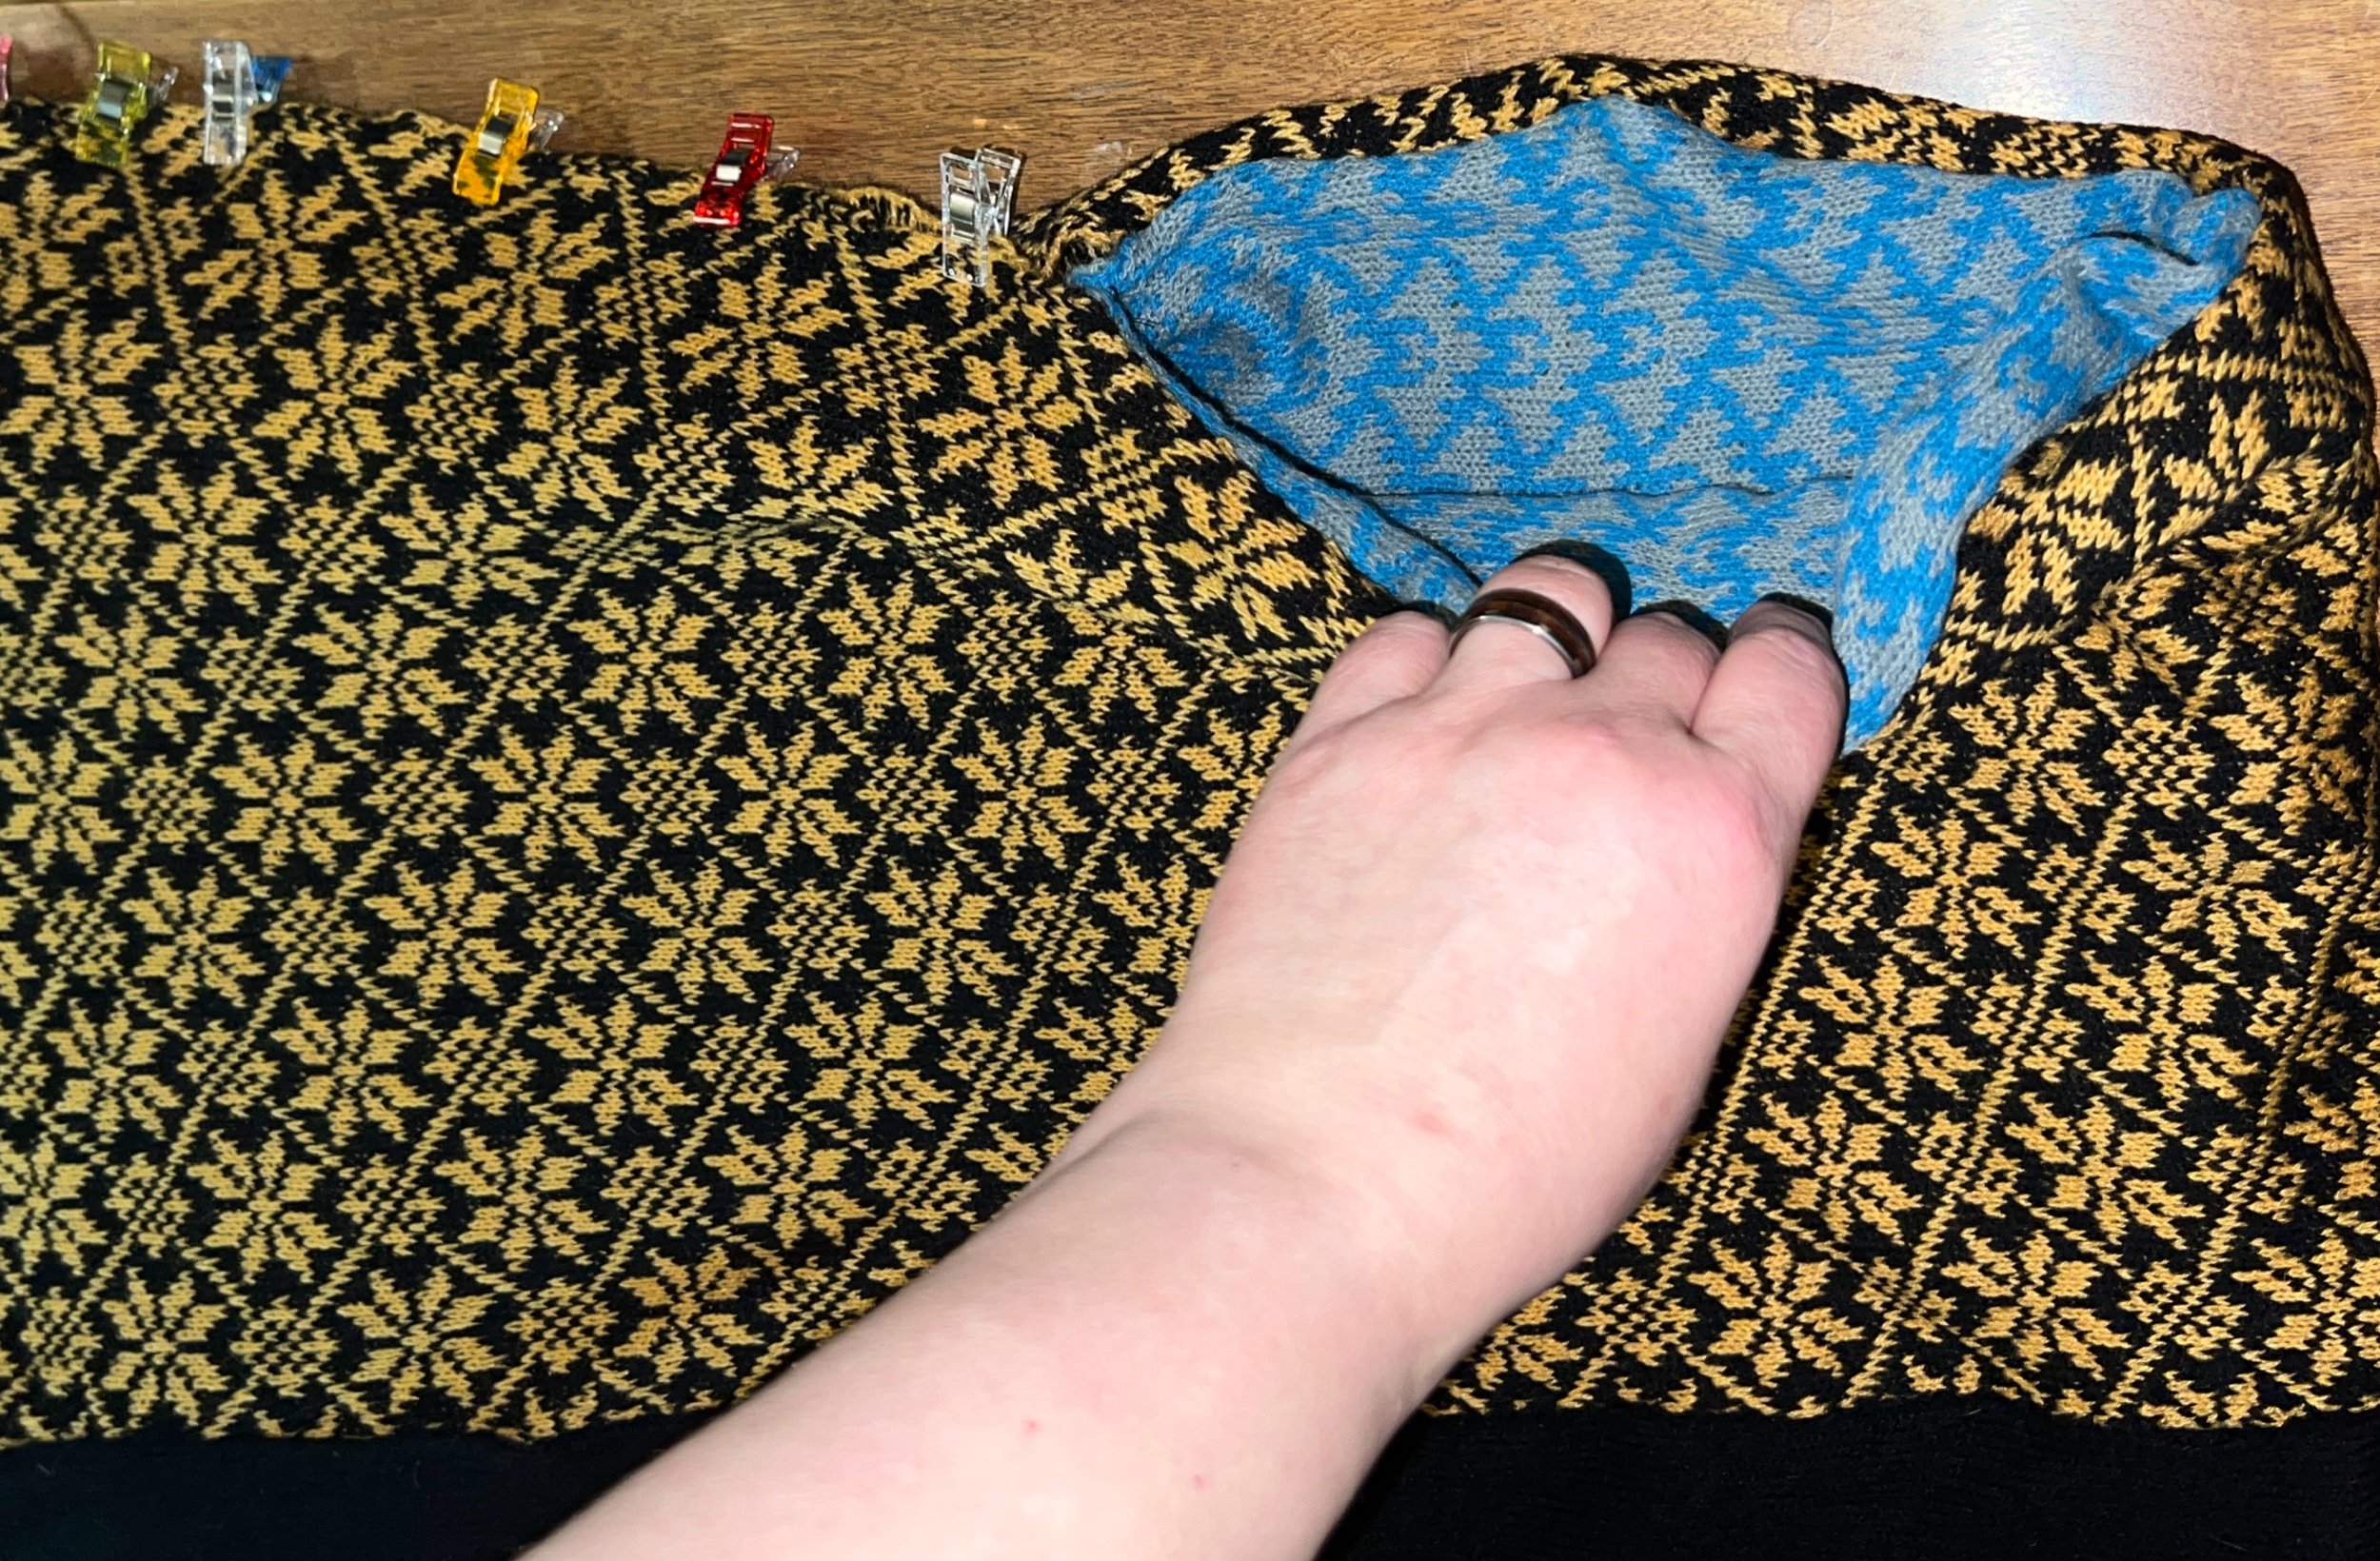
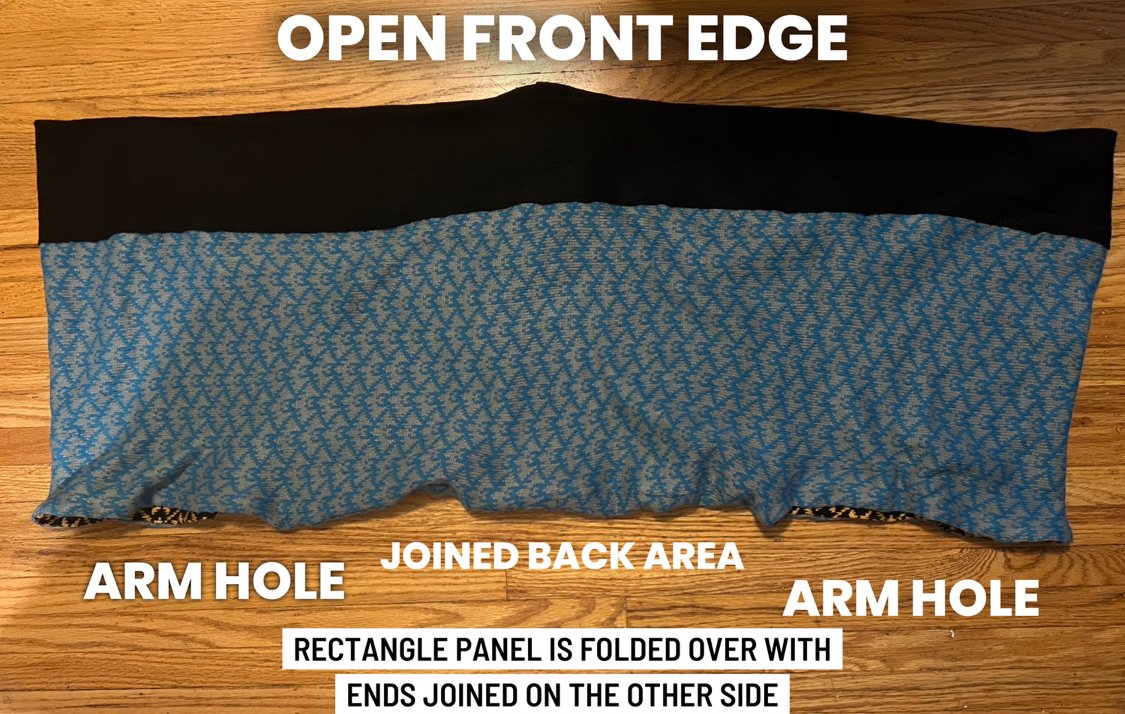
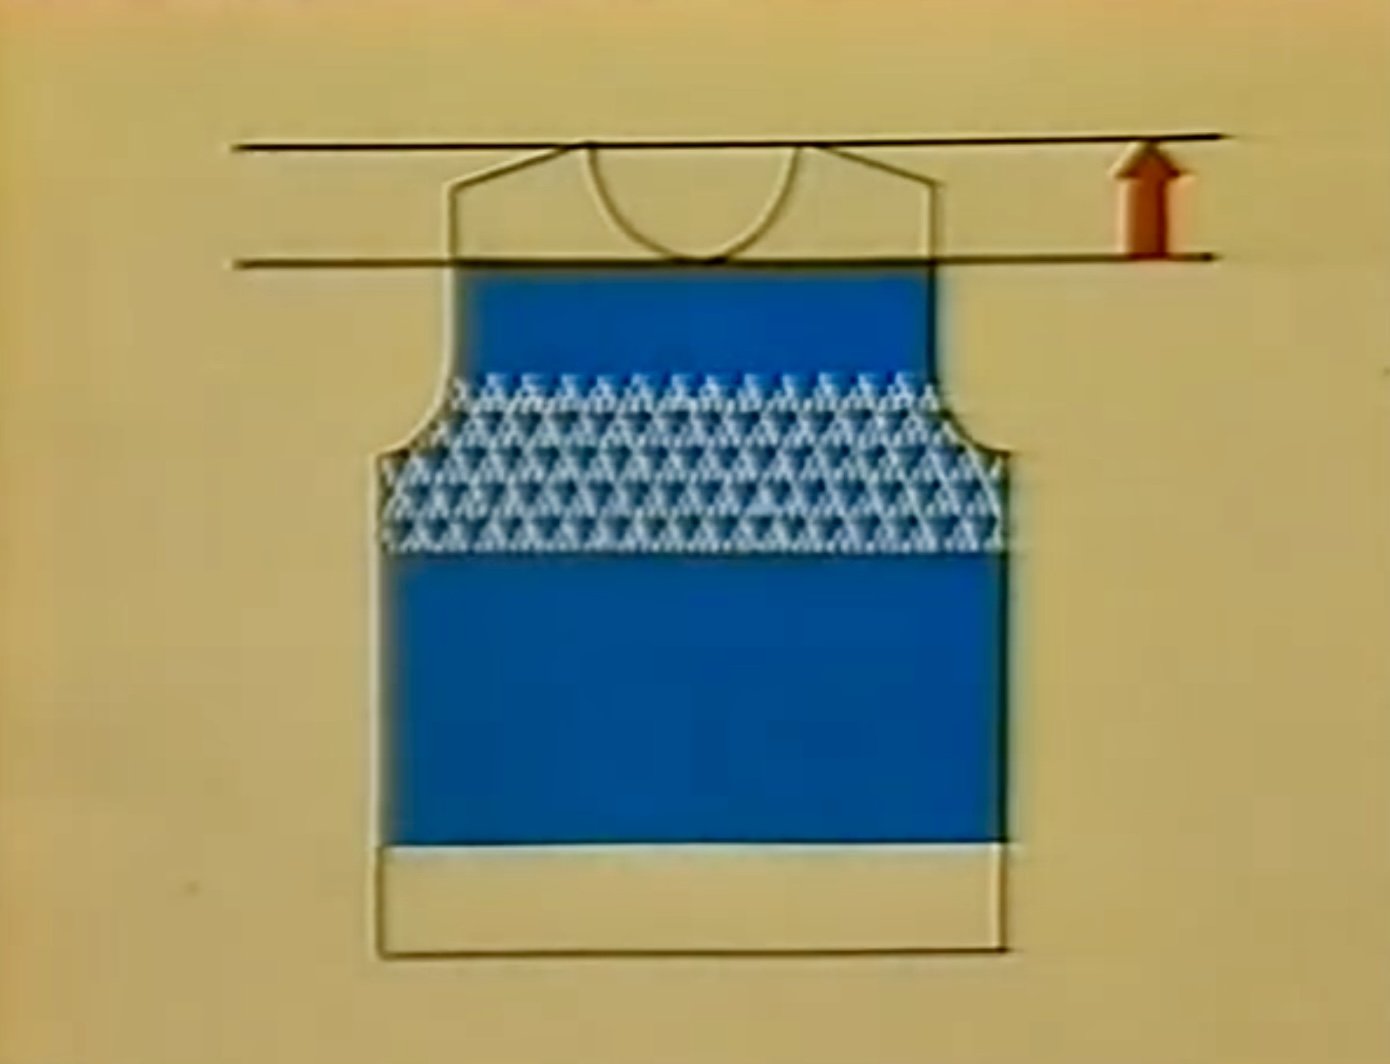
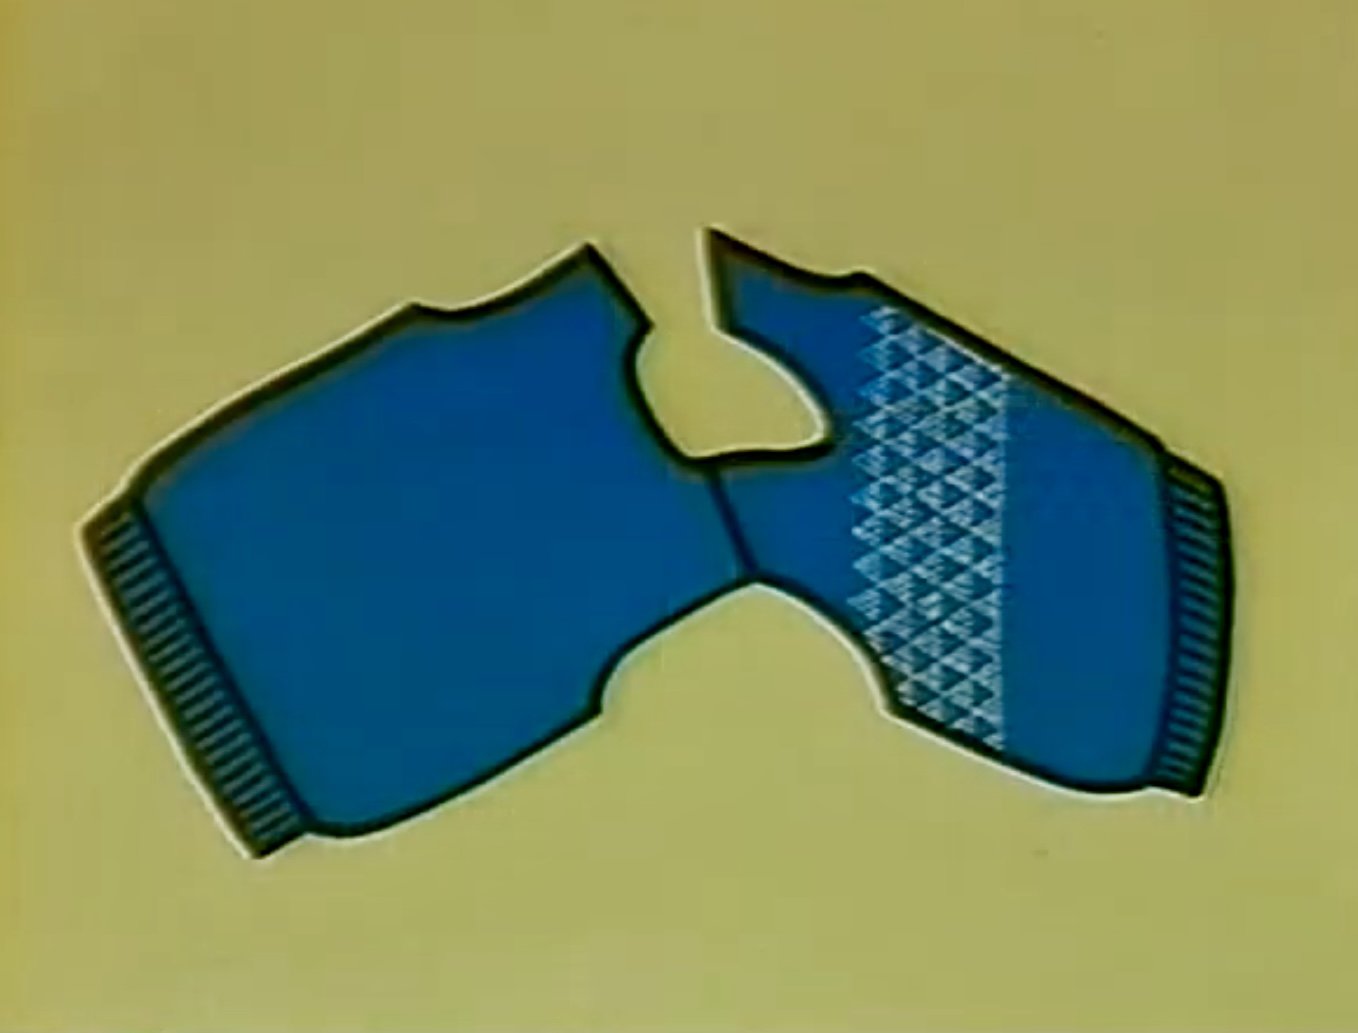
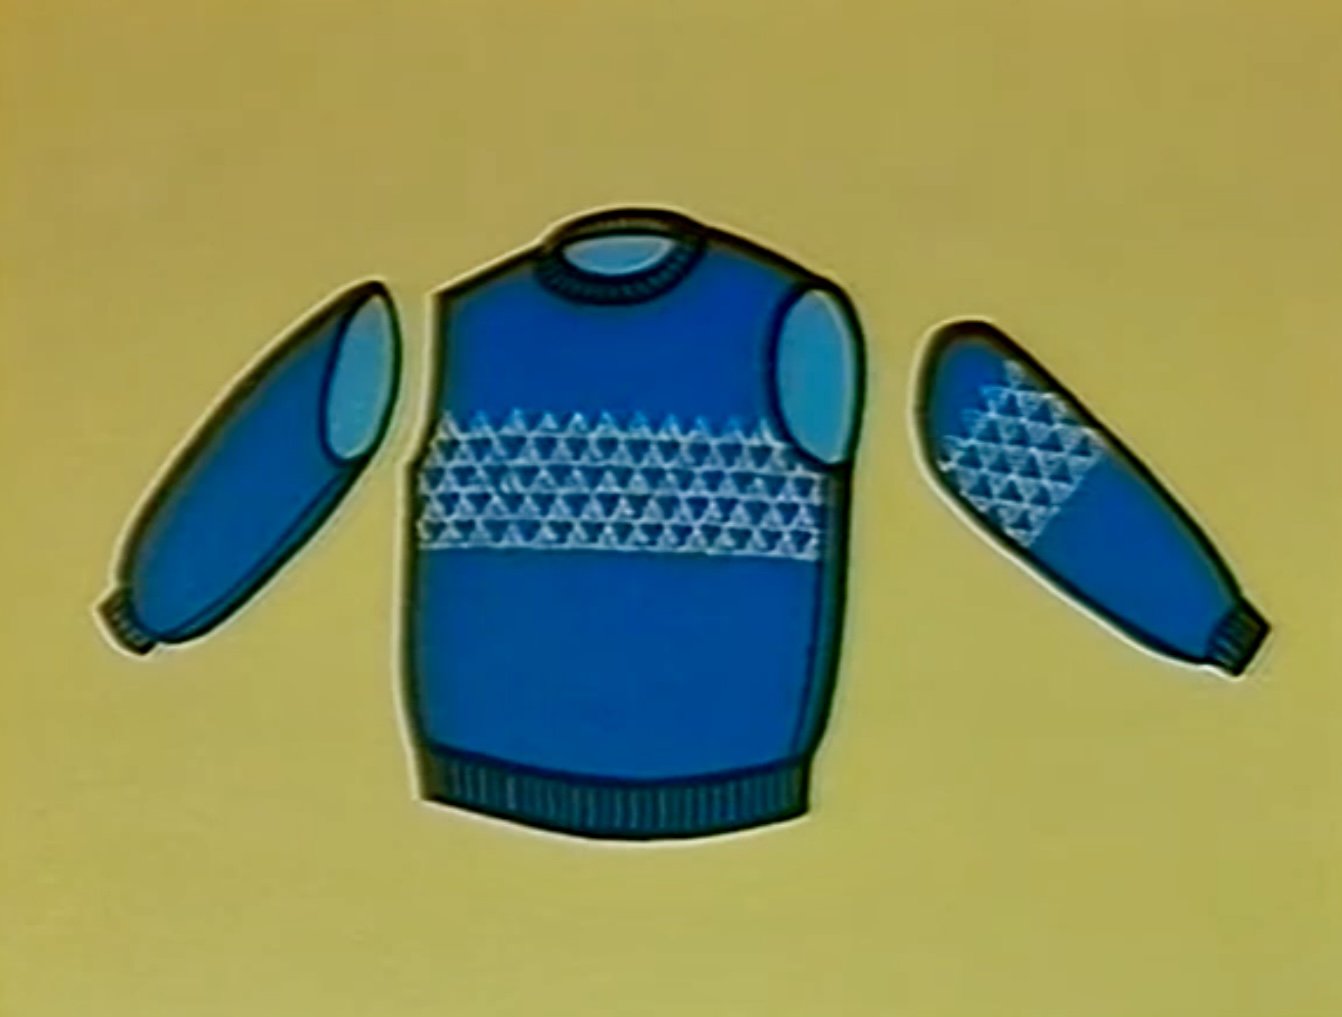
Joining the Pullover sections - Okay so now that we have the front, back and two sleeves knitted let’s put them together. First let me give you the order in which we will be doing the joining. Begin by joining the front and back segments at the shoulder sections. Start tat the back section of the right shoulder. Knit the beck band in k1p1 rib, close the last row of stitches for the welts, cuffs and neckband, and then join the left shoulder sections. This will be followed by joining both ends of the neckband and the side seams of the back and front by blind stitch. We will then join the underarm seams and finally set in the sleeves.

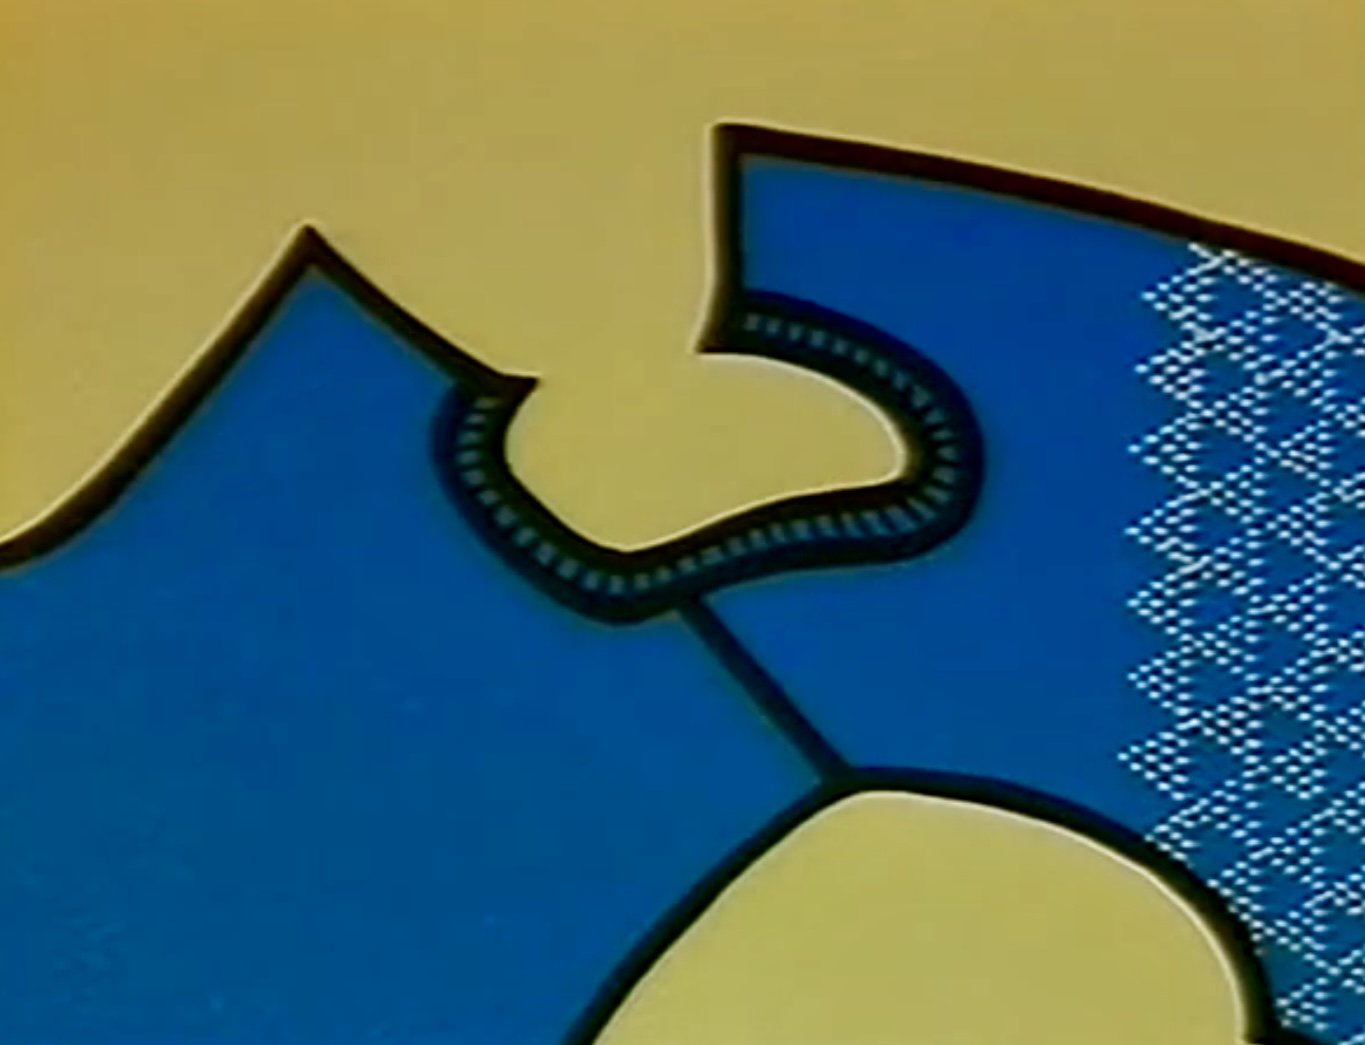
Begin with the right shoulder. Push the same number of needles as the shoulder stitches to the B position - pick up the main yarn stitch of the back section of the shoulder with the right side facing you and place them onto these needles. Then pickup the main yarn stitches of the front section of the shoulder with the opposite side facing you and place them onto these needles. Unravel the waste. Push the needles to the D position keeping the back panel against the gate pegs behind the latch while keeping the front section in the hooks themselves. Push the needles back into the B position so that the stitches behind the latches slip off the needles and over the stitches in the hooks. Now using a darning needle with the yarn tail close the stitches with a darning needle using the back stitch method - removing the fabric from the machine.

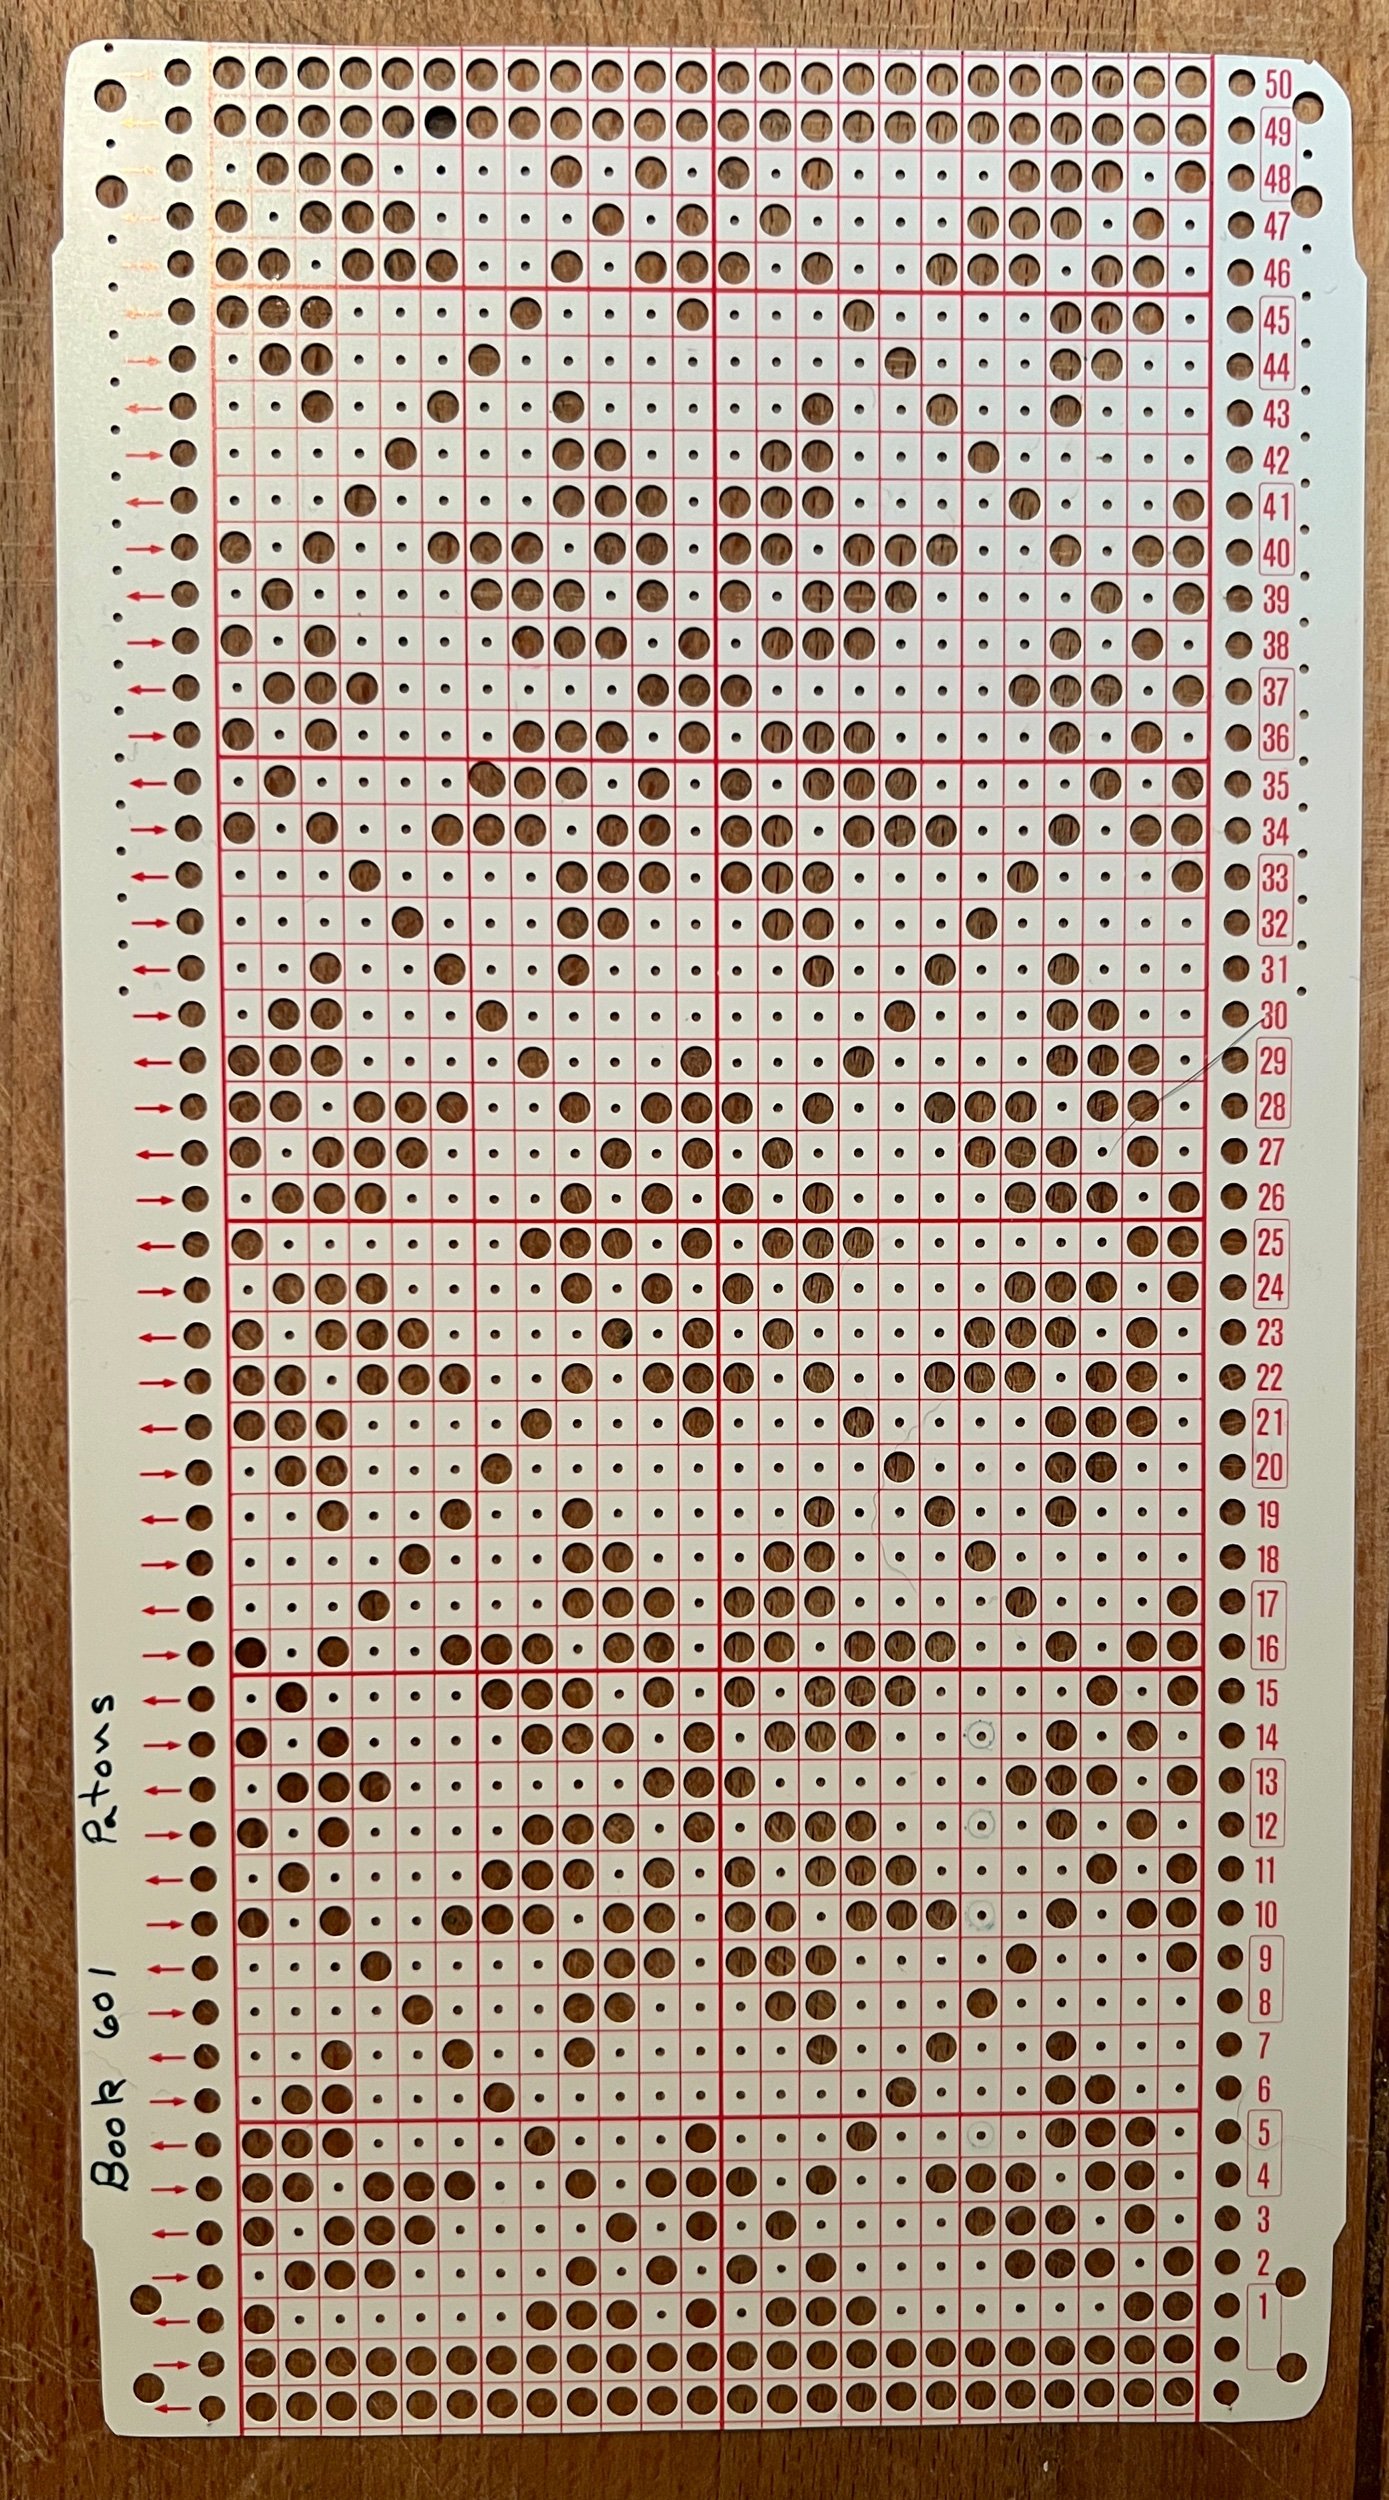
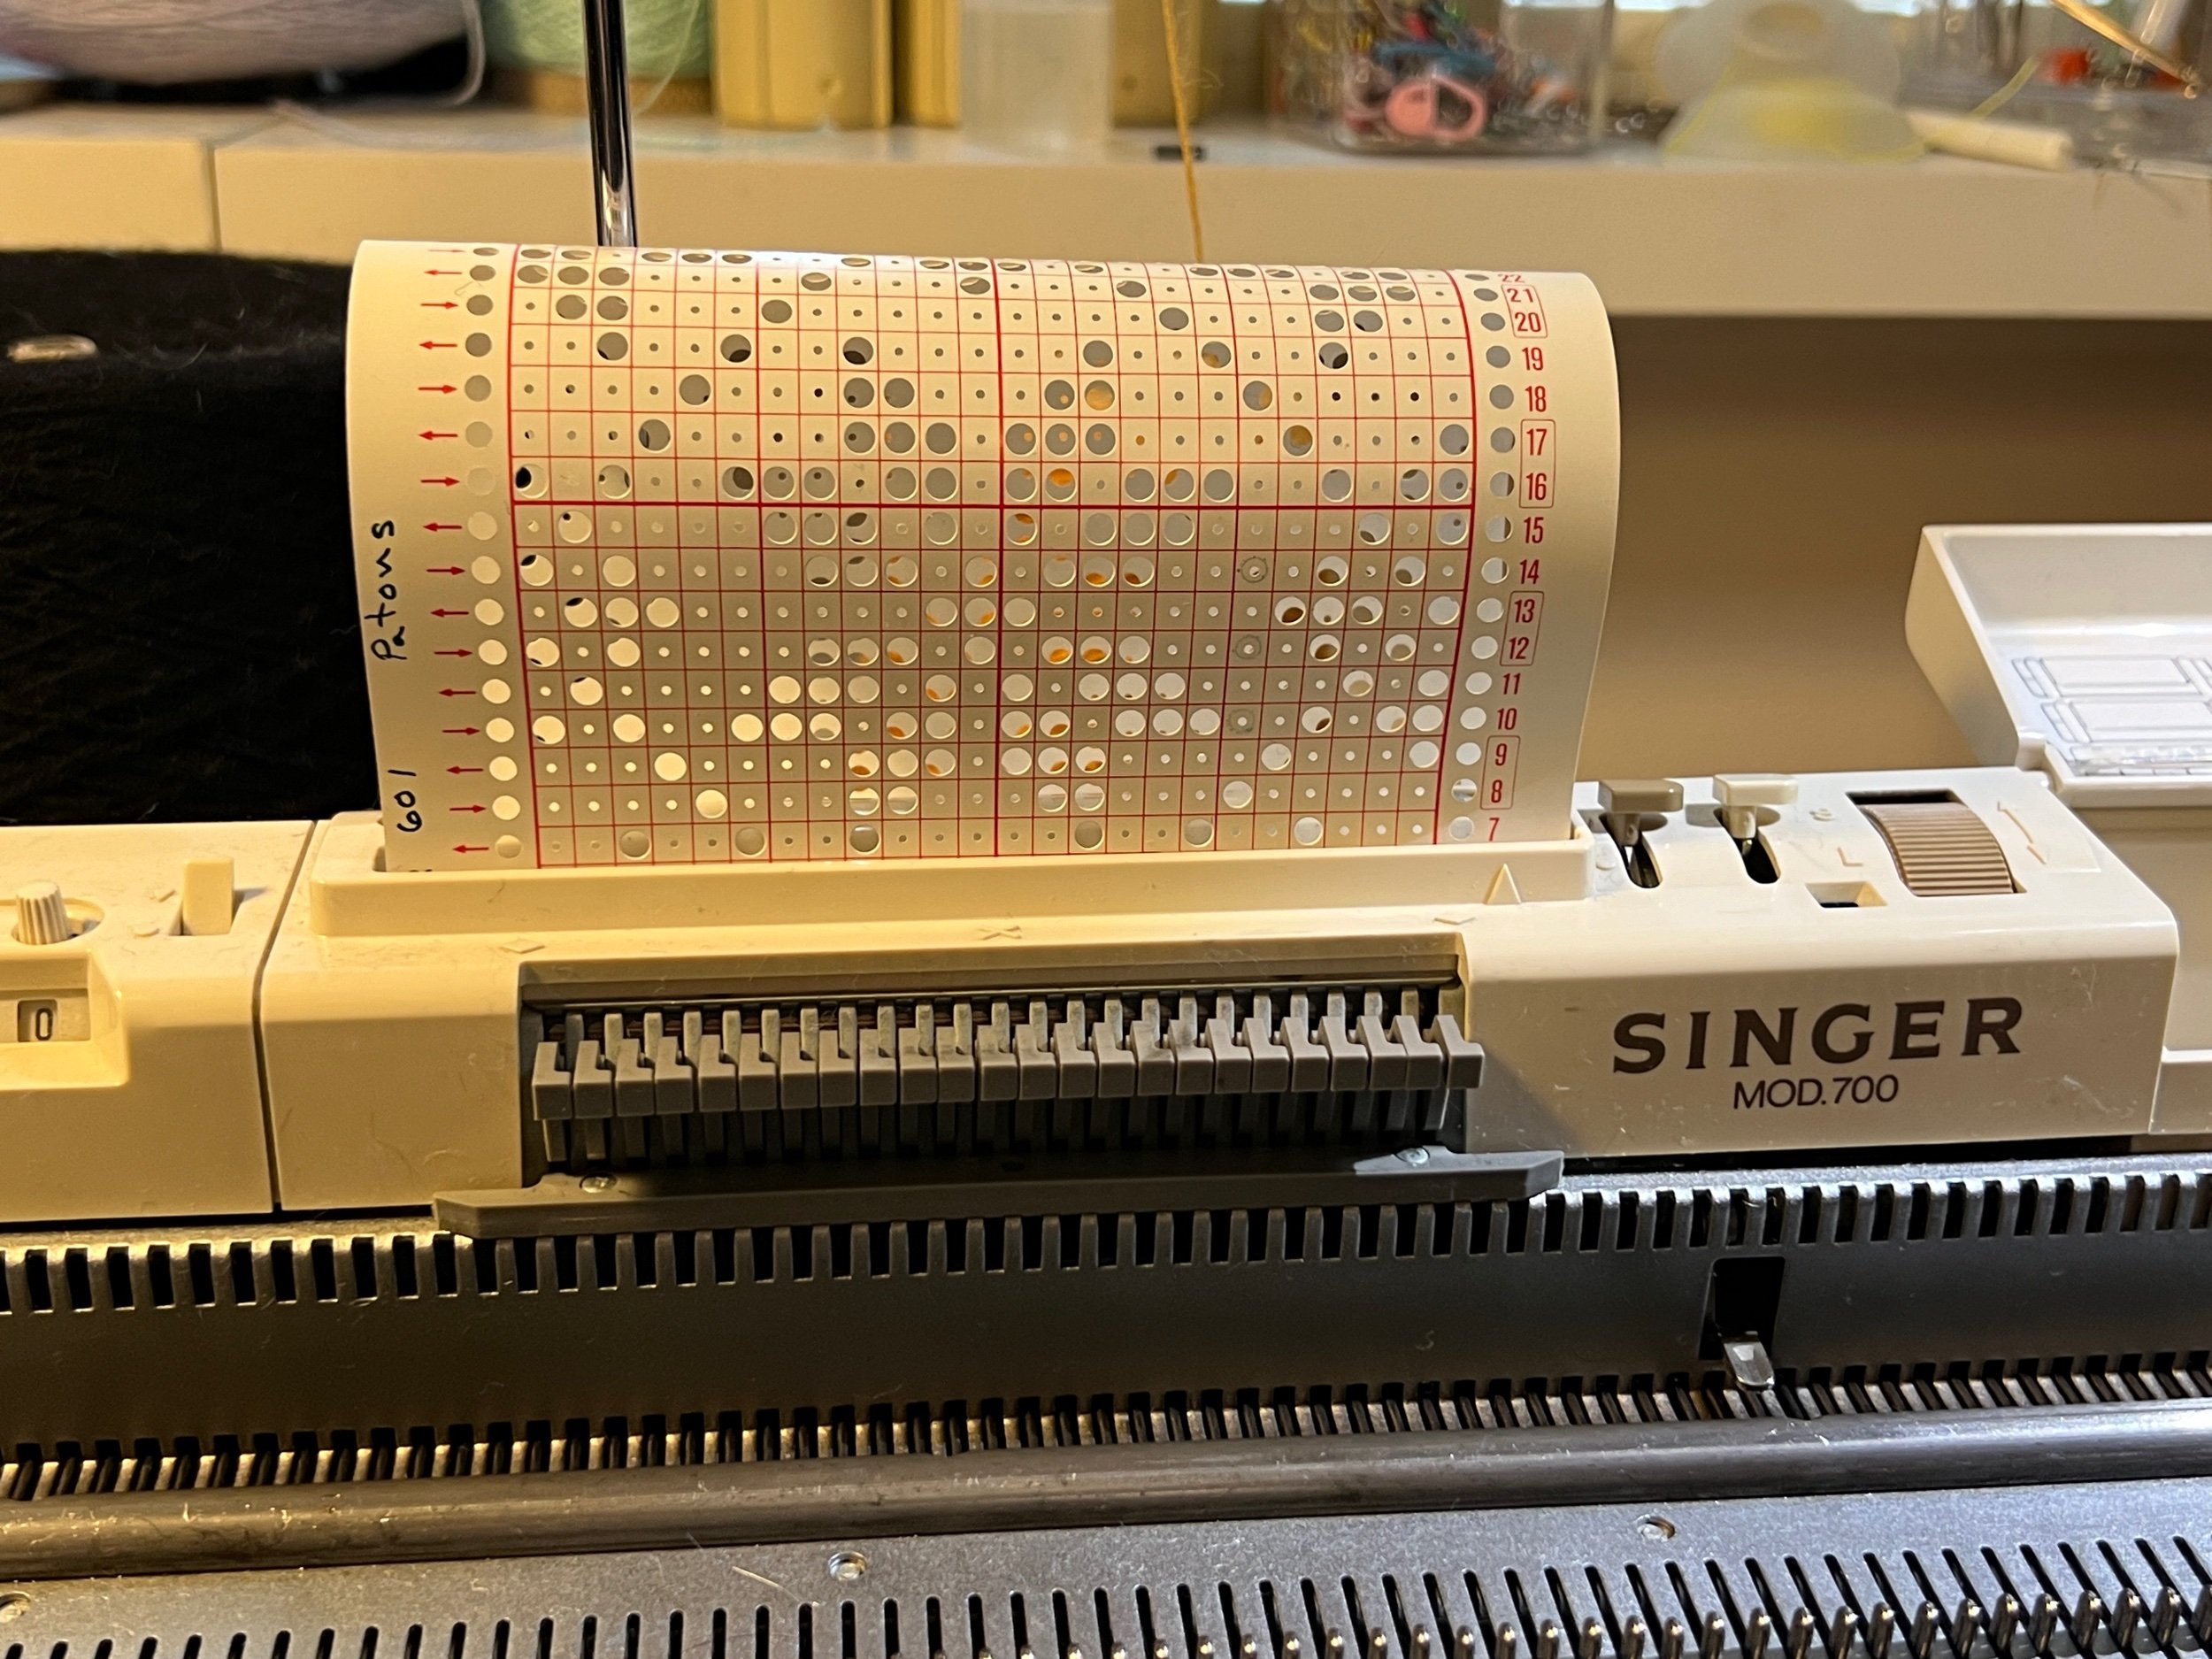
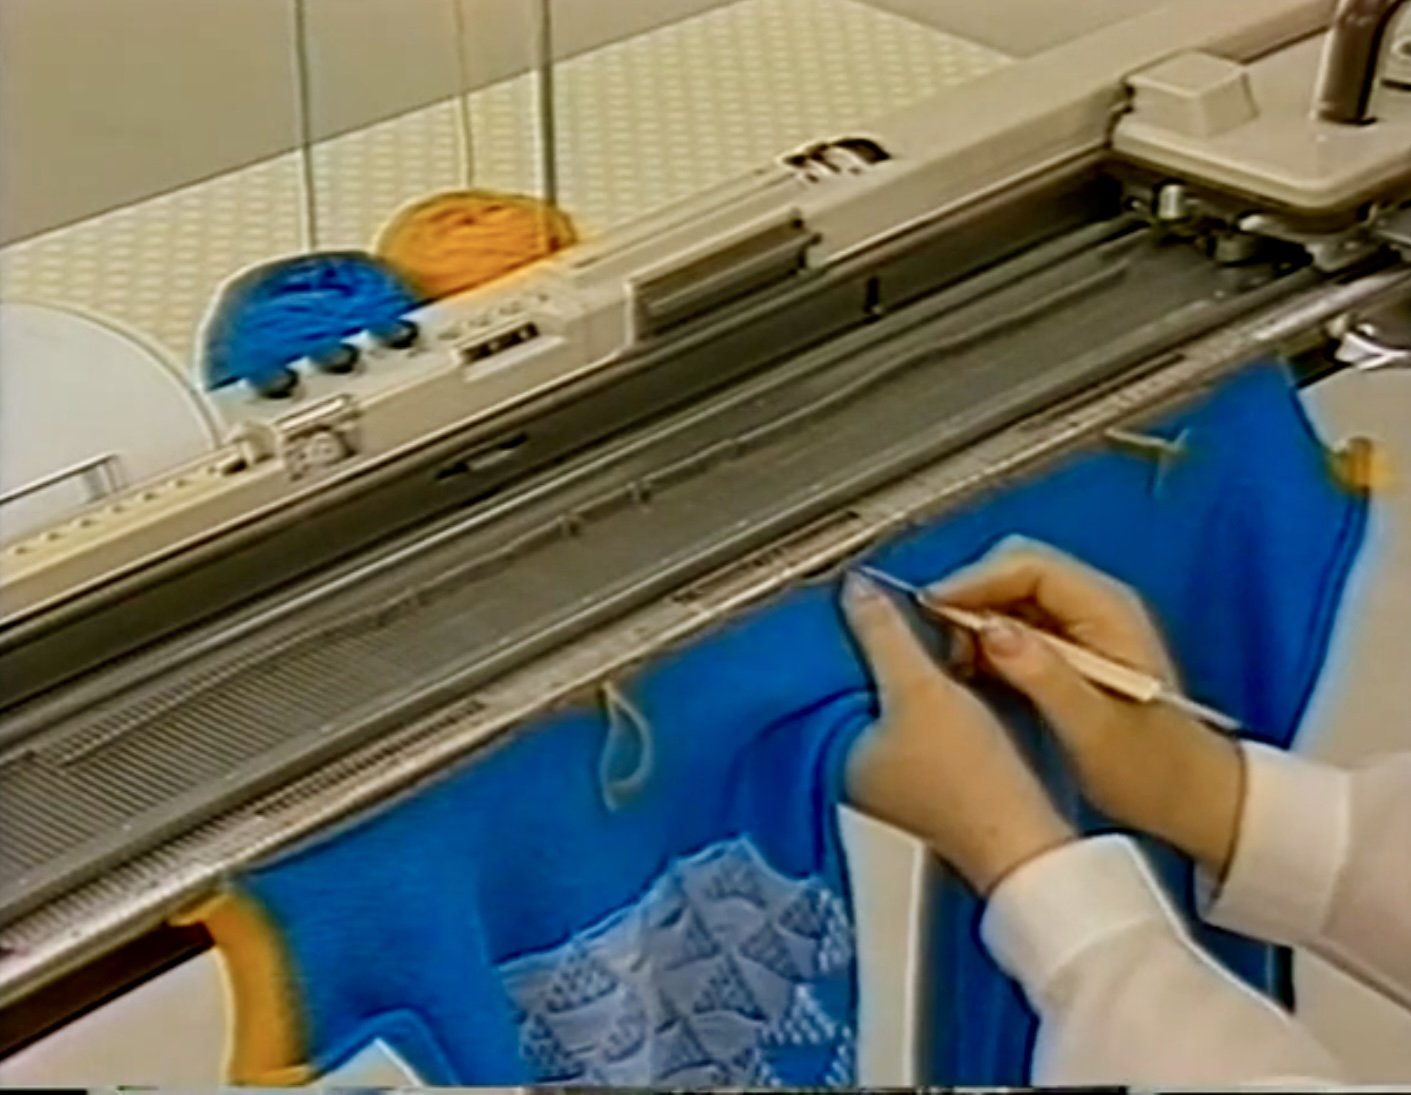
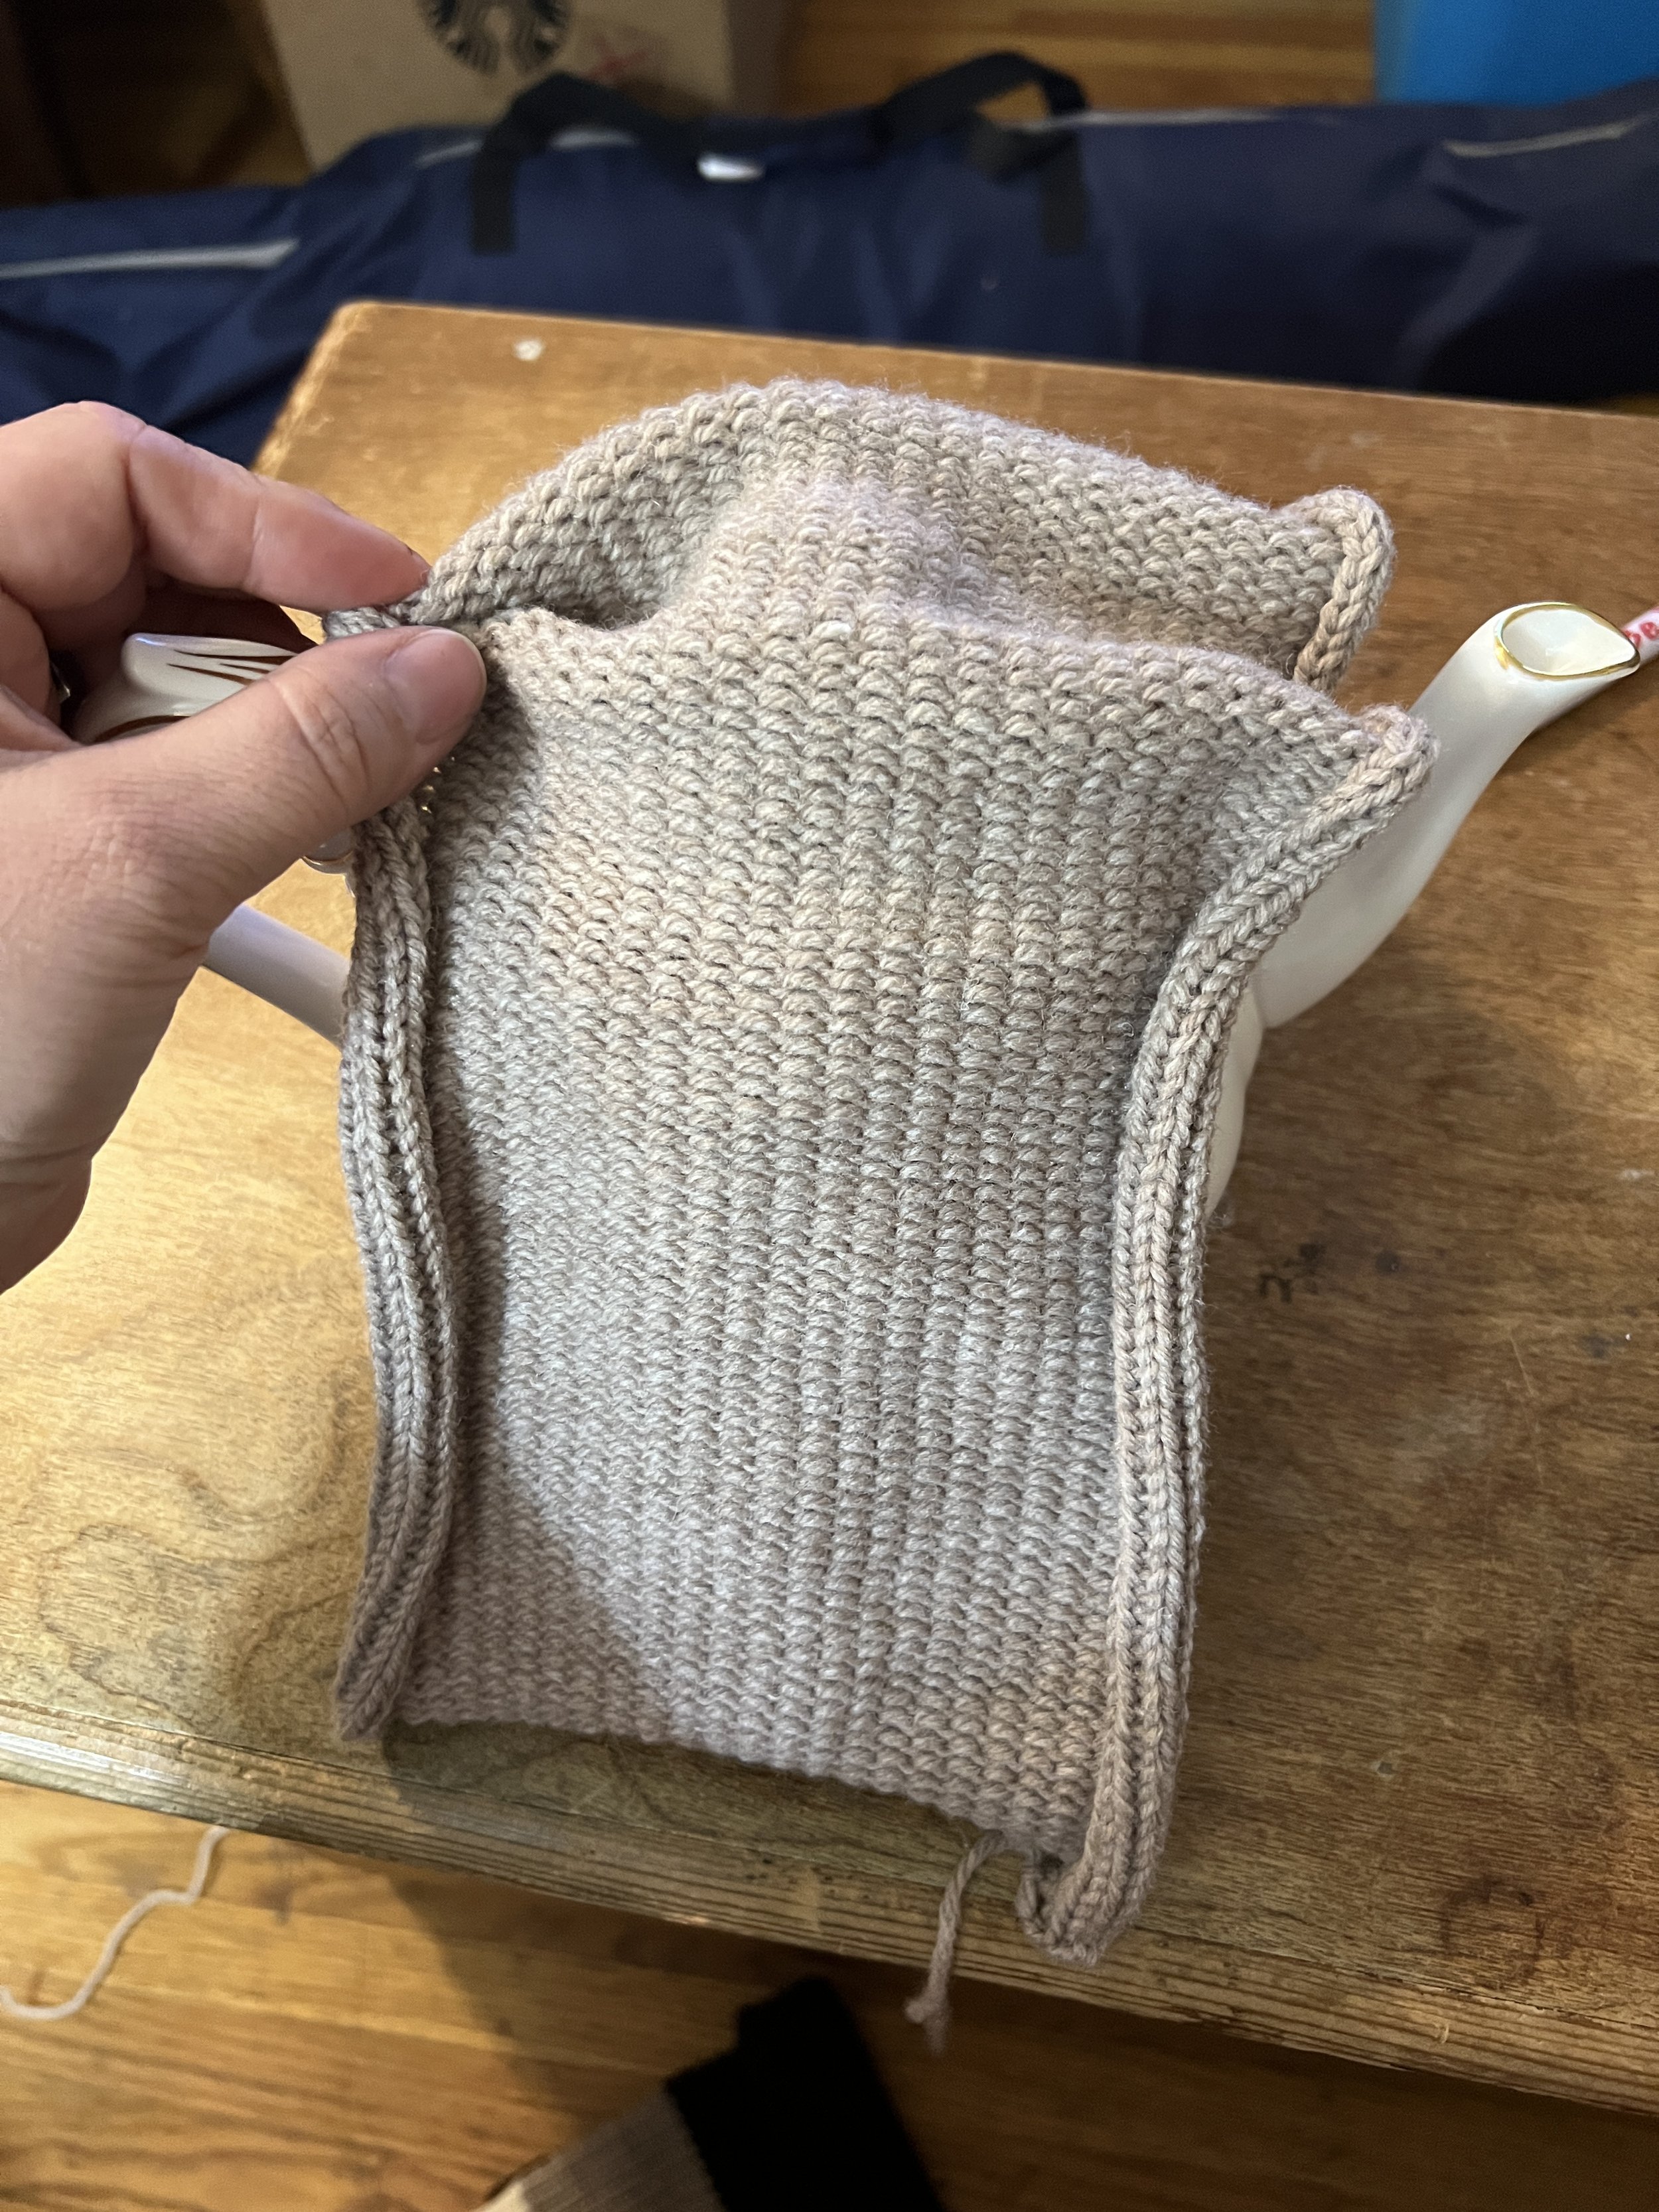
Knit the neck band - we first set the pattern paper at the starting line for the neckband. We must exchange the stitch scale for one with 10% higher number than the one we used for knitting stockinette. Set the stitch dial and the row number dial a the same setting we used for the welts. (45 rows.) Push the required number of needles for the neck band to the B position. With the reverse side of the front and back facing you pickup the neck edge and place them onto the needles in the B position. Knit the neck band as you did the welts and cuffs. That completes the neck band. Use your darning needle -

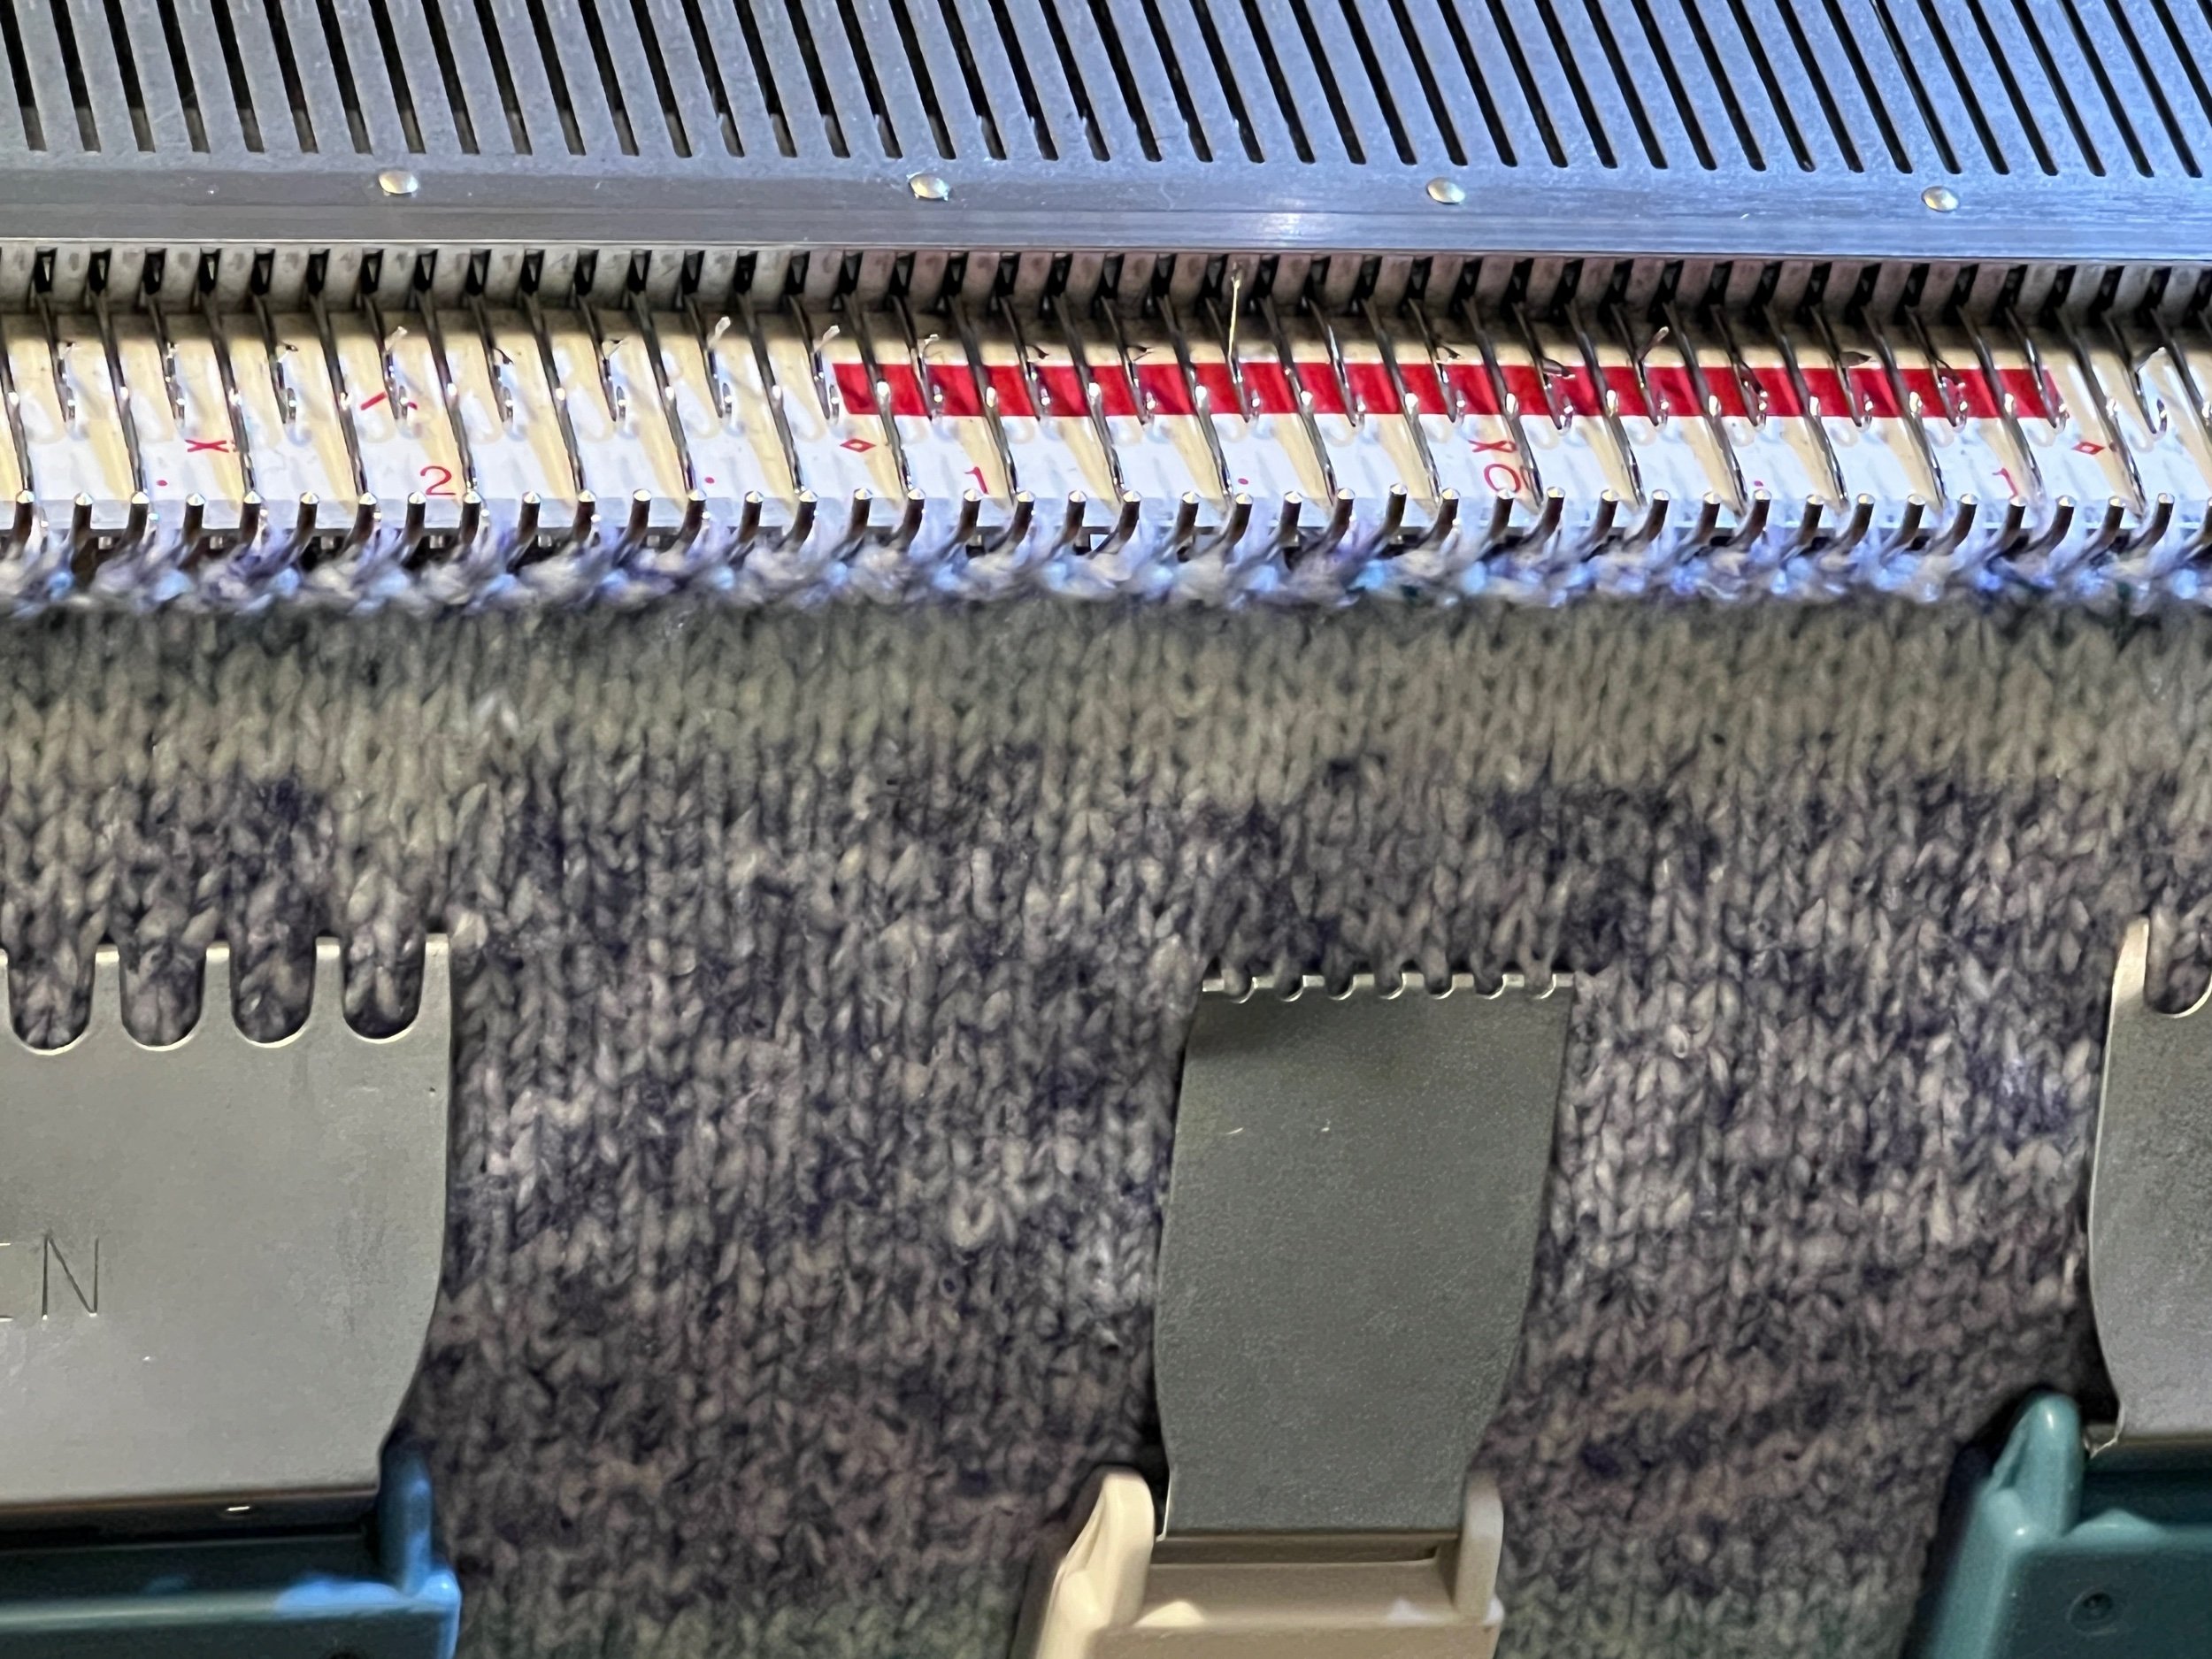
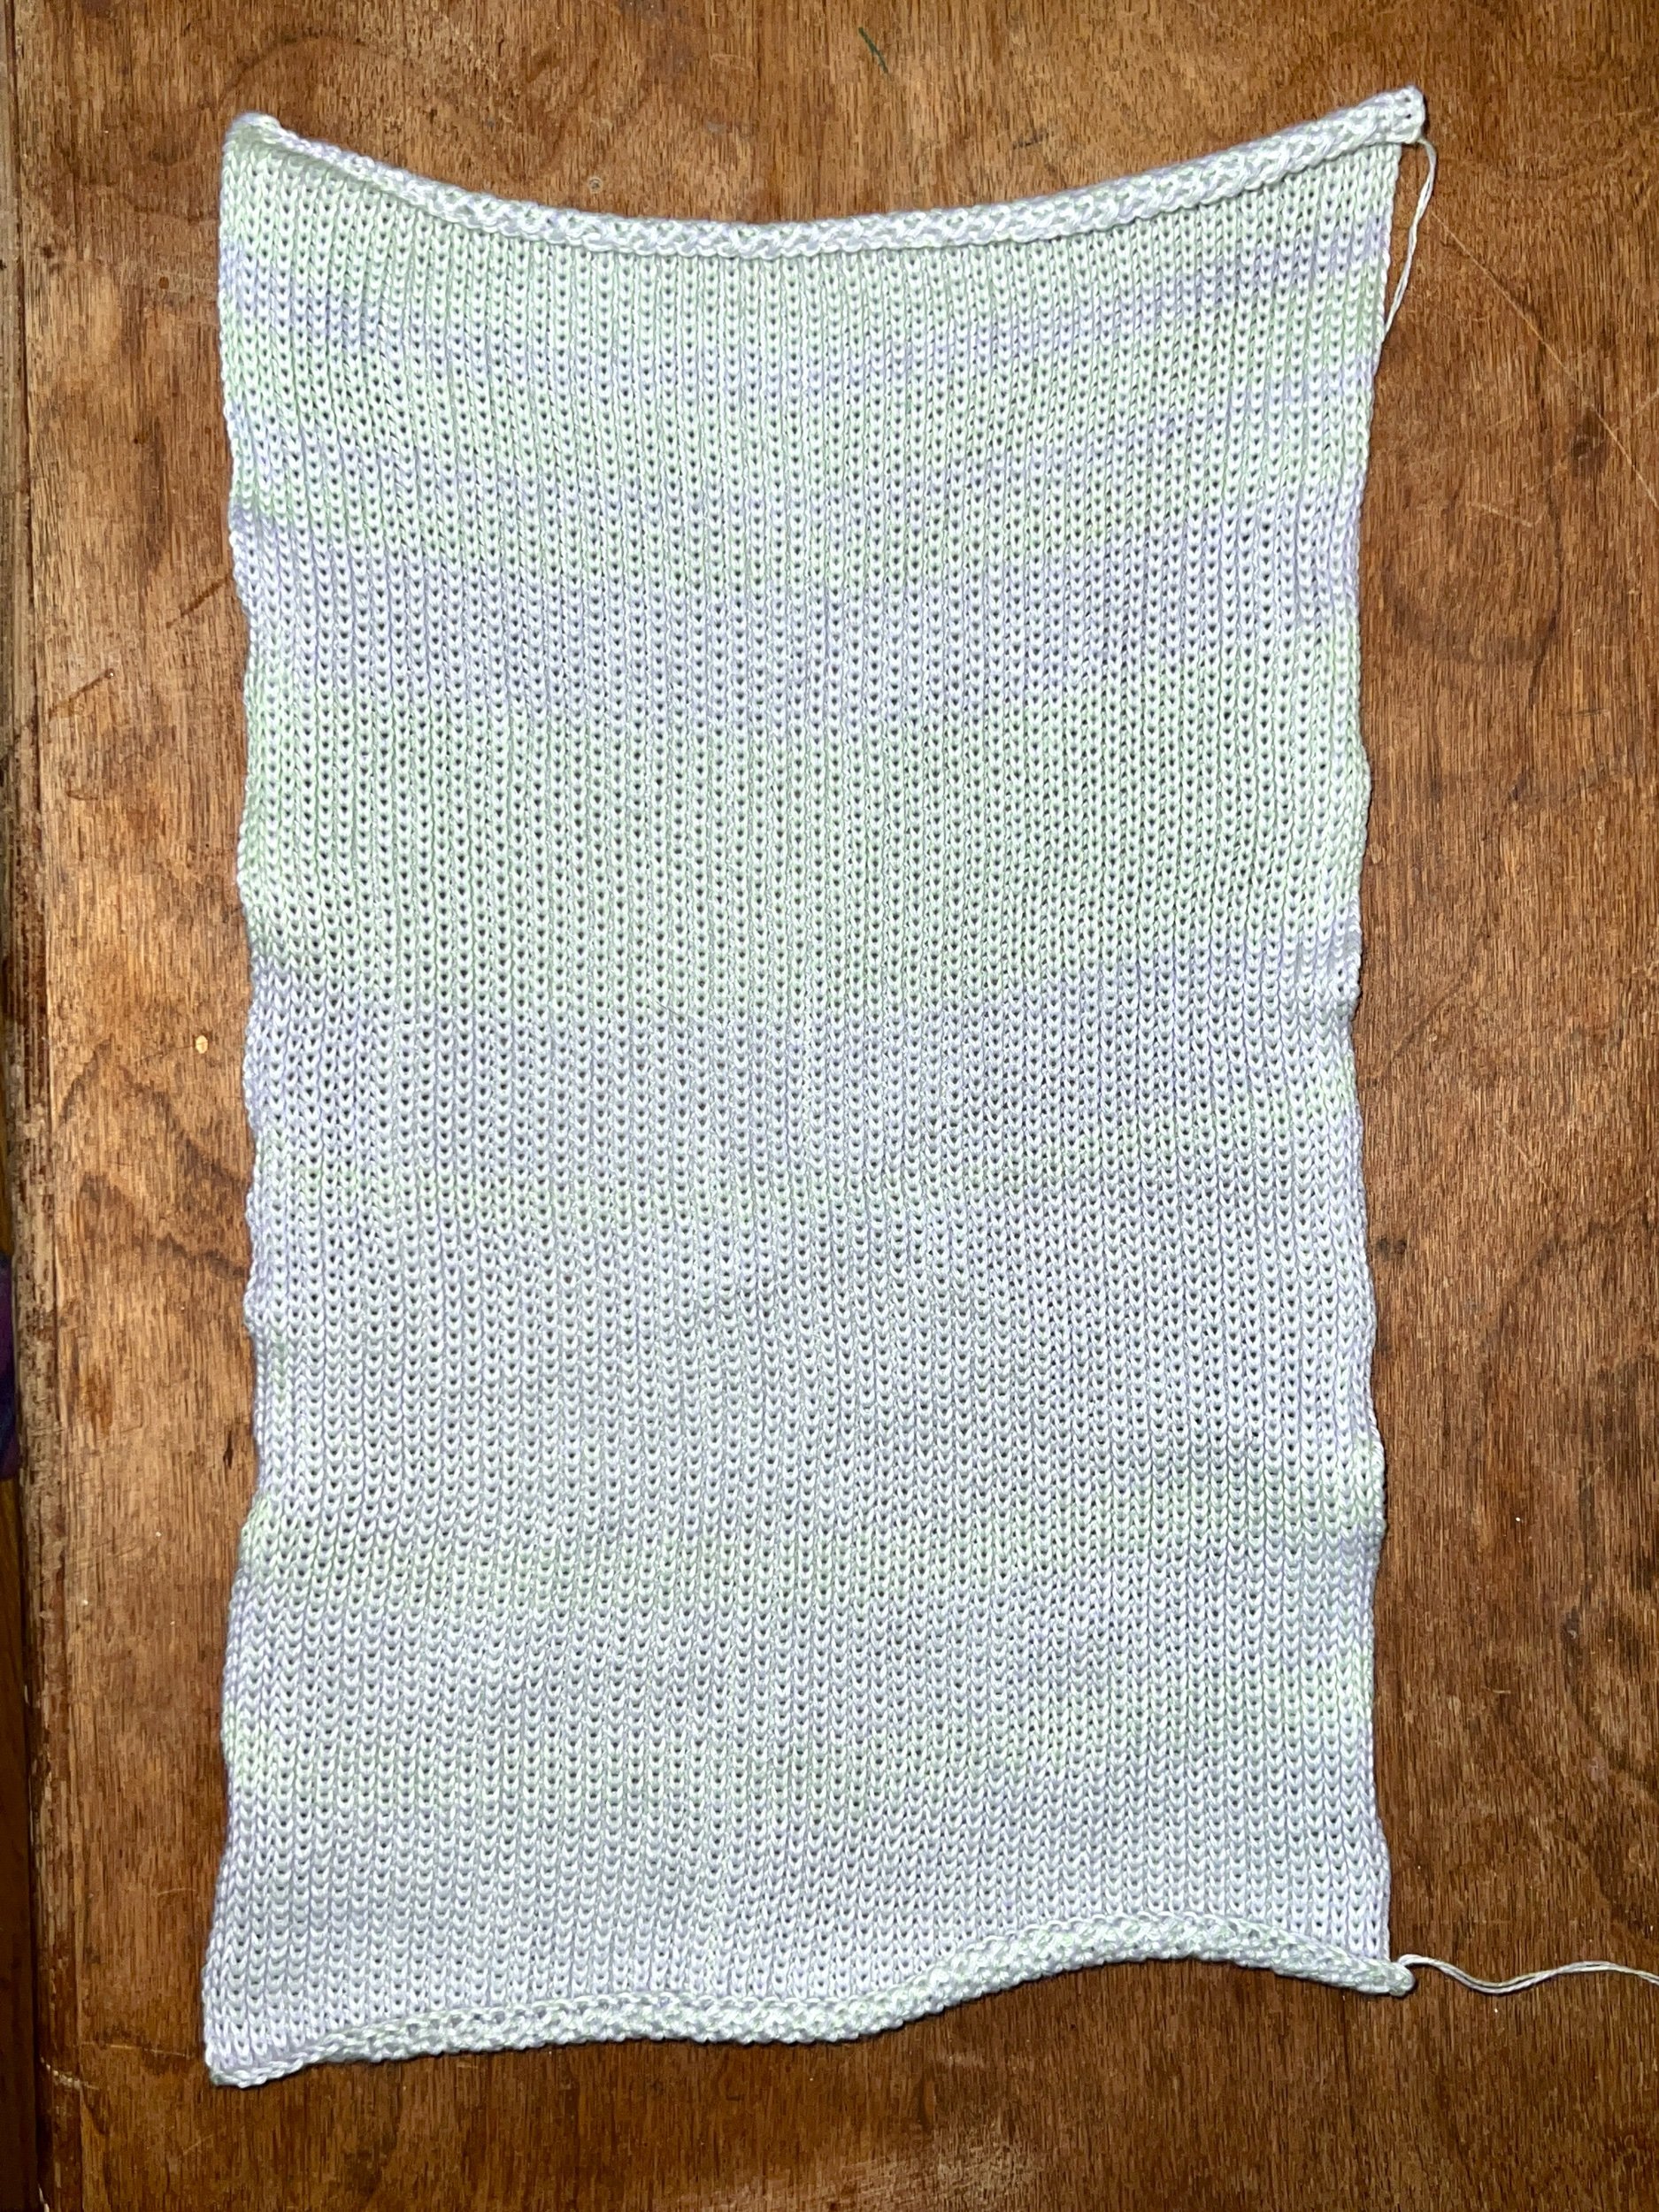
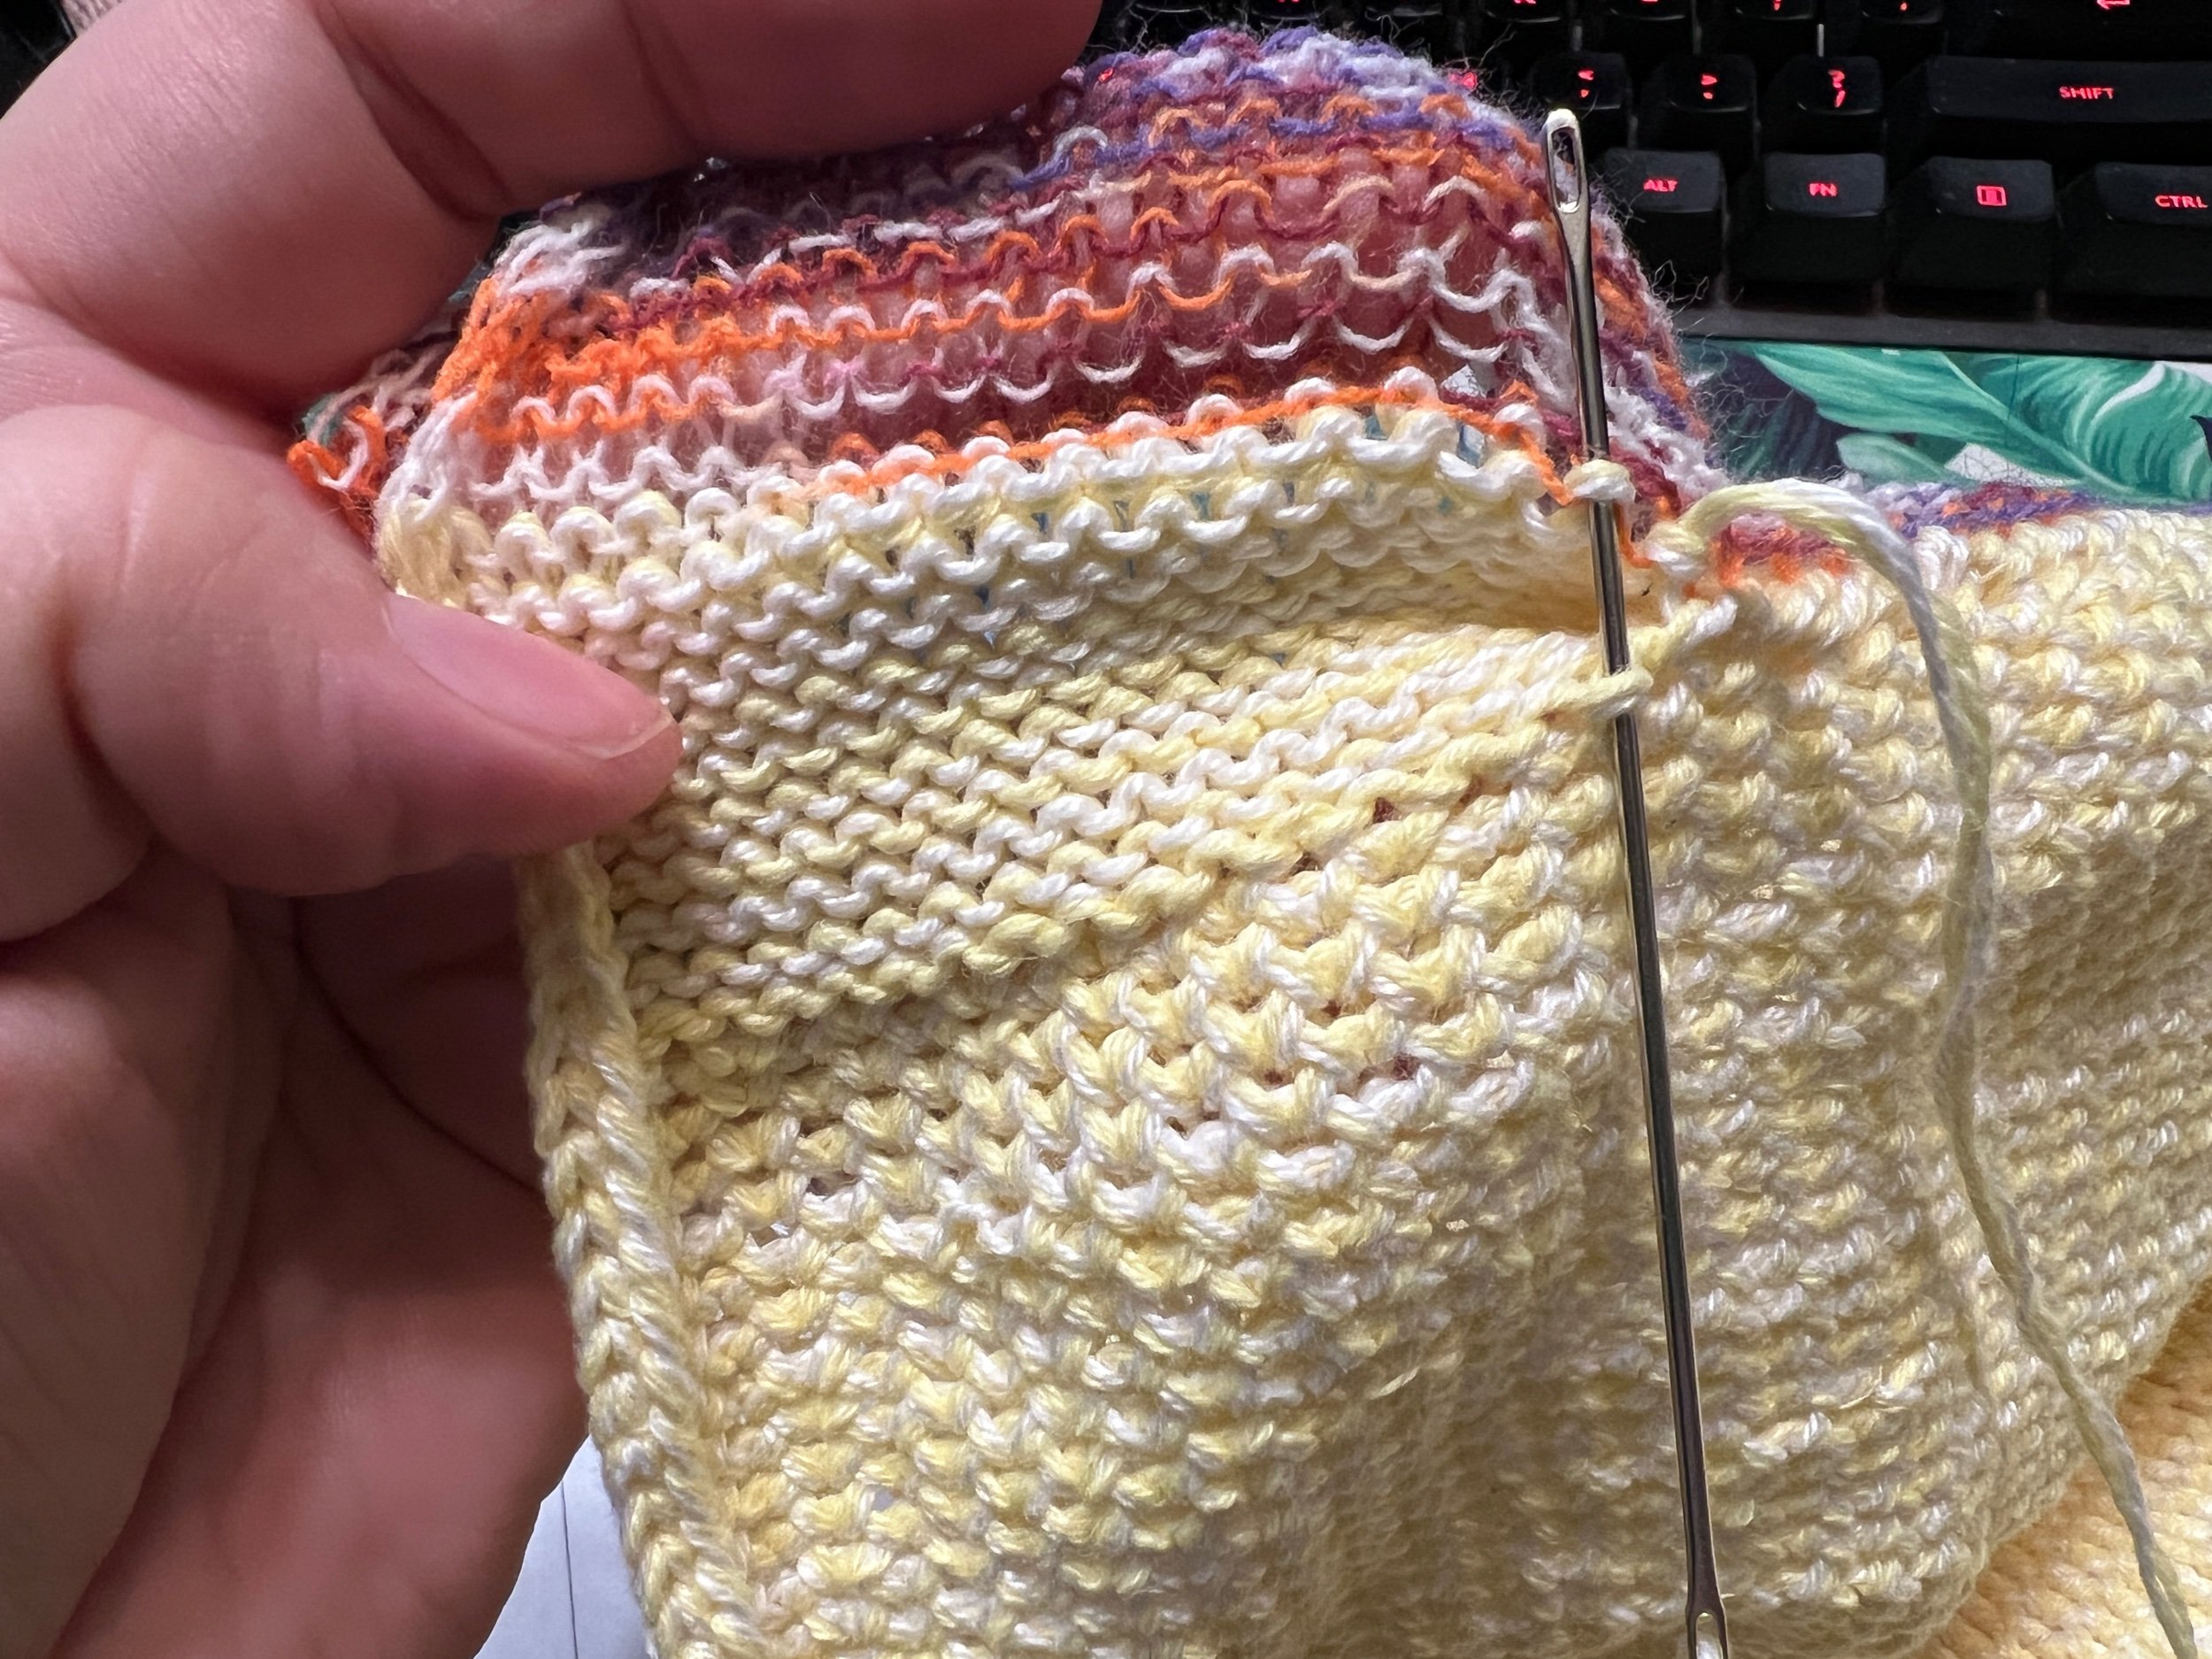
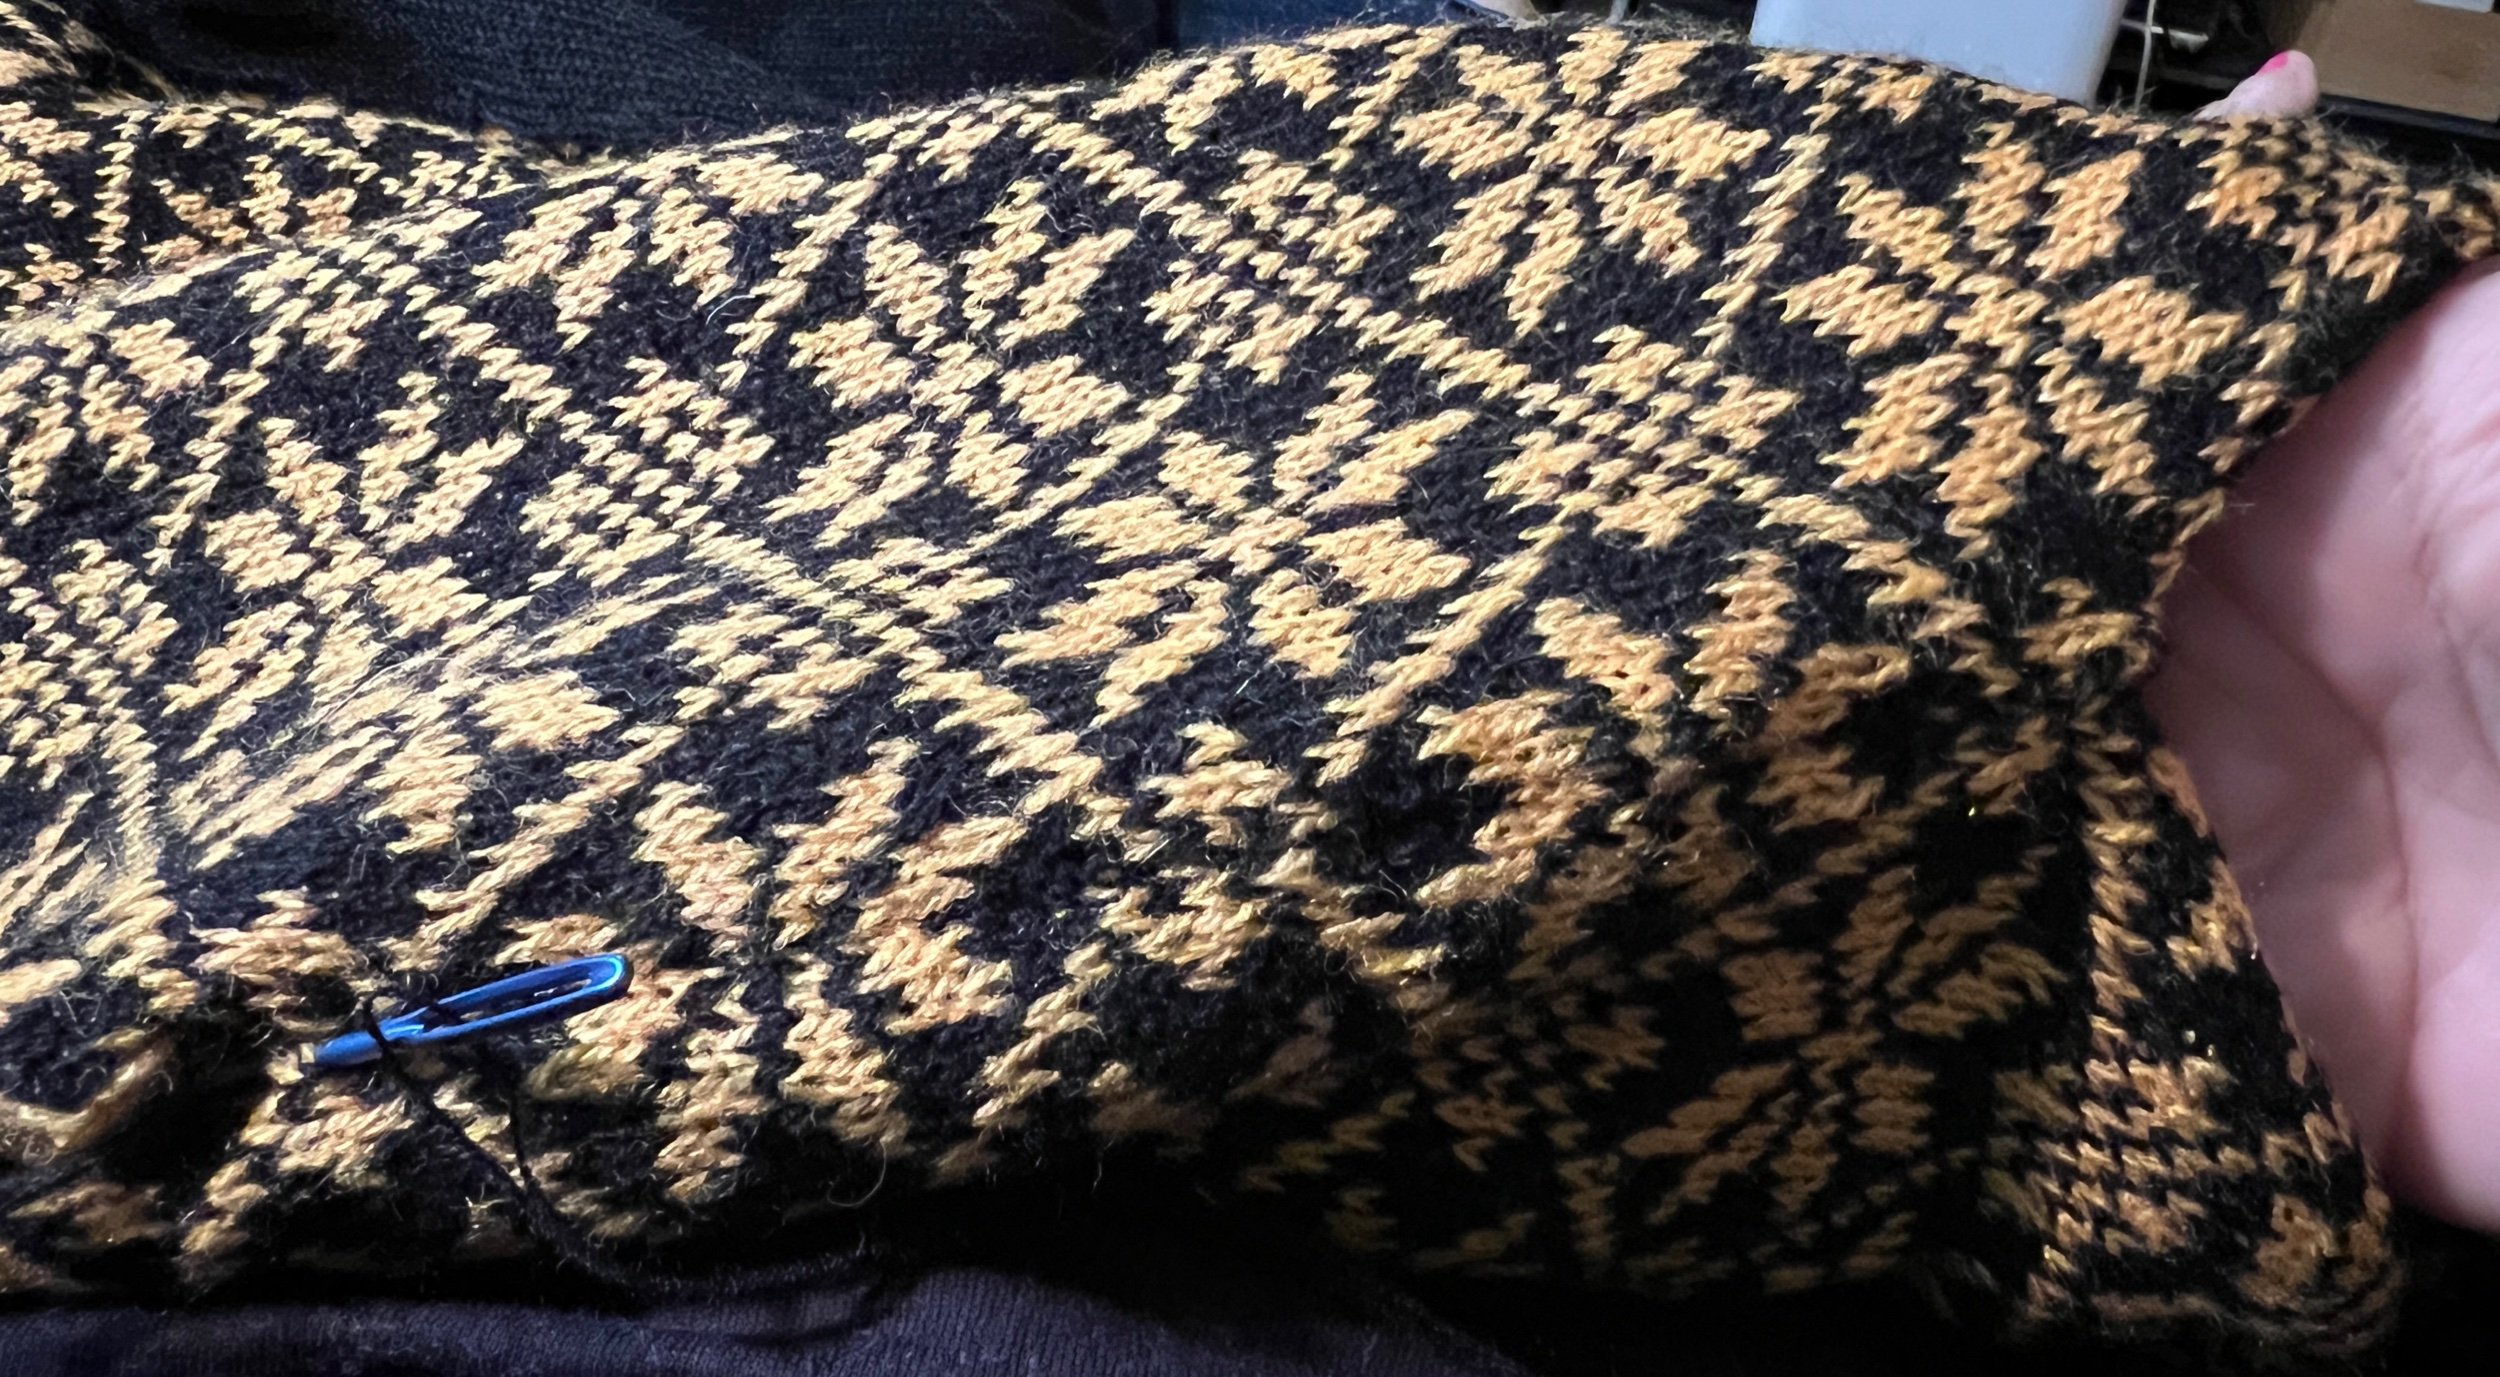
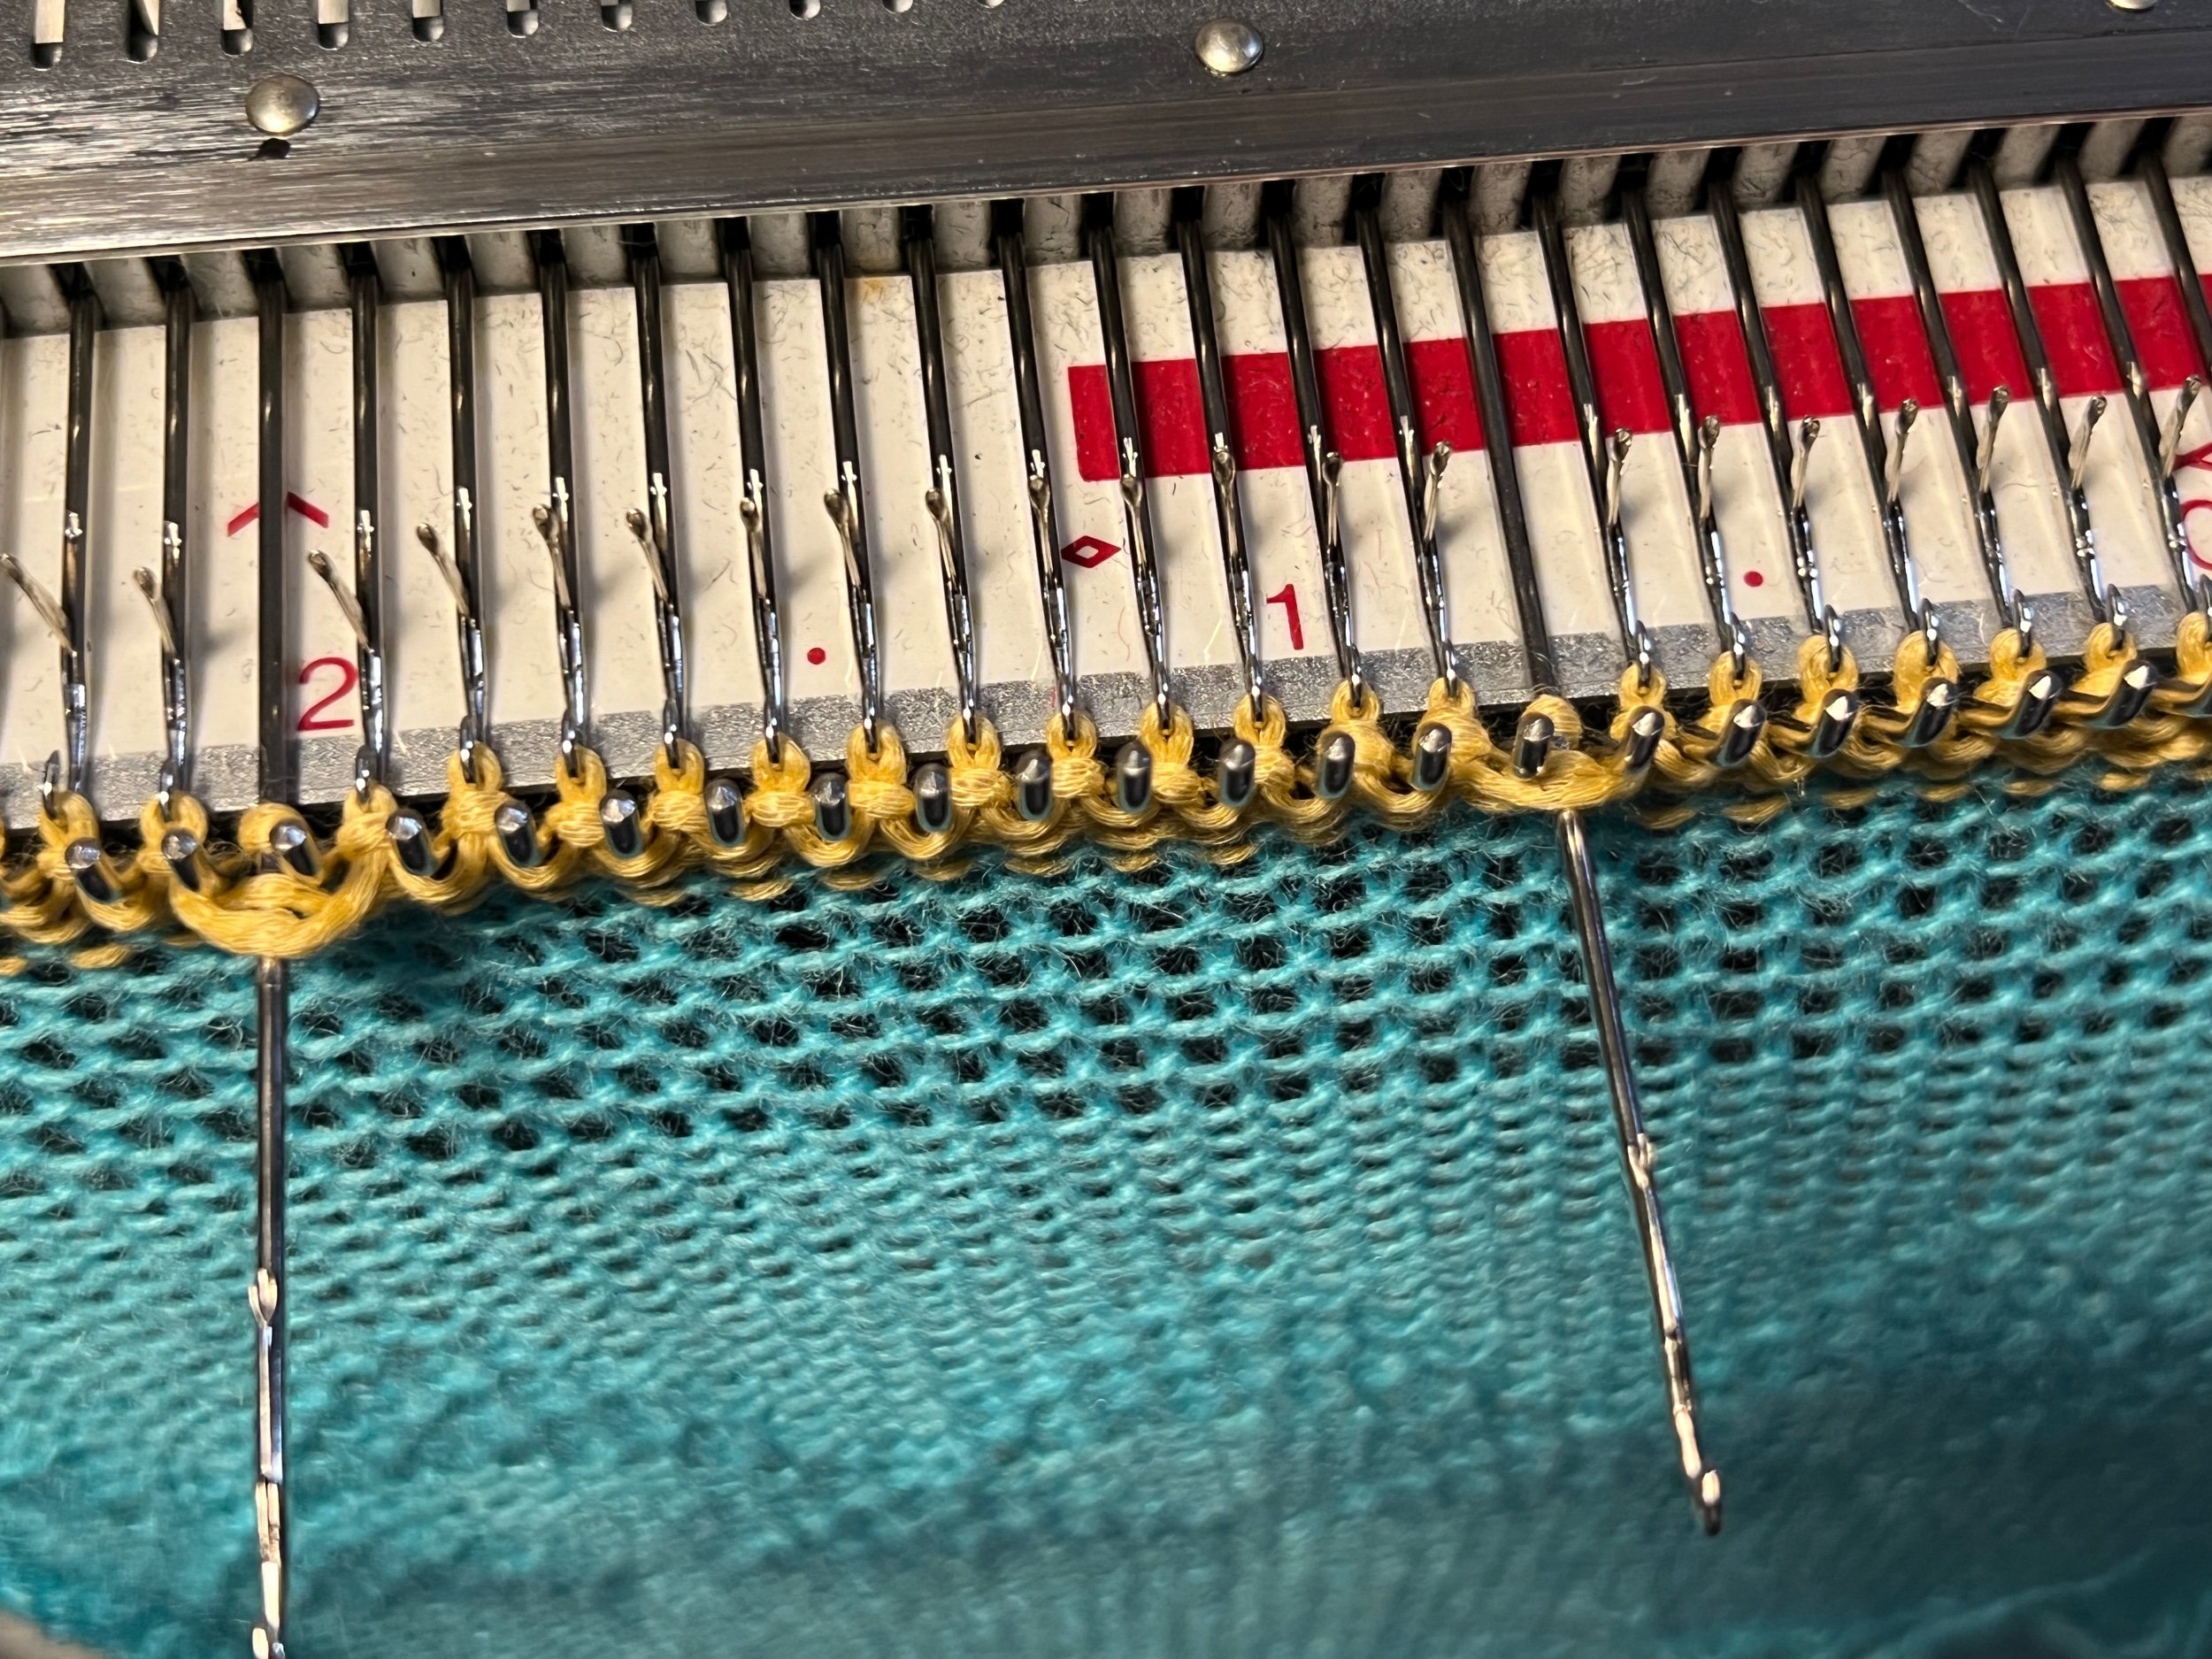
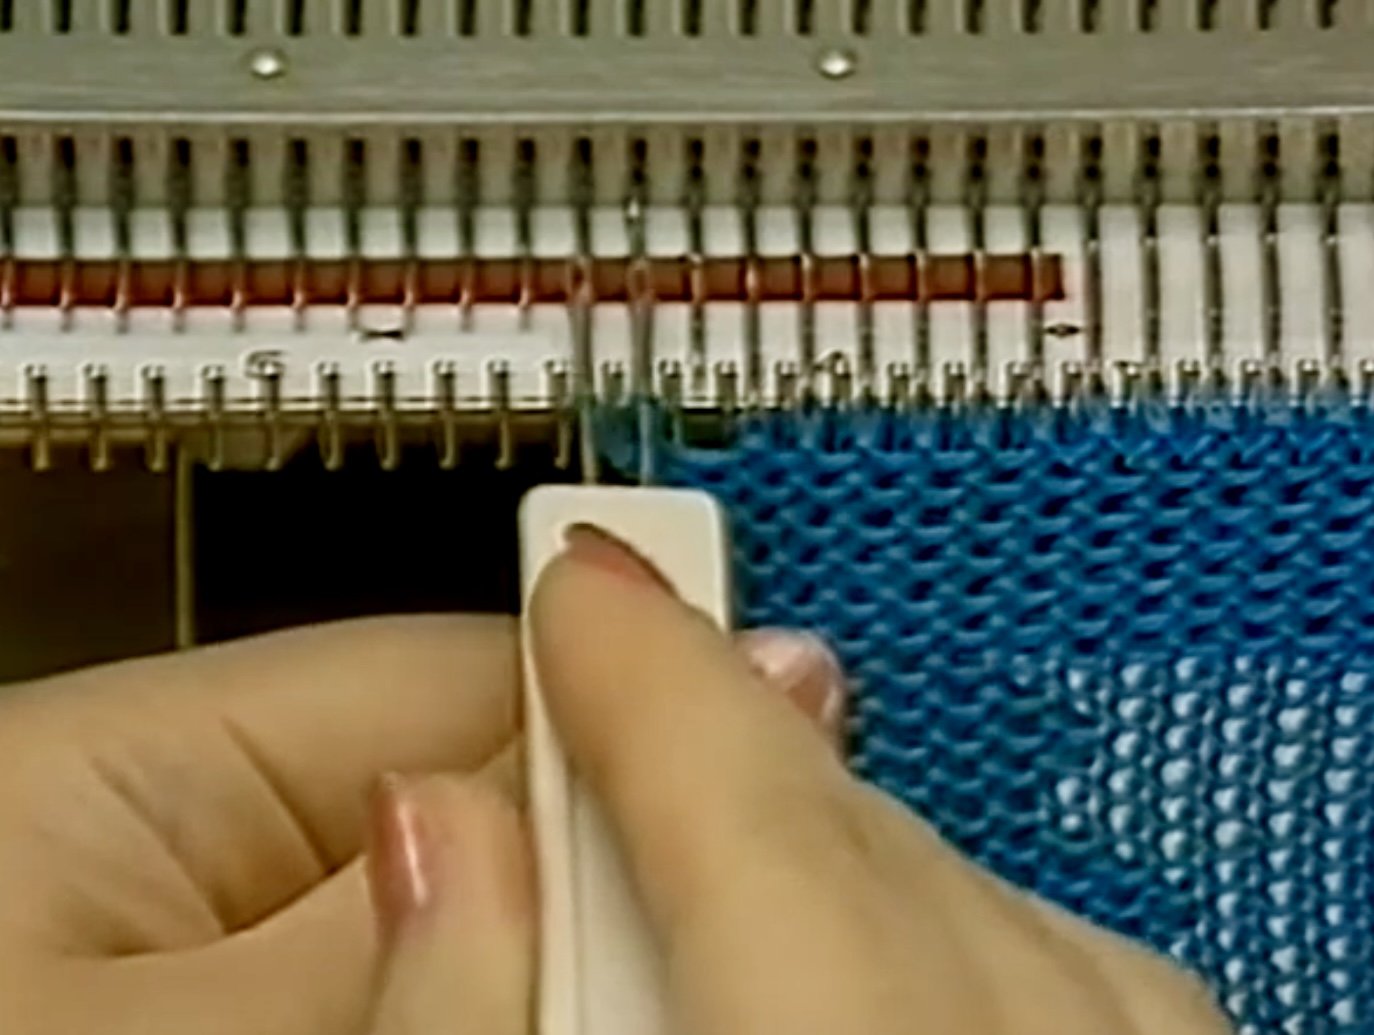
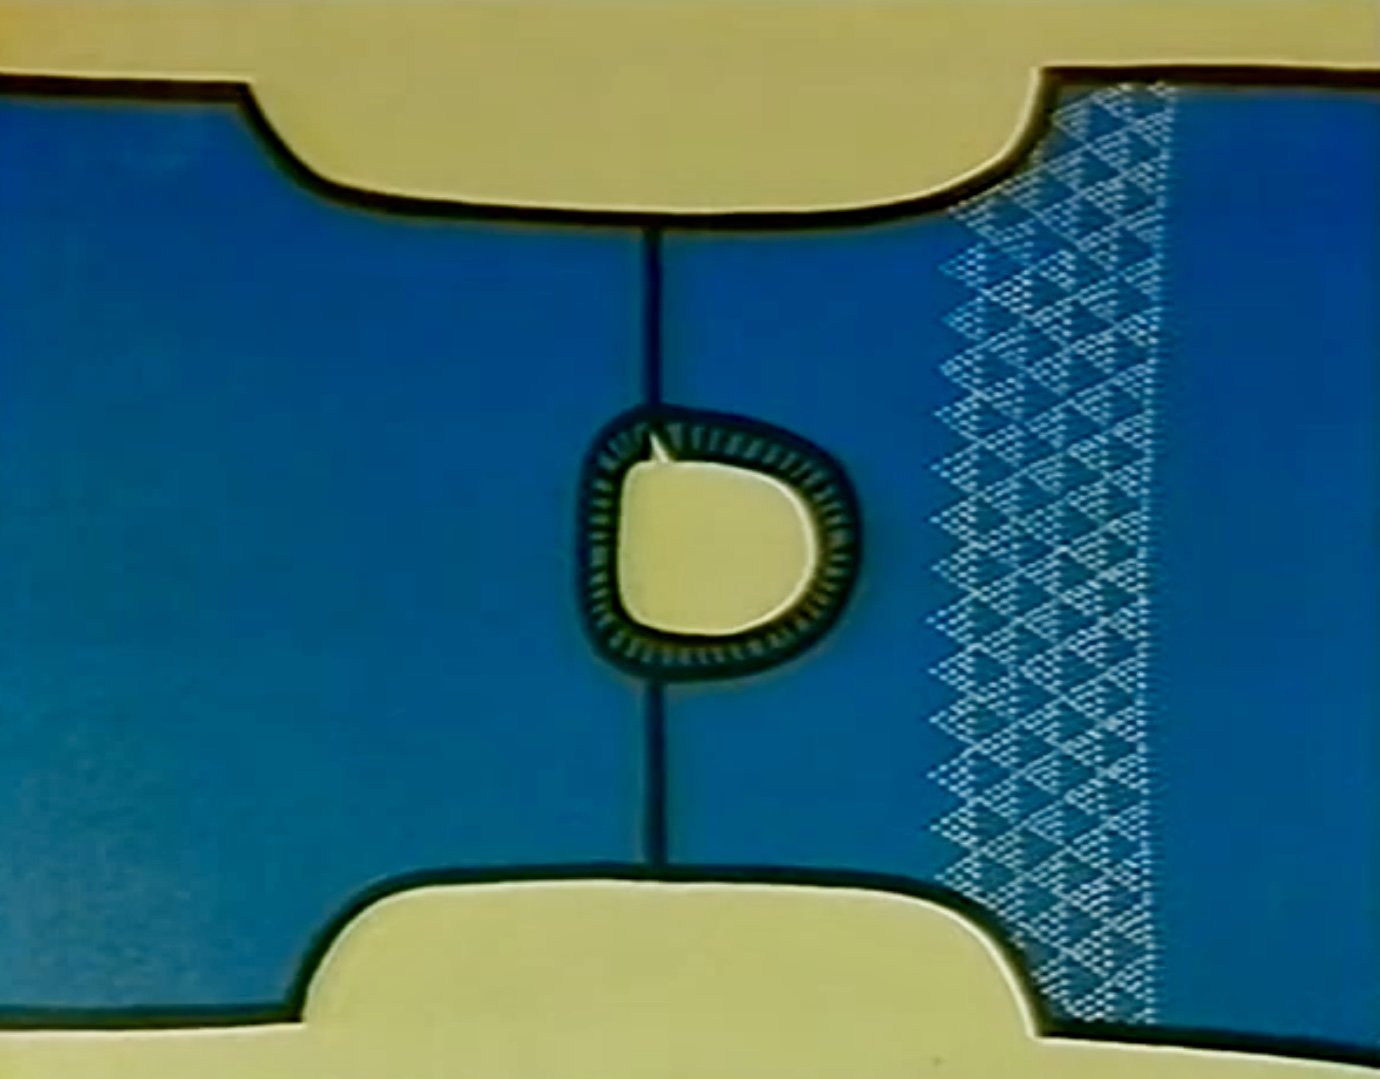
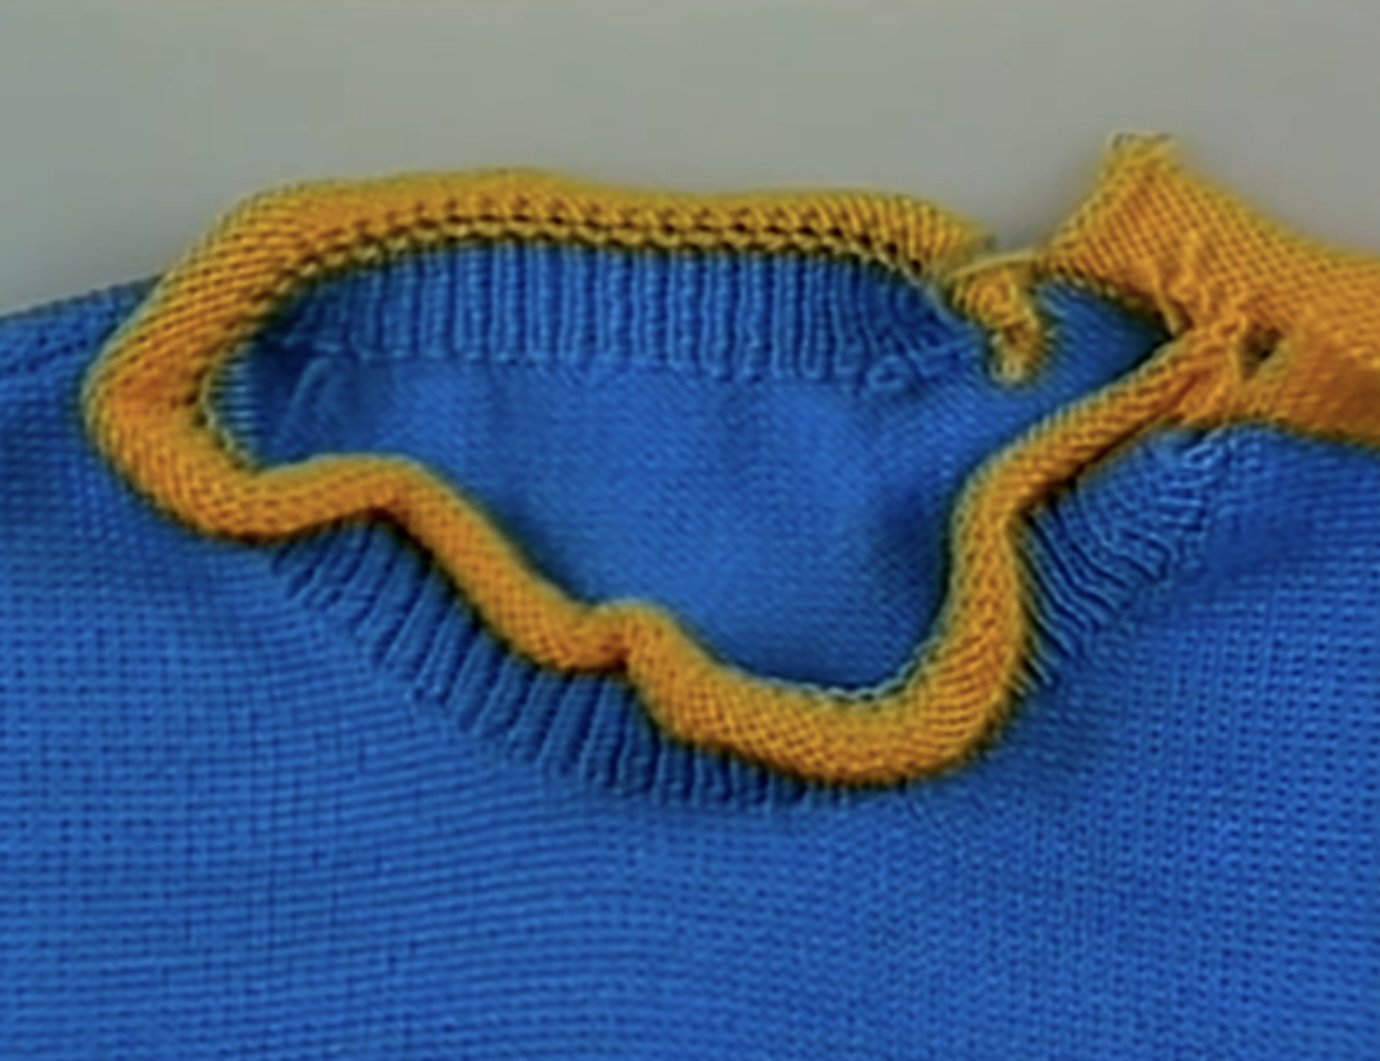
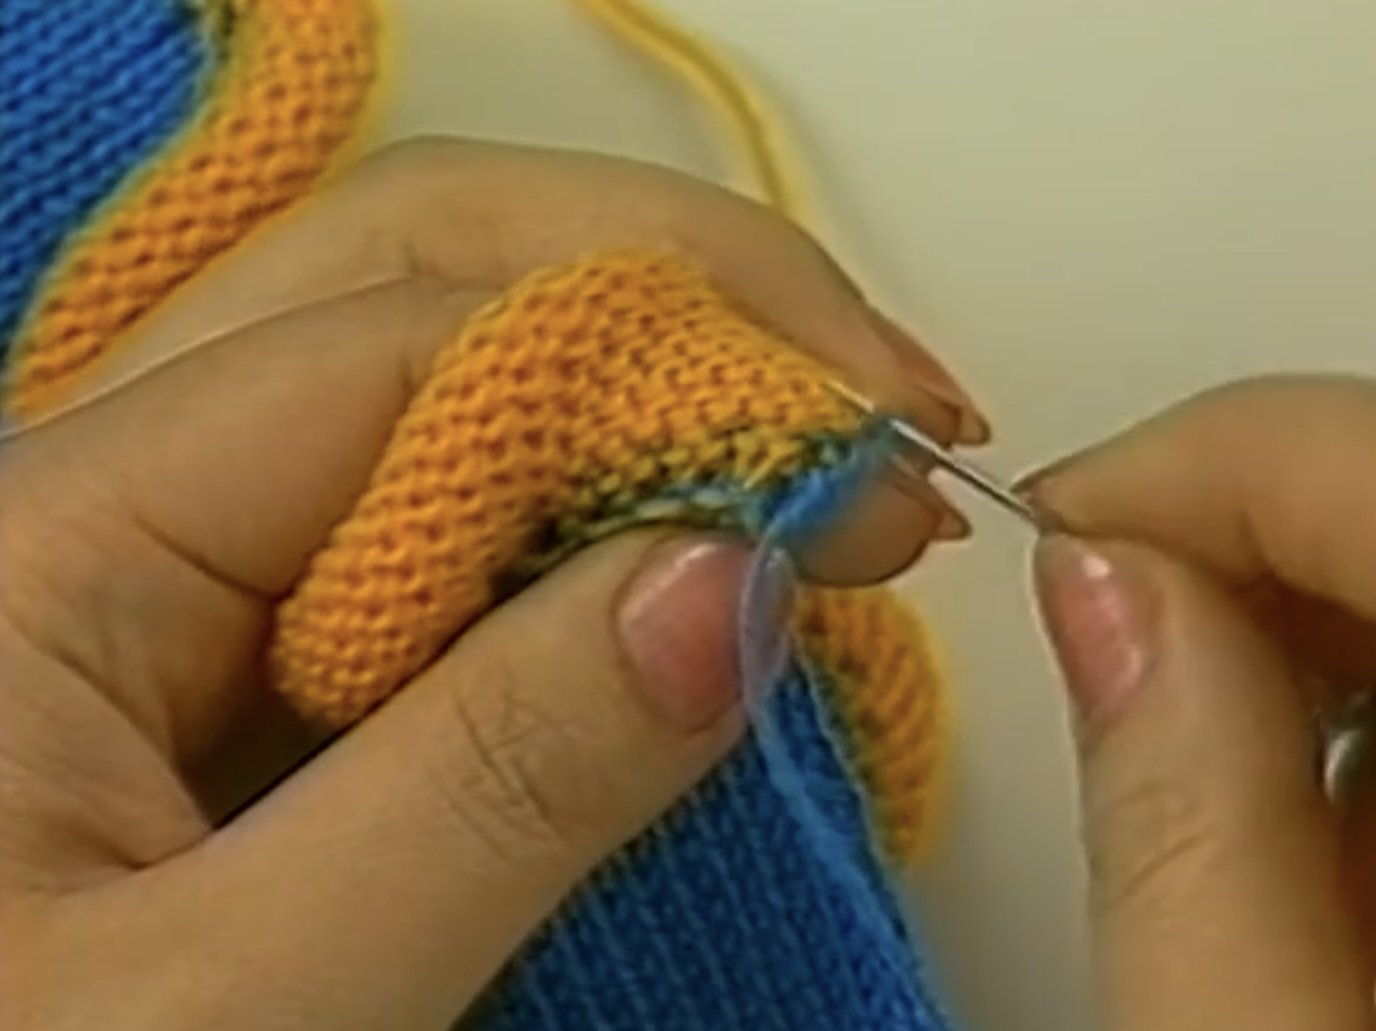
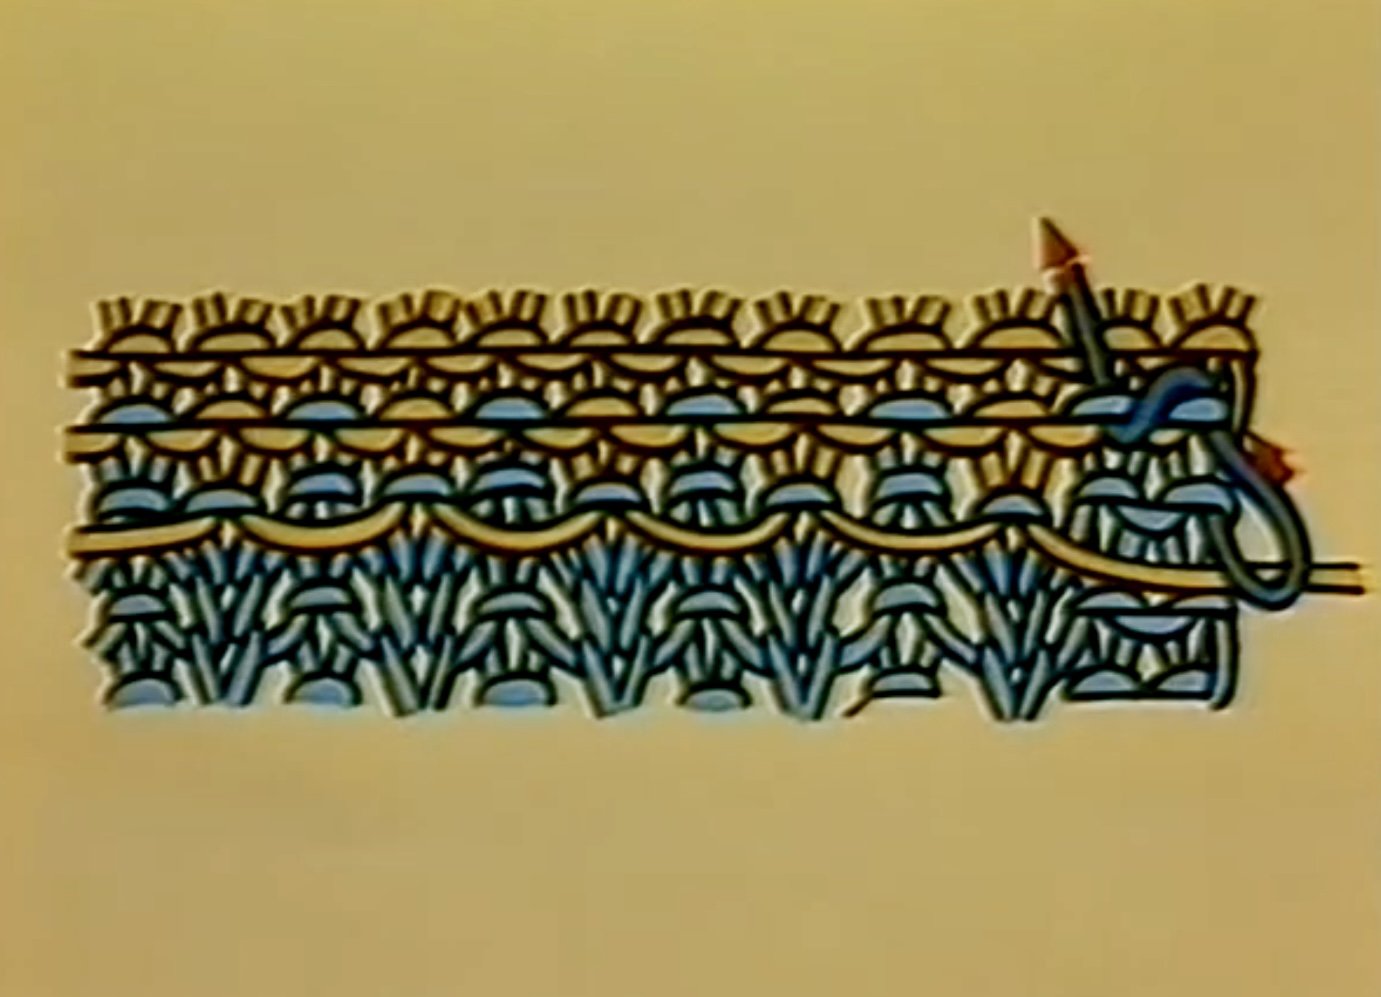
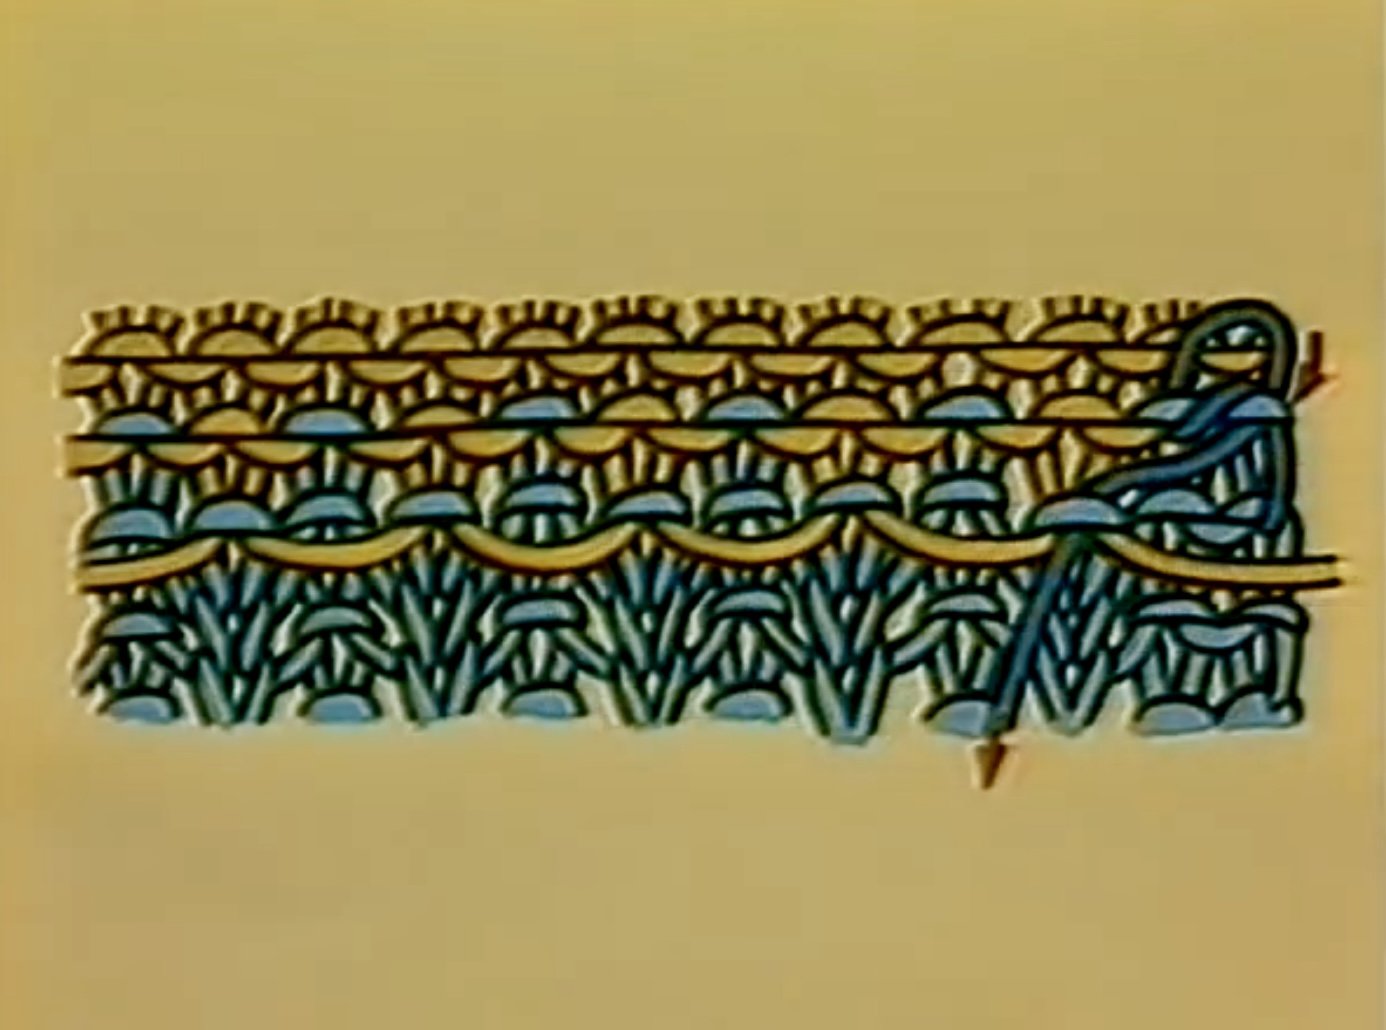
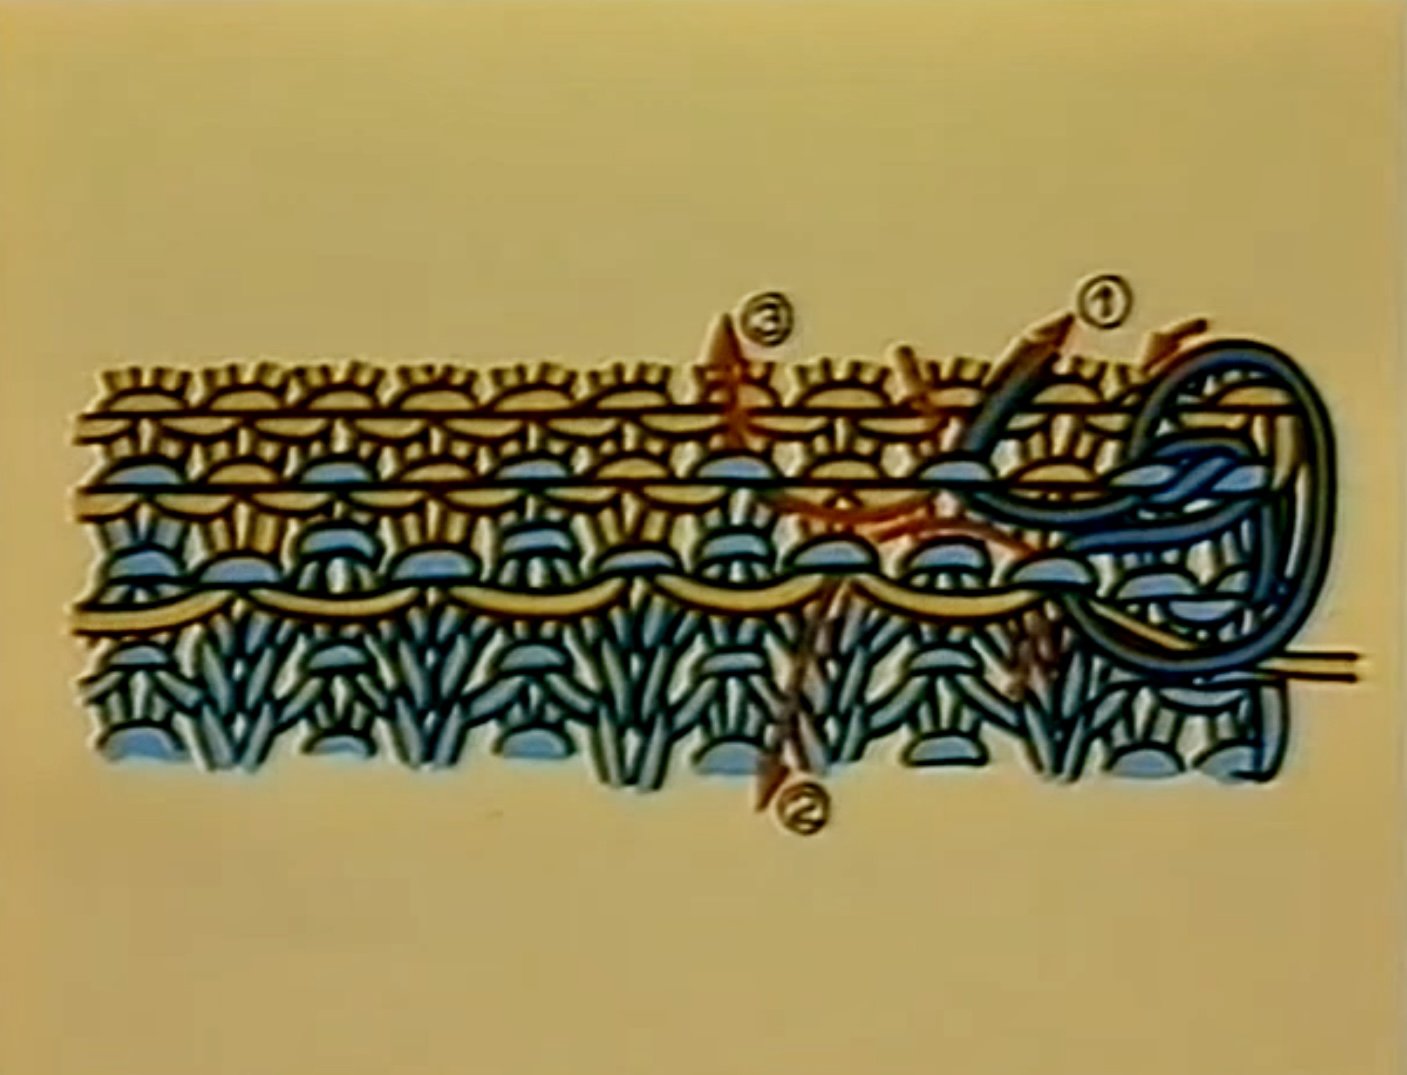
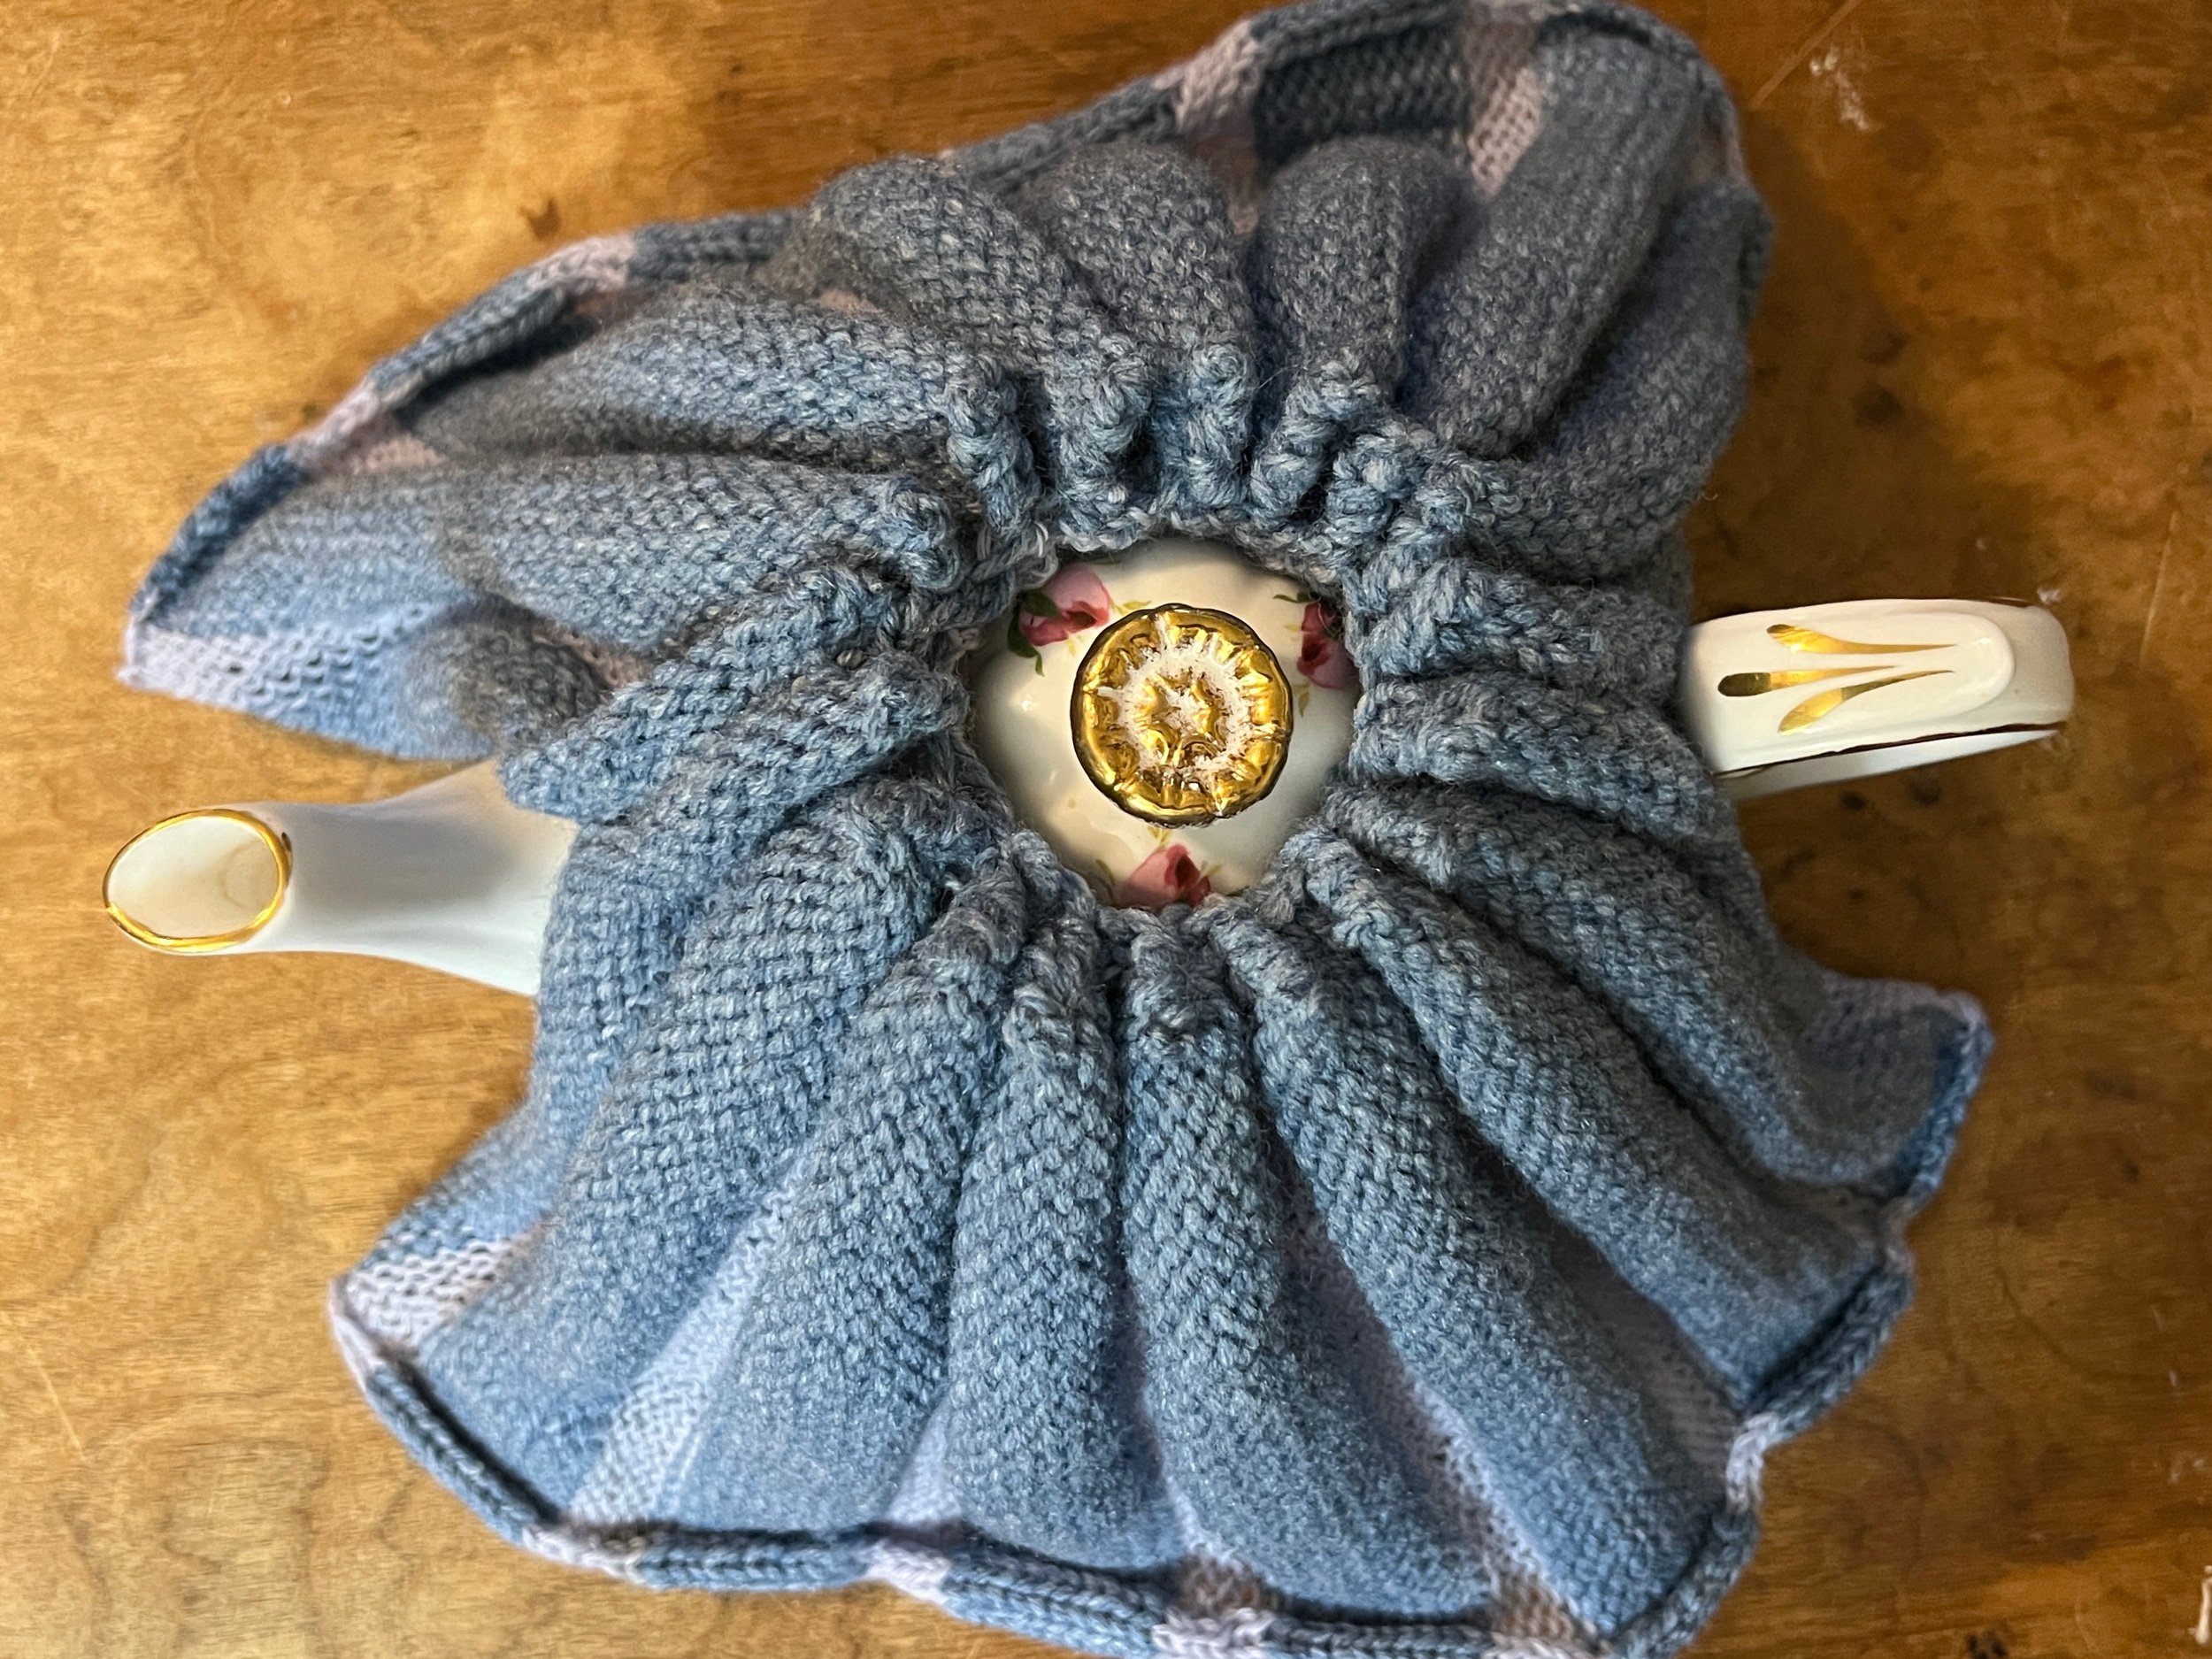
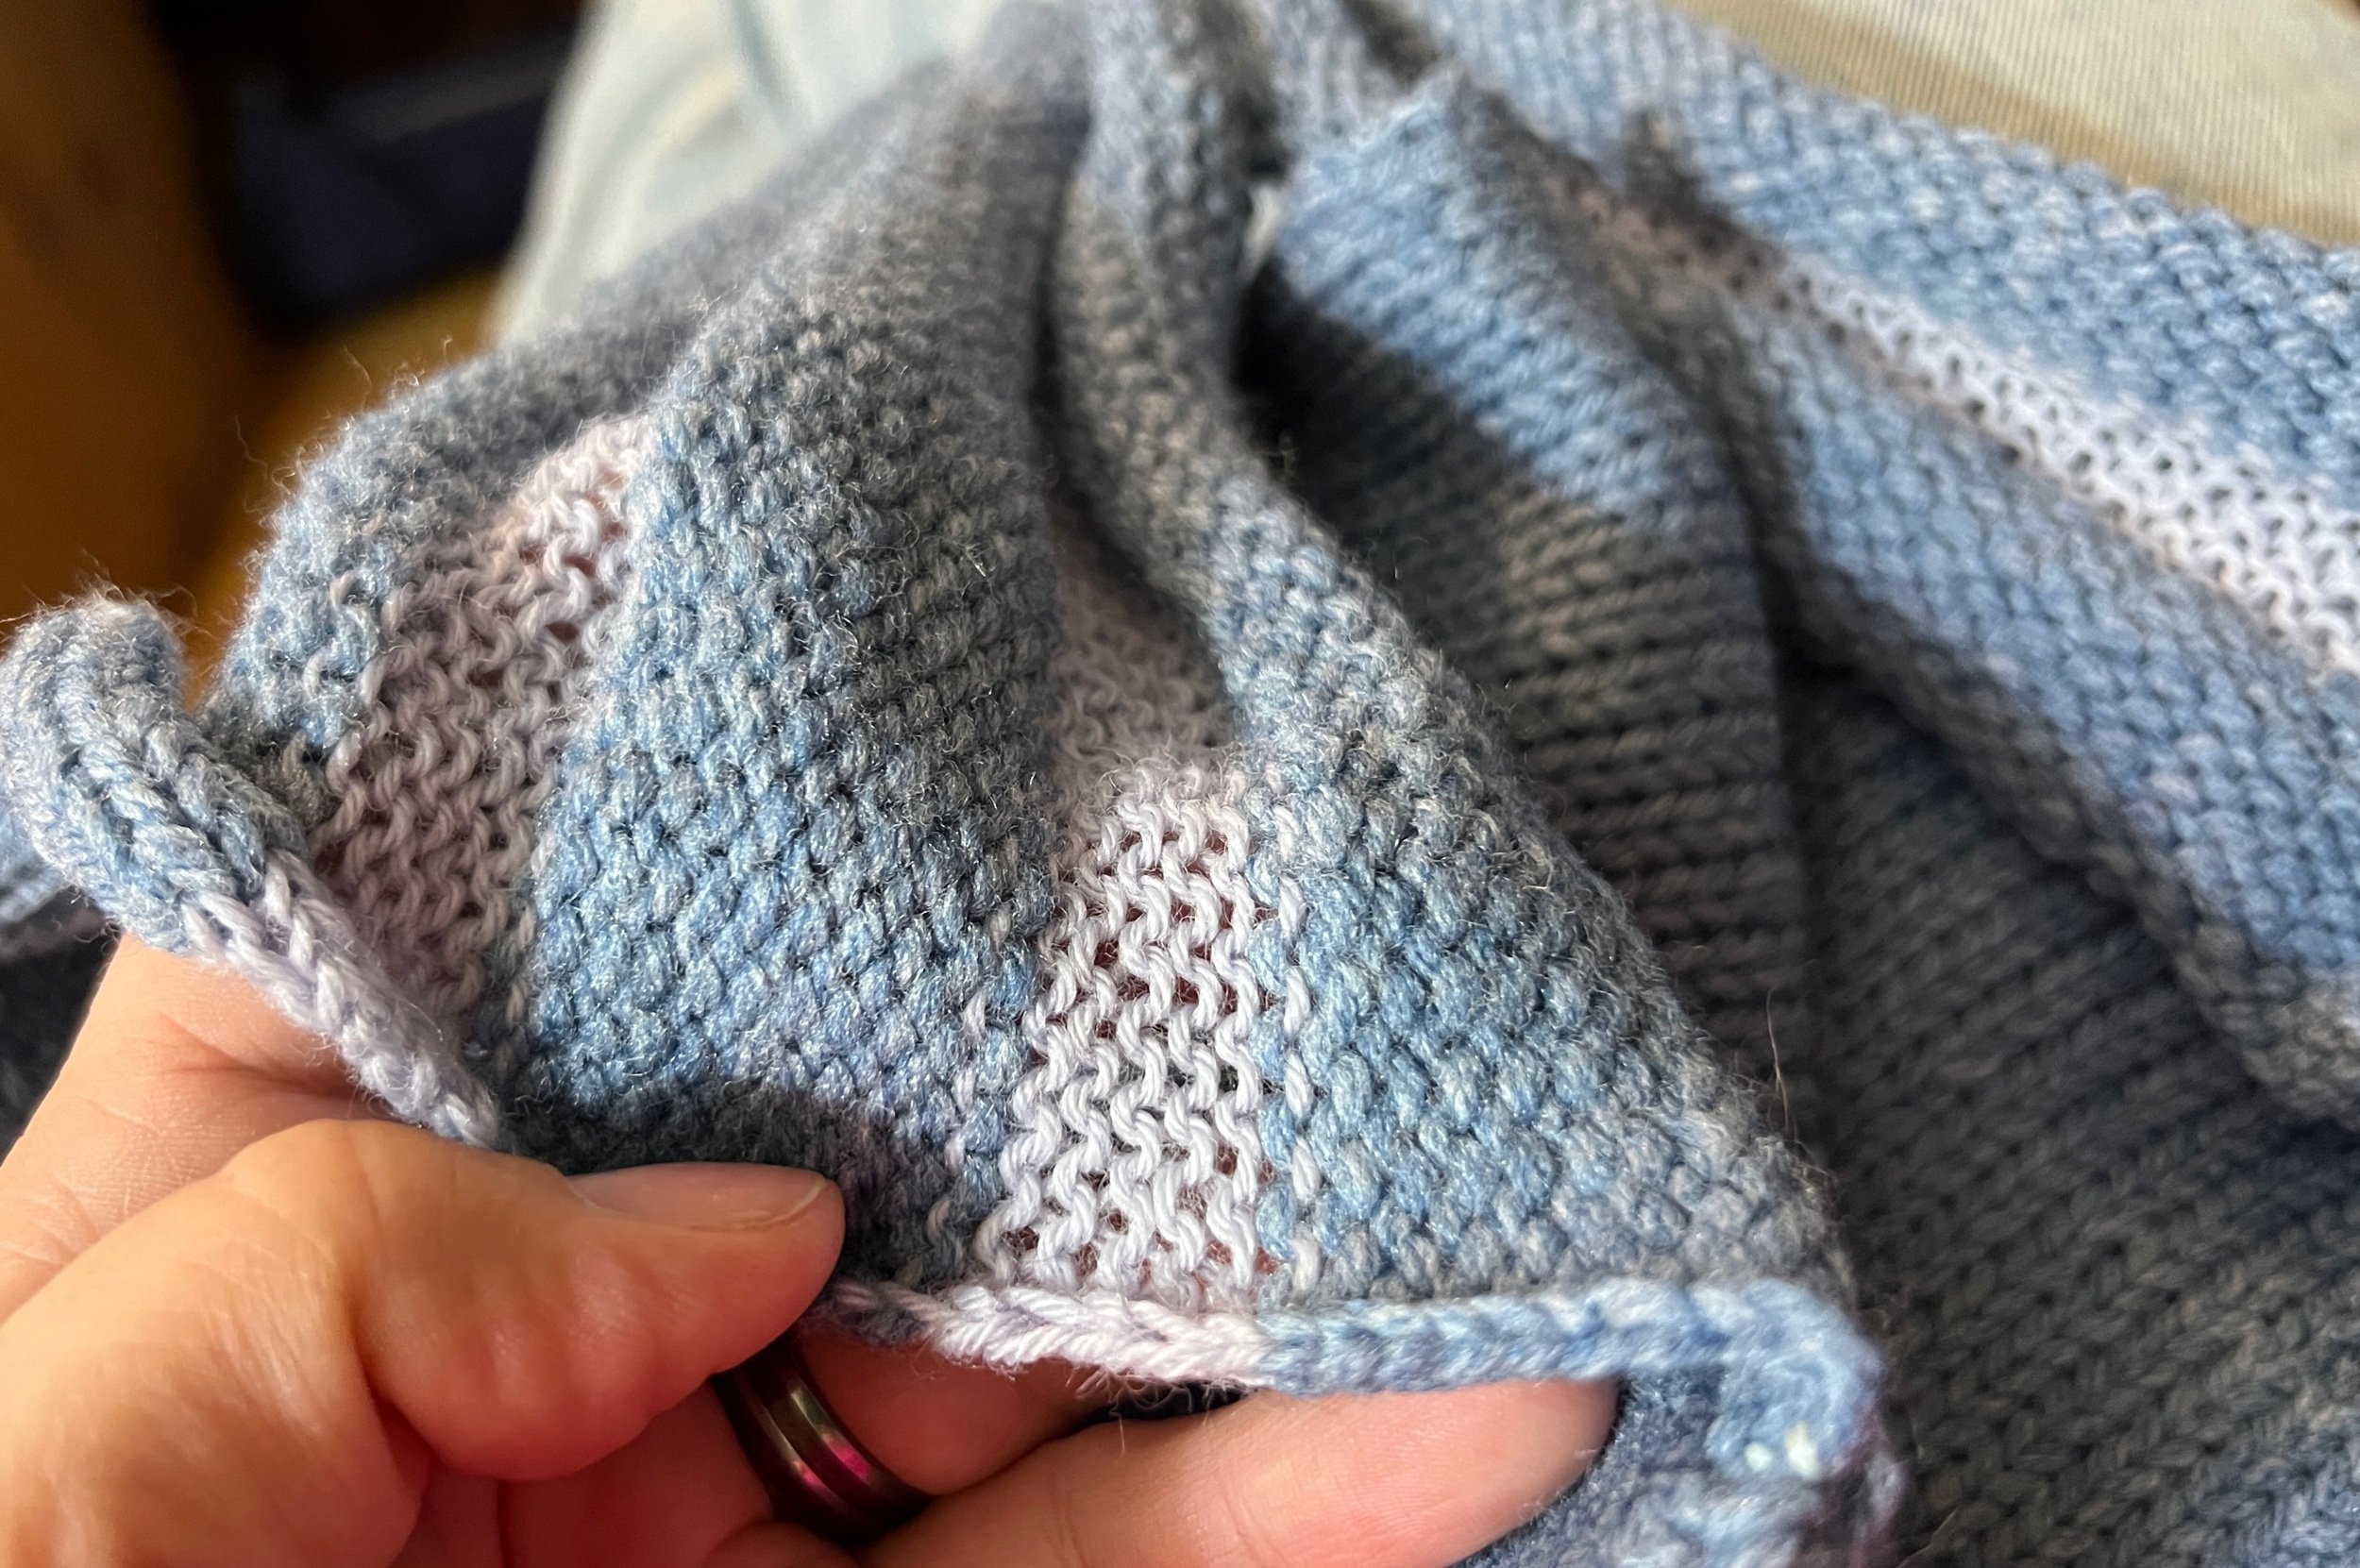
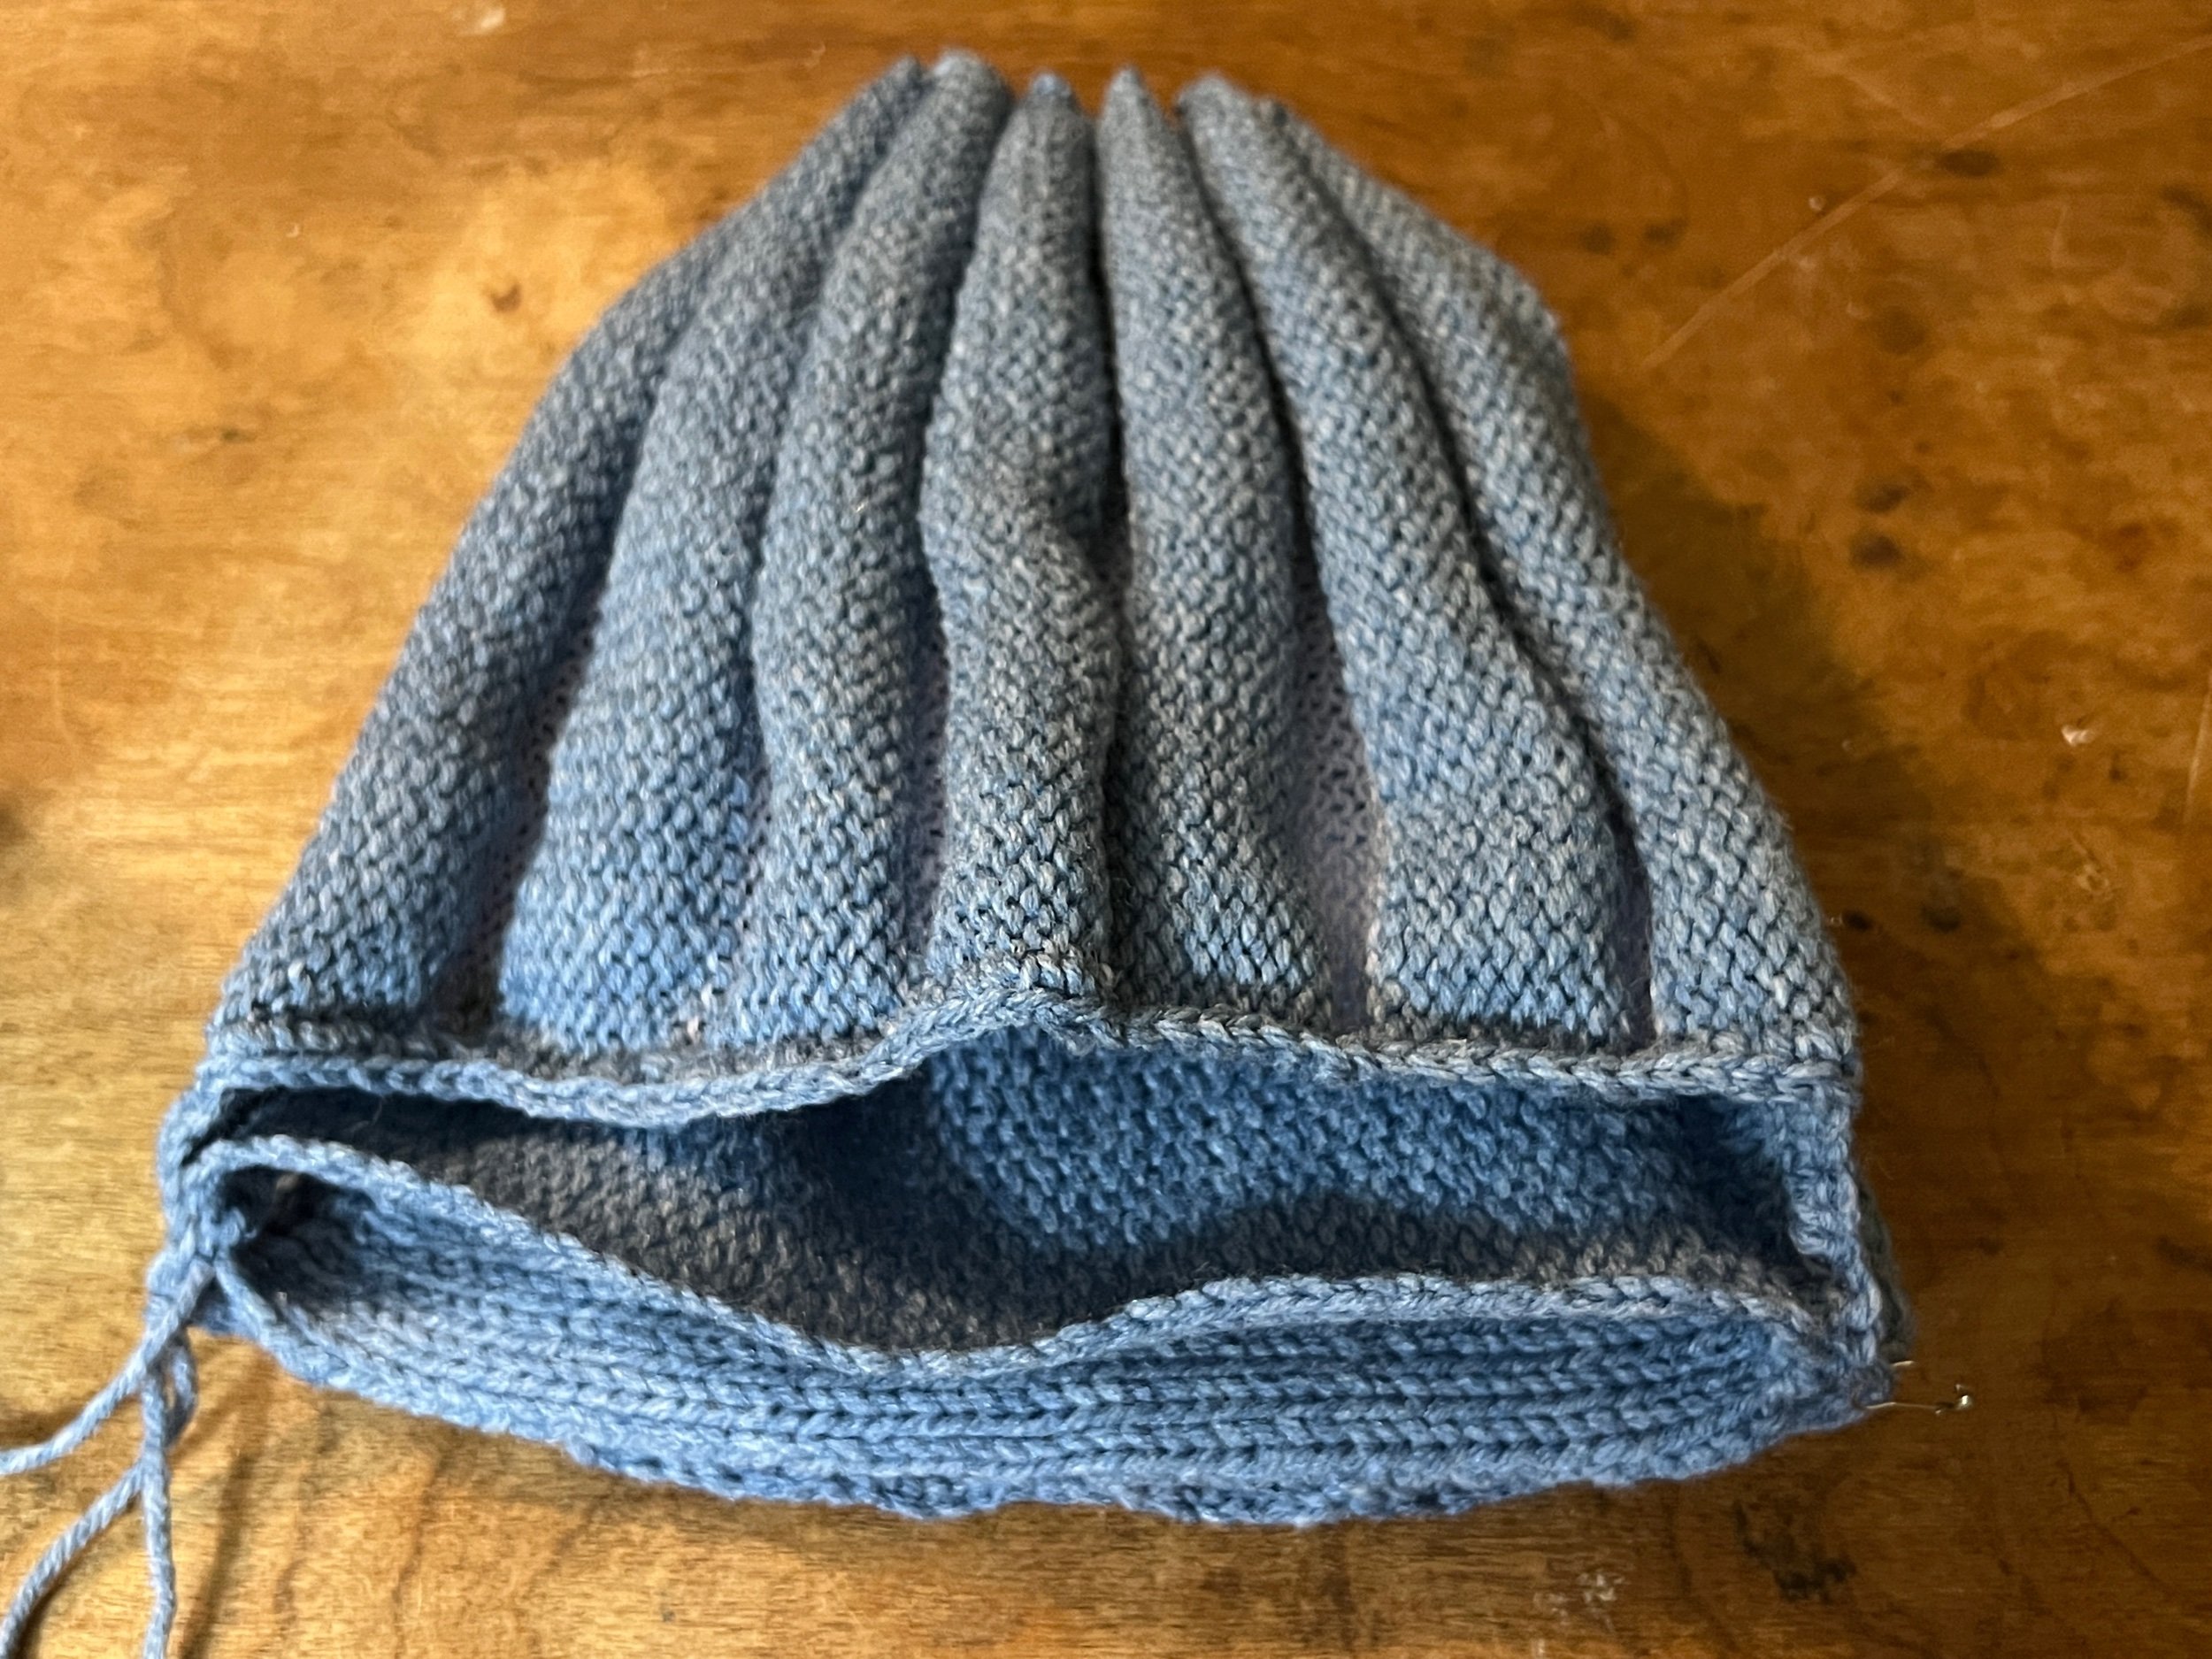
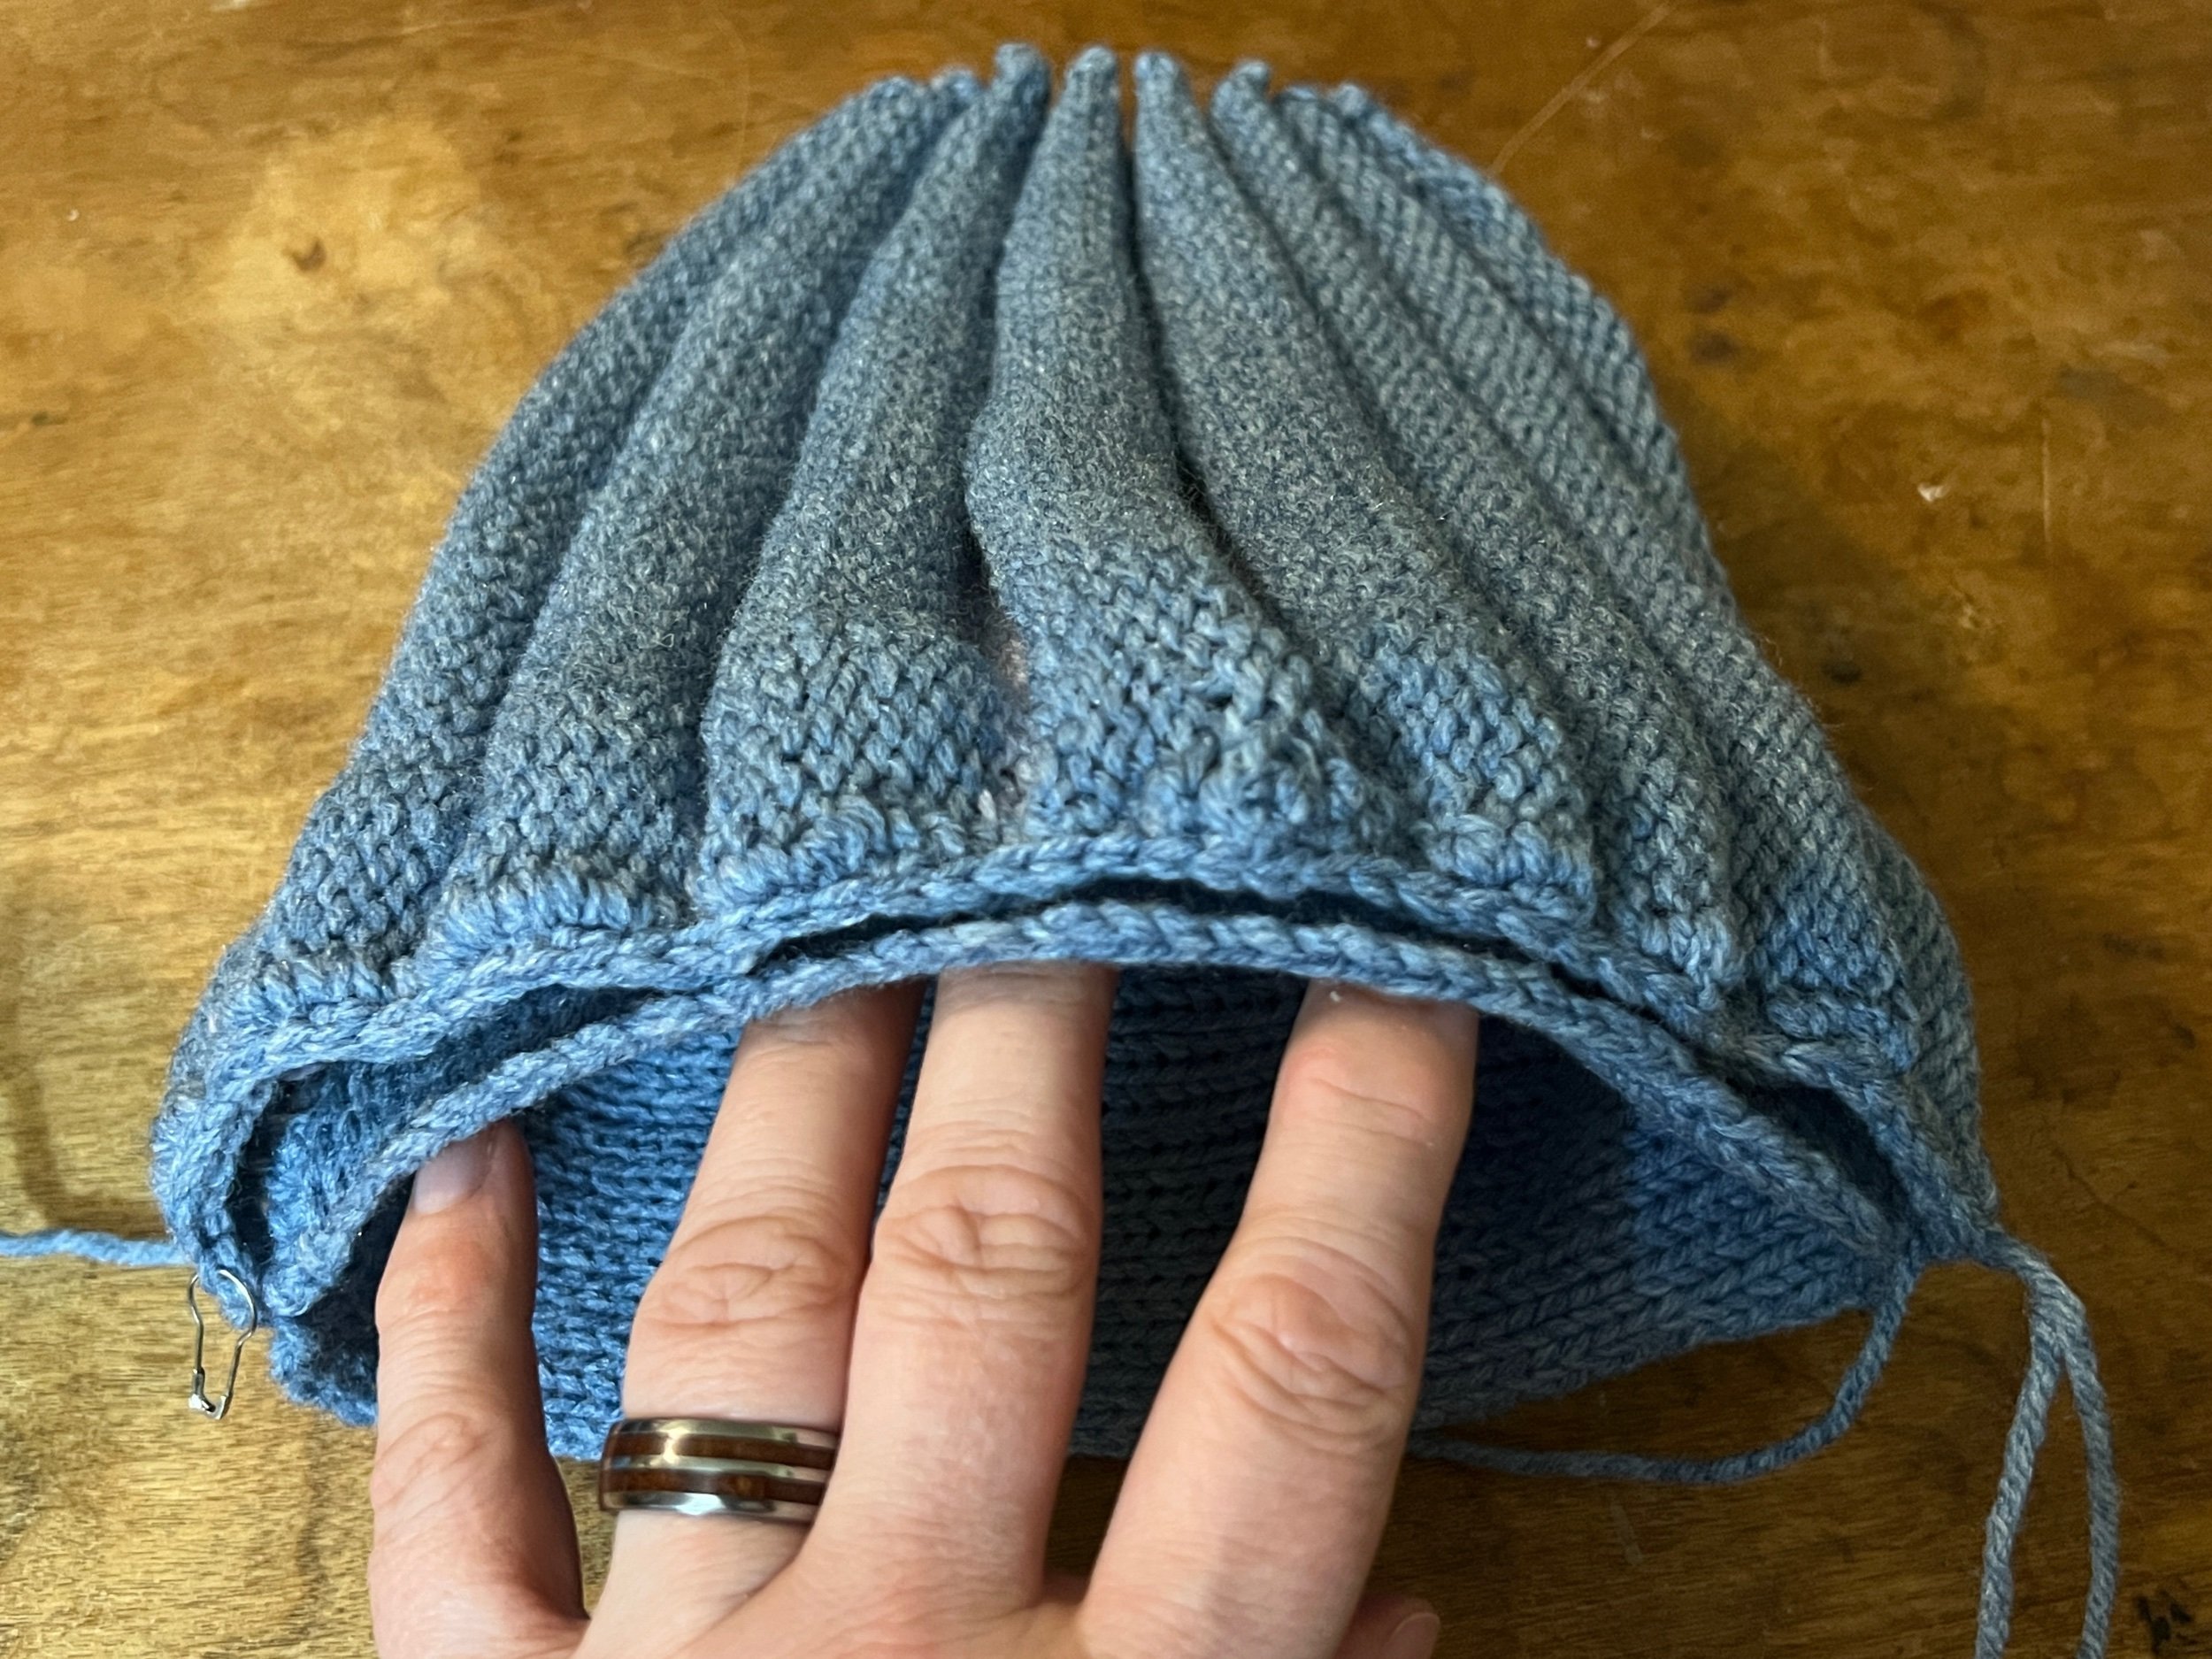
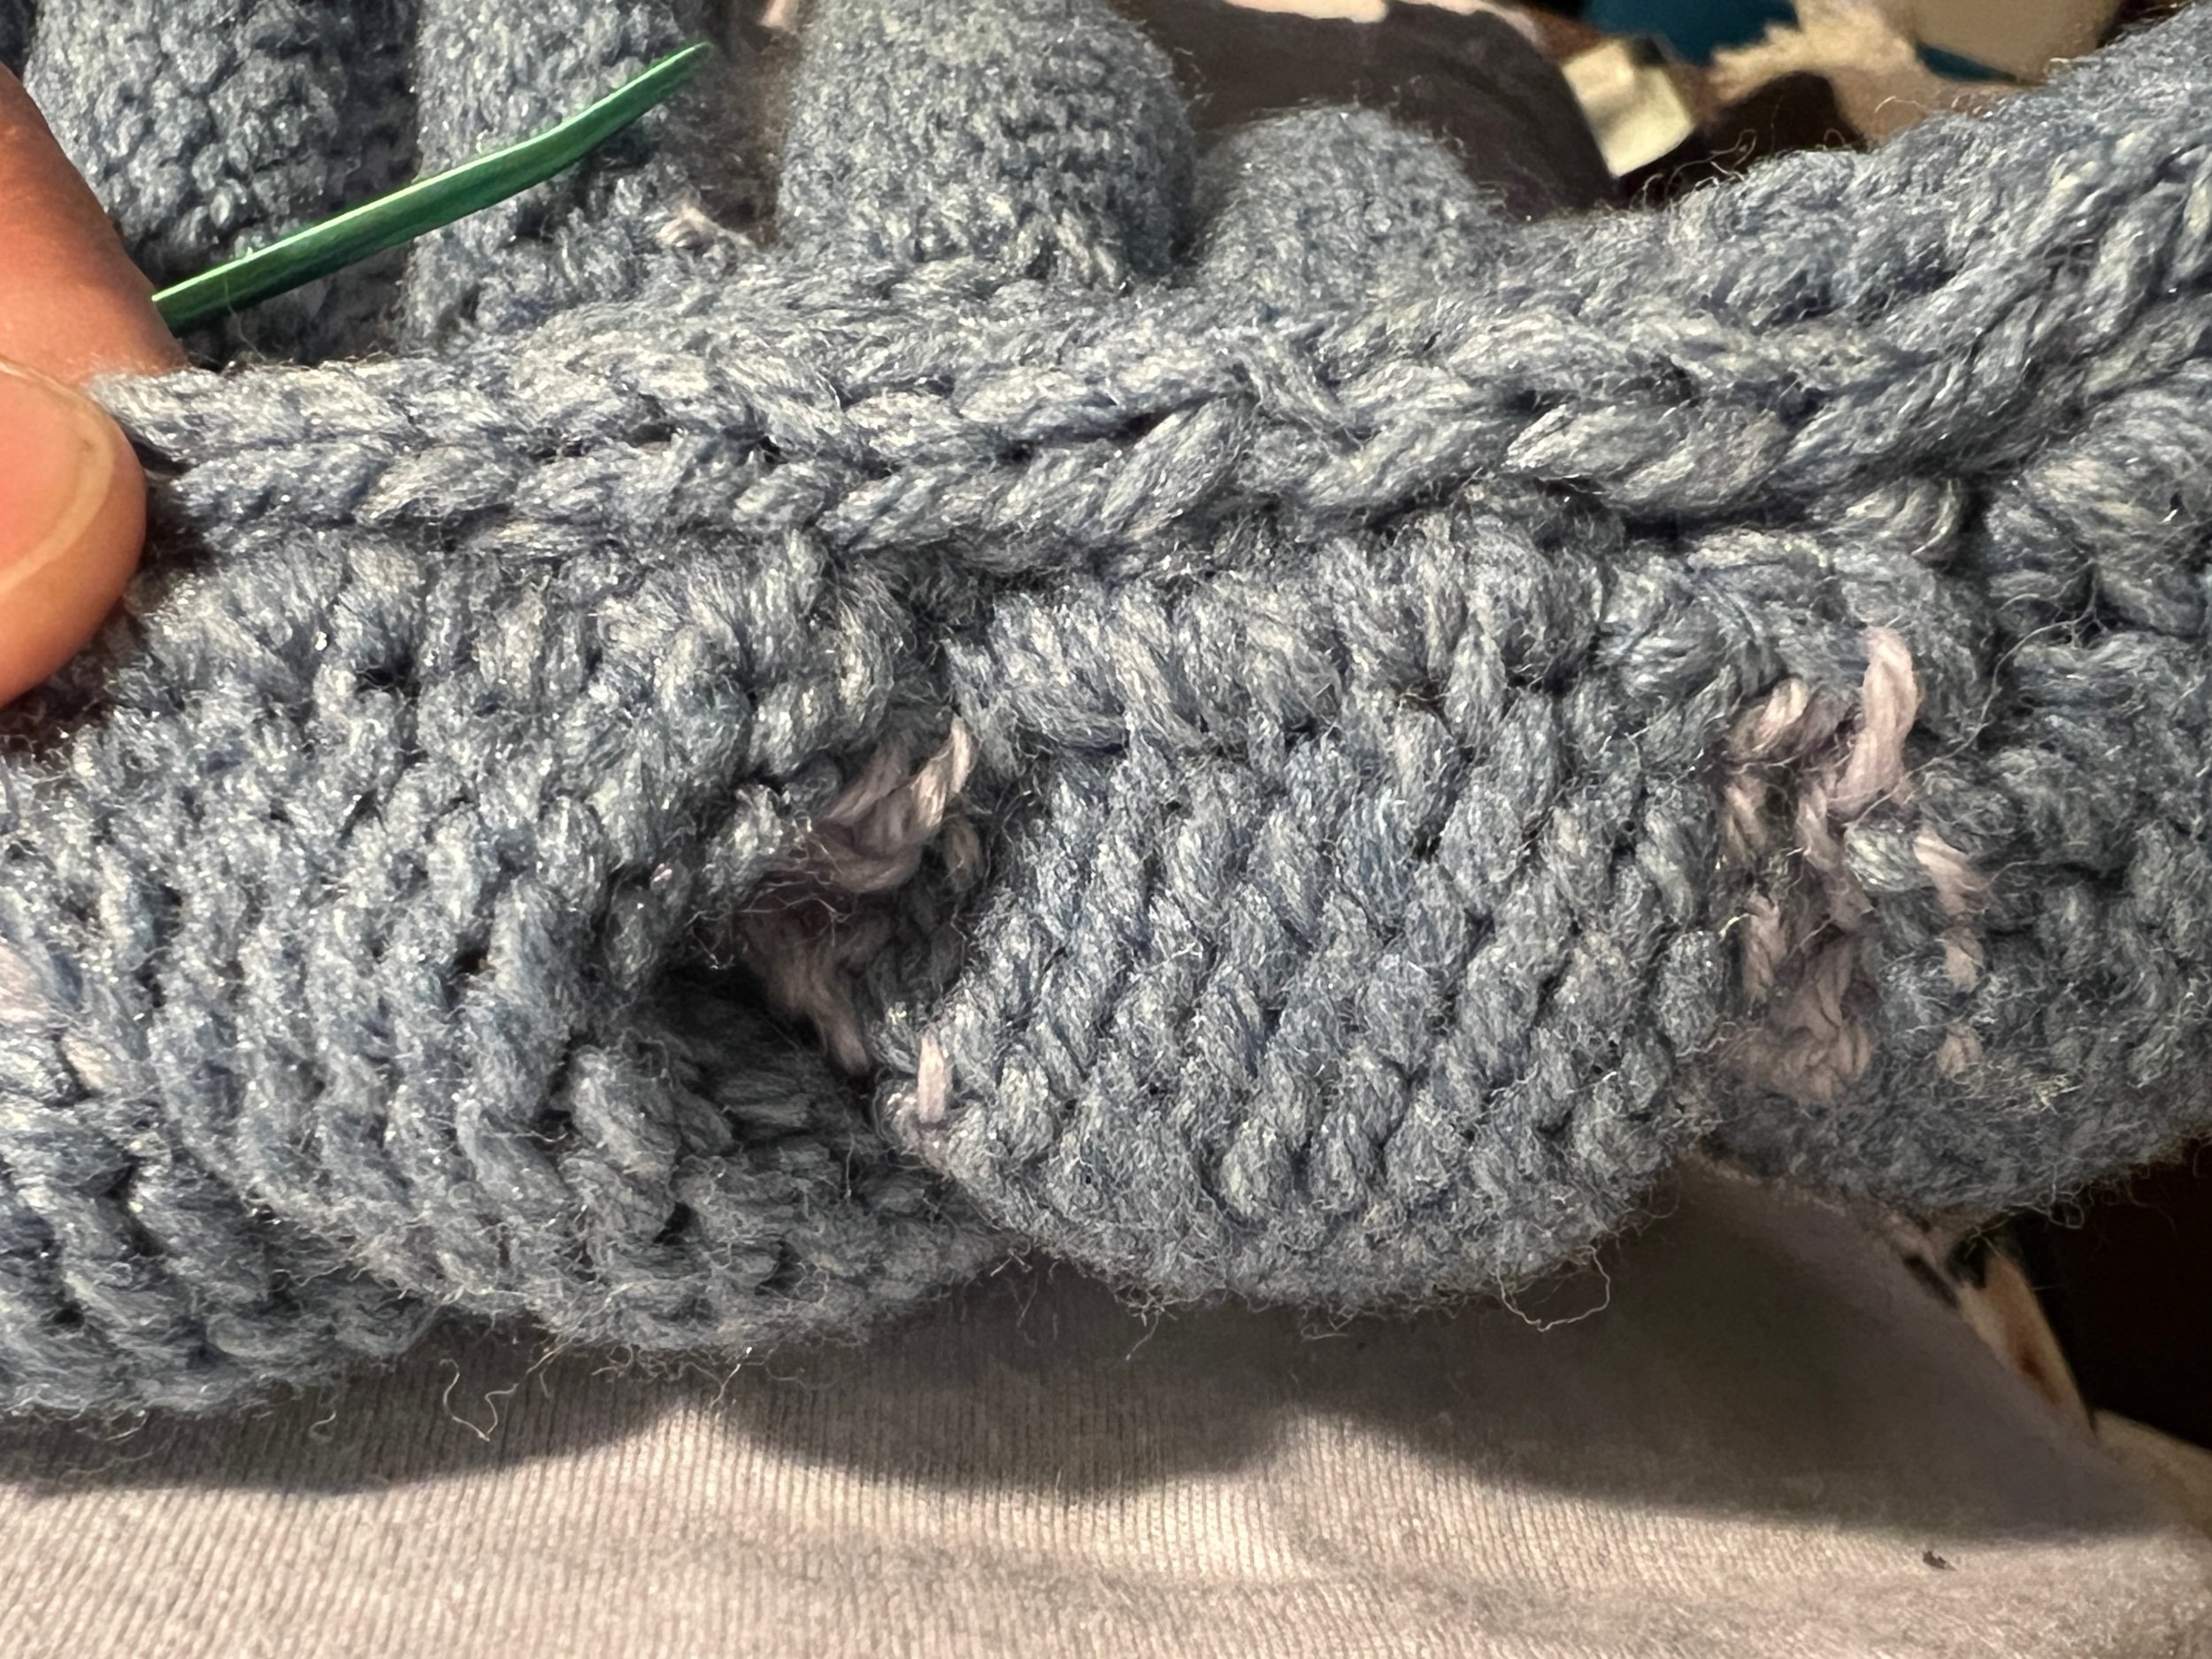
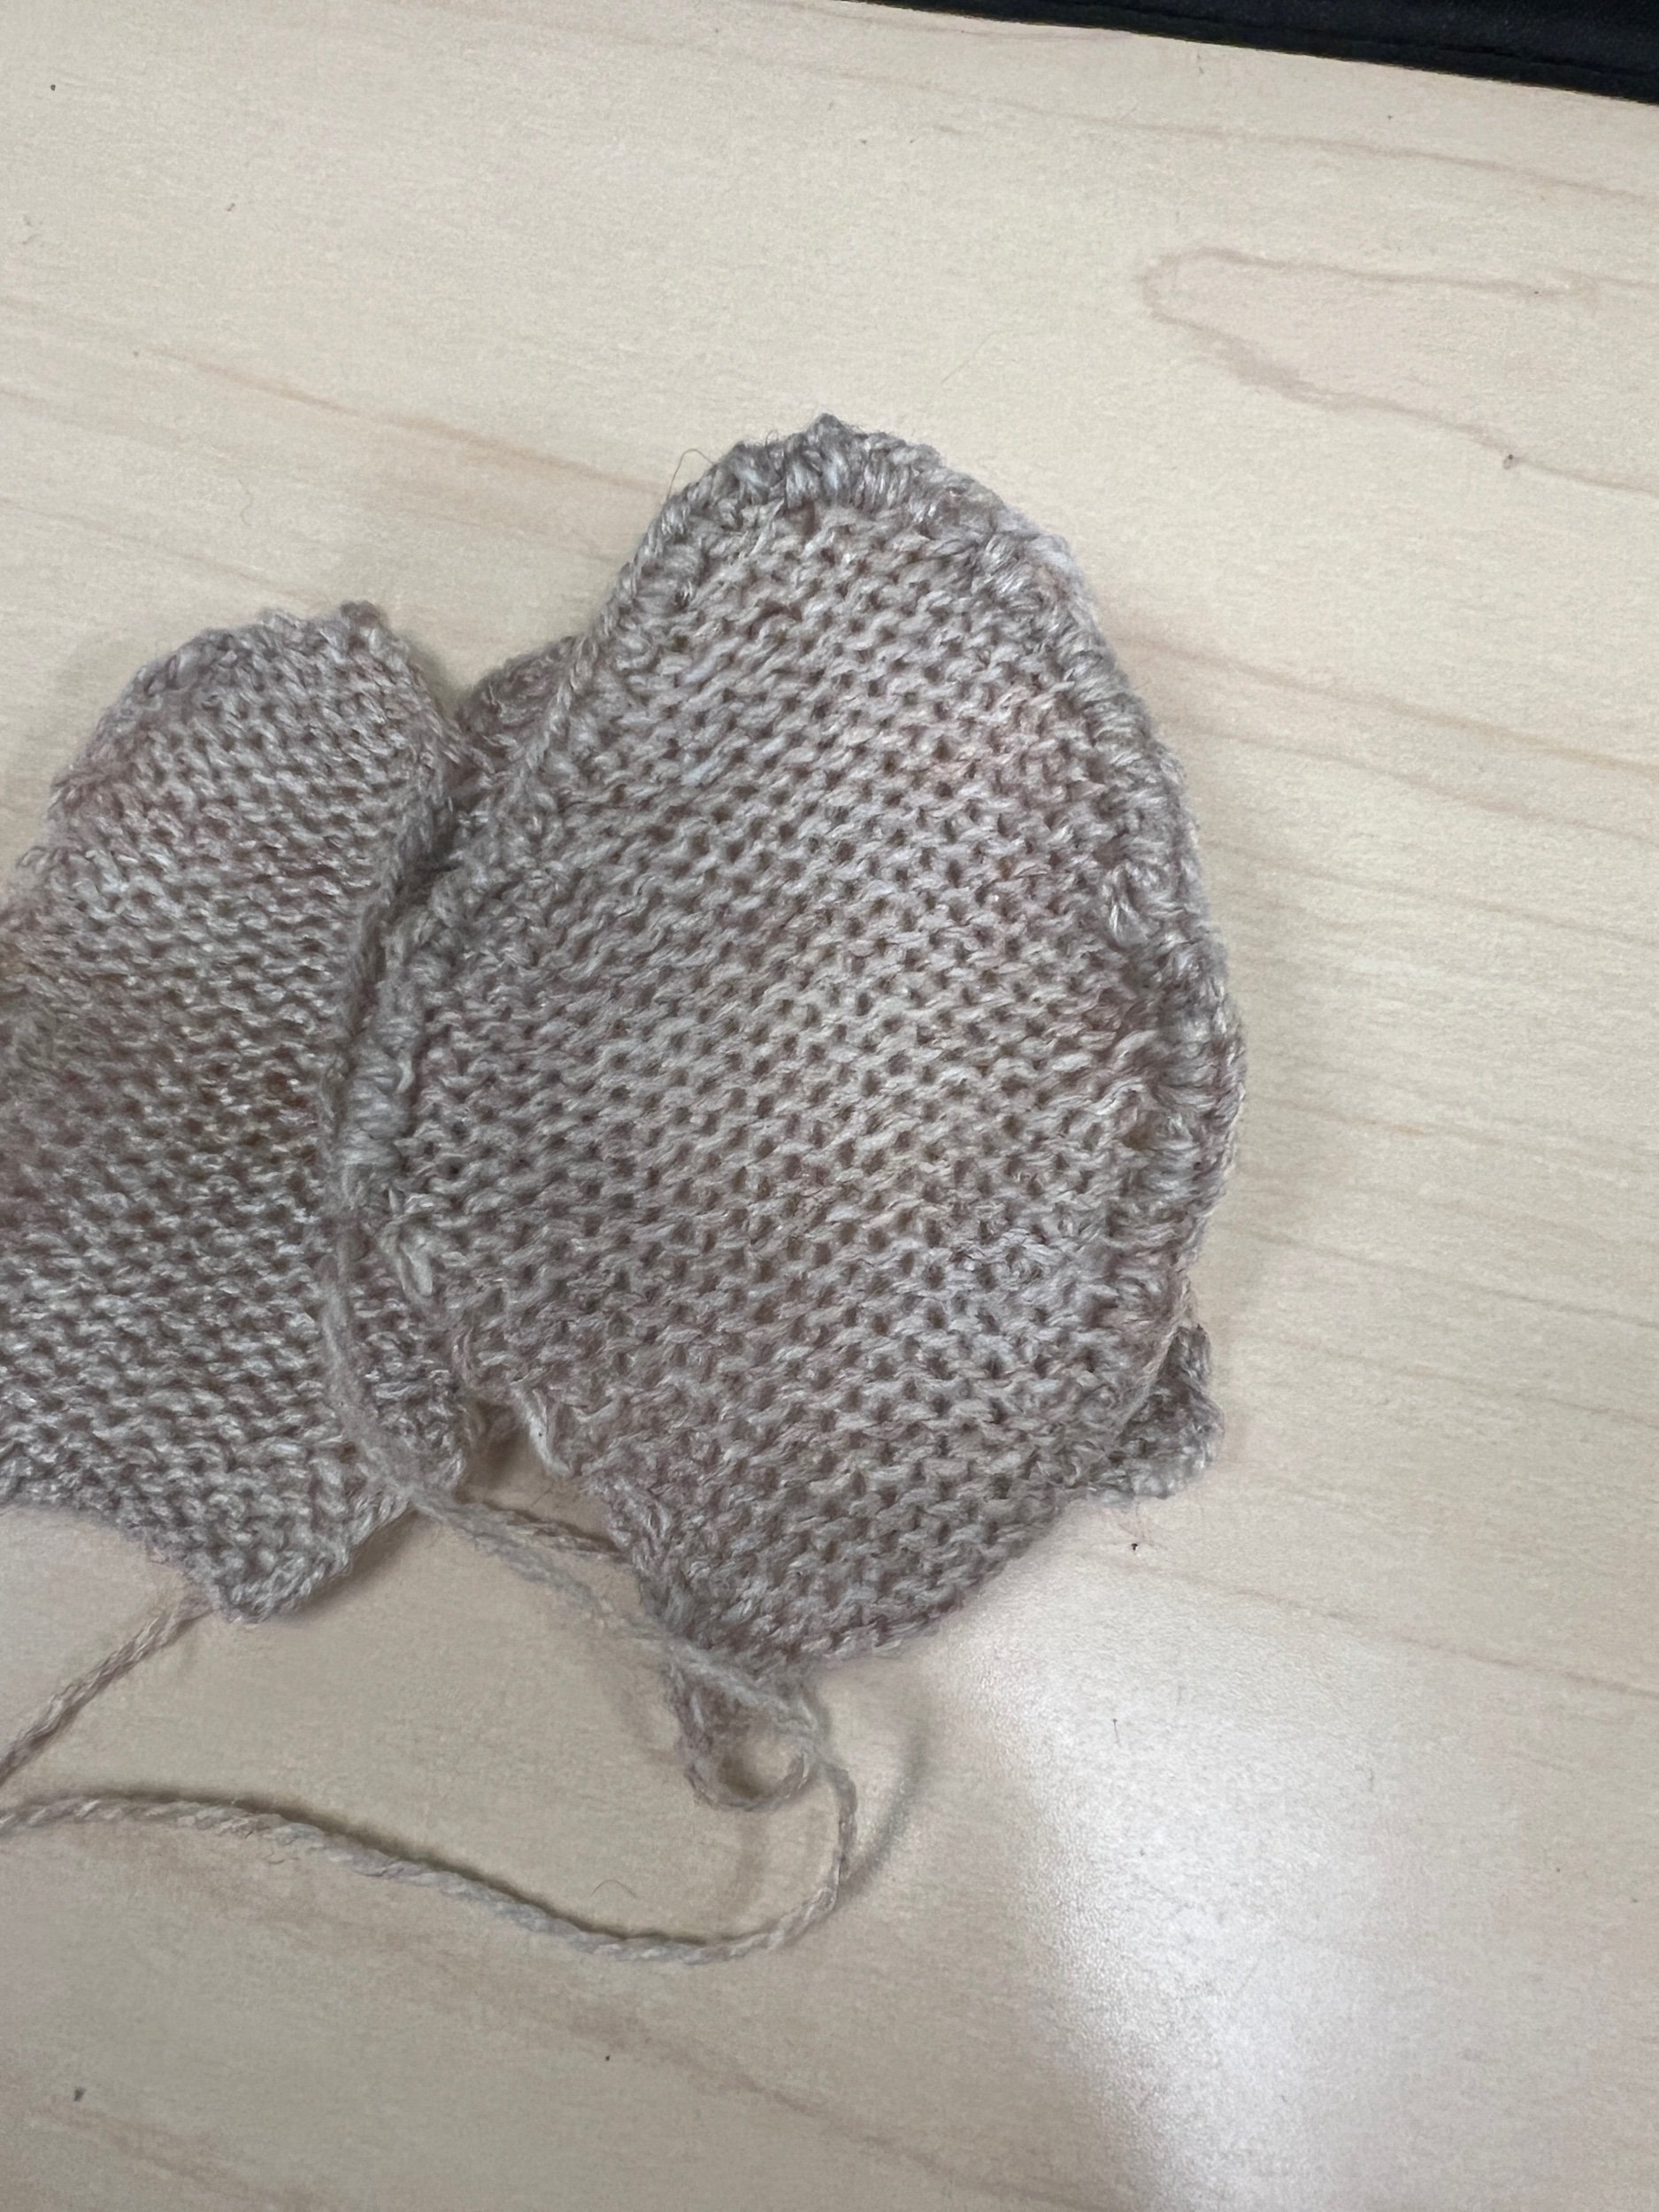
Close the back rows of stiches on the back welt. DIAGRAM

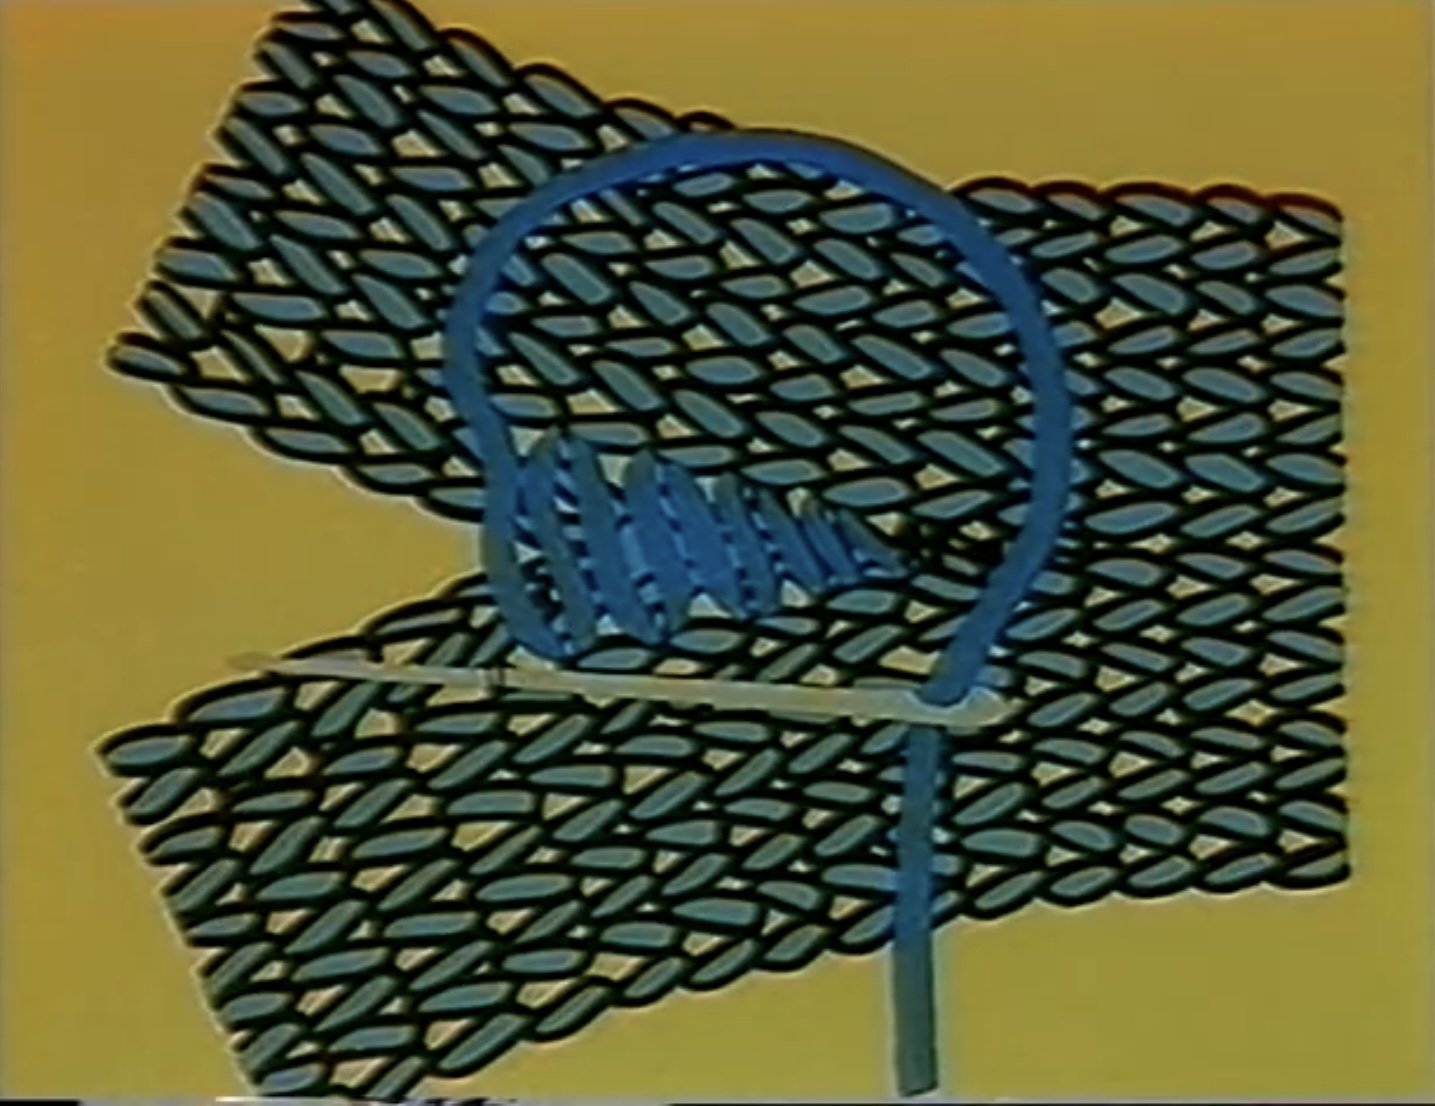
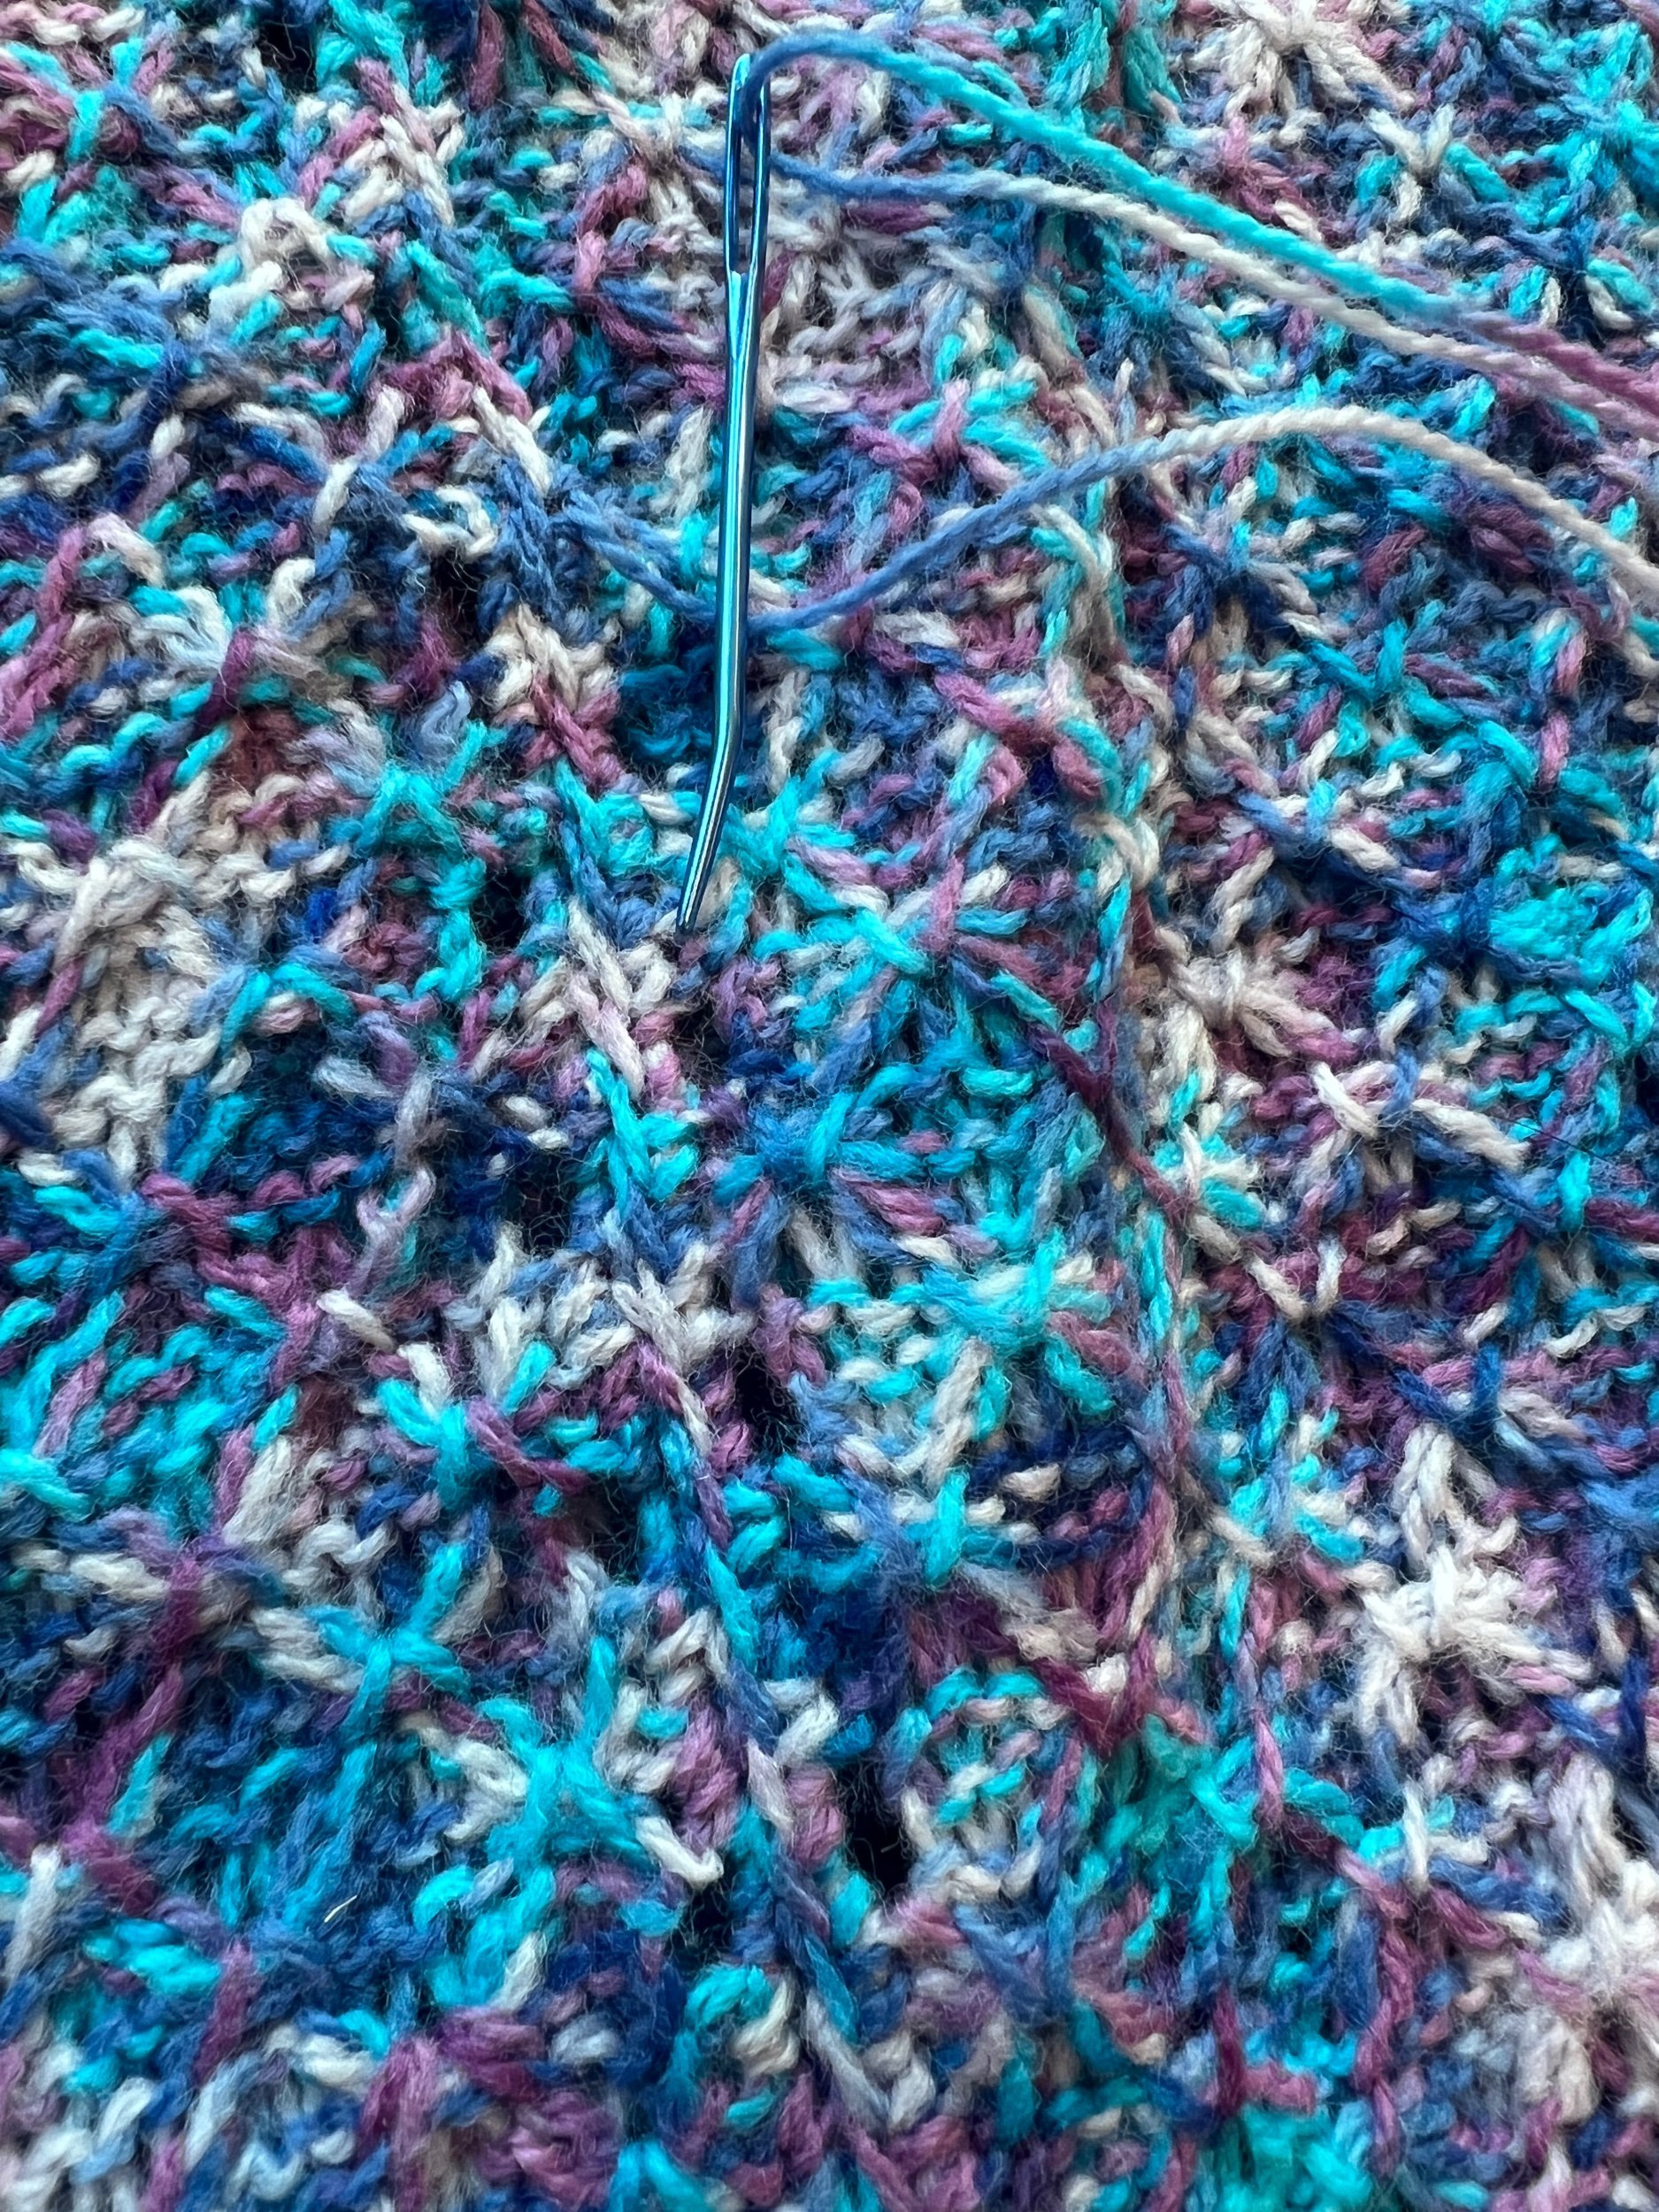
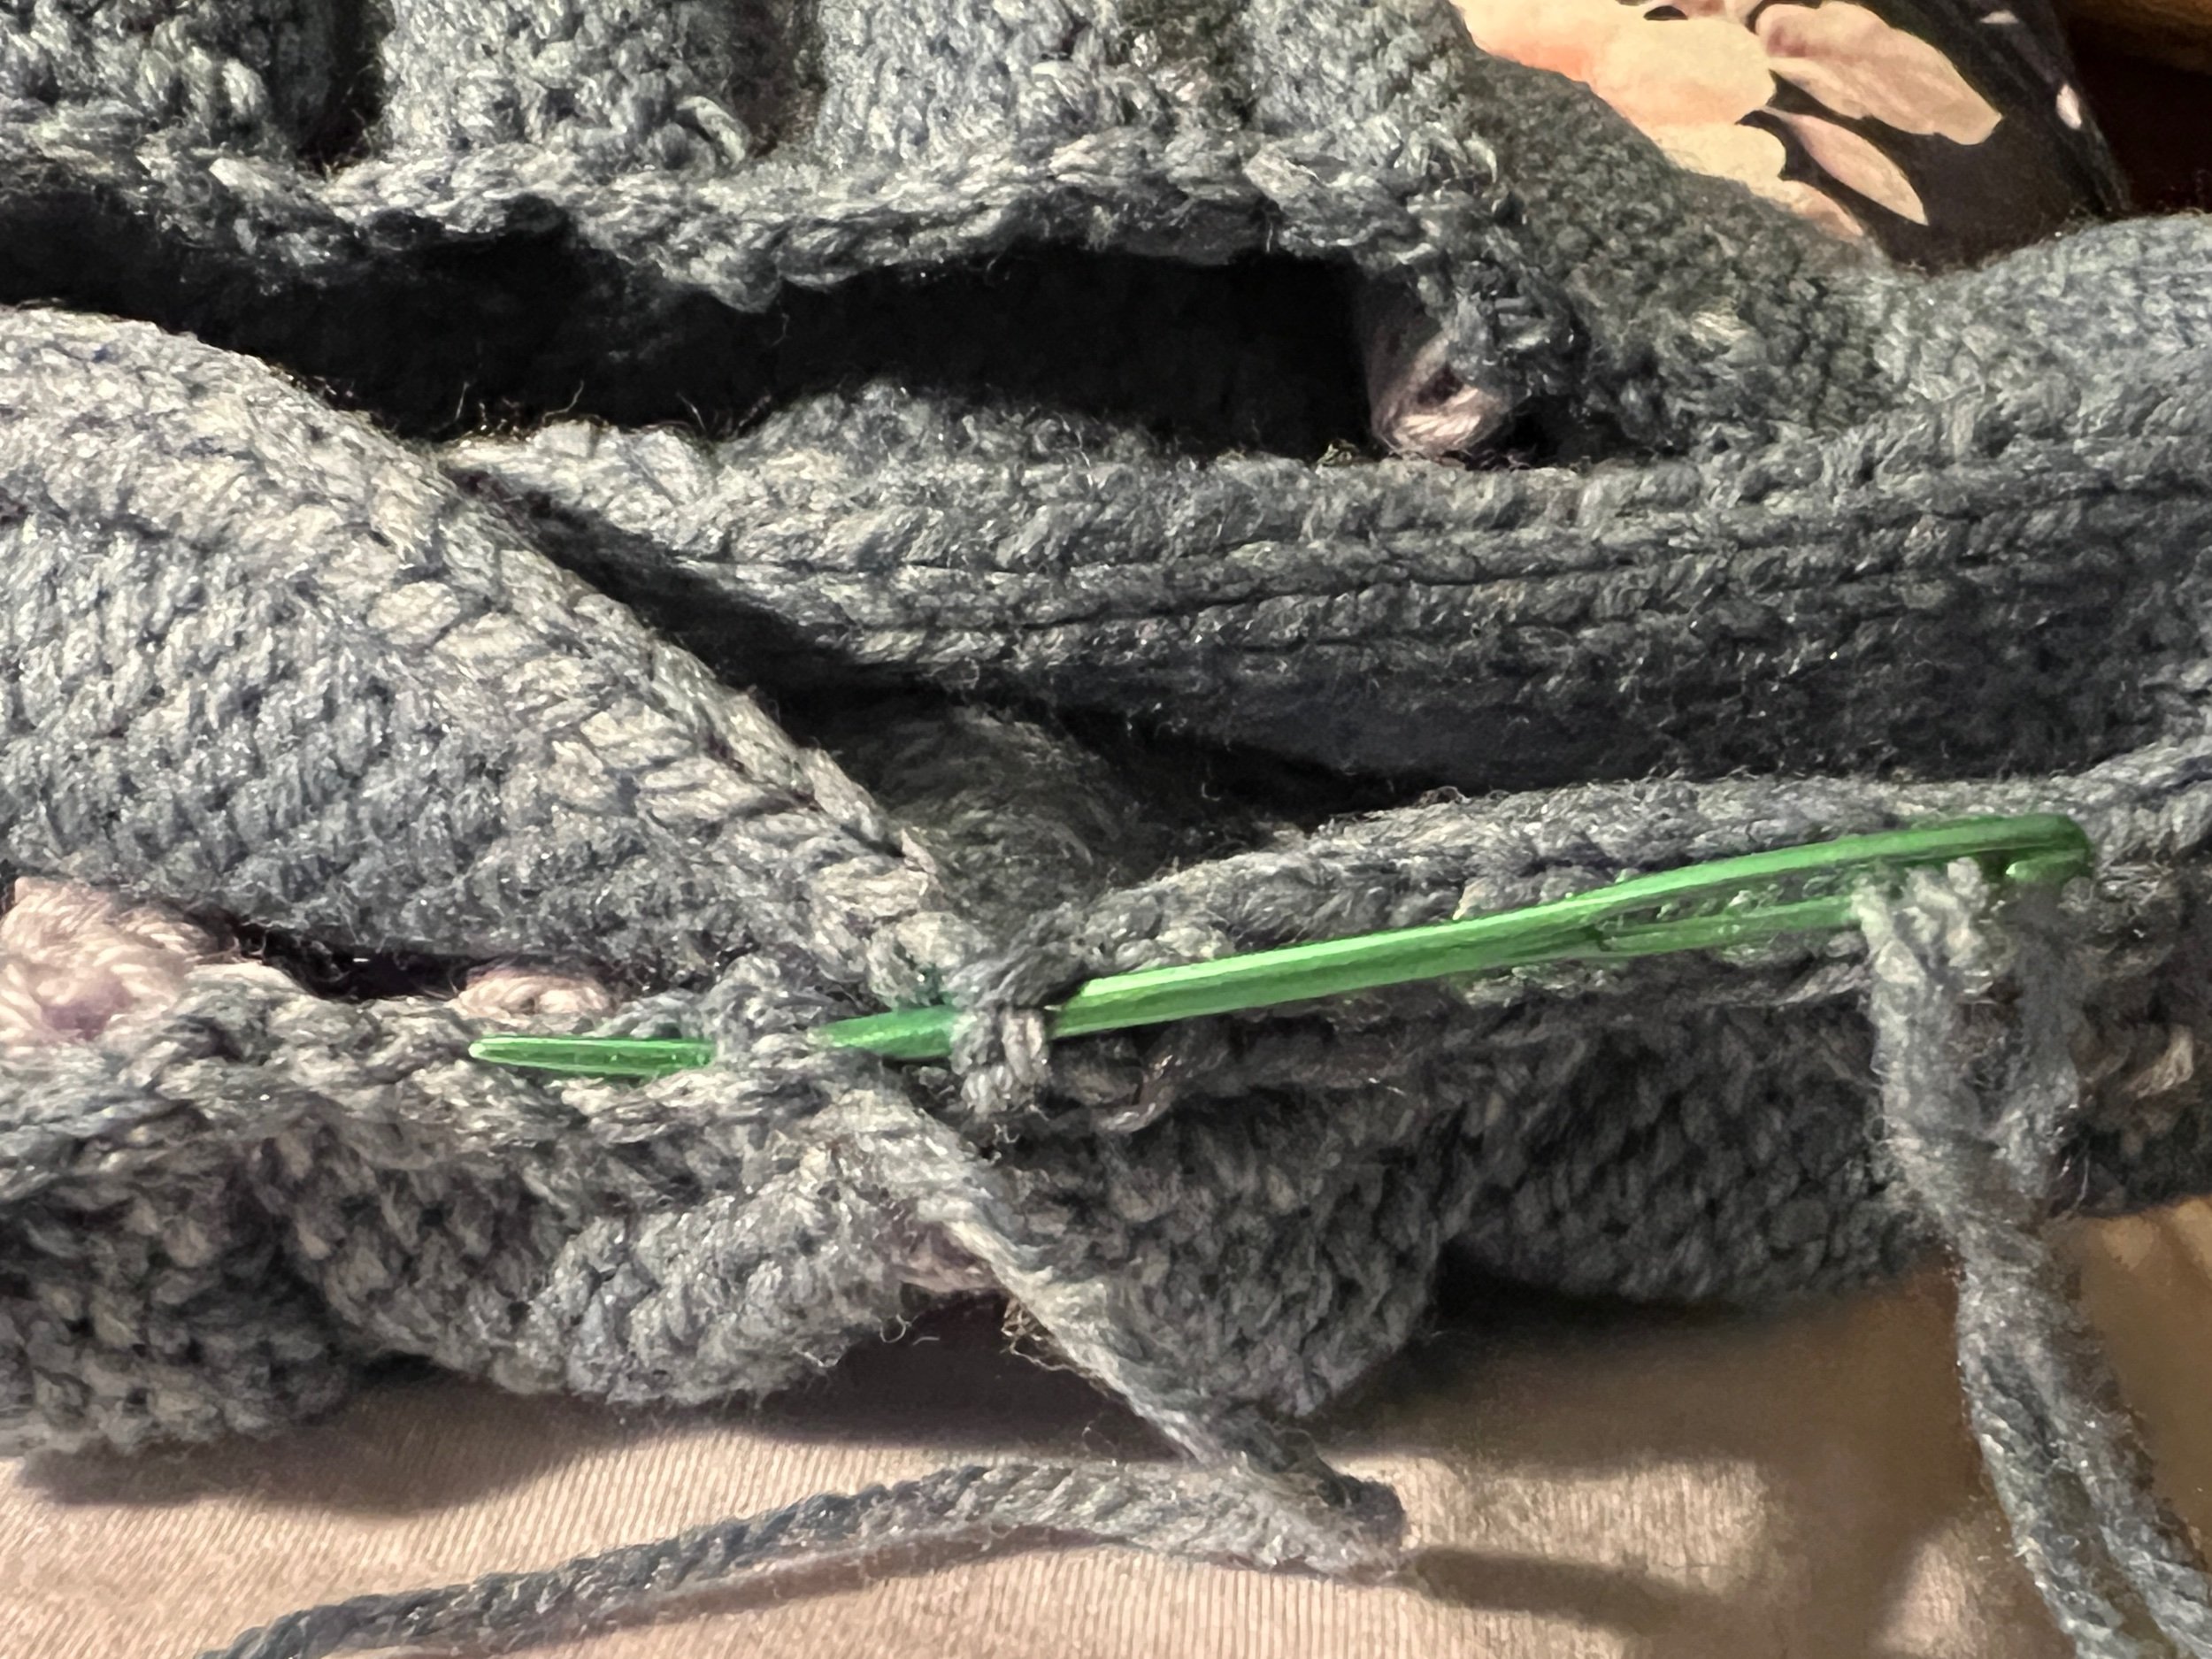
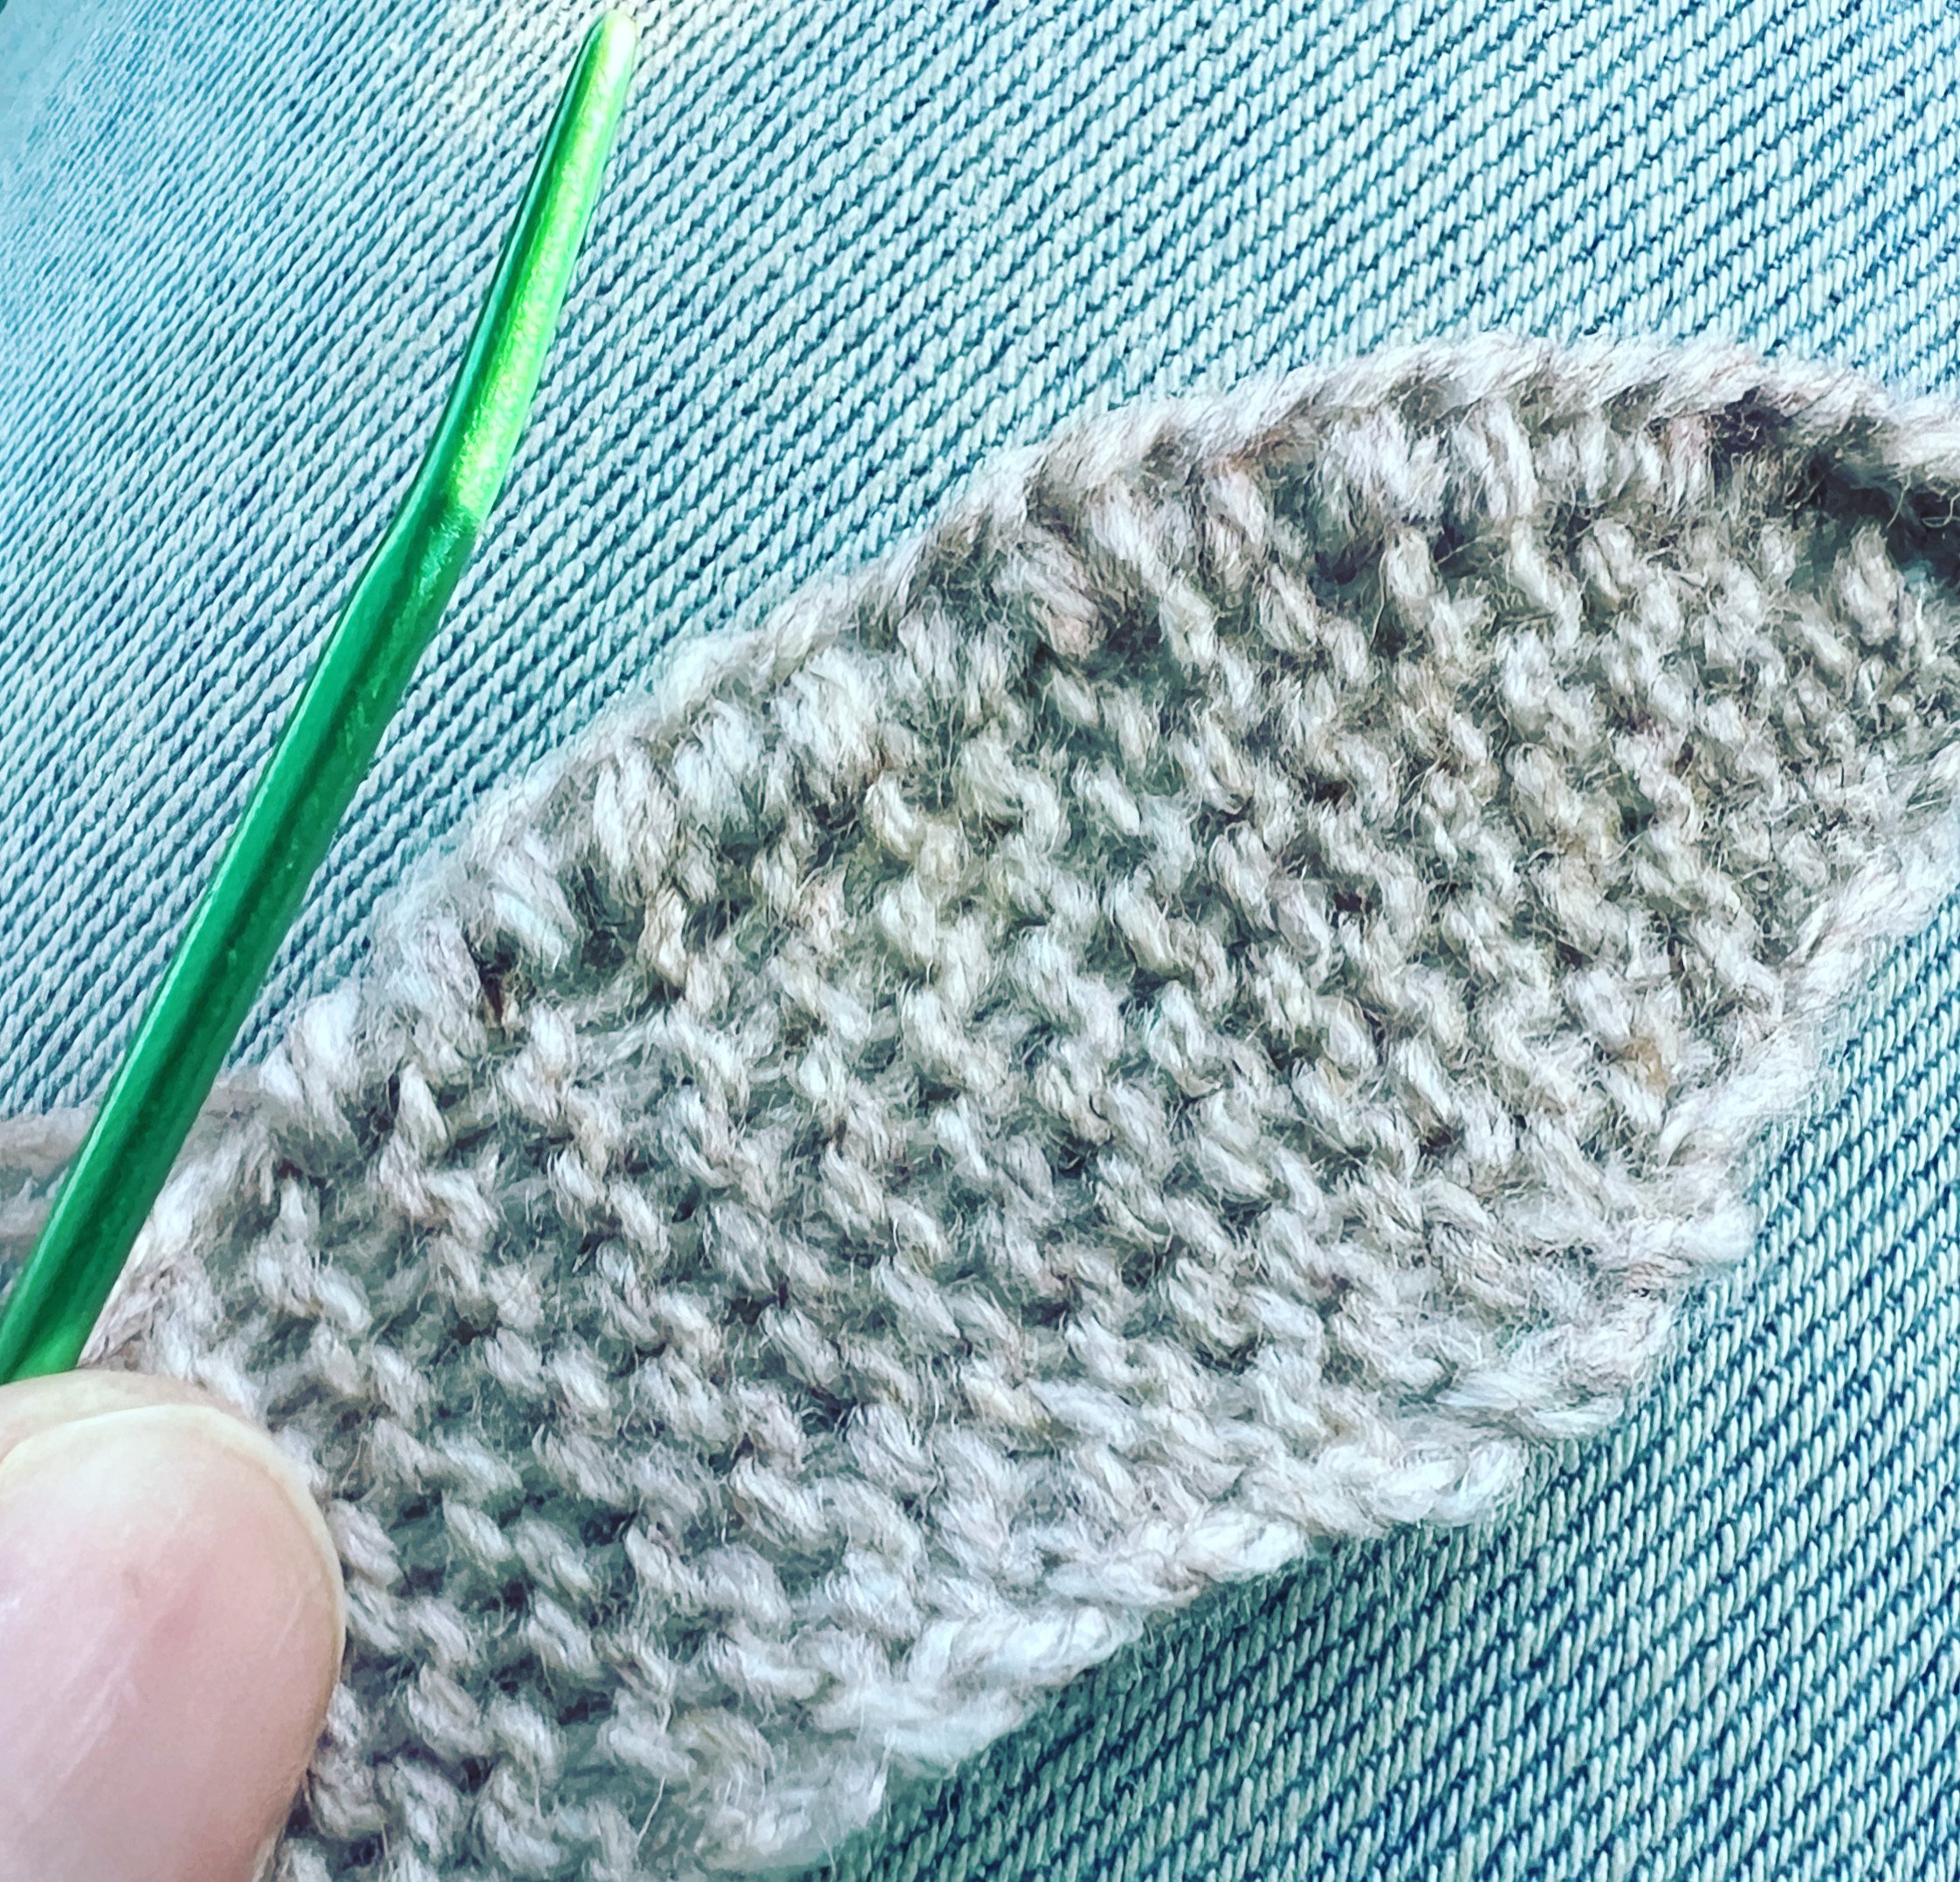
Using the darning needle insert the yarn into the first stich from the front. From the front again guide the yarn into the second stitch next take the yarn back to the first stich from the back and then over to the third stitch. Go to the second stitch again and then pull out the yarn at the forth stitch. After you have done this procedure for all the stitches you then unravel the waste yarn.

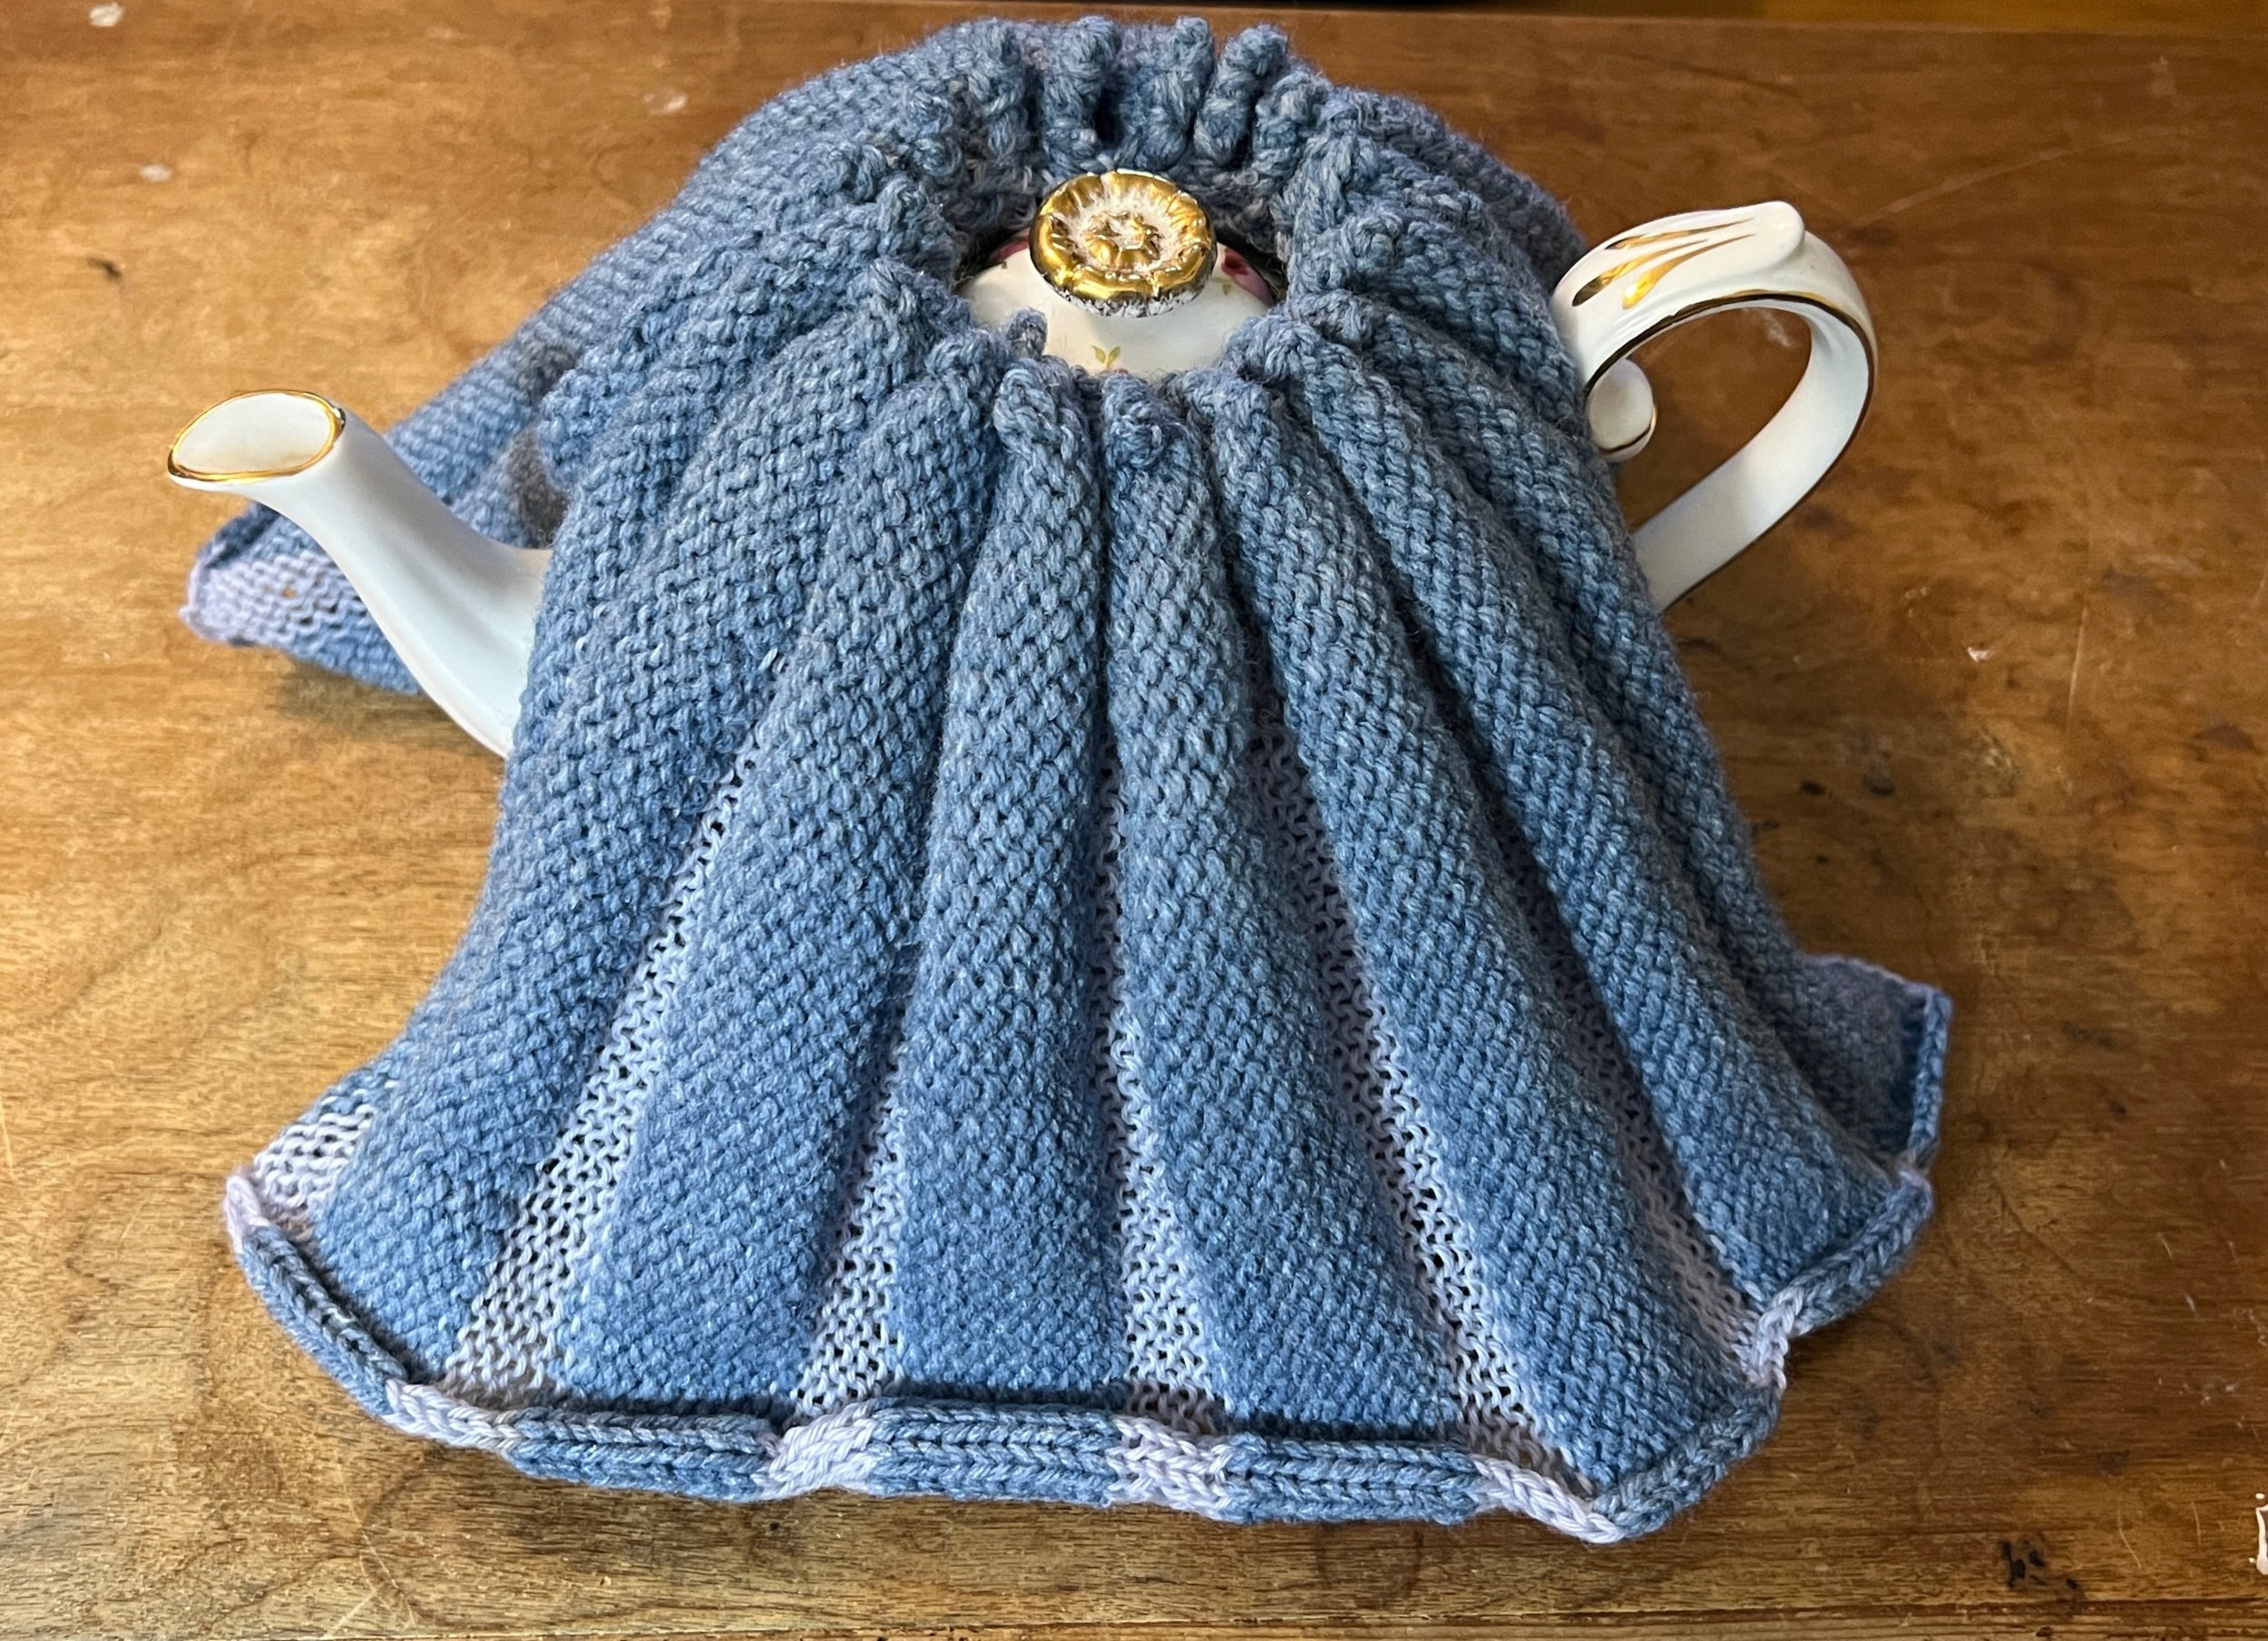
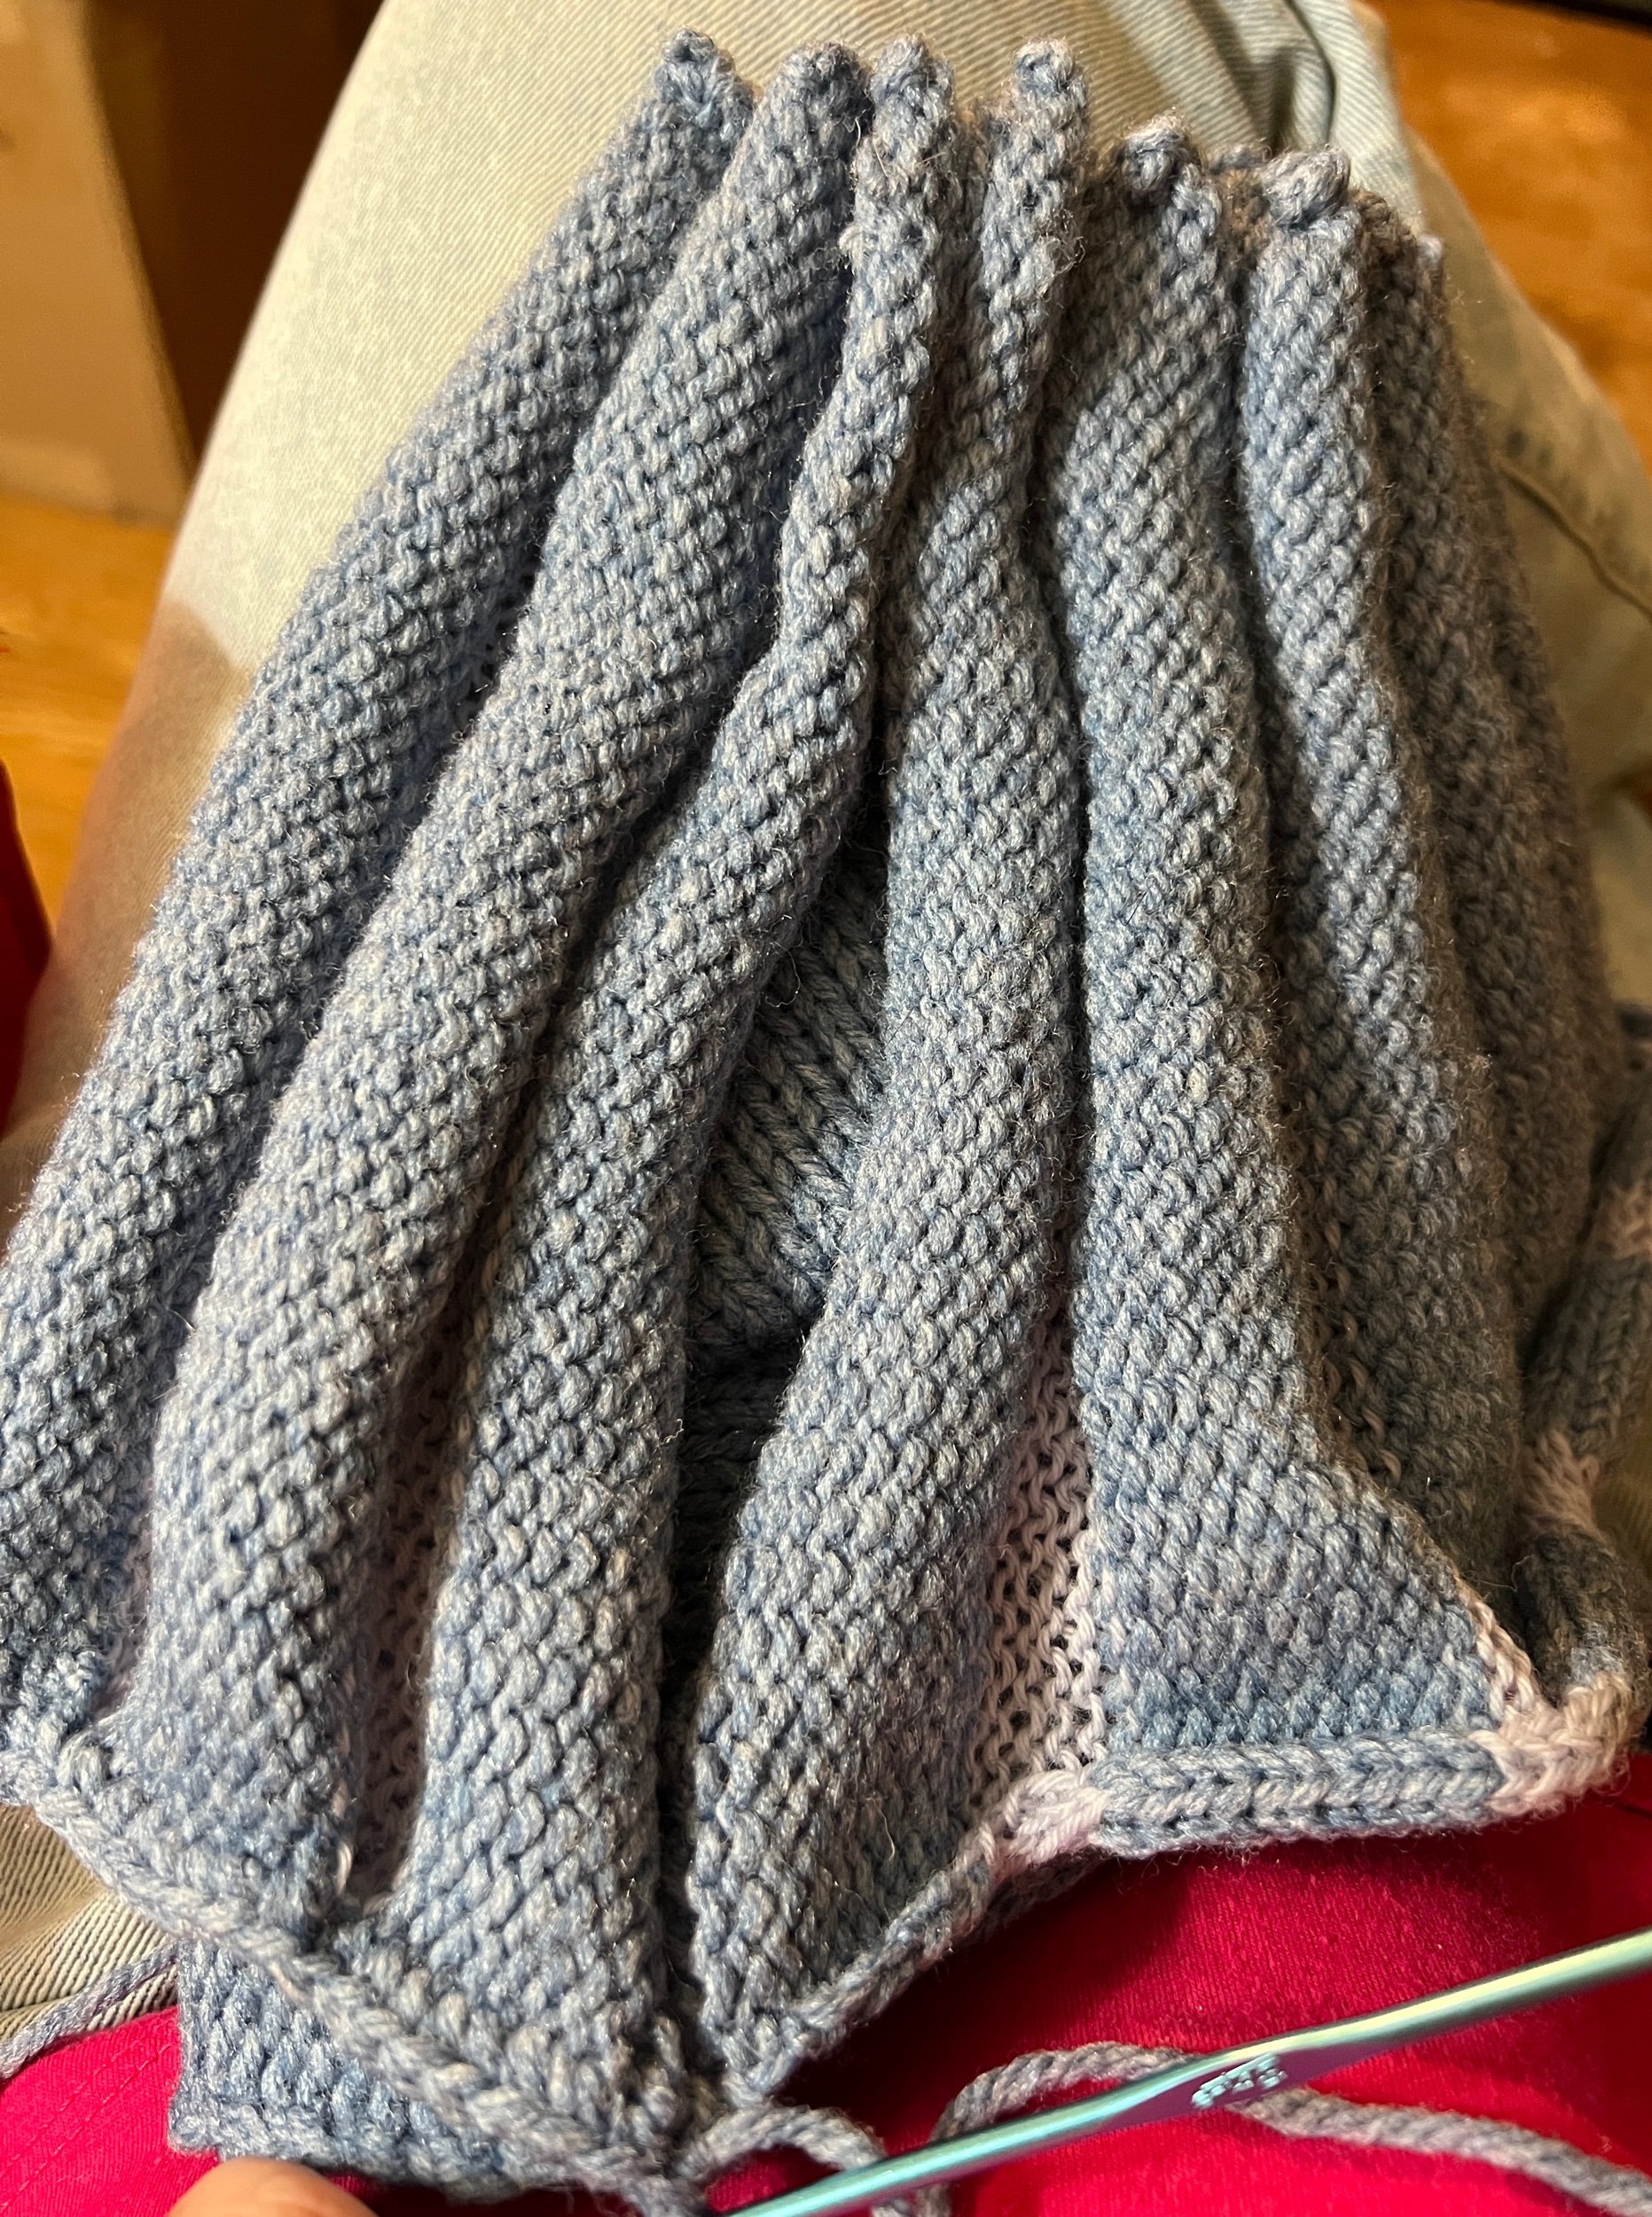
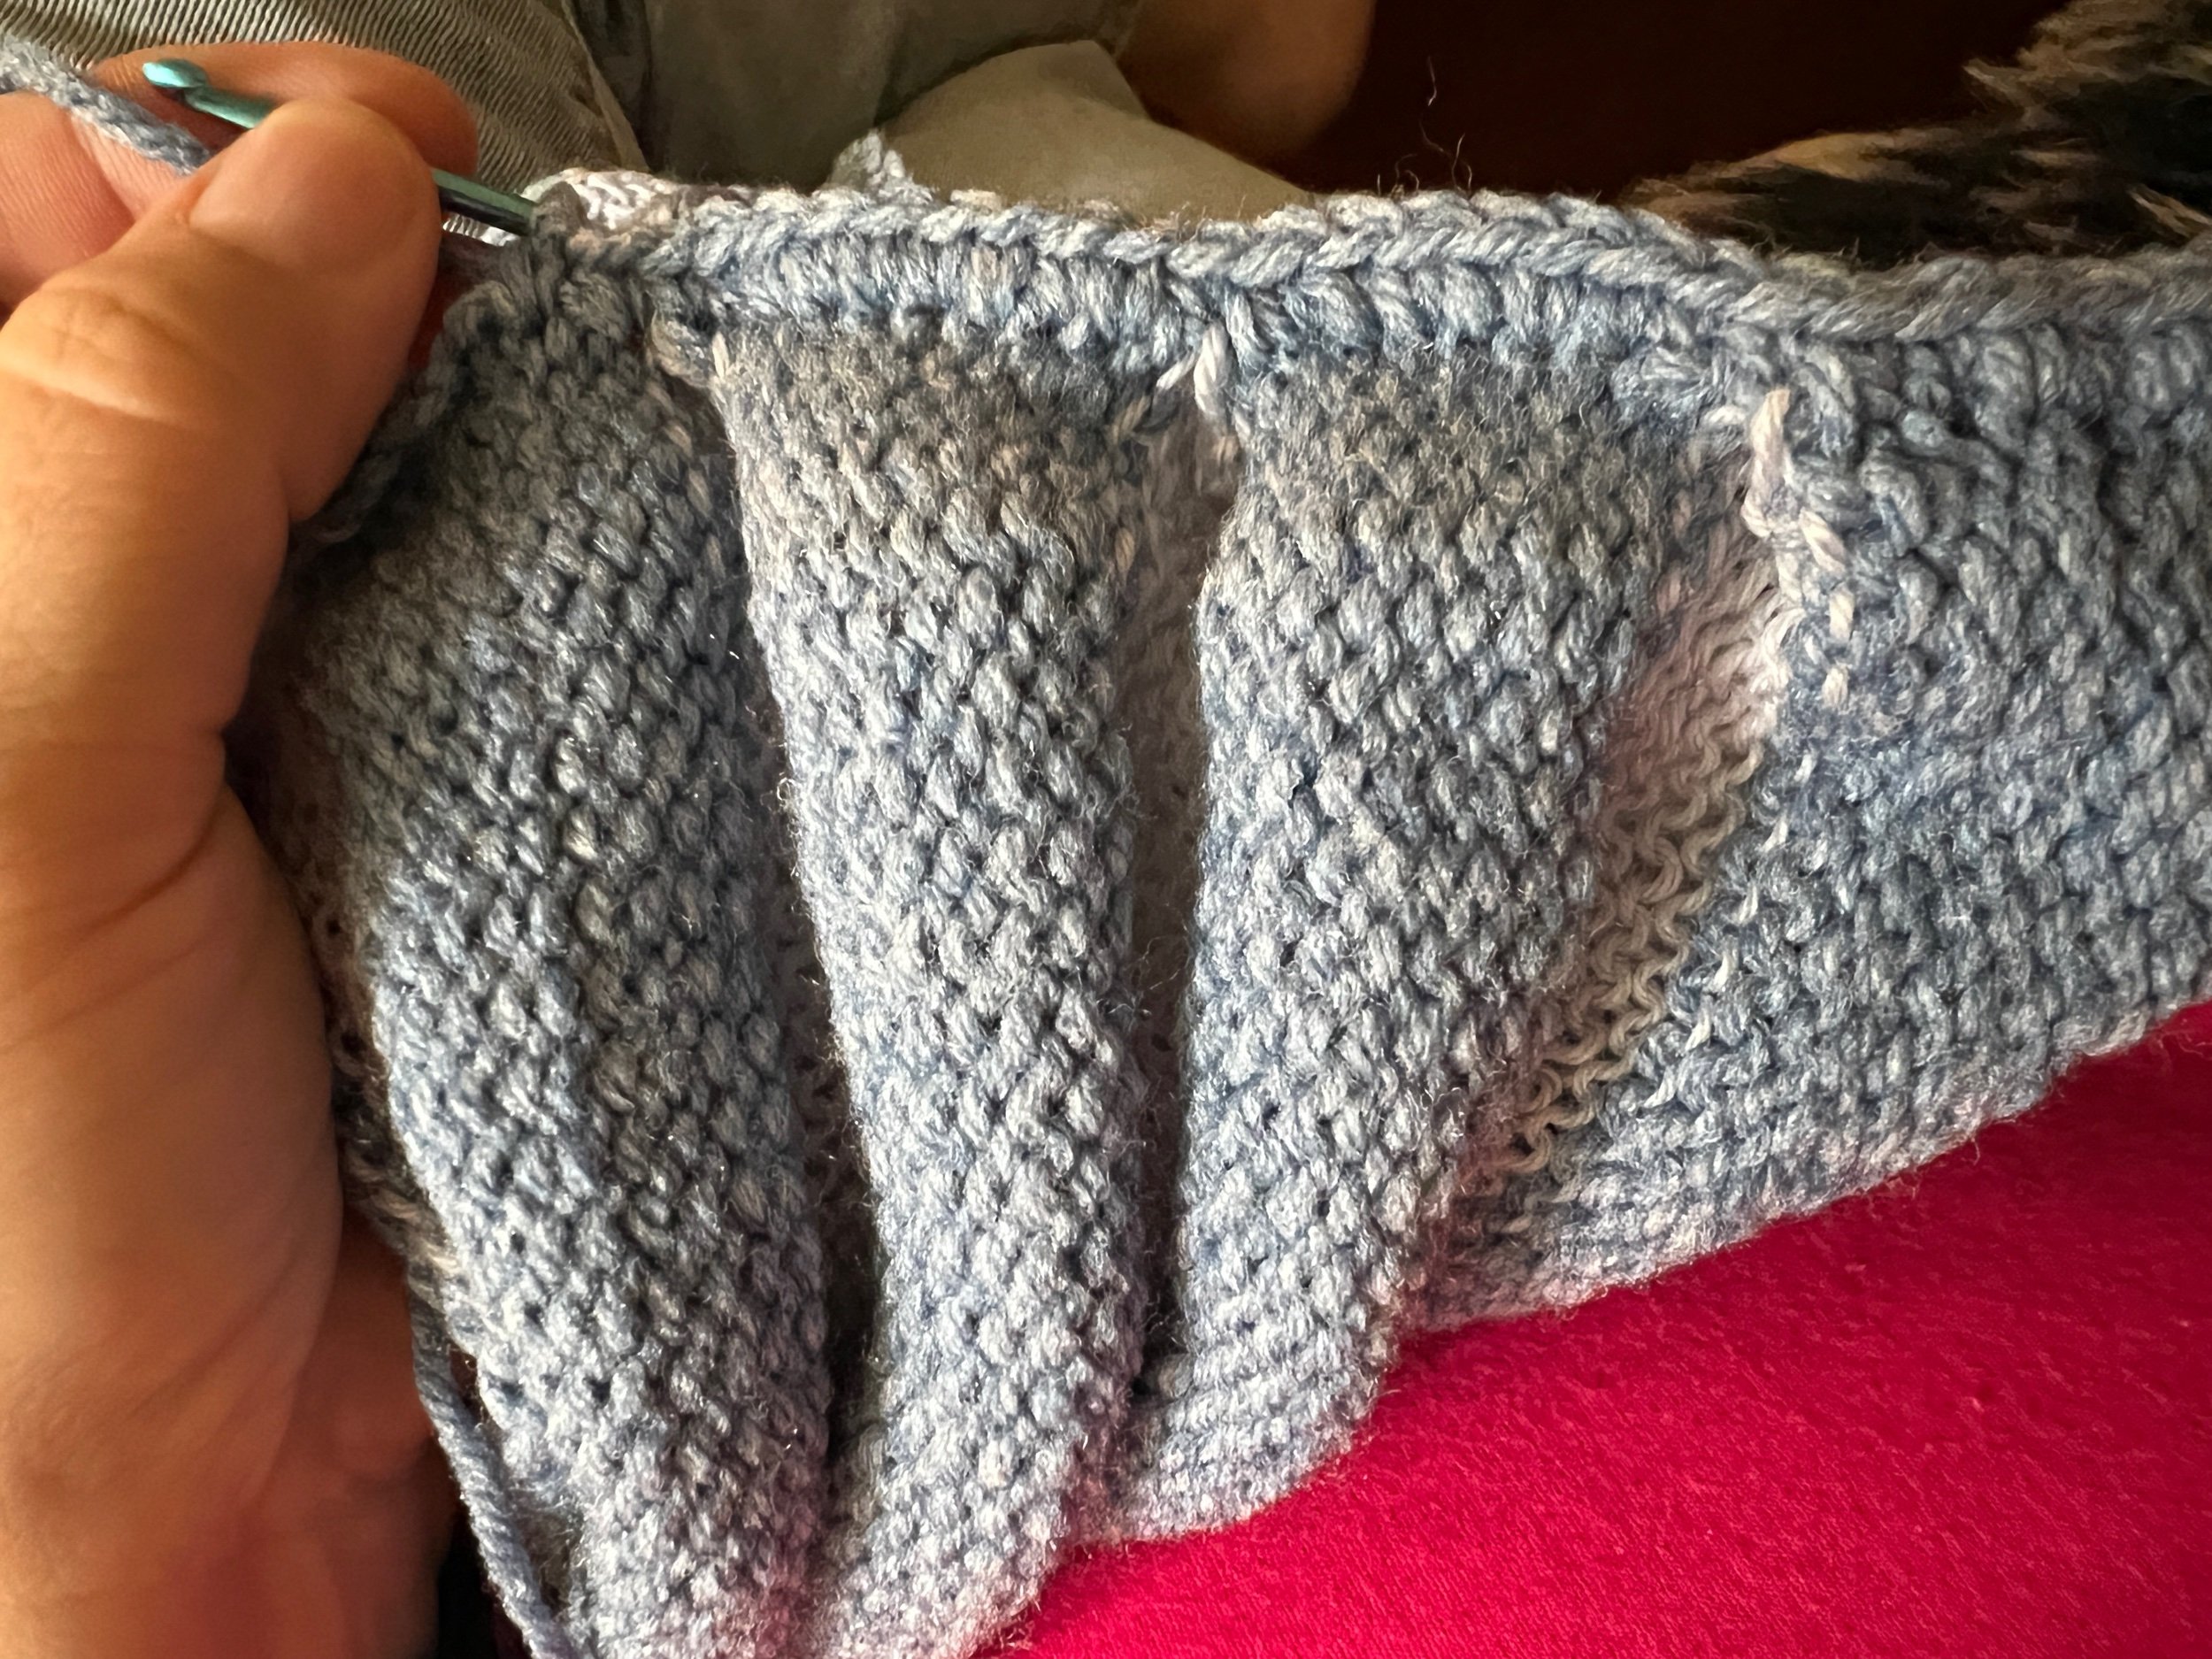
(TIME MARK 46:26) With the back welt now completed we then use the same method to close up the last stitches of the front welt, cuffs and neck band. Now for joining the left shoulder sections which is identical for joining that was done on the right.

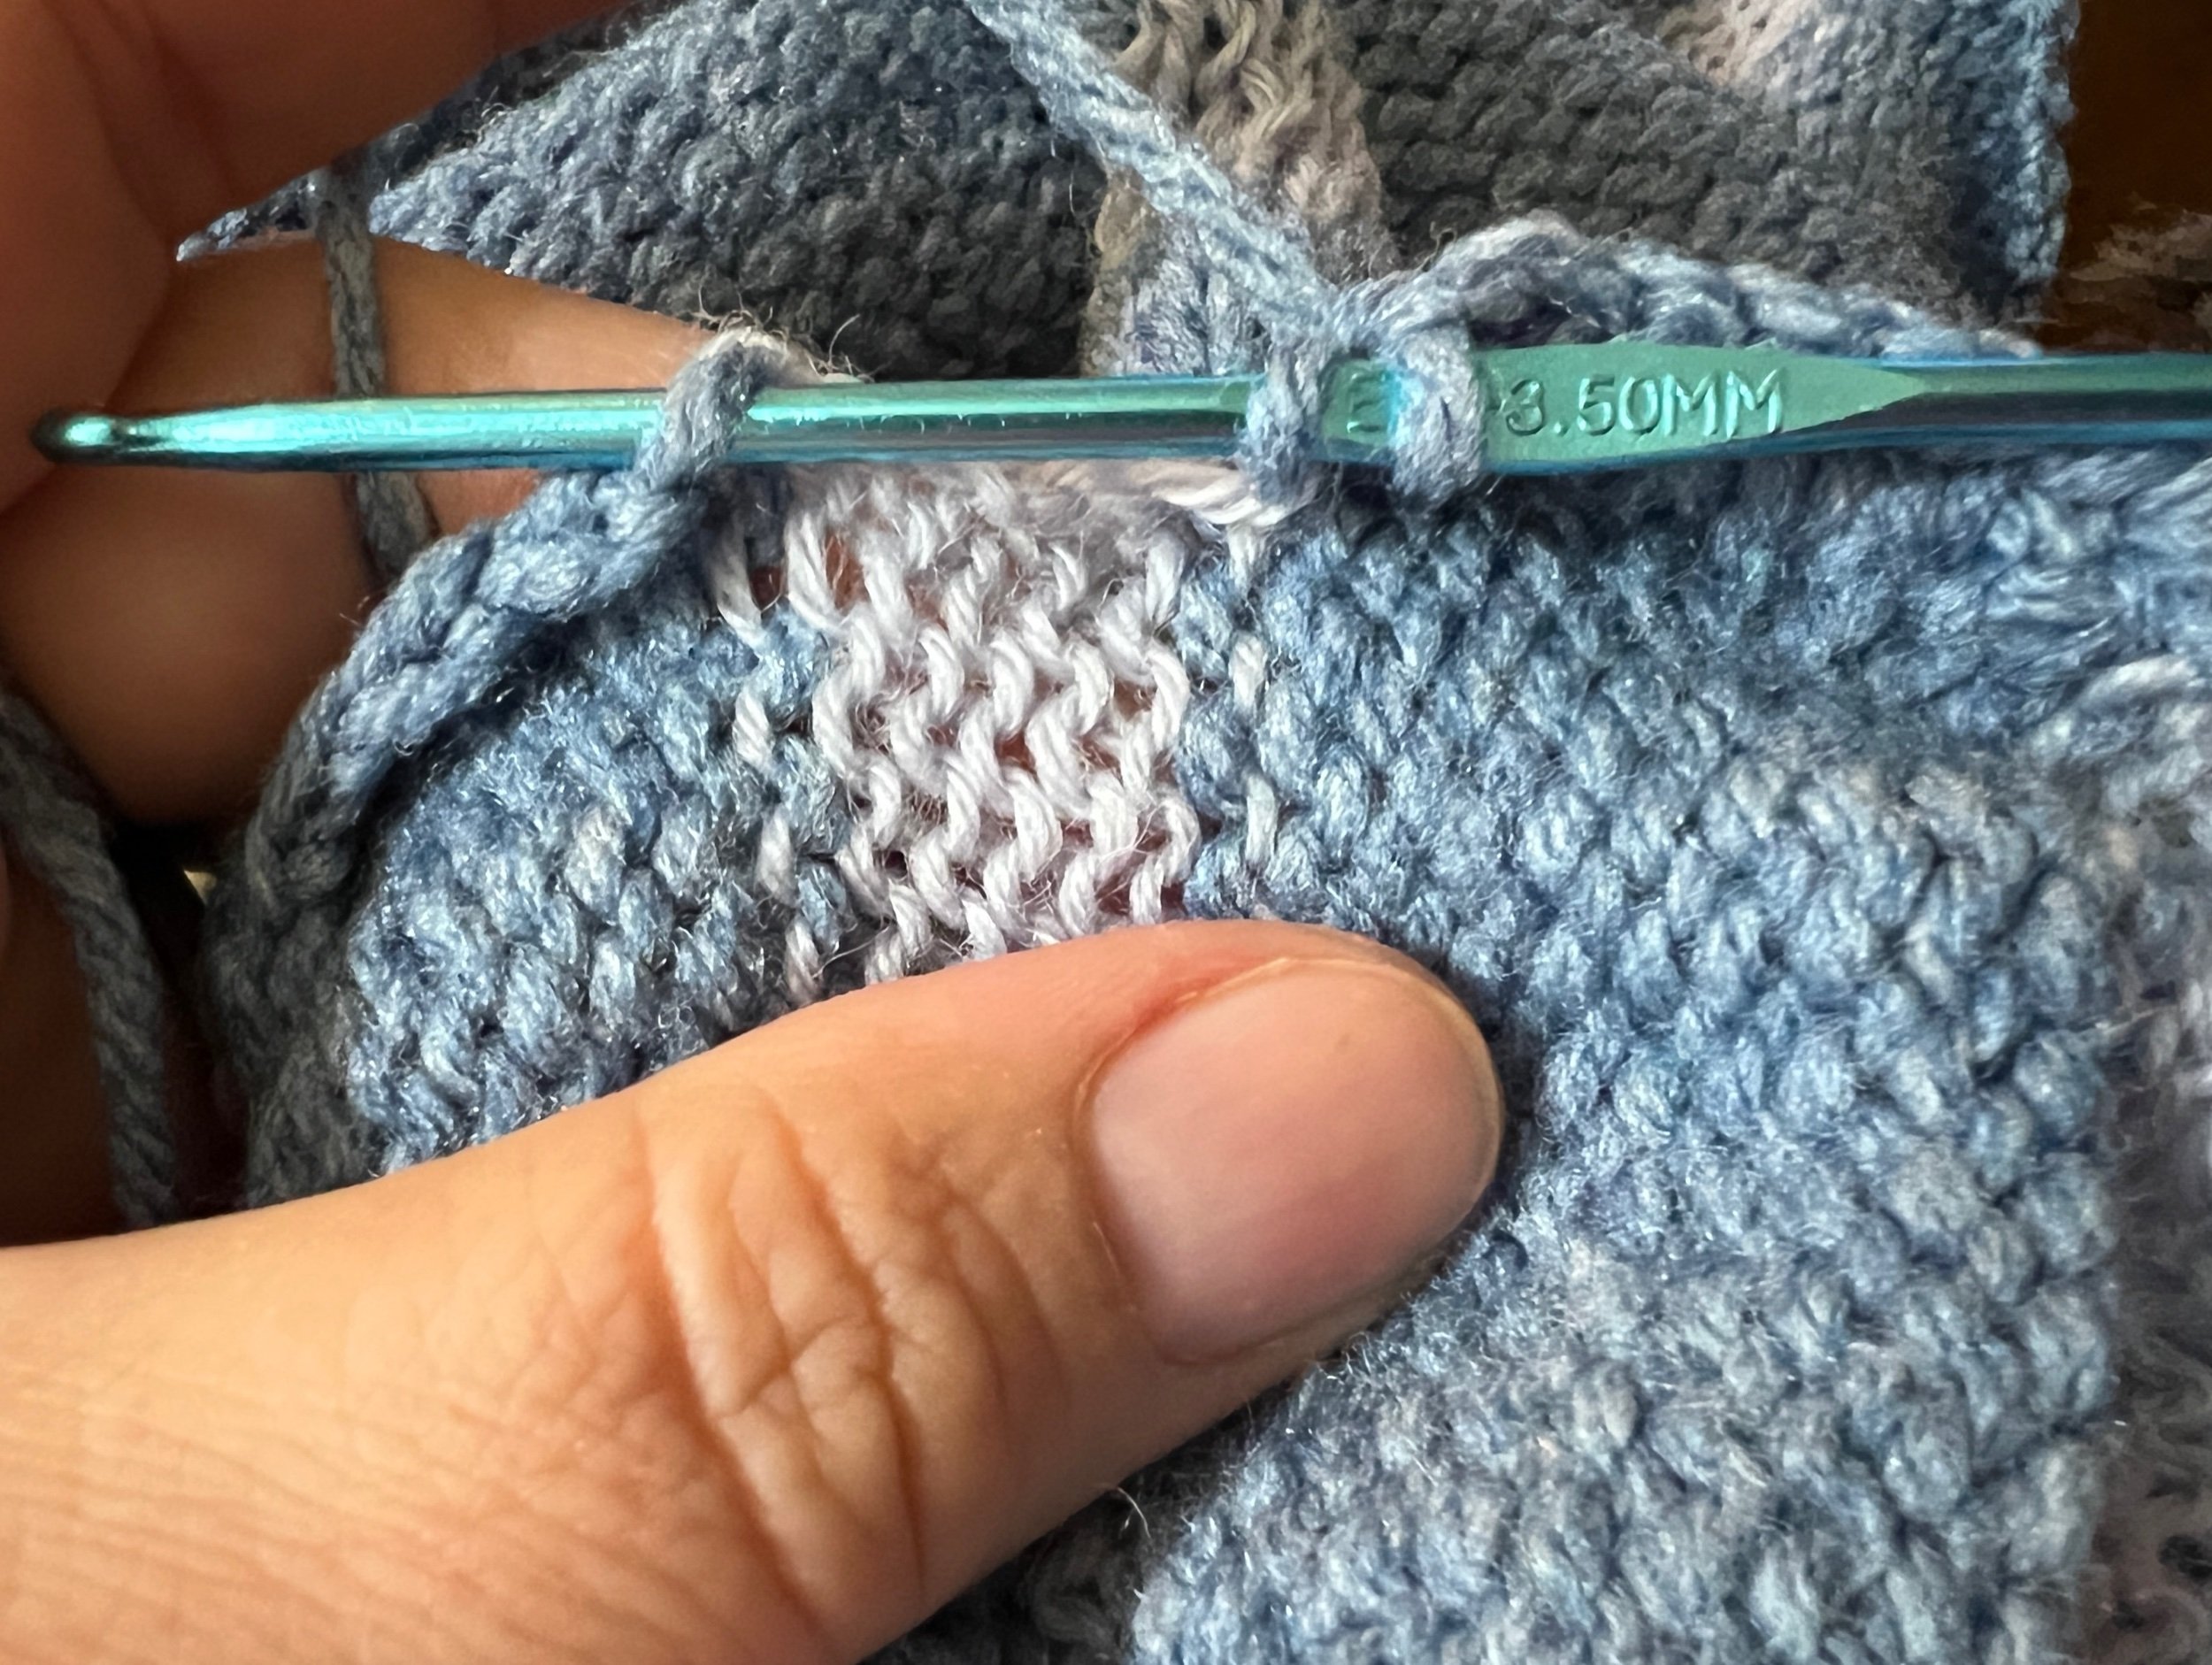
Next I will explain the blind stitch method of joining the side seams, both ends of the neck band and the underarm seams. We begin by threading a darning needle with our main yarn, with the right side of the fabric facing you, pick up each sinker loop between the last two stitches of the edge. Do this for every other row and then pull it tight to close up the stitches. Now we’ve come to setting in the sleeves.

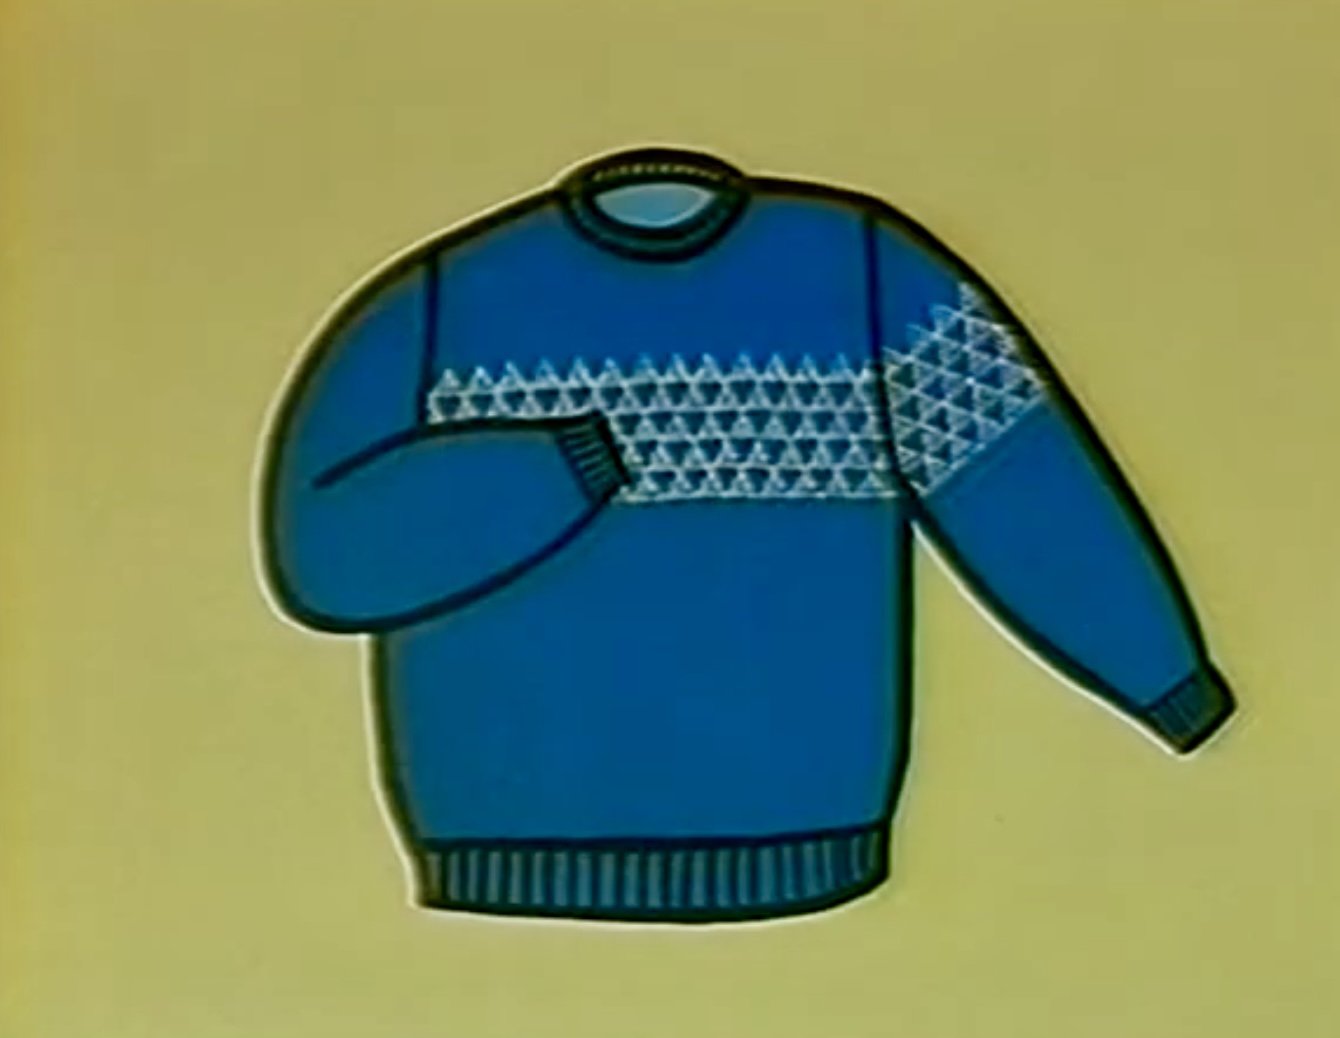
Using waste yarn and a darning needle Place two lines of stitching along the sleeve cap. Then draw the threads just enough to fit the sleeve cap to the arm hole. Neck pin sleeve in the arm hole in close intervals matching seams. Then do short stitch basting. Set sleeve with slip stitch method using crochet hook and main yarn. insert hook along and create crochet seam. When done remove basting. Turn inside sleeve to same orientation to inside out sweater. Still some finishing touches to complete. Using a darning needle work yarn tails into seams. Final light iron pressing.
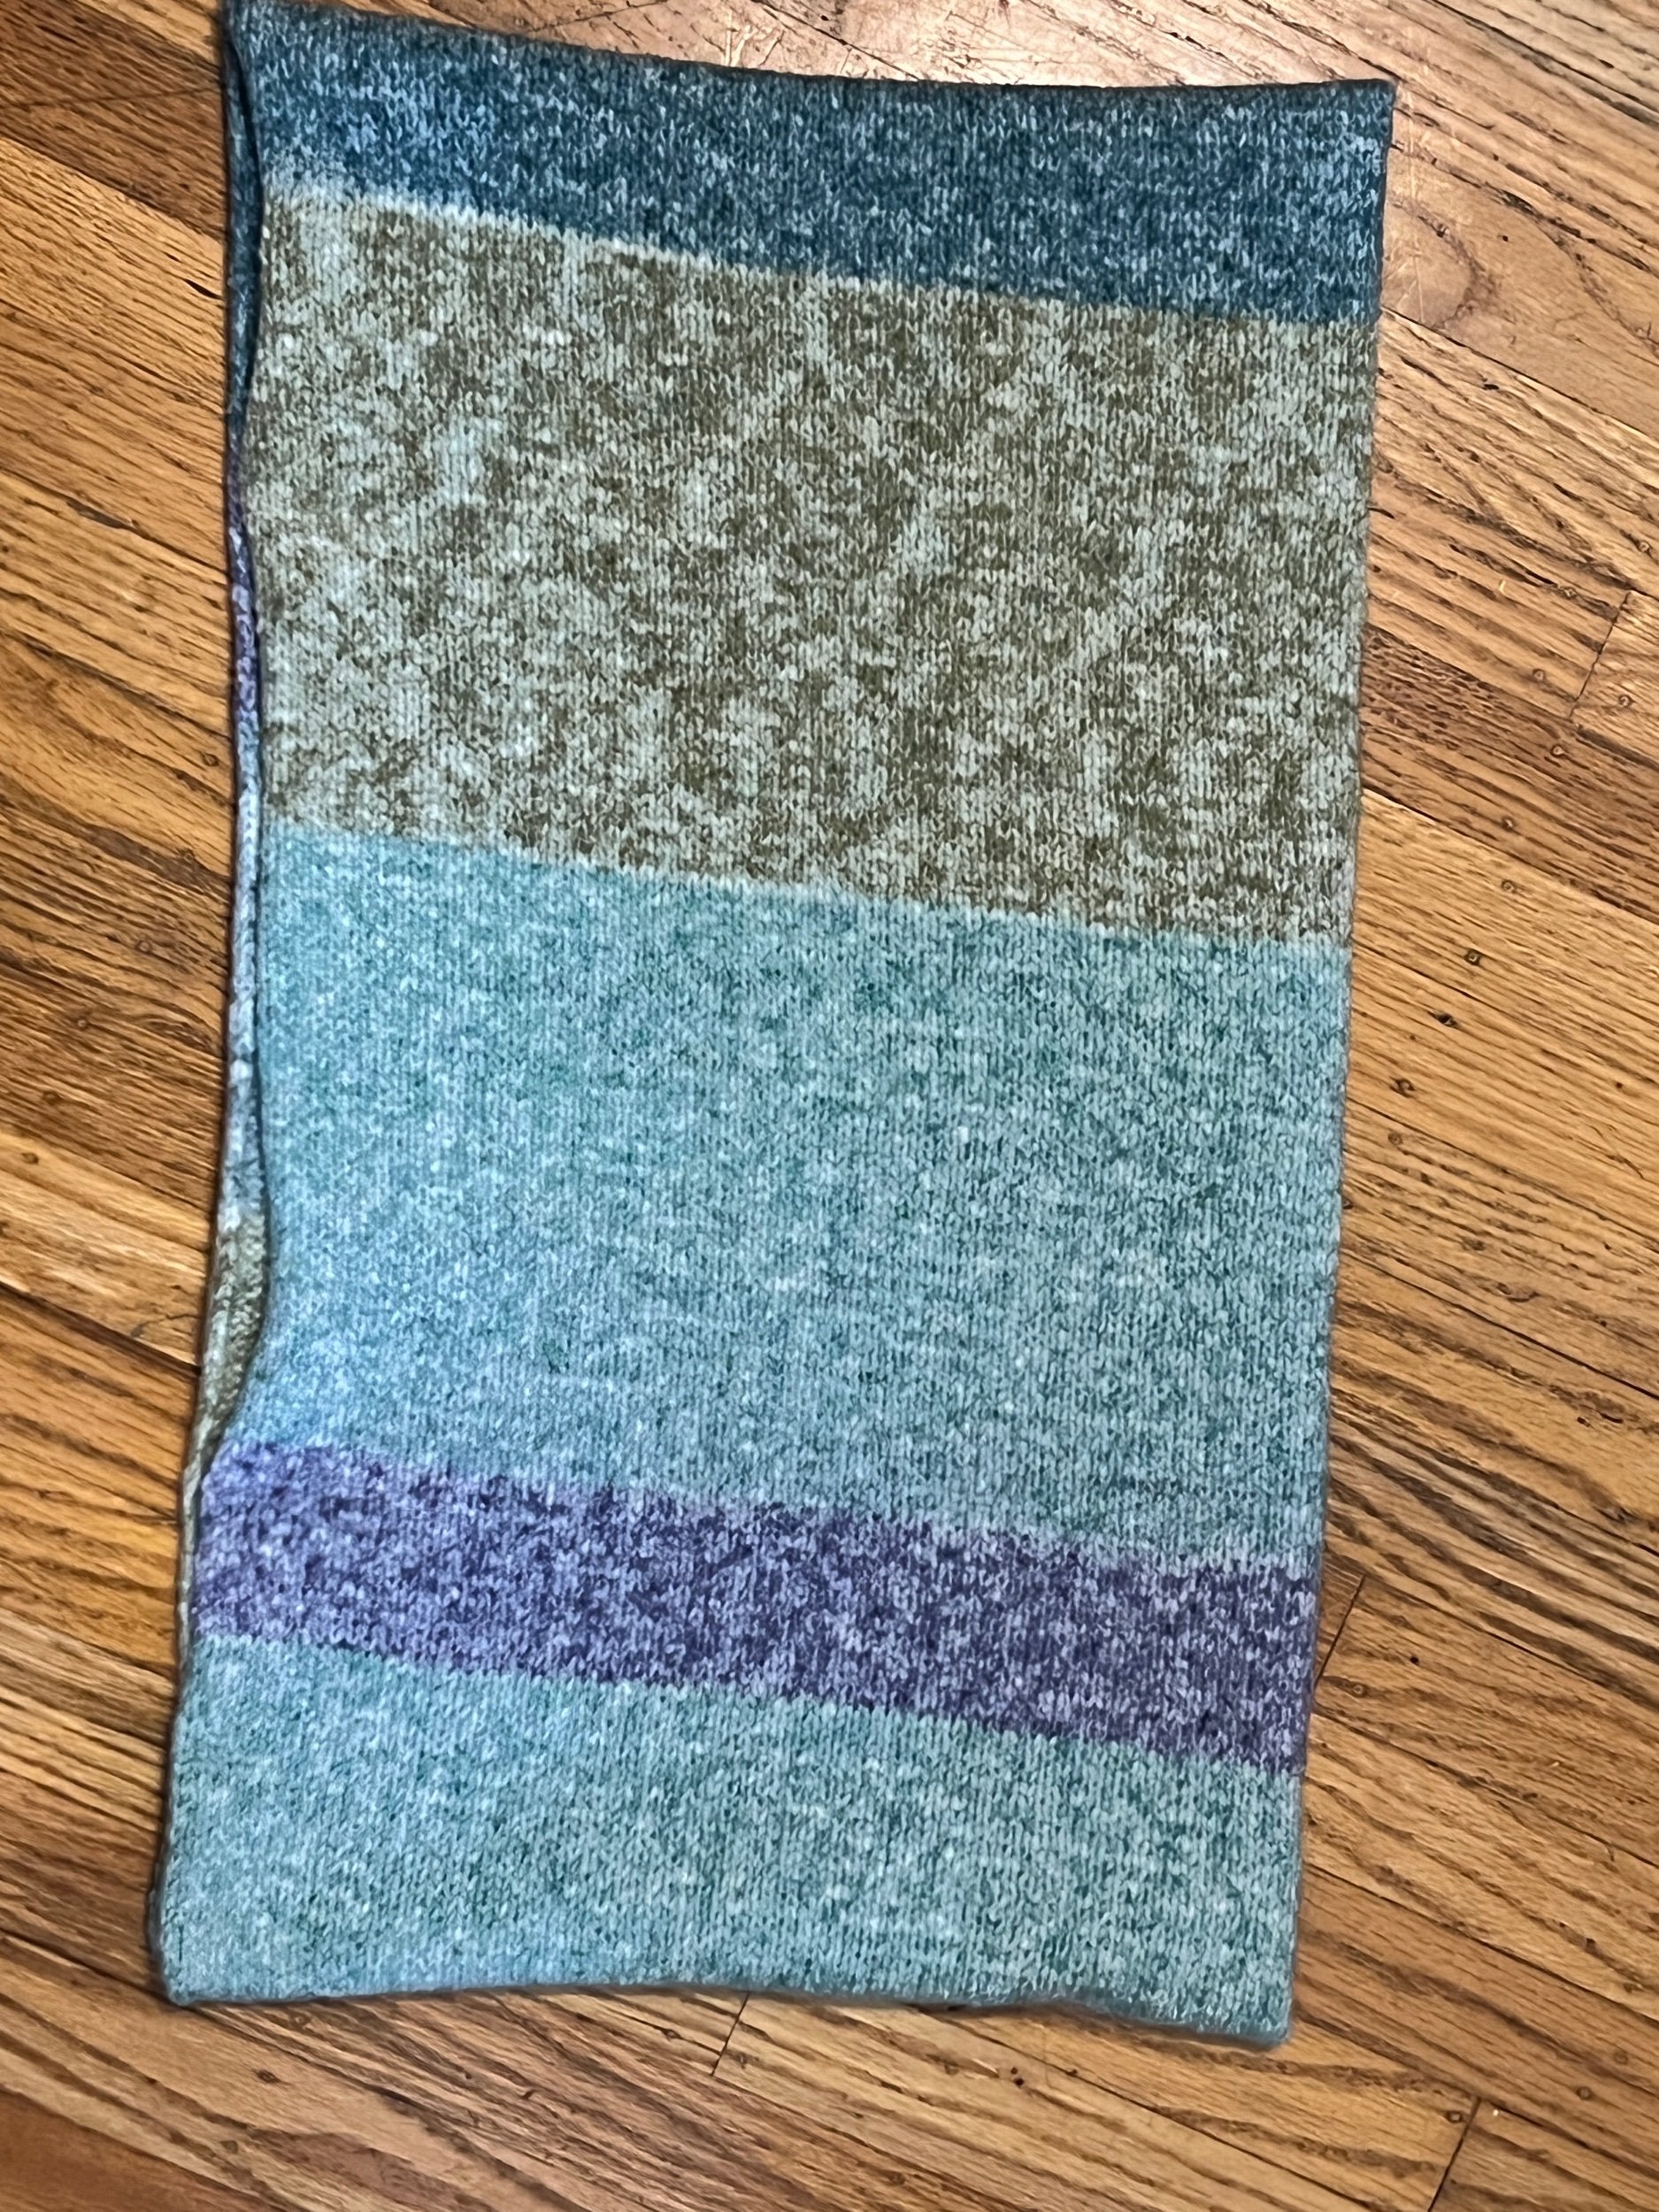
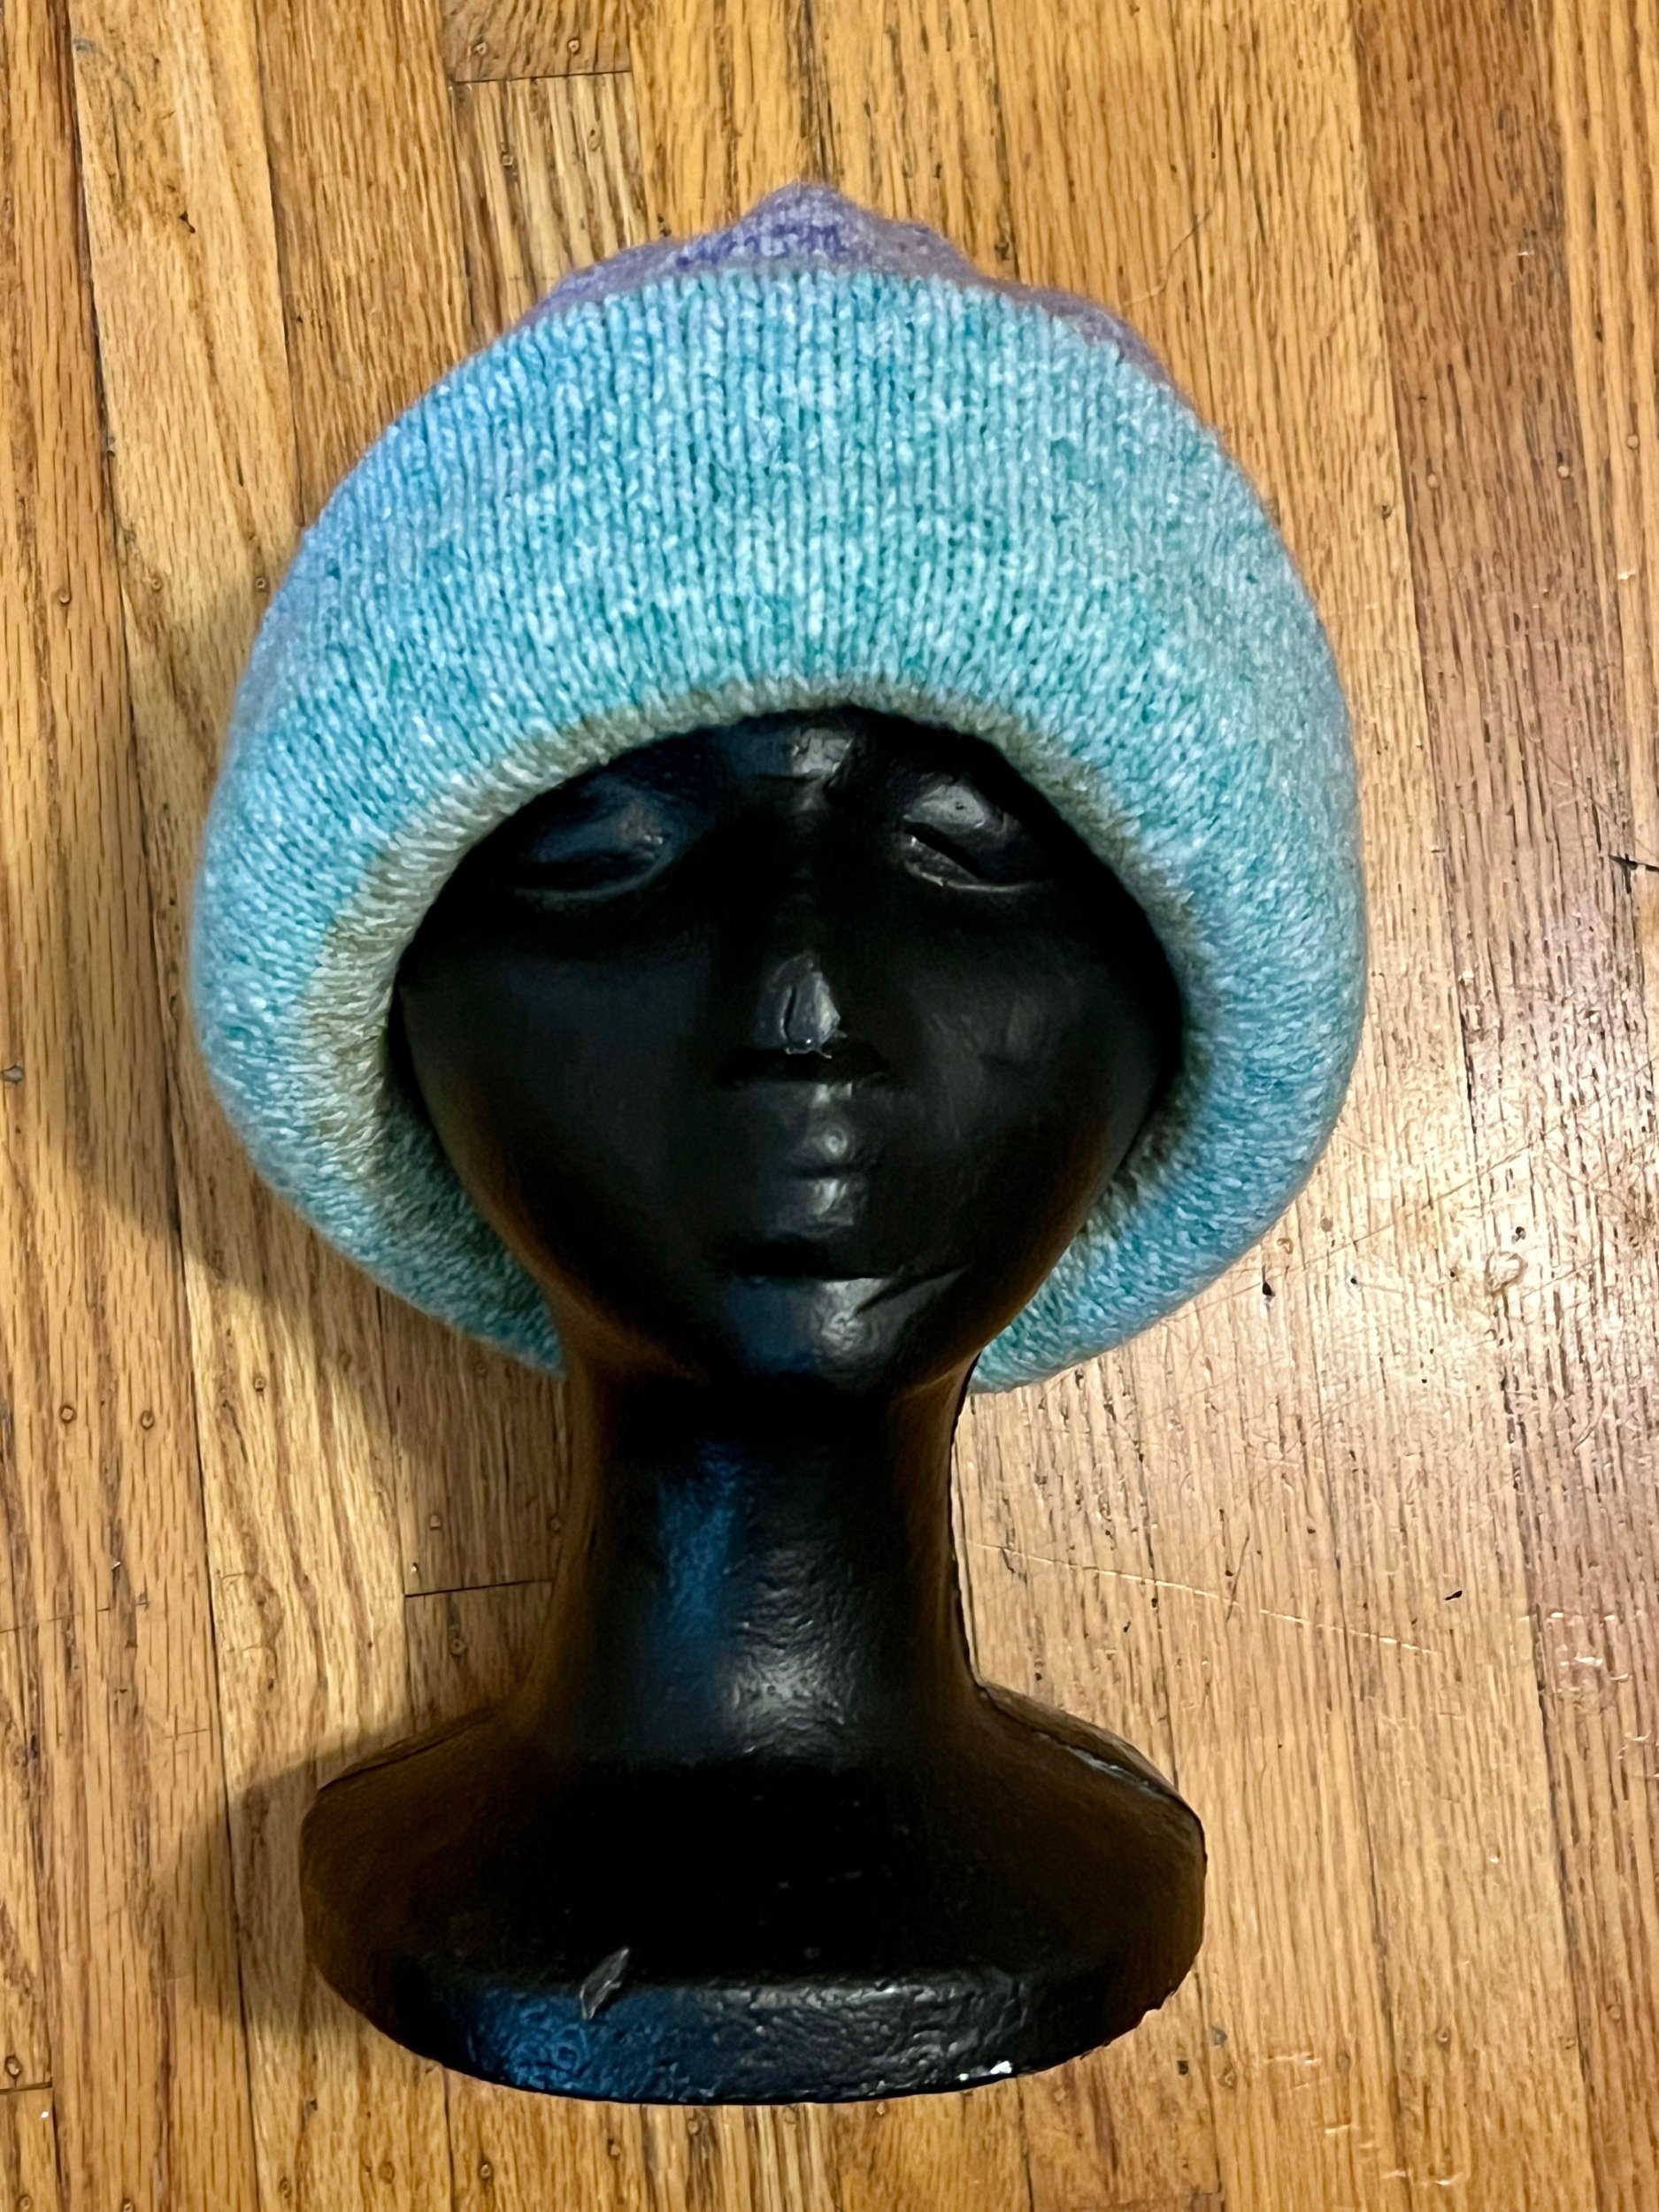
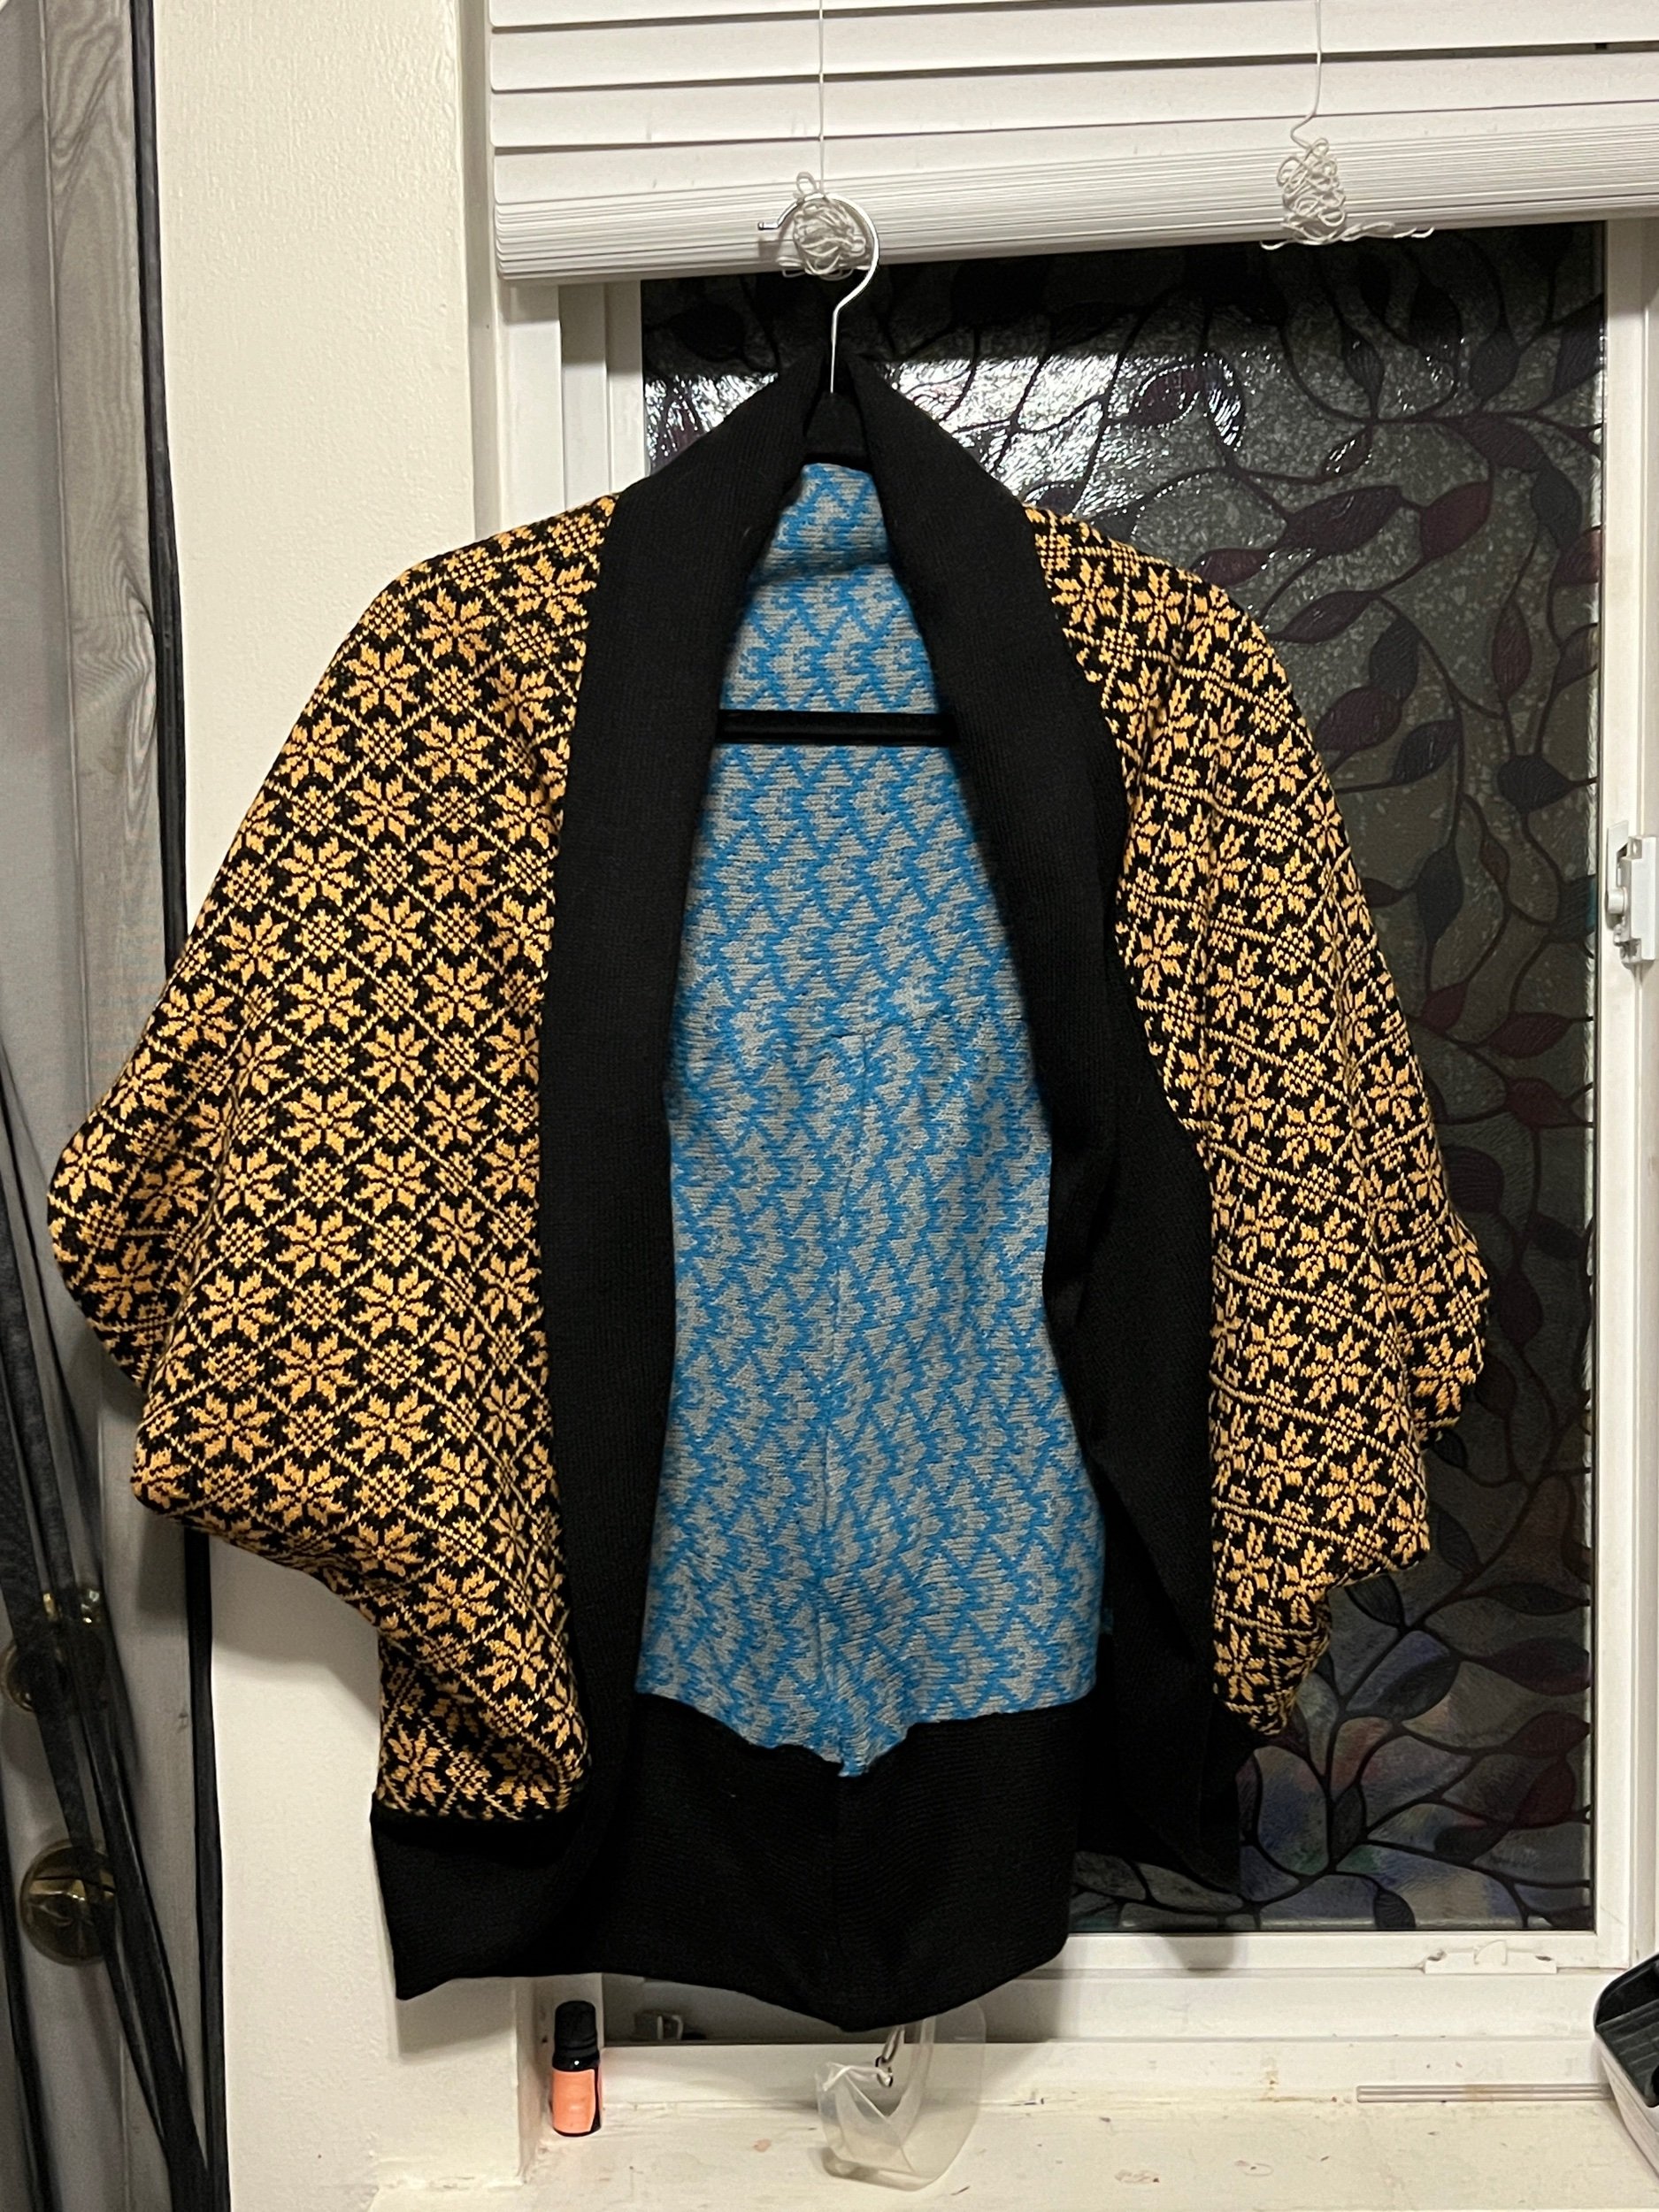
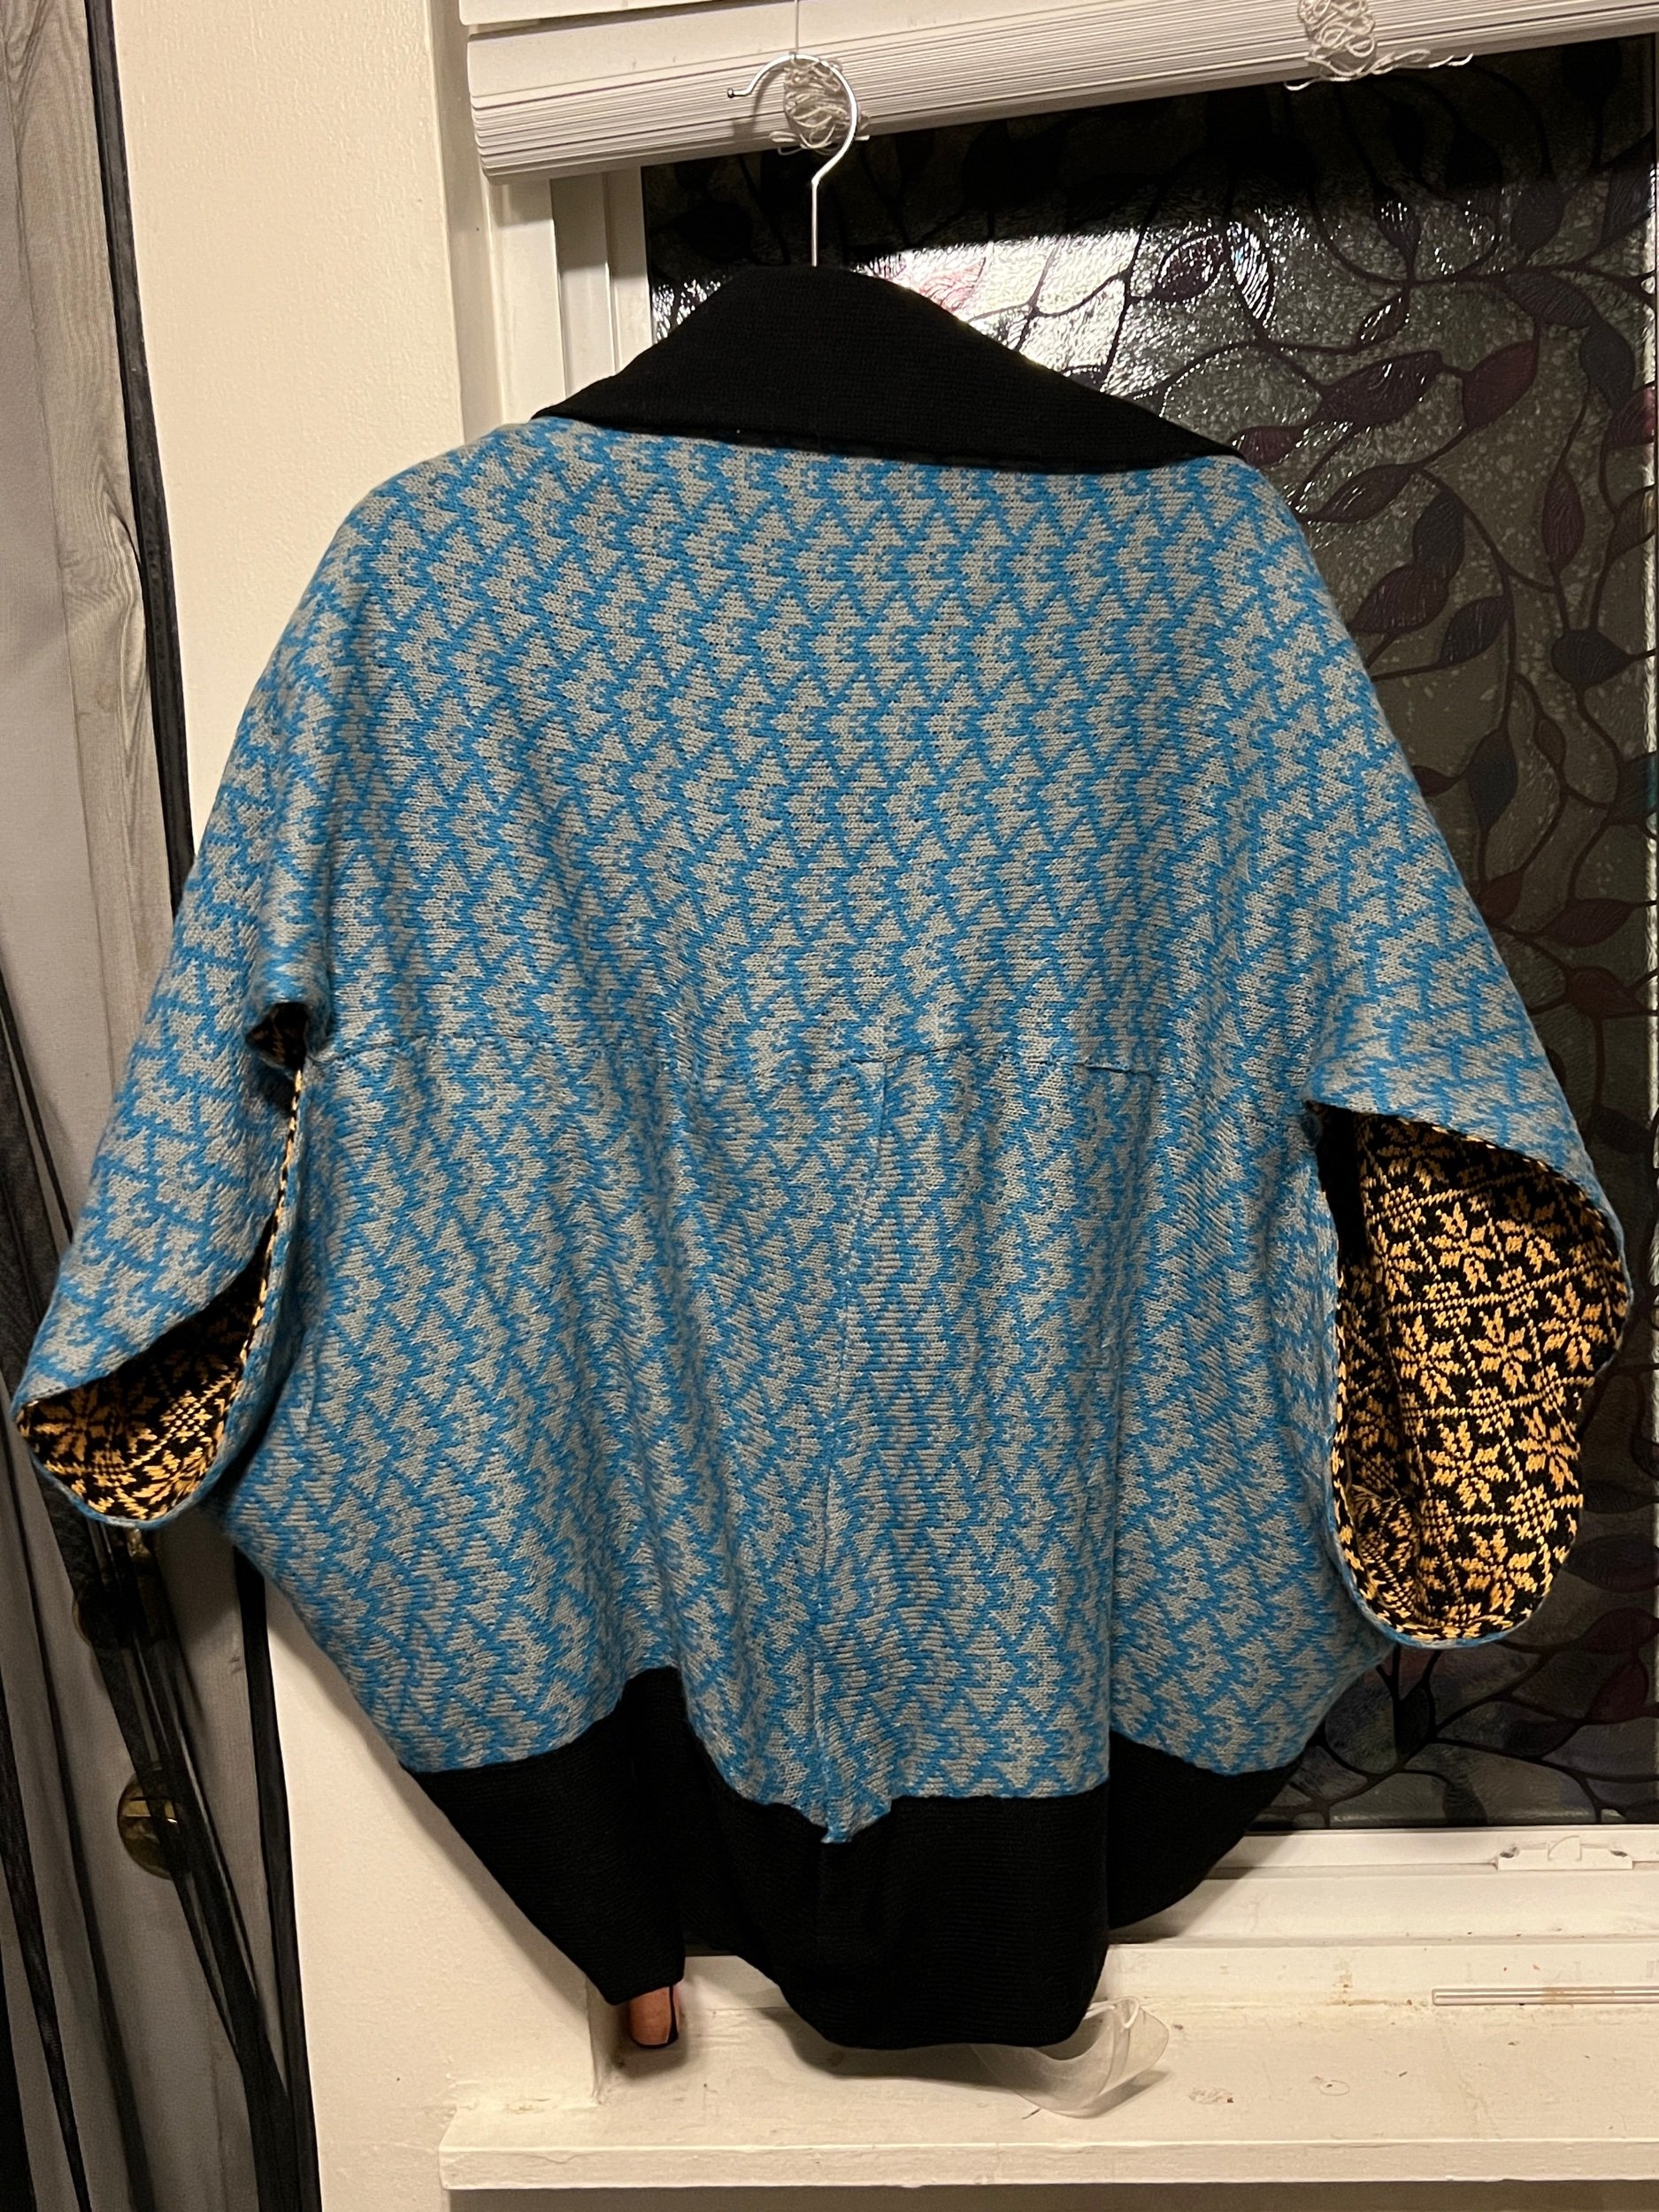
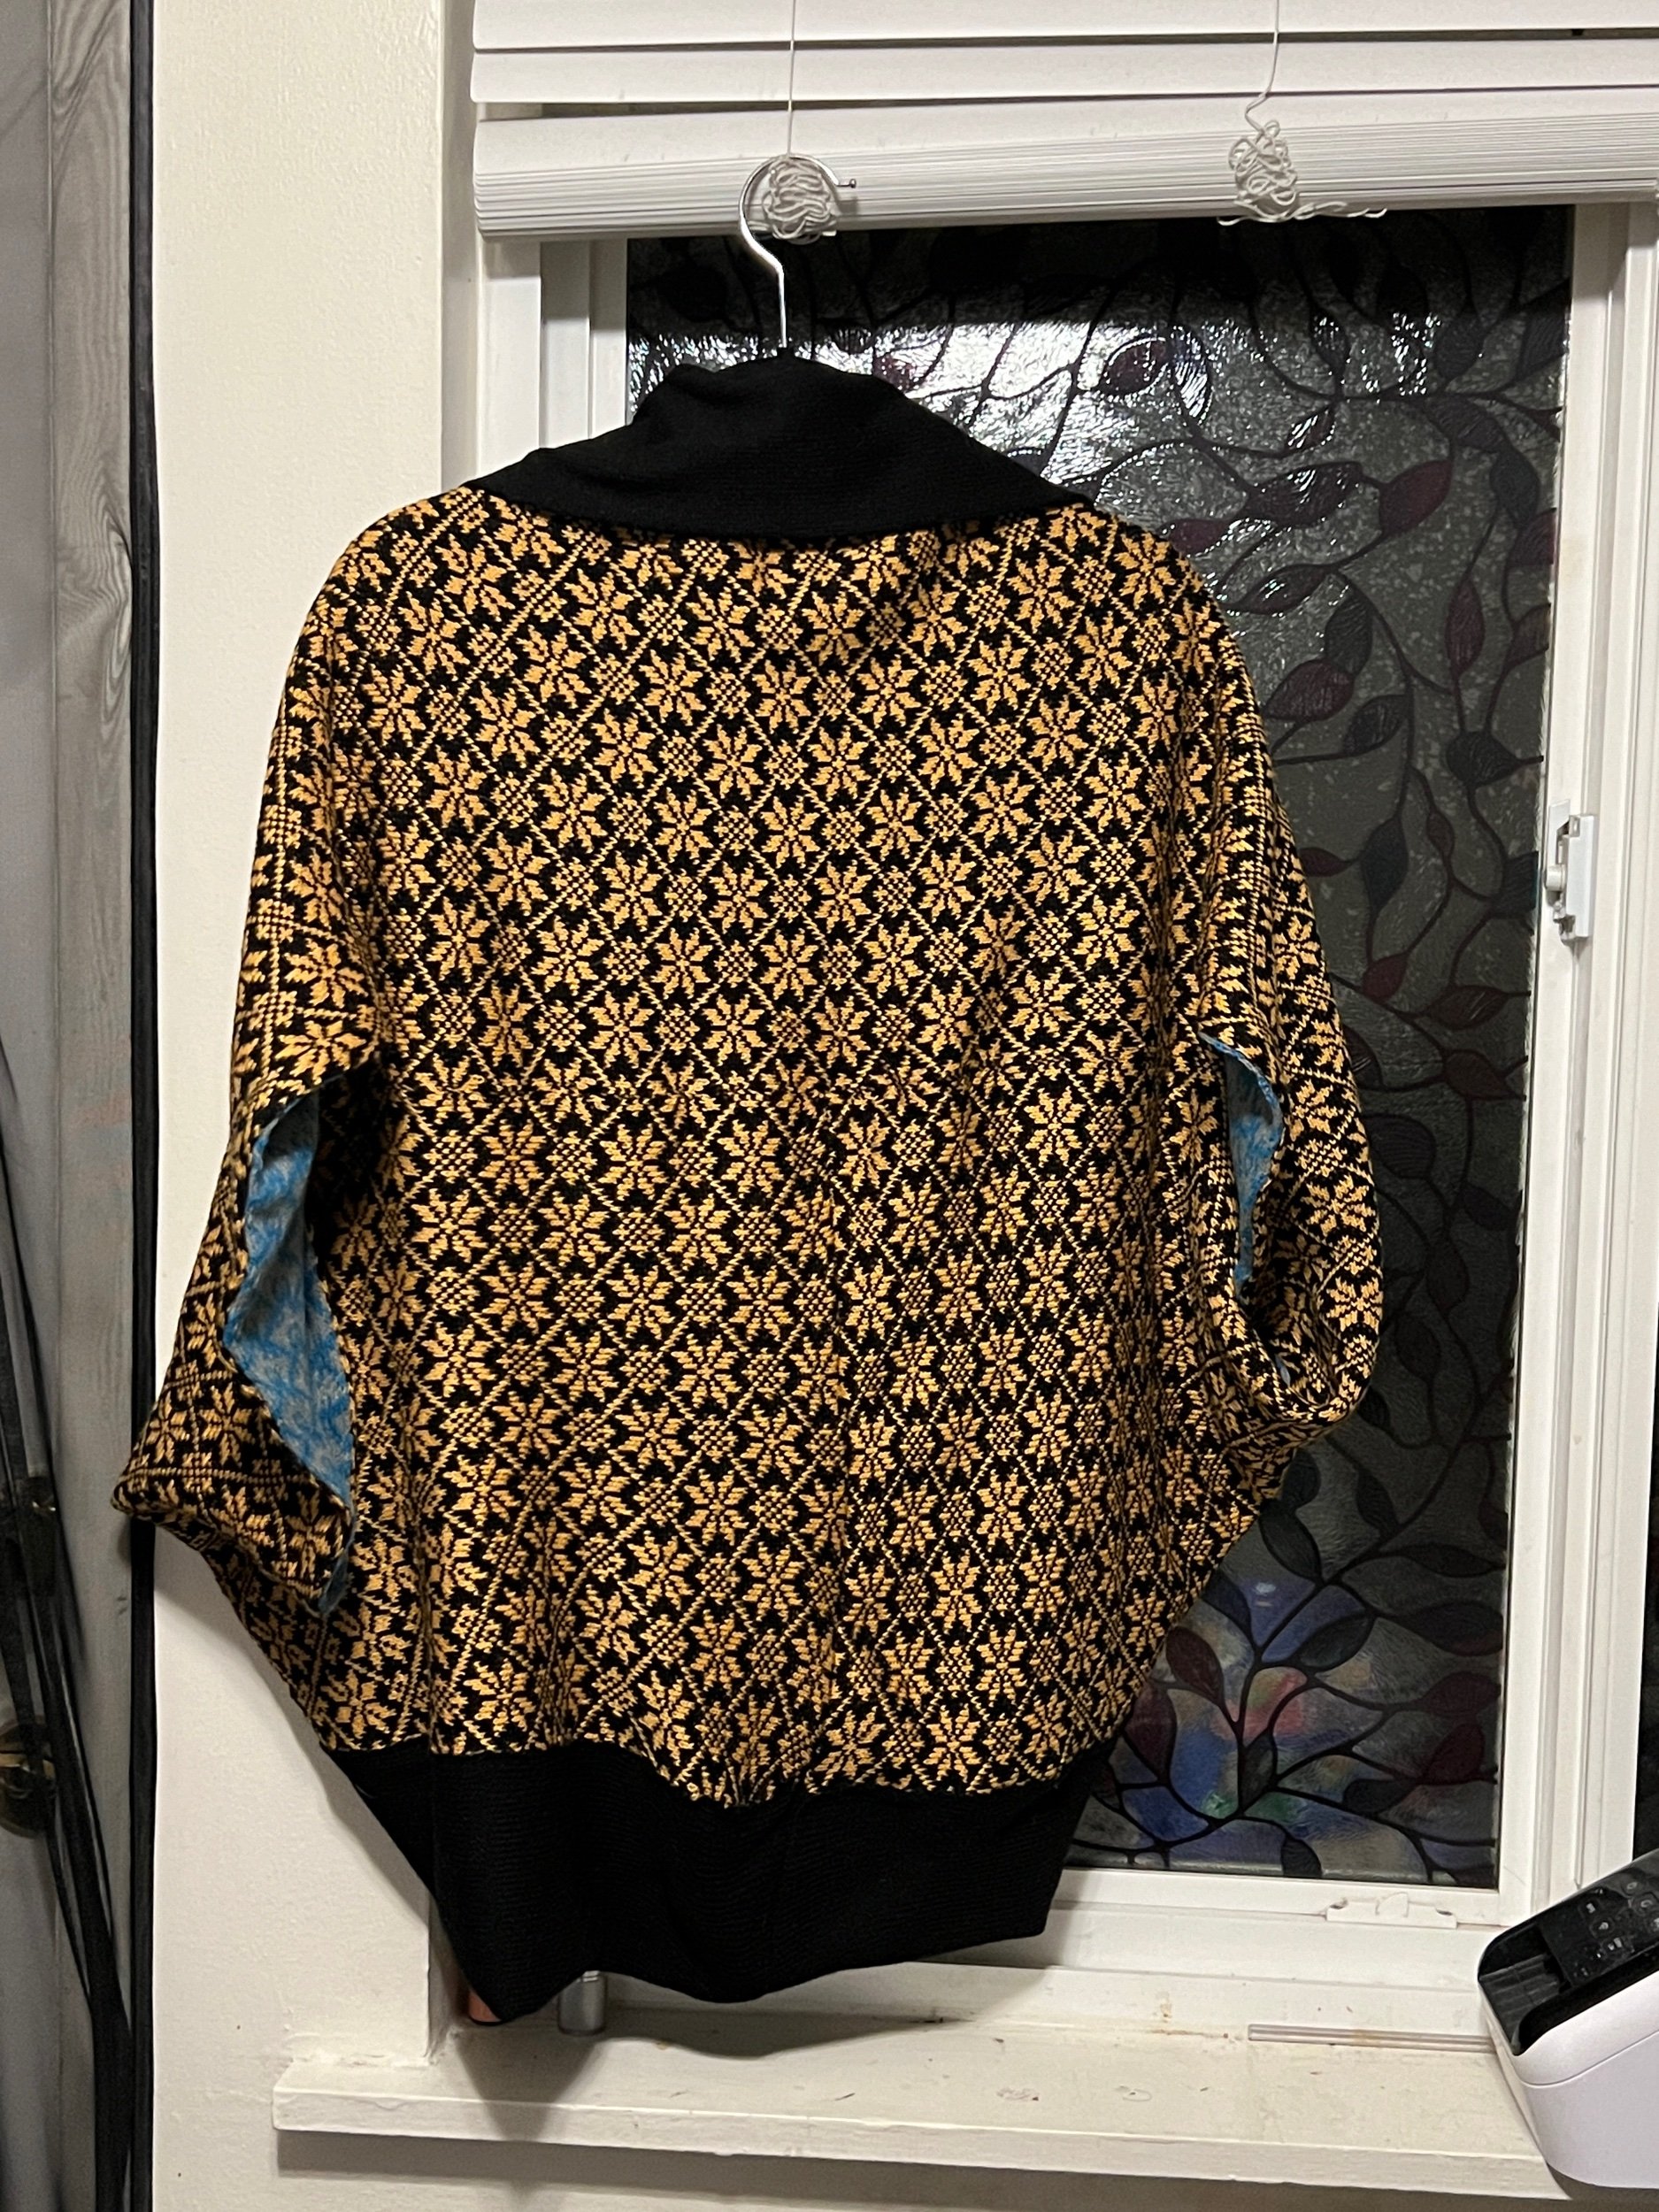
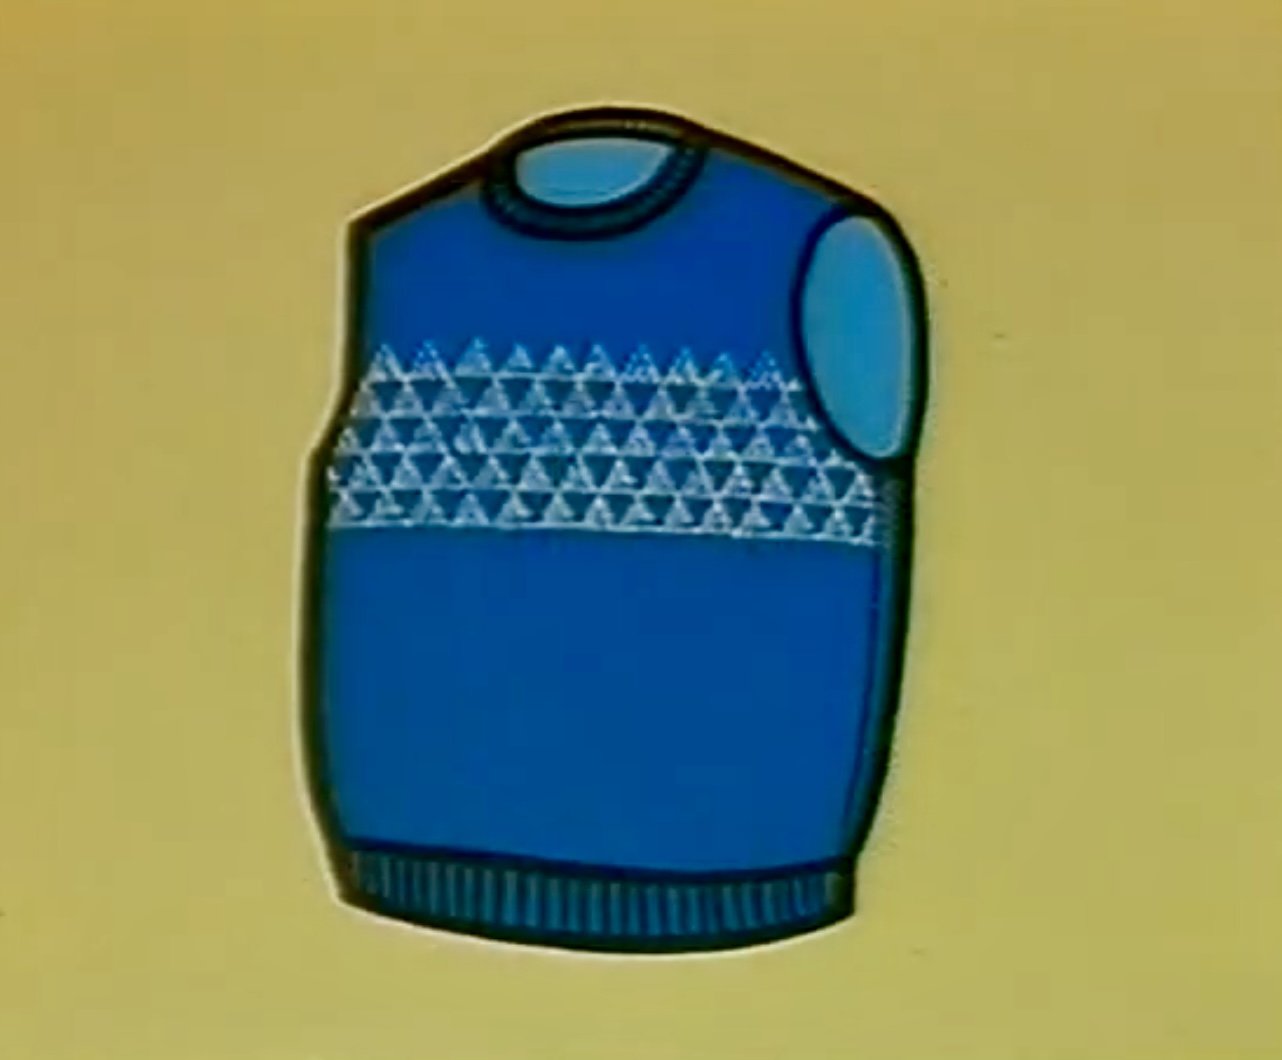
Pullover complete!

SEE ALL BLOG ENTRIES ON THE BLOG INDEX PAGE

2023 Oct 4 - Tension Swatch

While I’ve done a tension gauge in a project done before - I’ve realized that I should perhaps create a post JUST on this topic to make it easier to find in the future.

I covered this in: 2023 May 14 - Cat Hammock

As I am reviewing a YouTube Video (at the 9 minute mark) I thought I’d include the directions noted there as the post above were from my machine manual.

A tension gauge tells us how many rows and stitches to create fabric within a 10cm square.

Arrange 35 needles on both sides of 0 and cast on (70 needles). Cast on. Now set the row counter to zero. Work 20 rows at your desired settings. Exchange yarn to contrast yarn and knit two rows. Cut contrast and switch back to prior yarn. Knit 30 rows with the main yarn. Take 21st needle on both sides of center and push both into D position. Place a piece of contrast yarn into each hook for marking and push both needles back into the B position by hand. At this point knit another 30 rows with the main yarn then work two rows with the contrast yarn. Then 20 more rows with the main yarn. Now remove the yarn and remove the carriage across to remove the swatch from the machine. Since the tube was stretched from side to side on the machine roll it into a tube f rom side to side then pull it lengthwise. Press as yarn dictates. Use the GREEN rules with STITCHES noted with S ruler. Example shown was 30 stitches. To measure ROW use the R ruler. Measure between contrast rows. The ruler says 41 rows. Note stitch dial and tension mast gauge.


See all Blog Entries on the BLOG INDEX page

2023 Sept 20 - Standard 4.5mm Yarn Range

These are extremely fine yarns, often used more for crochet doilies and very open lacy shawls. 


Machine knitting with one strand might present some difficulties in knitting off the needles. When using this weight on the 4.5mm flat bed knitting machine it’s recommended to use their fine knit bar.

This gauge is commonly used in double bed multi-color fabrics. When knitted in an open & loose fabric, it is a perfect, light & airy fabric for lace curtains and shawls.


Using 2 strands, or 3 strands together, or combine with other yarns works well on this machine with a recommended knit tension setting of 5 or 7.


A common gauge for dress weight yarns.

Perfect for slim fitting slacks & skirts, as well as flaring skirts and suits.

If the yarn allows you to tighten down to one tension, this will help to keep slacks and straight skirts from seating out. Return to your regular tension for the shells, tops, jackets & blazers.


These fine yarns are still good for easy 2-color jacquard. Will knit off smoothly and create warm afghans.


A common gauge for light weight jean sweaters. Excellent weight for fairisle sweaters without the added weight that fairisle usually produces.


Good for socks, summer sweaters, for babies and lightweight shawls. 2 strands roughly makes a DK weight, 3 strands roughly make worsted weight.


Fingering is such a popular weight and somewhat ideal yarn weight for baby items and summer lace items.


You may find you are knitting this at knitting machine tension 6 or tension 8. "Tension" is not a hard and fast rule. It just gives us a place to start when in doubt.


These are probably the most commonly used weights for the average machine knitter. Tension 7 & 8 are the ranges a lot of new machine knitters are taught in. And for easy, quick garments we continue to return to it.


This weight is popular with men's sweaters & cardigans.


Almost twice as thick as Fingering.
Excellent for all types of sweaters, cardigans & afghans.


Used on the standard bed and sometimes not, because even though the yarn says DK or Sport Weight, we will have variations within that range.


This weight and the following DK weight yarns are great on the mid-gauge knitting machines and make beautiful cabled and hand manipulated designs.

Some variations won’t work using every needle on the flat bed but may work if using every second needle - one must simply try the yarn on the machine to best determine.


I knitted my 2023 wedding dress on my flat bed knitting machine using acrylic “Micro Tam” which is classified as size 3 DK weight.

Light weight yarns are also known as DK weight or double knitting yarns. DK yarns are lightly heavier than fine weight yarns, and are typically used for projects such as sweaters, hats, scarves, and baby clothes.


See all Blog Entries on the BLOG INDEX page

2023 Jul 17 - Quick Knit Bag

Inspired by the Instagram post by blackroseatelie - by creating a long rectangle of knitting you can form it into a quick knit bag. Apparently many persons are making this style bag - Instagram person |

My flat bed knitting machine version:

First I created a prototype - I ewrap cast on with scrap using 80 total needles. Carriage set at 10 and overhead mast tension at 1. Using punch card #3 on the tuck setting I worked 92 rows before calling it a night. On the machine it’s 30cm knitting both wide and long (to the needles).

I created a plan using a piece of paper plan to determine rectangle length. The finished project would than have a shoulder strap created. This project prototype was worked using 370 rows. The grey prototype used yarn that was old and breaking so it was created as a prototype. :)

The bottom left and right width of this bag as it lay on the floor straight from the machine is 42cm, The height of each side is the same 42cm. The diagonal top left to bottom right is approximately 57cm.

Now to make the bag for real :) While this is indeed a quick project, I wasn’t giving it full priority (why it’s not done on the day it was blogged about)

The blue variegated acrylic version I am making worked up to 360 rows in the same punch card tuck setting. Off the machine the fabric curled with total length 89cm now to steam it semi-flat. After steaming the length is now 90cm, the width is 38cm.

Now to seam.

An update:

Sunday I powered through on the quick knit bag, finishing seams wonderfully only to find the knitted rectangle was maybe 6 inches too short for seams to nicely align.

I had hoped somehow it would look okay - it really didn’t.

While at work today I pep talked myself into undoing the seams and considering how to make the flat bed knitted piece longer somehow. I ended up working 20 rows of single crochet on the short end of the rectangle. Here’s a poor triangle layout image planning how much more fabric is needed. This shows the shapes and further fabric needed still to extend with crochet.

Never give up!

The final rectangle had enough length after adding enough crochet rows that the total piece could be folded into 6 triangles of identical size (this is the secret to this bag design). If you’re making it now it doesn’t matter my rectangle size as it depends on your worked gauge and fibre.

I reinforced all edges with single crochet then finished the main bag by seaming after steaming the fabric. I started again with two strands and 16 stitches for the strap and reinforced the join with a smaller triangle overlap of the bag to strap. A final steam it looks great!

Instagram posts: Page 1 |


See all Blog Entries on the BLOG INDEX page

2023 Jun 15 - Cast On Rag Upgrade - The Flat Bed Love Cast On Bonnet

I began my machine learning journey with an Addi Plastic circular machine some time ago. Eventually I discovered circular sock machines which (while working full time) - I dove full into CSMS in 2018.

While working on the CSM I started adding split rings in late 2018 and then in early 2019 came up with a flat circular sock machine knitted cast on item utilizing 6mm split rings - I call these “Universal Cast On Bonnets”. I create them on a 96 needle slot CSM therefore they can be universally used on any CSM using 96 needle slots or less. More on CSM CAST ON.

When I started my Flat Bed self adventure, I didn’t like what was available to cast on. I later learned of something called a “Cast On Rag” which could be used with the transfer tool to load the knitted stitched edge so that each flat bed needle would have tension and therefore be ready to work. Needing to use a transfer tool to cast on seems like a of work.

SINCE 2019 I’ve come up with a flat bed equivalent to my circular sock machine universal cast on bonnet - I prefer to call it the “Flat Bed Love Cast On Bonnet” (mostly because rag seems to demote it). Therefore I consider it a Cast On Rag Update as one surface can be used as it always has (with the transfer tool to place a stitch on each needle) OR instead the split ring edge can be used where a split ring can be placed onto every in work flat bed needle.

My initial work on this idea is outlined in the Dec 19, 2022 BLOG POST

Therefore - taaaa daaaaaa!

I would like to introduce this item I created on my standard 4.5mm standard flat bed knitting machine.

To USE this to cast onto a standard gauge 4.5mm flat bed machine: hang a split ring onto every in work machine needle, thread the machine as you would with your scrap yarn (or Ravel Cord), and pushing the cast on item back to the bed against the gate pegs, bring the machine carriage across slowly with all the regular cast on settings you’d normally use. I tend to prefer to use every second needle when casting on for a quicker start.

The benefits of having the split ring edge is the easy ability to load a needle without a transfer tool. The opposite edge is still available as a cast on rag transfer tool cast on.

MAKING ONE YOURSELF:

On the standard 4.5mm gauge machine simply cast on with scrap yarn using your preferred method. With all needles in work create a hung hem/turned hem then work 30-50 rows depending on gauge in your desired pattern. After the pattern switch to plain knitting and work 8 rows. Transfer every second stitch on the whole bed and once done, open the latches and then transfer split rings to each needle that was holding two stitches. For clarity the needle holding two stitches has those stitches picked up with the transfer tool where a split ring is then placed on that needle and then the two stitches are placed back onto that same needle. All the needles not with stitches are brought back into working position and for this row we go slower while working the carriage across. Now work 7 rows of plain knitting then change to scrap and off the machine and hand finish the live stitches with a darning needle and extra long yarn tail.

One way to finish the live stitches is to use what I call the Single Pass Off Machine Bind Off - see my VIDEO.

How to add a split ring on a flat bed VIDEO.

I have tested this extensively on my specific 4.5mm standard gauge flat bed machine and through trial and error recommend using the 8mm split rings as they play nice with the gate pegs. I have had no issues or damage to my machine using metal split rings.


INTRO VIDEO

https://tinyurl.com/intro-castonrag-upgrad

COMING SOON YouTube VIDEOS:

How to Make this on a Flat Bed | How to use this on a Standard 4.5mm Gauge Flat Bed


INSTAGRAM: One | two | three


See all Blog Entries on the BLOG INDEX page

2023 May 30 - Classic Teapot Cozy

Inspired by a classic vertical pleat style tea cozy I did some online research for ideas.

One partial pattern recommended creating two exterior pleated panels and two interior plain knit panels that were an additional inch taller. The exterior and interior panels were side seamed together first then having two panels - they were only side seamed an inch from the top and two inches from the bottom side seams (leaving spout and handle access). I then came across Roni’s chunky gauge free Raverly pattern.

MEASUREMENTS:
One side of the teapot from spout to handle: 21cm
Height with slight clearance 18cm


BUILDING THE PROJECT ON THE FLAT BED
Using Mast Tension 1, Cam Lever (Carriage) 10 tension for the thicker fiber and 8 for the thinner.

SUMMARY : The outer two panels I created had 10 rows of thicker fiber and 6 of the thinner with 9 blocks of the thicker fiber. I open cast on using scrap (every 2nd needle up to the 76 needle mark - 38 actual needles). I will then create two dense panels for the liner. This will allow for pleats from the purl side.

  • USING right side of 0 pull out every 2nd needle to 76 (38 needles). Open Cast On with scrap then switch to dark blue. Work 10 rows with assist on tension to ensure all edge stitches are even.

  • Switch to lighter color blue and work 6 rows.

    Repeat until 9 thicker blocks have been created. Switch to scrap yarn, work a few rows and take the project off the machine..

NEXT CREATE A PARTIAL LINER:

  • Cast on again using every second needle (using the 60 needle mark on the right side of zero - 30 actual needles). Scrap cast on then e-wrap the thicker yarn.

  • Work 50 rows. Make a long project tail, add many rows of scrap and then start again with the ewrap on the project yarn for the second panel (liner). Cast off with project yarn.

Assembling

Once all the pieces are off the machine: two flat regular knitted liber pieces and two pieces which each have 9 thicker yarn (10 worked rows) stripes and 8? Thinner yarn (6 row stripes).

The striped pieces were made this way as they will sit nicer on the Purl side to work as pleats.

I fully steam ironed the non-striped pieces and carefully only partially steamed one side end edge of each striped piece (to ensure it doesn’t flattern completely and loose it’s natural pleating effect)

I then sewed the left and right edges of the liner to the stripped piece (stripes going vertically with the liner knit side out. The liner is about 1.5” shorter heightwise to reduce fabric area at the top of the project. I then accordion style sewed only the dark thicker striped ends (skipping the thin yarn sections) to fully gather the top of the project. I did this again with the other pieces.

now I have two lined accordion top pieces. I seamed their sides near the top and not where there wasn’t any liner.

It sits now like a dress on the teapot

next to I will join the bottom edges of the thicker fibre stripes without making an accordion so that that edge will go more snug against the bottom or side of the tea pot. I used crochet to bring the thicker segments together on the bottom of this project and to join the two panels on the sides.

Now with the bottom edge of the outer panels reinforced with a row of crochet it’s time to consider how to connect the liner on the bottom to the flared outer work. I chose a slip stitch reduction row: slip Stich the first stitch then for the second, skip a stitch and slip. Repeat. This brought the edge of the outer work closer to the same size as the edge of the liner there.

I then seamed the inside edge of the liner to the edge of the outer work and joined the lower openings at the handle and spout to about three fingers high from the bottom edge of the project. I further reinforced the inside top and outside top area, created a crocheted flower and attached it.

The crocheted flower was created using https://youtu.be/_VkHJUT73y0


Instagram posts: one | two | three | four | five | six |


See all Blog Entries on the BLOG INDEX page

2023 May 28 - Owl Teapot Cozy

Today it was asked if I could make a new Teapot Cozy.

Not owning an actual Teapot I borrowed one. :) Then I surfed the internet for ideas - WOW!

Digging through some recently donated yarn I then spent too much time winding balls into cones so that the knitting machine would be happy and the yarn tension/stitches even.

I am looking for a cover that will span 21 inches. I am using unlabeled maybe worsted weight acrylic so I approximated the width via needles and after open casting with scrap yarn using every second needle, I then switched to white project yarn, continuing with the every second needle - ensuring not to make a fabric too dense. Lets see what that does.


BUILDING THE PROJECT ON THE FLAT BED
Using Mast Tension 2, Cam Lever (Carriage) 10 tension.

SUMMARY: Create two rectangles (every 2nd needle) using needle marks total for EACH rectangle of 60 rows THEN join/work both rectangles.

  • USING right side of 0 pull out every 2nd needle to 66 (33 needles). Open Cast On with scrap then switch to dark brown. Work 50 rows with assist on tension to ensure all edge stitches are even.

  • Switch to lighter color (beige). Work 20 rows.

  • Switch to white. Work 20 rows. (Total rows are now 100)

  • NOW to do what do did above but in reverse.

  • Work 20 rows white. (Total rows are now 120)

  • Switch to beige. Work 20 rows. (140 total rows)

  • Switch to dark brown and work 50 rows. (190 total rows). Cast Off with the project yarn.

NEXT CREATE A PARTIAL LINER:

  • Cast on again using every second needle (but cast on with one less than above so its slightly narrower than the outer piece is) - 32 needle scrap cast on then e-wrap beige yarn cast on.

  • Work the number of rows used in the dark brown and beige (2x50, 2x20=140). Cast off with project yarn.

Seam both sides of the white and lighter beige - leaving the dark brown edges unseamed. Now finish both short edges of the dark brown ends by folding up inside the piece and secure the edge of live stitches with a darning needle - like a hung hem. Now attach the liner from the inside to the edge of the dark brown seam - repeat on the other side. The liner has the knit side viewable with a planned excess liner we will seam to allow a kind of pocket inside the owl head that we will first finish the face features before closing the interior. I asked persons on instagram and my facebook what eyes they preferred - almost everyone chose the THIRD (which are just two styles of buttons that I later sewed on). The nose is a crocheted piece I created then attached. :)

I added tassels to the points on the ears and after completely seaming the inside liner, decided to help shape the top of the head by seaming it there a bit.


See all Blog Entries on the BLOG INDEX page

2023 May 22 - Teddy Bear using Knit Radar

Today I am tinkering with a teddy bear pattern with which to us the KR7 on my Singer 700 to create.

I dug into the yarn I recently received and found a lovely fuzzy teal but when I started working with it, it was damaged and weak (only good for scrap yarn). I switched begrudgingly to this other cone of yarn.

I made yet another swatch so I know how many stitches etc. Want to see how? See the Cat Hammock Blog Entry


SWATCH/STITCH GAUGE

Following the manual the standard green gauge (labelled as A below) says we have 20 stitches by 36 rows over a 4” measured gauge.


KNIT RADAR SETTINGS:

20 stitches means using the 1/1 rulers with that 20 stitches note in the KR7. The far left dial is adjusted to 36 with also adjustment of the far right dial into the 30-60 setting. Now to insert the paper pattern into the KR7 and work each knitted piece.

THE PAPER PATTERN - I searched online and found this Buddly Crafts bear pattern. I printed it out then photocopied it 125% larger in landscape mode which still fit the width restriction of the Knit Radar. Those pieces that required a reverse piece made I outlined the pattern of those pieces on the back of the printed paper and then noted which pieces needed what done.

The full size (1/1) gauge rulers I have, have the zero at the far left (not mid ruler).

Now to cast on and build each piece.

Technically the right and left pieces are worked in reverse (working the right from the purl side will be the left from the knit side if the knit side will be facing out).

The pieces have now all been knitted (with E-wrap starts and cast off ends). Now to steam iron all the pieces and set about identifying the parts to assemble.

I’m wishing I hadn’t used acrylic for a more controlled final piece not containing plastic. The pieces are not fully what I hoped I’d knitted.


The Teddy Bear is done!

I’m gonna call him frank (for Frankenstein due to how prominent the seams are).

This project is the result of a successful challenge to myself to make something from a very basic sewing pattern online using my singer 700 flat bed knitting machine and the knit radar feature it has (which allows for visual pattern following). The very basic pattern was printed and made slightly bigger using a photocopier. Each piece was knitted/built as needed (over creating fabric that was cut). Yarn: Bramwell 4 ply 100% acrylic.


Instagram post: one | two | three | four | five | six |


See all Blog Entries on the BLOG INDEX page

2023 May 20 - The Ruler Strip

As a new flat bed knitting machine user, even though I HAVE read the manual a ton of times, the ruler strip continues to mystify me. Today I noted things which might help you!

This is my standard 4.5mm gauge flat bed knitting machine - a singer 700.

INSTAGRAM POST: one | two |


See all Blog Entries on the BLOG INDEX page