


Update: Nov 25, 2020 - The CSM blanket 1.0 is done!
In the next day or so it will be wrapped, boxed and mailed out for the awesome gift it is. Now onto socks! Want more info? Project yarn info and more can be found on Ravelry also see below for this yarn adventure.
Want to share this blog post? Use this shortcut url: https://tinyurl.com/csmblanket1
The details from Nov 17, 2020 - I’ve decided to attempt my first CSM built blanket. After much thought and internet searching I decided on creating “worked in the round” tubes on my 96 needle slot cylinder. This version will be a classic straight forward tube version of an ideal size to be used on the sofa. This will be the Christmas 2020 gift to my boyfriend’s parents with whom we won’t be able to visit for Christmas due to CoVid. (They live almost 5 hours via car from us).
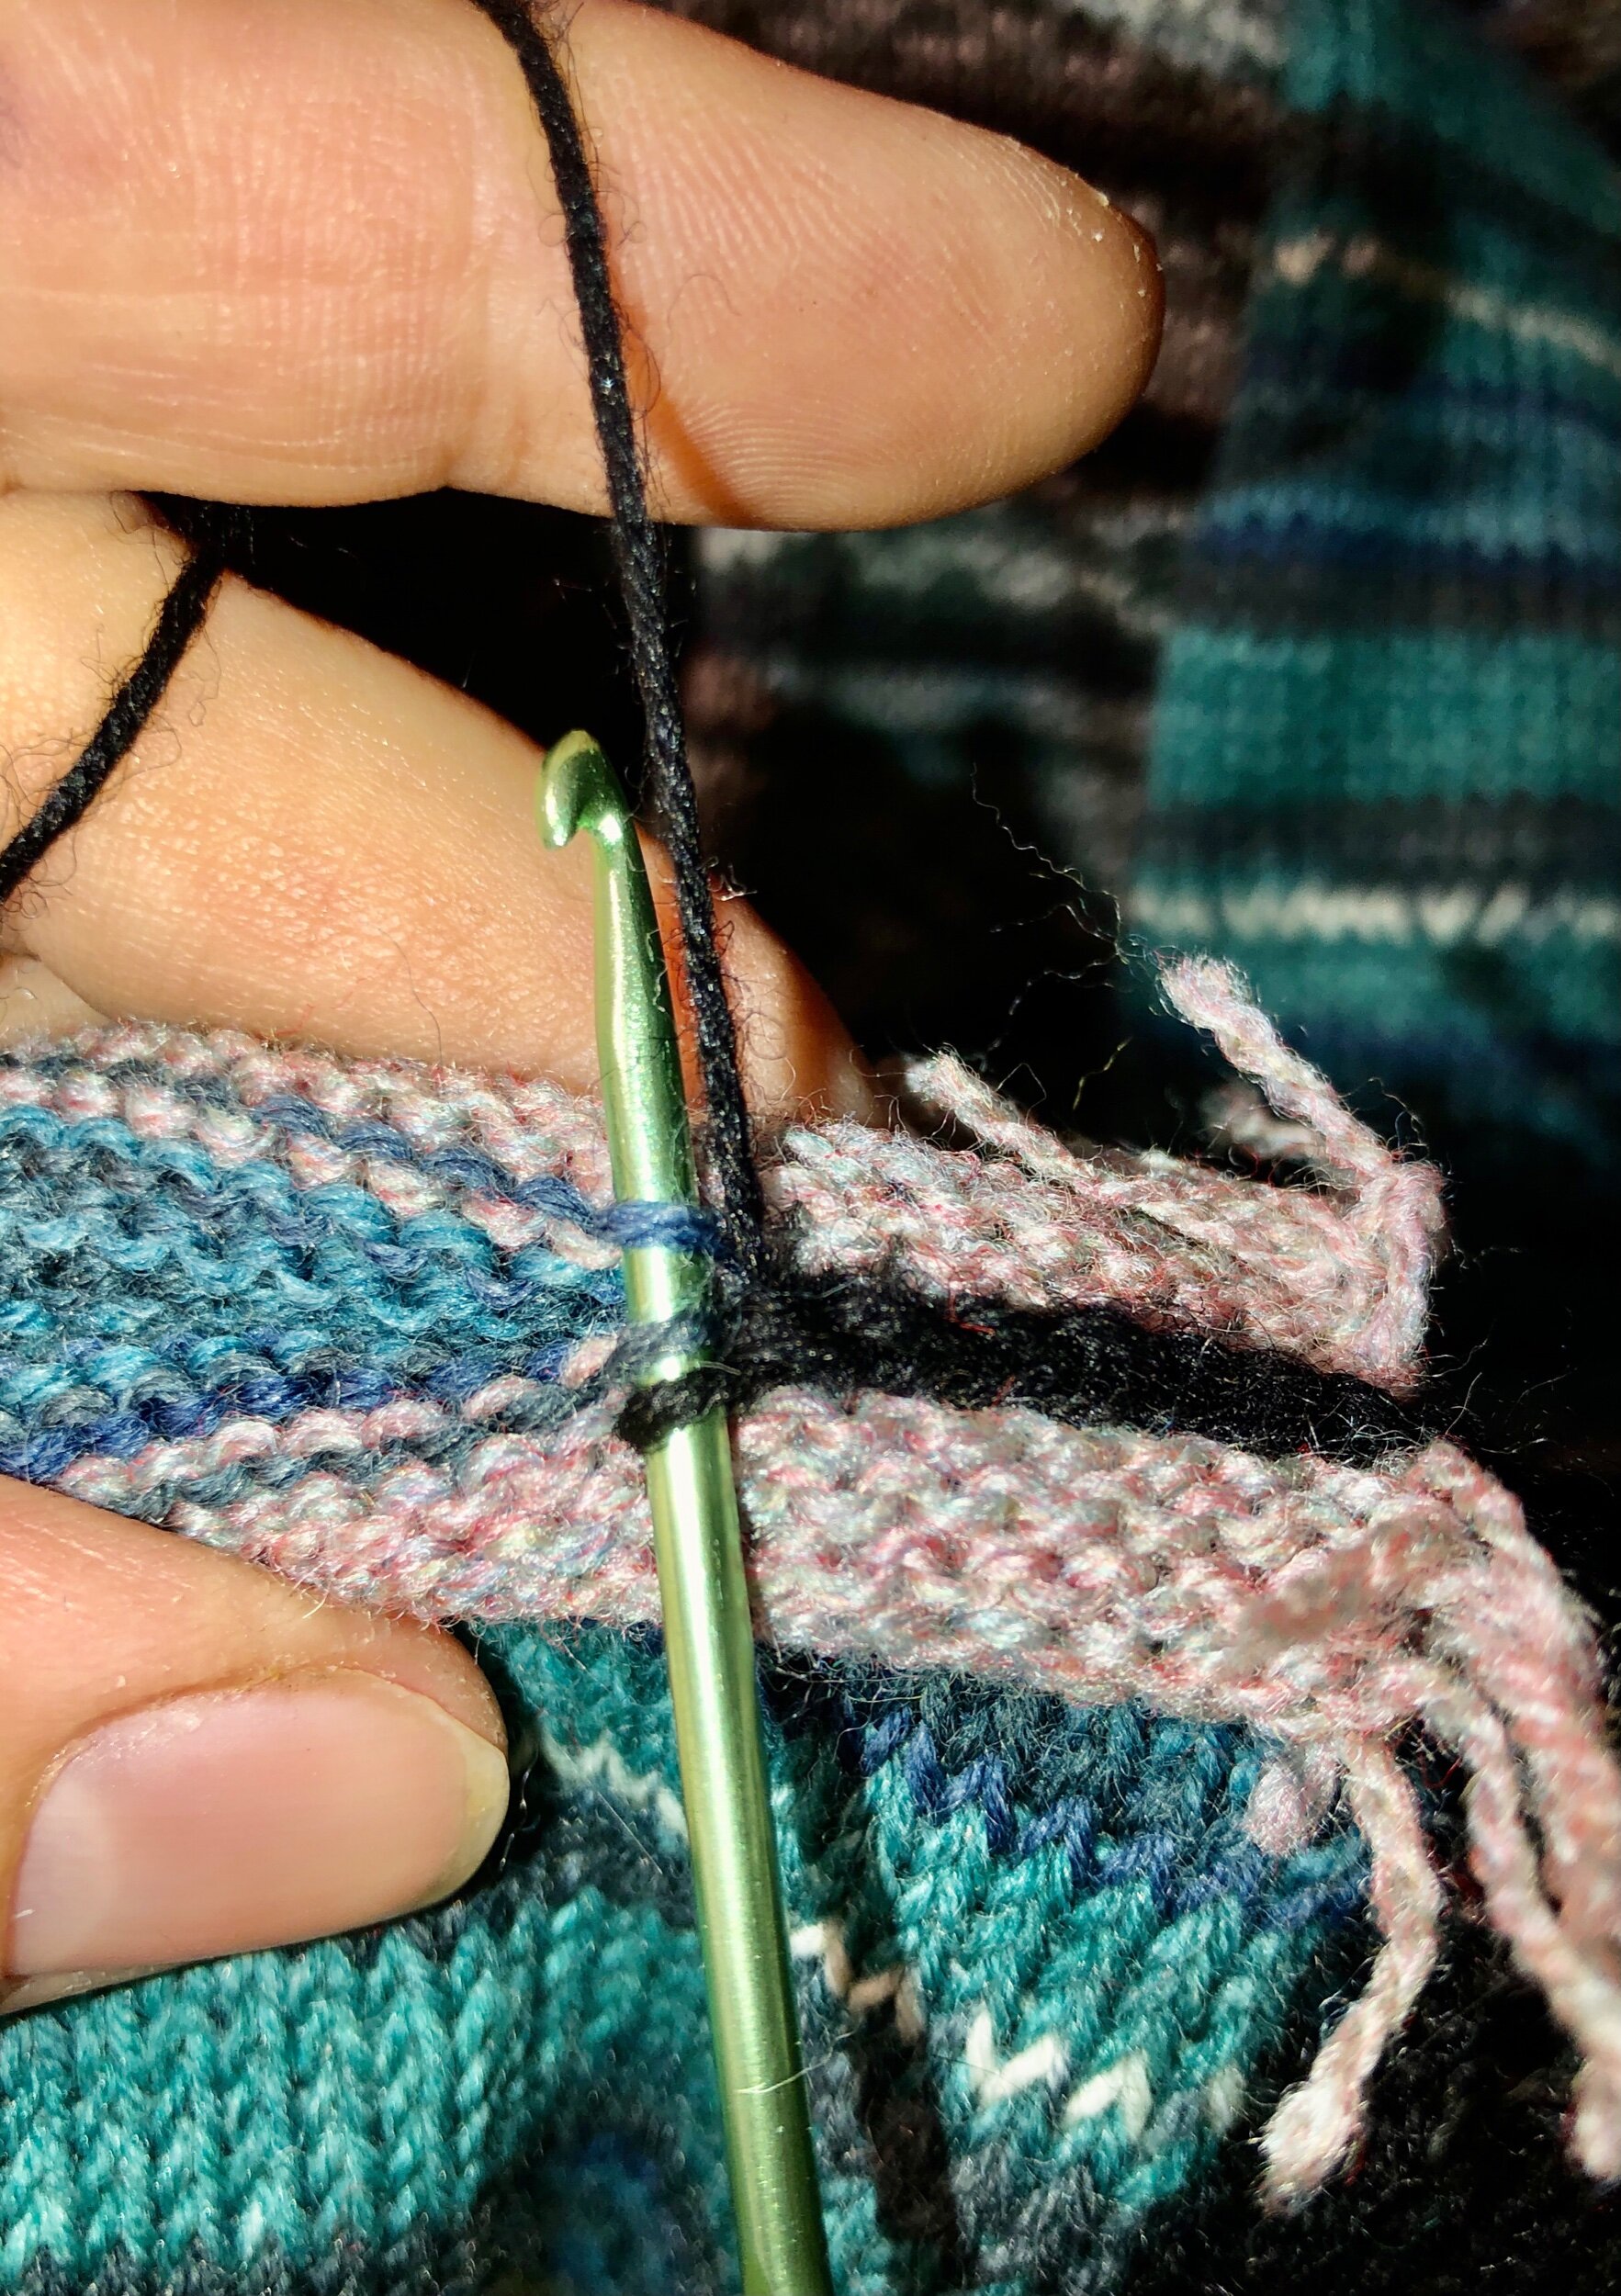
This blanket will be joined on its side(s) by dropping stitch(es) and using a crochet hook to alternate between the bars of both tubes held parallel for the join. I was excited to find this method online - it creates a sort of ‘braided’ look, is two-sided and wonderful from either side and is very simple to do. The method I found used only ONE dropped stitch from each tube, however after testing this, I chose to drop TWO dropped stitches on each tube for the join to create a more pronounced ‘braid’.
Crochet with Miranda YouTube Video Part 1, Part 2
To help me decide how big to make this blanket I first searched blanket dimensions as defined by the internet. I then approximately decided how many rows to create on the first tube, and as I was working that first tube on the CSM, measured how long it was getting, deciding upon a tube of 700 rows. In retrospect I could have easily knocked off 200 rows.
The project outline:
Each tube begins and ends with a generous 15-30 rows of scrap with the project yarn starting at the 3 o’clock position on the CSM.
On the very first row worked of each tube I stitch marked the stitches on both sides of the 3 and 9 o’clock positions (each are 46 stitches apart).
Although I could drop the stitches needed later for joining while the tube is on the machine, I chose to do so AFTERWARDS to reduce edge stitch migration and to allow for any design changes on the go.
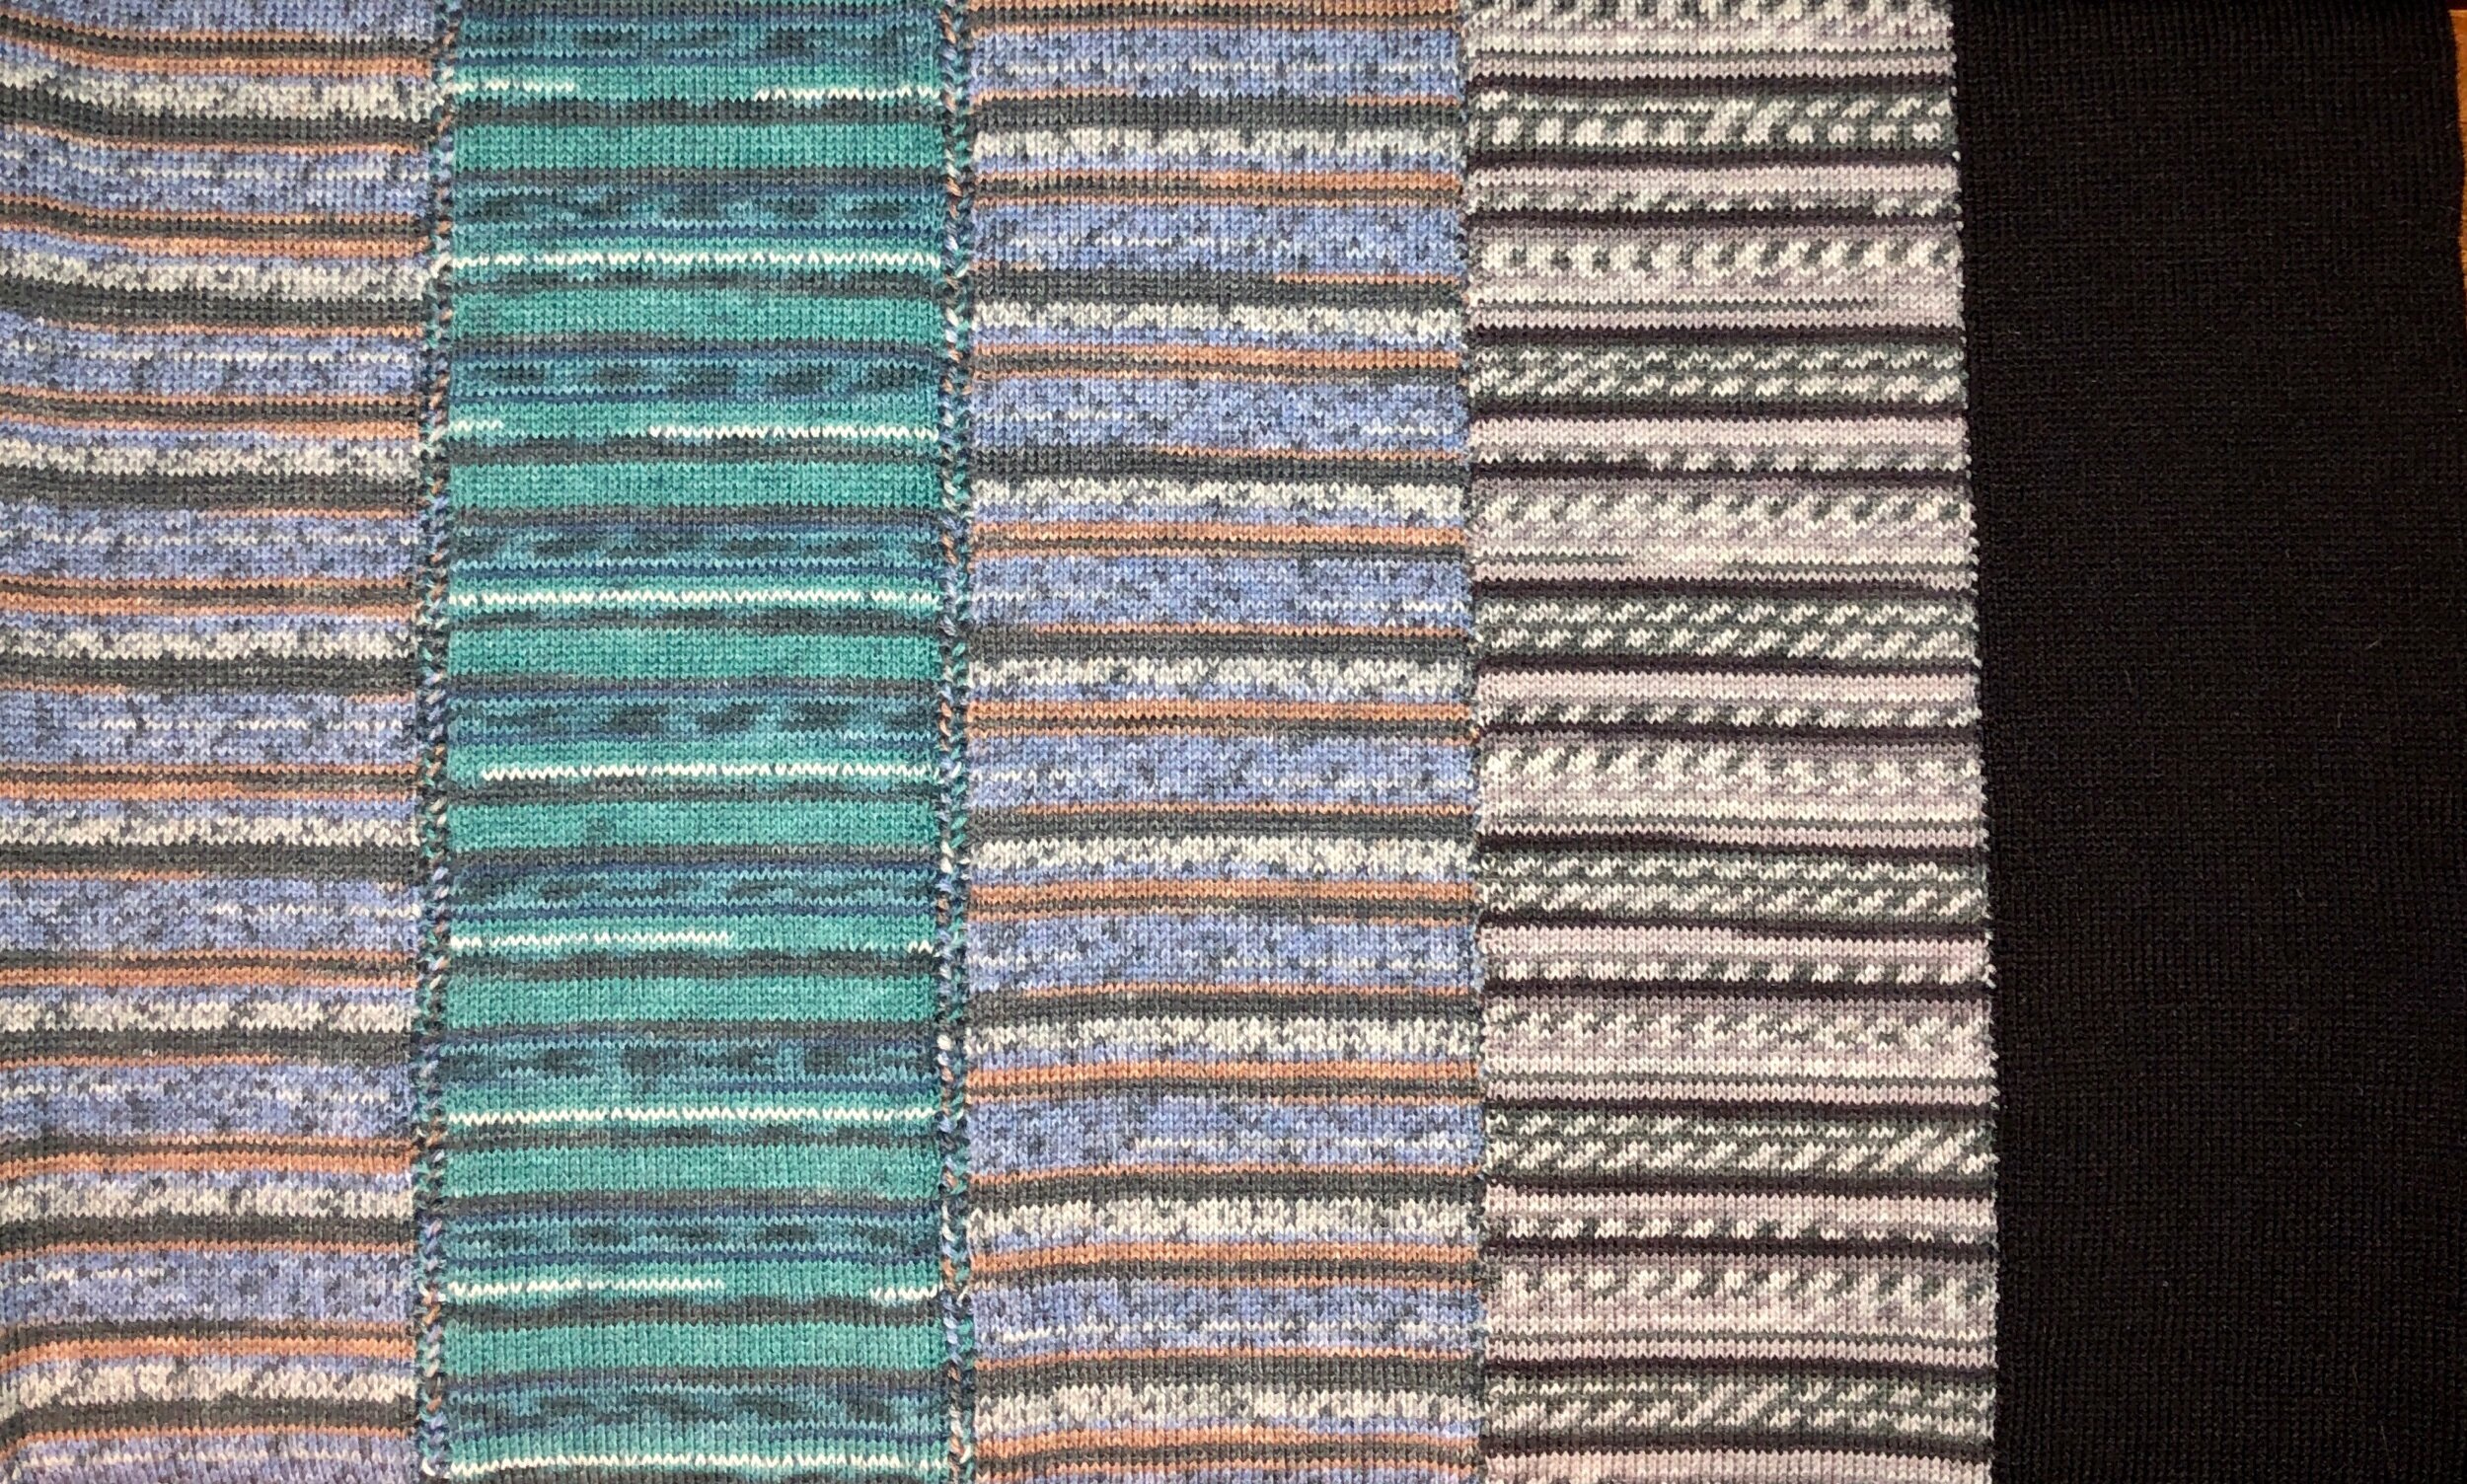
Final design: 9 tubes wide consisting of 3 green tubes and 2 of each other color used. I hope to have the top and bottom blanket edges look the same as the edge of the outside left and right edges of the blanket by kitchenering the open tube ends.
DETAILS: Tubes worked up on the 96 needle slot cylinder resulted in a resting tube width slightly over 5 inches wide. I determined that a tube of 700 rows resulted in a tube of approximately 57 inches long. I preferred to have different tubes side by side over having same yarn tubes joined in succession. There are MANY ways to finish this blanket - I am simply choosing the method I have. :)
PRO: Fast to work up. Join is pretty from both blanket sides. Join is easy. Blanket feels amazing to use and I feel shows the love for the recipients.
CON: Blanket weight increases quickly due to tube not a single thickness. Closing the open tubes is harder for me on the knit side than the purl side. I could have made this easier by closing at least ONE end from the inside prior to joining it.
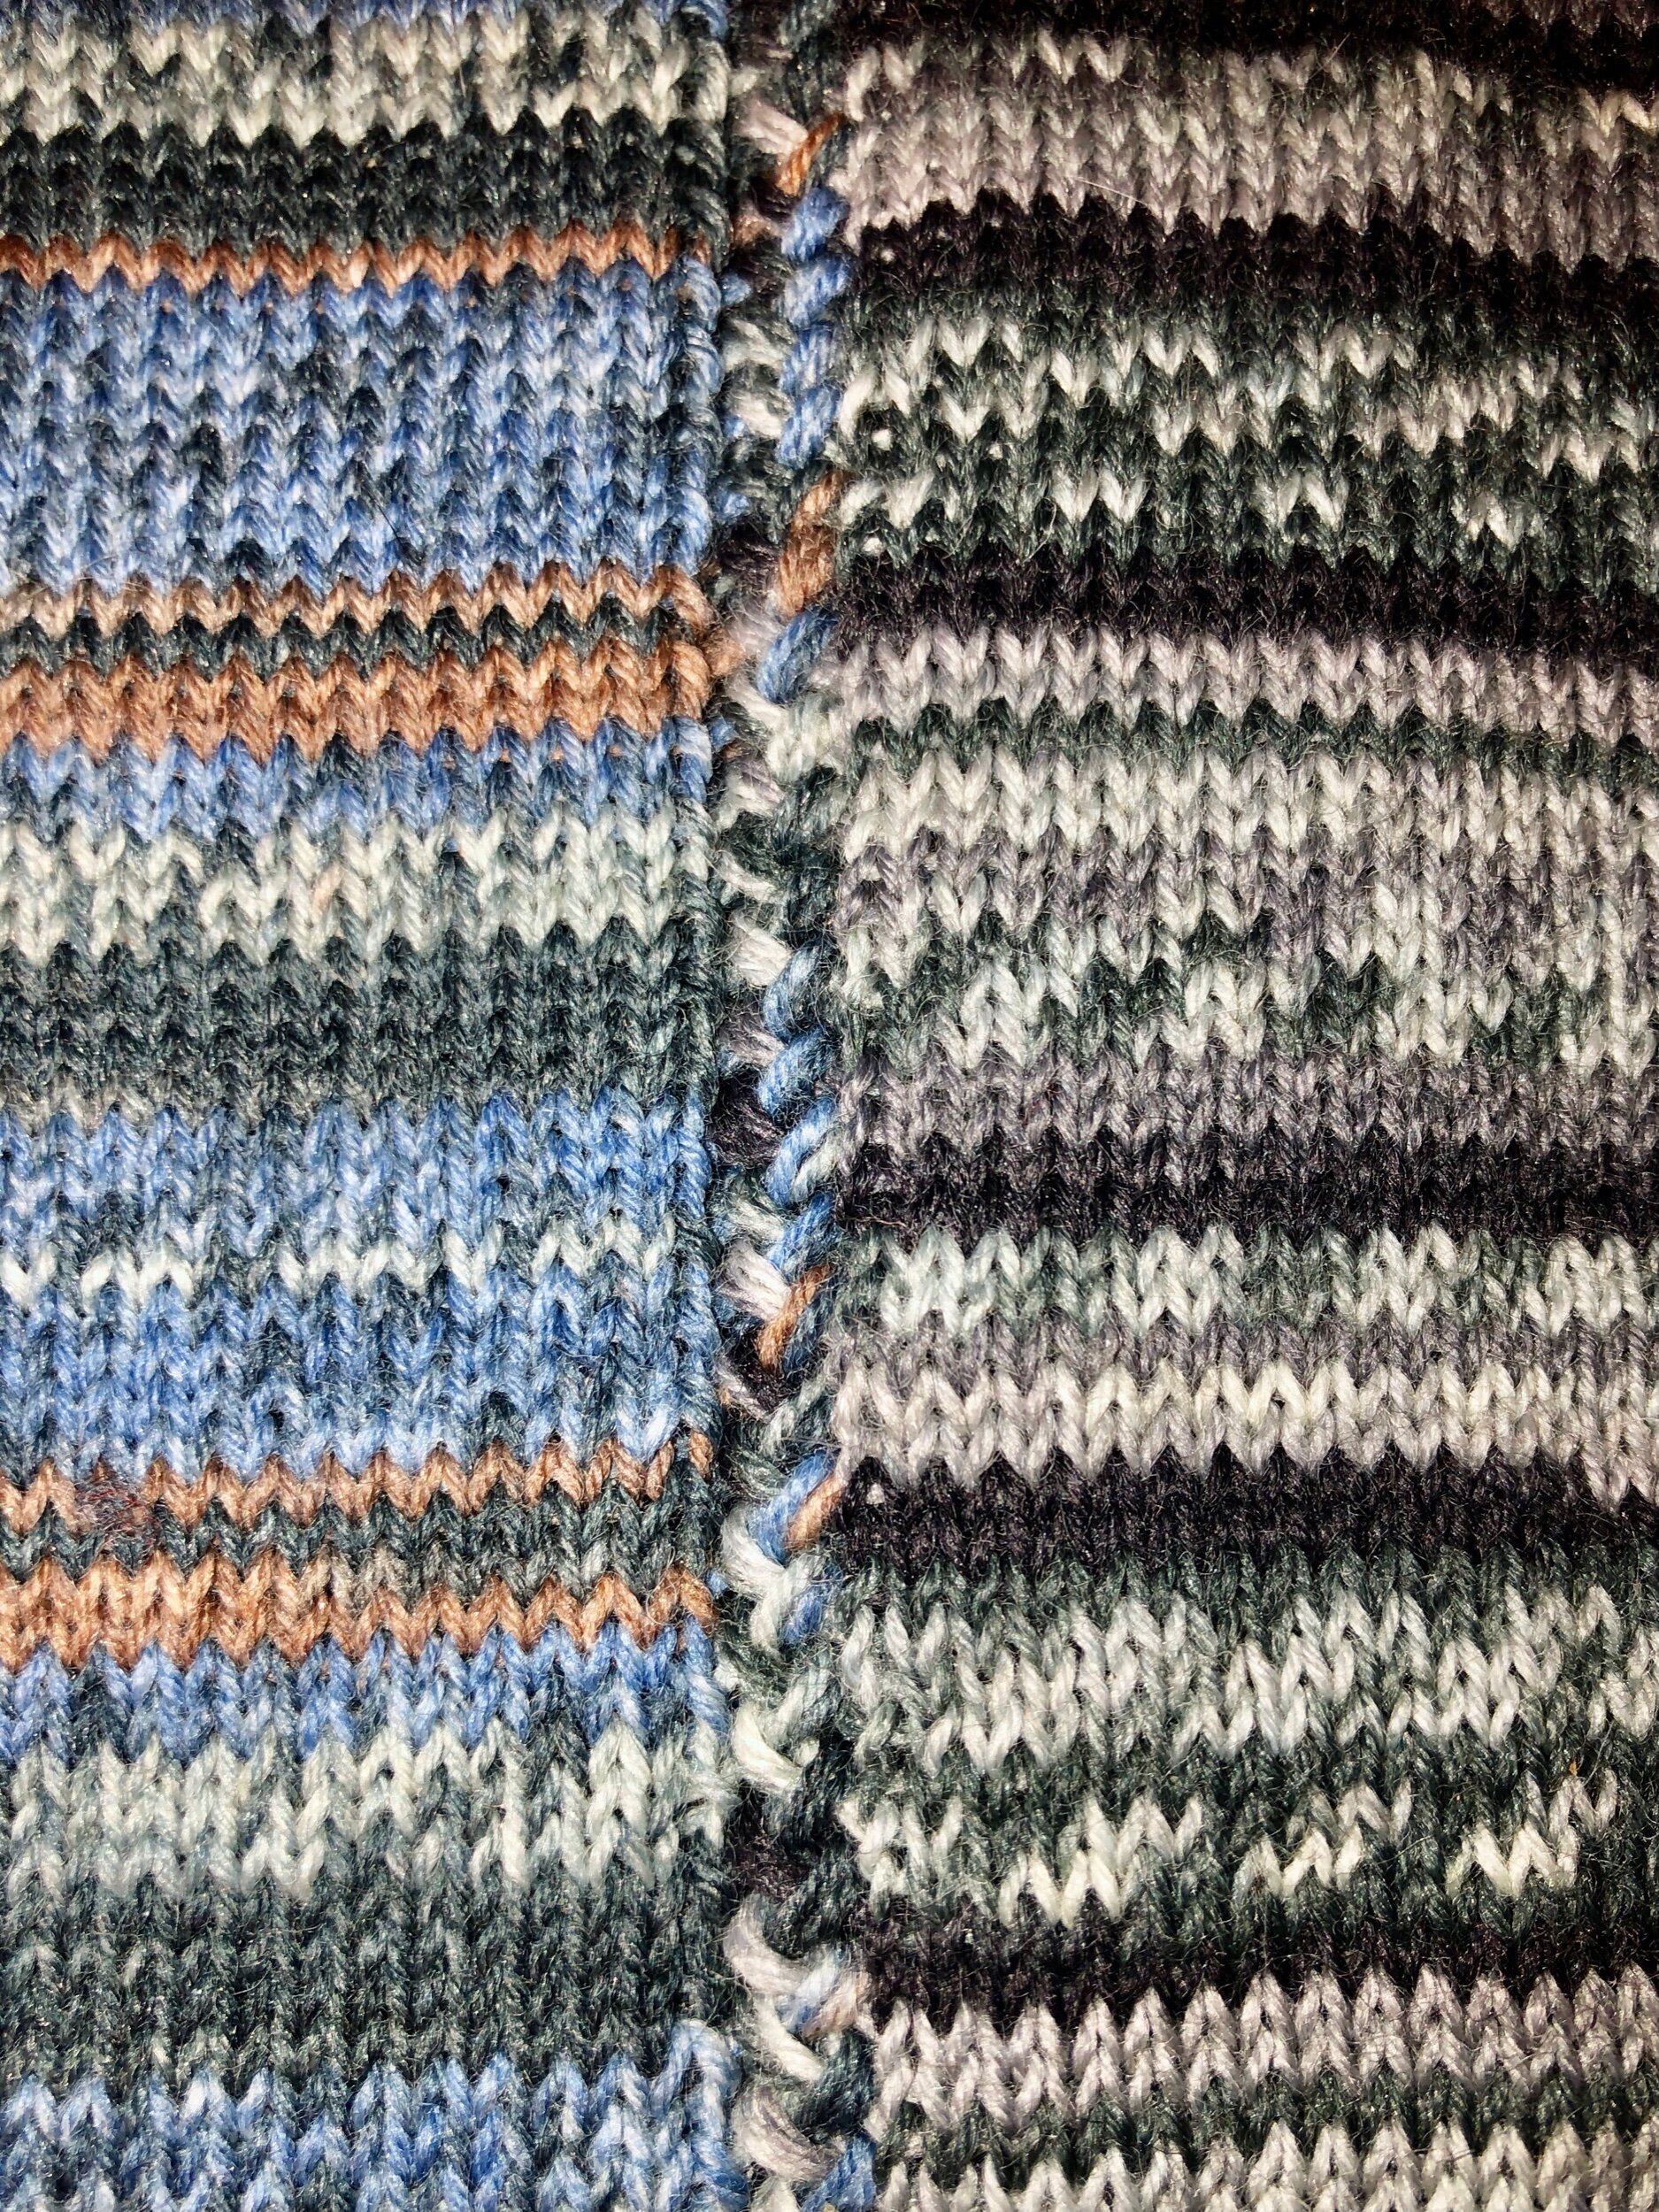
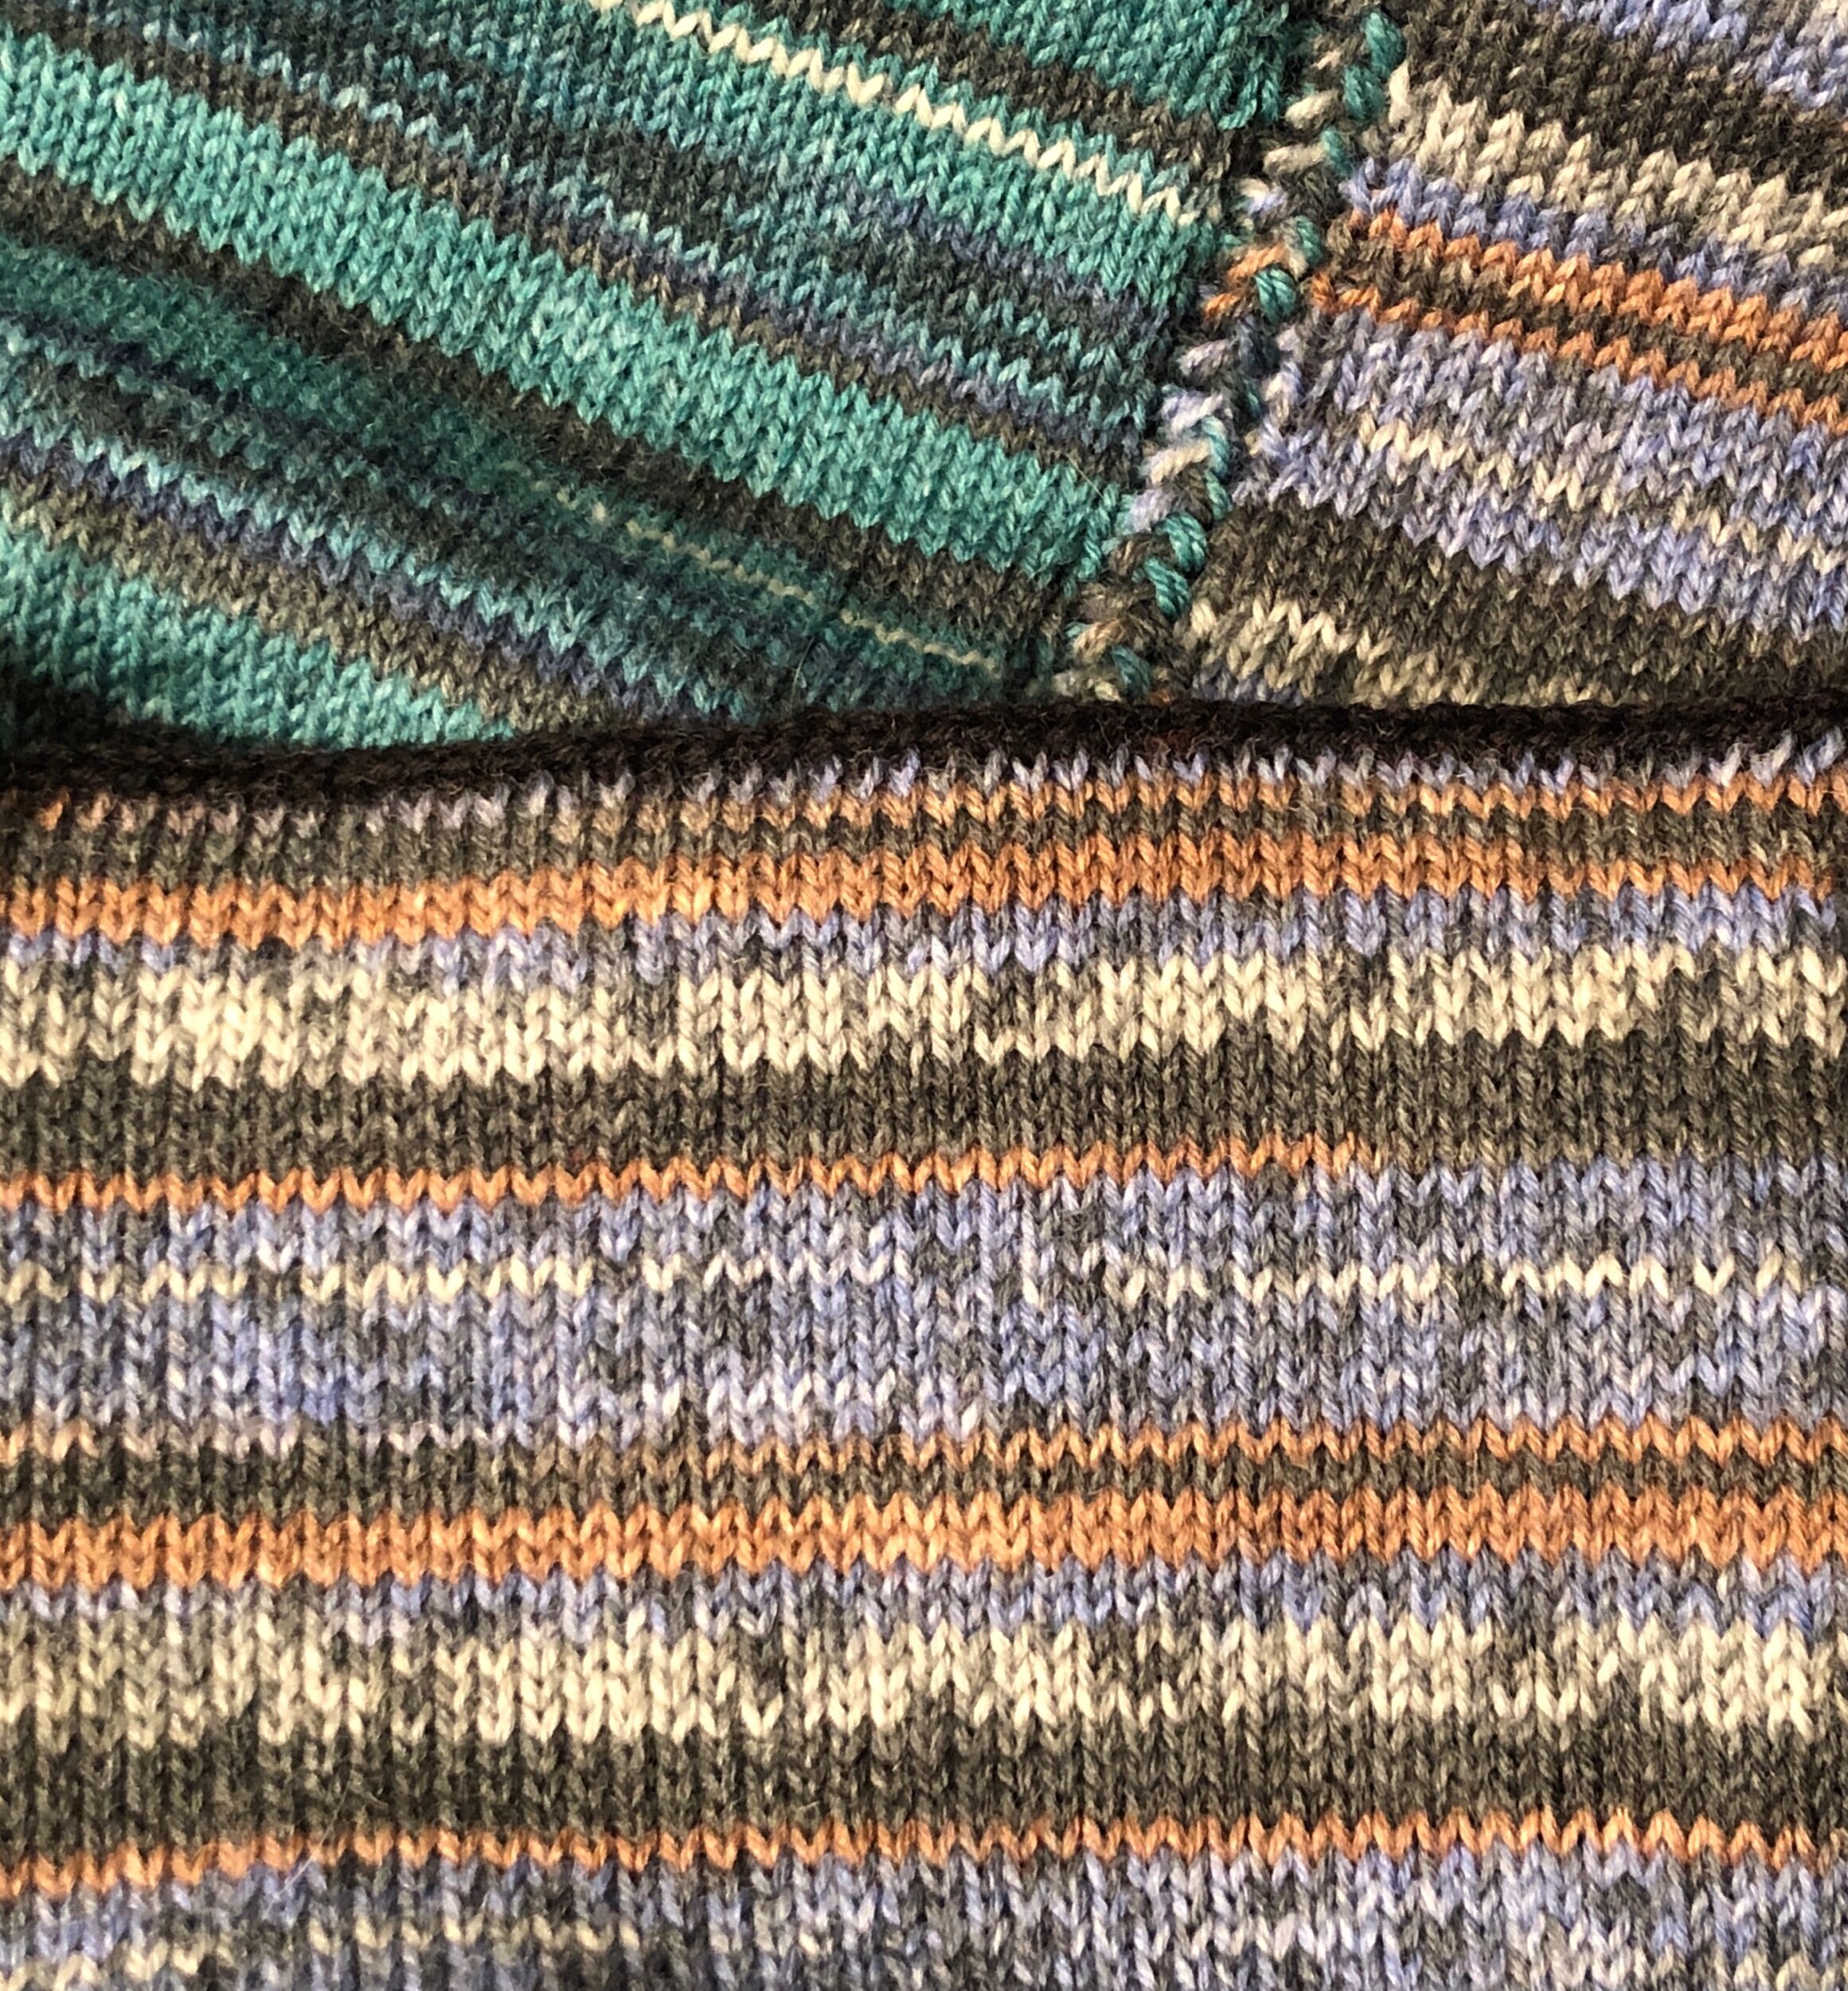
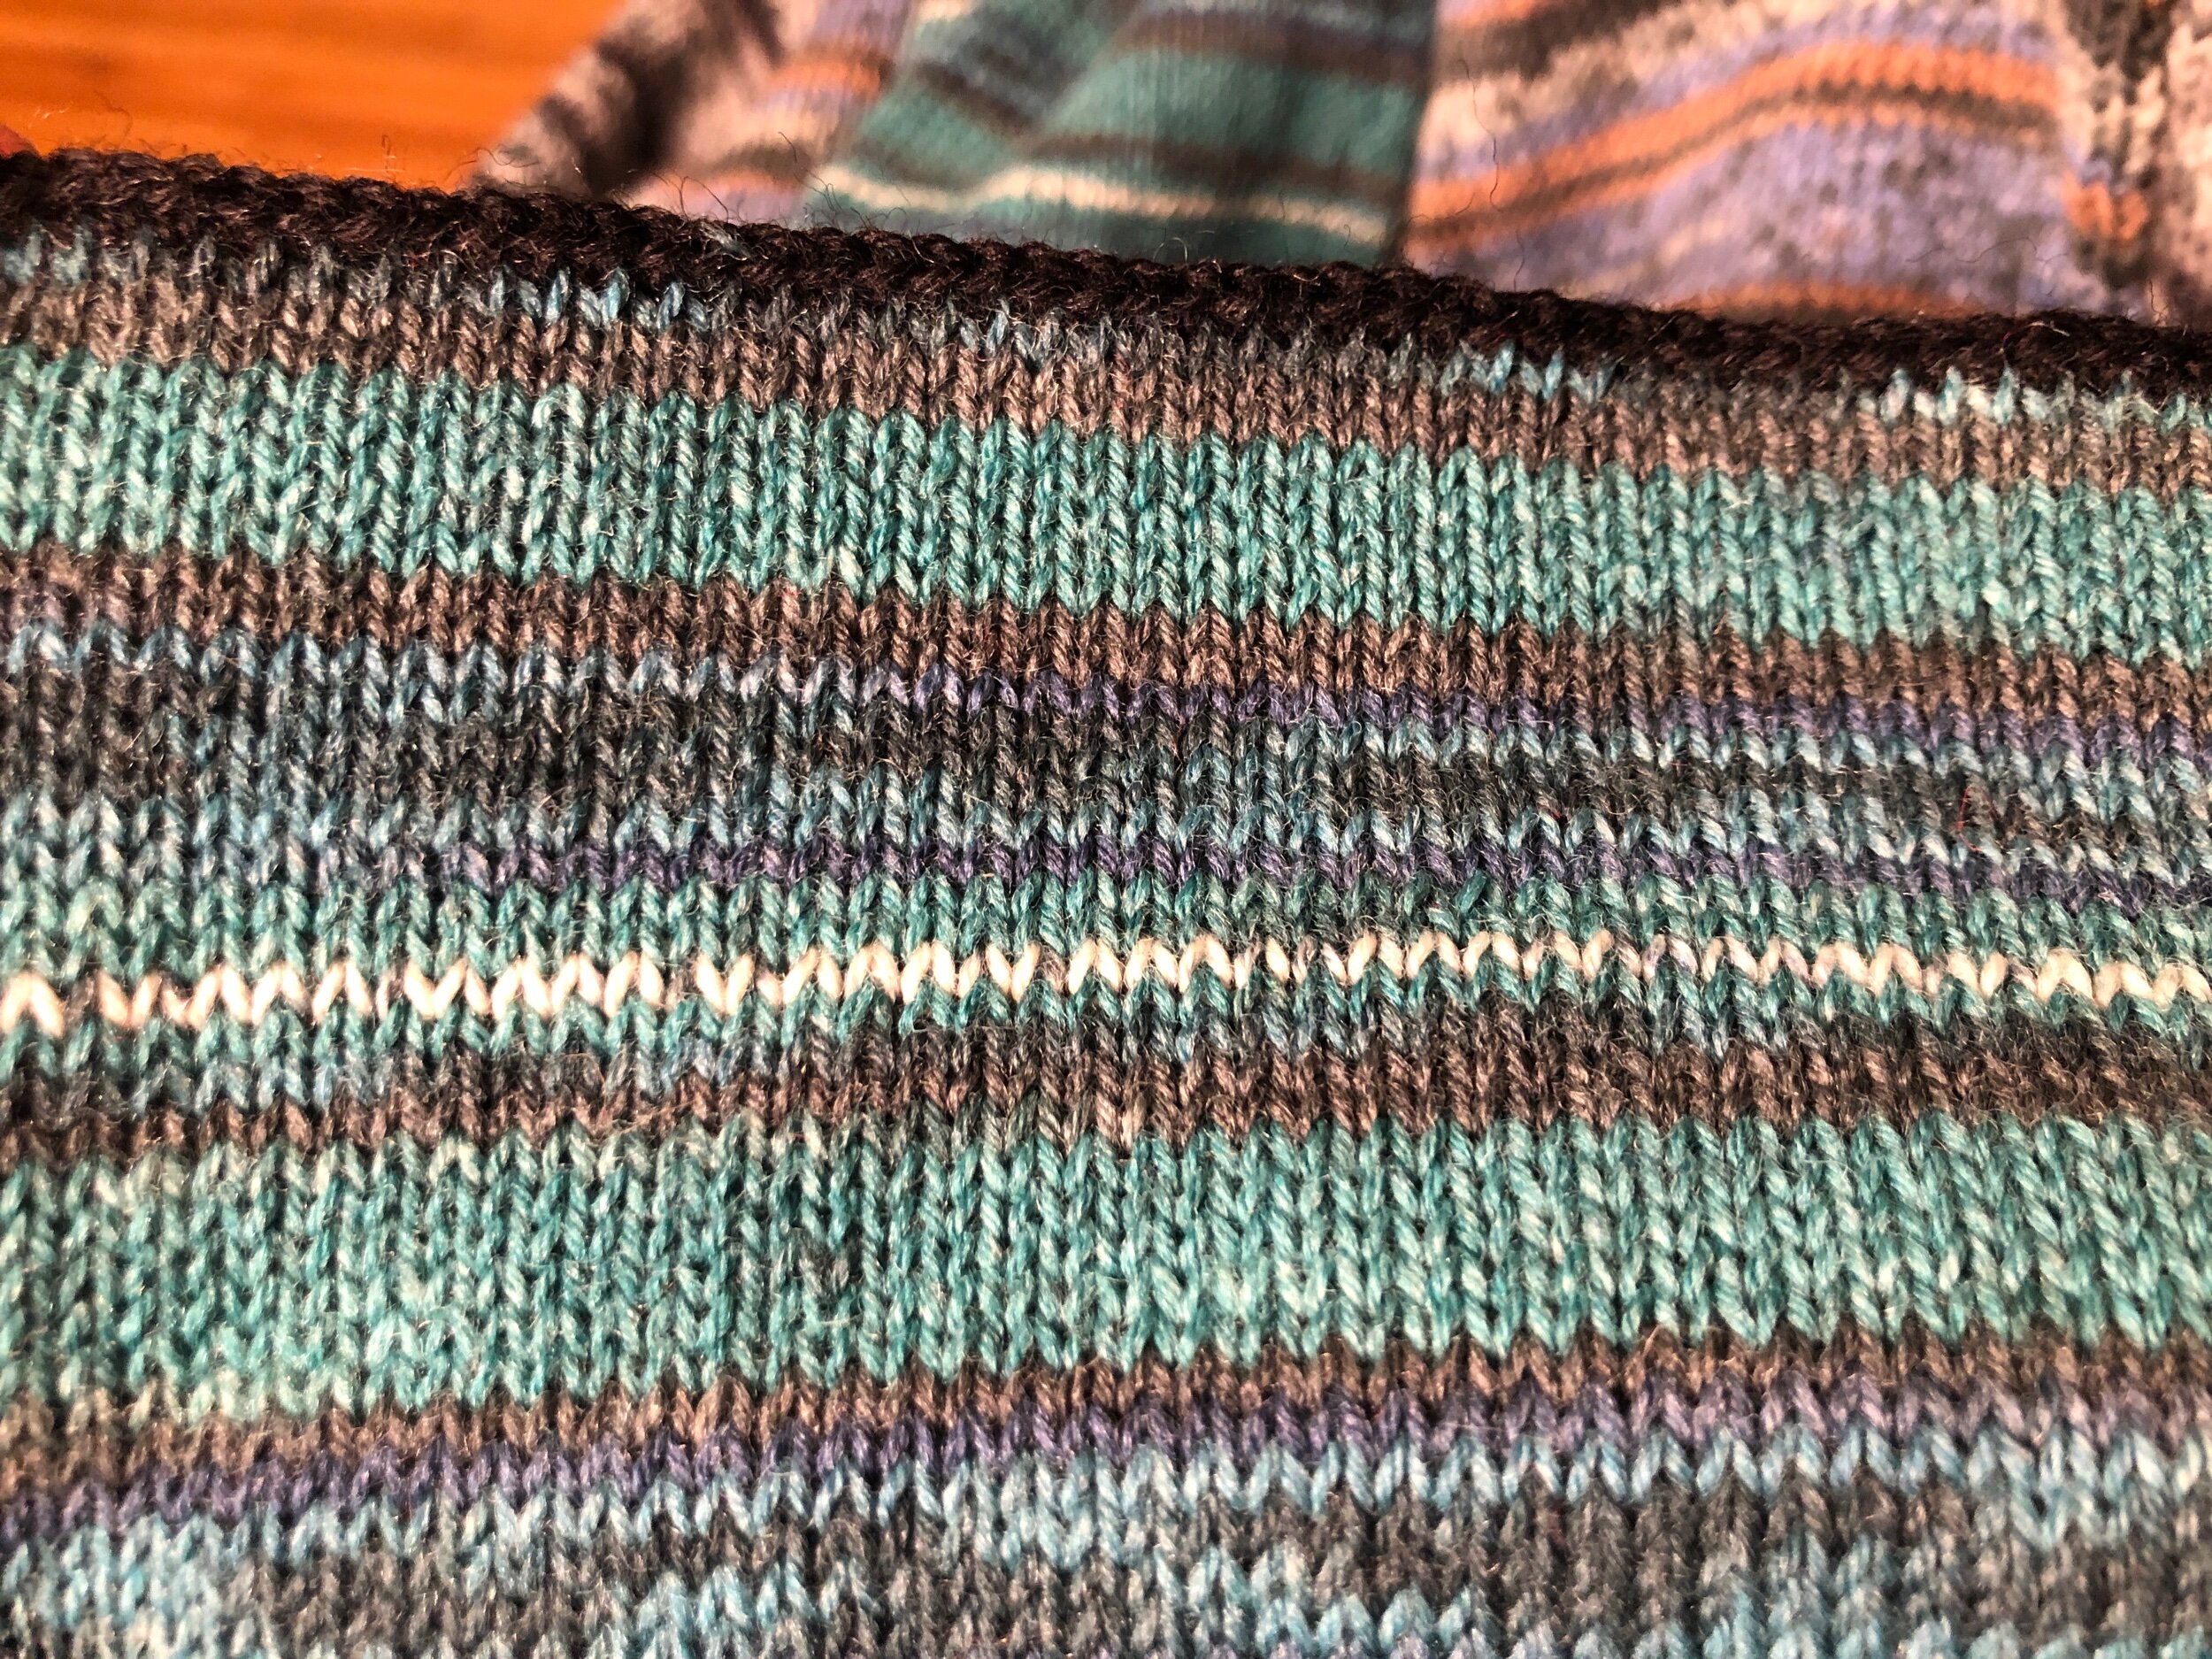
Below is the sample I worked up to test the join - this is just a sample using scrap and extra leftover sock yarn and does not show the actual blanket colors.

LEFT IMAGE: Two dropped stitch join. RIGHT IMAGE: One dropped stitch join. Decided to do TWO dropped stitch join.


WHY DID I CHOOSE TO DROP STITCHES VERUS SIMPLY REMOVING NEEDLES DURING TUBE CREATING?
I created these tubes without any needles removed so that when the drop stitch done manually later allows there to be plenty of yarn in the drop stitch to do the join. If the dropped stitch row has minimal yarn to join then the ‘braided’ look of this join wouldn’t be as robust (why I dropped two stitches over one).
Its ideal to work the tube with as many needles as that cylinder uses to allow the knitted fabric to be as wide as possible (wider tubes mean less tubes needing to be worked). However it is still possible in a future blanket to remove needles in larger quantities to I feel the next blanket version I will instead of making the finished tube with the scrap yarn I will maybe instead not work some needles into it so perhaps on the 96 cylinder I will instead use all of those needles except for maybe three or four uneven number at the halfway point on both sides of the cylinder then make the tube. The benefit to that would be that I wouldn’t have to worry about dropping the stitches before joining them later. Negative to that is that it would then make a very narrow bit of yarn (the bars) - why one would need to remove more than one needle on each halfway point when making tubes.
I’ve now finished blanket construction of the 9 tubes. The blanket is currently 48”x54”


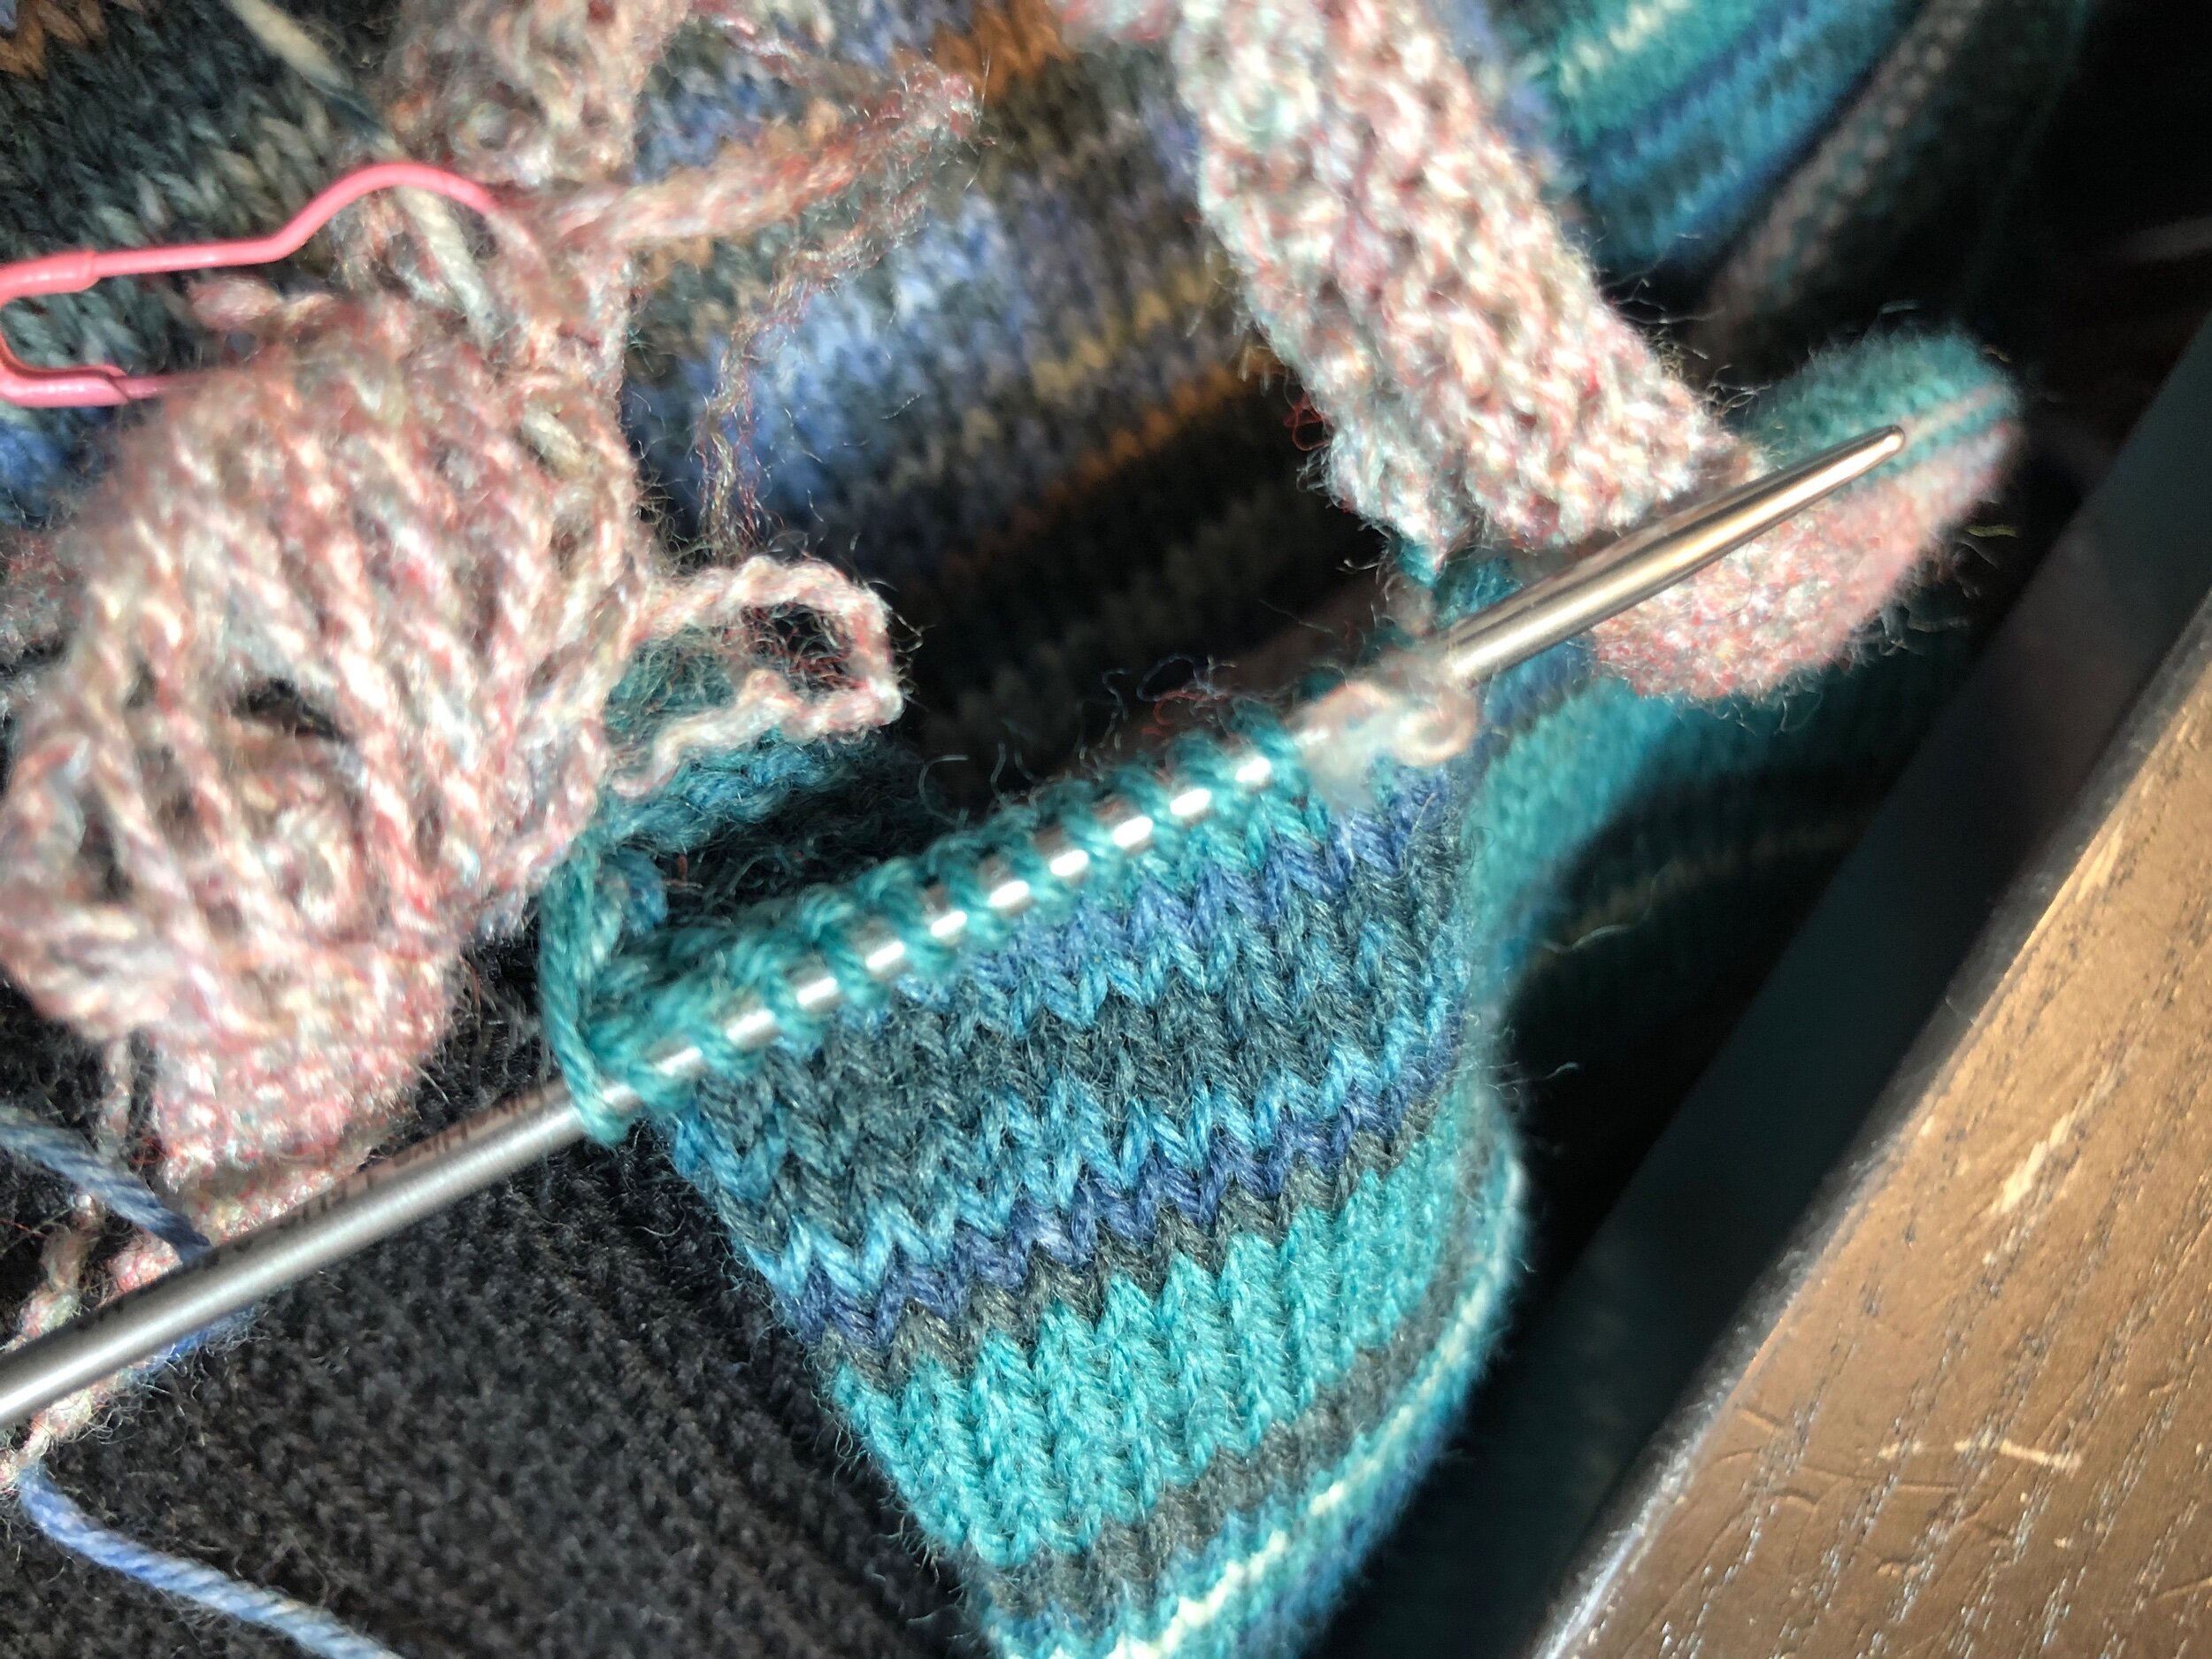

Now we address the open ended tubes one tube at a time. I felt to proceed I needed to remove the scrap yarn so to do this I am using a 2.5mm circular sock needle to pickup the live stitches as I removed the scrap. I undid half the tube to ensure the yarn tail was in the correct position in order to approach the technique I will use to close the tube.


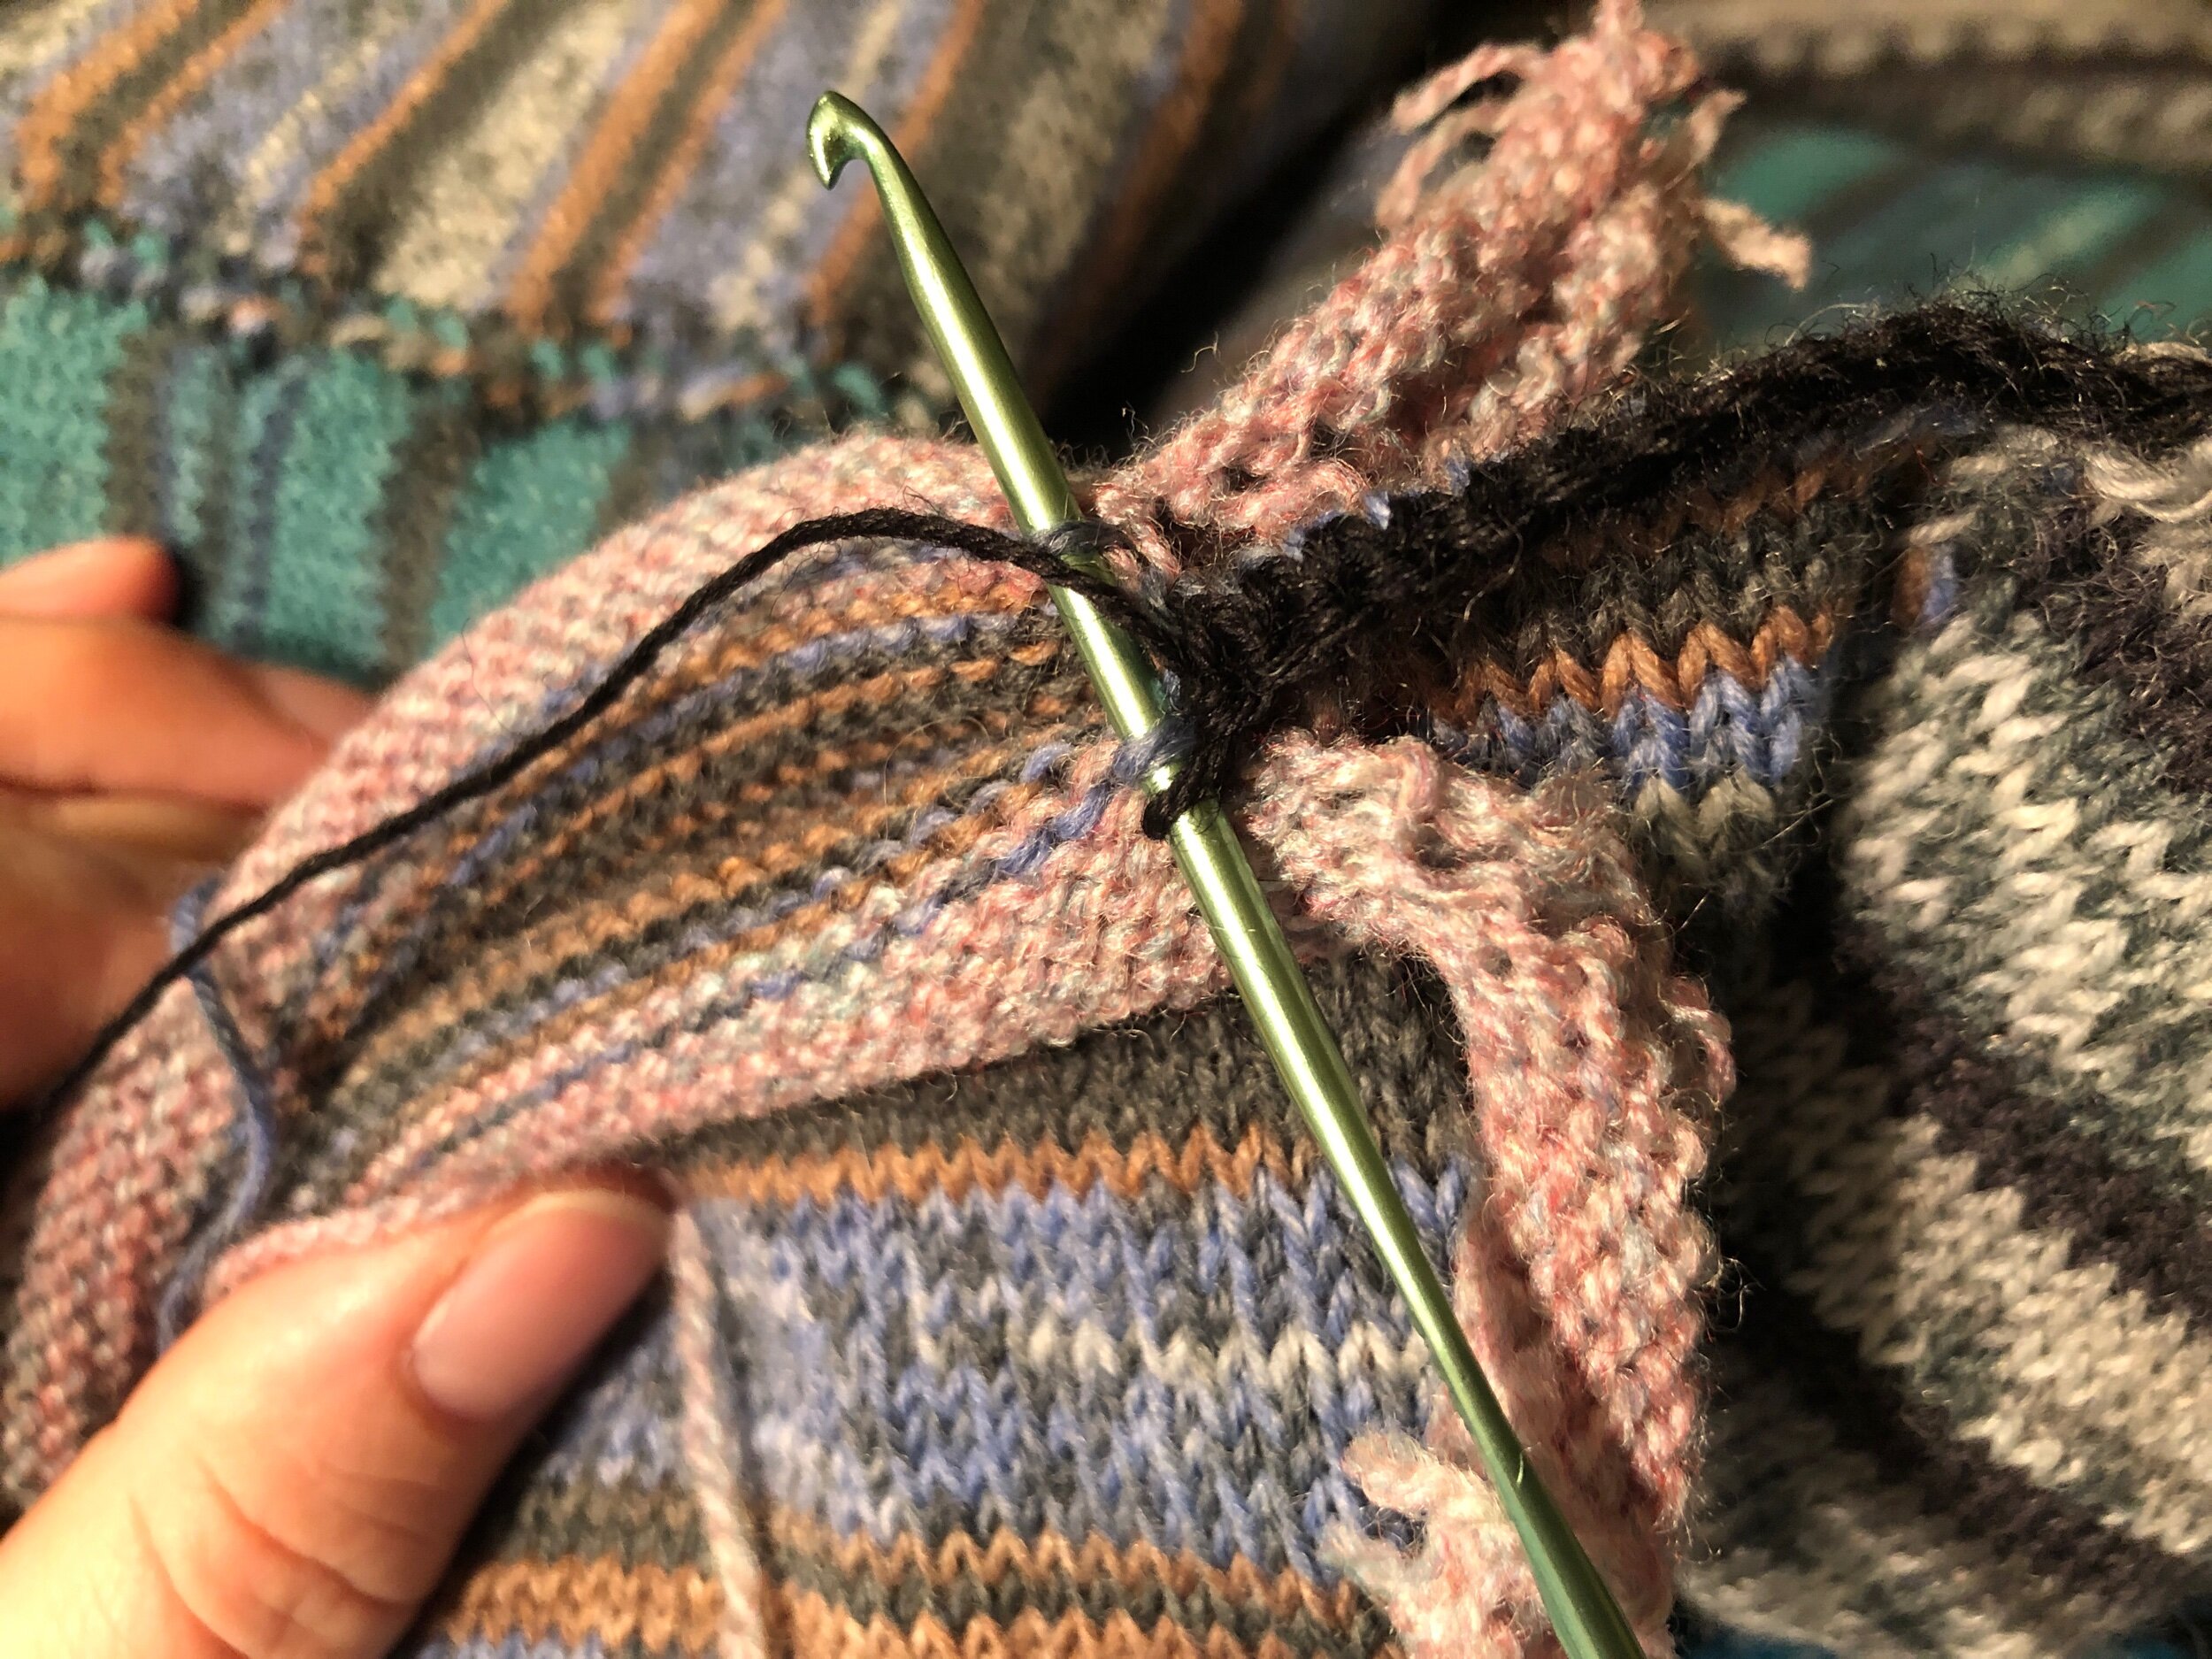
I really liked the idea of a smooth or rolled edge fabric on each blanket edge (like the left and right sides) however after kitchenering the first twice panels on the far right l decided to use the chain stitch closure instead (see part two of the seaming method above).
The bonus to using the crochet hook (3.25mm) is one doesn’t need to prep the live stitches - just catch them and cut the scrap as you go.
After working all the way across on one end I then chose to leave this edging just on the top (and later bottom) edge of the blanket (not the sides). To add further decoration I started this pattern which I repeated: single crochet, single crochet, double, double, in one stitch three treble crochets, double, double, single crochet, single crochet.


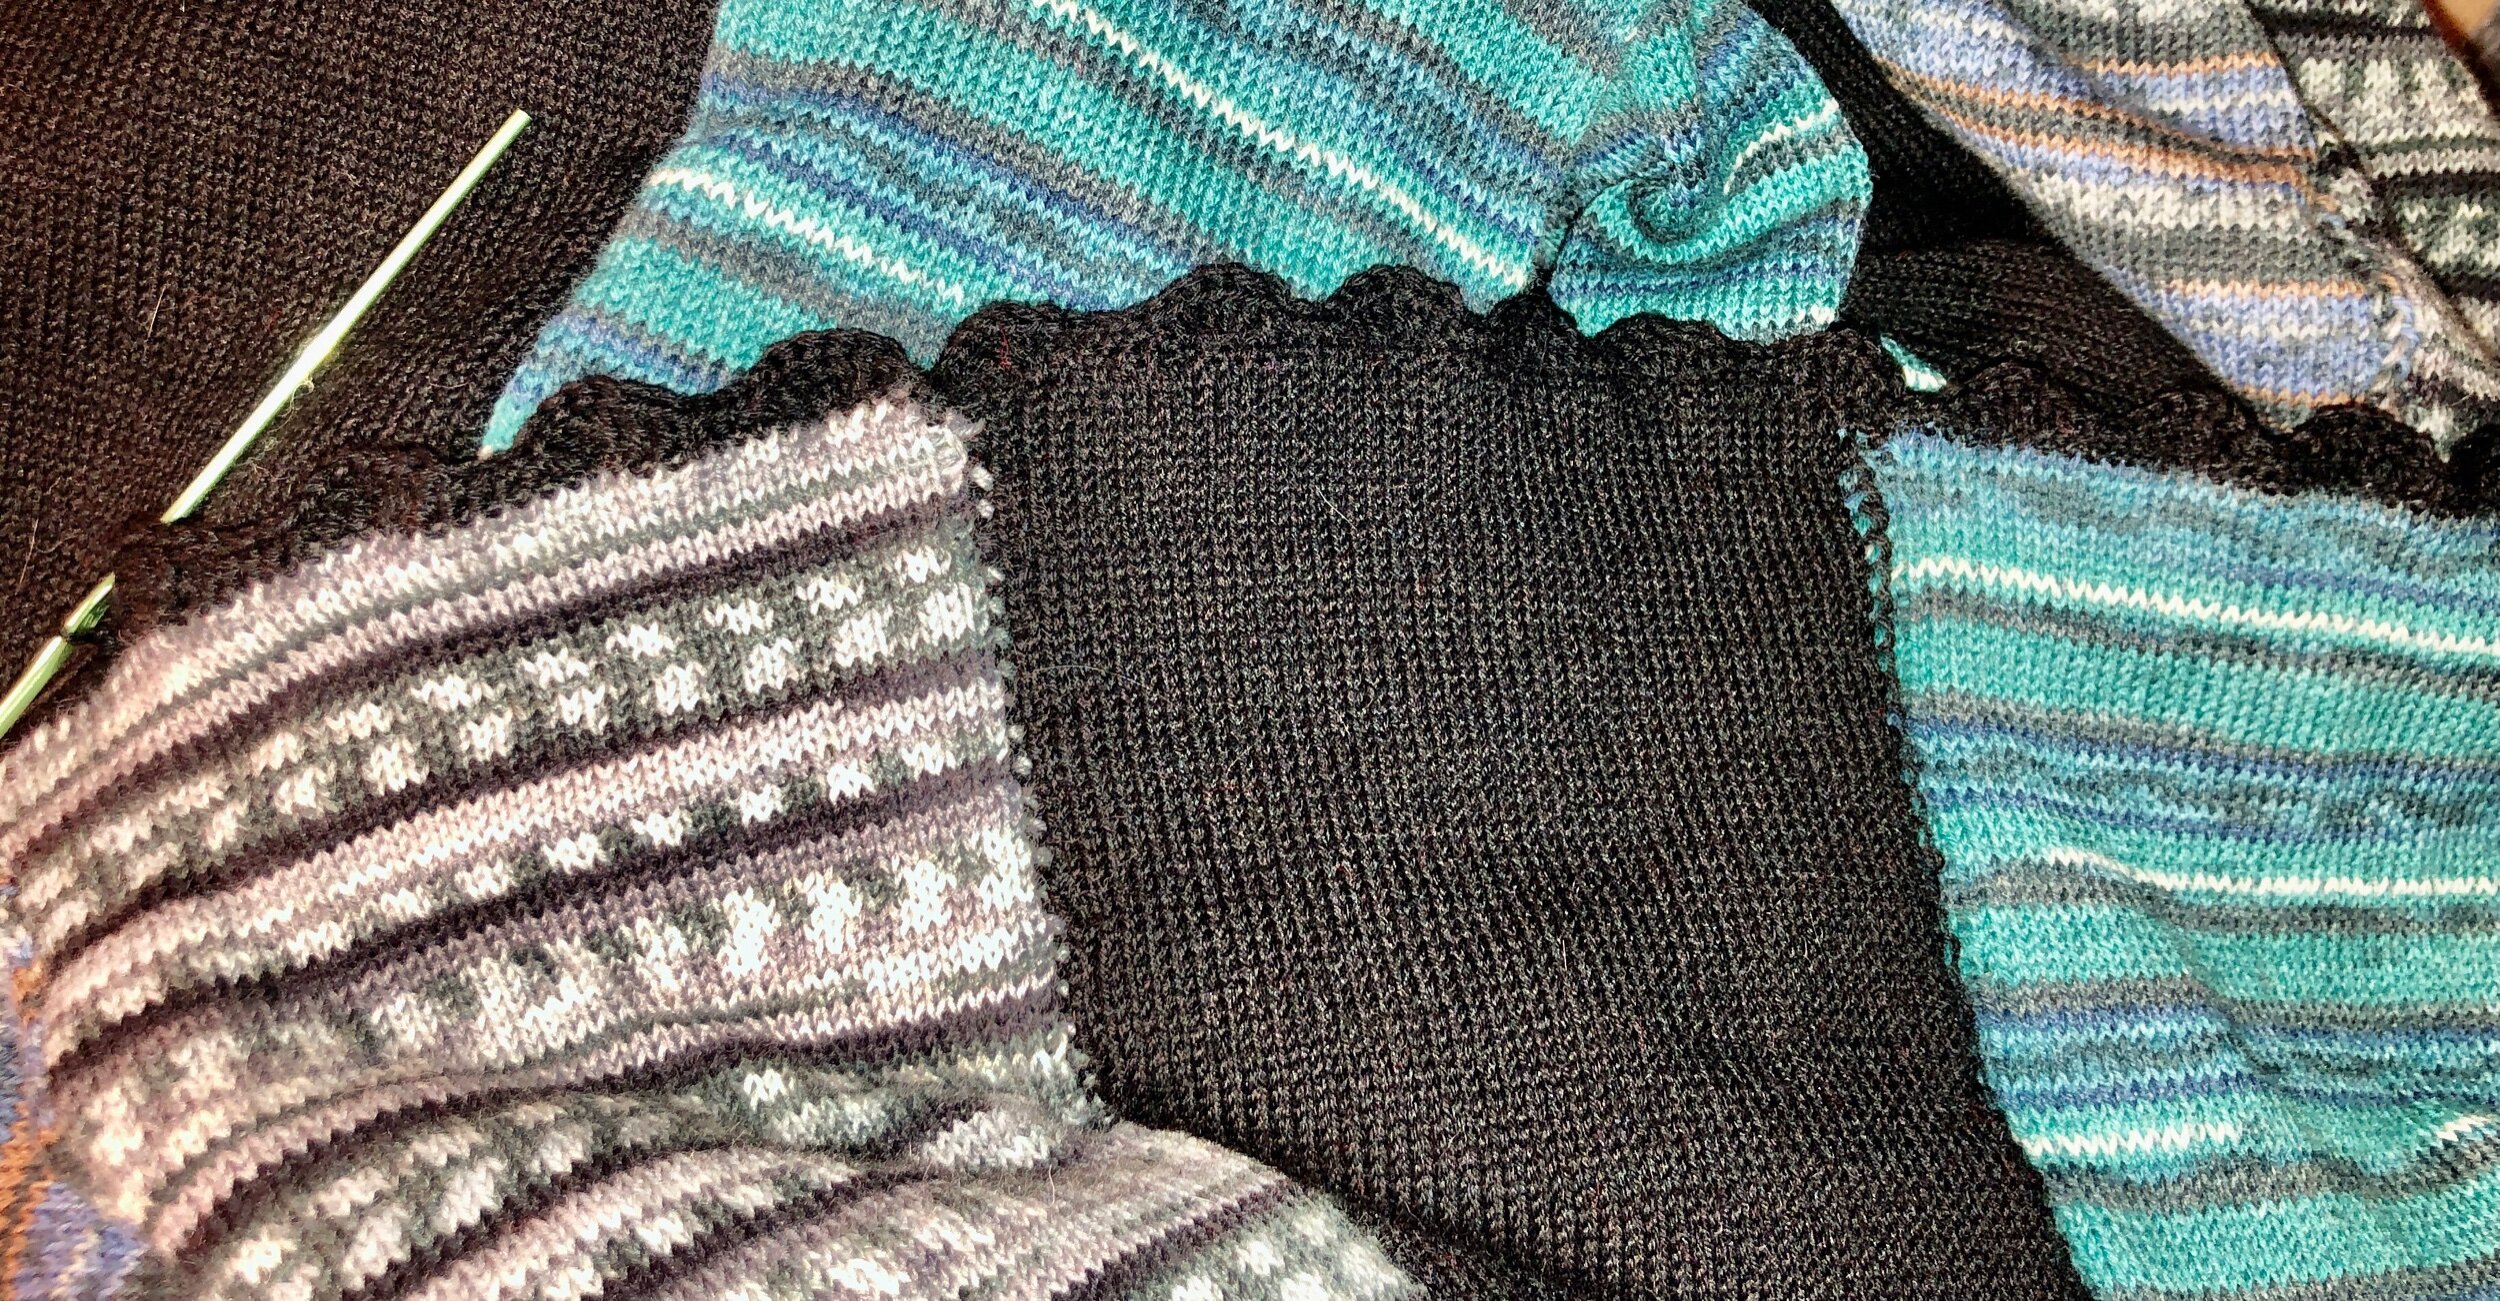
I’m now done one complete end of the blanket, seamed with a crochet single crochet stitch with a decorative second row in a wavy pattern. I’ve just begun the other end of the blanket and completed one of the nine remaining tubes to seam. Using the crochet hook to capture the live ends is way faster and a nice flat edge. Running a decorative second row looks great and helps balance and bridge the joined tubes.
November 25, 2020 - This blanket ended up weighing just over 4lbs (1905grams) - due to its size and double sided tube construction. I feel this is still a manageable size and weight to still be able to be machine washed and dried however the next version will be made flat not in the round, or if in the round, using a lacy pattern to reduce yarn weight.
It’s lovely on ones lap when watching TV for a cozy hug. I’m looking forward to gifting it.