
CSM Start Page 2
Supplies and CSM Prep
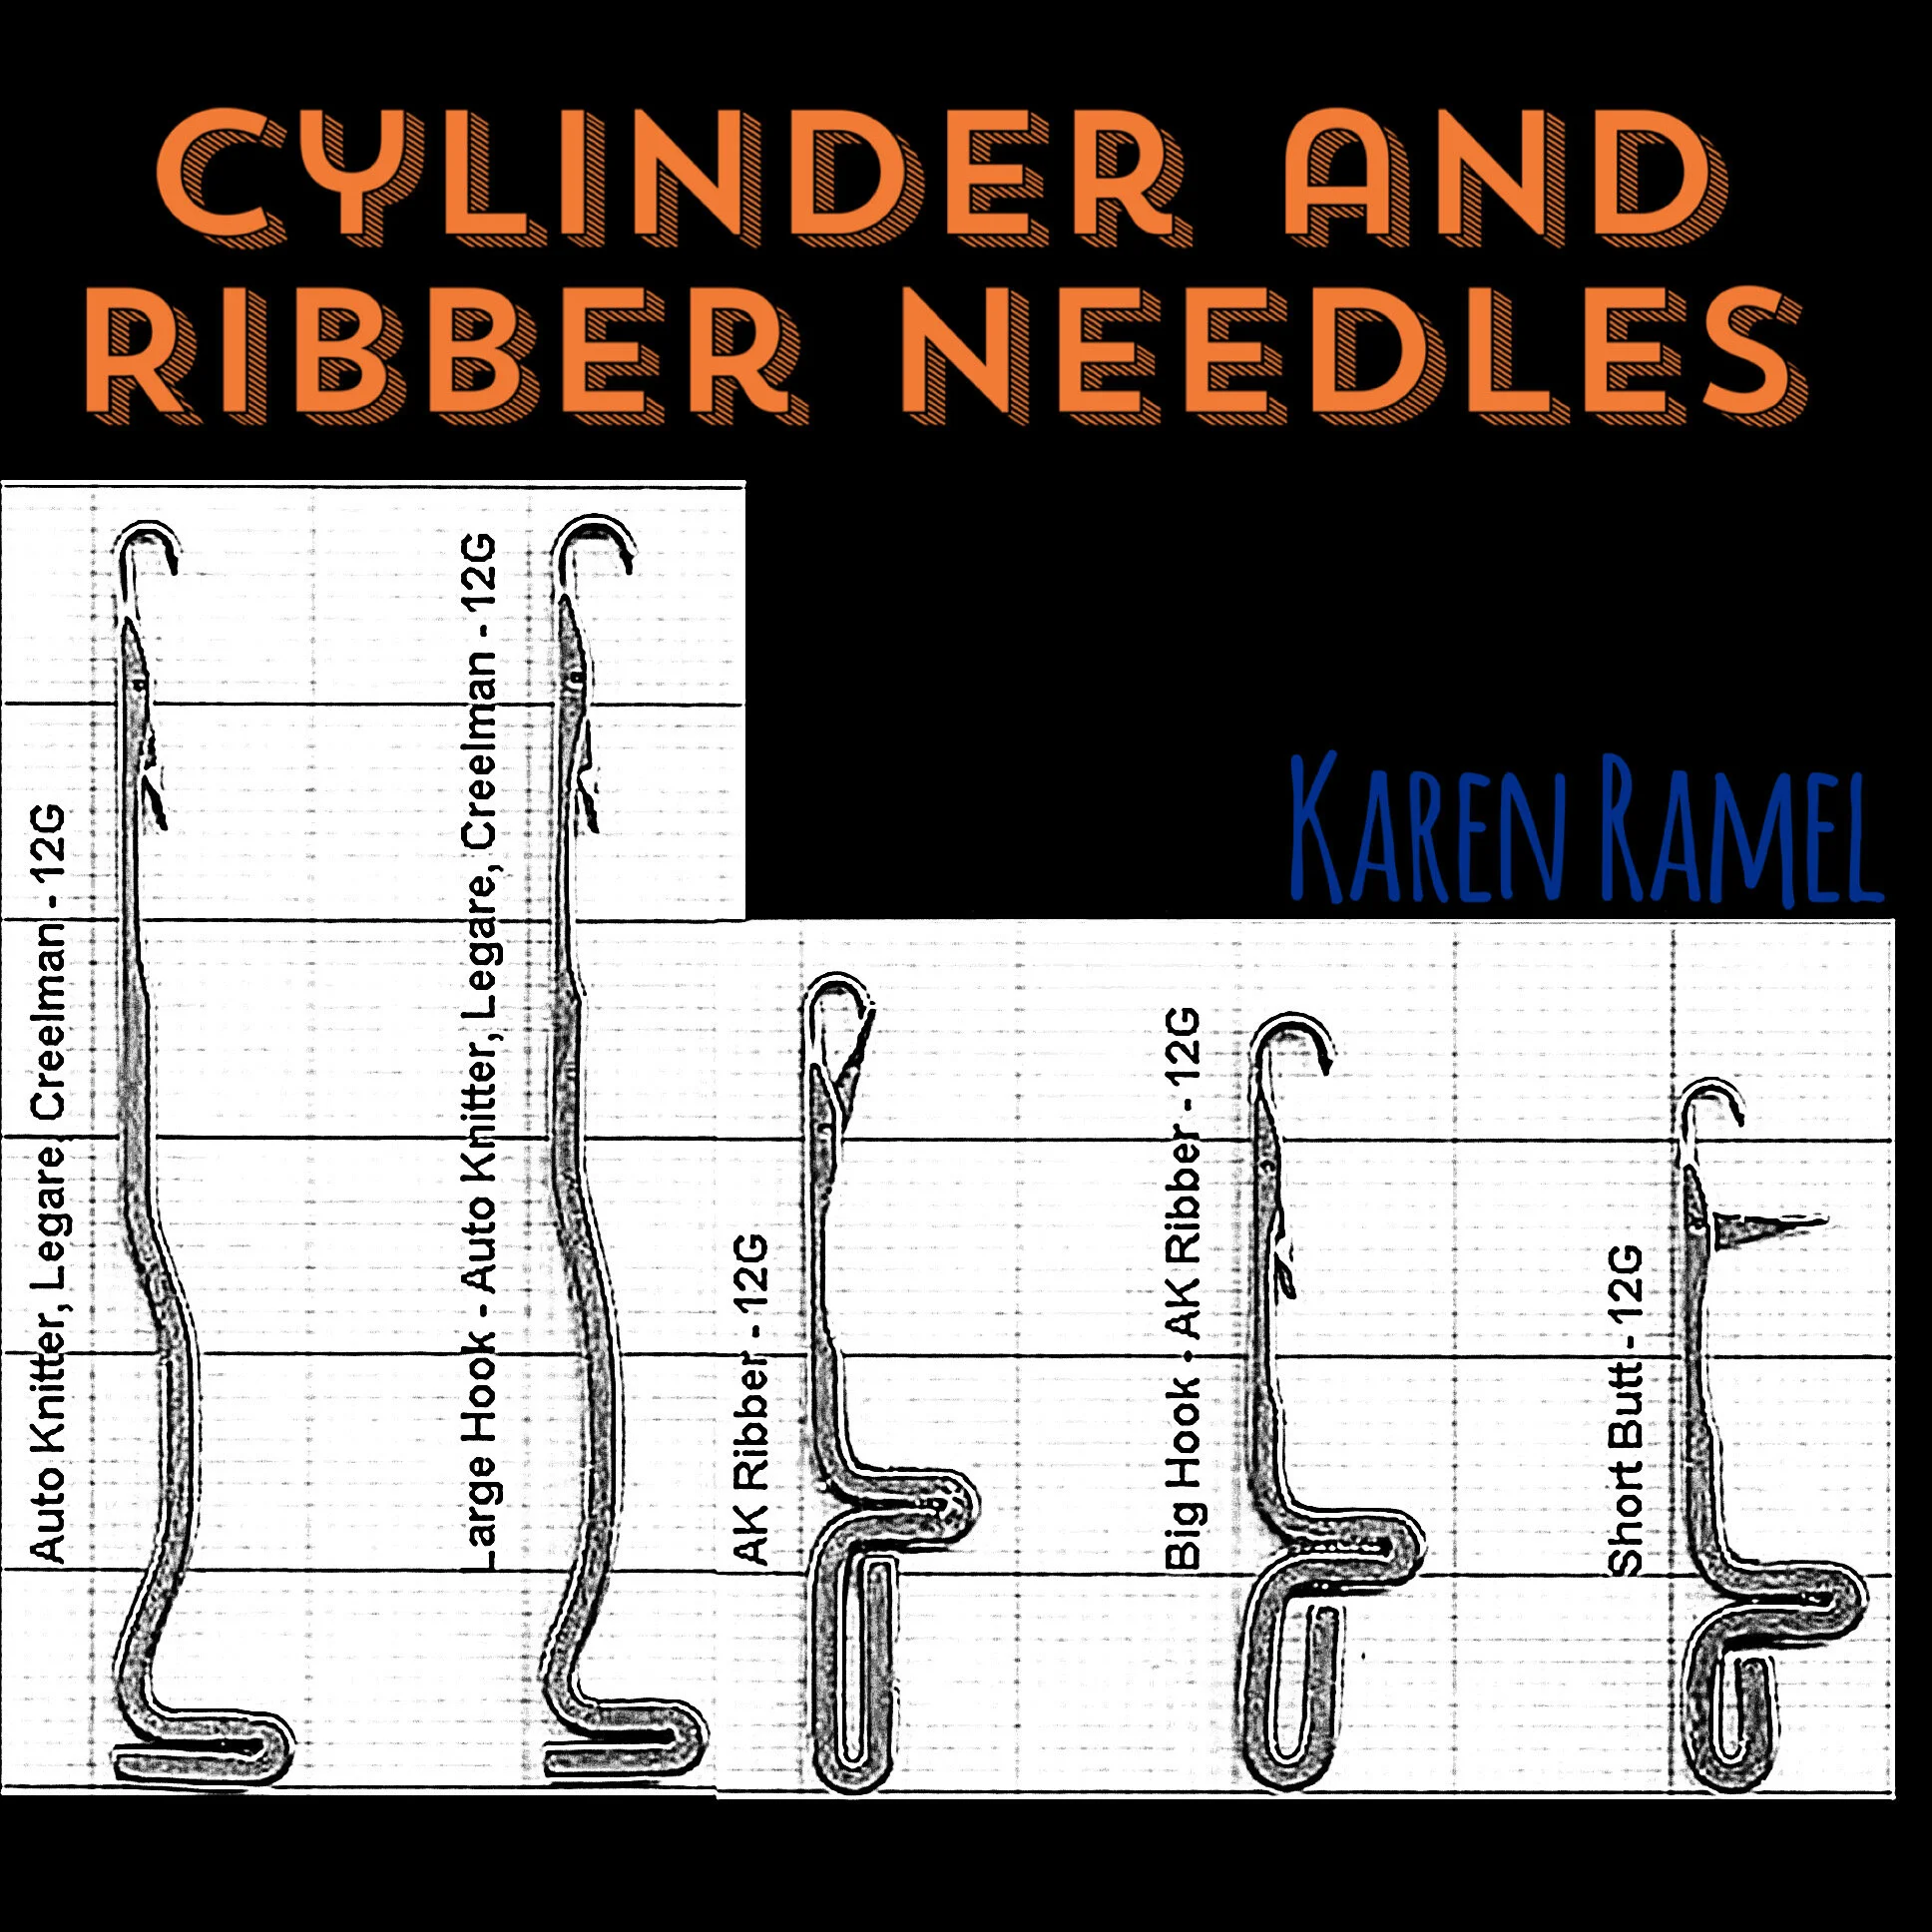
CYLINDER and Ribber needles
SUPPLY: Ensure you have extra cylinder and ribber needles. It’s best to consider new needles if yours are rusted or show wear. Needles that are undamaged and new will behave in a more successful way. These can be purchased from a variety of sellers see SUPPLIERS *Note the main supplier of a vast array of needles is Angoravalley.com/Pat Fly.
STORAGE: People commonly store used/working needles in metal mint containers. My preference and recommendation is to use air/water tight plastic containers so that a bit of oil can be added and the container closed (when shook you can ensure oil gets into the latch!) see SUPPLIES I LIKE.
Ensure to get the correct needles for YOUR machine.
Legare needles are compatible with Auto Knitter / NZAK / Quiknit /most Creelmans / Master Machine / Harmony / Golden Fleece / Home Profit / Verdun all use the same regular style hook 12 gauge ribber and cylinder needles. When in doubt email the supplier to ask! Reference: angoravalley.com
Its very IMPORTANT TO only SLOWLY AND MINIMALLY turn the crankwheel handle with needles Installed if machine is not threaded with yarn!!!
You mIght not notice but your yarn carrier will clash and bash Misbehaving latches resulting in broken needles you might be frustrated at later!
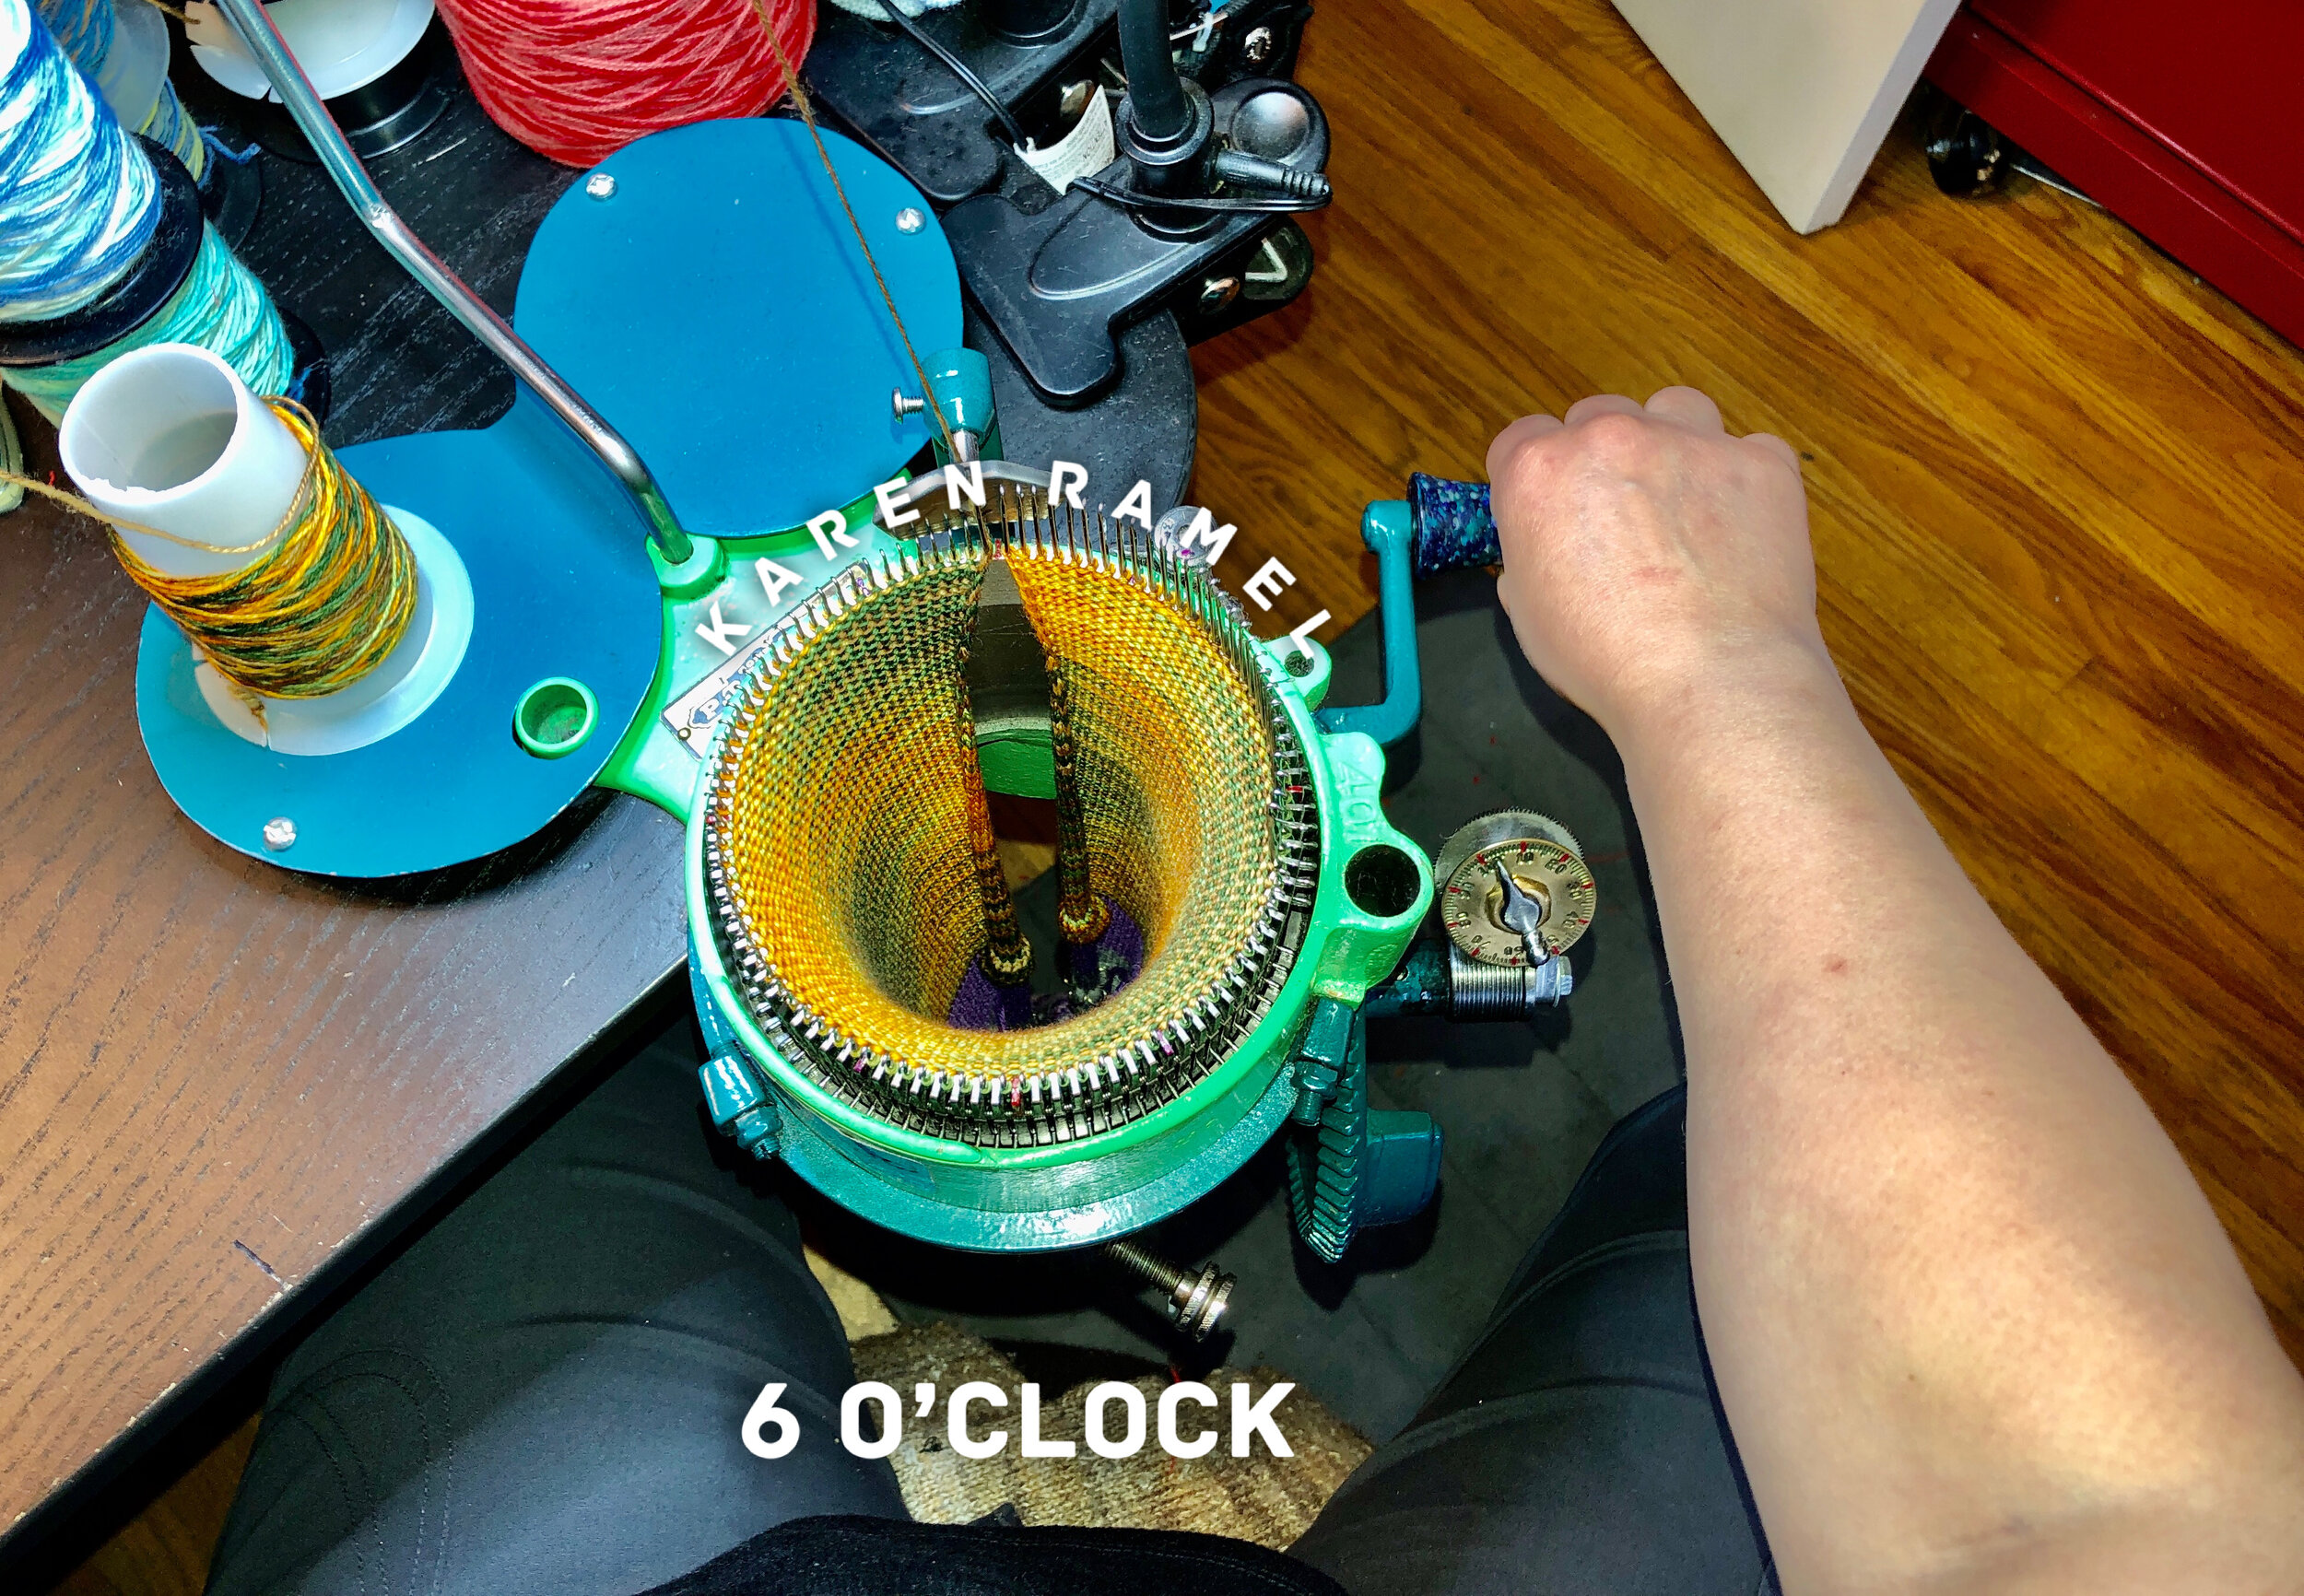
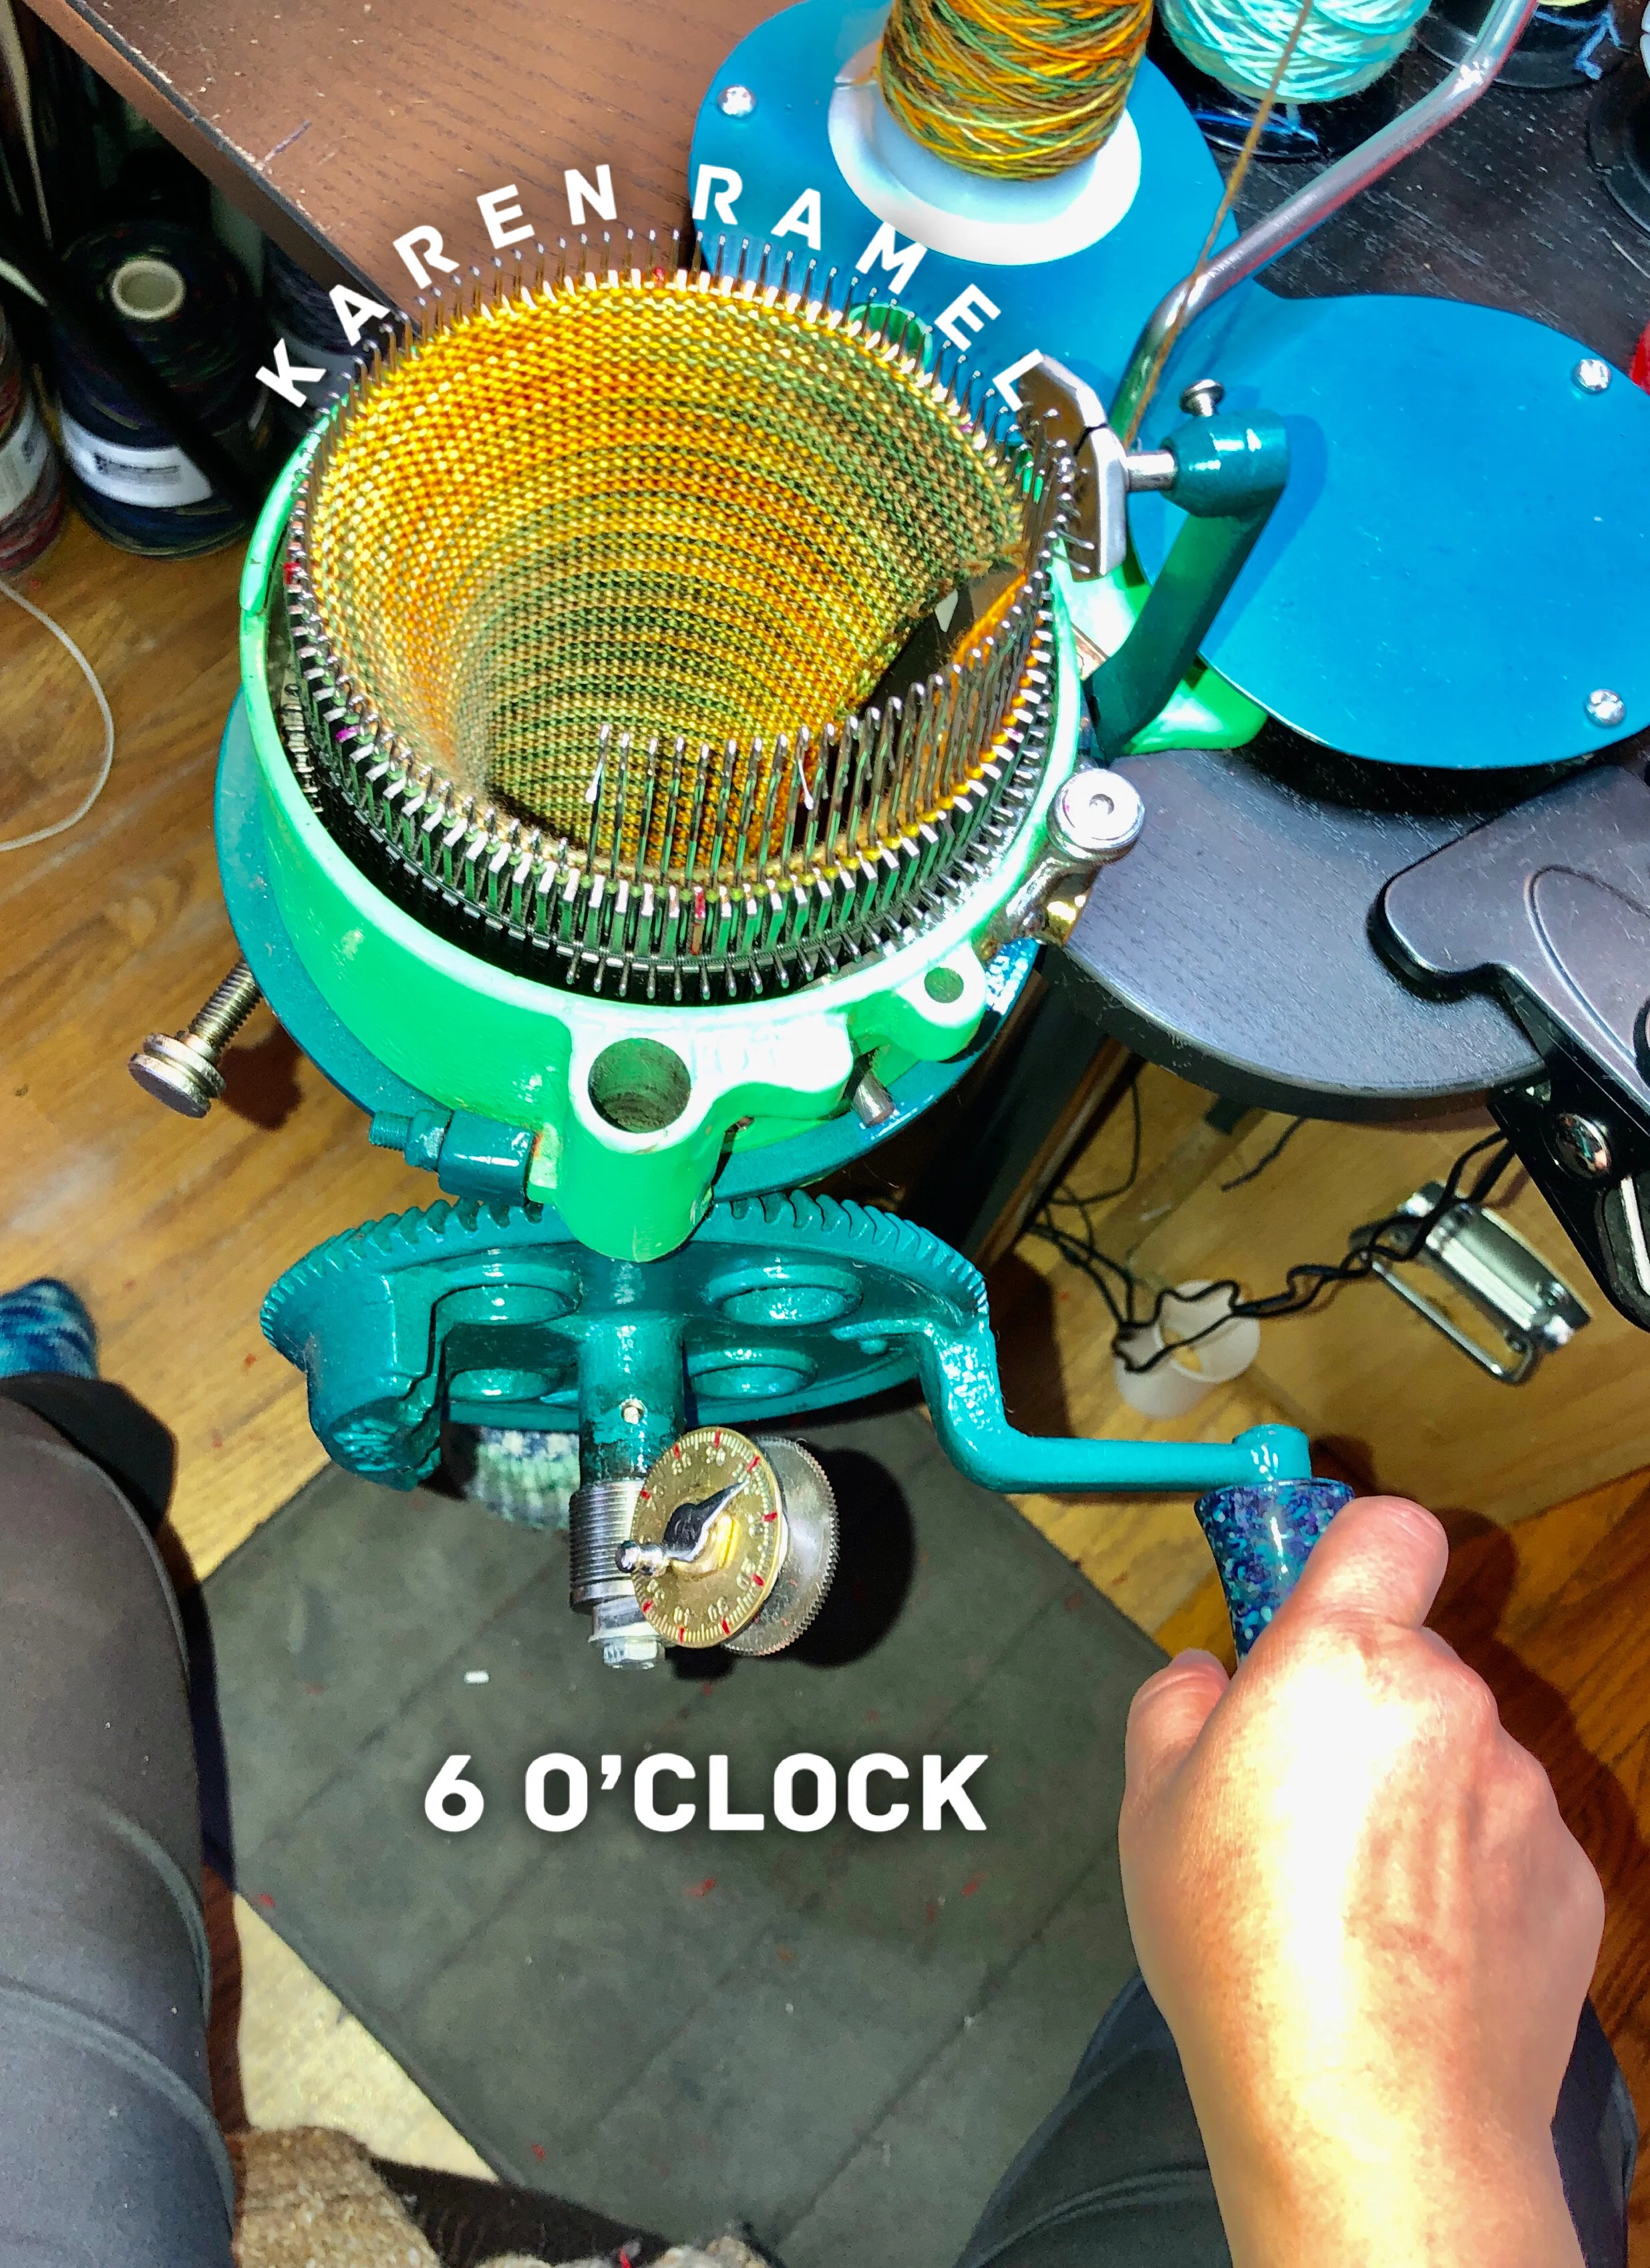
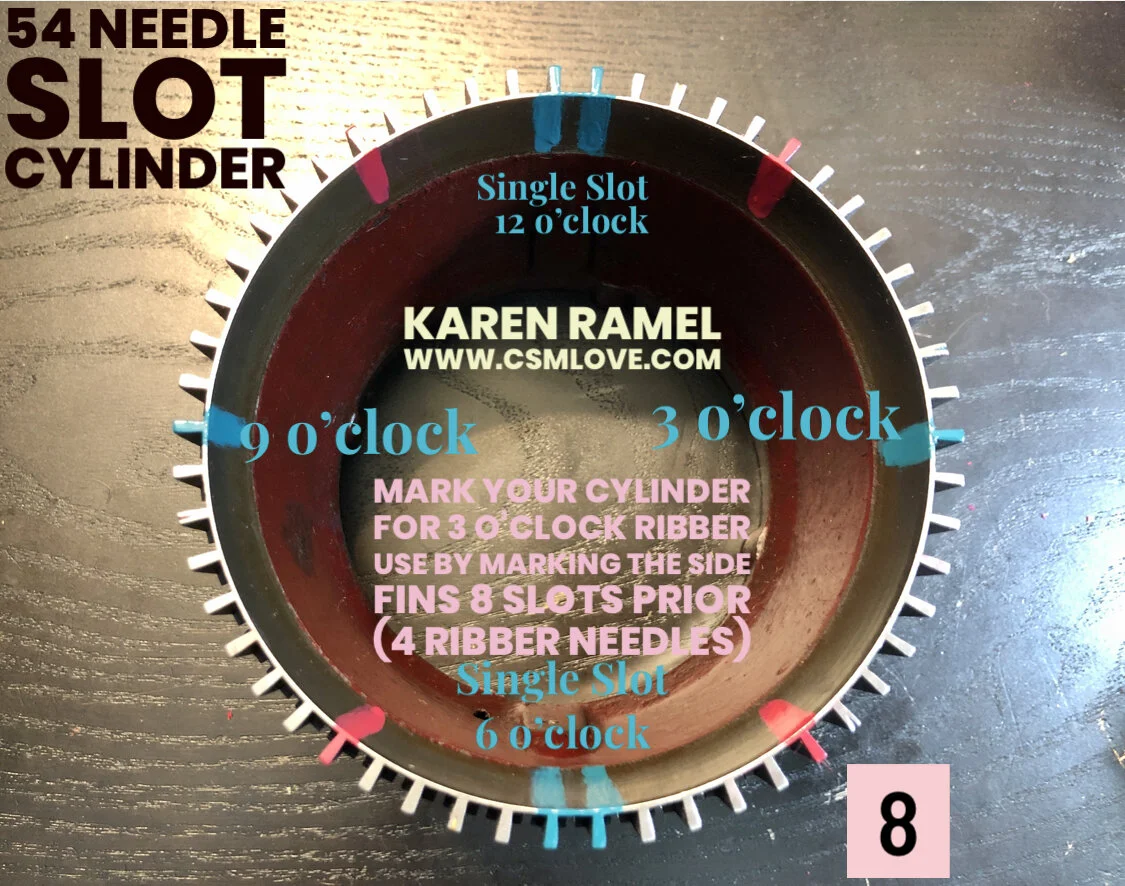
mark your cylinders/Ribber Dials
Where you mark your cylinders depends greatly on what angle you will sit at your machine. This is why I added the table section first.
If you have a used machine and the cylinders came marked note that those marks might not be at the right angle for you. Let’s look at these two photo examples.

Where you choose to start your socks is certainly your preference however it’s standard to start at 3pm.
How you sit at your machine dictates where you’ve put your custom marks and how close to 6pm you mark your cylinder in relation to the ribber stop on the inside of the cylinder dictates by alignment of the ribber and ribber dial - whether your first ribber needle best aligns with the first or second slot after 3pm.
Don’t worry - you can mark your cylinders with nail polish and easily remove those marks if you need to. Be sure to apply nail polish on an oil-free surface with primer coat of a flat white color if needed to better enhance the mark. Count the needle slots not the fins (top corner pieces).
If you haven’t yet, please stop here and take the time to mark your cylinders for best success. While you might not be making socks yet, reference points are essential for any item made on the machine.
I’ve already noted to orient 6 o’clock very near the area the ribber accessory connects to on the inside of the cylinder which is also a bonus as it ensures you have easy clearance to add heel/toe weights to your work later without it being in the way (this will make more sense later).

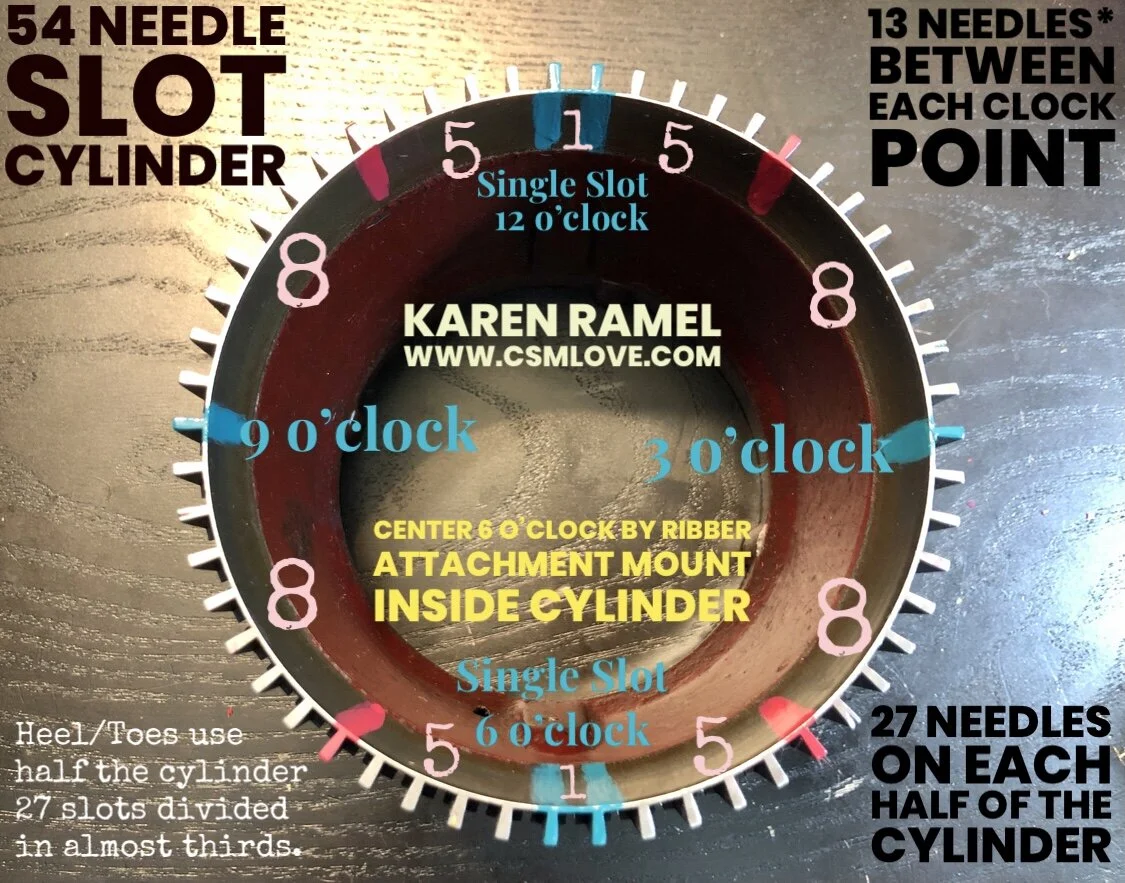
MARKING YOUR CYLINDER FOR RIBBER USE: Having success on your machine with reproducing exact items means starting/ending or activating/de-activating the ribber at precise same points. As the ribber when activated or deactivated (in work or taken out of work) requires the distance of FOUR ribber needles, and because many (including myself) start the ribber at the 3 o’clock point on the cylinder, why not mark the cylinder for that? Here’s how that looks. :)


Now let’s look at this next image. Don’t worry at first glance it seems a bit chaotic. The clock positions remain where they are on a clock but here we see the 72 needle slot cylinder where the average heel/toe marks are 6 needles on each side of the 6 o’clock position. That an easy ribber dial alignment for regular ribbing (full pitch) has an ALIGN MARK for easy confirmation of the Ribber setup alignment on my machine. The Tappet Target mark on the cylinder is 8 cylinder needle slots before 3 o’clock and is used during selvage to engage or disengage the Tappet IN/OUT switch (the Tappet requires 4 ribber or 8 cylinder slots in order to activate/deactivate ribbing). My 6 o’clock position on my machine is aligned with the ribber accessory mounted on the inside of the cylinder to make the small working space on the inside of the machine easier later with whatever Heel Forks or Weights used for Heel/Toes.
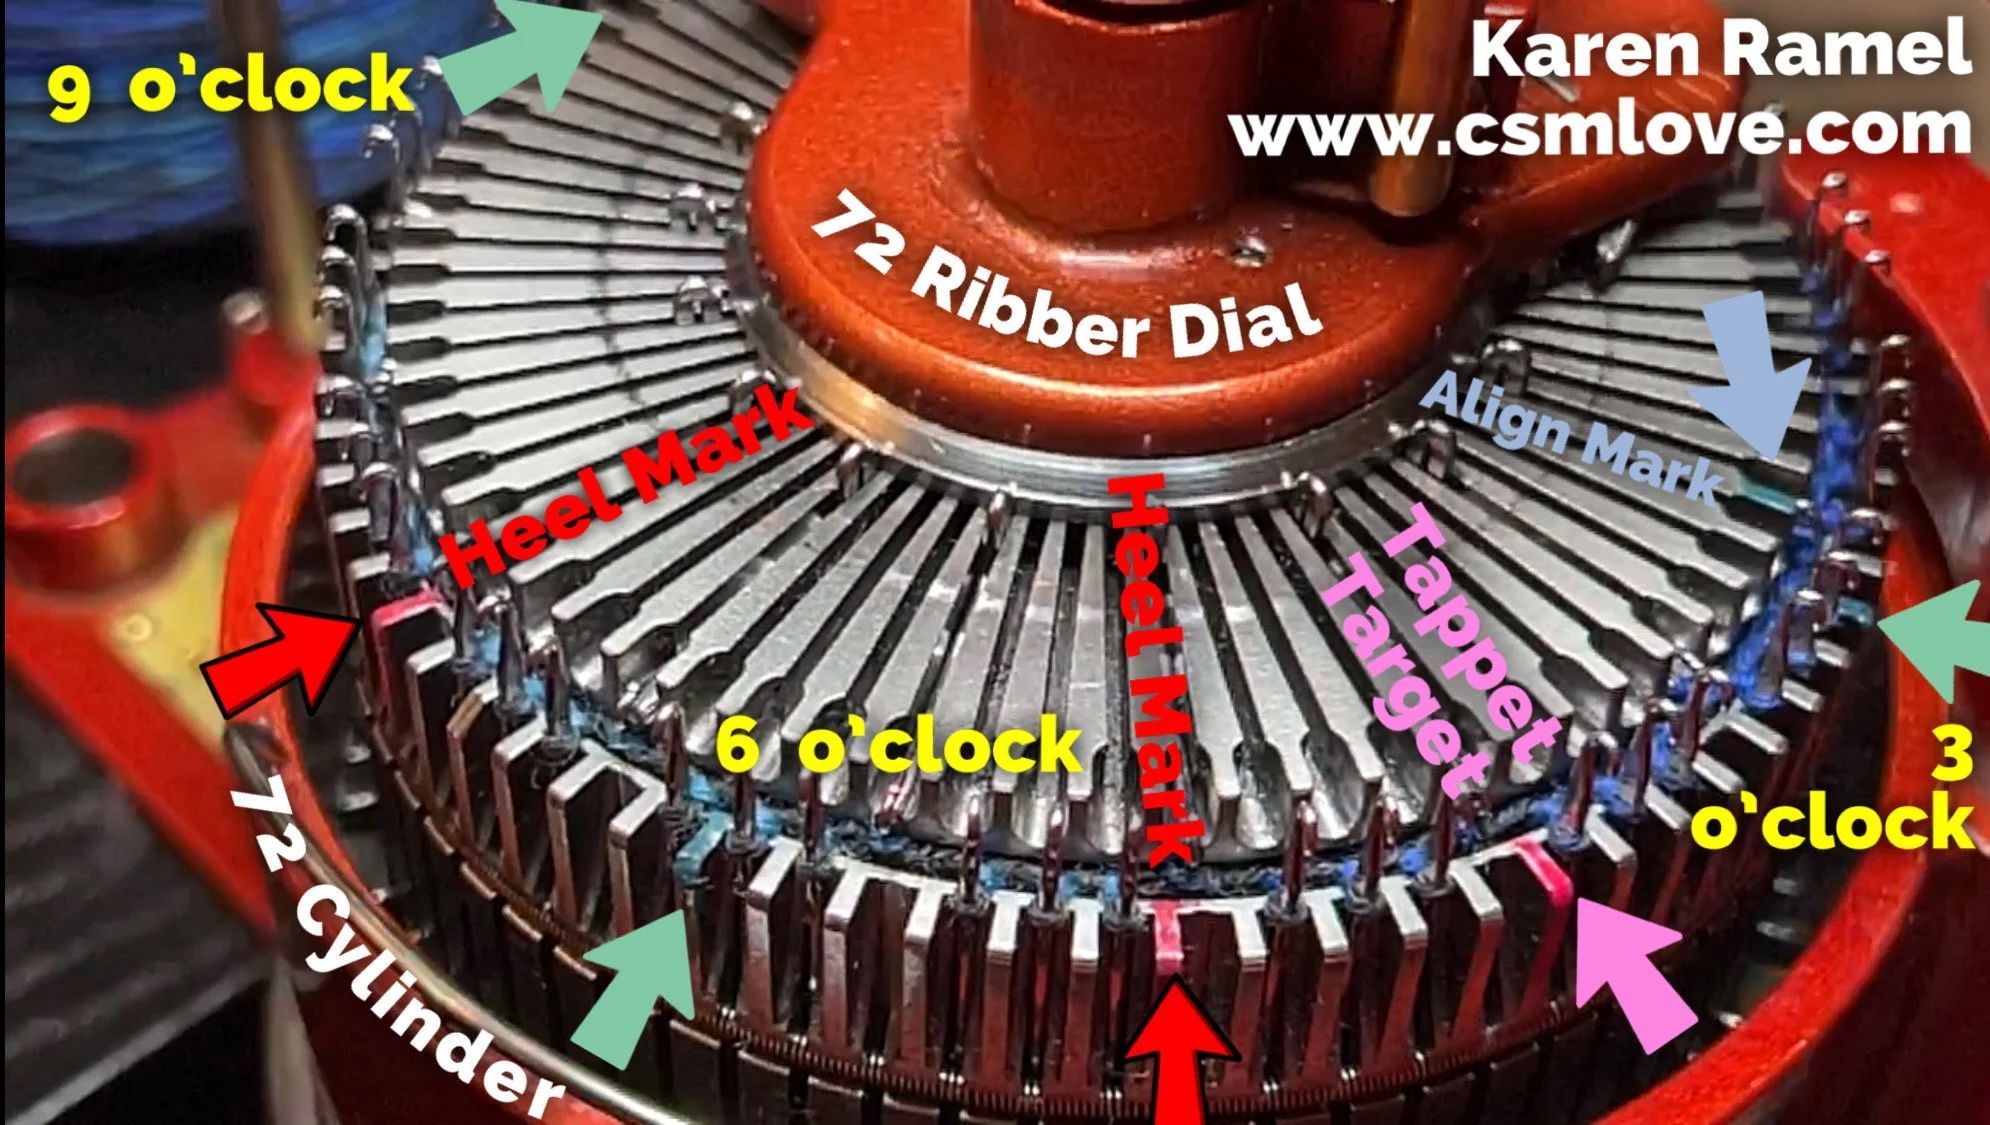
For more info on Cylinder Marking see my Feb 8/19 Blog entry. For even more info see CYLINDER MARKING on the INDEX page.

Do YOU see any issues with the photos of cylinder marking on the left? I do.
If you don’t center the ribber accessory (part on the inside of the cylinder that aligns with the ribber dial when in use) then you risk colliding with it during heel/toe making on the CSM - this is why the new image above (and more once uploaded) are BETTER. Unless centered completely away from that attachment, centering it is best for clearance when working with sock. HOWEVER the marks are correct in their distances from one another - COUNT SLOTS NOT FINS. :)
If you’re completely lost don’t worry see GET HELP page.
SeTting Up for CSM success!
Let’s review before we start.
You’ve reviewed the SUPPLIES I LIKE page and have dismantled your machine and reassembled it, becoming familiar with its parts and how they fit together. You have a manual. Your machine is functioning and complete with cylinder/ribber needles, scrap sock weight yarn on a cone, project sock weight yarn on a cone and oil for your machine. You have a buckle and stem weight with the two extra weight pucks.
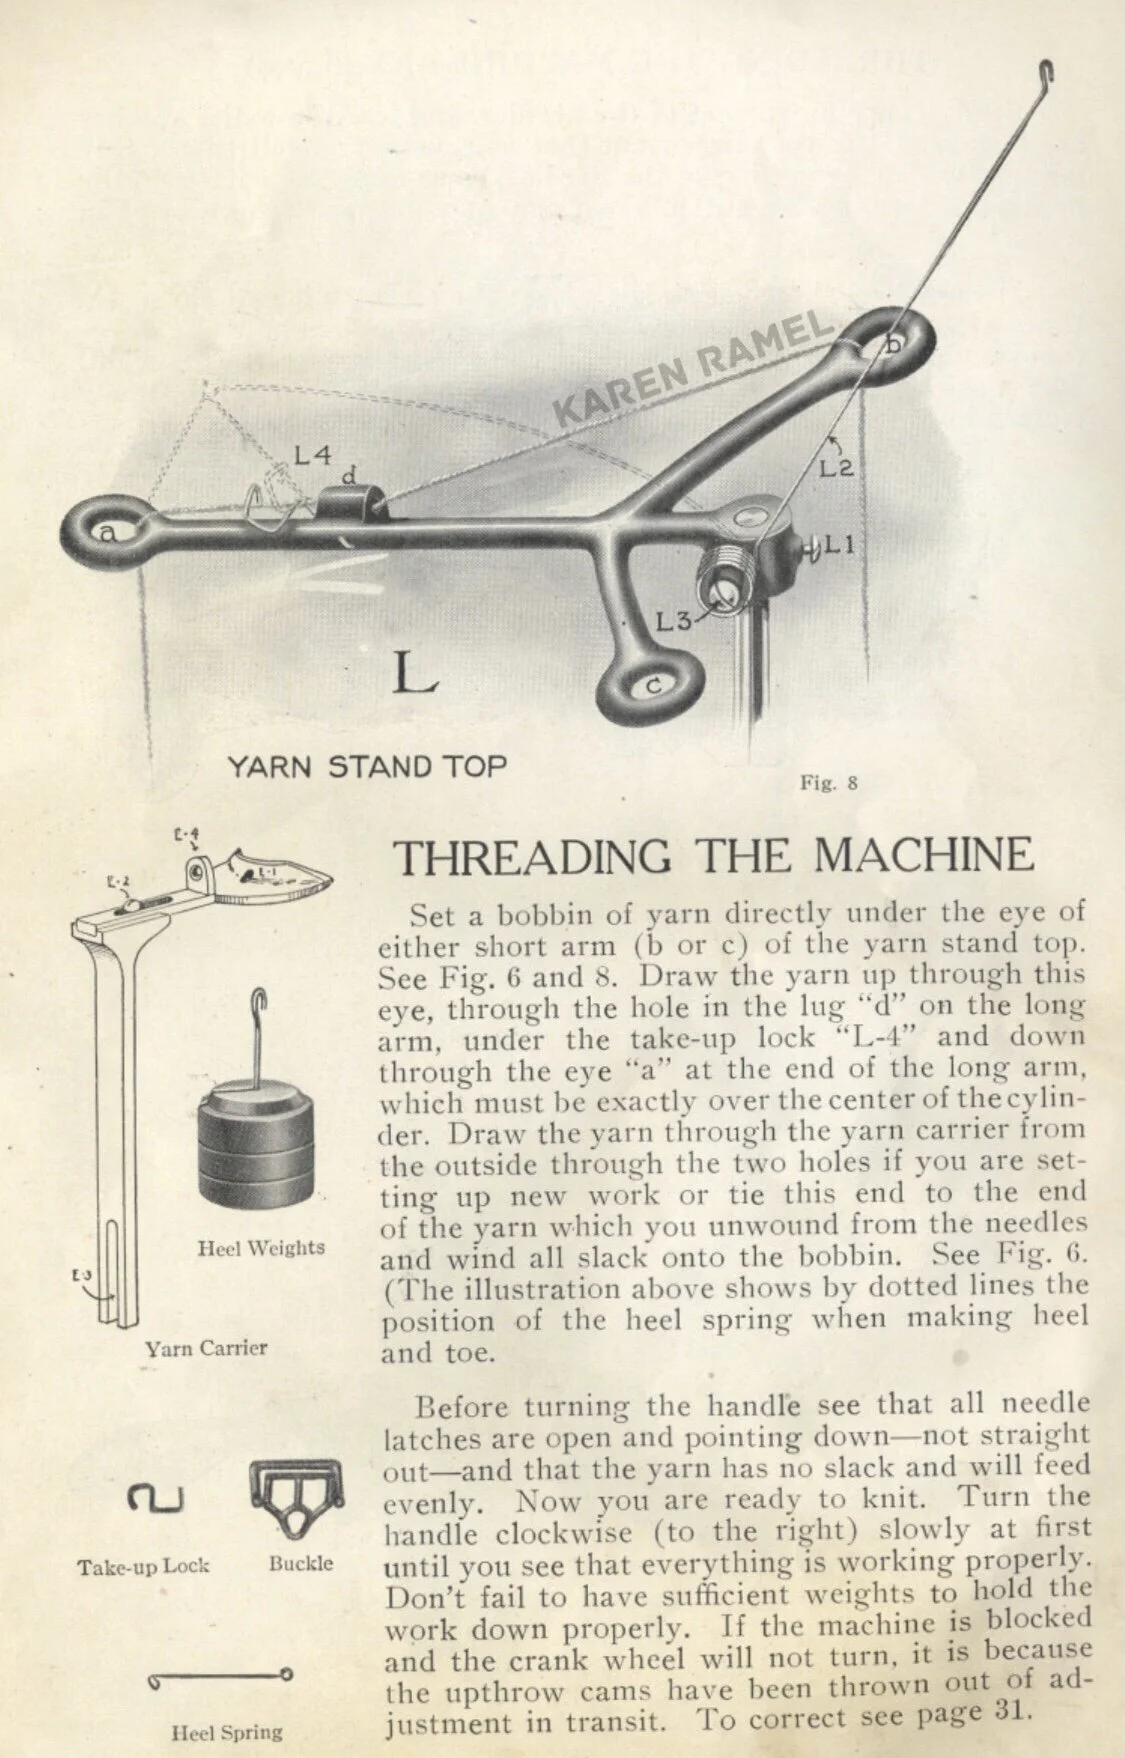
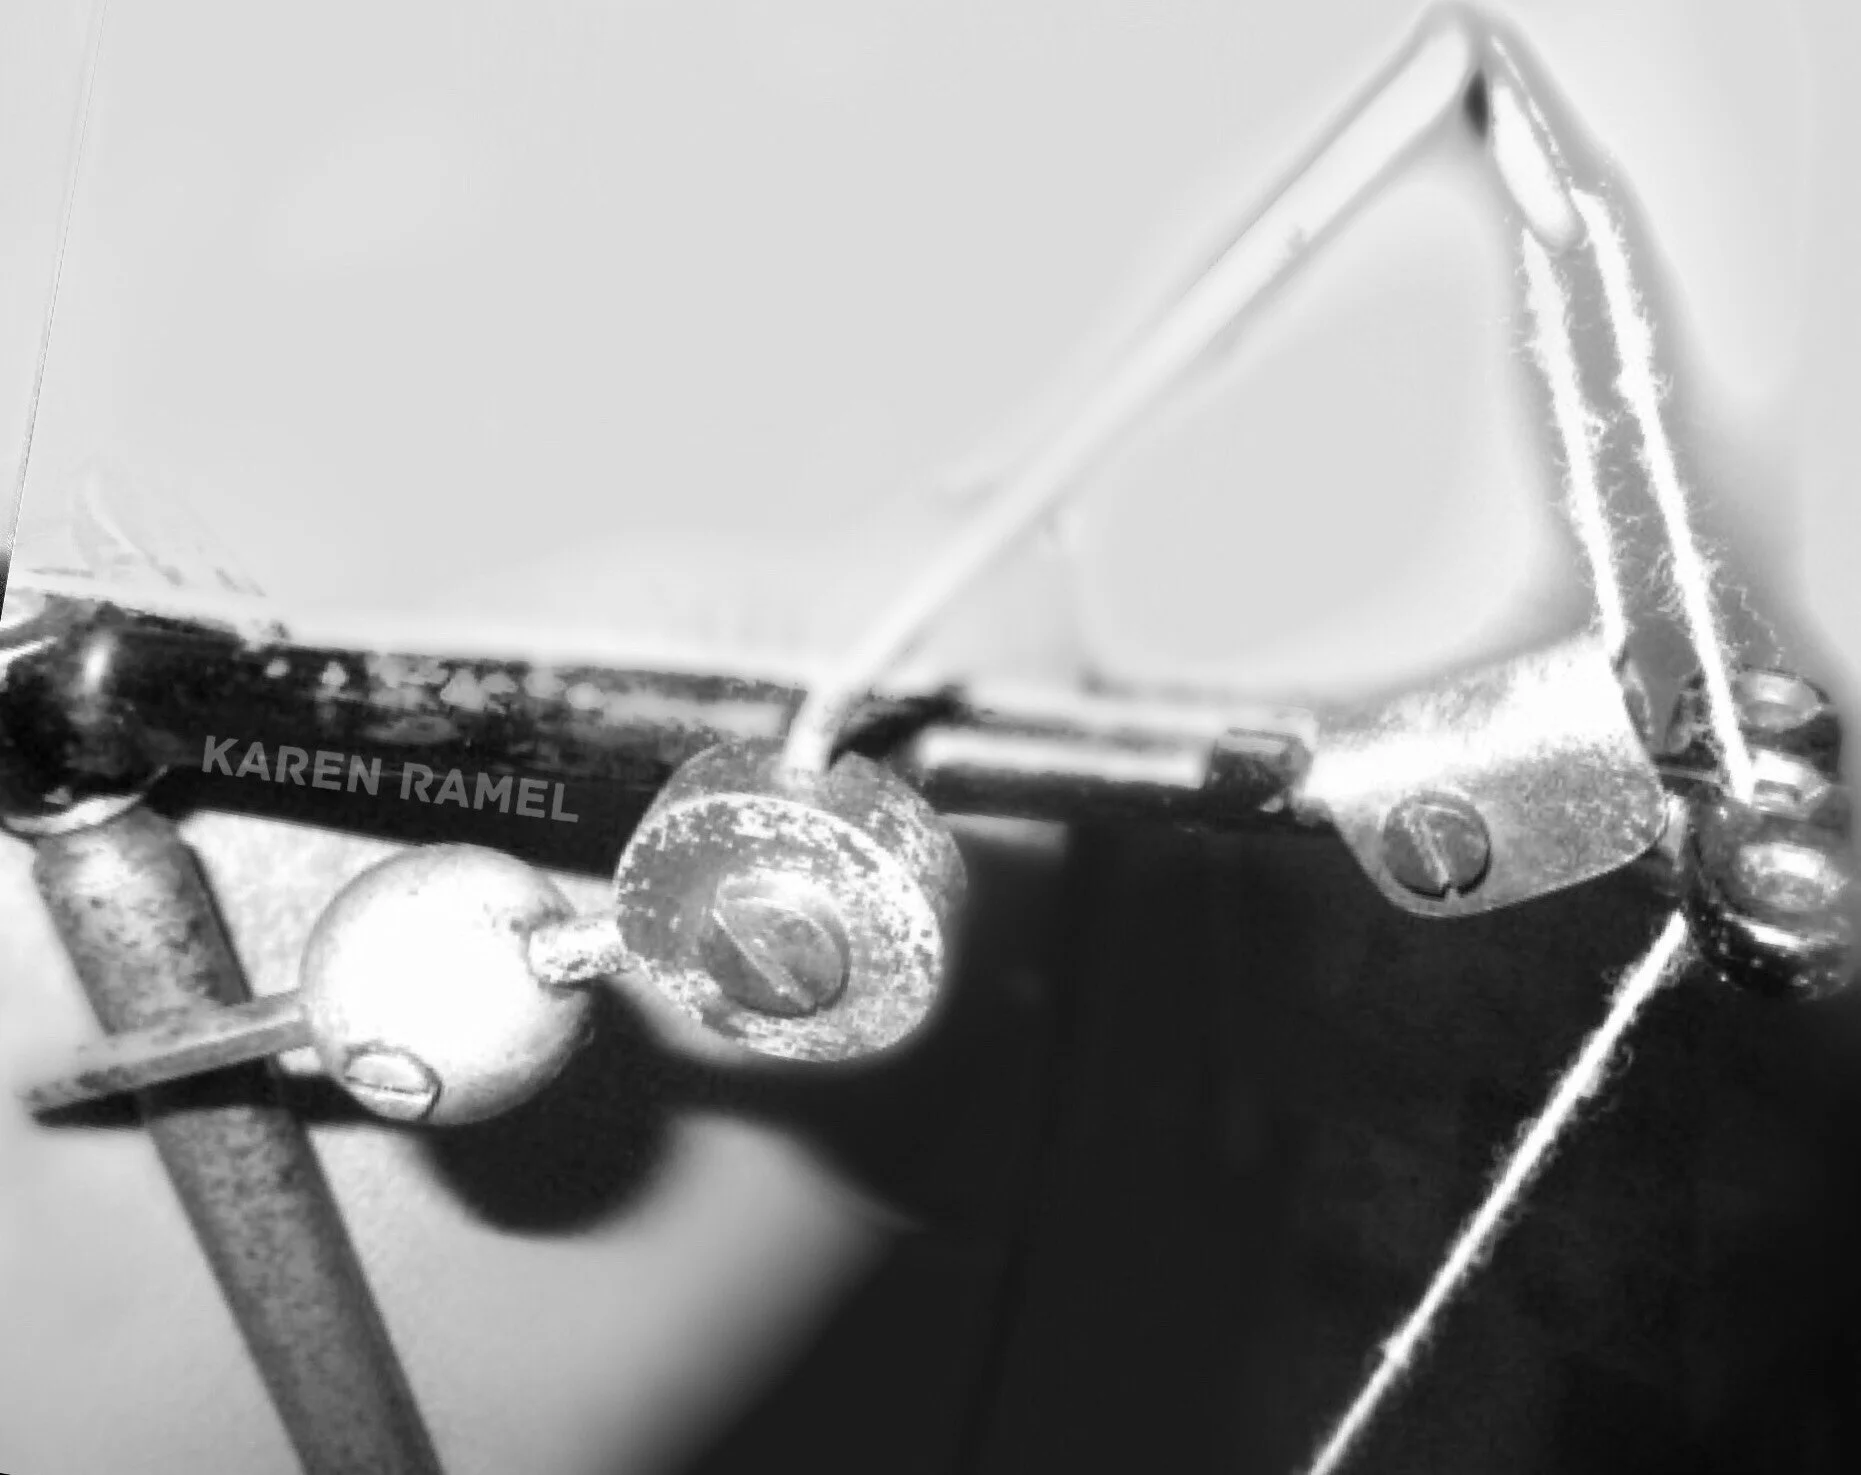
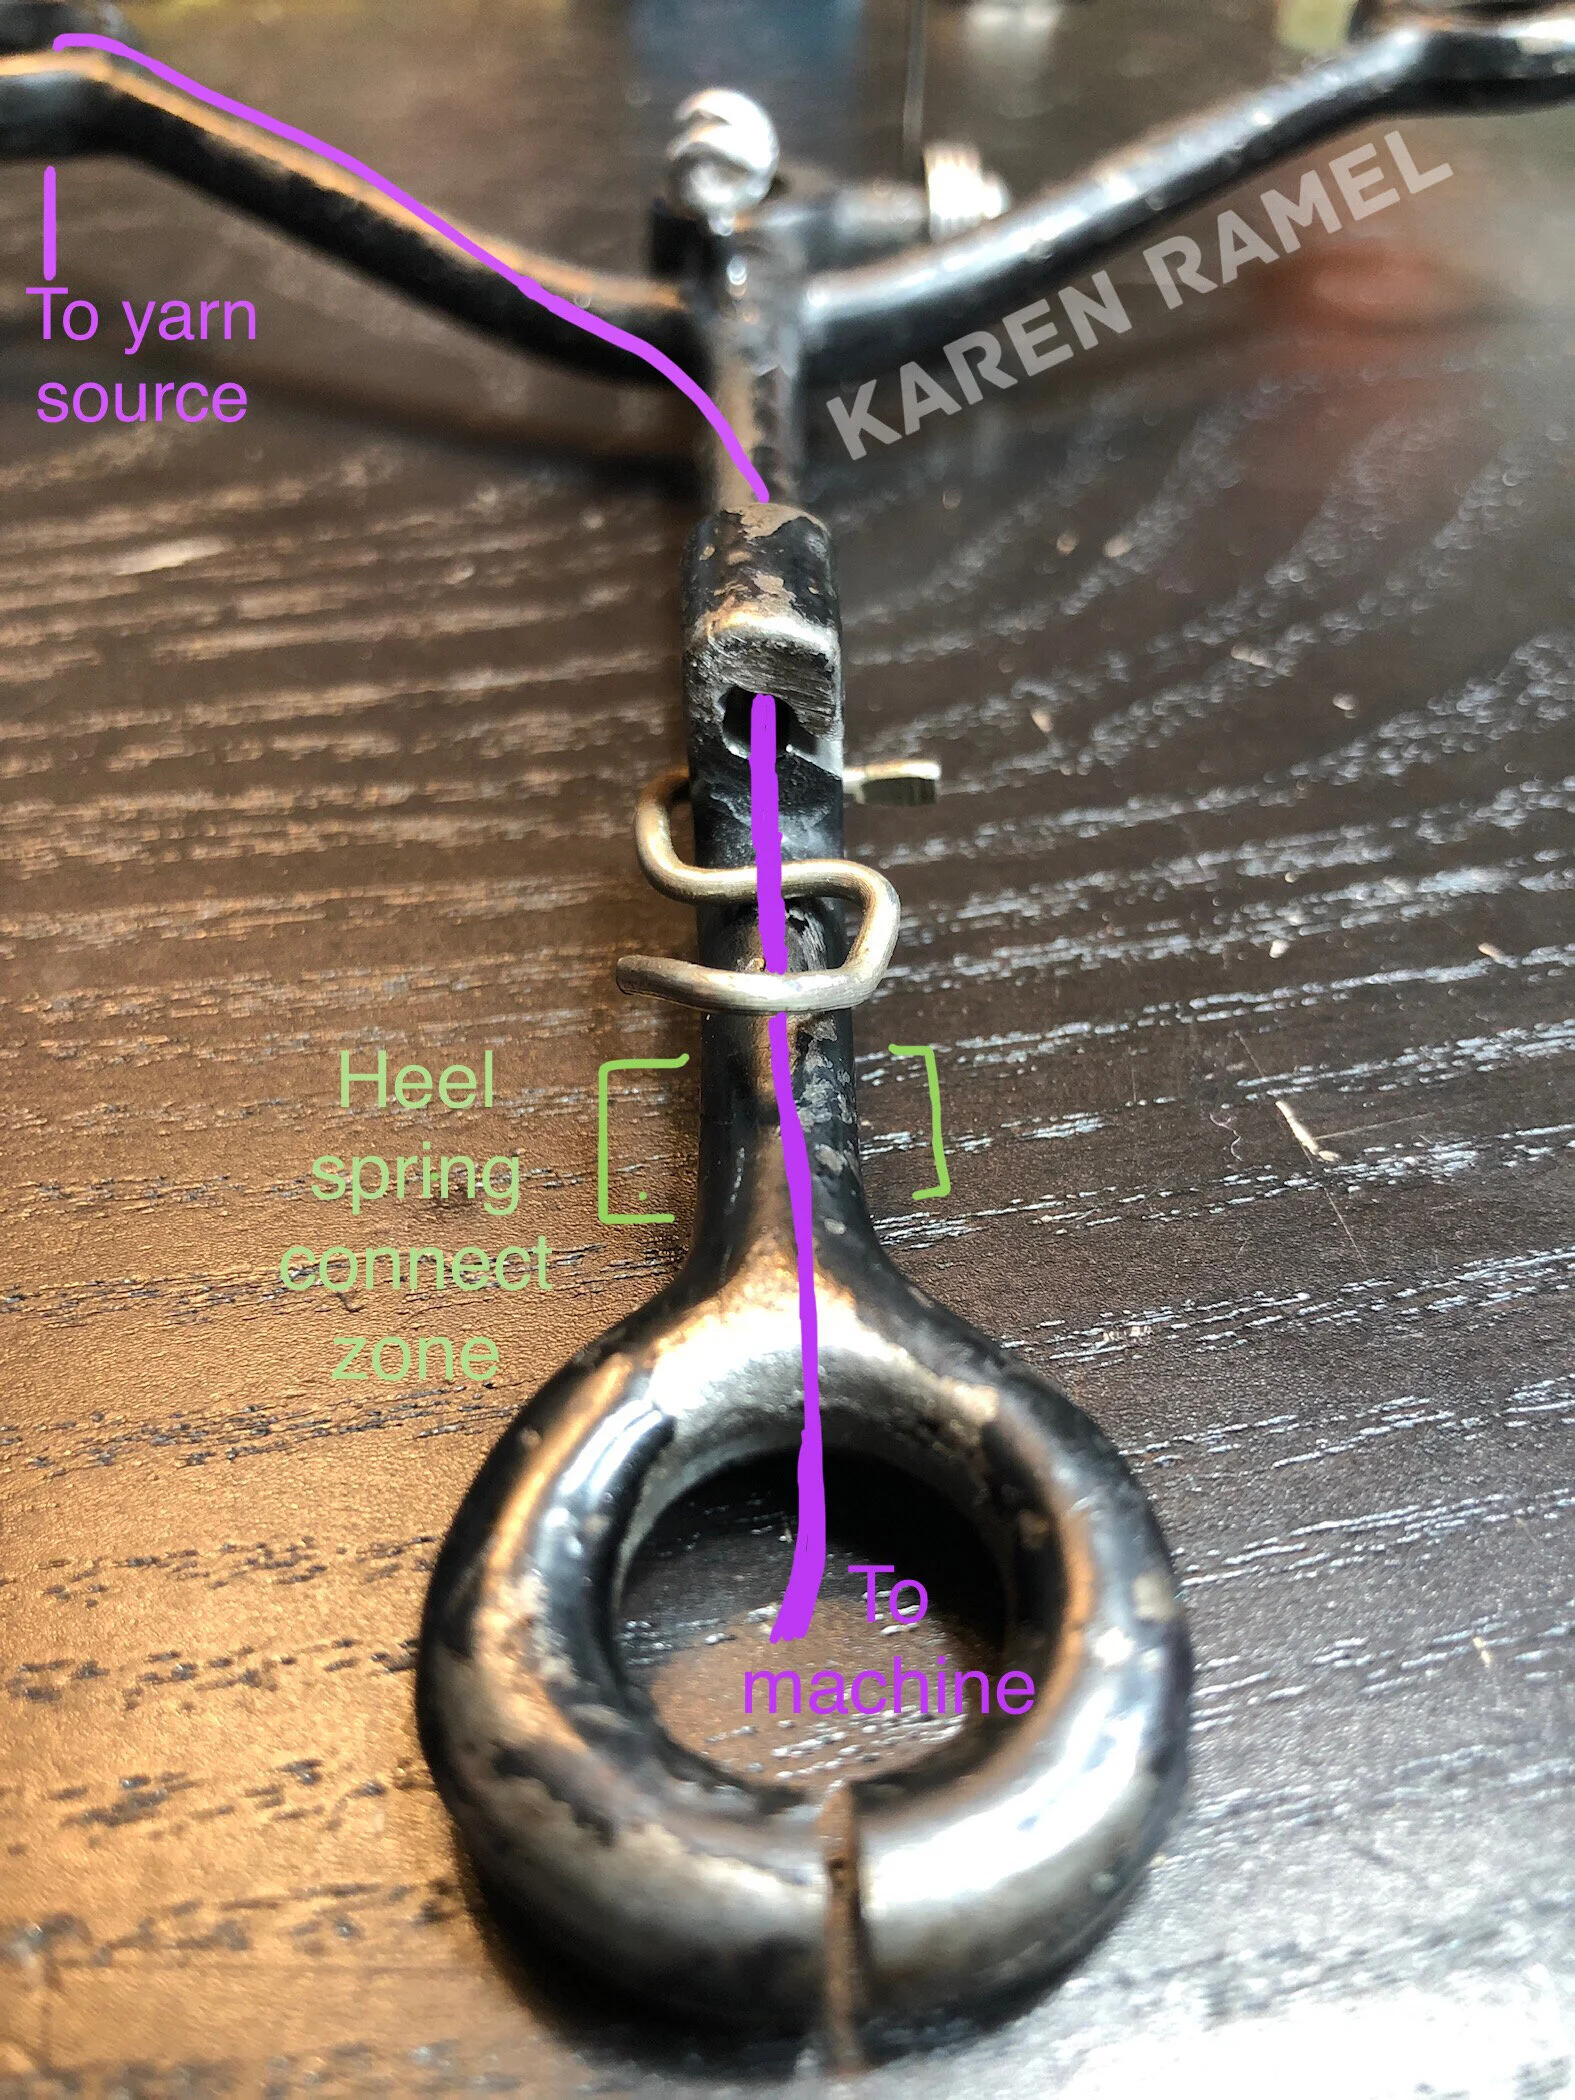
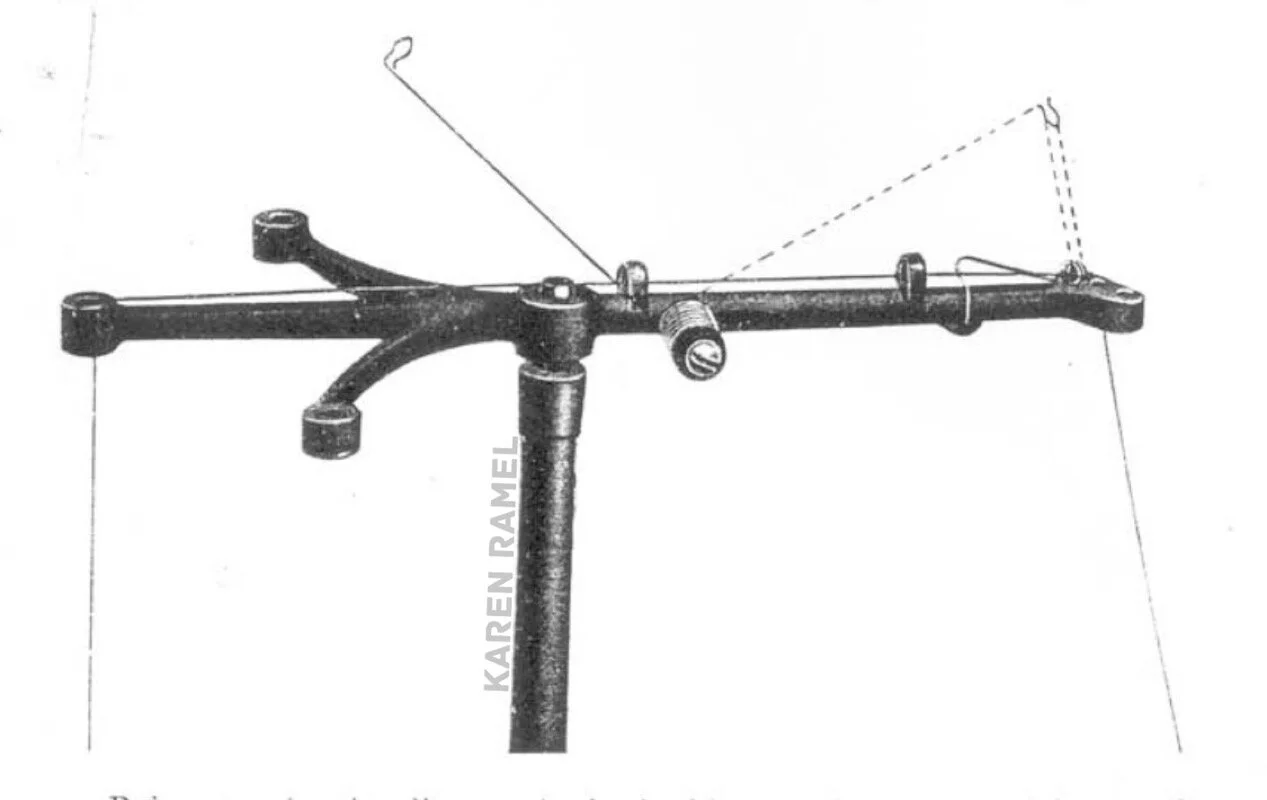
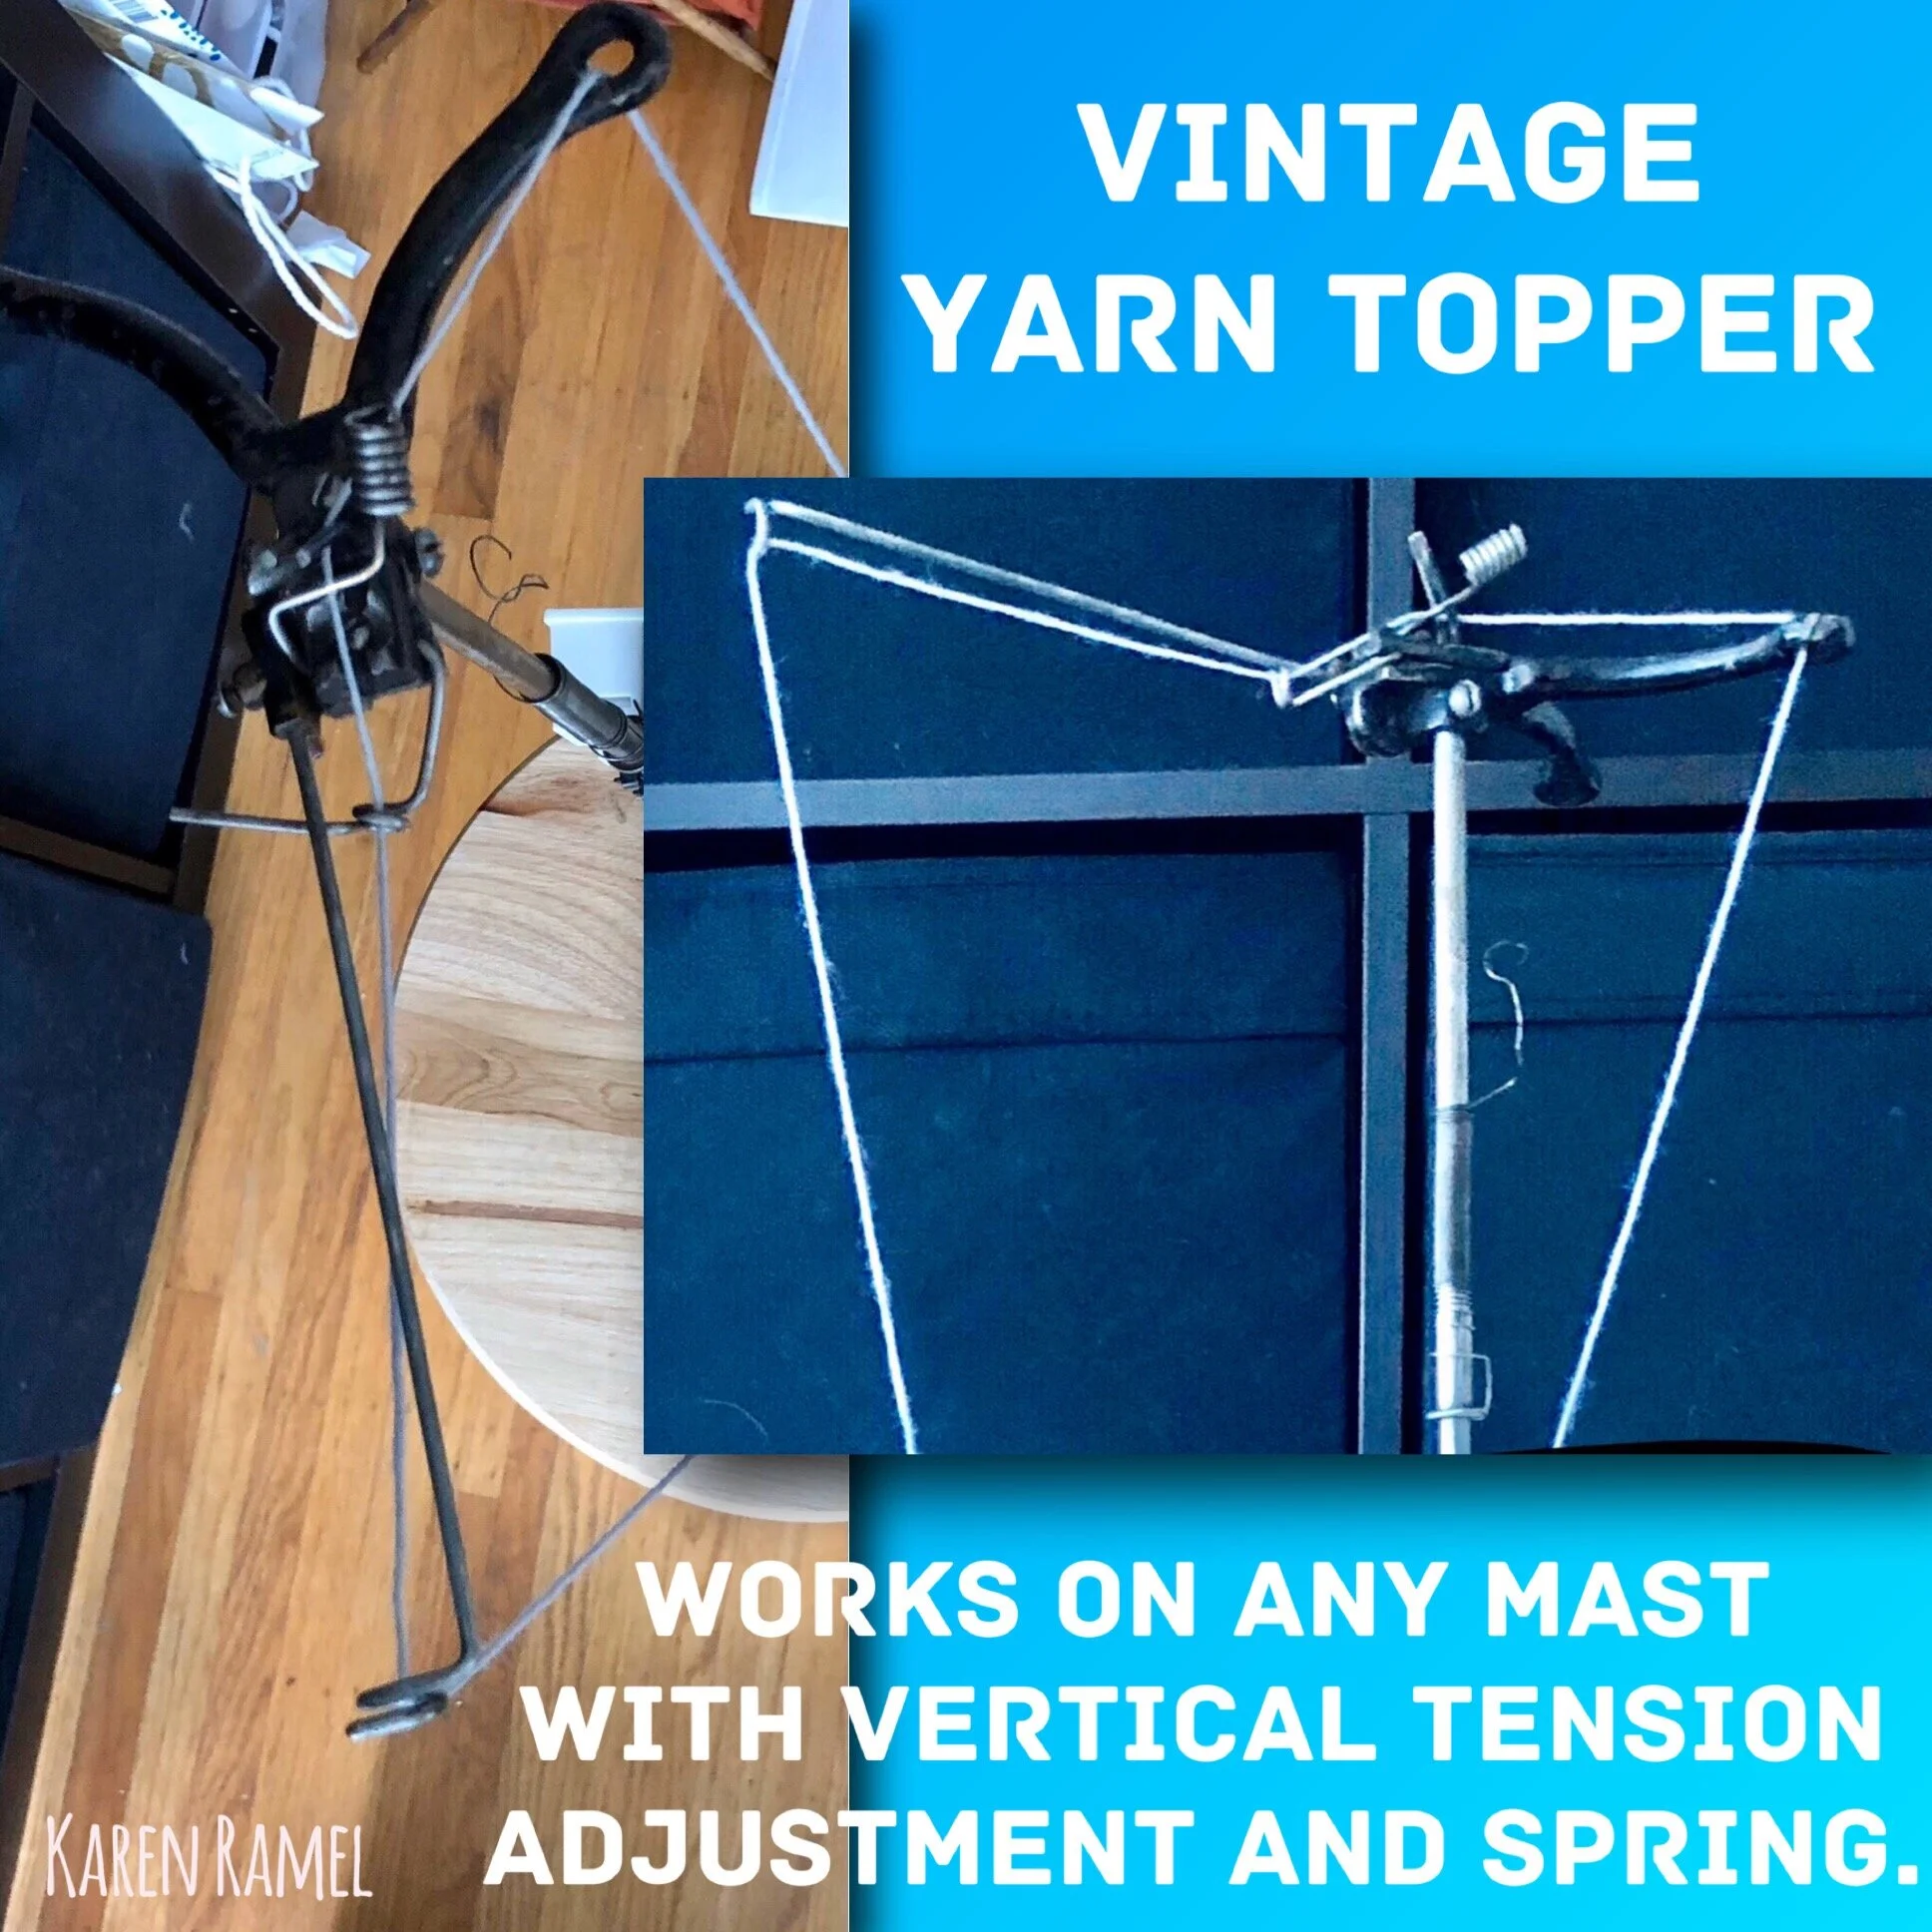
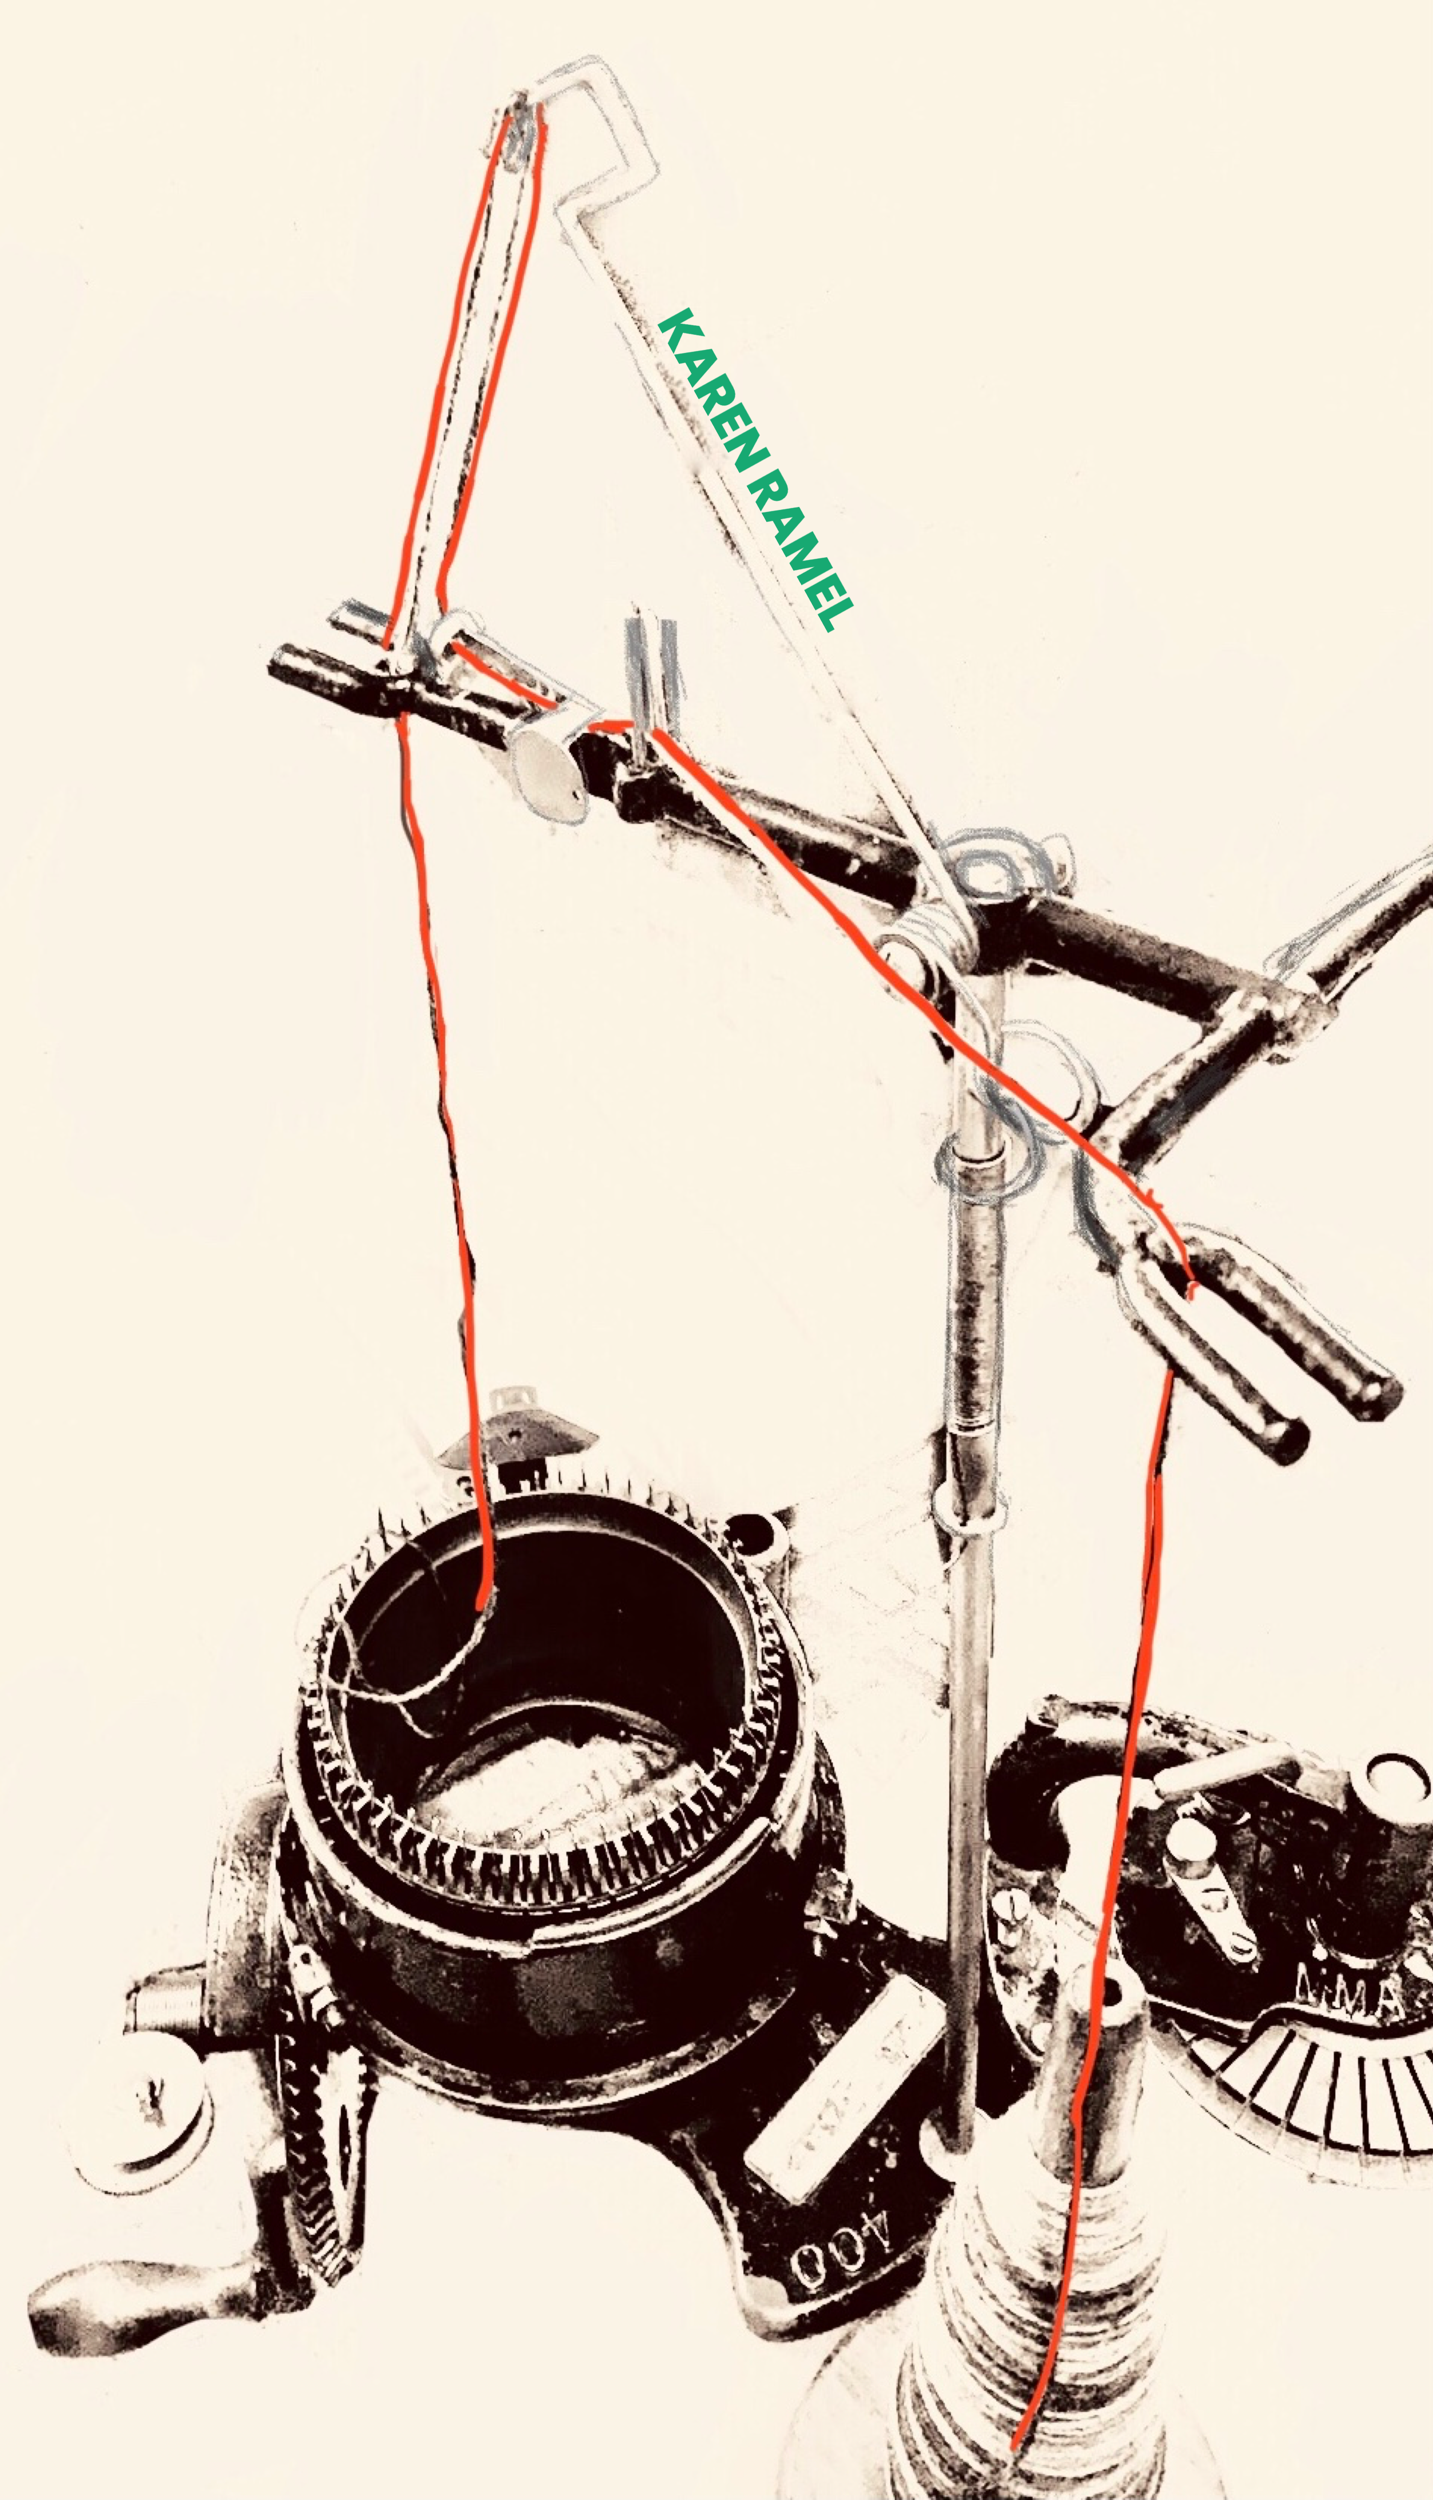
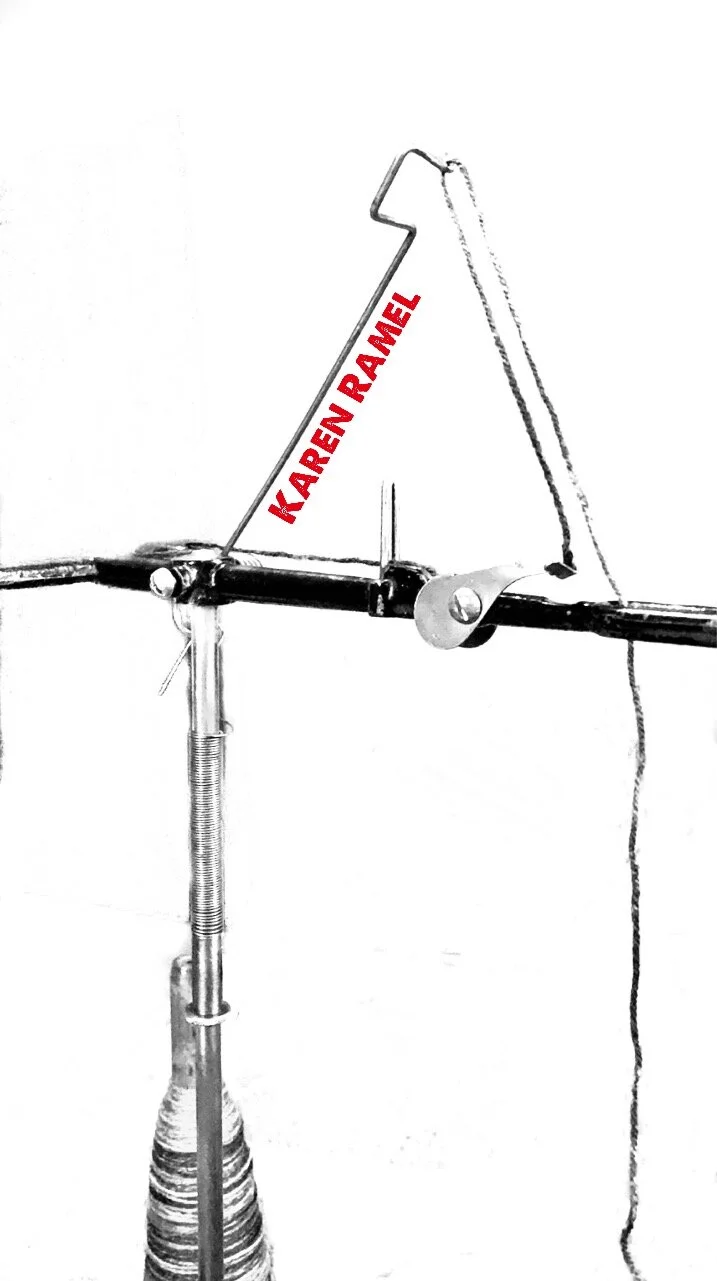
Have you threaded the machine? There are a few different versions of yarn mast/toppers out there. Here are some with threading examples. Click on the image to view larger version.


Perhaps you have an Argyle Mast? (Referring to multi-yarn managing top part and strand holder) see images of this on the SUPPLIES I LIKE page under “Colorwork/Mini-masts”
Setting up for success is best done with first just working with the cylinder and its cylinder needles. We will later discuss the more intricate setup for timing your ribber (to use the ribber arm with ribber dial and tappet). You got this just don’t rush. Helpful tip: if you’re here after using your machine because the yarn brake is slipping (a common issue with these) see my video on how to upgrade the brake on the topper.
The position of the Yarn Carrier is covered on the next page….
Yarn Source
Whatever machine you are using, it’s important the yarn going into the machine can feed evenly without restriction. This is true with all machine knitting. One way to ensure even yarn feed is to prepare or wind yarn from its store bought skein or hank onto a cone. See my YARN WINDERS page for more info. The video below show the yarn feeding without restriction or pause into my machine as the handle turns.
Need more information on YARN?


Cast On
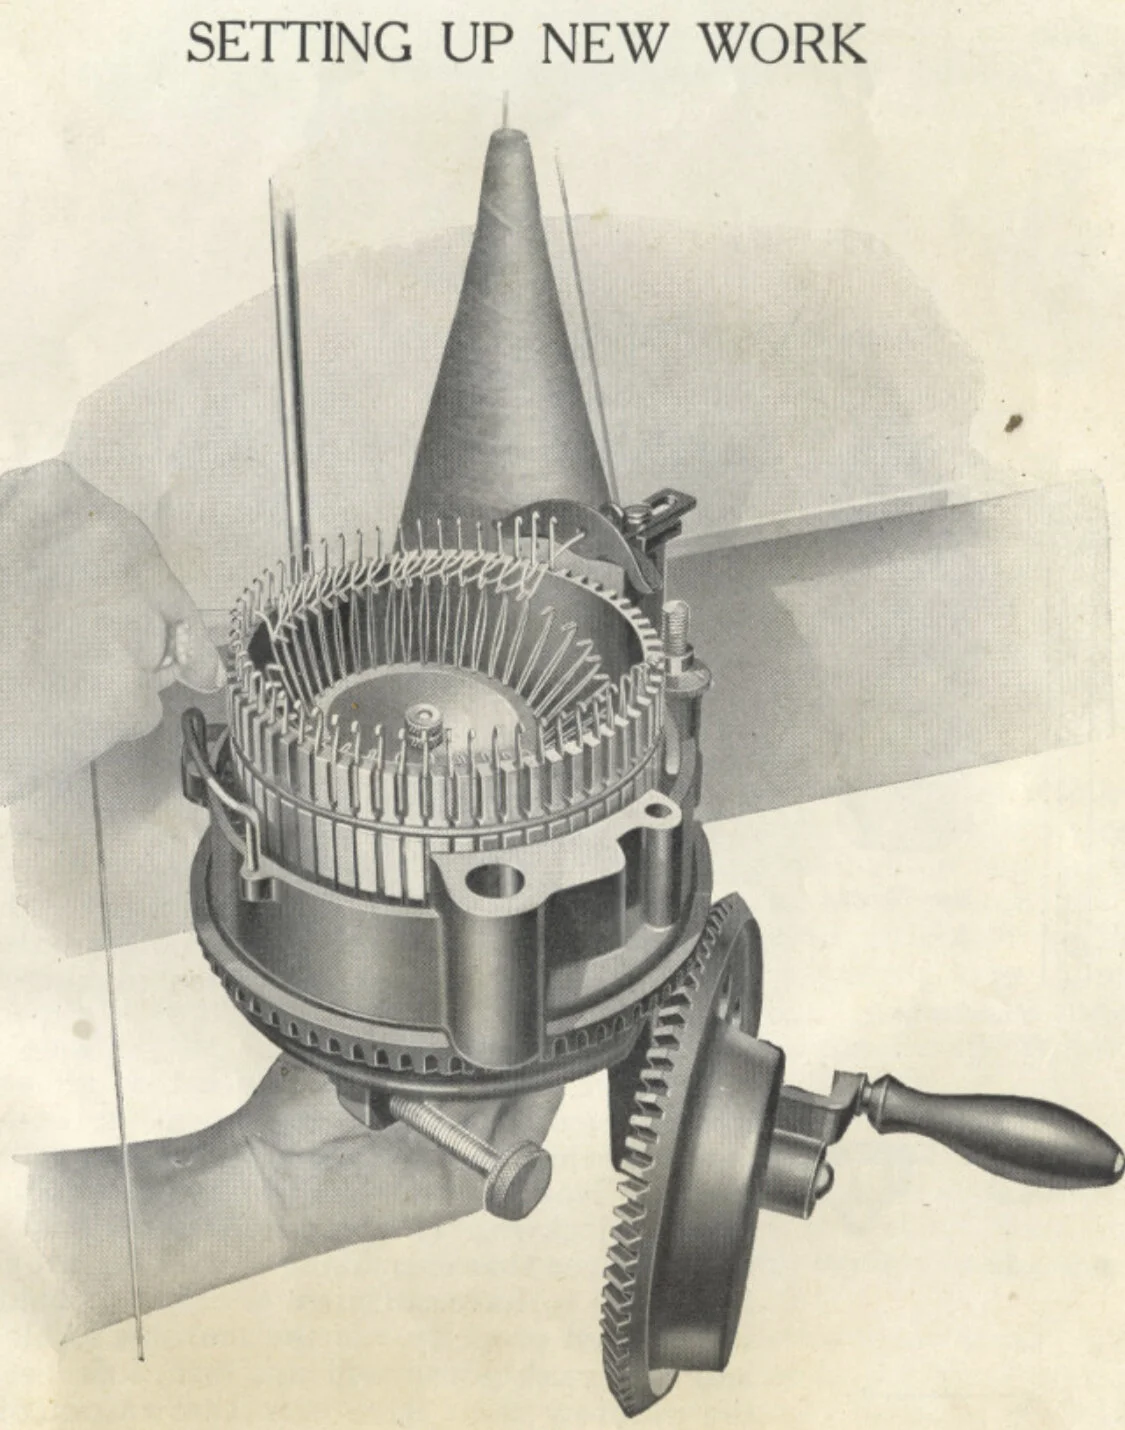
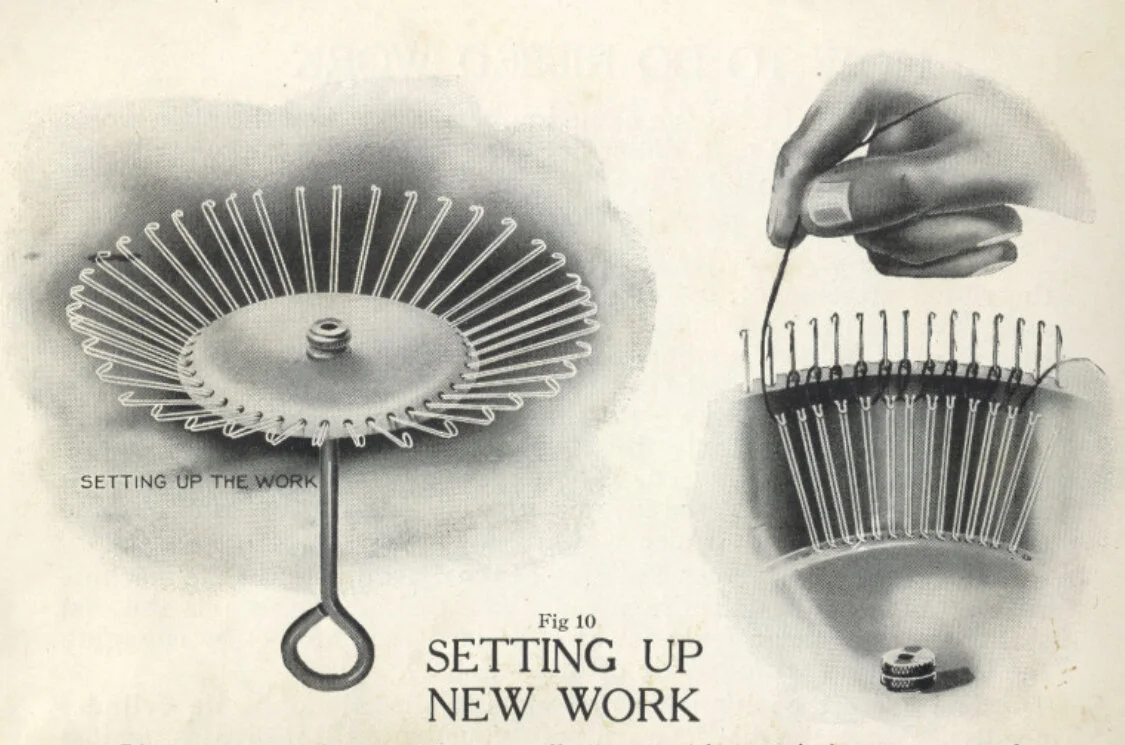
In order to use your machine, WHATEVER machine you have, you need to be able to add even weight to the needles - we do this using a Cast On Bonnet or Start Up device. See my CAST ON page. Come back here afterward so we can continue.
There’s MORE - Please see the next page in this sequence CSM Start Page 3
THIS PAGE IS A WORK IN PROGRESS. Please stay tuned.