
CSM Start Page 4
You’re ready to start
Perhaps you are wondering what to make or where to start. I recommend approaching this as a walk before you can run. Set achievable goals and work at it. If you are on this page presumably you’ve worked your way through the previous CSM Start pages. Congratulations!
SKILLS TO ADDRESS ON YOUR CSM…
You should have ALREADY gained confidence and recognition of your machine and its components, being familiar with how they dismantle and how to reassemble reliably.
successful cast on with cylinder needles
create a tube - get a feel for it - don’t turn the crank handle too fast
consider creating your own simple Cast On Bonnet - (tube style which is cylinder specific) see how on MY YOUTUBE VIDEOS - my video shows how to hang a hem, knitting and picot edge with hung hem (picot edge is done by putting two stitches on one needle all the way around then regular knitting). Yes you can make it with 6mm split rings
practice fixing dropped stitches on the machine - practice making 10 knit stitch fixes and 10 ribbed stitch fixes (referred to as Latching Up - as a latch hook is often used)
practice hanging a hem - (outlined in tube style cylinder specific cast on bonnet mentioned above) casting on, knitting, removing weight, hanging first row knitted on current row of needles
create a gauge swatch (see category on the quick lookup index page I linked) - essential!
review a variety of easy techniques
work on a heel/toe and practice, practice, practice - see that section on the techniques page or see WHOLE written patterns with videos “Socks - Cuff Down” under the menu “My Patterns and Videos”
create a sock with heel and toe - cuff down is recommended
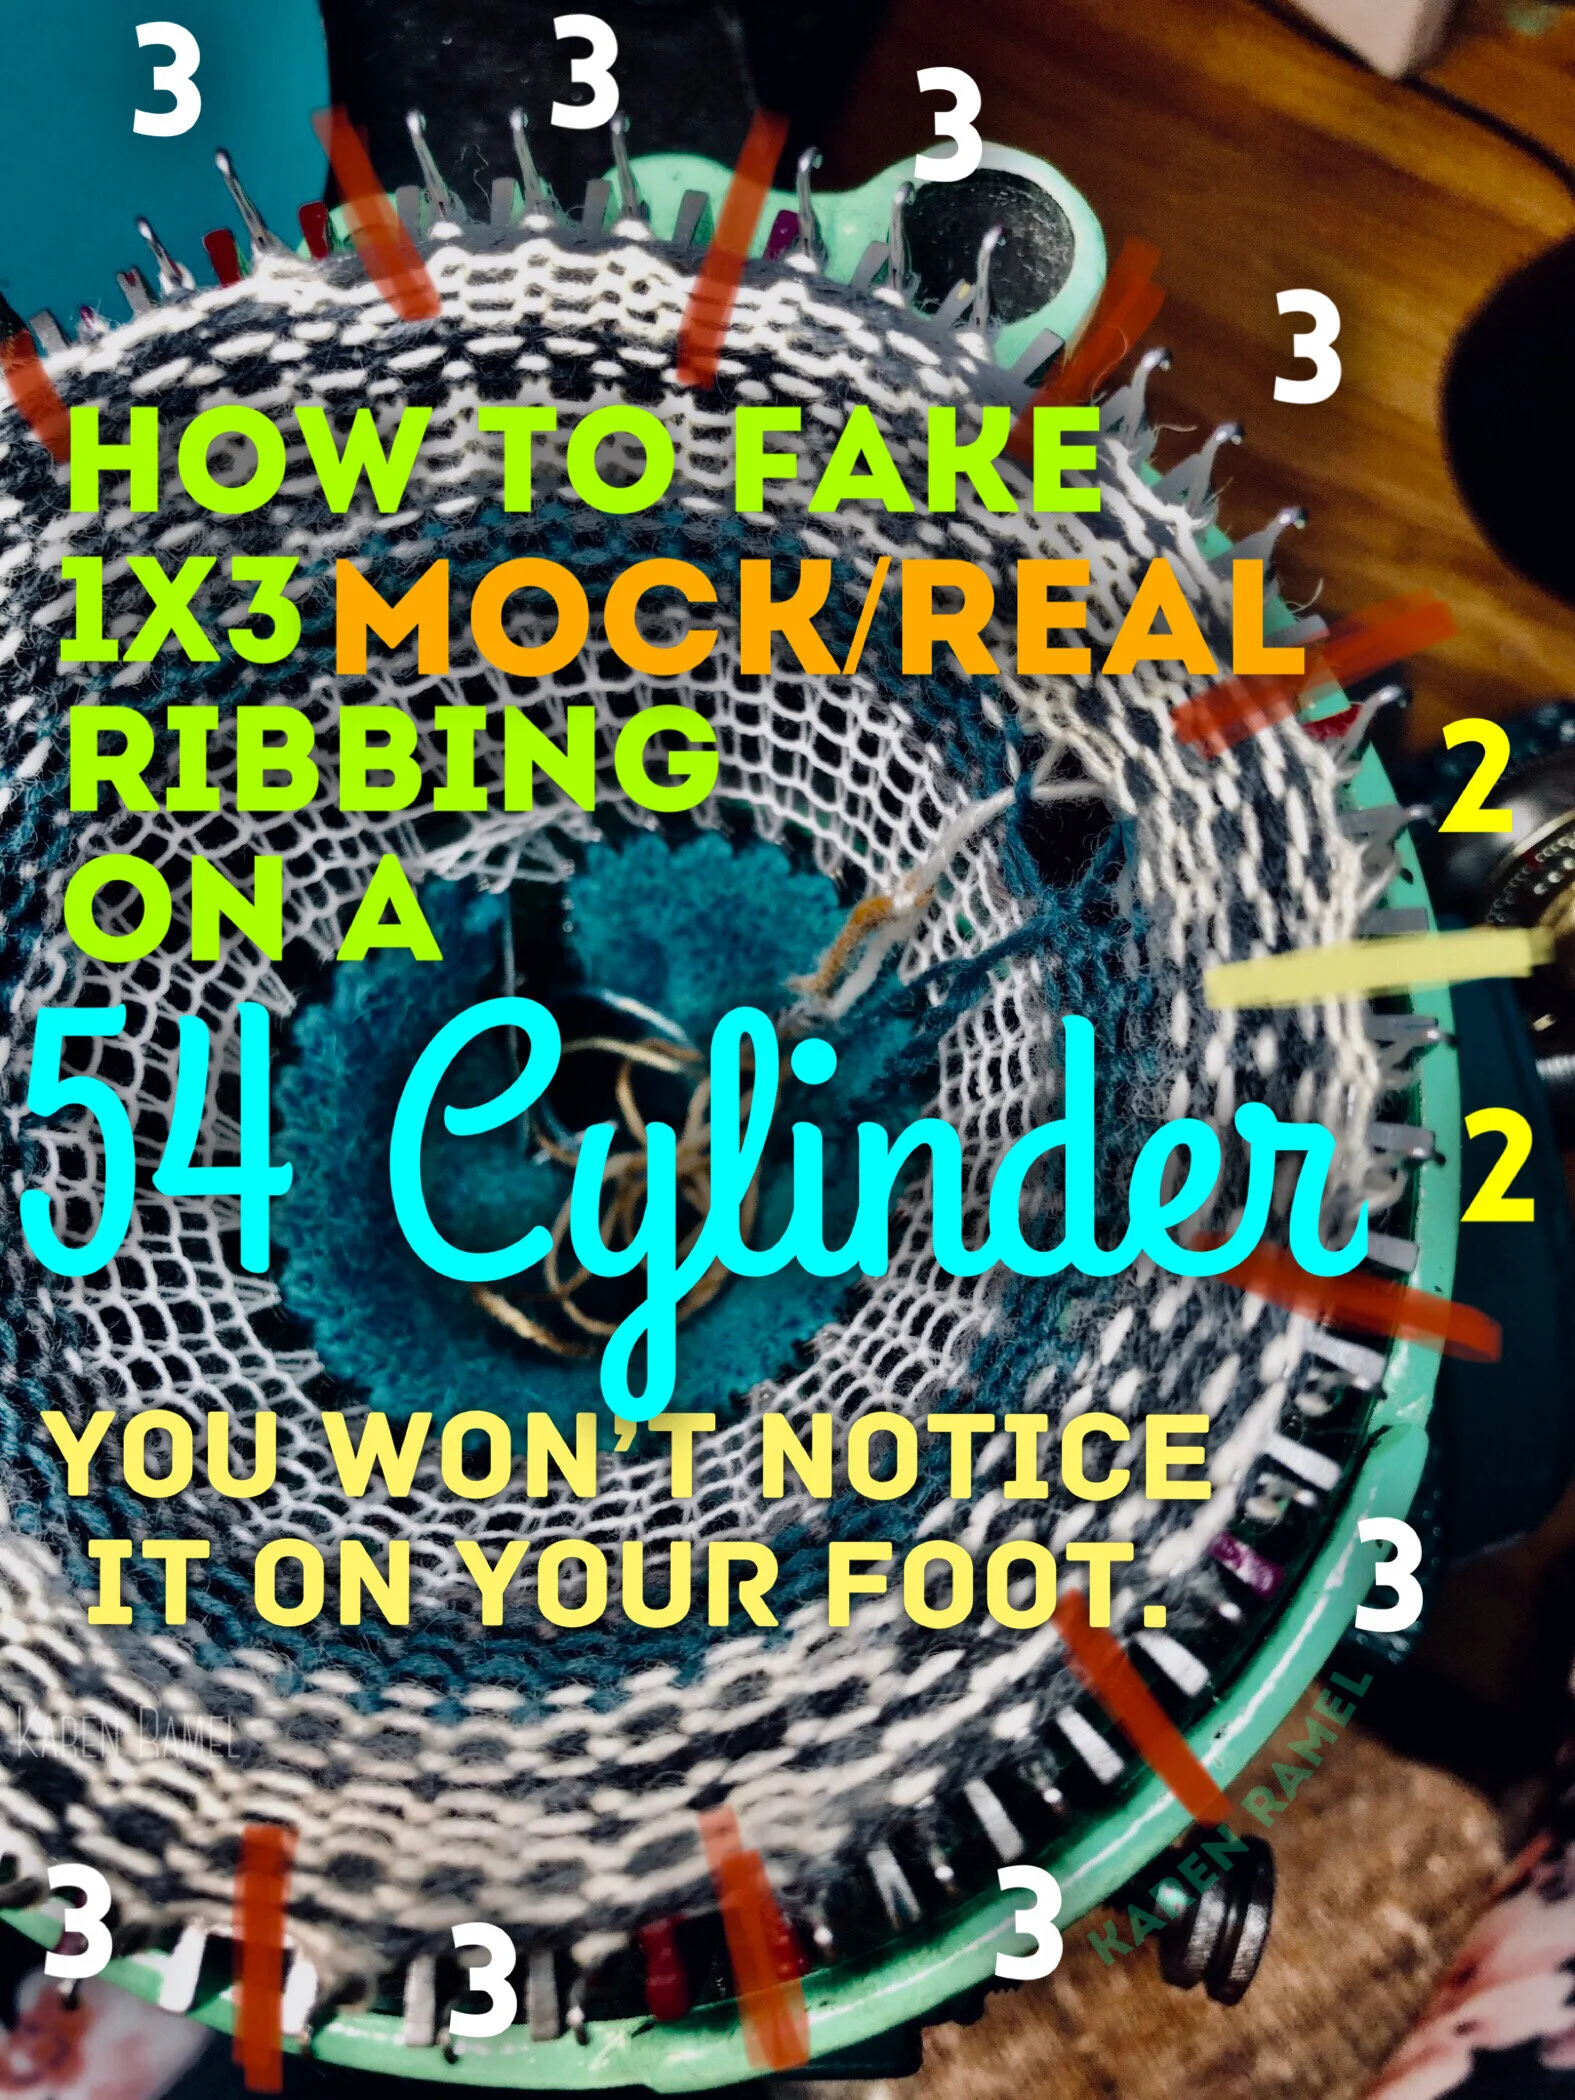
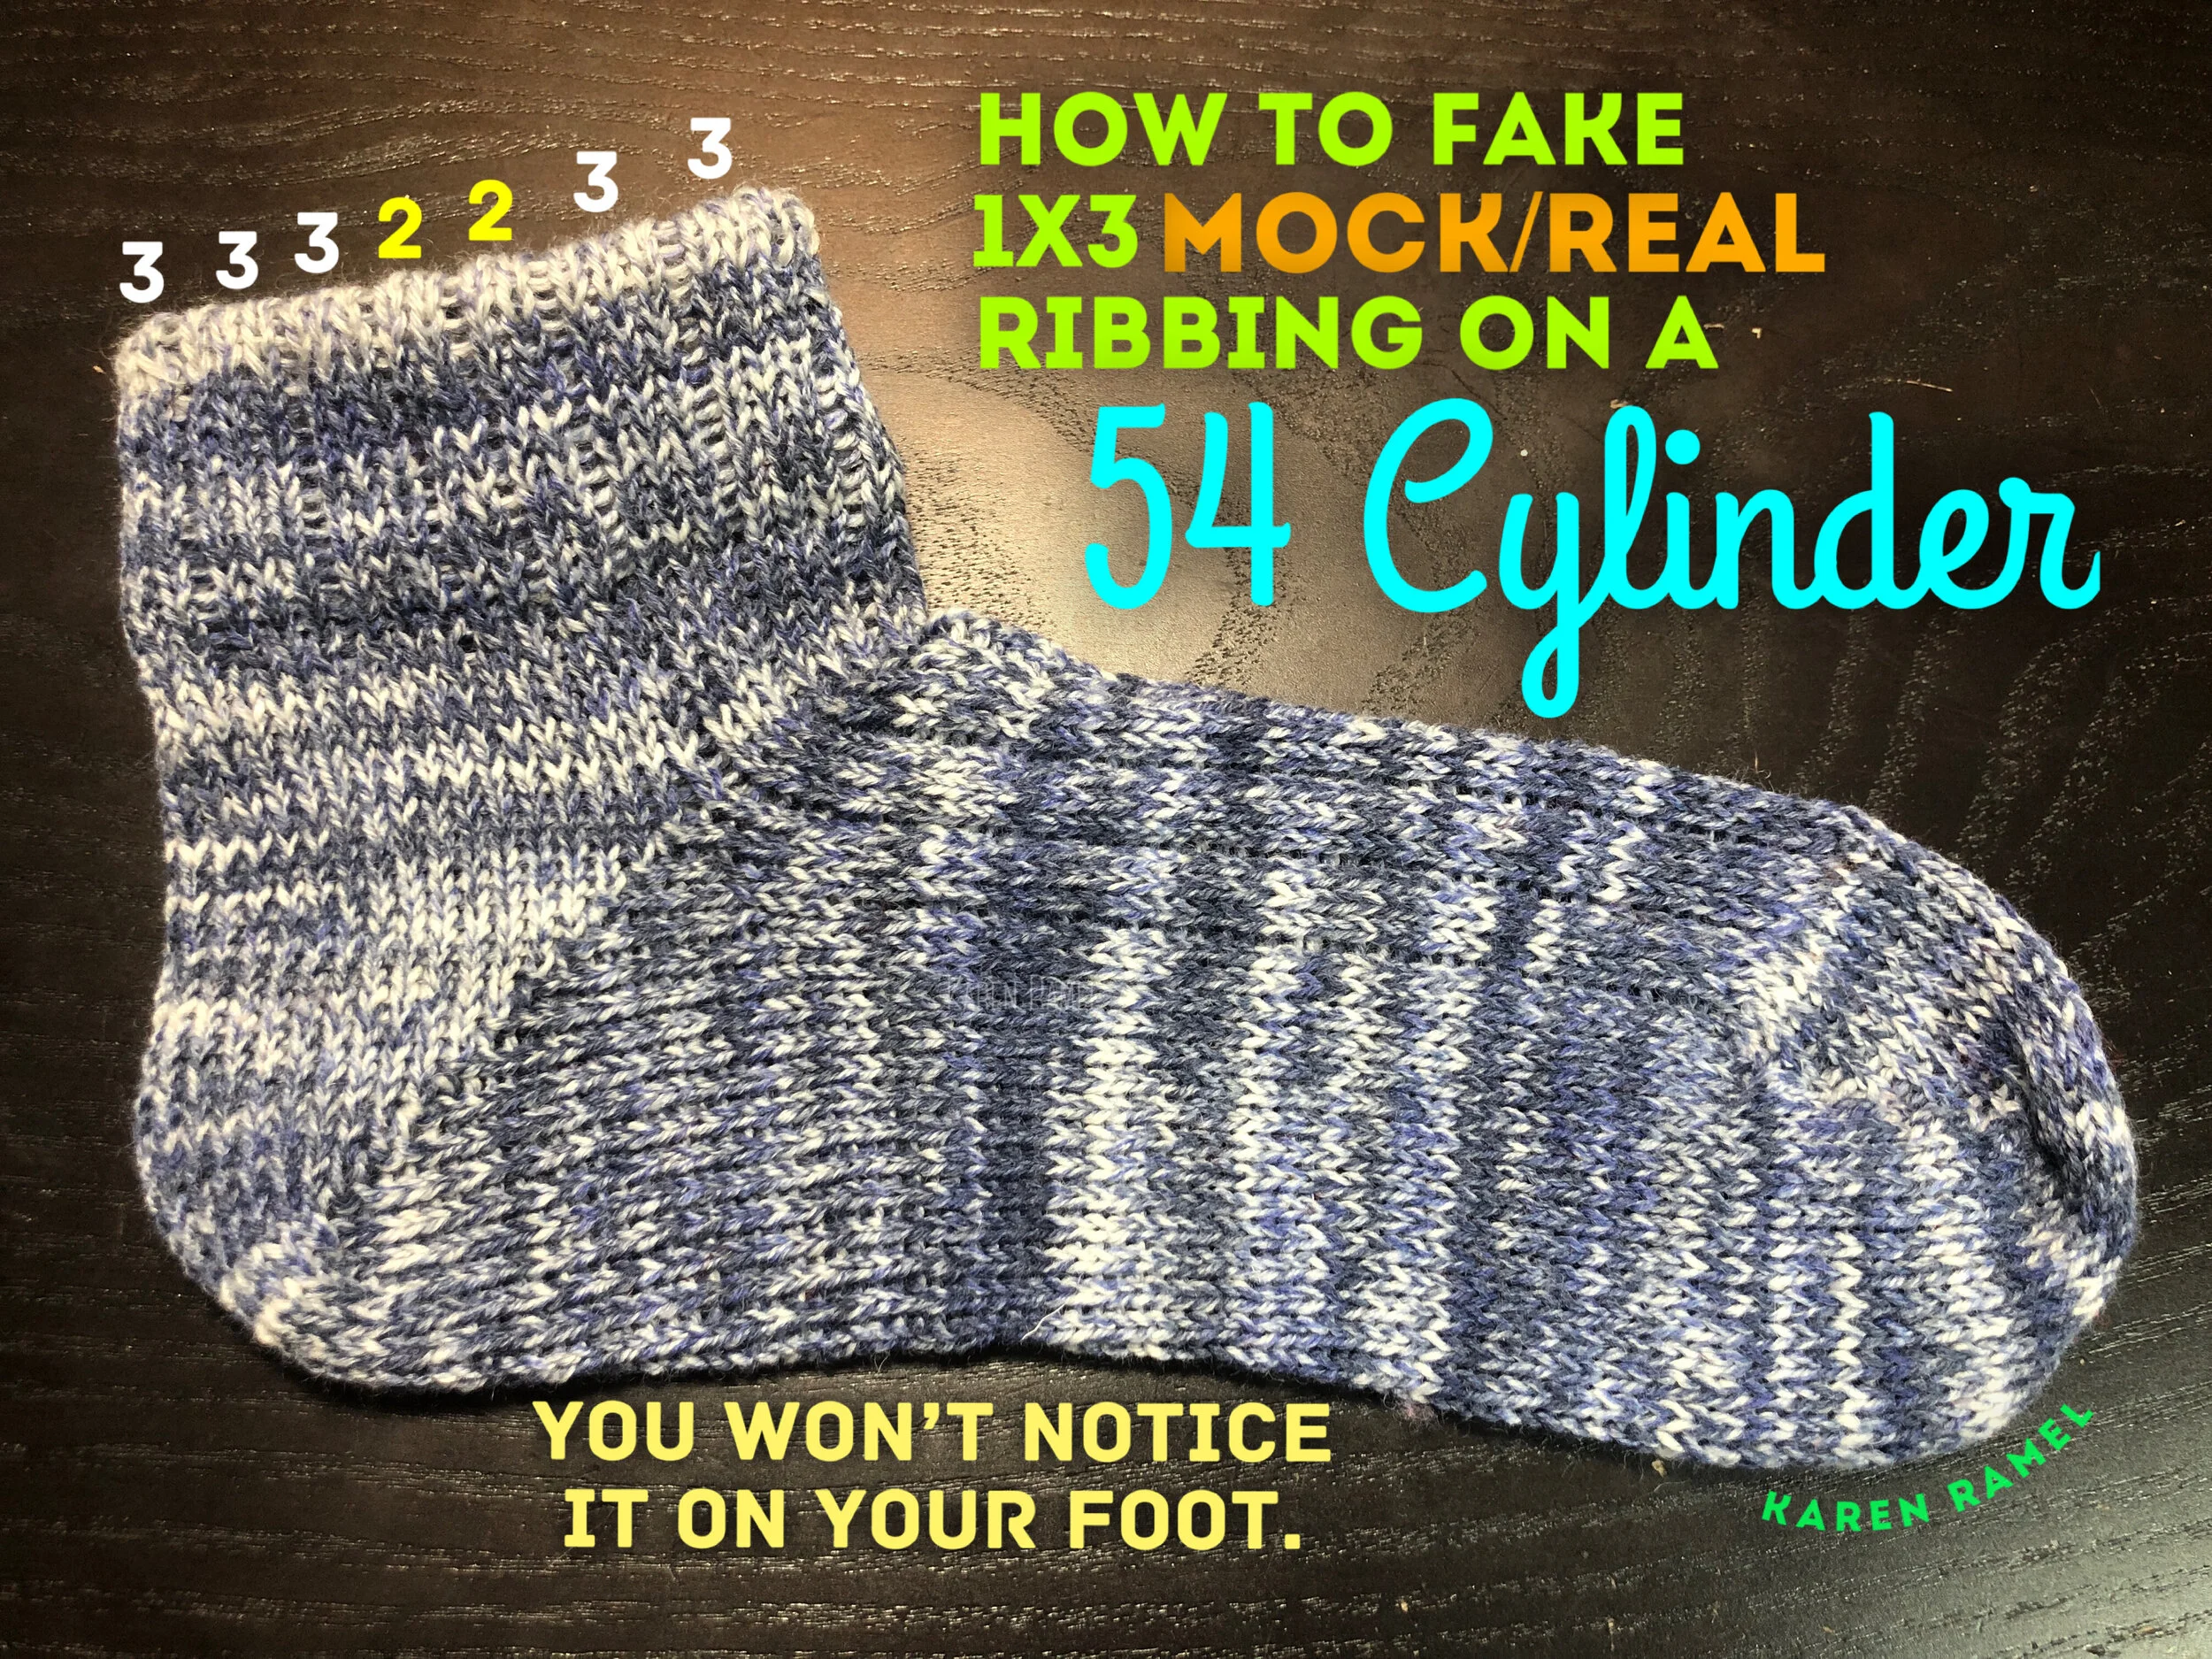
create a mock rib sock
practice closing the cuff down sock (toe of the sock) - kitchenering
consider creating a Universal Cast On Bonnet - Video found on MY YOUTUBE VIDEOS - technique shown is working flat using ALL the needles in the cylinder a specific way. We do a hung hem working from the bottom to the top of a flat rectangle piece. We work another hung hem with knitting and a picot/6 mm split ring addition, add scrap and remove it from the machine. Finishing the live stitches if not in that video, is shown on my page of videos. Yes you can make this with or without the split rings
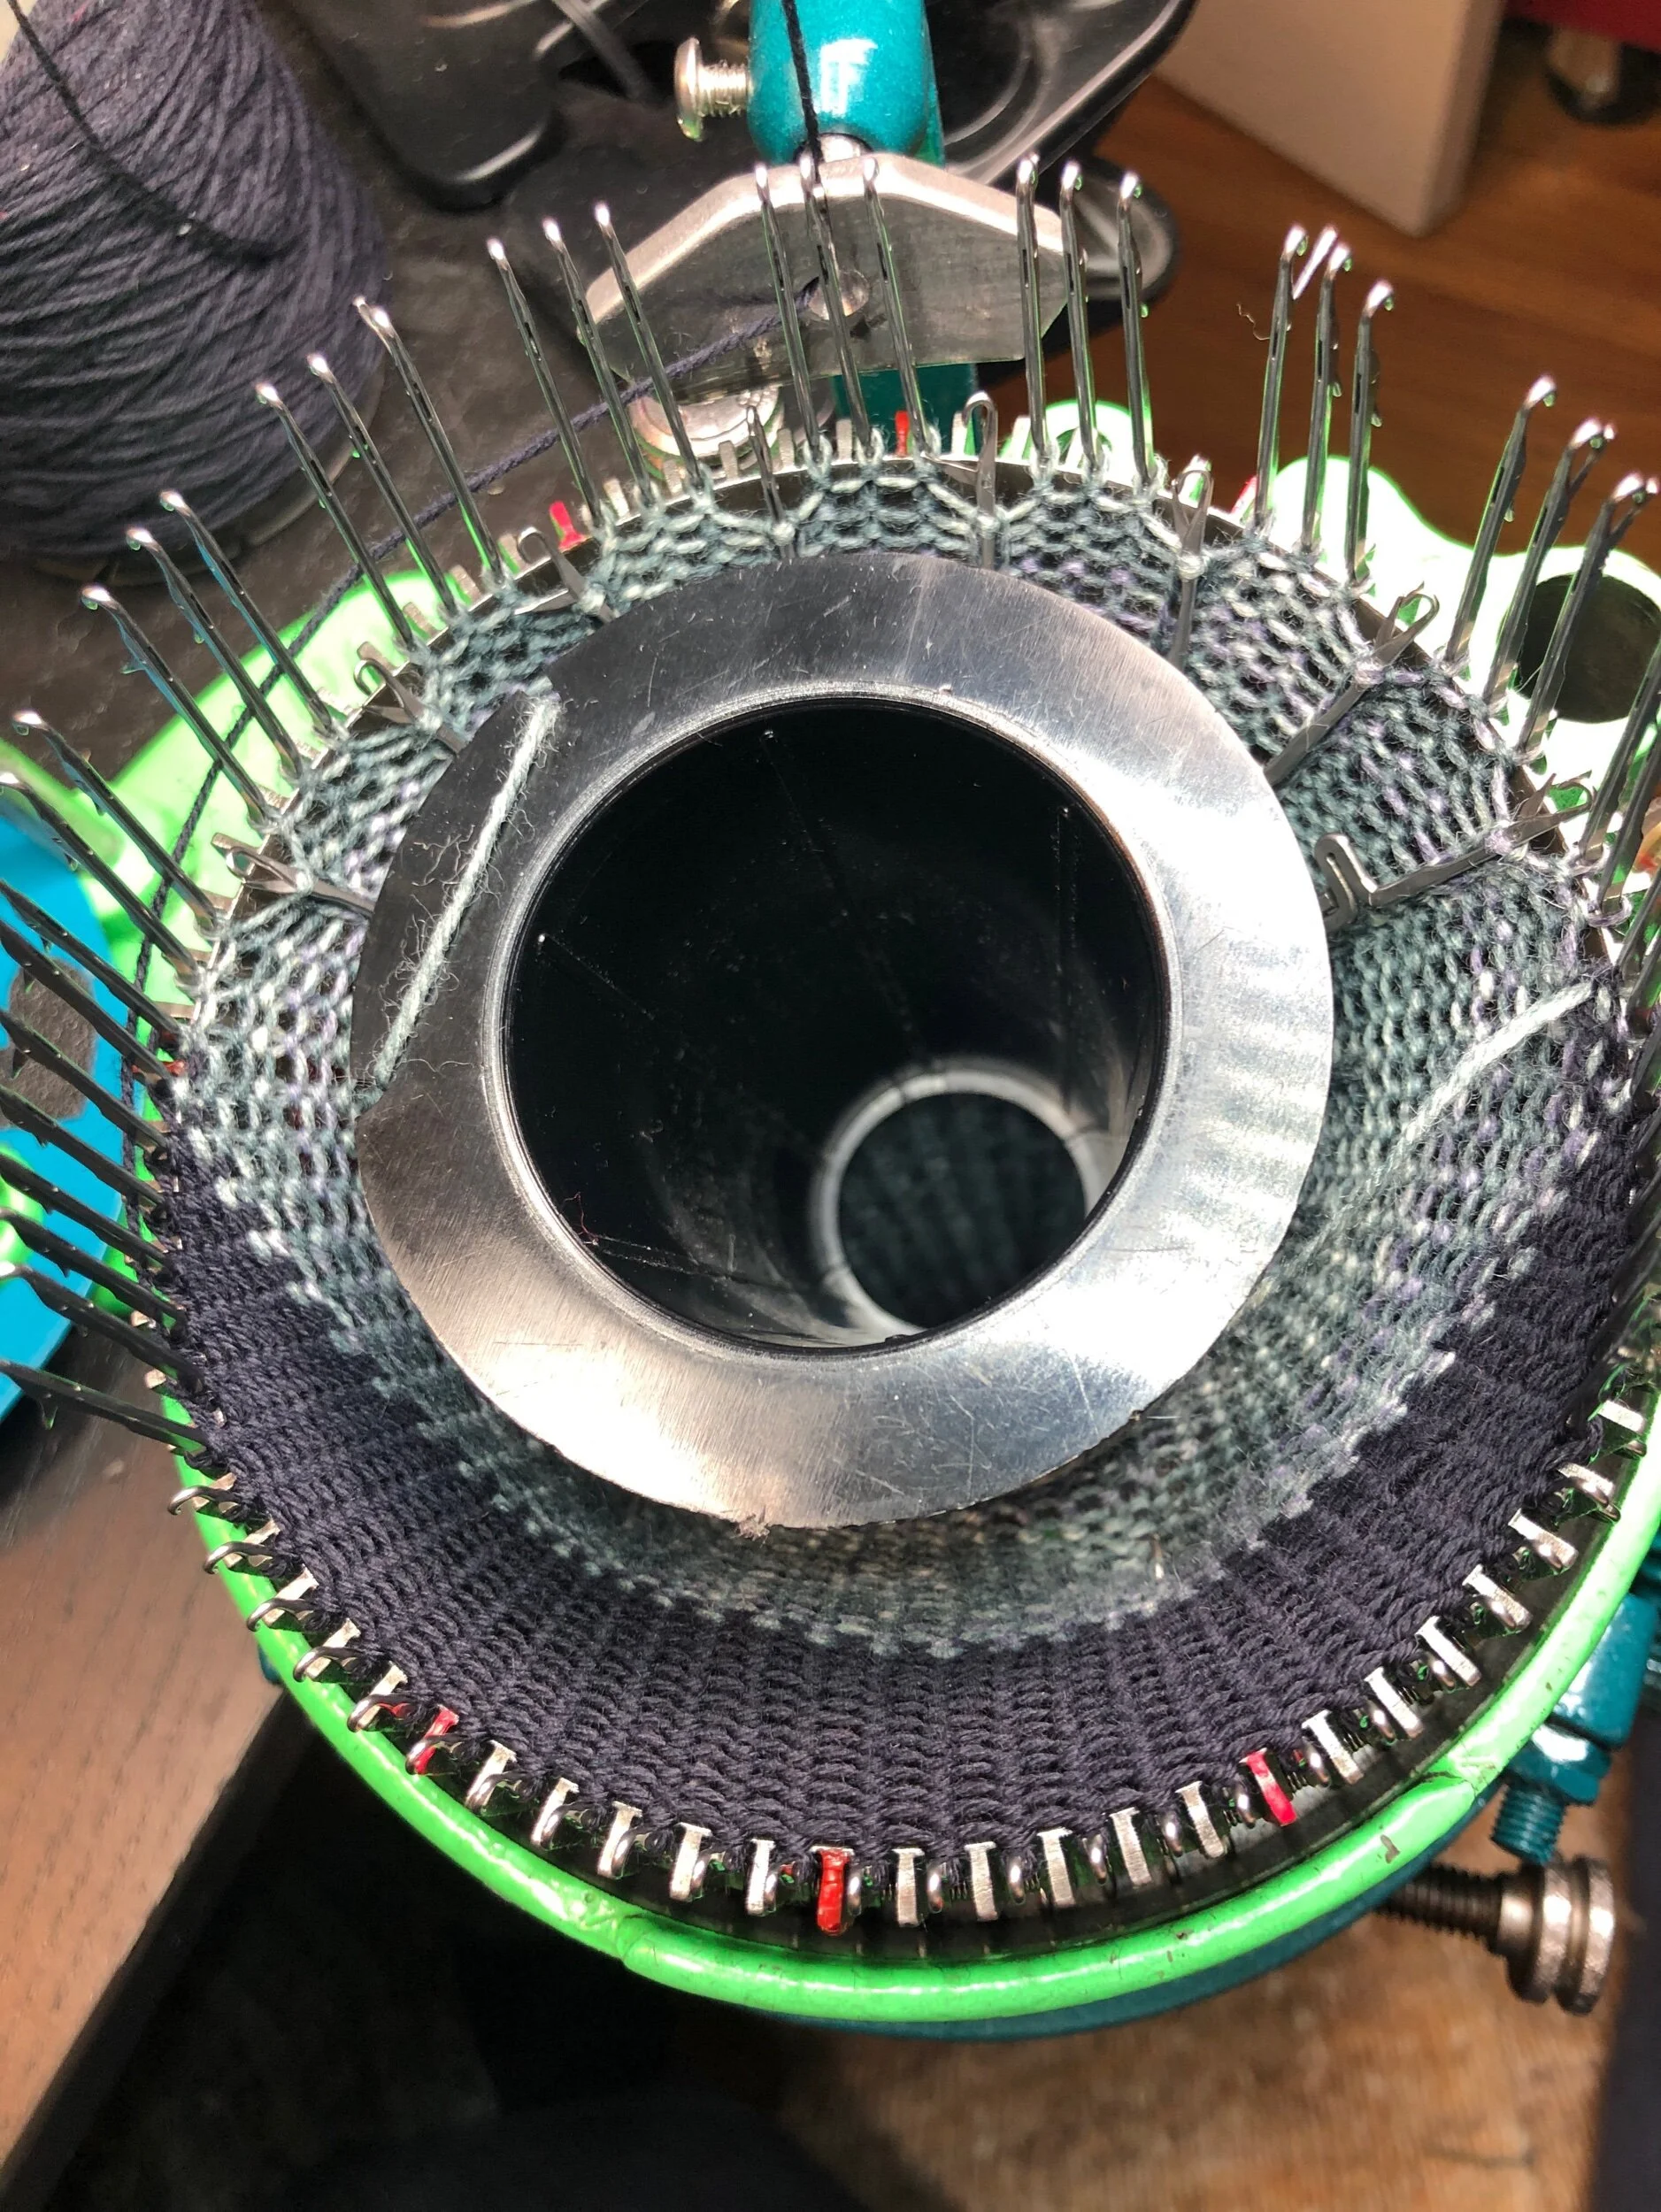
practice removing your needles and cylinder from the machine to inspect the inside of the machine (and setting all back up again).
add your ribber and practice adding ribber needles, removing them and transferring between the cylinder and ribber. Time your system if not already done.
practice, practice, practice
NOTE: Having problems with dropped stitches during the heel/toe creation? The SECRET is ensuring the stitches stay DOWN against the cylinder (outlined in the baseline settings on the CSM Start-CSM3 page). If you are working the HEEL/TOE with the ribber removed (or not using the ribber at all) and have FULL access to the HEEL or TOE you’re building - SLOW DOWN. For easy success keep the stitches down - I prefer to put my finger on the first and last three stitches of each row - see the EASY short demo “NO WRAPPED HEEL (SOMETIMES CALLED THE SUICIDE HEEL) - JUST THE HEEL - A Quick CSM No Wrap Heel DEMO “ on the TECHNIQUES page.
To help you accomplish these goals checkout the LEARNING AND CREATING menu of this site for:
MY YOUTUBE VIDEOS / MY SCRAPBOOK (patterns followed to make projects shown) / MY IDEAS AND UPGRADES / CSM VIDEO HOTLIST / and much much more.
There is a paid monthly service known as SOCKTV - see this page for that supplier info.
Consider joining Ravelry to add projects and notes - TAKE GOOD NOTES!
not all sock styles are made by everyone - find your style!
see what others make to sell to get great iDeas by viewinG suppliers - socks or tubes
Are you stUck and frustrated? Get FREE help!
YES you can make MORE THAN JUST SOCKS! See my SCRAPBOOK page - see the BLOG INDEX page for “PATTERNS/PROJECTS - NON-SOCK”.
USING YOUR RIBBER
Once you have a working machine and have the knowledge of its parts and functions I strongly suggest learning how to use your ribber.
Where to find info:
-My instruction video to come (future plan)
-See my written summary below and ensure you’ve setup your BASELINE see CSM3
-See the section RIBBER KNOWLEDGE on this CSM VIDEO HOTLIST Page.
-I still need to verify this YouTube video however there’s Ribber Confidence (Legare).
To Time The Ribber Cams
Perhaps you have a NEW CSM, perhaps you have a vintage CSM. Regardless, even if Timing was set on your machine and then it was shipped - there’s a high probability that settings could have loosened during shipping. Timing isn’t hard - its just precise and can differ slightly by some fibers (so you cannot set it ONCE and expect it to be timed for all work).
If working coarse yarn, timing might need to be adjusted to stitch earlier and if using a fine gauge cylinder the timing might work better if timed later. ie. the nearer the setting makes the cams act sooner, and the further the setting will make the cams act later. MORE TO COME.

To use the ribber, circular sock machines generally have some sort of contact on the inside of the cylinder that acts as a rest for the underside of the ribber dial fin. This contact allows the ribber dial to stay in alignment once setup. Some machines like the Erlbacher modern machine have a fixed contact on the inside of the cylinder and instead have an adjustable ribber dial fin on the underside of the dial. Generally many of the vintage machines have some kind of moveable inner cylinder part that can be adjusted from the outside (making it easier to adjust while the machine is in use)
Whatever the connection it’s essential that there are no sharp edges that can catch knitting as it comes into the machine.
The ribber stop accessory (one of its many names) for the autoknitter and Legare machines is identical and formed when bought new from Dave Lord of Chambord CSM to fit perfectly by you the user. The inner cylinder profile can differ so I recommend buying and using one for each cylinder you have. See SUPPLIES I LIKE-VINTAGE and the LEGARE page.
What correctly timed setup looks like
Shareable link: https://youtu.be/bxKjmgoDmOA
Shareable link: https://youtu.be/6VzXoxFvg8A
For more see the TECHNIQUES page. To see this used in a sock project see the main page for the menu MY PATTERNS AND VIDEOS and see the Cuff Down or Toe up pages.
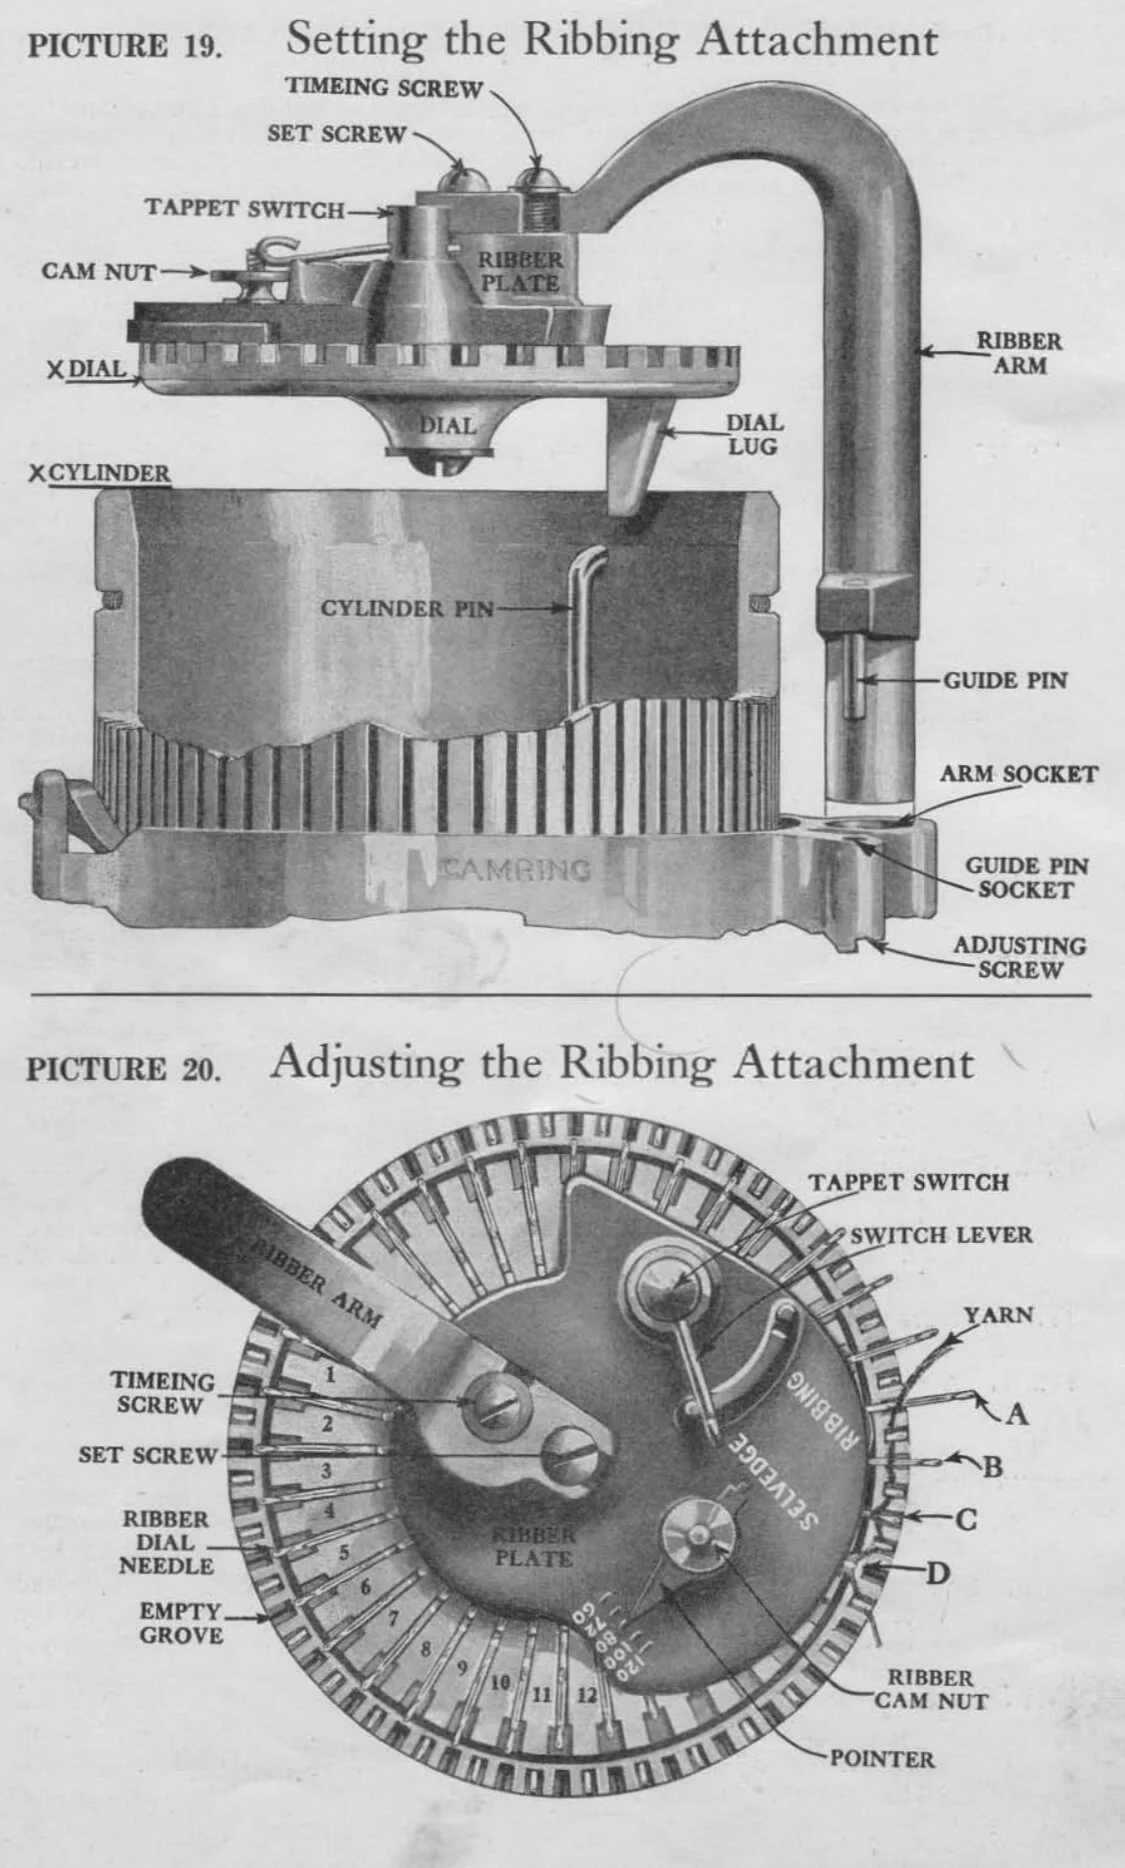
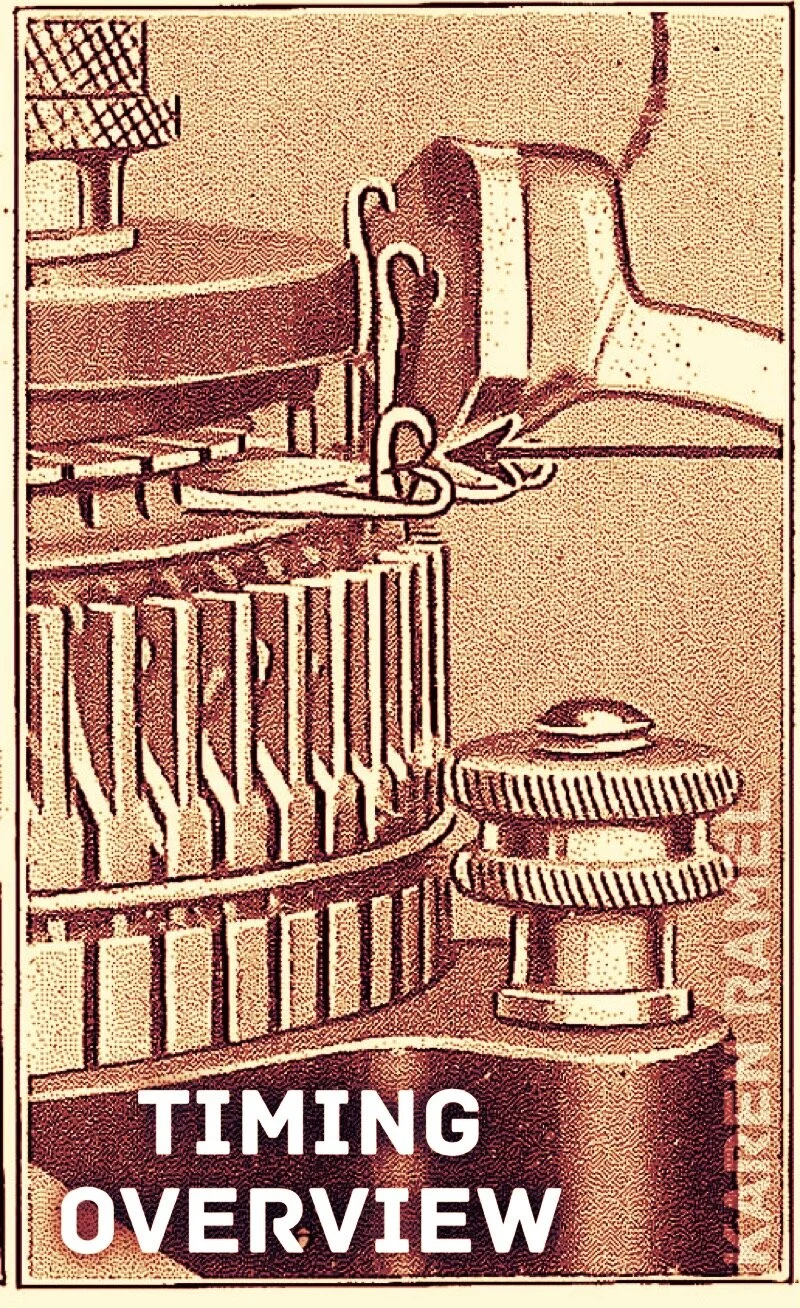
TIMING THE RIBBER
(This section is a work in progress).
Setting up timing is like making a layer cake. One thing is measured in relation to the thing before when discussing heights/alignments of things. My ribber dial is about the width of my half moon/crescent tool thickness above my cylinder, the yarn carrier is aligned heightwise to just clear the horizontal ribber needles while the yarn carrier face is almost but not touching the cylinder needles, the yarn path feeds so that if one imagines a fainting needle - it still catches the yarn. When one is quite close to ideal you can slightly raise the ribber arm if needed ensuring items in relation are also adjusted if needed). Regarding the actual yarn/stitch creation/latch closure timing - advancing or retarding the adjustment to ensure that the yarn lands within the open mouth of the needle with only the needle closest to the yarn carrier hole counted in sequence, 1, 2, 3, 4 (I messed with my timing screw to see what it could do - very interesting).
Note that timing may differ slightly with some fiber (its not one setting forevermore) and that using the machine causes vibrations - which can cause things to shift/loosen/out of alignment. AND FINALLY try to ensure you don't try to reuse damaged needles - if all is right but a needle is wrong it might be the needle OR it might be the ribber height to the yarn path. Good Luck :)
See what a correctly functioning ribber working in a 1x1 rib setup on a Legare 400:


What ribbing patterns are possible for my cylinder/dial?
What Ribber Dial is compatible with what cylinder and what ribbing MATHEMATICAL combos are possible? See the image below which is from a vintage manual on that very set of questions…
(But you don’t HAVE to have a totally mathematical pattern see further along this page).
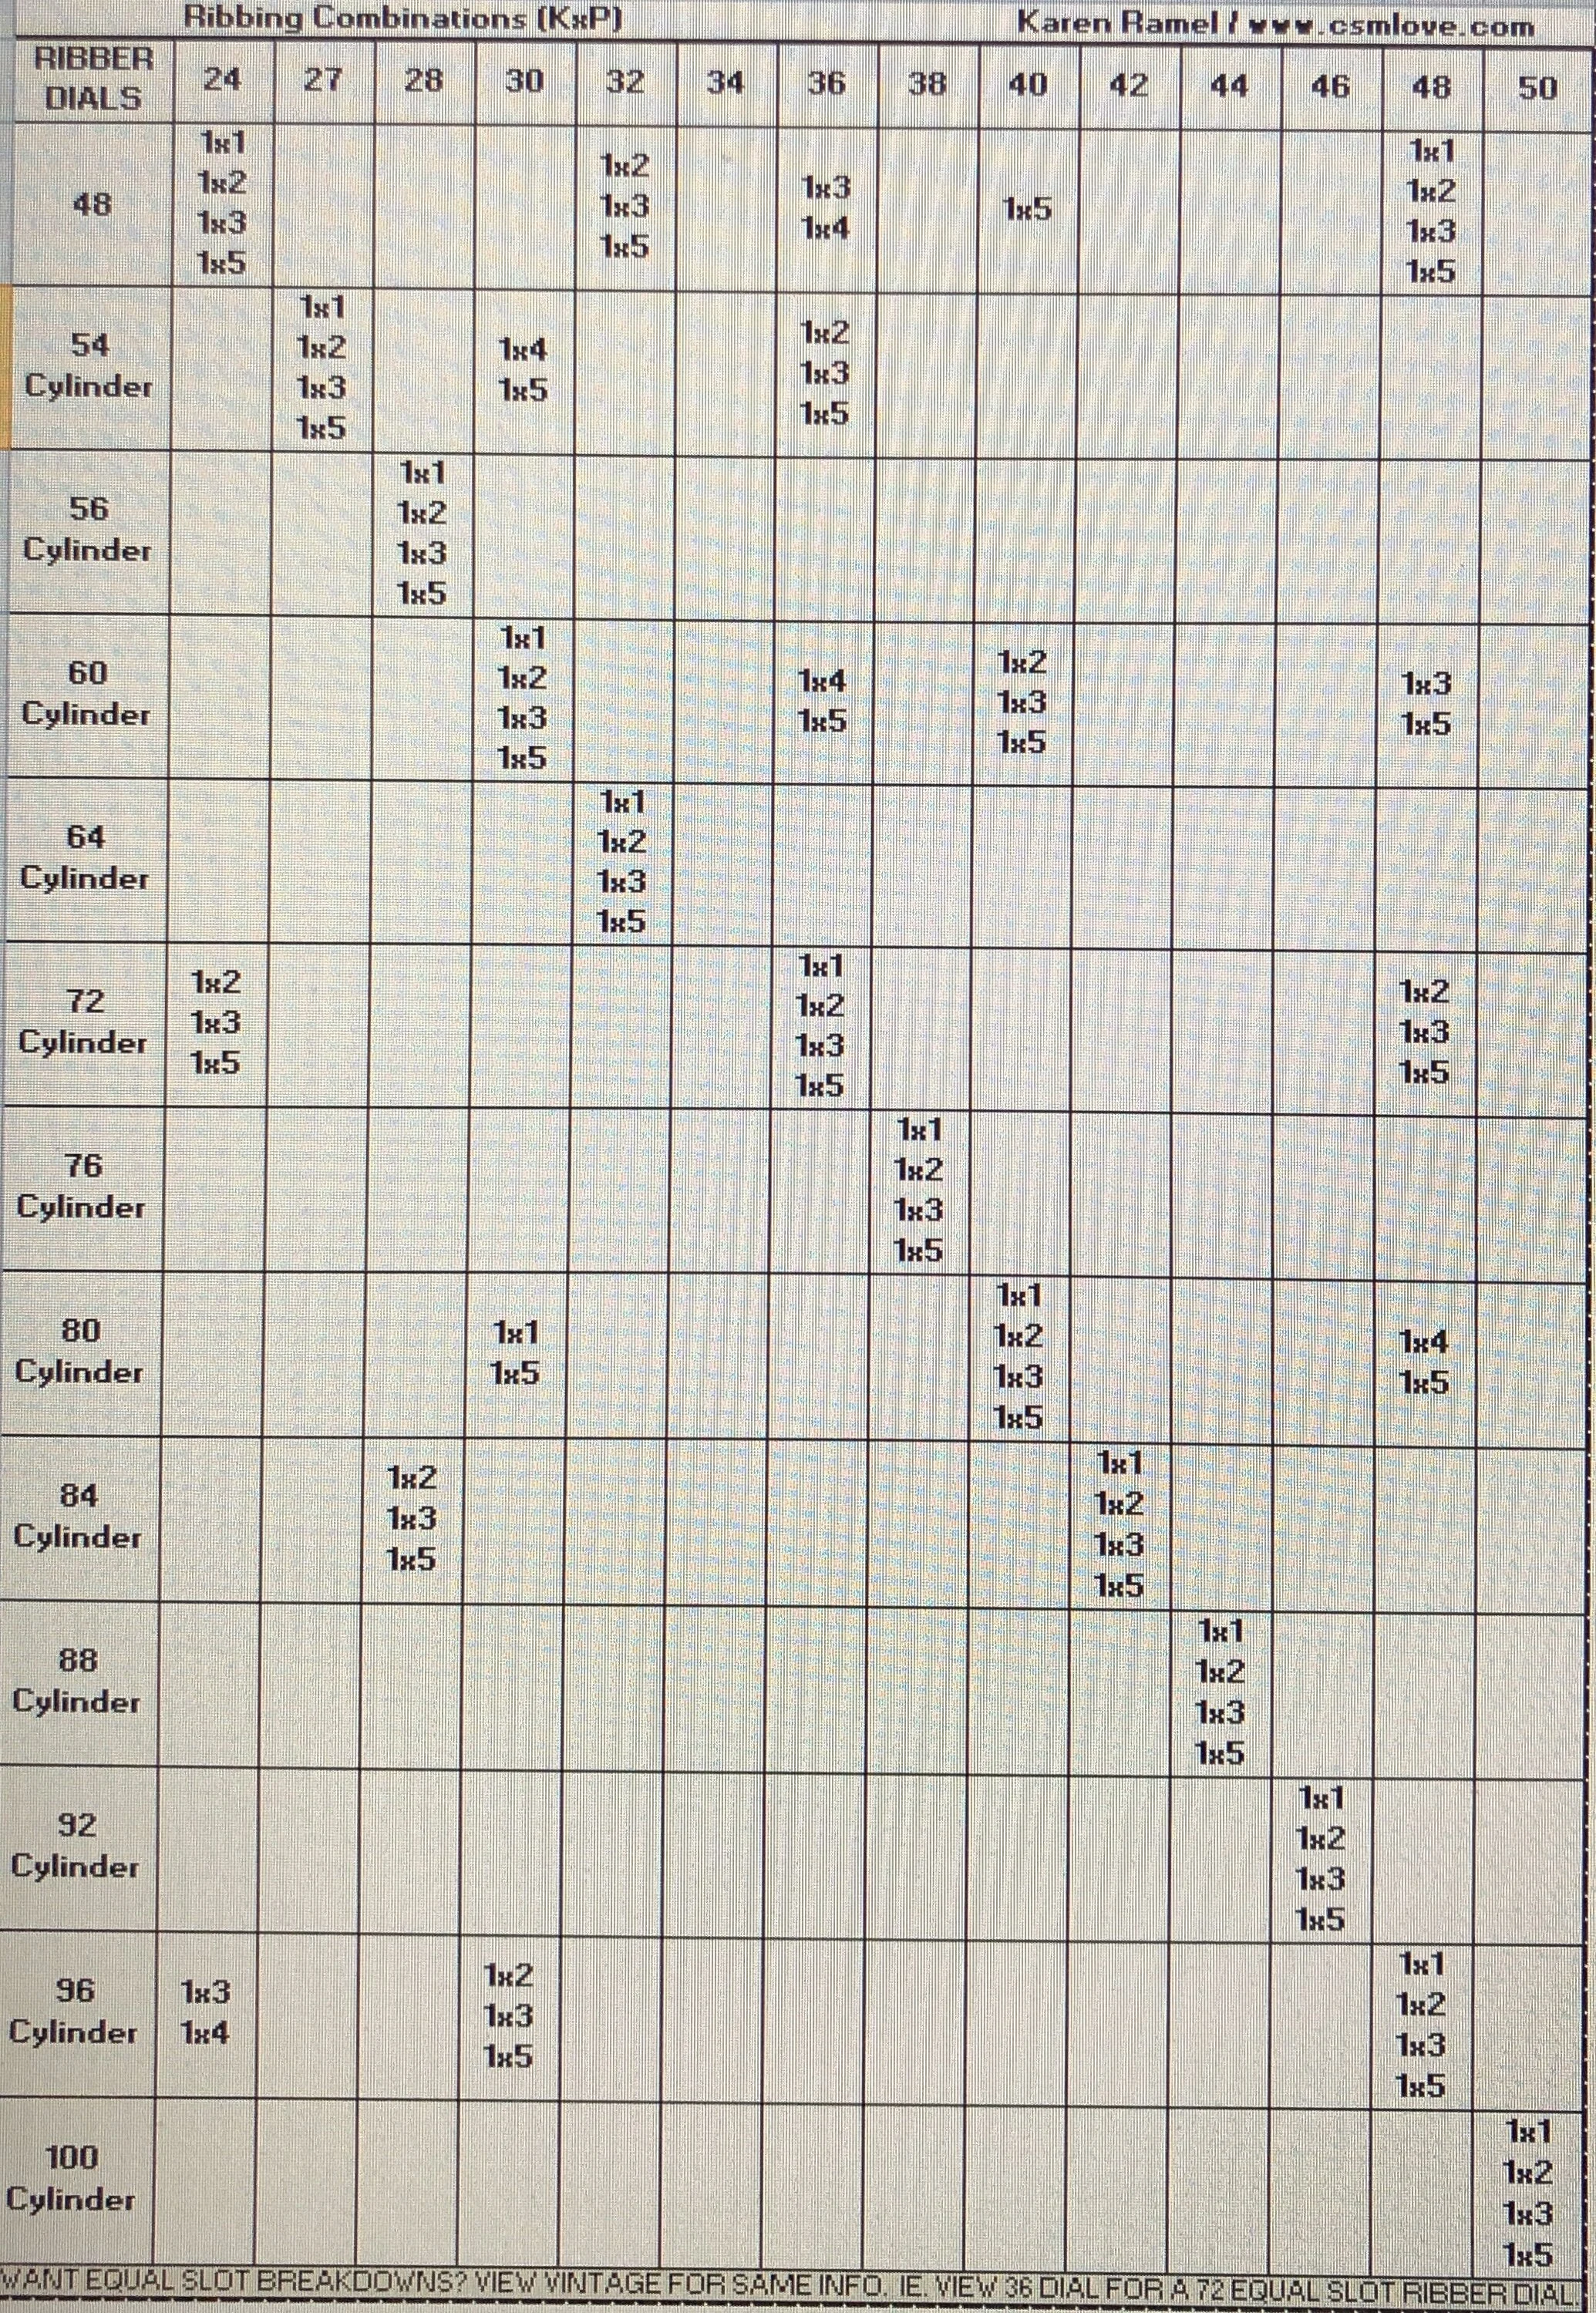
NOTE: The very last line says “want equal slot breakdowns? View vintage for same info. ie. View 36 dial for a 72 equal slot ribber dial.” Equal slot refers to the ribber dial having the same number of needle slots as the cylinder its used with - vintage machines only were made with ribber dials having half the number of needle slots as the cylinders they were used with.
Which ribbing pattern is the most stretchy and which, the least?
If knitting in 1 colour,
1x1 ribbing is the stretchiest
Stockinette is the least stretchy.
Between these there is a gradual progression in stretching as as you add in ribbing needles
1x1 stretchiest
2x1 a bit less stretchy
3x1 less again
Etc
Transferring Needles
For now, until more time is made to complete this section, please find these two images from vintage CSM manuals in regards to moving stitches from a cylinder to a ribber dial and back.
Other than NOT dropping the stitch, no real ‘care’ is needed moving the stitch from the ribber needle to the cylinder needle. HOWEVER definite care is needed when moving a stitch from the cylinder to the ribber - the stitch needs to be placed on the horizontal ribber needle within the needle not behind the latch or the stitch will drop - not knit - when working on the CSM.


RIBBING PATTERNS ON ANY CYLINDER
When deciding to work a certain ribbing (or mock rib) pattern on your cylinder you can look to see what the MATHEMATICAL breakdown on which ribbing patterns will work - OR - you can wing (or fudge) it. See below.


Half and Full Pitch Ribbing - what is it?
It’s all about the Ribber to Cylinder alignment. Full aligns a Ribber slot fully to a Cylinder slot while Half simply refers to a Ribber slot aligned halfway between the cylinder slots. Why would we want to align the Ribber between and not to a Cylinder slot? To make a projects using all the needles without needing to buy a higher slot count cylinder.

Interested in using your Ribber to make socks? See My (Patterns &)YouTube Sock Videos - I strongly recommend printing the detailed pattern AND watching the video, following along. :)
Seek more info?
Try the quick look up via the INDEX page by viewing the category you seek or drop me a detailed email. :)
THIS PAGE IS A WORK IN PROGRESS. Please stay tuned.

Often a question is how to work socks with different colour cuff/heels and toes
My approach is:
Here’s my video on Faux Russian Join
Start with first color and at (5 stitches prior) cut cuff yarn and faux Russian join to leg yarn. I have a slotted yarn carrier and topper so at when it’s 5 stitches prior to heel color start I thread in heel color (not cutting leg color but unthreading and leaving on inside of the cylinder as ribber is removed). I work heel and switch to foot yarn by cutting heel yarn and faux Russian joining 5 stitches prior to where foot begins (adding ribber back to machine as needed). I work foot and again 5 stitches prior cut the foot yarn and add toe yarn to finish toe then add scrap. Why 5 stitches before? So each tail is securely fastened on machine prior to it working (save off machine finishing on yarn tails). Example socks (forgot to switch yarn at toe).
This cone size is another reason why I’m a huge fan of the royal cone winder yarn winders https://www.csmlove.com/yarn-winders
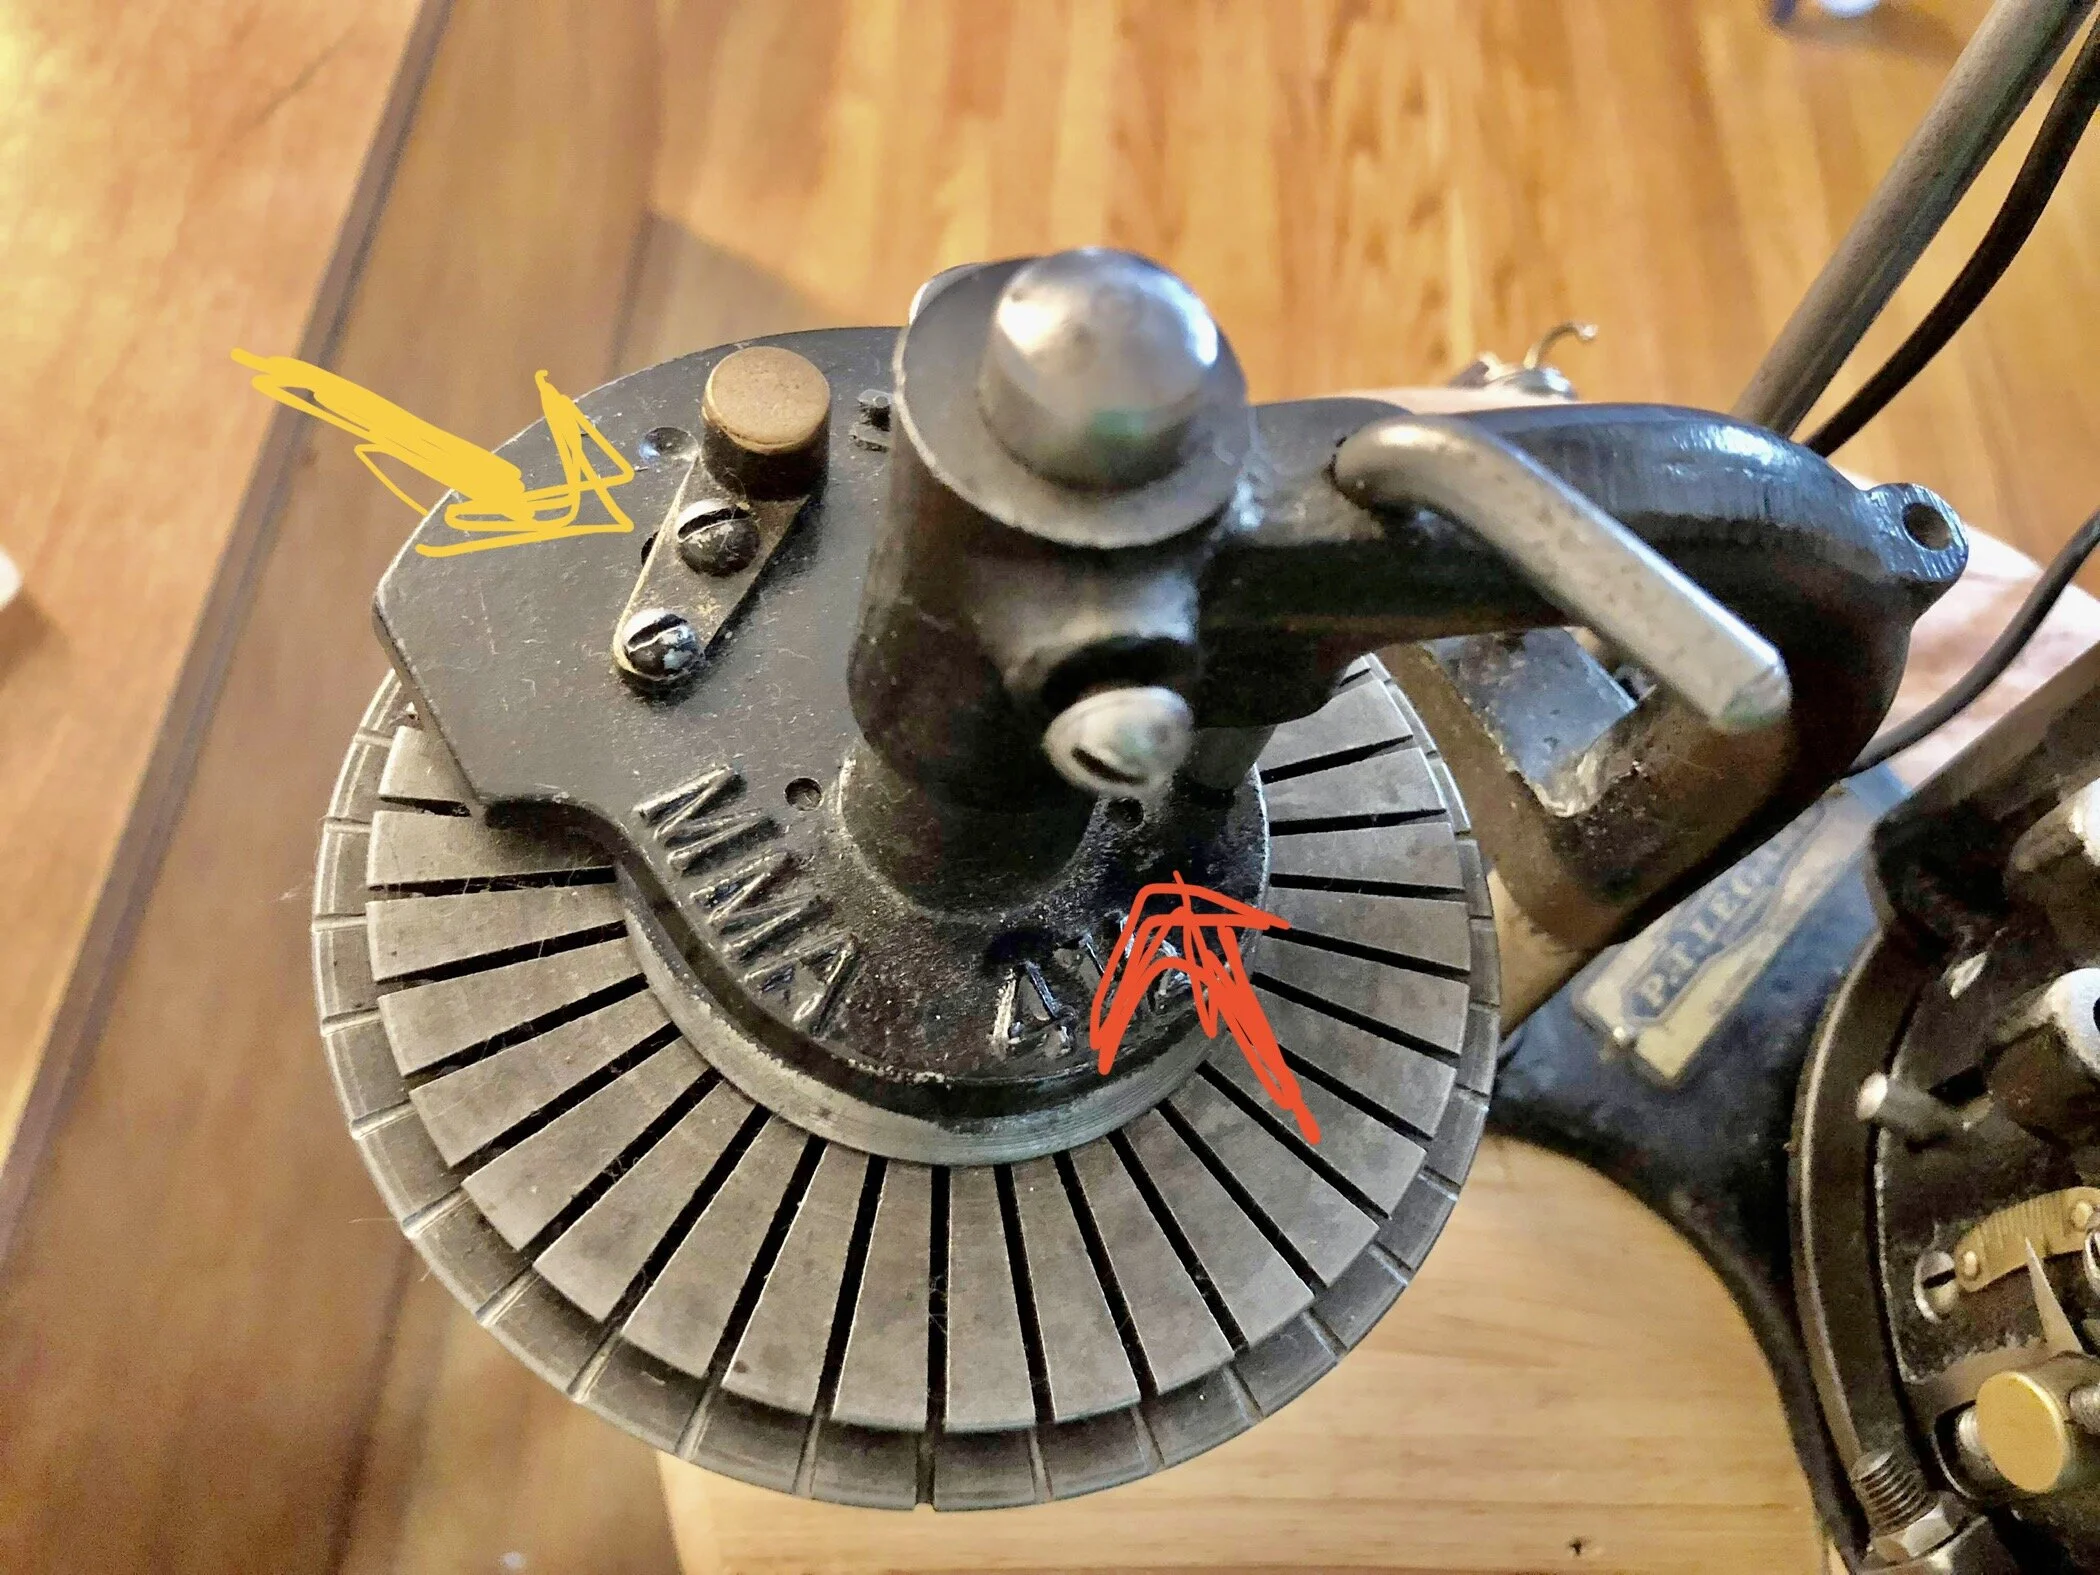
What to do if your machine become jammed while using the ribber?
Here’s what you can do if this happens. First depending on what was happening when/if something jams. 1. Gently toggle in/out switch (yellow arrow). Sometimes engaging or disengaging the tappet (if not done completely) it can snag so to help it - moving the switch in fully or out fully with slight tappet movement helps.
Or if it’s stuck completely then it’s a start over from scratch time by using one hand under the machine to catch what will drop and using the other to gently unscrew the red arrow ribber post screw. Once the screw is loose and the ribber post off the tappet can be removed and the ribber needles removed.
Not a bad idea to take a moment to determine what happened. Sometimes it can be user error with the ribber accessory mounted on the inside of the cylinder when starting perhaps the ribber dial fin wasn’t seated on the correct side or seated flush against the left side of that part. All the best