
FLAT BED LOVE MISC PAGE
For the bits of information I want to note but haven’t found the “right” place yet.
UPDATE October 2, 2022 I started actually using the machine and therefore created east resources - see Flat Bed Love Home
It all started with my 2021 Jan 22 - Singer Memo-Matic 700 Flatbed Knitting Machine blog entry.
WHY?
Why does some YouTube videos working a PUNCHCARD suggest to pull out the FIRST needle nearest to the carriage before working that row?
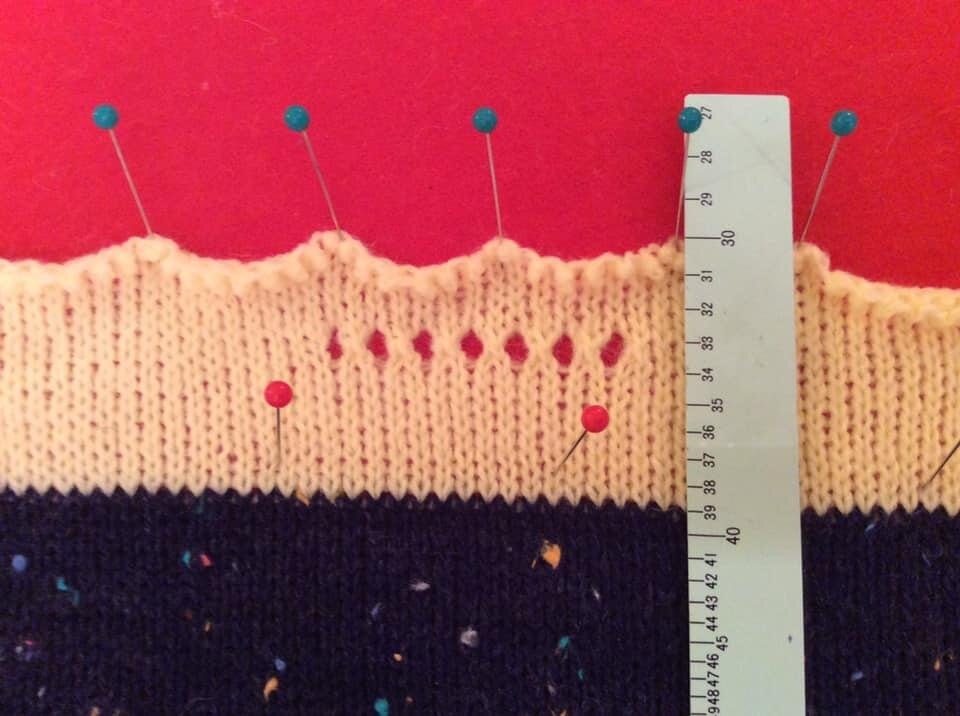
By doing this you create a “slip stitch on the edge” which is a ‘cleaner edge’ - you could even try doing the slip stitch on the edge every other row.
KNIT CONTOUR
Irene Woods Clearwater Knits Tutorials | Sizing Charts |
The Diet Diary - Knitting Fiend | Knitting Conversions
Knitting Calculators - Increasing/Decreasing | Website | Magic Formula for placing Increases/Decreases | Evenly distributing shaping | The wonderful “magic formula” for calculation shaping |
KNIT RADAR STITCH GAUGE - Sewing patterns to consider using with flat bed
Many Machine Knitting Patterns can be found: http://sandeeskwikknit.com/
How old are flat bed knitting machines? See here
Dishcloth, tuck striped 2 carriage MK Ravelry
KNIT RADAR STITCH GAUGE - Sewing patterns to consider using with flat bed
Useful videos:
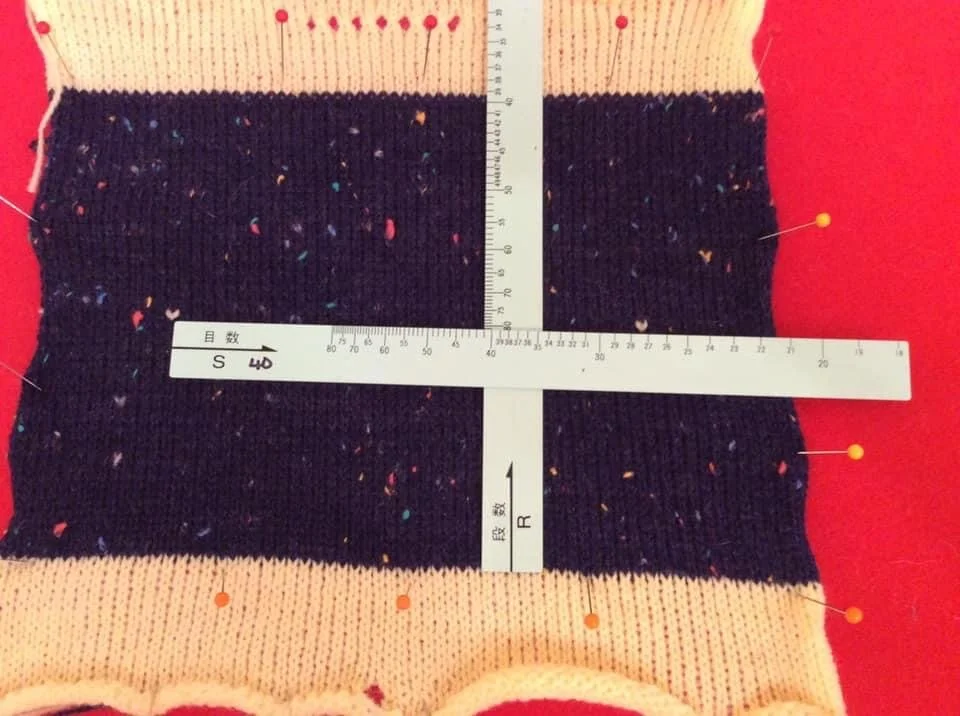
Using the colour “ruler” on the flatbed to confirm gauge.
Washcloth on flatbed with cast on and bind off
A person asked about U knitting on the machine. Here is the how posted by another person on fb:
You must change settings from slip to knit on both carriages when your carriages are on the side where your fabric joins from main bed to ribber bed. Let's imagine that your 'fold' side is on the left, and the open edges are on the right. 1. Carriage on right. 2 You are going to knit with main bed across to the left. set main bed to knit and ribber carriage to pass. 3. carriage on left : set ribber to knit and main to pass- to knit the ribber bed needles. 4. carriage on right- don't change settings, because next pass must knit on ribber and pass on main. 5. set main bed to knit and ribber to pass, 6. carriage on right . repeat #2 -6. So it takes 4 passes of the carriages with changes to both beds on the fold side = one row. practice with a smallish sample to get the rhythm. Oh- I cast on both beds with full needle rib and switch to circular for some wasteyarn rows, then two ravel cords (one for each bed) then cast on over the ravel cords , carriages on right- cast on from right to left on ribber bed, then left to right on main, which brings your yarn back to the carriages and you are ready to go. Weights on the open ends and the fold, as well as the cast on bar. move the end weights up every 10-20 rows. Best of luck. Separately there is also this video
I saw the most wonderful instagram post
I asked them what the technique used was and they answered “it is referred to as double jacquard. It can be executed on both punchcard machine models and on electronic ones. A color separation is required, and color changes are made every 2 row using both beds. A color changer is recommended. Stock punchcards and manufacturer supplied electronic designs do some of the work for you. I like to explore how to use DIY designs and separate the colors for the planned fabric technique.”
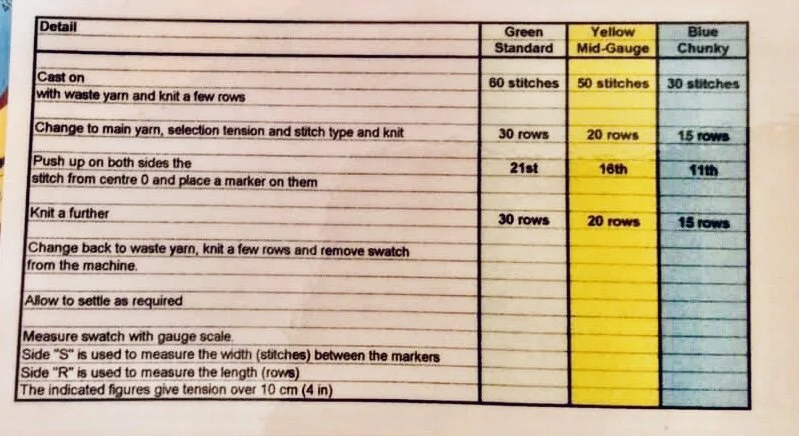
Stitch Gauge knowledge as per Julie Boylan on her Hand y Machine Knitting podcast - Episode 4 from March 5, 2015. | Ravelry | Instagram |
Using the machine rule helps ensure correct row and stitch counts are correct. She recommends using the rule that comes with your machine and with scrap and project yarn, work a swatch on the flat bed.
Describing how:
11:34 point of the podcast
Say you’re trying to get 16 stitches over 4 inches. Cast on with waste yarn 16 times 3 or 48 stitches on waste yarn. knit a few rows. change to project yarn and knit 10-20 rows. place thin yarn markers showing center 16 stitches. carry on smartly 10-20 rows. change to waste yarn for few more rows then remove from the machine. steam swatch, block it and let it dry. Measure in centimeters if possible. divide by 16. you have a gauge.
Row gauge isn’t as important.
You can take this measurements across several rows on the inside of the project to avoid curled edges. Take the average. It allows less adjustments needed.

Instagram post from a person who quickly reviews ribber use with cast on with 2x1 ribbing. Post.
Please show your support by following me on the following platforms: