

Techniques
This page is a compiled and sorted technique page not designed to show complete sock videos. Outside of the info here see other website info easily using the INDEX quick lookup page (found in the MISC CSM menu)
Socks Cuff Down | Socks Toe Up | See all of my YouTube Videos
Looking for more patterns see the homepage for the menu “Other Patterns and Videos”
What can one make on a CSM? Socks and Non-Socks! See MY SCRAPBOOK page - which are visual Ravelry projects.
Want to see what I’m up to? See my INSTAGRAM | Have a question? EMAIL ME! karenramel@yahoo.com
Need Circular Sock Machine HELP? SEE THIS PAGE
New categories below are formatted to the left. New sub-categories are center formatted.
Circular Sock Machines - Open Cam versus Closed Cams (the two main differences in machines)
Closed Cam: How to take apart a Legare and put it back together again - CLICK TO GOTO THE VIDEO - Shareable link: https://youtu.be/JiiYJanqjLA
Open Cam: How to take apart an Autoknitter and put it back together again - CLICK TO GOTO THE VIDEO - Shareable link: https://youtu.be/NApUY51OOqs
Baseline
The concept of foundation settings to ensure the ability to successfully knit on a Circular Sock Machine. Yarn Baseline Video - CLICK FOR THE VIDEO - Shareable link: https://youtu.be/6uB9mBUPS4k
For more info please see this topic on CSM Start-CSM3
Cast On - Making your own Cast On Bonnets
In order to successfully start knitting on Circular Sock Machine, there needs to be pull down tension on a minimum every second cylinder needle on the machine. There are many ways to Cast On. Once you have cast on, a great first project is a cylinder specific cast on bonnet. I offer below easy instructions for your first project and an upgraded version I created called the Universal Bonnet. See the next section below for other ways to Cast On.
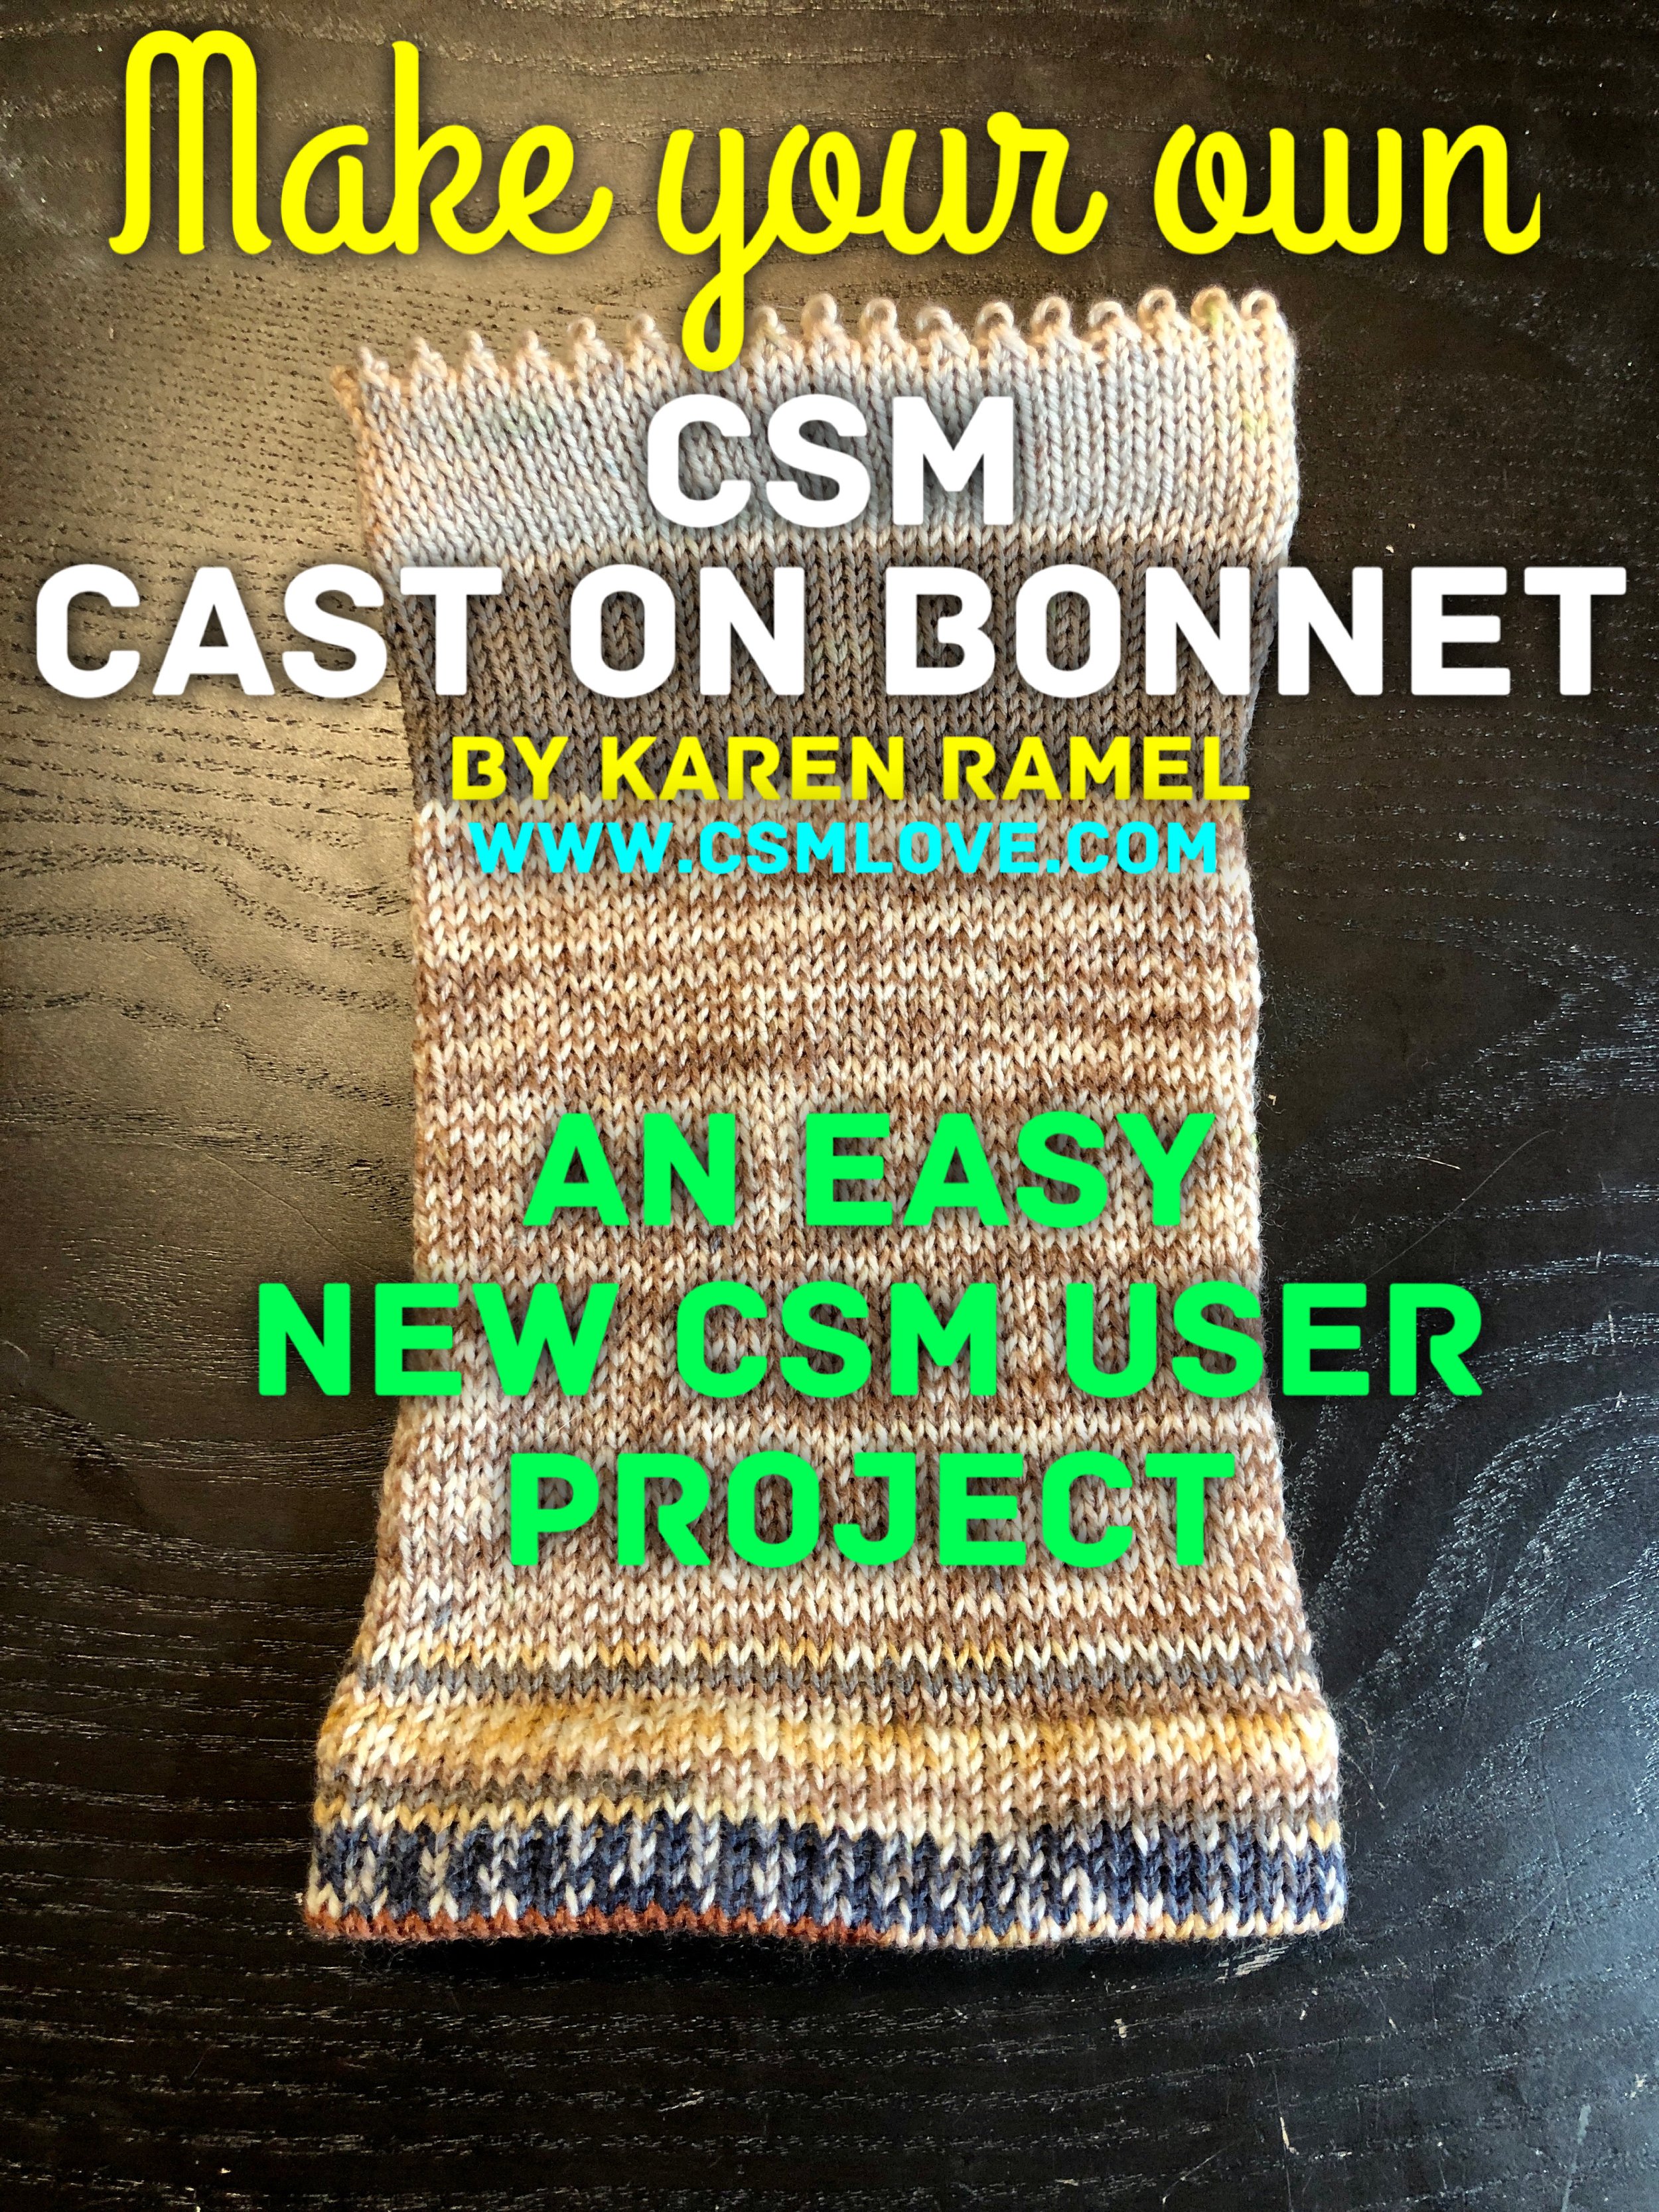

Making a Cylinder Specific Cast On Bonnet - an easy new user project. The shareable YouTube link is https://youtu.be/Pp-5HXE7enA
Making a Universal 6mm Split-Ring Flat Cast-On Bonnet. The shareable YouTube link is https://youtu.be/Ii3NfRO_PKA
Cast On - Starting on the CSM
To correctly cast on, amongst some important things, are also the correct settings or base line. See CSM START LEARNING menu for CSM START-CSM3 page.
Whether you are casting on with a split ring bonnet or with a bonnet without rings, the method is the same. Don’t have a bonnet? See the CAST ON page where there are links to other cast on videos on the CSM VIDEO HOTLIST.
How to use a Split Ring Universal Flat Cast On Bonnet (a quick review) - CLICK FOR THE VIDEO - Shareable link: https://youtu.be/6uB9mBUPS4k | For further clarity please see the written step by step instructions on how to effortlessly cast on located on my HANDOUT page.
How to Cast-On with Any Style Split Ring Bonnet (including the universal bonnet) - CLICK FOR THE VIDEO - Shareable link: https://youtu.be/1mxYpau_fiU
Cast Off / Bind Off / Finishing Live Stitches
I get that Cast ON isn’t alphabetically before Cast OFF however it makes more sense in this order. :)
ON MACHINE


Double Pass shown here after creating and hanging a hung hem THEN doing the bind off (can be done without the hung hem first) - CLICK FOR VIDEO - Shareable link: https://youtu.be/JlzaPoroUmA
Double Pass - CLICK FOR VIDEO - Shareable link: https://youtu.be/j7rnhZf_IbM
Latch Hook Bind Off-Short Version (Silent) - CLICK FOR VIDEO - Shareable link https://youtu.be/cIiyrgh3r8M
Latch Hook Bind Off -Long (Silent) - CLICK FOR VIDEO - Shareable link https://youtu.be/DWFRm7Z-d_s
A NOTABLE tip with the latch hook bind off is to ensure you are working this without over tightening each stitch or you’re restricting the edge once done, of course this style bind off doesn’t create the same stretchy edge some others do. Try it and find your preferred method.
OFF MACHINE
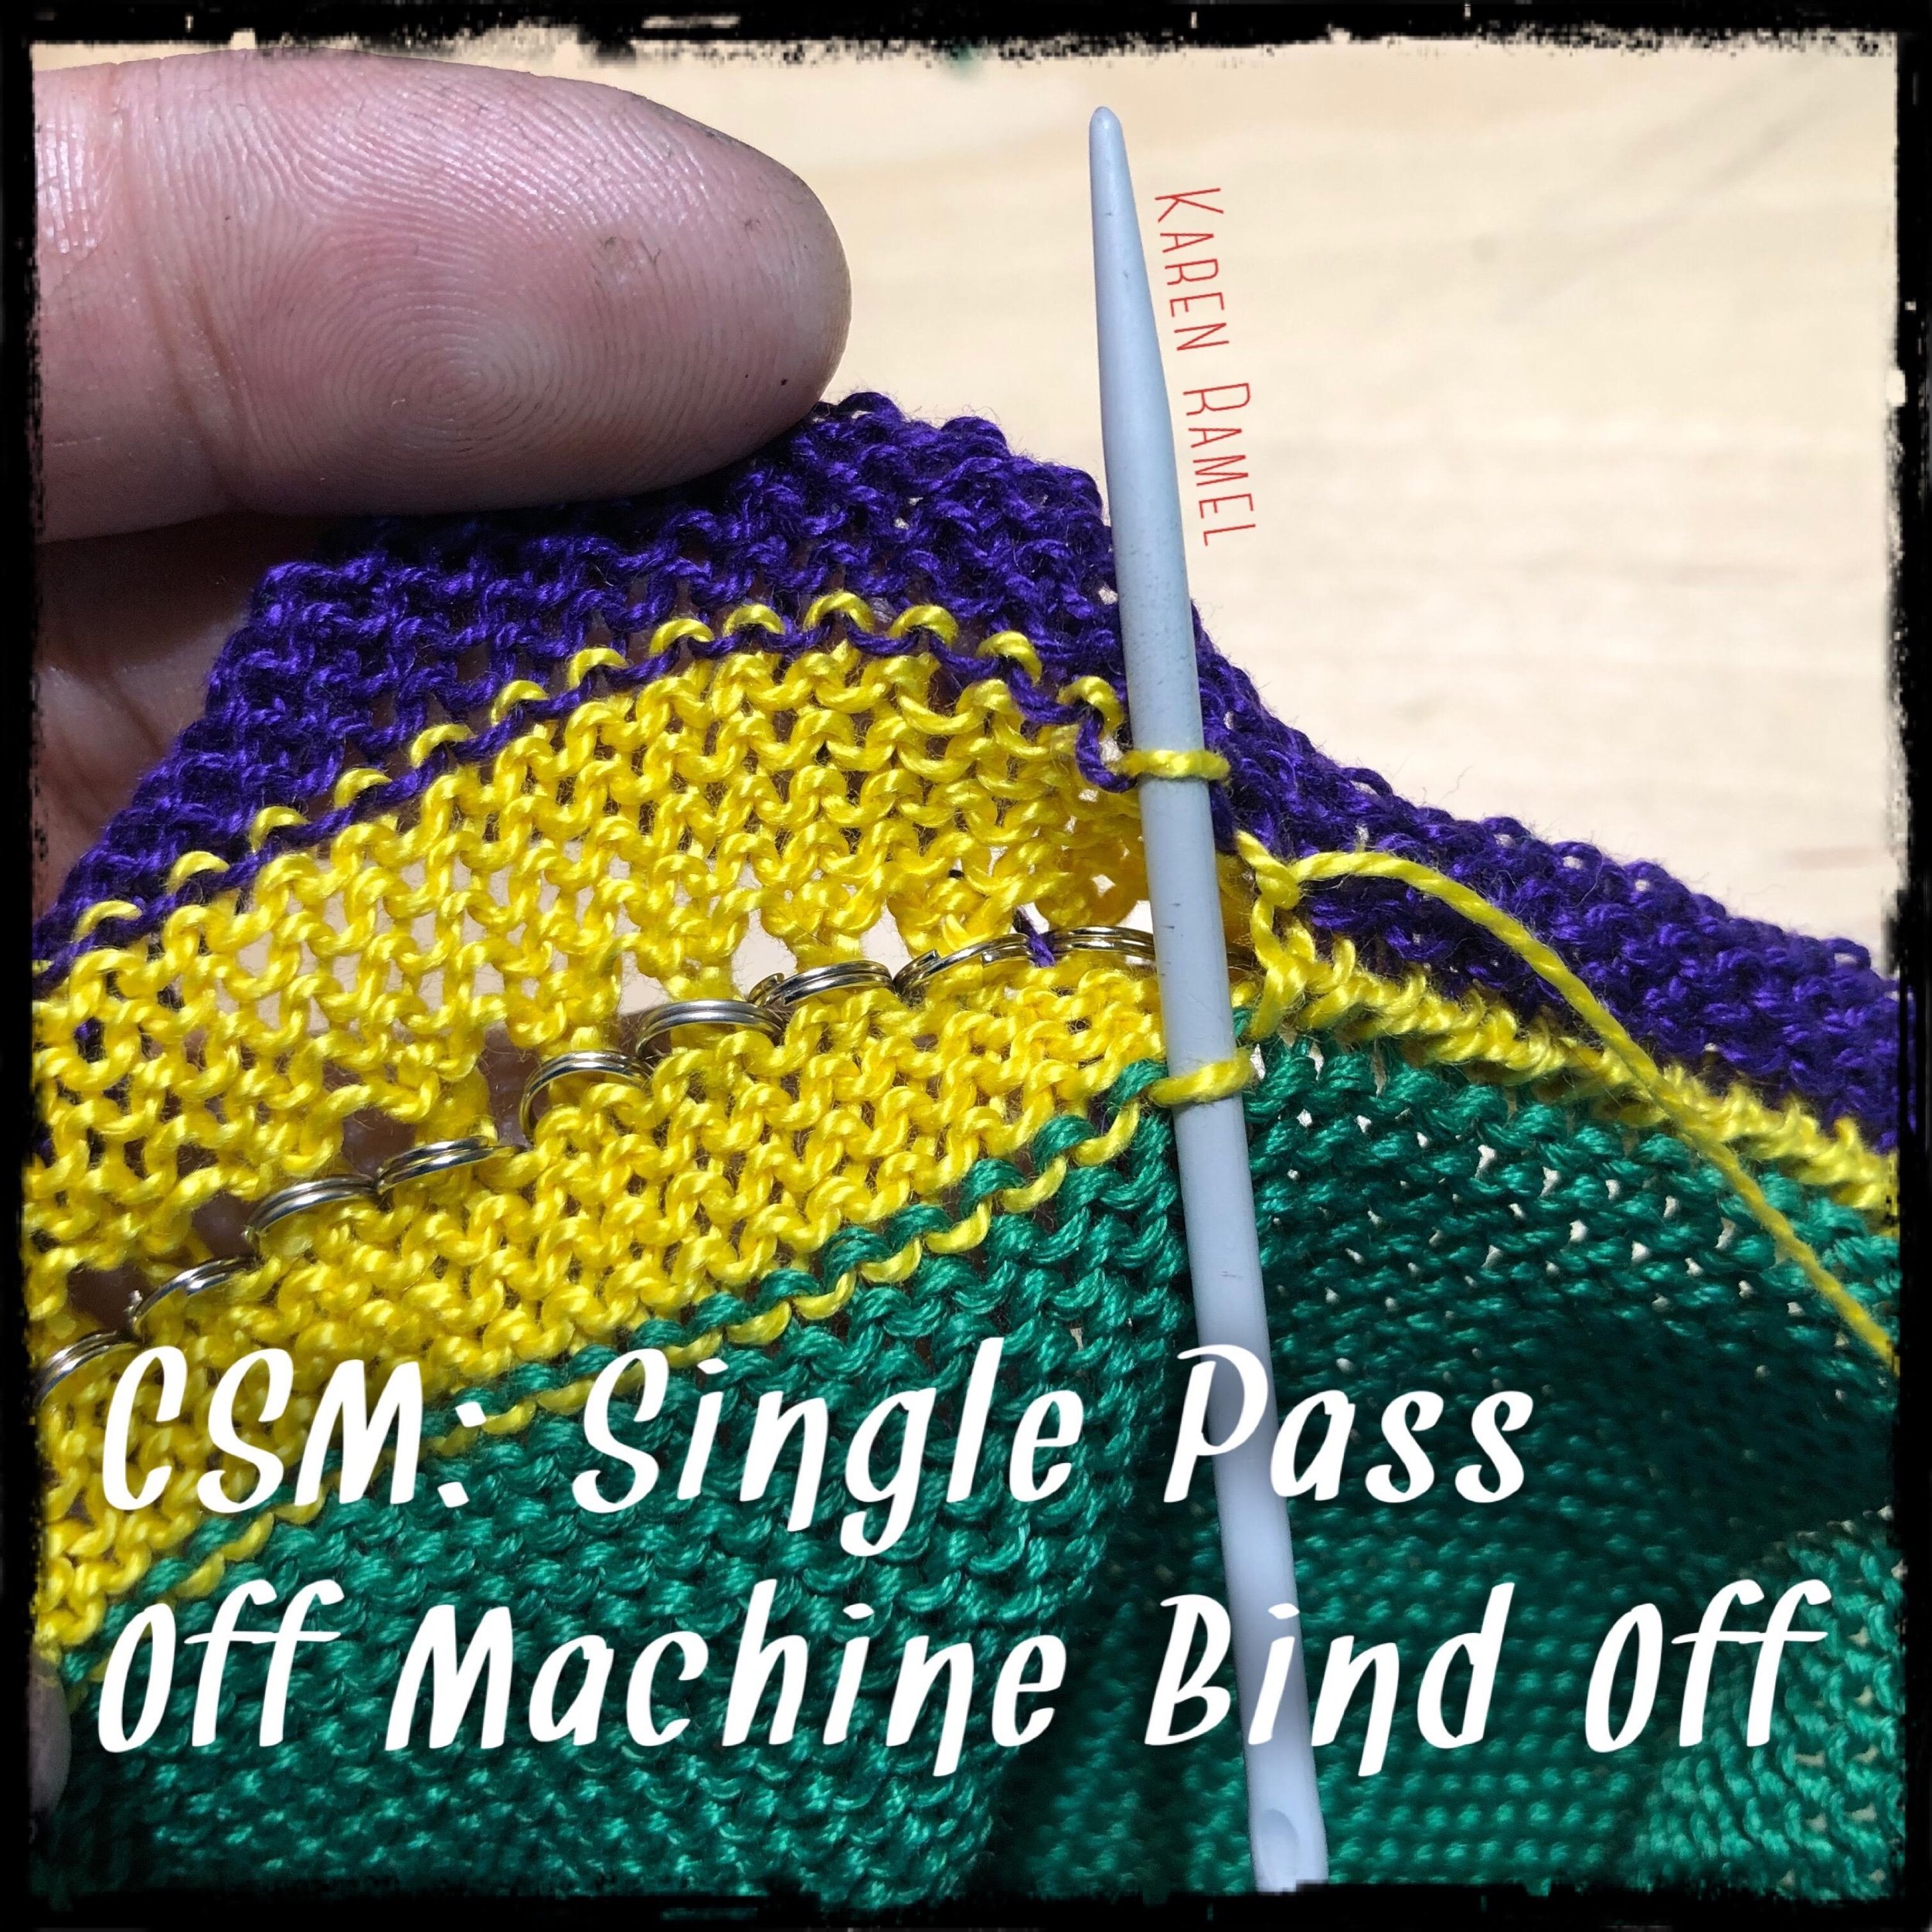
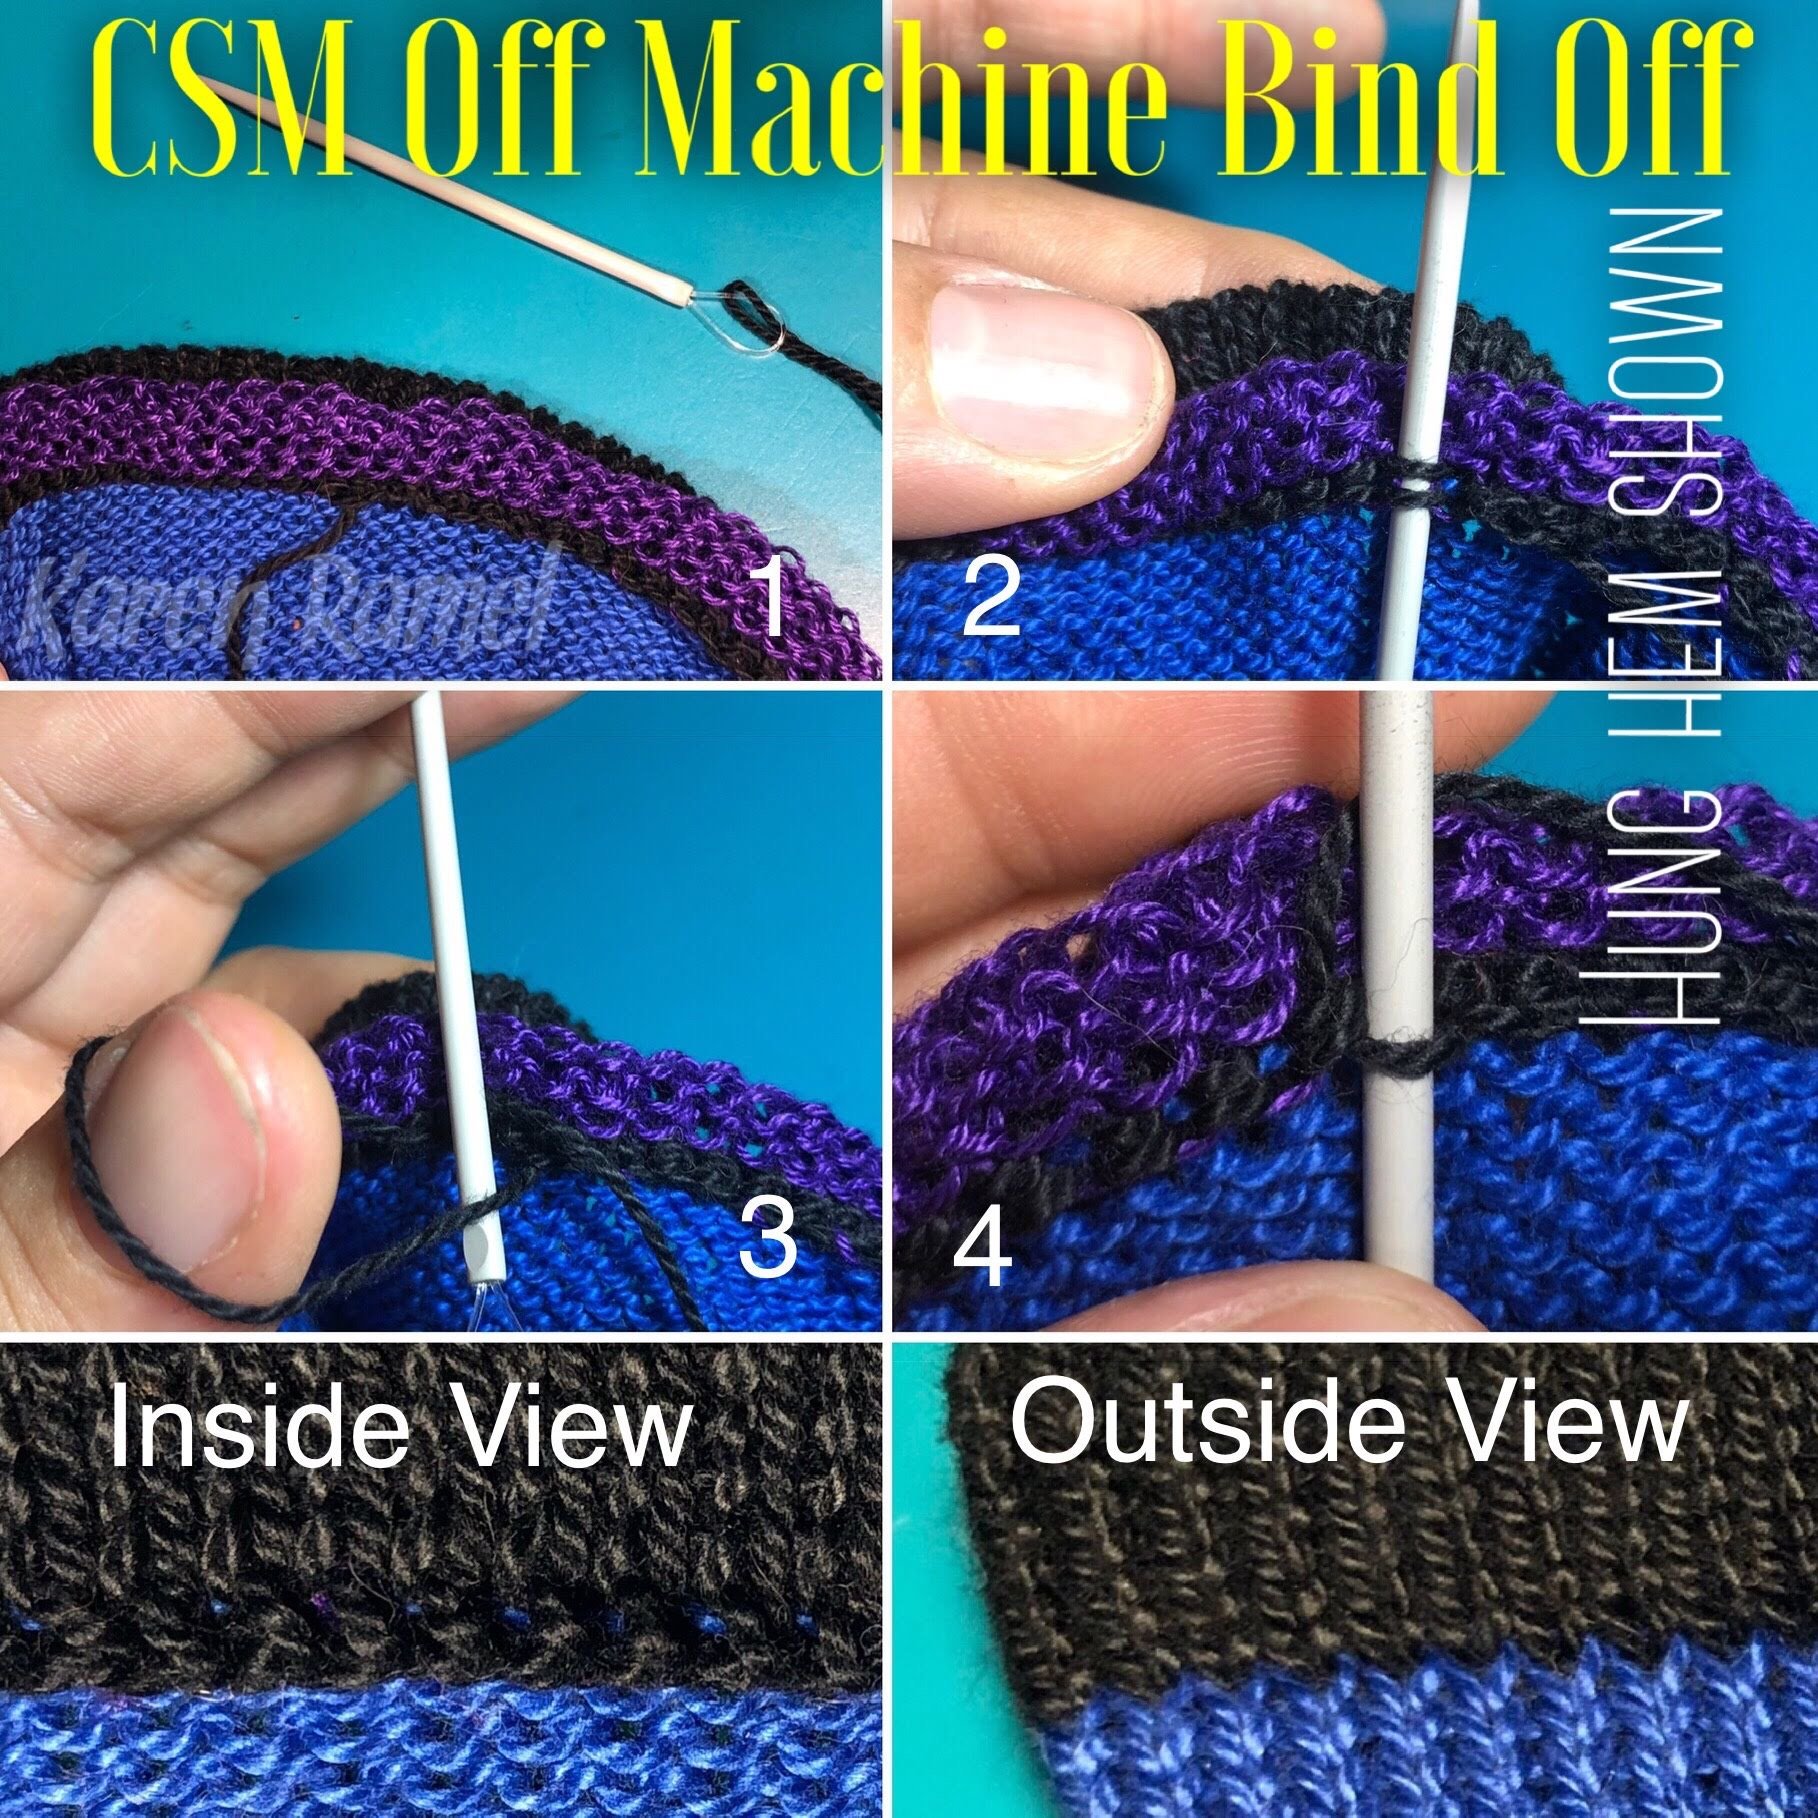
Single Pass Bind Off (This is my preferred method) - CLICK FOR VIDEO - Shareable link: https://youtu.be/iPcoOI1Lriw
I use this method the most as it mirrors a hung hem (see example image). For more info on Hung Hems see that topic.


Close the Toes of your sock (see Kitchenering)
Colorwork

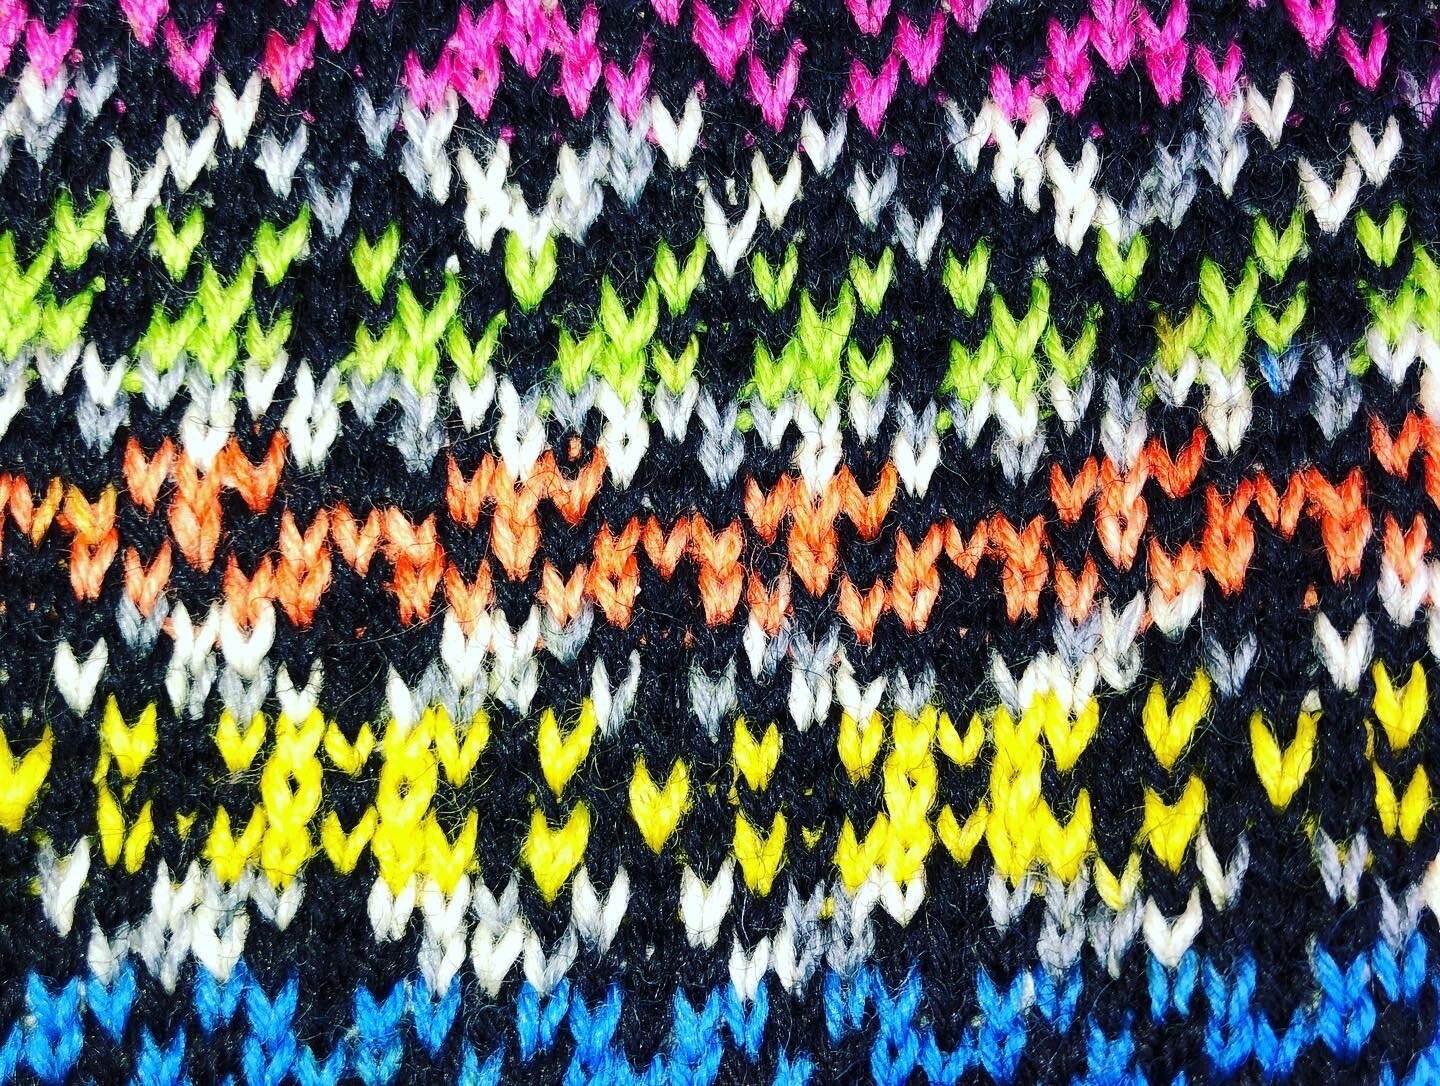
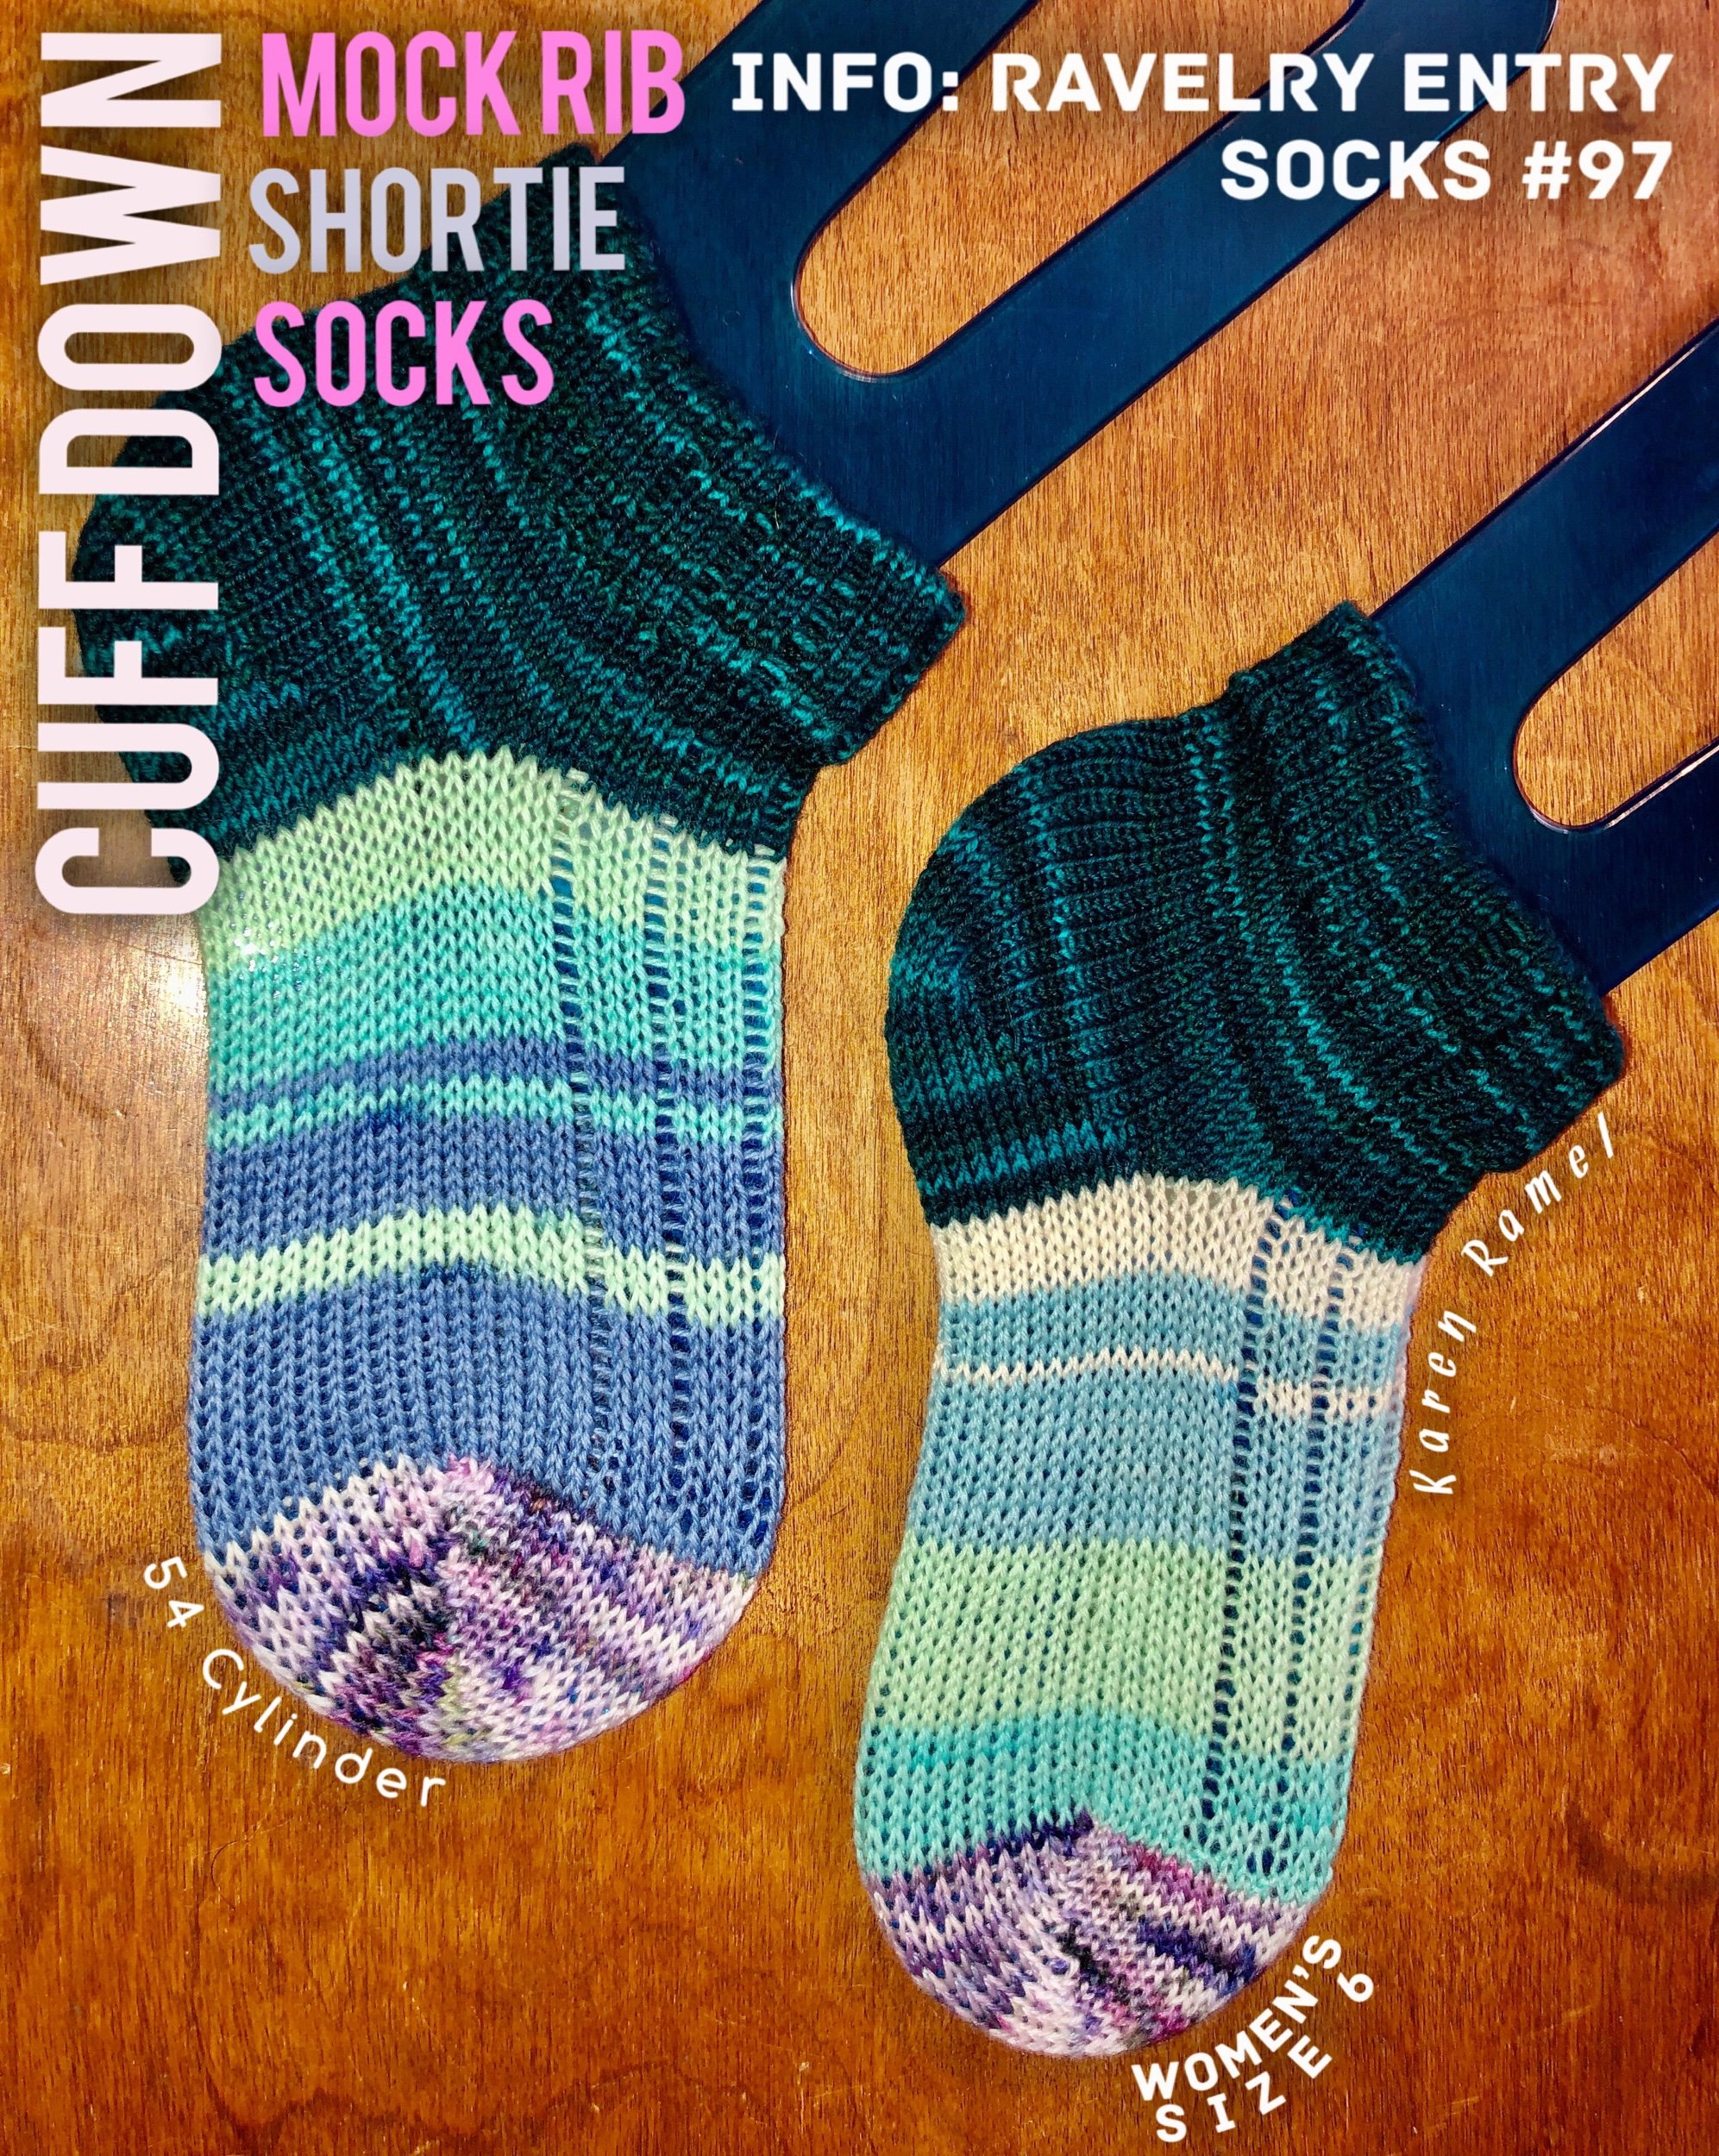
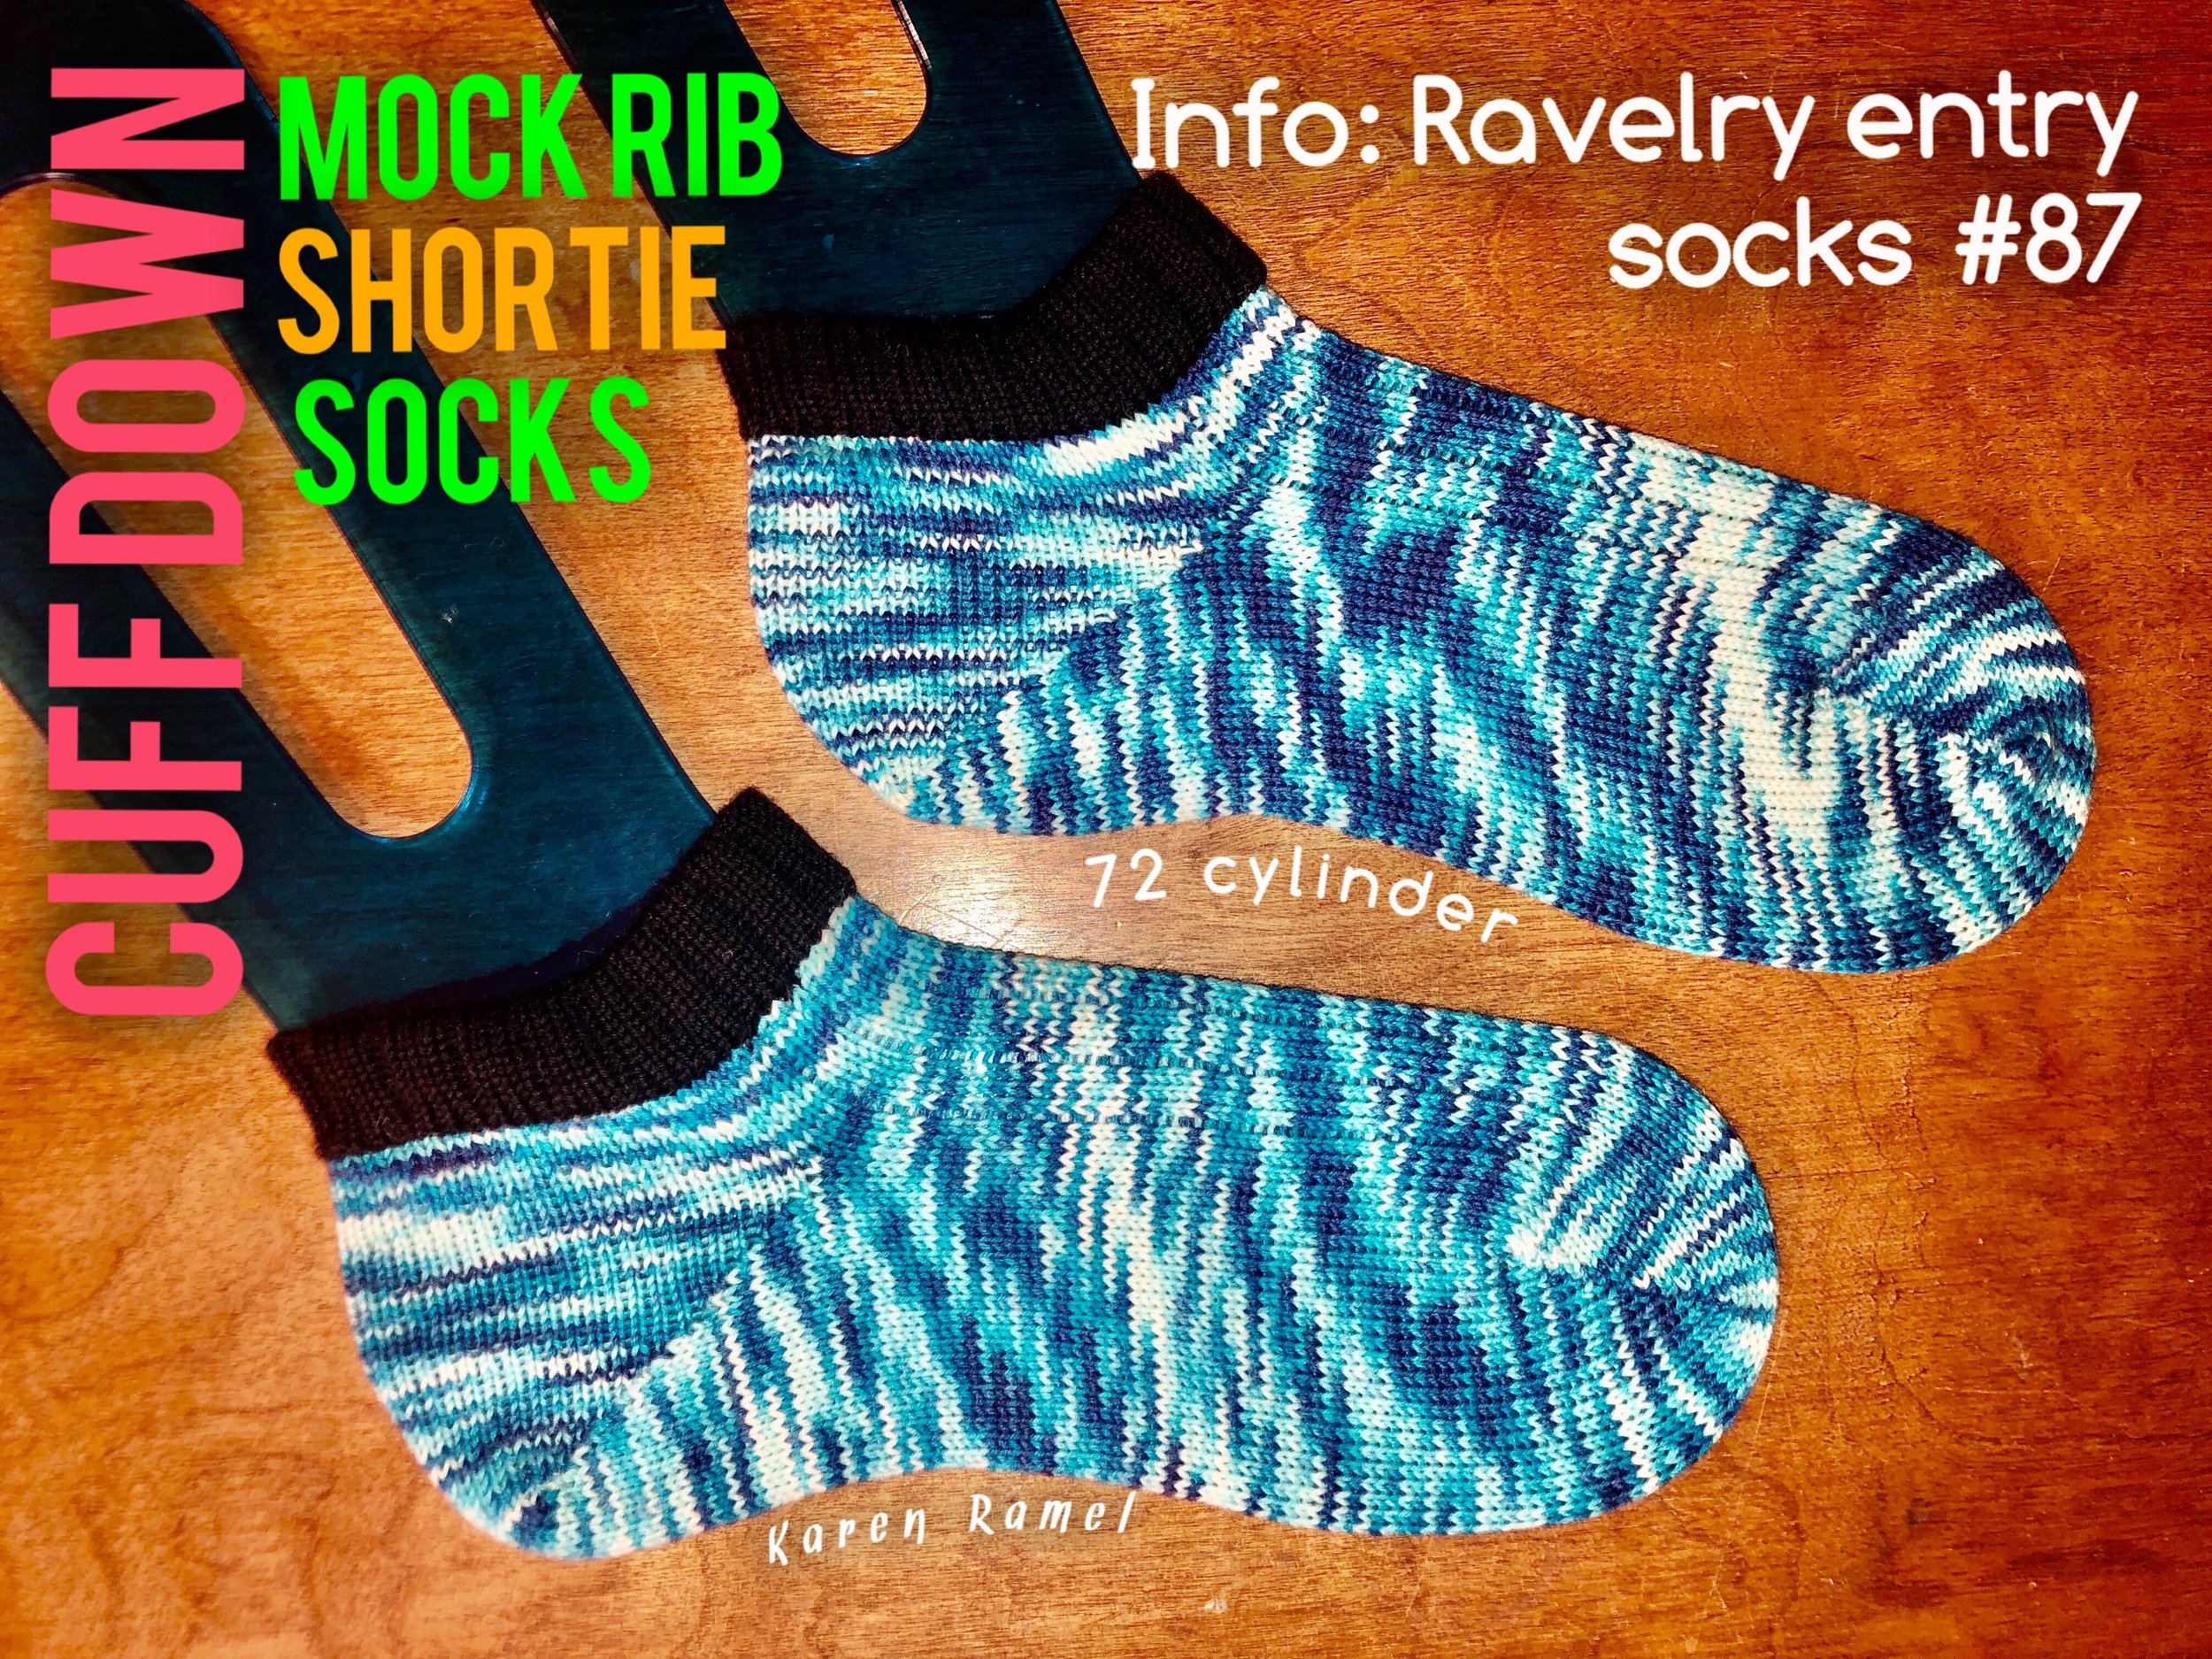
From simply swapping between 2 or more yarns, changing out the sock colors of your Cuff/Heel/Toe or working a stitch by stitch masterpiece…
The purple and white Universal Bonnet shown above was built using two yarns - see how this was done - Two Yarn colorwork briefly demonstrated while working flat - CLICK TO VIEW VIDEO - Shareable link: https://youtu.be/yTzfXBOtW1I
Colorwork - Presenting two ways to make chart following easier on the CSM - CLICK TO VIEW VIDEO - Shareable link: https://youtu.be/ZDNfl16Qql8


Quick CSM Colorwork Tip - Special thanks to Heidi Bears for her Colorwork video - To avoid floppy embarrassing Stitches - CLICK TO VIEW VIDEO - Shareable link: https://youtu.be/2m3st0DEIHQ
Colorwork snippet and sock progress - CLICK TO VIEW VIDEO - Shareable link: https://youtu.be/17CUaoK_hcQ
Also see MINI-MAST on the CSM Hotlist page
HOW TO WORK DIFFERENT COLORS INTO A SOCK
Below are sock projects to demonstrate how some color changing can look.


Detailed video on whole method to come.
In the meantime check out how I join two different yarns while working on the CSM - FAUX RUSSIAN JOIN - CLICK FOR VIDEO - Shareable link: https://youtu.be/POuiD9-FOB4
Start with first color and at (5 stitches prior) cut cuff yarn and faux Russian join to leg yarn. I have a slotted yarn carrier and topper so at when it’s 5 stitches prior to heel color start I thread in heel color (not cutting leg color but unthreading and leaving on inside of the cylinder as ribber is removed). I work heel and switch to foot yarn by cutting heel yarn and faux Russian joining 5 stitches prior to where foot begins (adding ribber back to machine as needed). I work foot and again 5 stitches prior cut the foot yarn and add toe yarn to finish toe then add scrap. Why 5 stitches before? So each tail is securely fastened on machine prior to it working (save off machine finishing on yarn tails). Example socks (forgot to switch yarn at toe).
This cone size is another reason why I’m a huge fan of the royal cone winder yarn winders
Covers
See the blog entry of the Machine Cover I made.
Protect your cylinders and more with ideas shown on the SUPPLIES I LIKE page.
Dropped Stitches
Quick Legare CSM Stitch Unknitting (undoing the stitches) - CLICK FOR VIDEO - Shareable link: https://youtu.be/M4atJcoVOnQ
Tricks and Tips: Removing Ribber and Fixing Dropped Stitches on a Cuff Down Sock - CLICK FOR VIDEO - Shareable link: https://youtu.be/wAb0AcoQMaw
You’ve Dropped a stitch. Now what? - CLICK FOR VIDEO - Shareable link: https://youtu.be/7e2SkrfDqQk
How to fix or unknit an accidental extra half row on a Legare 400 - CLICK FOR VIDEO - Shareable link: https://youtu.be/XU_PlY4x0N8
For more EASIER dropped stitch fixing see this Live Stitch Needle Lock DIY tool.
FLAT KNITTING PANELS
(See below for the Working Flat section)
FULL PITCH
(see PITCH)
HALF PITCH
(see PITCH)
HEELS
Two images showing how Heels/Toes were weighted in vintage manuals
Some vintage machines came with two sets of weight stacks/stem weights, and during the Heel or Toe both weights were used (one set with the buckle and one set with the V hook). Newer times, we feel three weight pucks are too much for building Heel/Toes. However some vintage machines came with just one weight stack and advised that during the Heel/Toe you would remove the buckle and weight from the main work and instead add your weight stack to just the Heel/Toe you were working on with the V hook. For information on WEIGHTS see this BLOG ENTRY.


Included here for now, this section will cover some of the different heel recipes there are.

Holding the first and last four stitches of each row while working that row helps reduce the need to move your heel weight very often and better ensures stitches stay put during their creation on those specific areas often where stitches can easily drop because of that prior stitch lifting on the needles.
No Wrapped Heel (sometimes called the Suicide Heel)

JUST THE HEEL - A Quick CSM No Wrap Heel DEMO - CLICK FOR VIDEO - Shareable link: https://youtu.be/ejVTuc2fWyY
A quick & easy tip on reducing dropped stitches on the No Wrap Heel/Toe Method - CLICK FOR VIDEO - Shareable link: https://youtu.be/n9QkKBw2xyM
Hung Hems
How to make a Hung Hem (a folded over and hung hem) on a CSM - CLICK FOR VIDEO - Shareable link: https://youtu.be/m5qJV0wCuws
How to easily add split rings/make a picot edge (hung hem edge) - CLICK FOR VIDEO - Shareable link: https://youtu.be/0XvYsTkjn1A
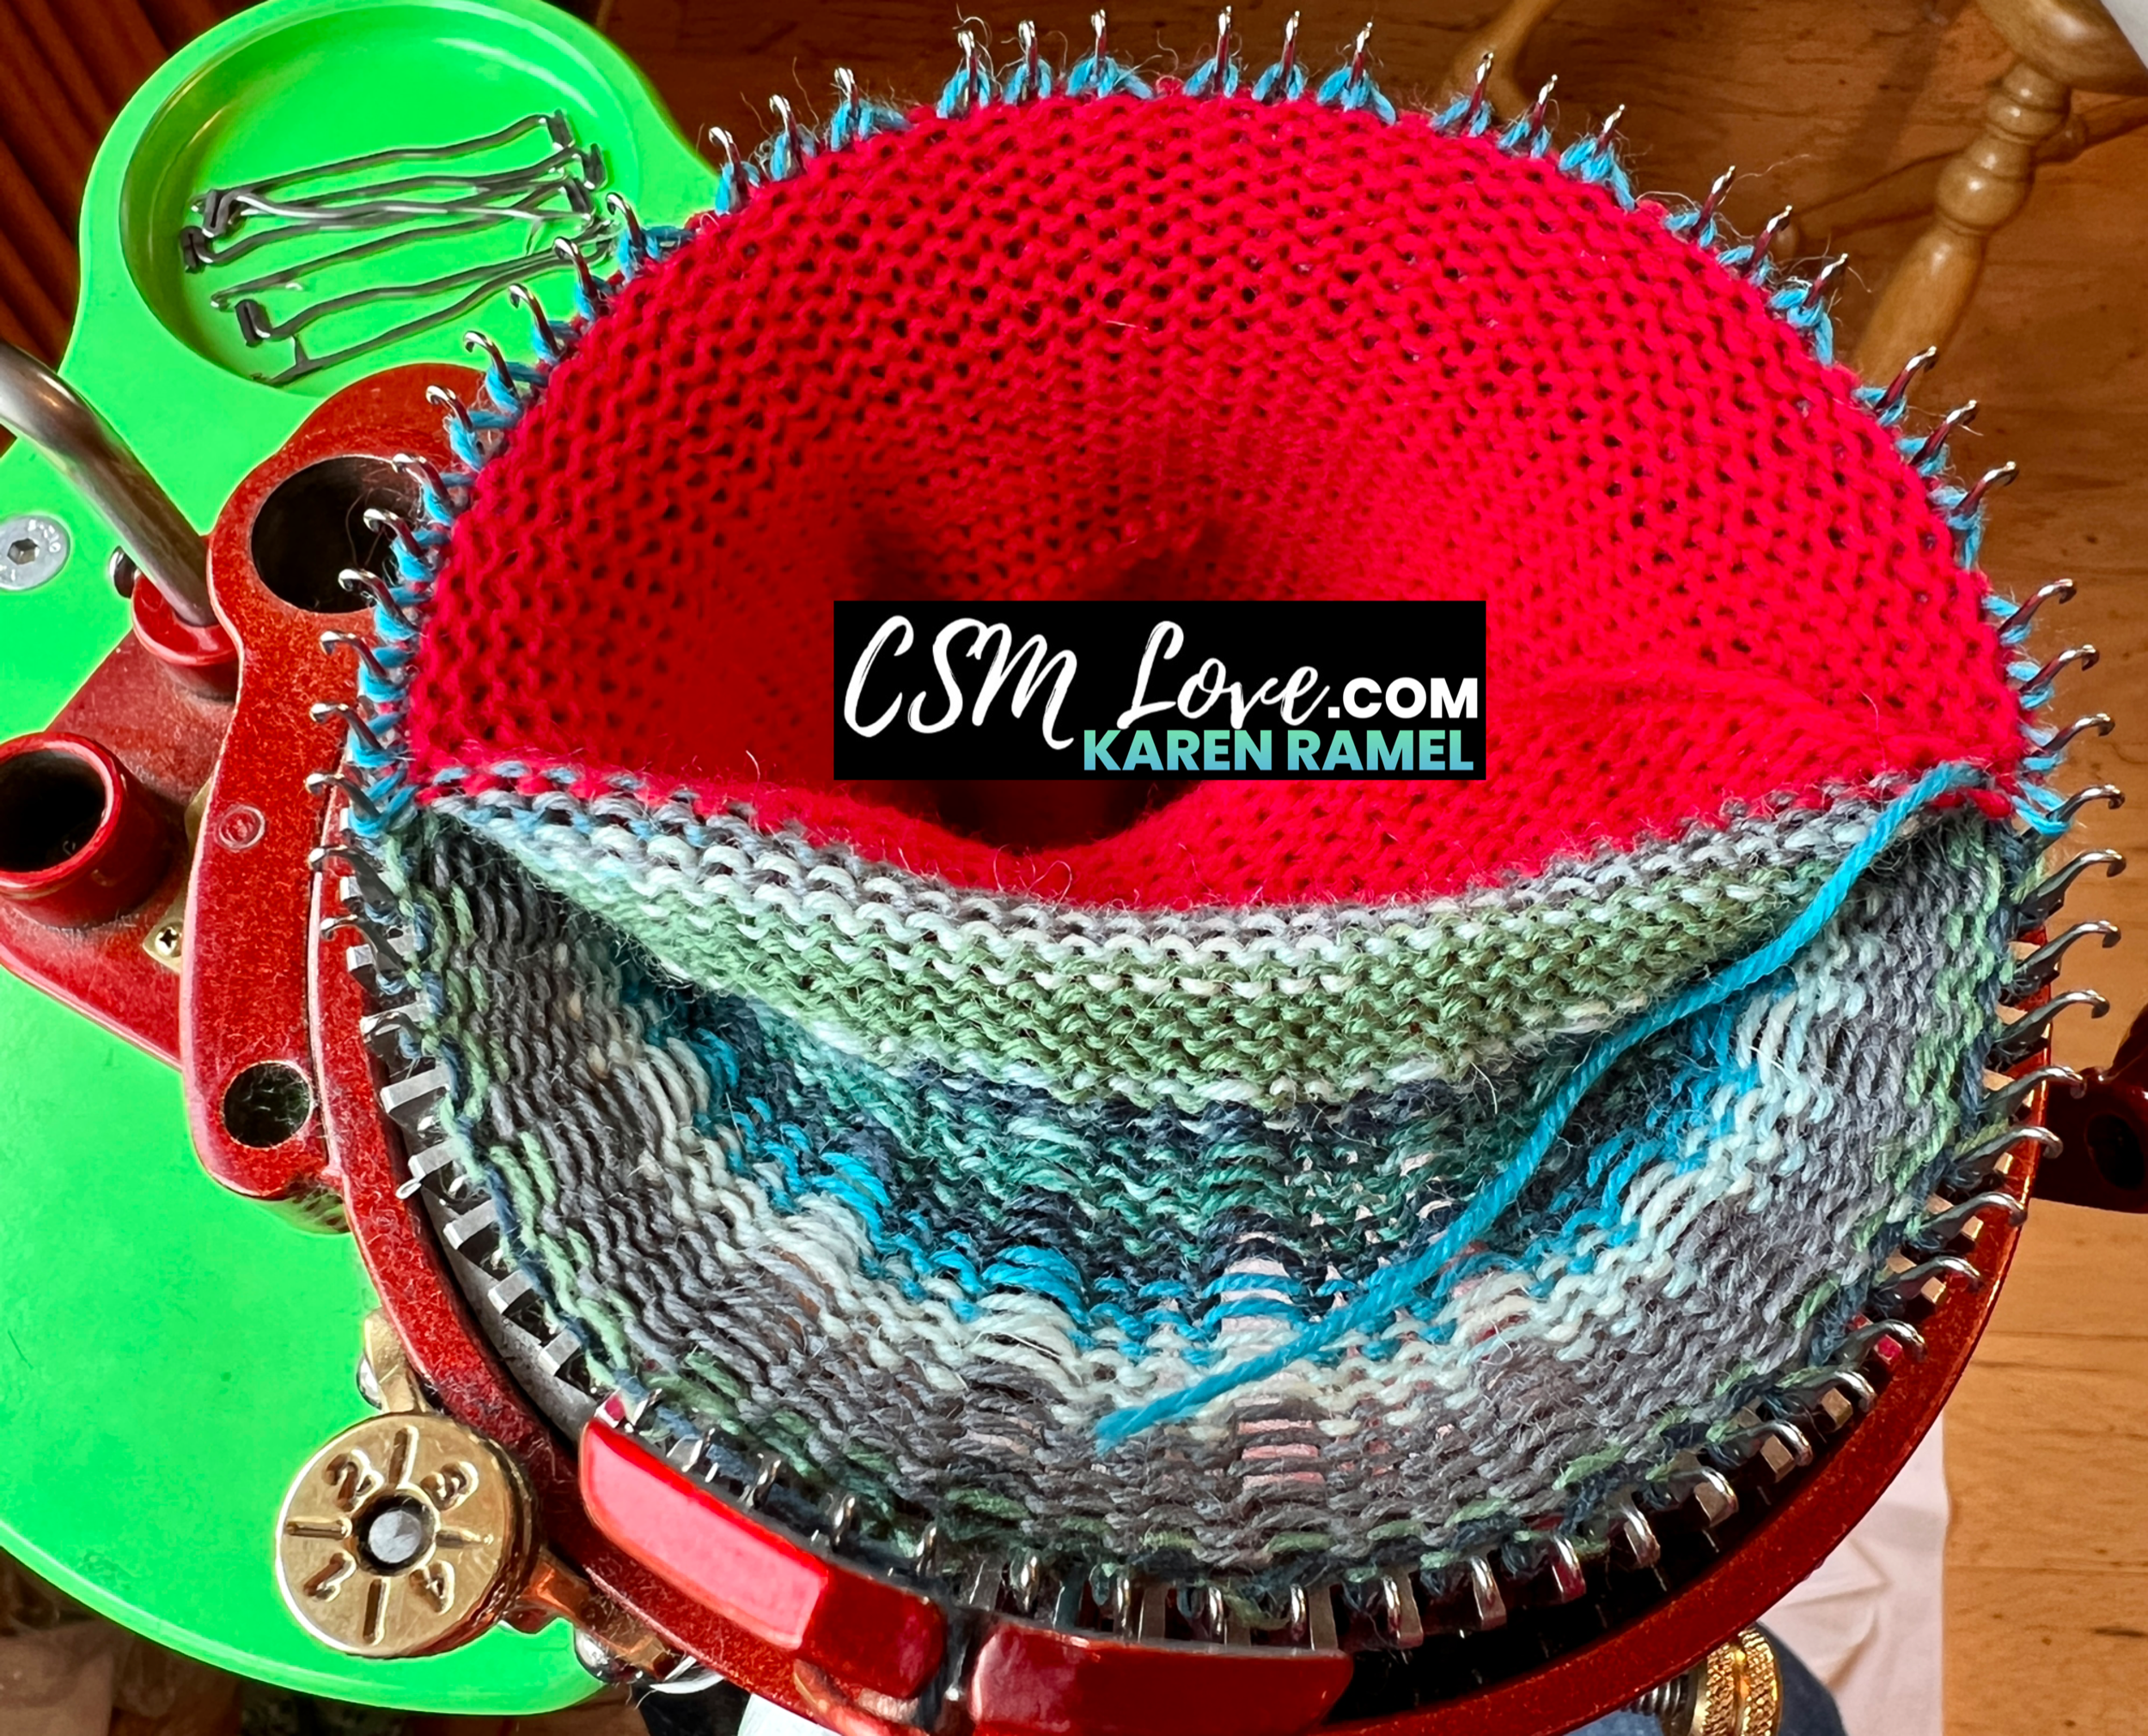
Examples shown below. Example ONE: Shows the different ways the inside of the hung hem appears when a project has a hung hem started compared to when a hung hem is completed off the machine. Example TWO: shows the holes which happen with one doesn’t hang a neighbor stitch on a newly added needle whether that needle is a ribber or cylinder needle. Example THREE: on the left shows the nicer non-hole hung hem as the neighbor needle stitches were hung on the newly inserted cylinder needle, compared to the hung hem without having hung neighboring stitches. Example FOUR: shows the neighboring stitches on both sides of each newly added needle hung (then with needles raised) which gives a more balanced appearance from the outside view of the sock.


If you chose to work a Hung Hem Cuff Down Sock where the cuff uses Mock Rib (removed needles), you will need to return those needles for the Pre-Heel (area above the Heel) and the Heel, in order to add those needles you want to ensure you don’t create a hole - see How to add a new cylinder needle into an empty mock rib cylinder slot without holes in your project - CLICK FOR VIDEO - Shareable link: https://youtu.be/vxYlAhdFjn8
The above video method applies ANYTIME you have an empty slot and need to add a cylinder needle into that slot. ;)
Below is an example of using Ravel Cord between the scrap and project yarn - especially useful if your contrast scrap yarn isn’t as contrast as you’d like - making it harder to see where the stitches should be where you need to pick up.

Temporary Lifeline

In the in the beginning, I found it hard to hang a hem evenly. So in the beginning, I chose to run a temporary lifeline which simply was a Ravel Cord fed into a complete row before starting the hung hem itself. I’d work that section and add scrap to take it off the machine. Off the machine I would use my darning needle to secure the lifeline row and the live stitches - less errors but after doing this enough, you find that you don’t need the extra effort, and you can simply hang the hem with your darning needle more easily. The sock shown above is my pattern and can be found on the SOCKS - TOE UP page on this website under the menu MY PATTERNS AND VIDEOS
For more on Ravel Cord see that section on this page.
KITCHENERING (Closing the Toe)
On Cuff Down Socks
(From the inside/purl-side)


The shareable YouTube link is https://youtu.be/9VPfdHLcodA
In the beginning I found toe closing difficult so I tried Russian grafting. Unfortunately it doesn’t make a fully flat join like kitchener. See the blog entry.
MACHINE UPGRADES
For a collection of easy machine upgrades see MY IDEAS AND UPGRADES page.
This video shows an upgrade that did work but I’ve since found a better method (see image with Heat Shrink). The material shown in the video is the same shown in the image (the small black square between the goal posts - a minimal piece helps as a foundation).

Check out the Quick and easy way to upgrade the csm brake on the Yarn Topper - CLICK TO VIEW VIDEO - Shareable link: https://youtu.be/ApP3Kc8F5cA
Mini Mast
(please see Colorwork on this page)
MISC
EASY TRICKS AND TECHNIQUES

Tip: Add a clip for scissor easy access. Attach to shirt neckline for ease of use - CLICK FOR VIDEO - Shareable link: https://youtu.be/bOv1I8njAKo
The Anchor Yarn Tail Technique - how to easily work in your start yarn tail so that you don’t have to worry about it later - CLICK FOR VIDEO - Shareable link: https://youtu.be/r1RRqsFXJX4
How to join a new yarn using the Faux Russian Join - CLICK FOR VIDEO - Shareable link: https://youtu.be/POuiD9-FOB4
How to add a new cylinder needle into an empty mock rib cylinder slot without holes in your project - CLICK FOR VIDEO - Shareable link: https://youtu.be/vxYlAhdFjn8
Introducing an easy way to go from scrap to sock yarn on the CSM - CLICK FOR VIDEO - Shareable link: https://youtu.be/S8kZJqVjSxs
Tricks and Tips: Removing Ribber and Fixing Dropped Stitches on a Cuff Down Sock - CLICK FOR VIDEO - Shareable link: https://youtu.be/wAb0AcoQMaw
How to easily add split rings/make a picot edge (hung hem edge) - CLICK FOR VIDEO - Shareable link: https://youtu.be/0XvYsTkjn1A
How to easily remove yarn from your cast-on bonnet and project without using Ravel Cord - CLICK FOR VIDEO - Shareable link: https://youtu.be/GlWiGXU4gzY
Mistake Fixing
(Not dropped stitches but needing to UNKNIT or UNDO)
The YouTube shareable URL is https://youtu.be/M4atJcoVOnQ
Also see the DROPPED STITCHES or RIBBER section for video on fixing dropped stitches.
Panel Knitting
(see Working Flat)
PITCH
This refers to alignment when using the Ribber.

Half pitch is usually done to gain the extra stitches to make a hat or more needle needed item. Generically worked then those rib stitches let to run or undo to add diameter to an adult hat.
Full pitch is when a ribber needle is aligned to a empty cylinder slot (regular ribbing).


PREHEEL
This is simply an area of the sock between the heel and leg where usually plain knitting is worked for the best fit at the back of the ankle. How many rows is preference - I usually work 10. See sock segment diagram and writen patterns/detailed videos on the menu MY PATTERNS AND VIDEOS - perhaps the SOCK CUFF DOWN page.
RAVEL CORD
What it is and why it’s useful - CLICK FOR VIDEO - Shareable link: https://youtu.be/NNfaHlDP_UY
Tips to using Ravel Cord with success on a CSM sock - CLICK FOR VIDEO - Shareable link: https://youtu.be/ZqWT8ZIniGs
For more info on using this see the HUNG HEM section on this page
For more info on what items see SUPPLIES I LIKE (under the supplies menu)
RIBBER RELATED
What correct ribbing alignment looks like
CSM Ribbing. What it looks like… - CLICK FOR VIDEO - Shareable link: https://youtu.be/bxKjmgoDmOA
CSM Ribbing with an up-close view of the needles in their movement - CLICK FOR VIDEO - Shareable link: https://youtu.be/6VzXoxFvg8A
This following video shows how quickly yarn feeds off a cone into the machine when working. It essential that the yarn feeds smoothly into the machine (why a cone wound source is better than a cake of yarn - CLICK FOR VIDEO - Shareable link: https://youtu.be/aah7HBV4gMY
For more info see YARN WINDERS page.
How to work in the start yarn tail
(so you don’t have to do it later)
The Anchor Yarn Tail Technique - CLICK FOR VIDEO - Shareable link: https://youtu.be/r1RRqsFXJX4
RIBBER REMOVAL/RETURN
Shareable YouTube link: https://youtu.be/Q5v0zRIF69w
I developed my own approach to removing the Ribber setup around the end of 2019, deciding on my own that I prefer to remove my Ribber and Lay the Ribber needles on the inside of the cylinder knitting for full stitch access and easier dropped stitch fixing.
And while certainly the method I use that I came up with on my own - it is of course possible it was introduced possibly somewhere in a vintage manual. There are MANY techniques in the vintage manual that have been forgotten or put aside.
I am on my own here in Vancouver and spend a lot of time on my CSM (see my website and this page as an example).
Want more details? See this technique in use on the SOCKS-CUFF DOWN page under the “Socks using the ribber” section ;) Originally introduced on the amber sock image by the area “CUFF DOWN RIBBED SOCK WITH RIBBER REMOVAL (PARK & REST)” | Sock Video | Written Pattern | *Be sure to check out that actual section on that page to see this content and the newer related content.
Ribber removal during Cuff Down Ribbed Sock - Ribber Parking - CLICK FOR VIDEO - Shareable link: https://youtu.be/x-o53rVocdc
Tricks and Tips: Removing Ribber and Fixing Dropped Stitches on a Cuff Down Sock - CLICK FOR VIDEO - Shareable link: https://youtu.be/wAb0AcoQMaw
TRANSFERING STITCHES FROM CYLINDER TO RIBBER NEEDLES
How to switch from cylinder to ribber and vice versa - CLICK FOR VIDEO - Shareable link: https://youtu.be/oIzHWebMO-o
SELVAGES

A selvage is a generic term that relates to a special technique that locks in the start row of a project so that once the scrap yarn is removed the live project stitches won’t unravel. There are many out there. This section is to present JUST those segments usually on the Cuff Down Sock.
Selvage: 1 Row Ribbing, 2 rows knitting, Ribbing. Demonstrated with my ribbed socks on the cuff down sock page
Selvage: E-Wrap 1x3 Ribber Scallop/Vandyke - CLICK FOR VIDEO - Shareable link: https://youtu.be/E9cpGUJBfwY
Selvage: without the ribber in work, complete two-three rows and hang the hem. Add ribber.
There are quite a few - find what works for you.
Pretty much ANY flat bed machine selvage can work on the CSM depending on what edge you’re looking for.
Sizing Socks
See the main site lookup page INDEX for this category for more info. The index page is found under the MISC CSM website menu.
One can use a regular csm in a variety of ways to knit small people socks.
One way is to use what you have and remove a pattern of needles around the cylinder, with heel spring on - create a smaller sock. This is what truly vintage csm using persons did.
Another way uses that plus Lycra.
Another way uses a lesser slot count cylinder like 40 slots. See the red sock featured on socks-cuff down under the menu “my patterns and videos”
Another way is to work the sock flat and seam off the machine.
Another way can use a compound cylinder which the cylinder is thicker from outside to in - moving needles inward on a smaller diameter=producing a smaller tube. See supplies I like
SOCK BLOCKERS


The video here showing these sock blockers were the first adjustable sock blockers I used. Sock Blockers can be used for taking better photos AND why not also to confirm sock size made? This video were the prior sock blockers I bought and upgraded. I NOW use better sock blockers (see Katrinkles blog entry and image)
The original adjustable sock blockers I used needed an DIY upgrade in order to use them effectively - CLICK FOR VIDEO - Shareable link: https://youtu.be/41lMu7S3hPY
Where to find these now less preferred adjustable wood sock blockers (in the video above)
Visualizing how a sock should fit

SOCK VIDEOS
All sock videos can be found on this website www.csmlove.com under the menu on the first page MY PATTERNS AND VIDEOS. Content currently sorted as SOCKS-CUFF DOWN or SOCKS-TOE UP
SPLIT RINGS
I use 6mm metal split rings (they look like a mini key chain ring) on my circular sock machine cast on bonnets.
How to easily add split rings/make picot edge. The shareable YouTube link is https://youtu.be/0XvYsTkjn1A
Also see the CSM CAST ON page found under the CSM START LEARNING menu and SUPPLIES I LIKE under the SUPPLIER menu.
TENSION DIAL SETTING
Tension Dial ZERO POINT setting. See my VIDEO and more info on the CSM START LEARNING menu pages - specifically CSM START-CSM3
WORKING FLAT
Regardless to the cylinder or machine you’re using, you can work “Flat Web” as its referred to in the vintage Circular Sock Machine manuals but utilizing all the needles or less needles by removing those altogether.
I create “Universal Cast On Bonnet” and knitted panels for pants and sweaters this way.
See the HOW TO MAKE A UNIVERSAL CAST ON BONNET (I also sell these)
See the BLOG INDEX page for the links under “Patterns/Projects - Non-Sock”
Technique Teaser: Working flat on a CSM - a new Universal Bonnet - CLICK FOR VIDEO - Shareable link: https://youtu.be/e4WkZmCD-Dg
Speed Tip with Working Flat | Video | Instagram Post |

YARN WINDER

How to use these plastic cone winders known by many brands: “Empisal Knitmaster”, “Royal”, “Brother”, “Toyota” - CLICK FOR THE VIDEO - Shareable link https://youtu.be/RYR950xGSus
Speed Demo: Silver Needles SN100 Electric Winder - CLICK FOR VIDEO - Shareable link: https://youtu.be/sO9IYRtjQIQ
For more see the YARN WINDERS page
How I use the KrisKrafter Yarn Twister - CLICK FOR VIDEO - Shareable link: https://youtu.be/K_zjDpbYZmw
Technique Teasers
This section is for videos I’ve done to inspire and interest you with the variety of things that can be done on a CSM.
Technique Teaser: Two yarn colorwork briefly demonstrated while working flat - CLICK FOR VIDEO - Shareable link: https://youtu.be/yTzfXBOtW1I
Technique Teaser: Working flat on a CSM - a new Universal Bonnet - CLICK FOR VIDEO - Shareable link: https://youtu.be/e4WkZmCD-Dg
Silent Videos?
I’ve been asked recently why some of my videos are silent.
This is my reply: A silent film is easier for me due to ambient noise (especially when so many fans are running on a hot day). I understand at an audio video helps English speakers however I also feel a silent video is more focused, can help English as a second language persons and can help those with hearing difficulties. I am not a fan of chatty videos. But I do appreciate that an audio video does help - I will see about adding audio in the final edit of my next video.