CSM Gauge - Why do we recommend it and how is it useful?

Often one of the very first questions people have is HOW MANY ROWS do I need to make a sock - this actually depends on how many rows per inch are worked on the machine by its settings and fiber used (which responds to the settings sometimes in different ways).
For example, at my preferred setting I like to knit quite tightly and by doing so I can knit a 8.5 women’s sock using 80 rows on the machine for the foot. I recently received a pair of socks from someone else using looser settings - they used 50 rows.
HOW TO SET YOUR VINTAGE MACHINE TO DETERMINE GAUGE?
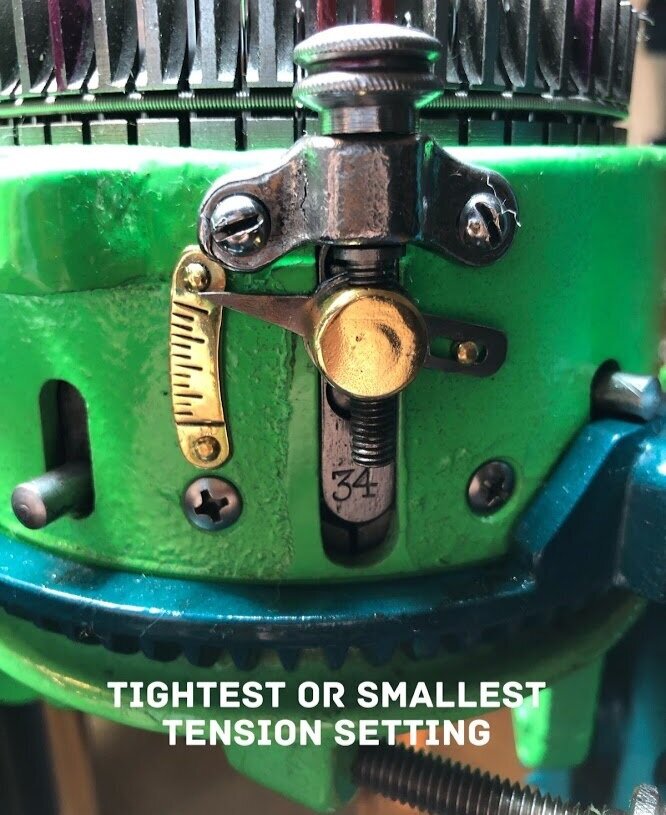
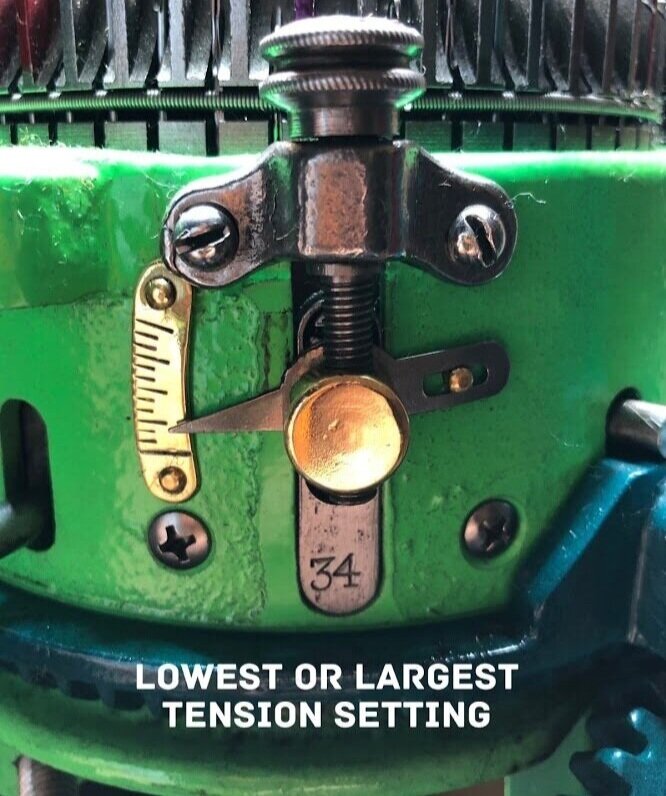
To CORRECTLY determine gauge you MUST have fiber loaded onto the machine and the dial turned all the way tight or all the way loose. Mark on your dial the place on the dial closest to the cylinder at 6 o’clock. Note which way you turn the dial to loosen or to tighten.
I like to also mark the opposite side of the dial (it represents half a turn when aligned with the 6 o’clock position on the cylinder).

Now consider that this gauge swatch is going to be a permanent swatch (not one you undo and reuse). Be sure to use fiber which has not already been used on the machine as it might react differently and indeed choose fiber most like the fiber you will most often use. I chose Michaels craftstore purchased Lions Brand Sock Ease in two different colors. This is what I DID.
My swatch starts with a hung hem and then I did each setting using a different color working 30 rows of each color. I repeated on the machine changing sections by only half a turn of the dial. 0= tightest setting, 0.5=half a turn etc. Work through all the possible settings on the machine until the dial cannot be turned any further. Finish with a hung hem with what I call the single pass live stitch securing/bind off. Your swatch needs to rest and be washed/dried (you can choose to air dry like I did or be naughty and toss in the dryer for the ultimate fiber reaction for testing).
Once the swatch is dry you can count the rows per inch and the stitches per inch. These numbers are your bread and butter. Knowing and recreating socks using the same settings will allow you to predict how this and similar fiber will respond when worked with the same settings. Similar fiber may involve a few more or a few less rows. You no longer have to GUESS.
For more info see this page for “GET TO KNOW THE TENSION SETTINGS OF YOUR MACHINE WITH A SWATCH!”


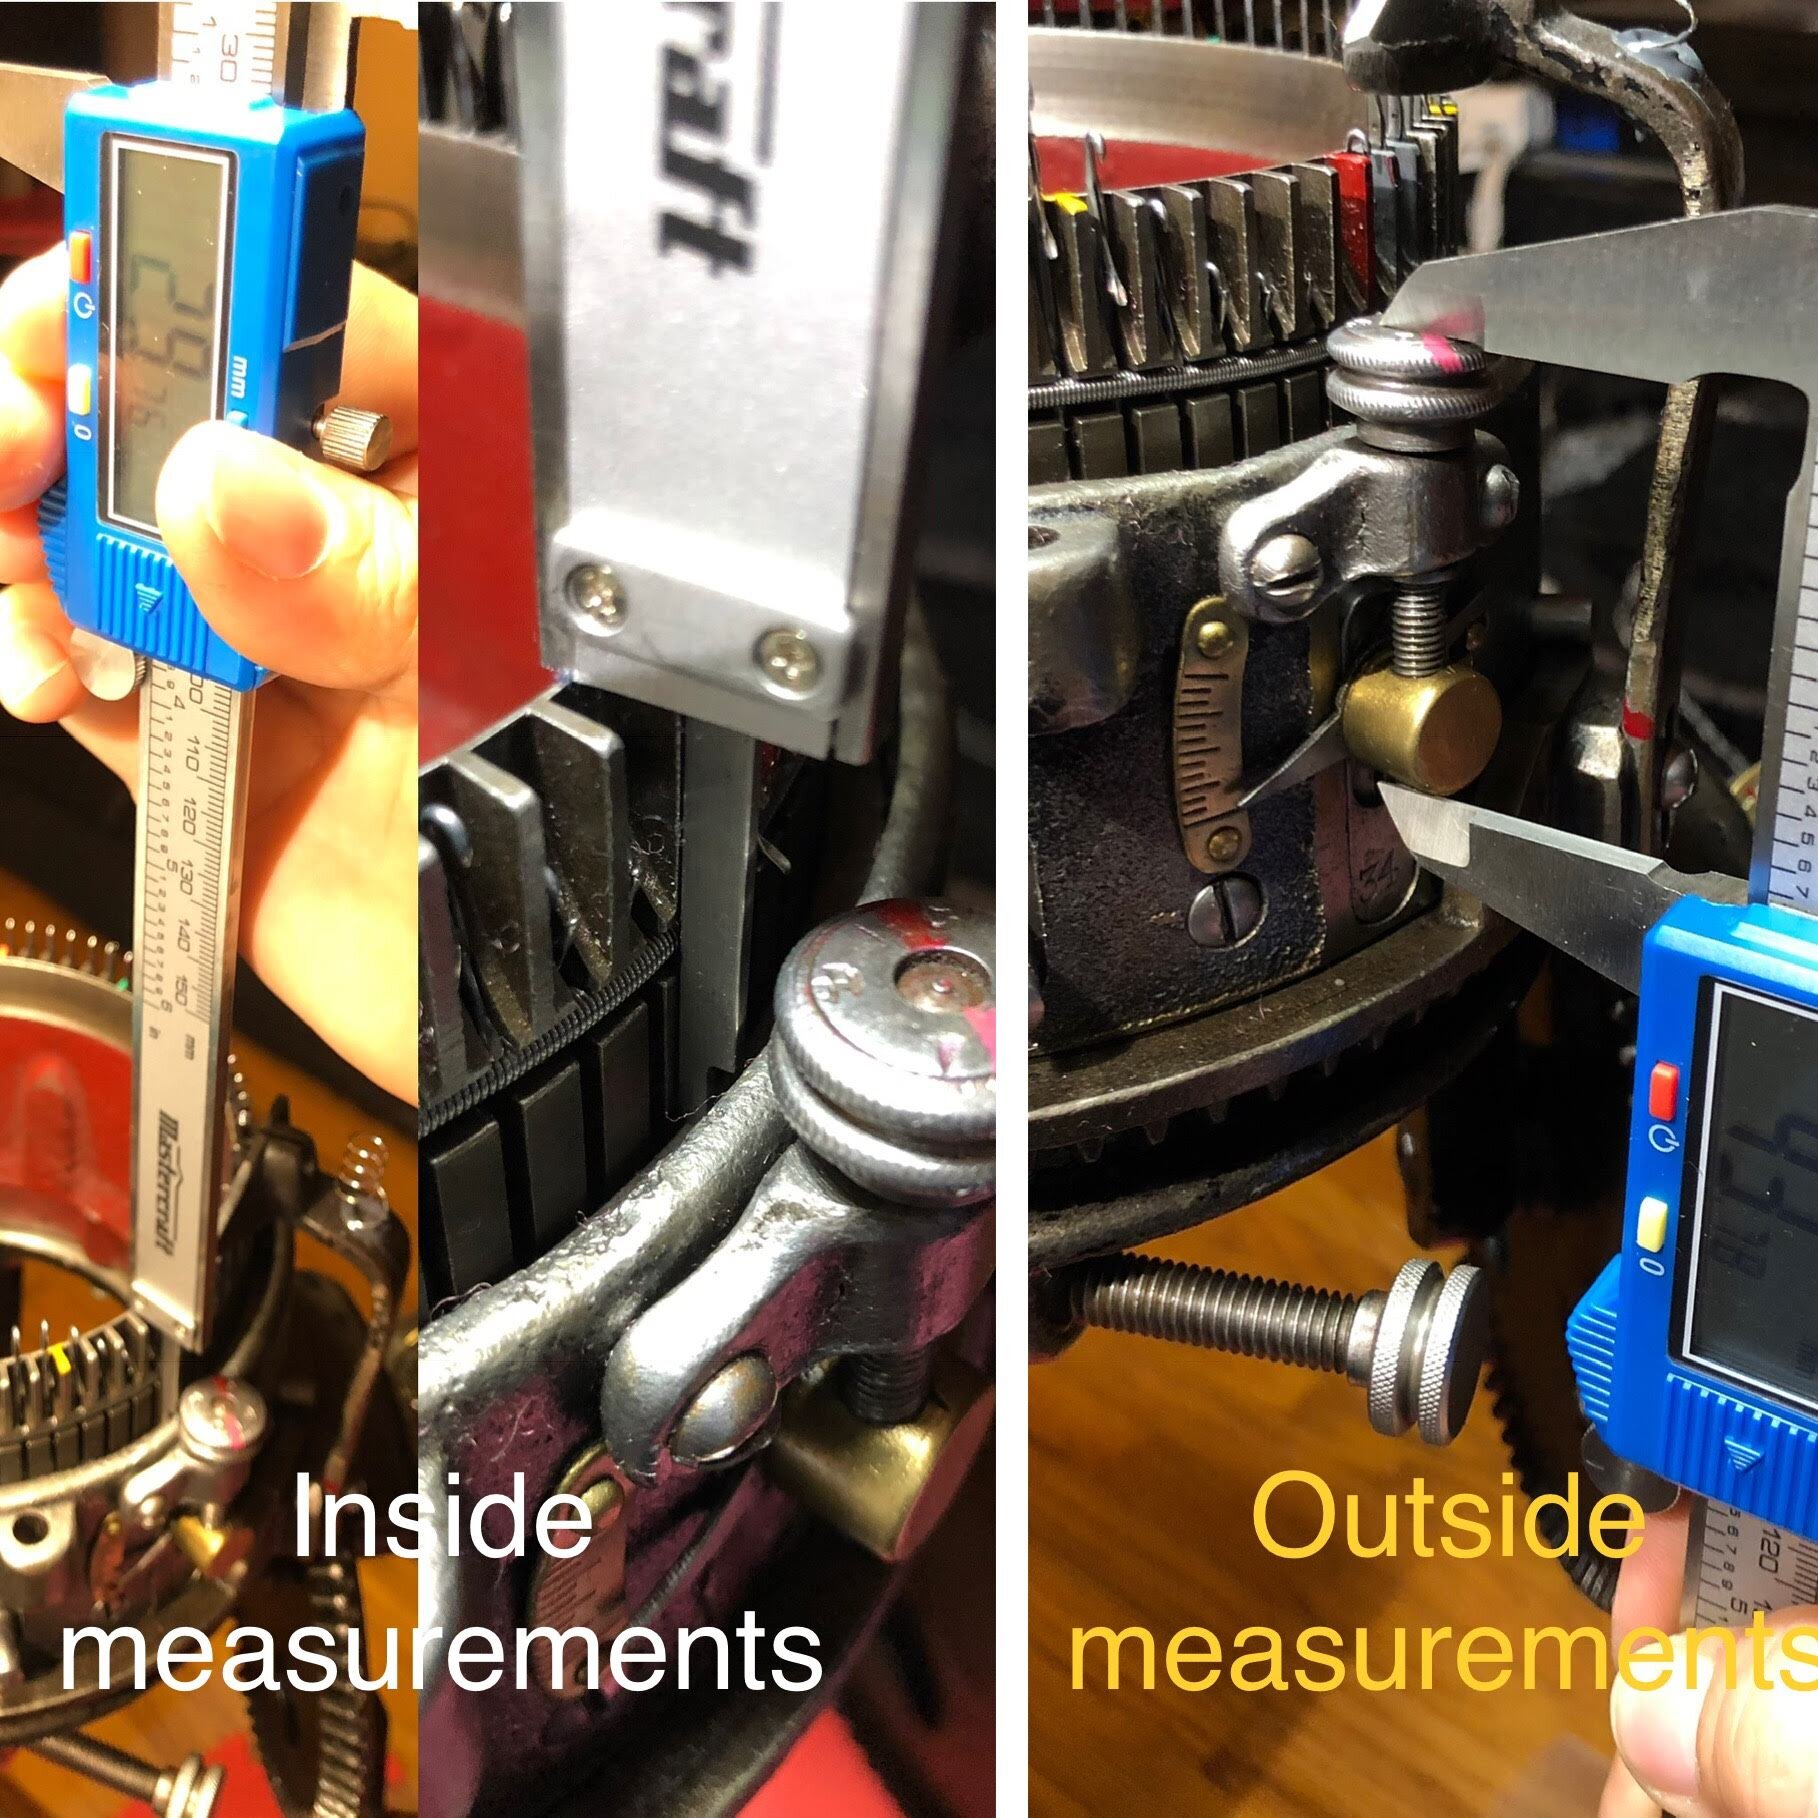
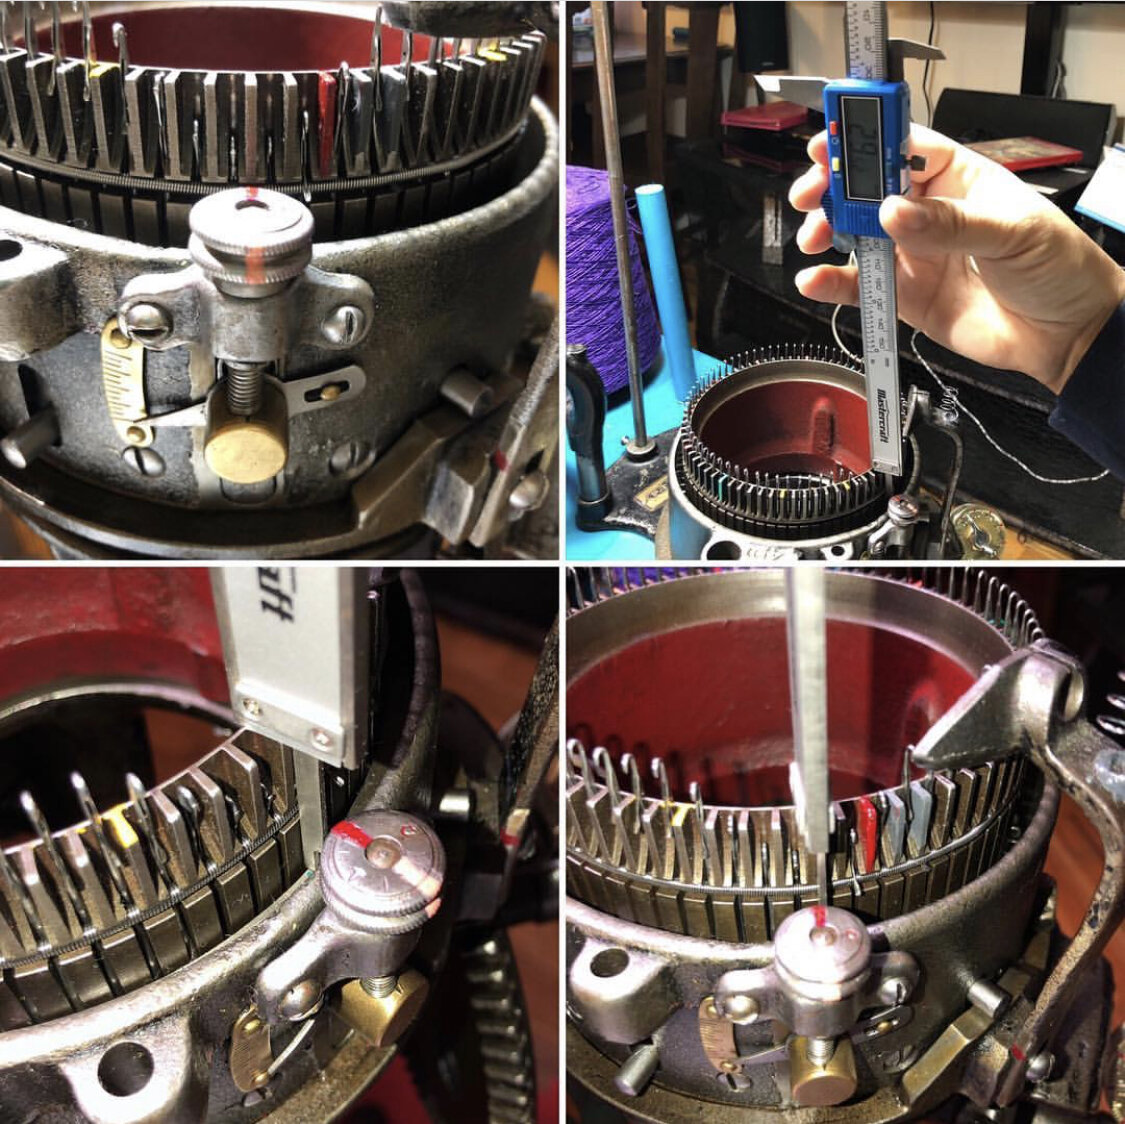
USING DIGITAL CALIPERS
If you choose to not actually mark the dial of your vintage machine you can instead attempt to use digital calipers. I personally did not get identical readings when measuring in sequence so I scrapped using these calipers shown below. Note the correct readings can only be achieved with fiber loaded onto the machine.