


The quick review: at now over $600 Canadian (October 2023) there are better winders out there for much less
PROS: I bought this winder April 2021 for CAD$348+$200 shipping. Spindle upgrades allow for different cones to be used. I used this with the already owned Erlbacher cardboard cones (17.145cm (6 3/4″) high with a 6.668cm (2 5/8″) diameter base) - these are the B cones and spindle
CONS: Since purchasing the simple version April 2021 I now note the base cost before shipping is CAD$600+. Seller is based in Hong Kong and ships the winder using the slowest service (ordered April 2nd - arrived poorly packed and slightly damaged June 23rd). Barrel has poor friction on cones so there is slippage on winding until properly started. Winder is bulky and heavy. Knot “detector” doesn’t stop machine when encountered and components can easily shred yarn fiber. Seller ships winder up to three weeks after order.
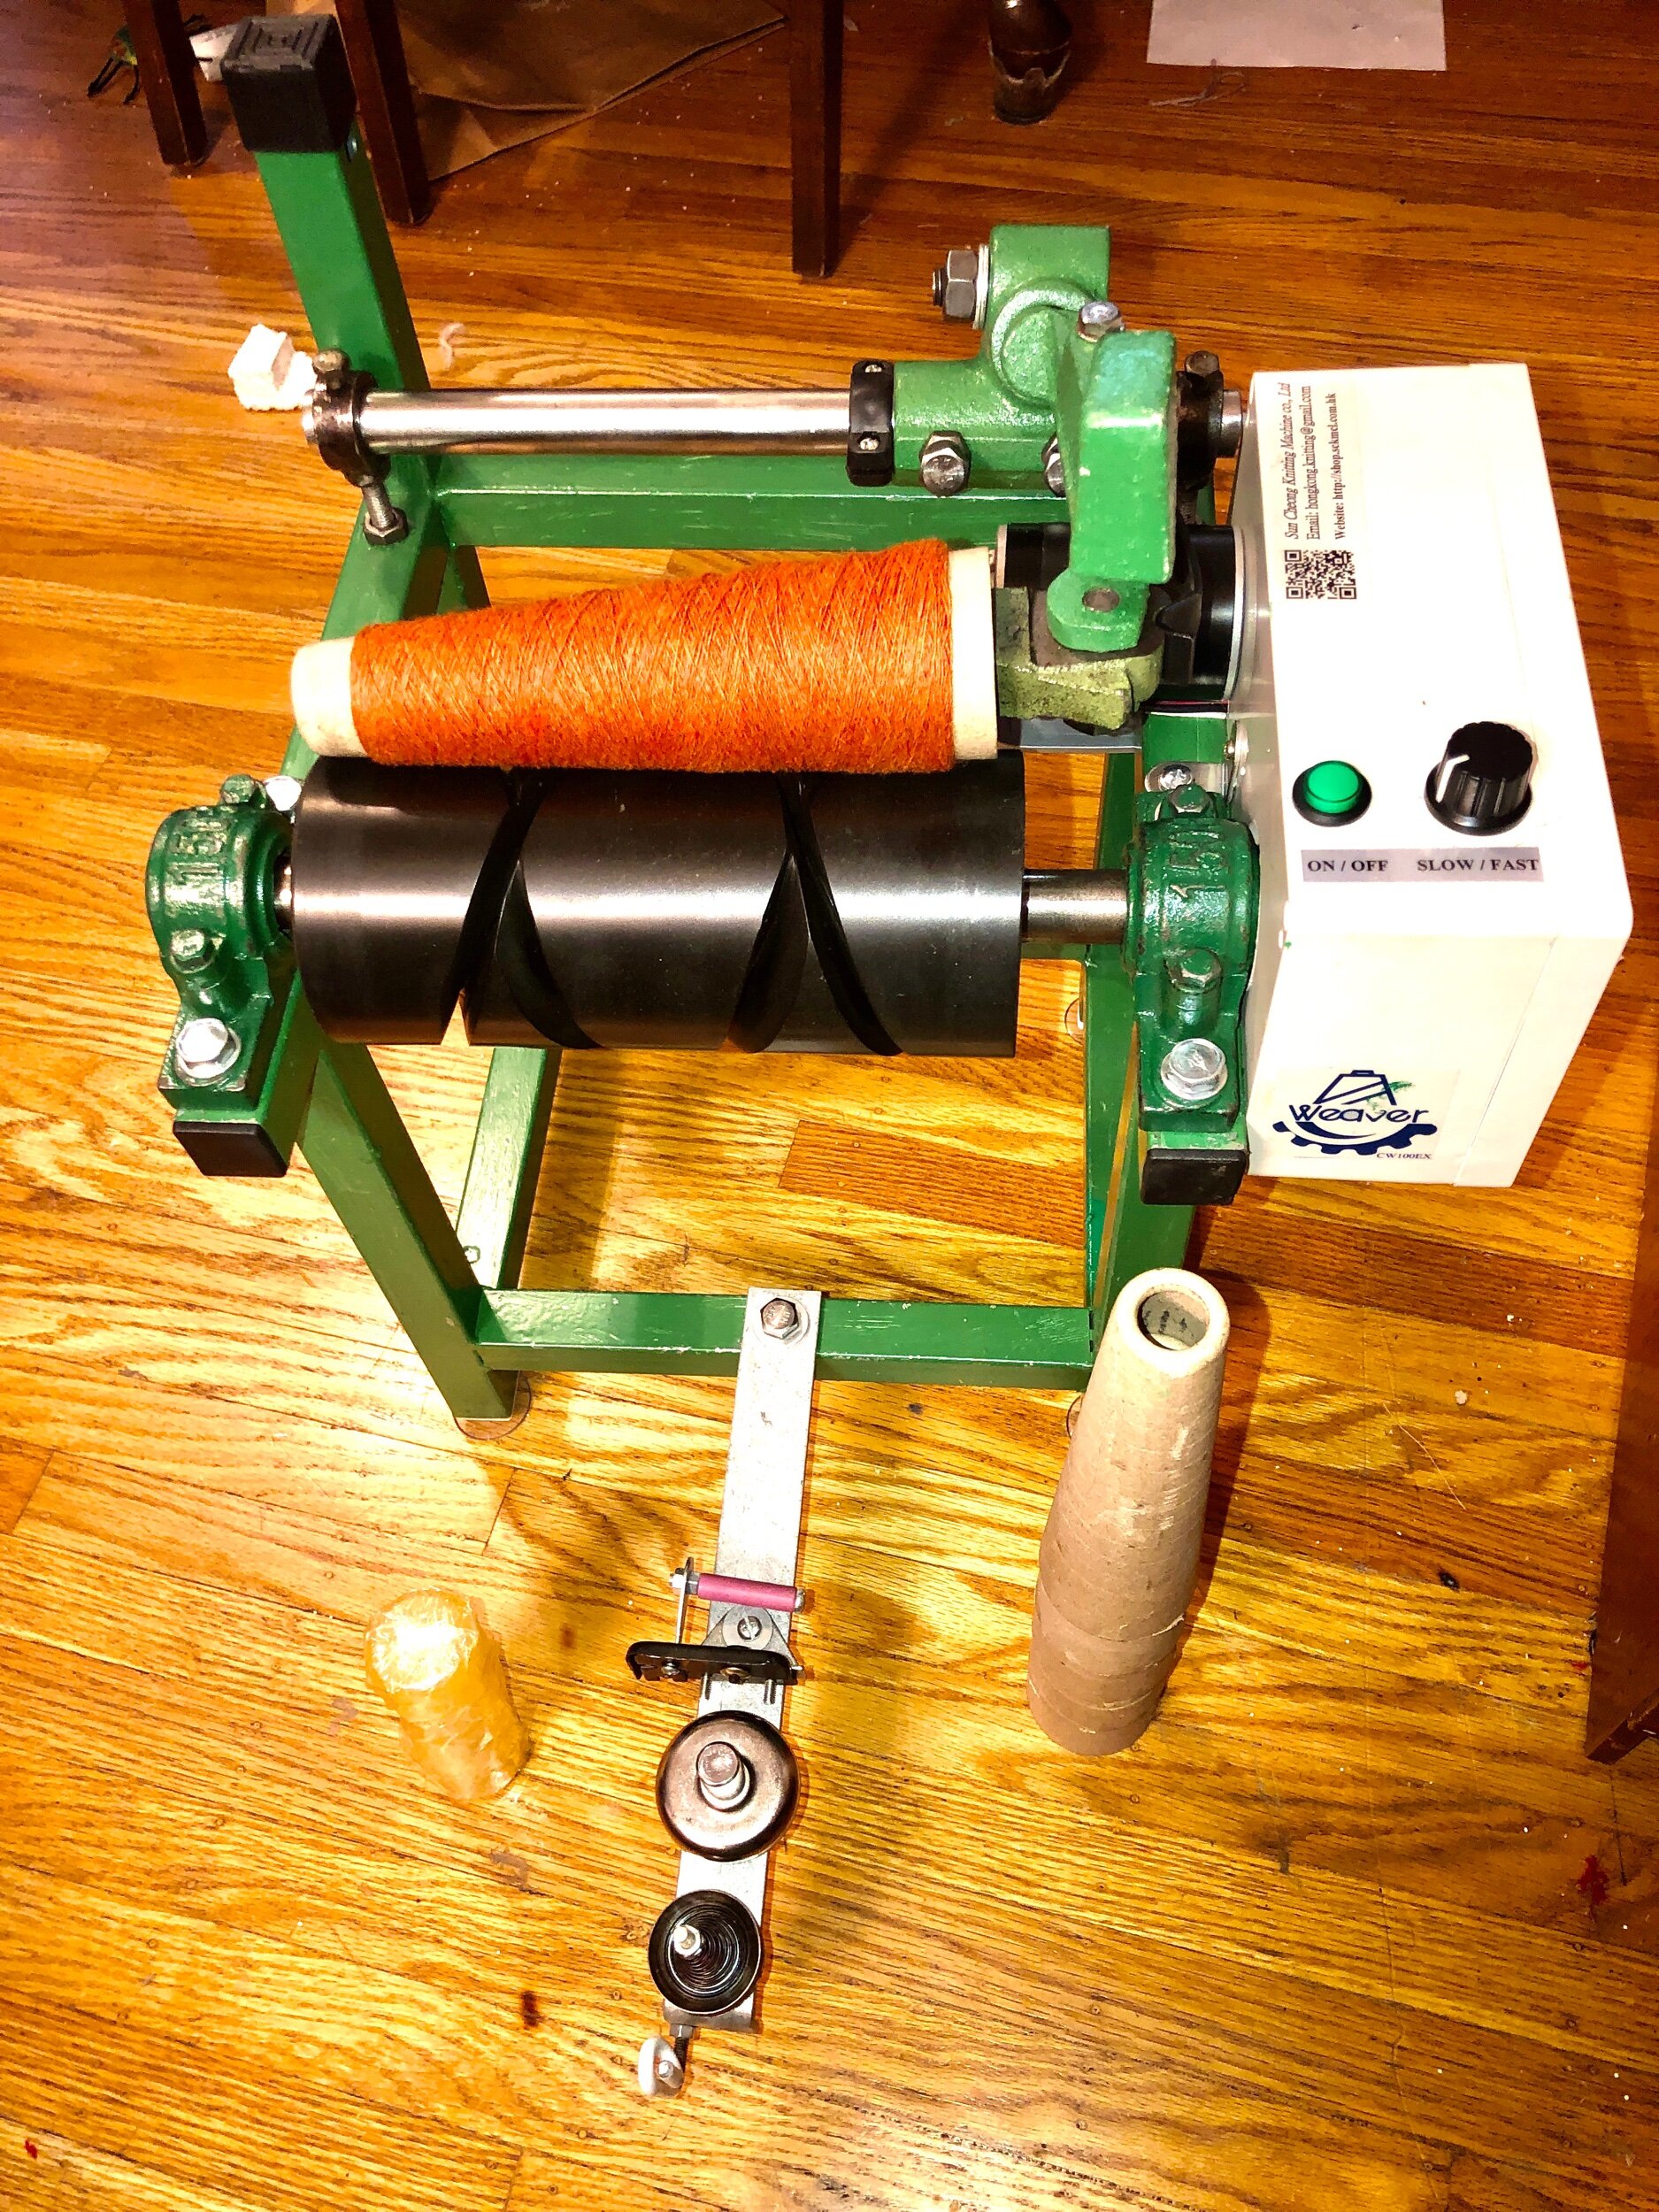
The detailed info: My new HongKongKnitBox Weaver Electric Cone Winder arrived yesterday June 23 on the slow boat from Hong Kong. The CW100EX model without “Twister” or counter. (Ordered April 1 through Etsy) for CAD$398+$220 shipping.
I had bought an extra belt for the motor and the B spindle so I can use my stock of inexpensive Erlbacher cardboard cones.
The box arrived beat up but only one machine foot was damaged (usable as is but a new foot is was promised to be on the way). I love the machine. It’s a quiet and well constructed machine with real metal parts and connections instead of the formed plastic parts some winders have. The paint job isn’t great - which is odd for what you pay for the device. Find more info on this winder on my website YARN WINDERS page.
The seller is Sunny Choi. Should you wish the full machine with upper swift (they call it a twister) it’s CAD585.29
This machine is very adjustable so if you find your drum not being fully utilized then adjust yarn feed, tension and arm/spindle connection to drum and/or realigning drum on its mount.
Arriving without instructions, I determined that the unusual shaped piece that came with is a weight added to the spindle arm
I ordered with the machine the spindle needed to use my preferred cone. I didn’t expect to also receive the original spindle and five cones so that’s a nice surprise. Also included are some wax circles should one want to wax while winding (I don’t use wax myself).
Regarding the spindle….
Changing out the current spindle to the preferred B version is easy with the removal of a bolt and it’s washer. I then swapped out the spindle, oiled the bar the spindle sits on, and added the B spindle. Adjust the bolt (yellow arrow) to adjust cone alignment and contact to the drum.
I found simply reinstalling the washer and the bolt that the bolt kept getting loose with the use of the winder. I then determined that the washer was contacting the spinning cardboard cone and causing the bolt to undo and to cause drag on the winder. I removed the washer and instead installed a tension washer which is the same diameter as the bar the spindle mounts onto (red arrow).
Ensure the spindle freely spins.


Prolong spindle rubbery guide…
This might not be necessary but to prolong the shape and life of the rubberized spindle contact by always either keeping a empty cone on the spindle of the spindle is resting on the drum or lift the spindle arm if not covered with cone.
Is your yarn not travelling all the paths on the drum?

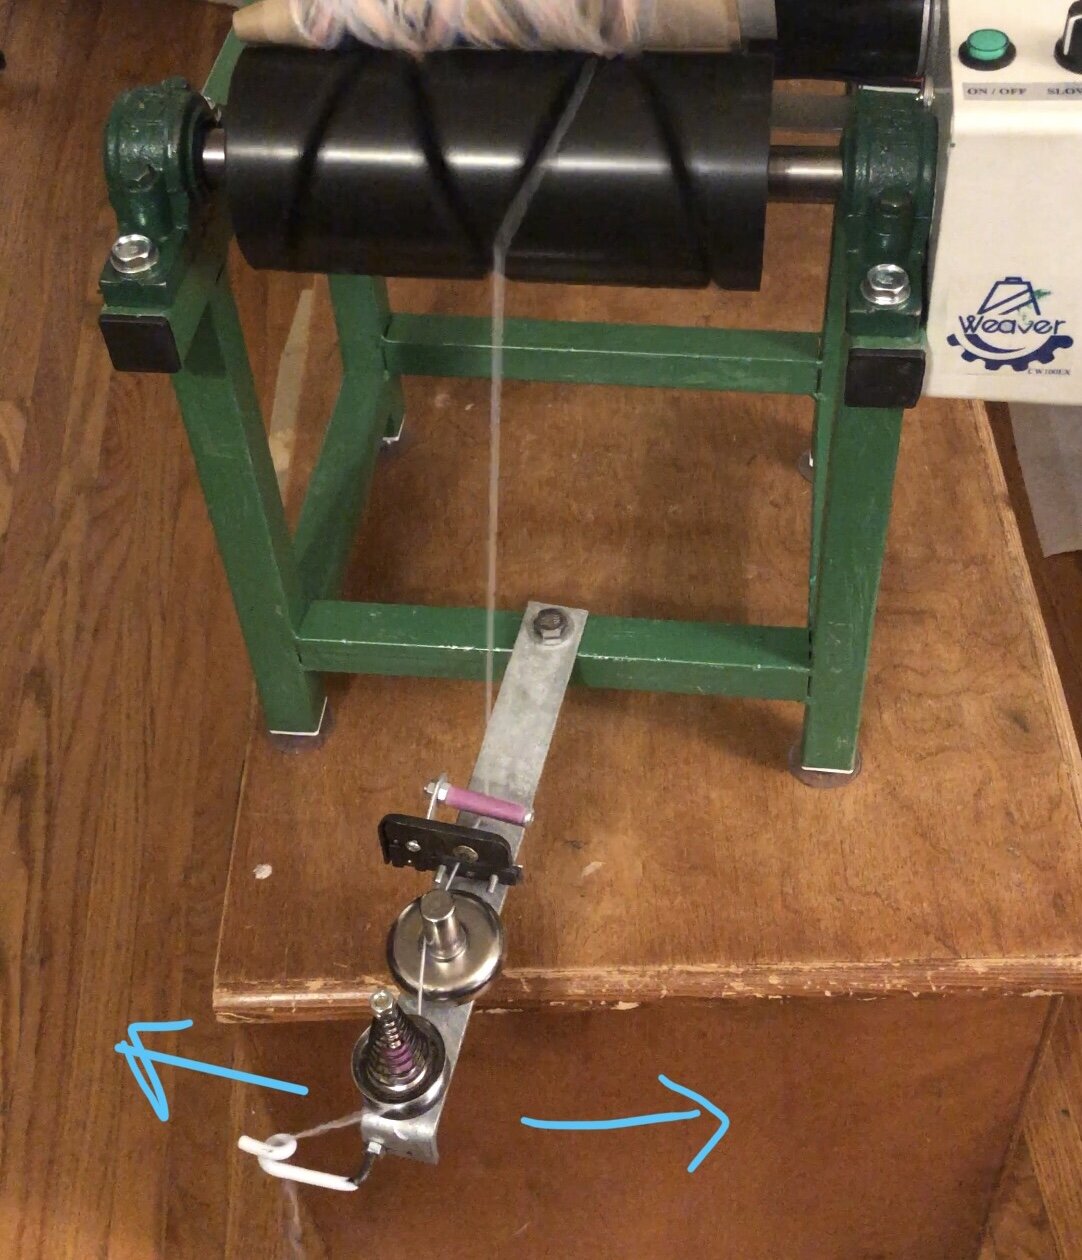
Check that your yarn isn’t snagged incorrectly at any point on the yarn tensioner between the drum and yarn source on the floor or twister (swift). I found slightly angling the bar that the tensioning parts are on better encouraged yarn to the full paths on the drum. Just slightly move to the left or right direction as needed where not travelling.
Oiling or maintenance?

The spindle and the bar the drum is attached to is what rotates on a ballbearing circular piece like those found in a skateboard wheel. It’s important these are well lubricated to reduce drag and encourage rotation. Consider using the same lubricant as skateboard wheels.
Is your wound yarn not centered on the cone?
The drum has two Hex/Alex key screws holding the drum to the bar that spins via the belt from the motor. Simply undo the two screws on the drum, realign and re-tighten the screws.
Are you hearing a off loud noise once and awhile within the electric box?

Stop immediately - the notched drive belt is probably slipping. To correct I removed the four screws holding the cover and going very slow as needed, verify the noise as belt slipping. Unplug machine. Then using an Hex/Allen Key loosen the left belt attachment pulley and very slightly move towards you then verify still fuctions by manually turning so belt moves then retighten Allen/Hex Key screw. By slightly moving that part you tighten the belt while still allowing the belt to easily sit on the pulley grooves.
Threading the machine

It might not be correct but with discussion with Donna who also has this winder she’s determined that the yarn path comes from the drum to under the purple part which has a left and right guide to keep the yarn in contact there. It then comes through the part I will call the knot detective (I need to further investigate whether this part damages the yarn.
If you don’t wind too fast the machine will stop with knot encounter but it’s important to watch the machine to adjust as needed.
I have found now with testing that it’s sharp here and because of this has broken the yarn in three different points on the cone. (See image).
The path then comes to the left of the wax stand then the right on the tensioner between the two metal disks of which I’ve loosed the tension to the loosest setting. I’m unsure at this time if I find that loose enough or whether I will change this part for easier tension. From there the yarn path goes through a wire guide and to your source or installed swift (on a nearby countertop or the twister attachment on the machine above).


The Over Knot system - I’ve dismantled this part from the machine and am smoothing the contacts. This is a brilliant and simple component that actually is more complex than it appears. This piece offers an adjustable gate which is kept in place by a tightened screw which can adjust the clearance through the slot. While winding, if not going too fast, anything wider (like a knot) that tried to pass would stop temporarily at this point. It worked for me once but mostly initially cut my yarn (hence the smoothing). Once connections are better I will reassemble and reattach this.

Smoother component knot tested!

The wax holder…
I’ve removed the wax holder from the tension area as I don’t intend to use wax.

Okay so I don’t understand why the winder is symmetrical when alignment of the drum and cone are not - why is the tension feed from the yarn source mounted in the middle of the machine? It doesn’t feed from there to the middle of the drum. Personally I also found the metal bar holding the tension components to be big and cumbersome and in actual danger of being damaged during storage due to the width it needs with that bar in place. This didn’t NEED to happen but was my preference so I built something more space saving.
Still not a fan of the pyramid style sewing machine tension device so I tried not using it.

Note that I’ve hidden the original extra large hole for the original tension bar under one of the right brackets.
The shortened shareable URL is https://tinyurl.com/HKKweaverwinder