Tables

2019 Nov 8 - NZAK Table Upgrade

IMG_0065.jpeg
IMG_0061.jpeg
IMG_8696_Original.jpeg

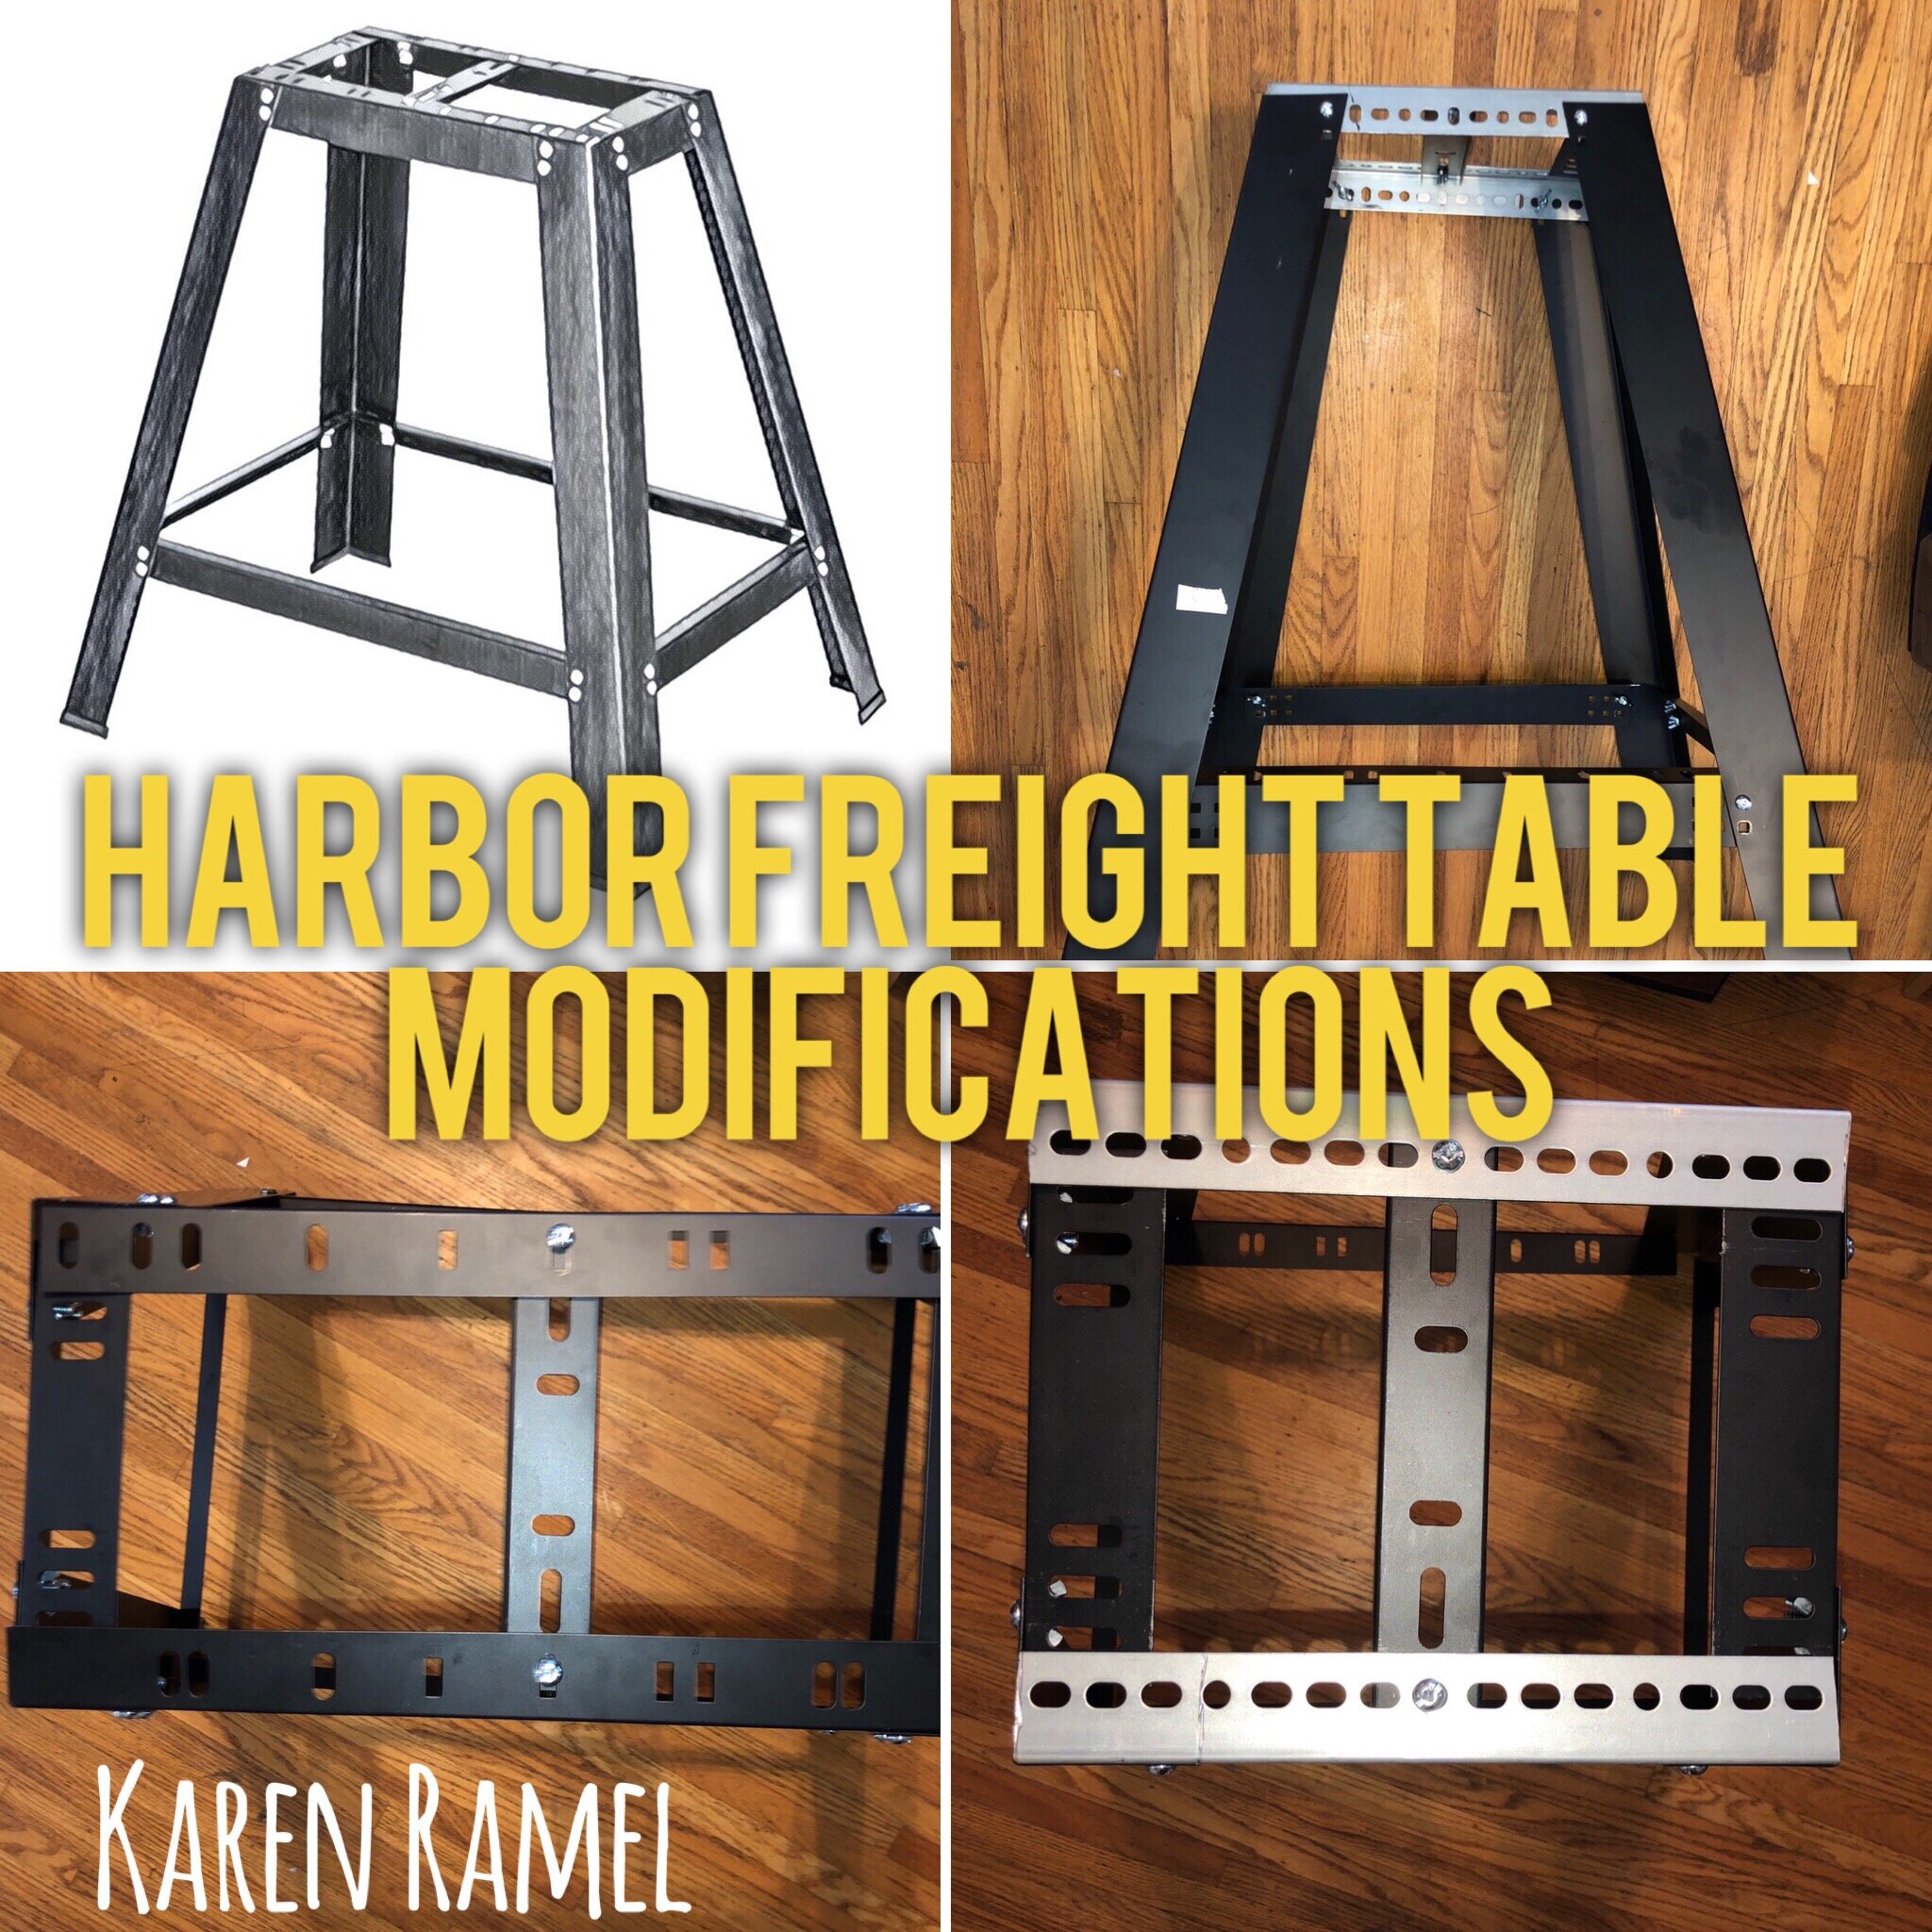
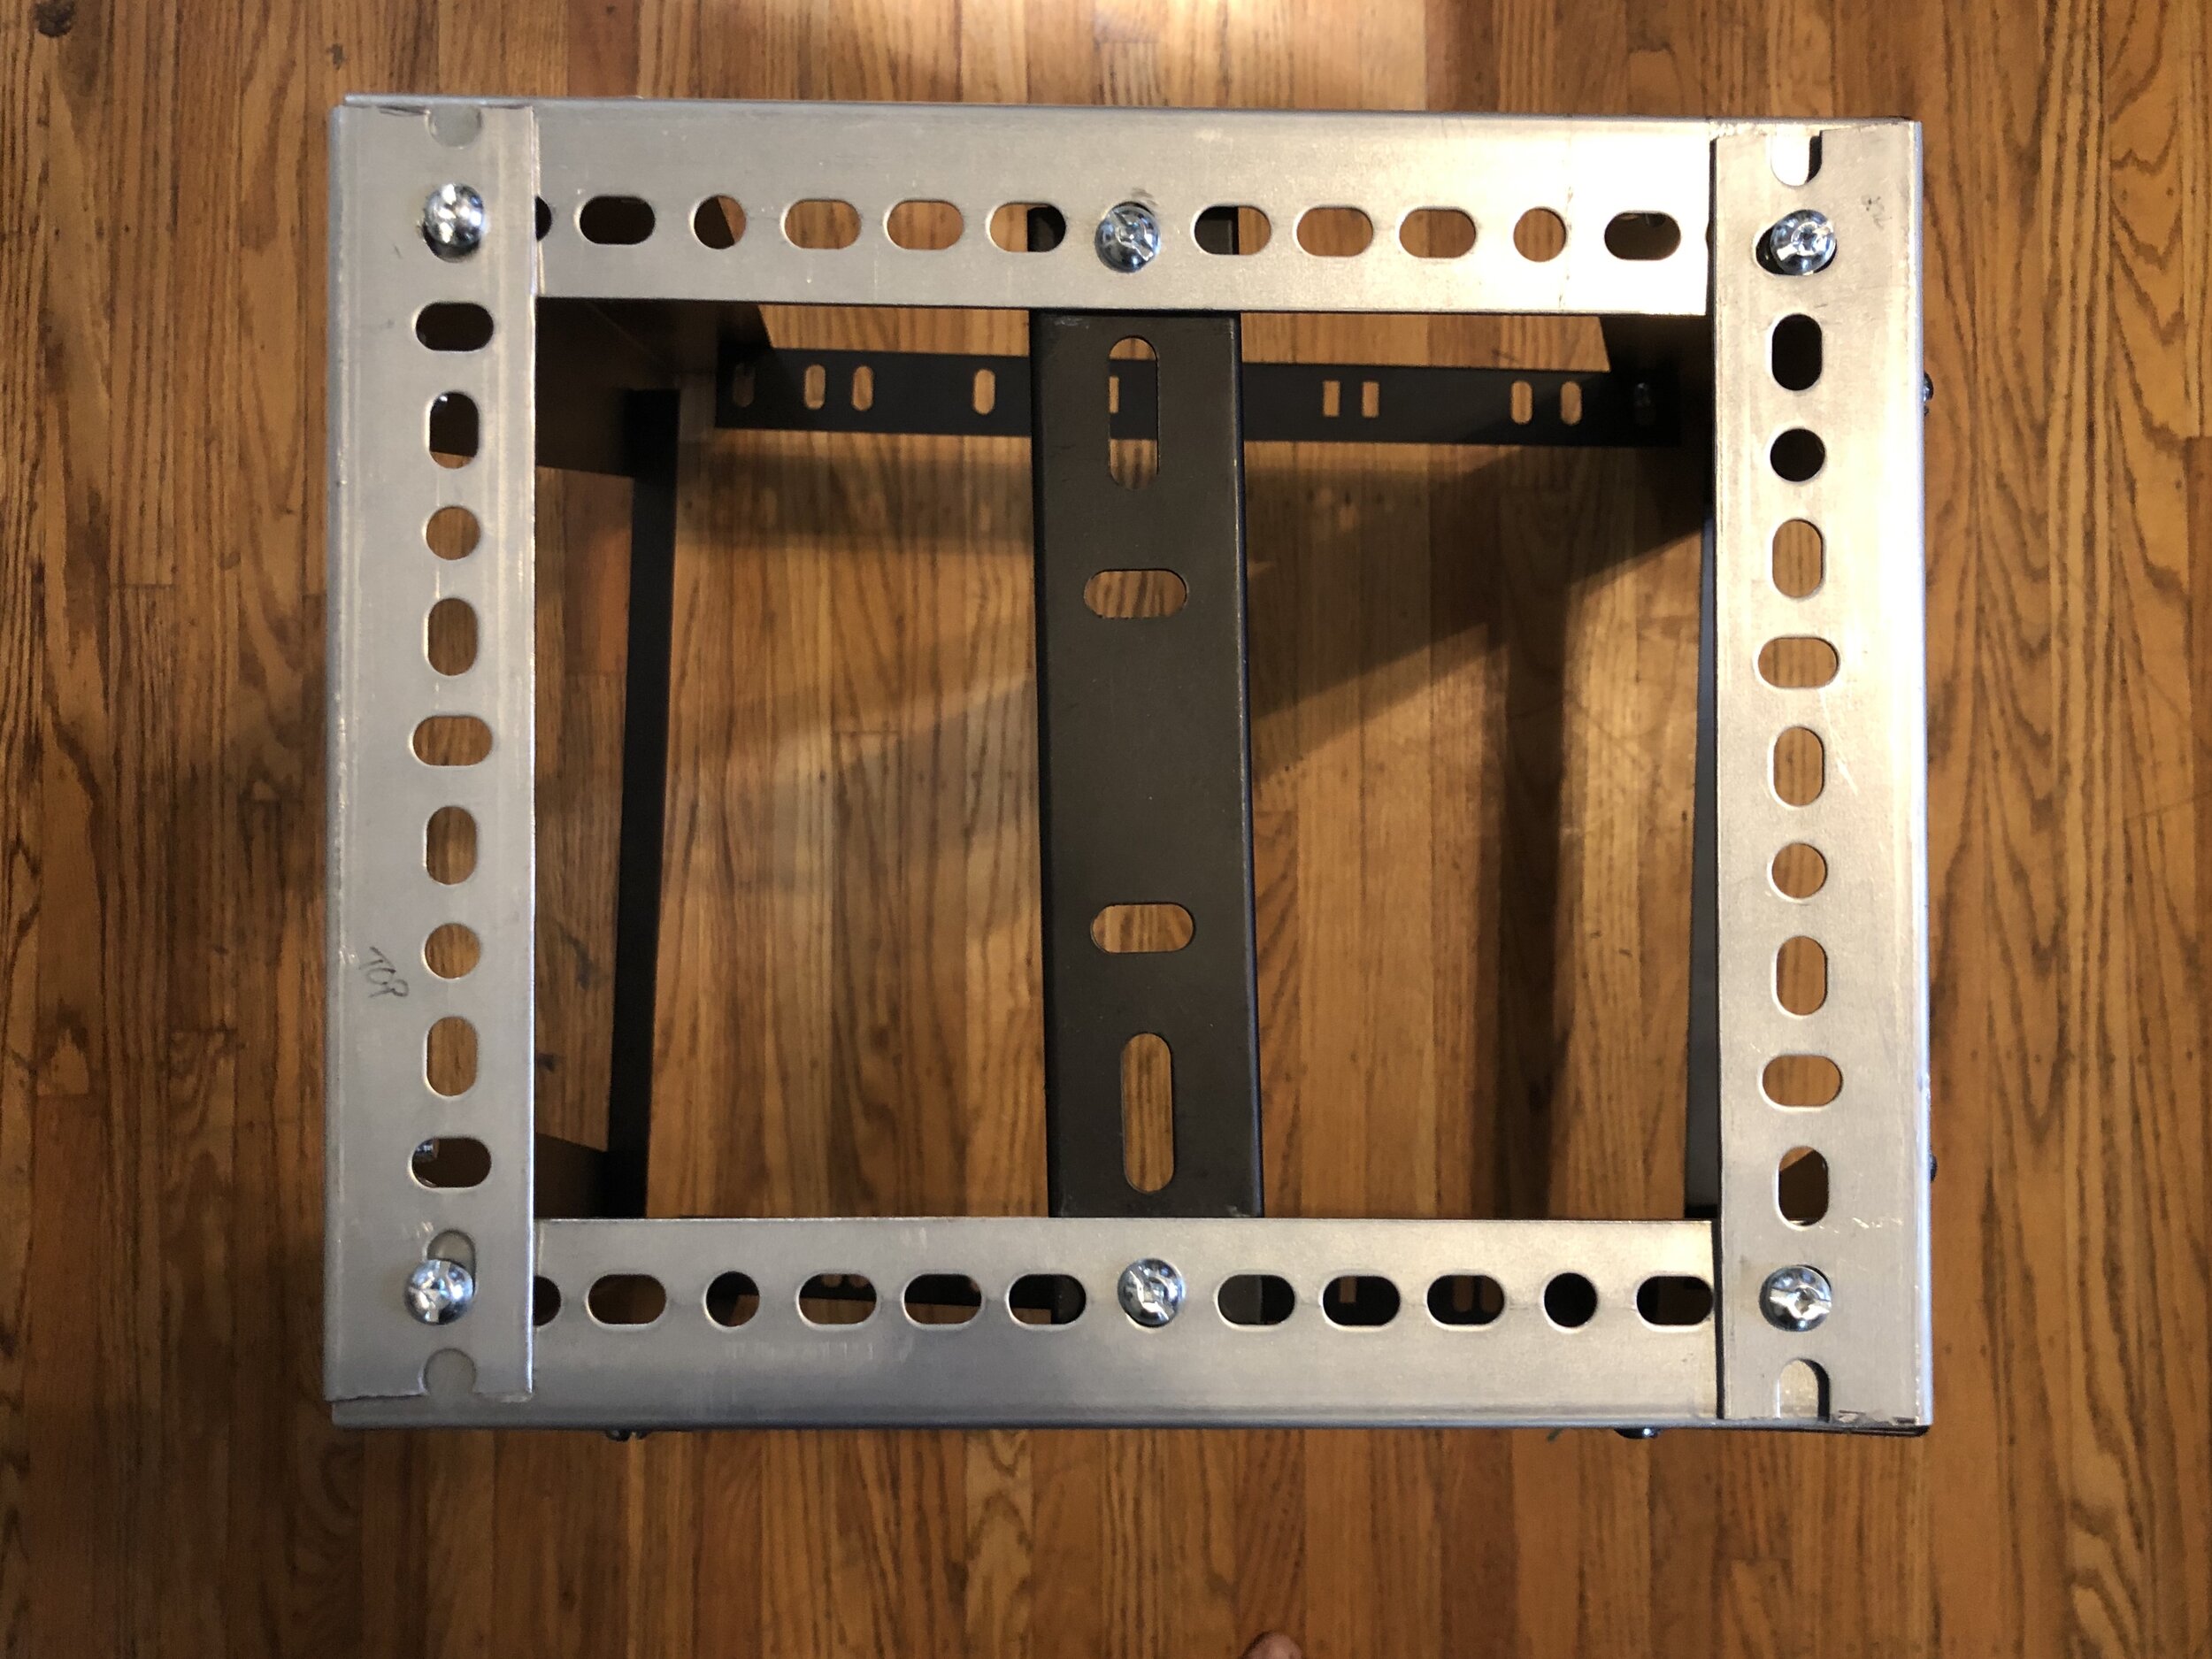
Nov 2019 first upgrades to this table

Nov 2019 upgrades finished with event photo shared

An UPDATE

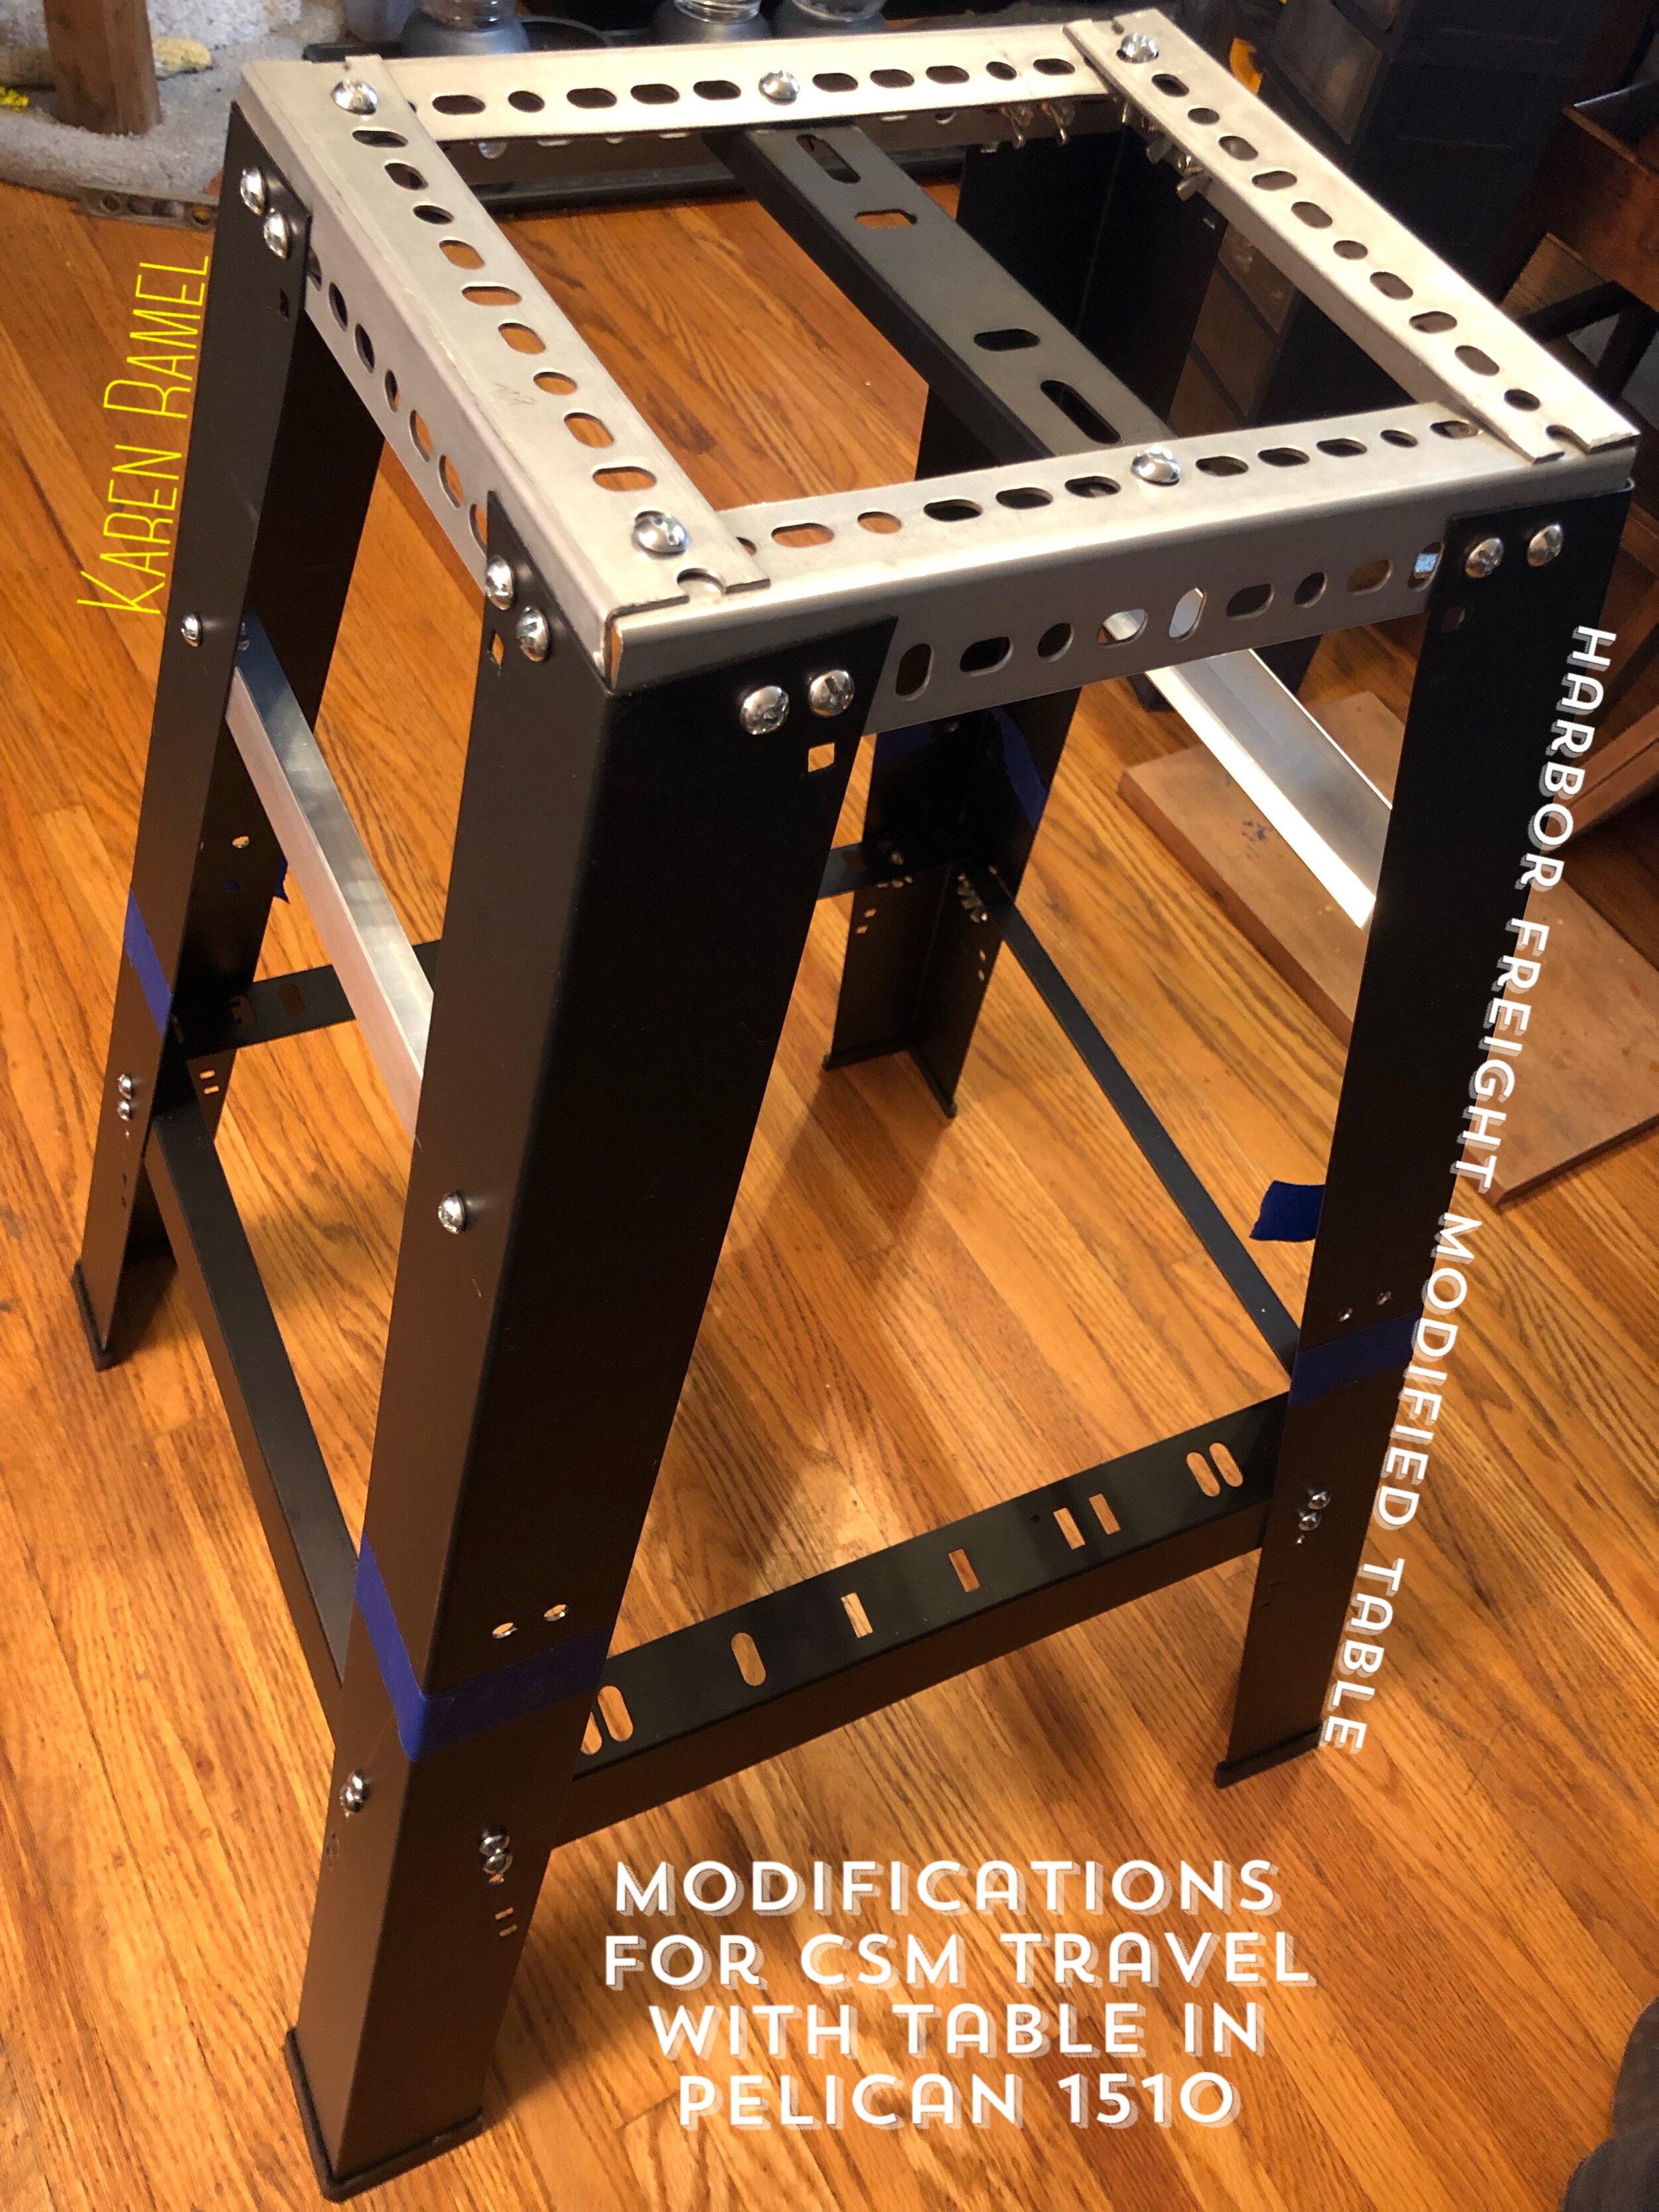
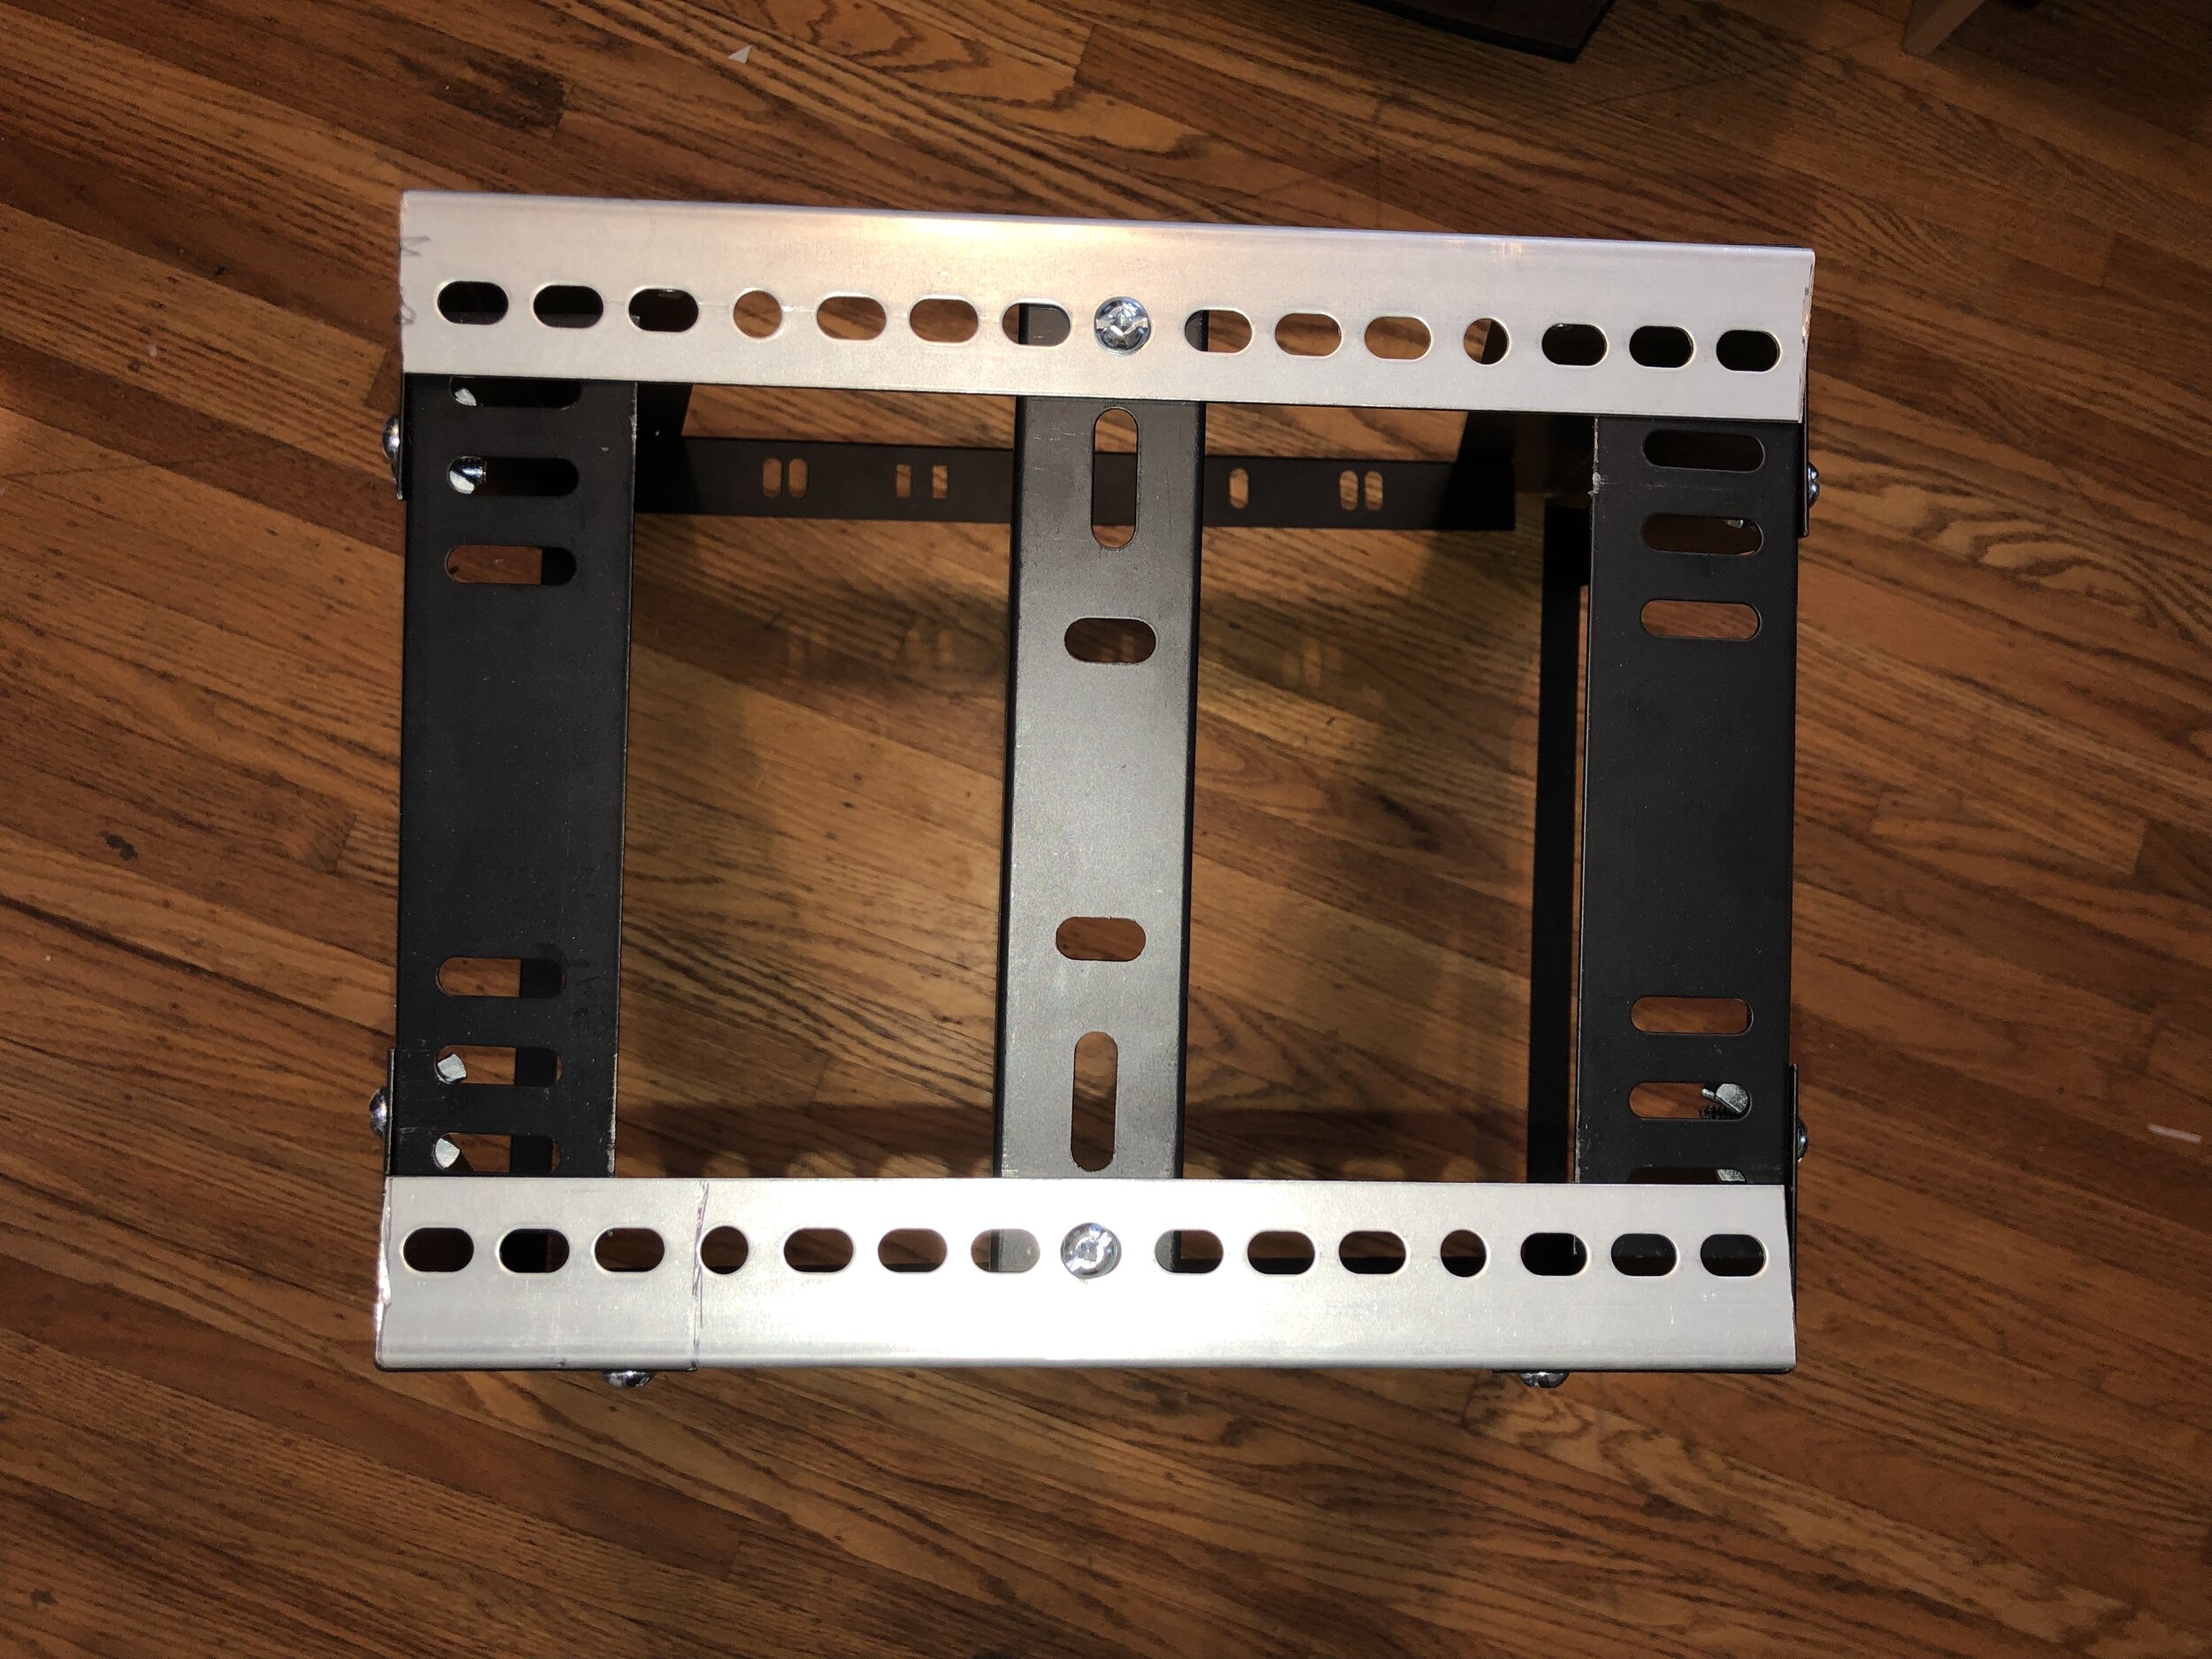
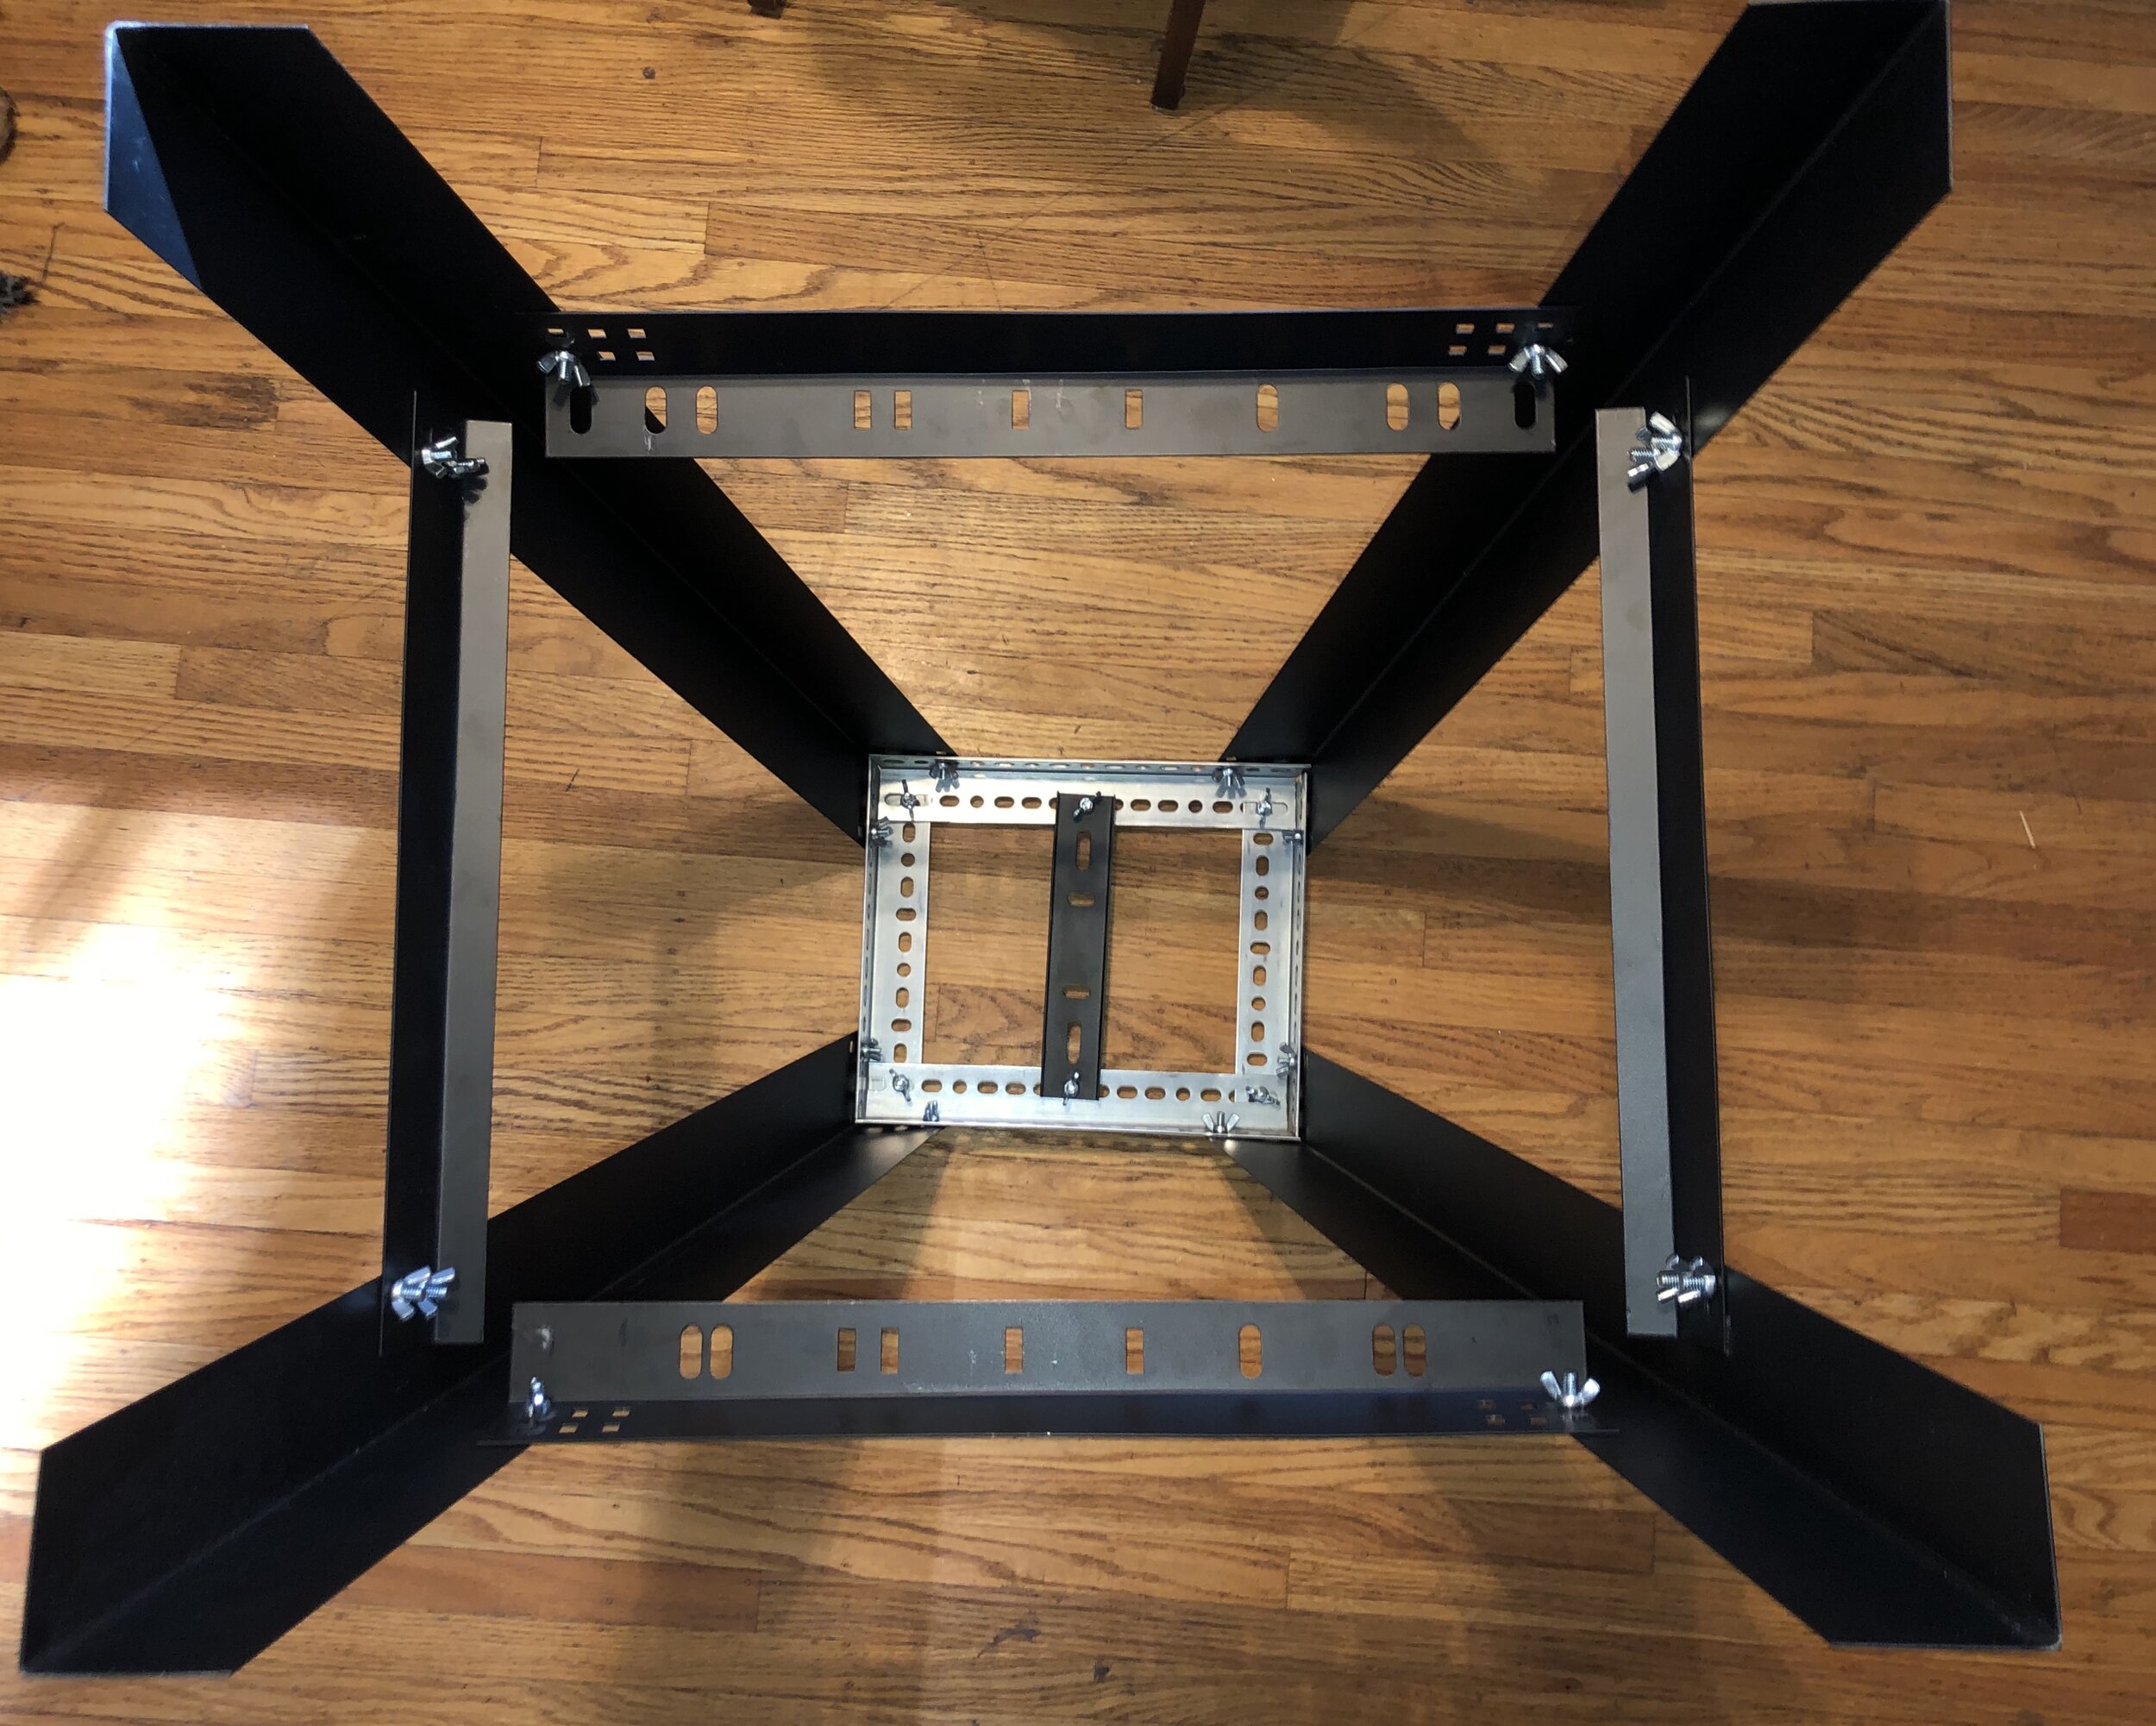
Today Oct 23, 2020 I decided to further enhance the three elbow joints near the top of the table. In each elbow is a screw holding the elbow together but with metal on metal if the screw slightly loosens it adds to undesirable table movement.

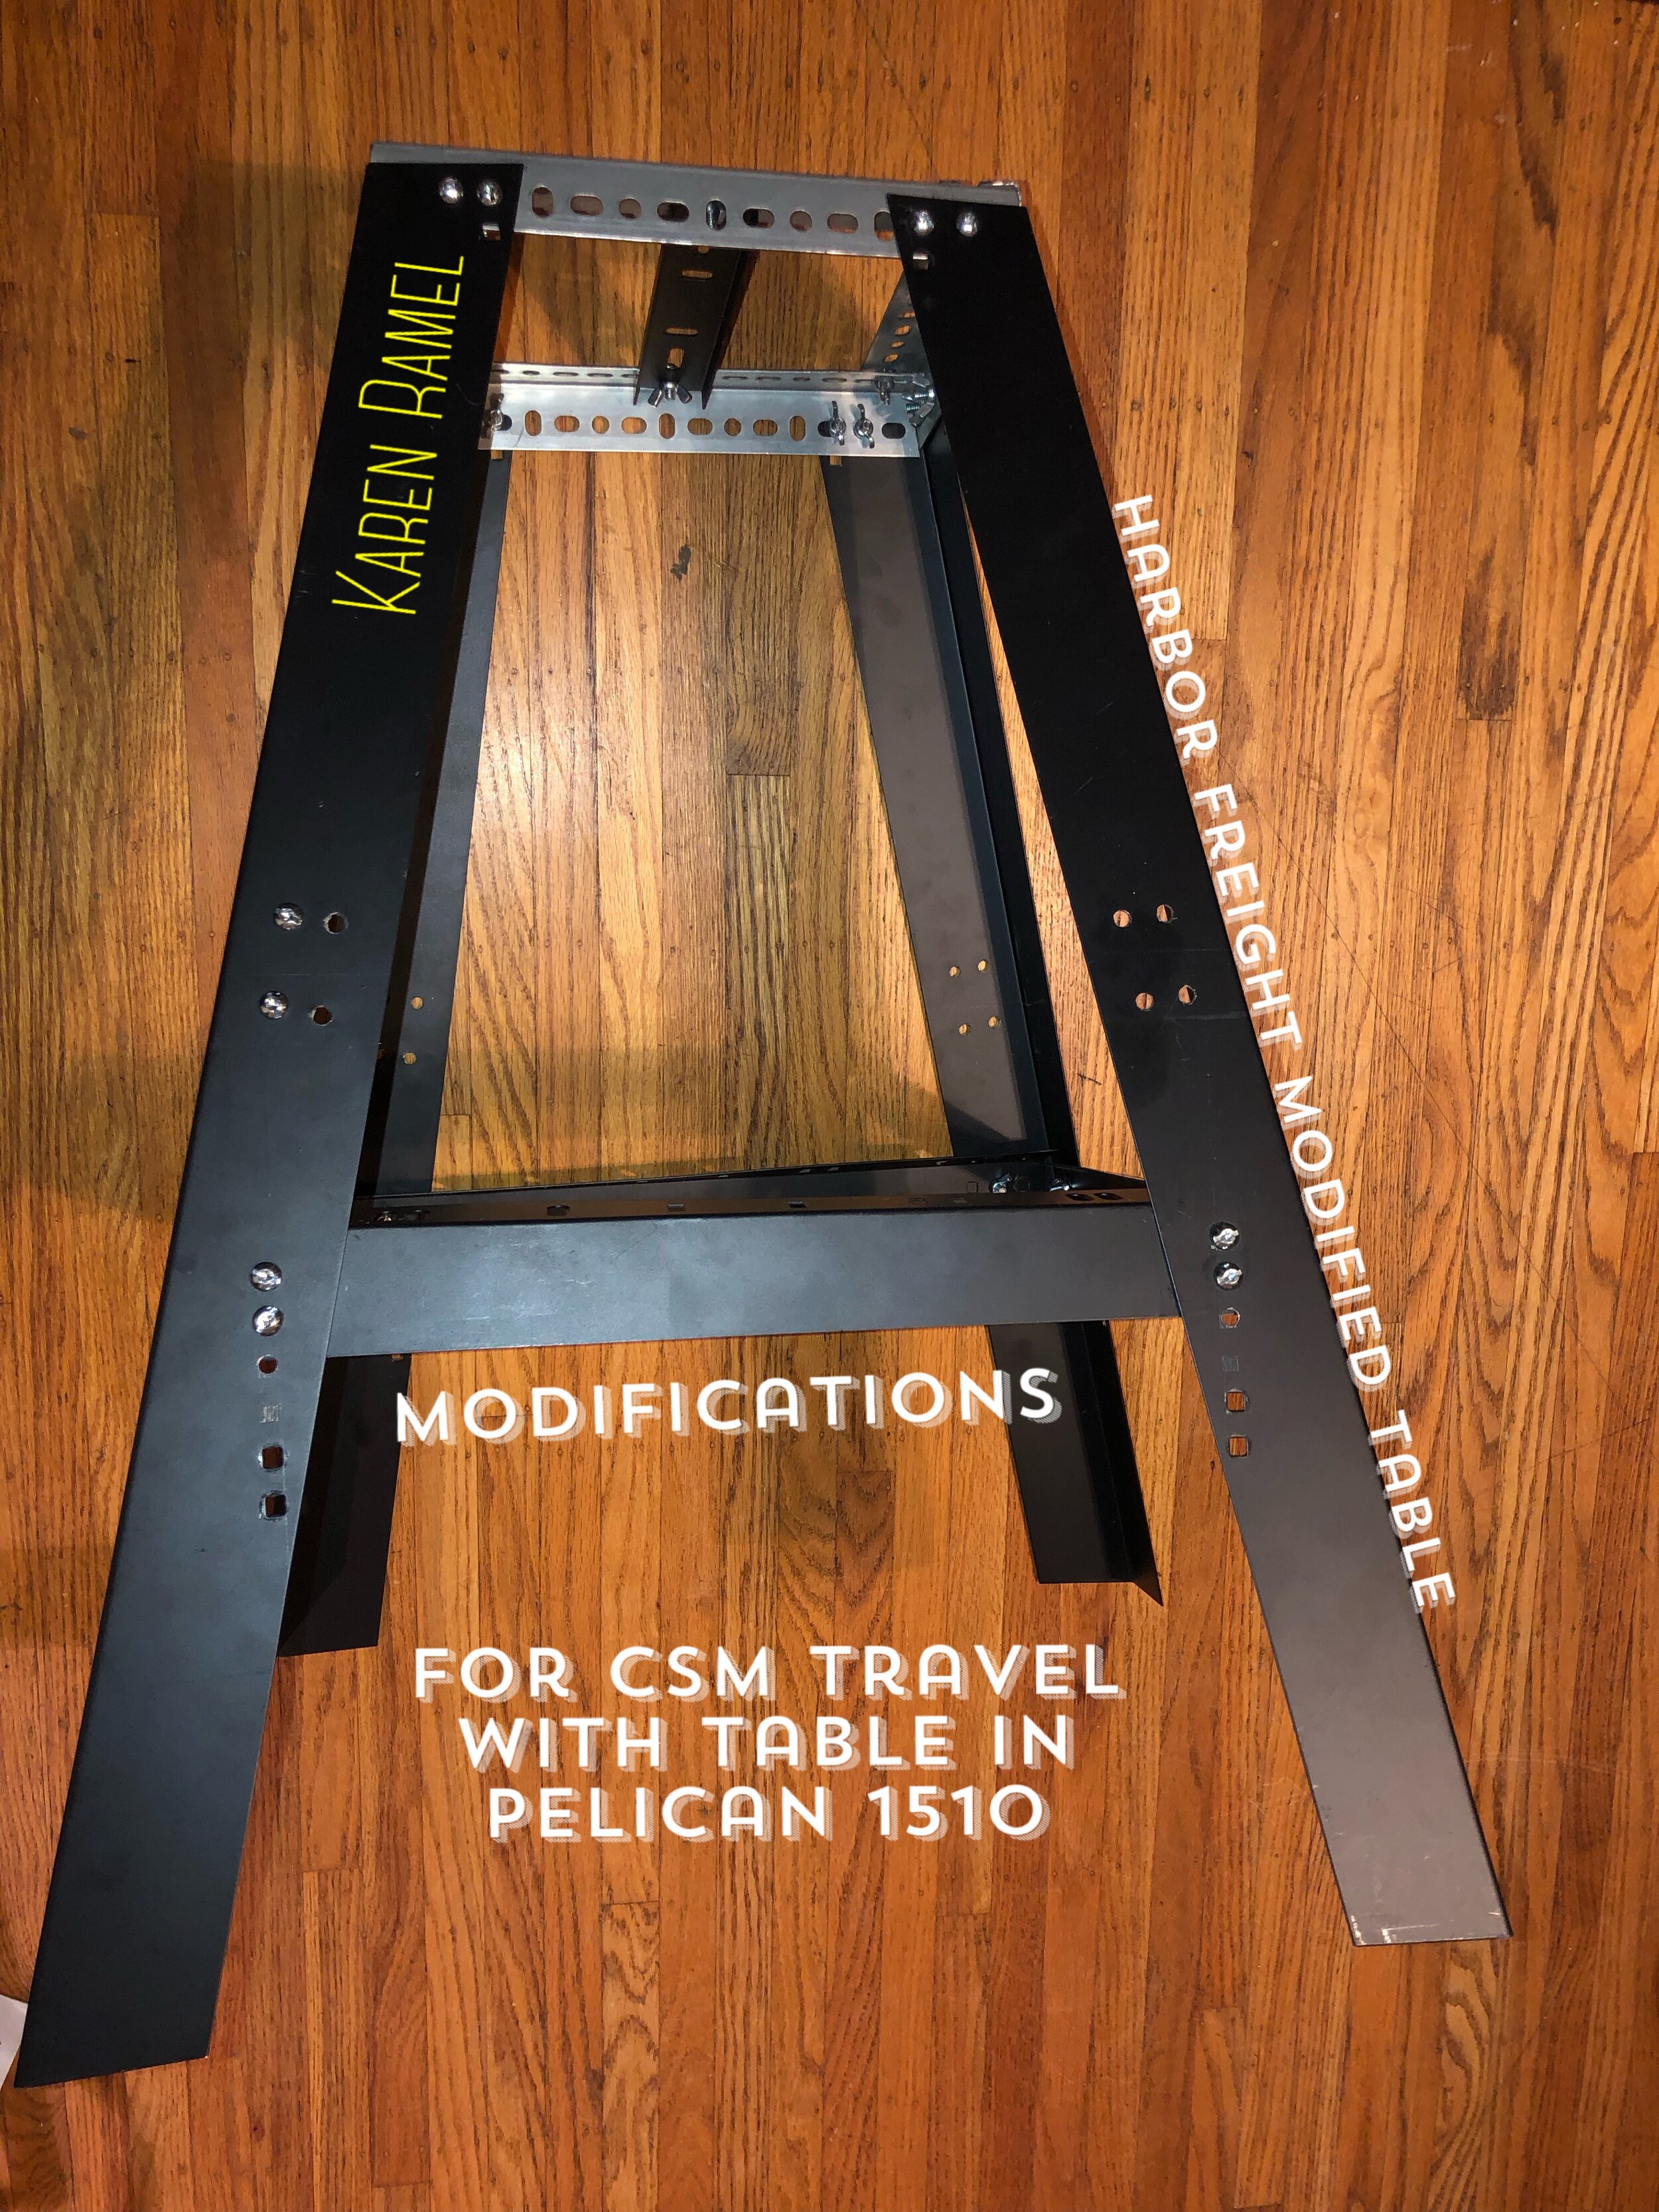
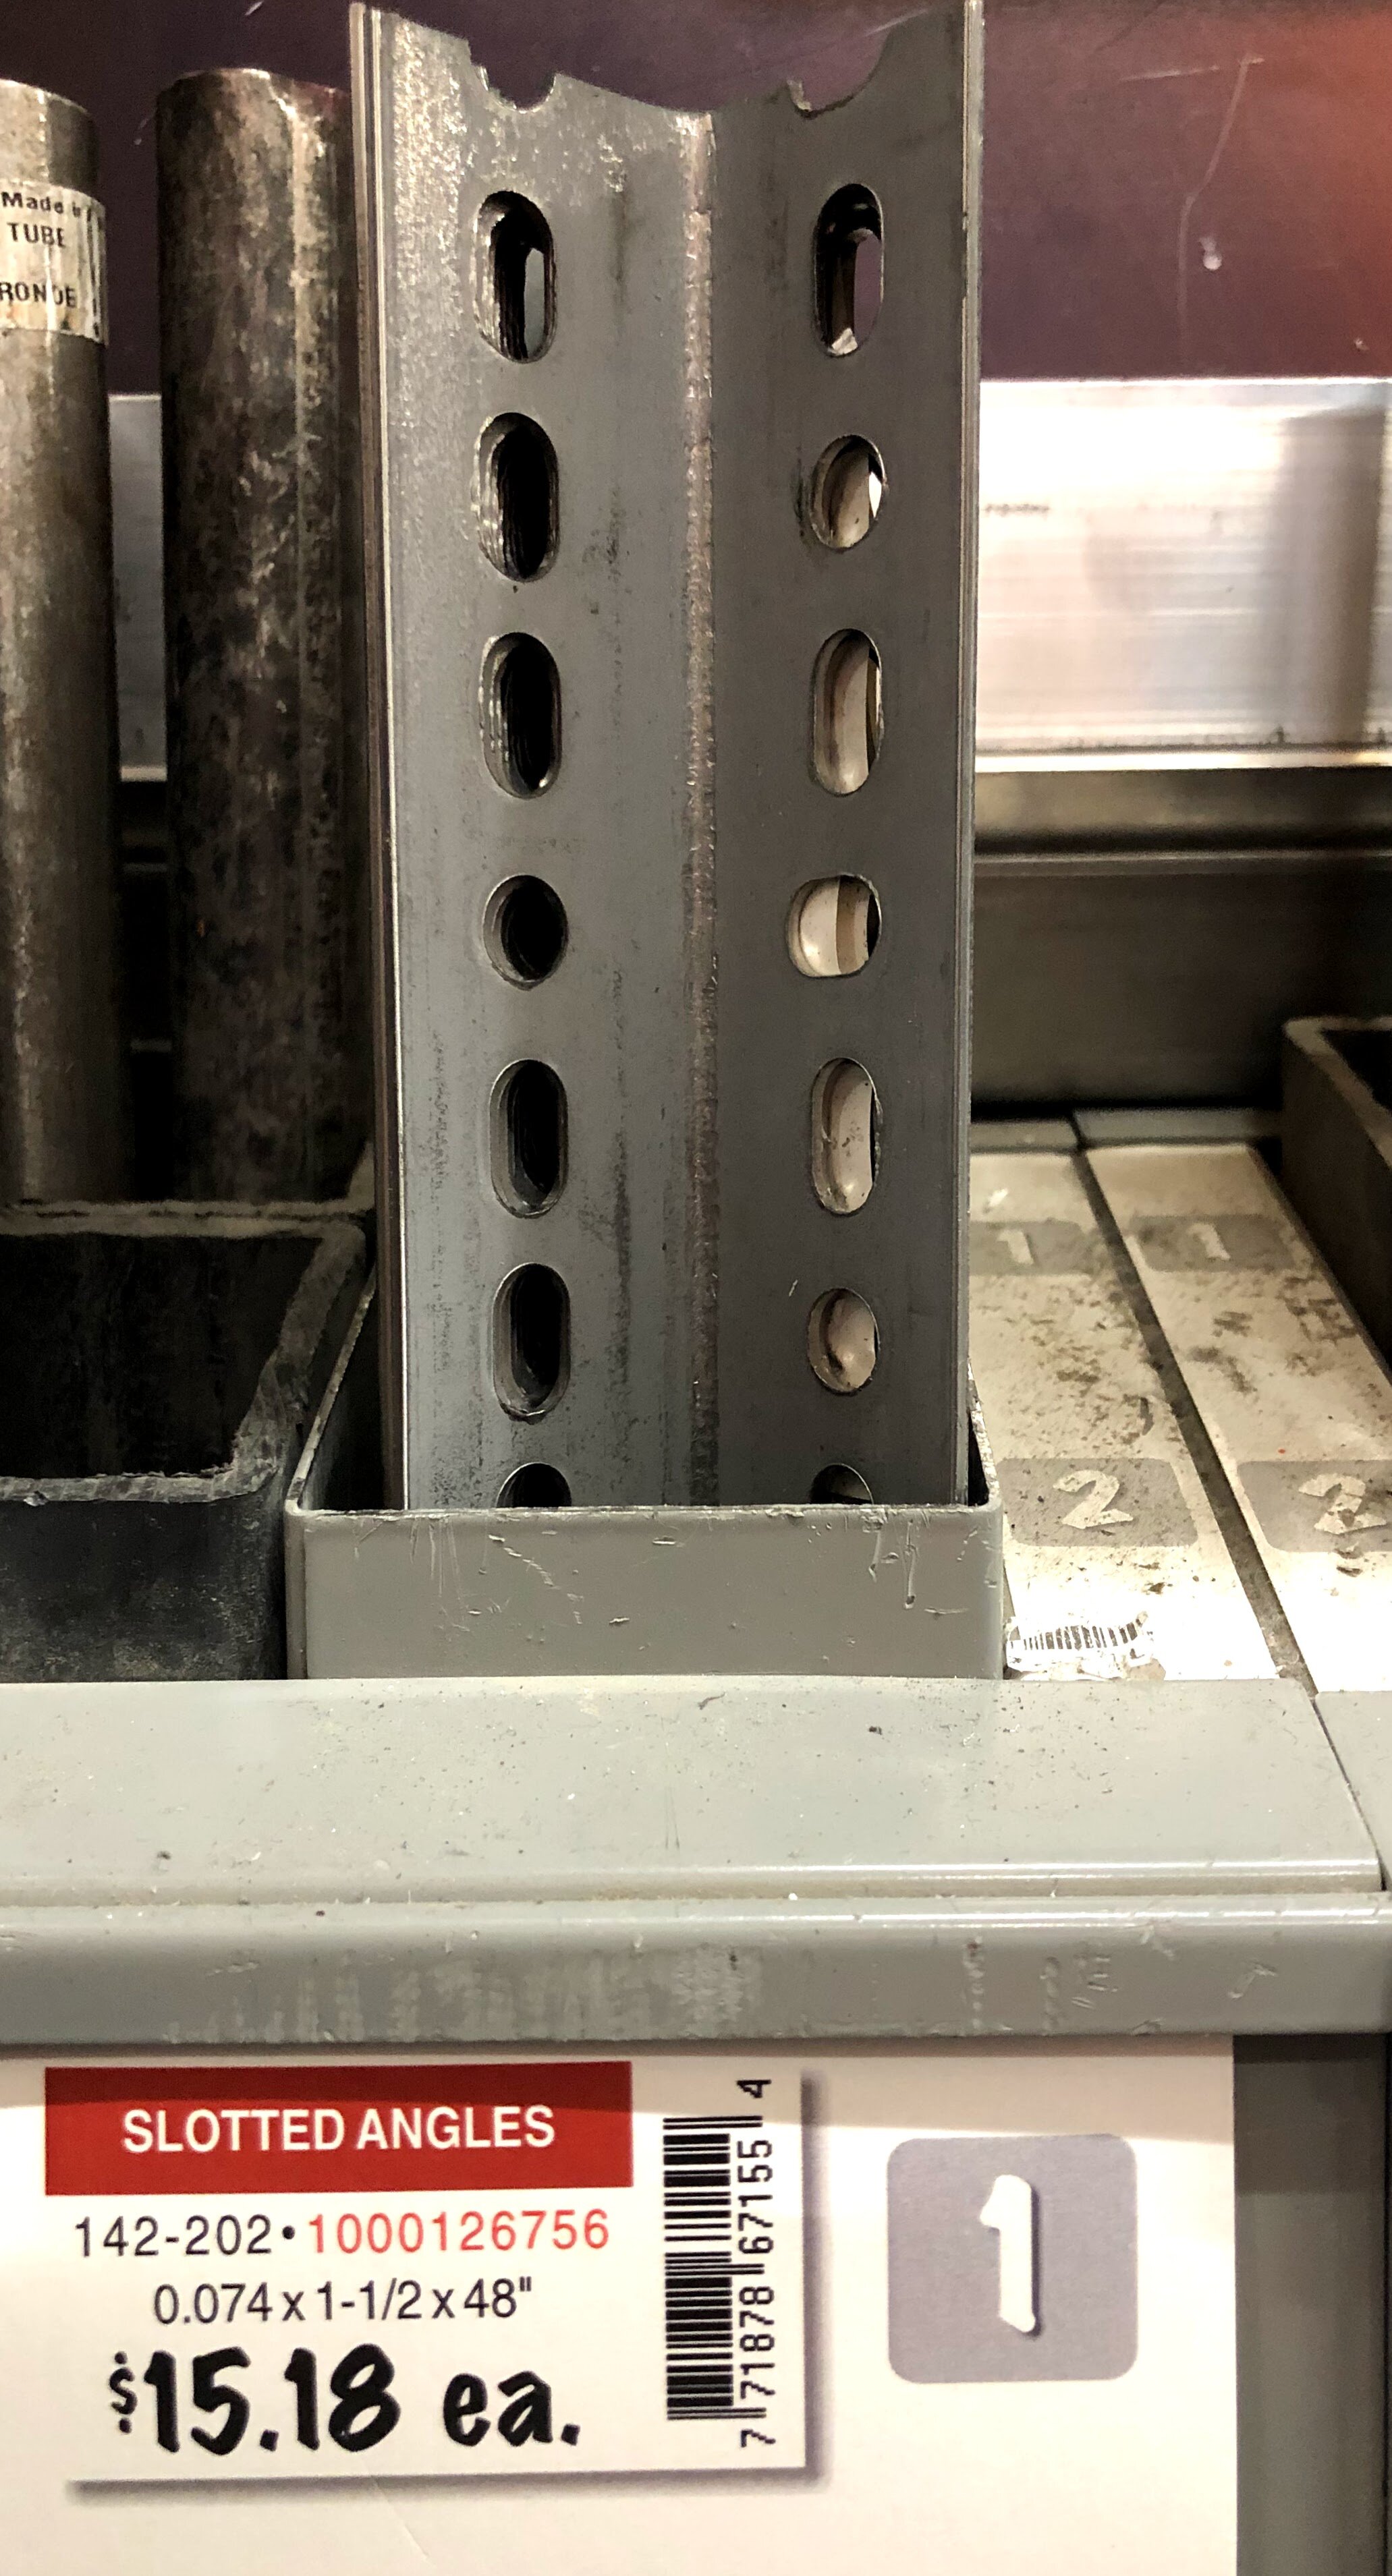
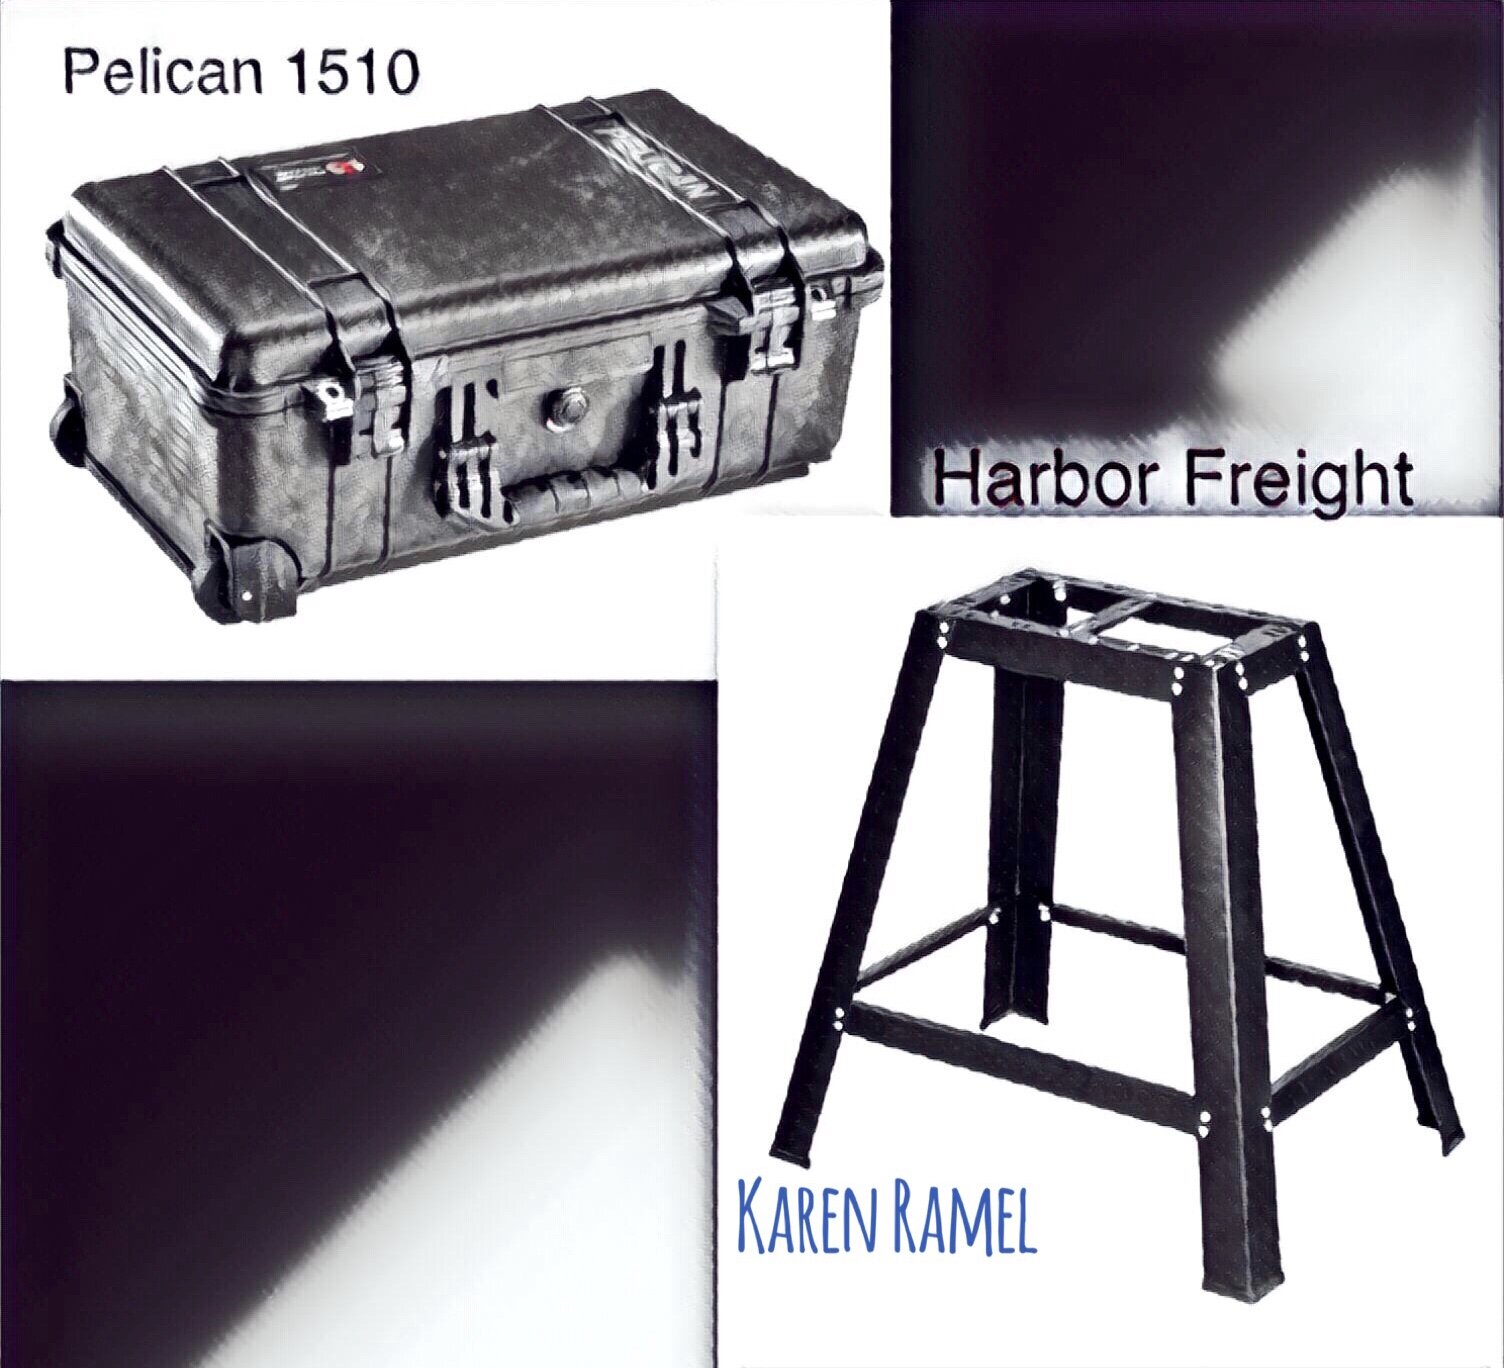
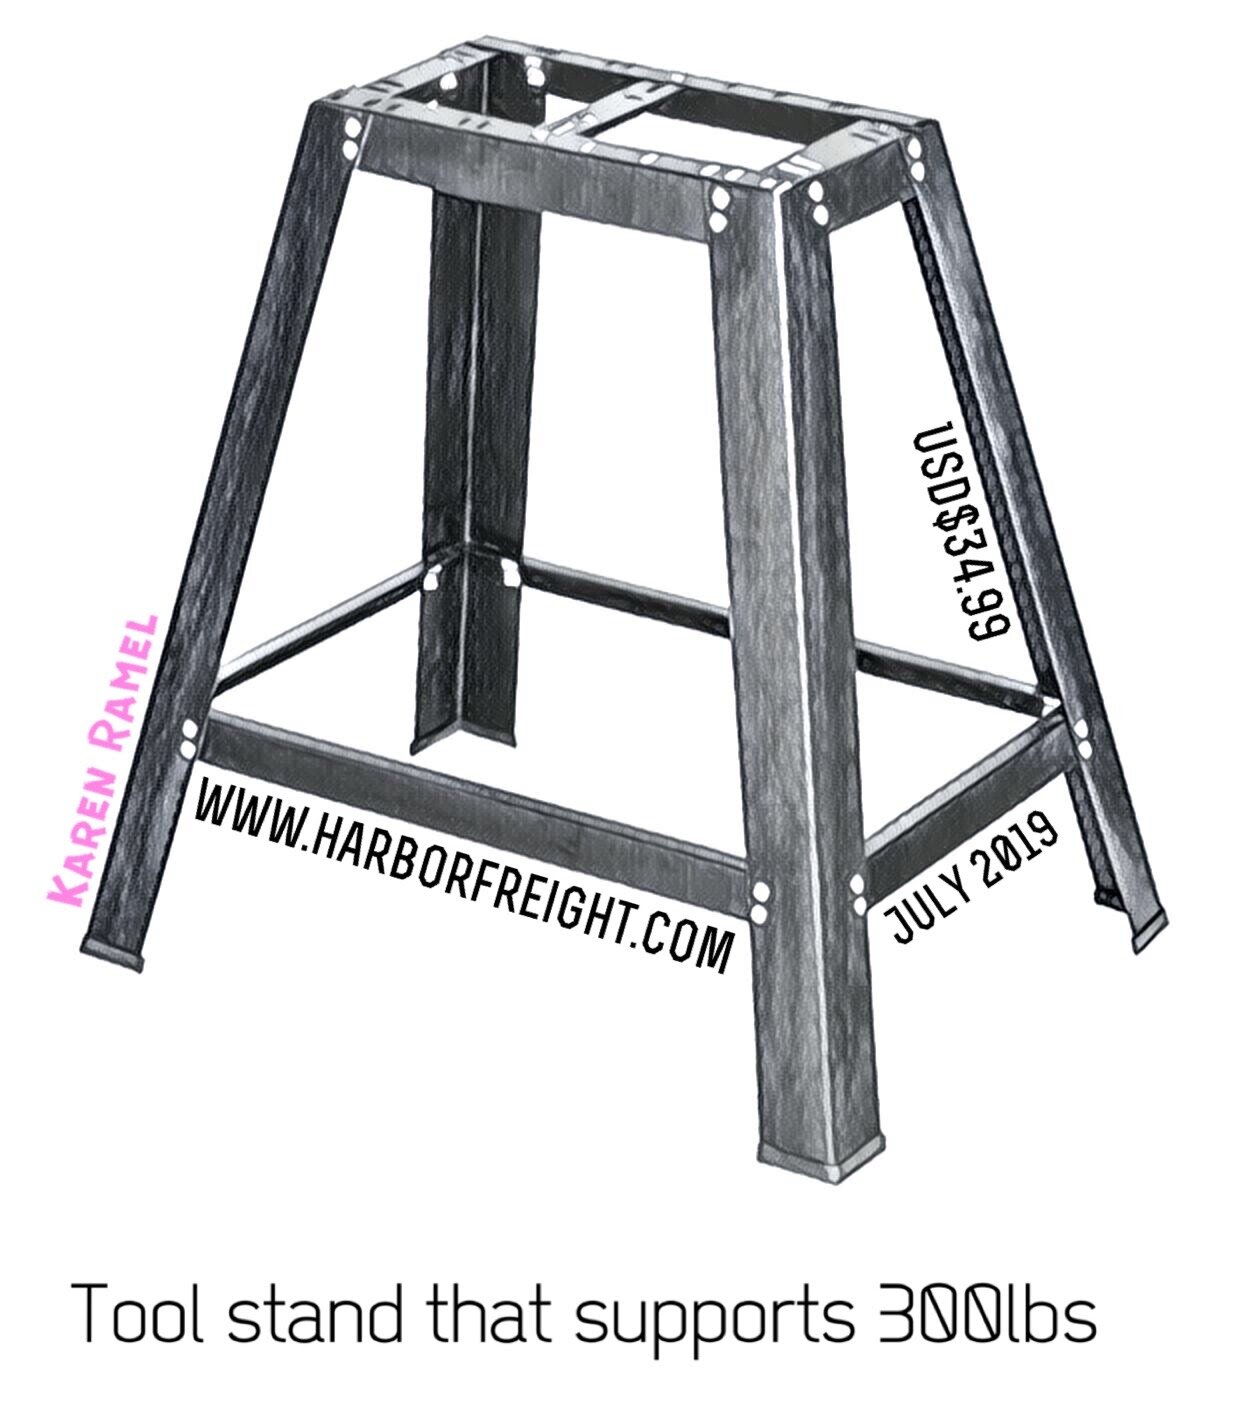
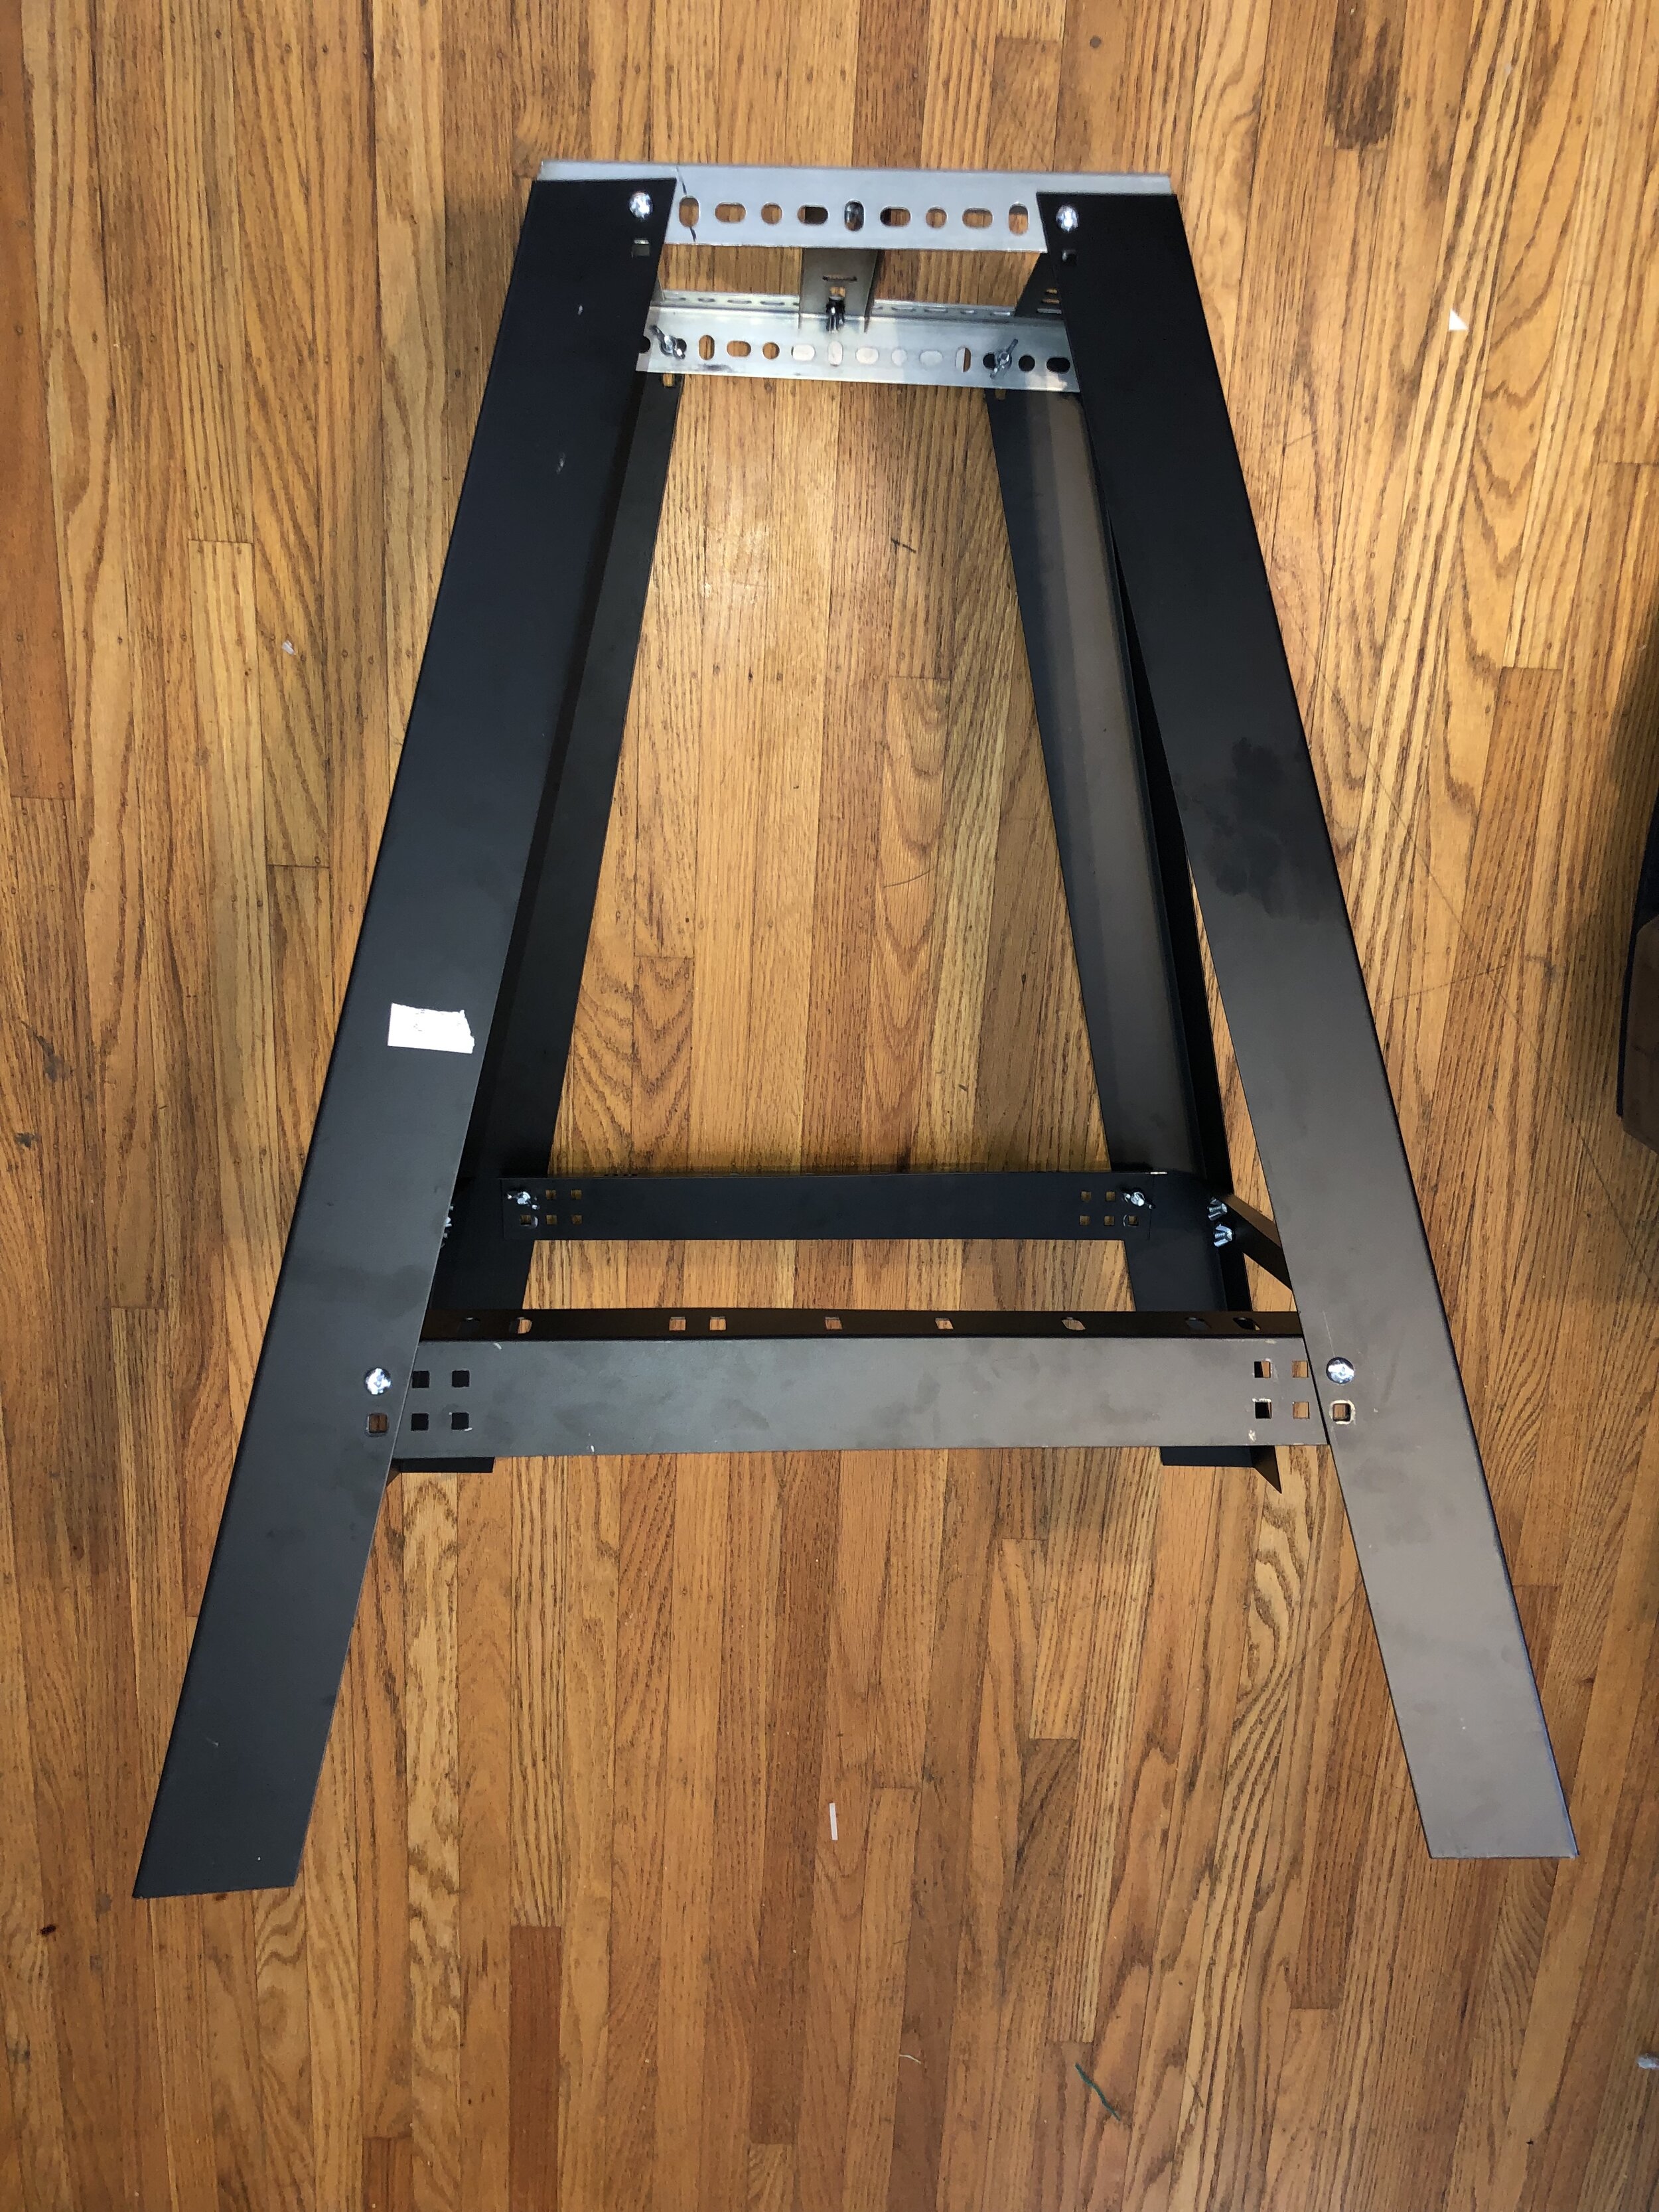
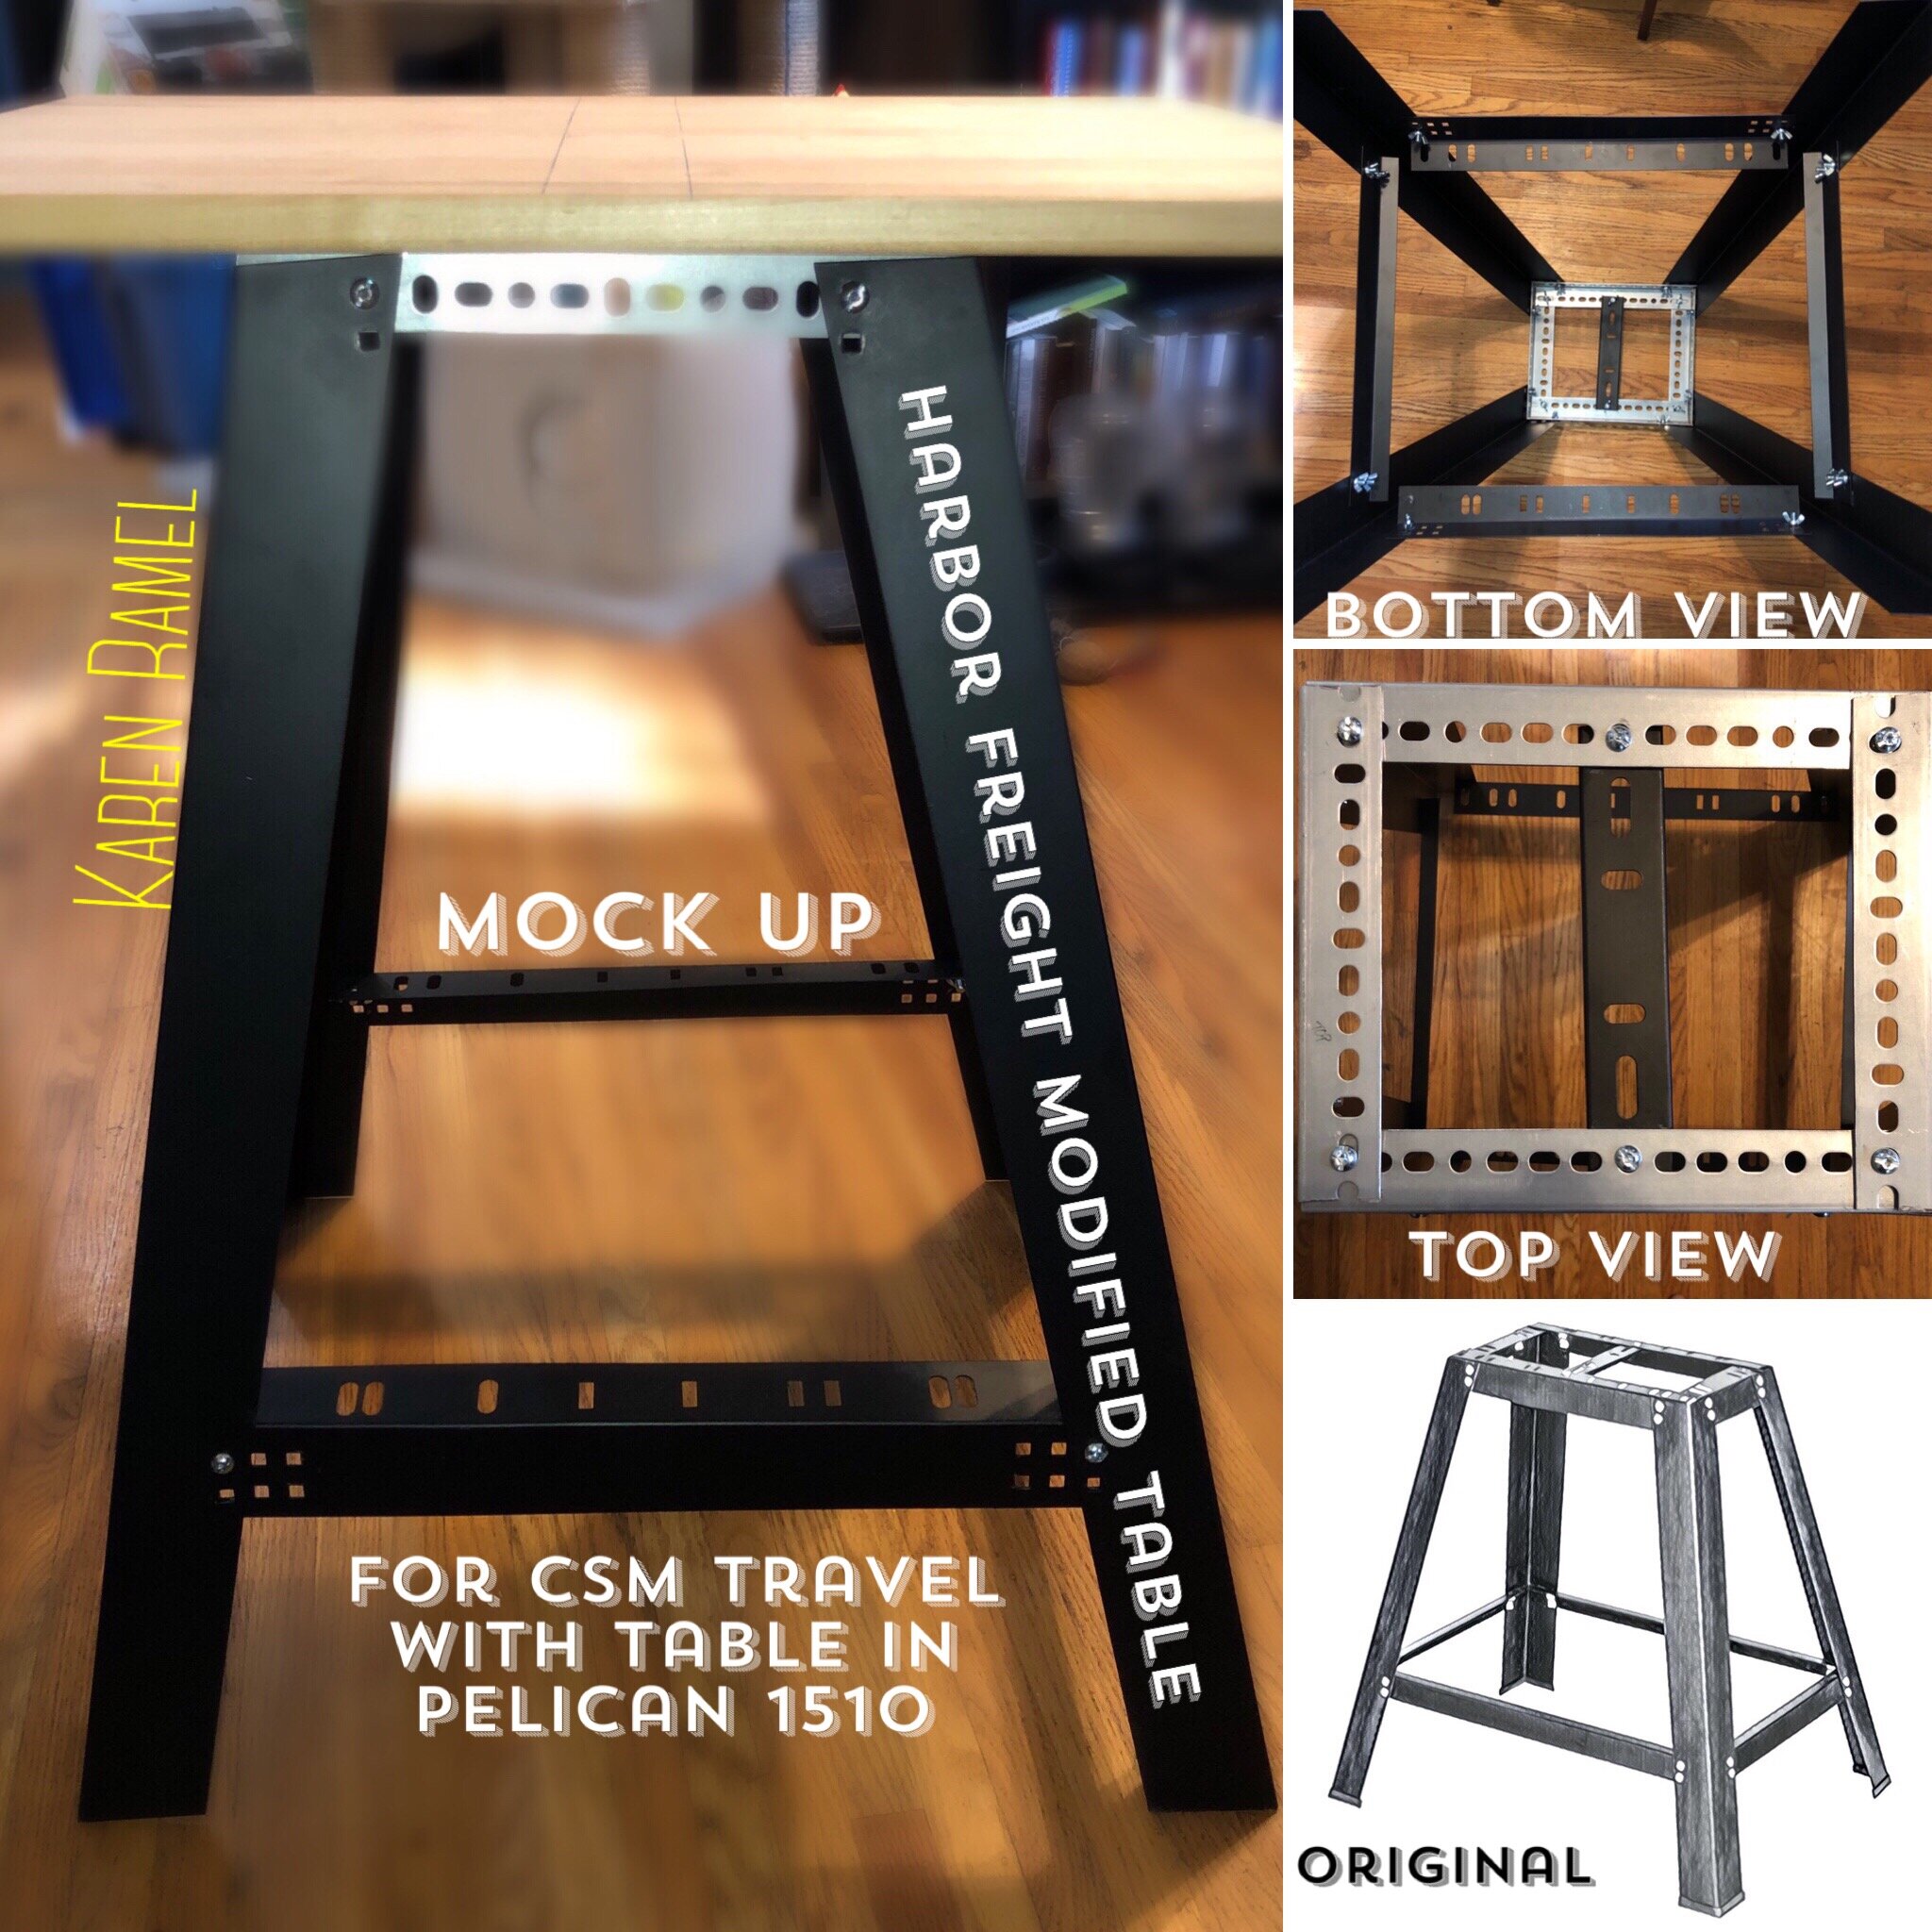
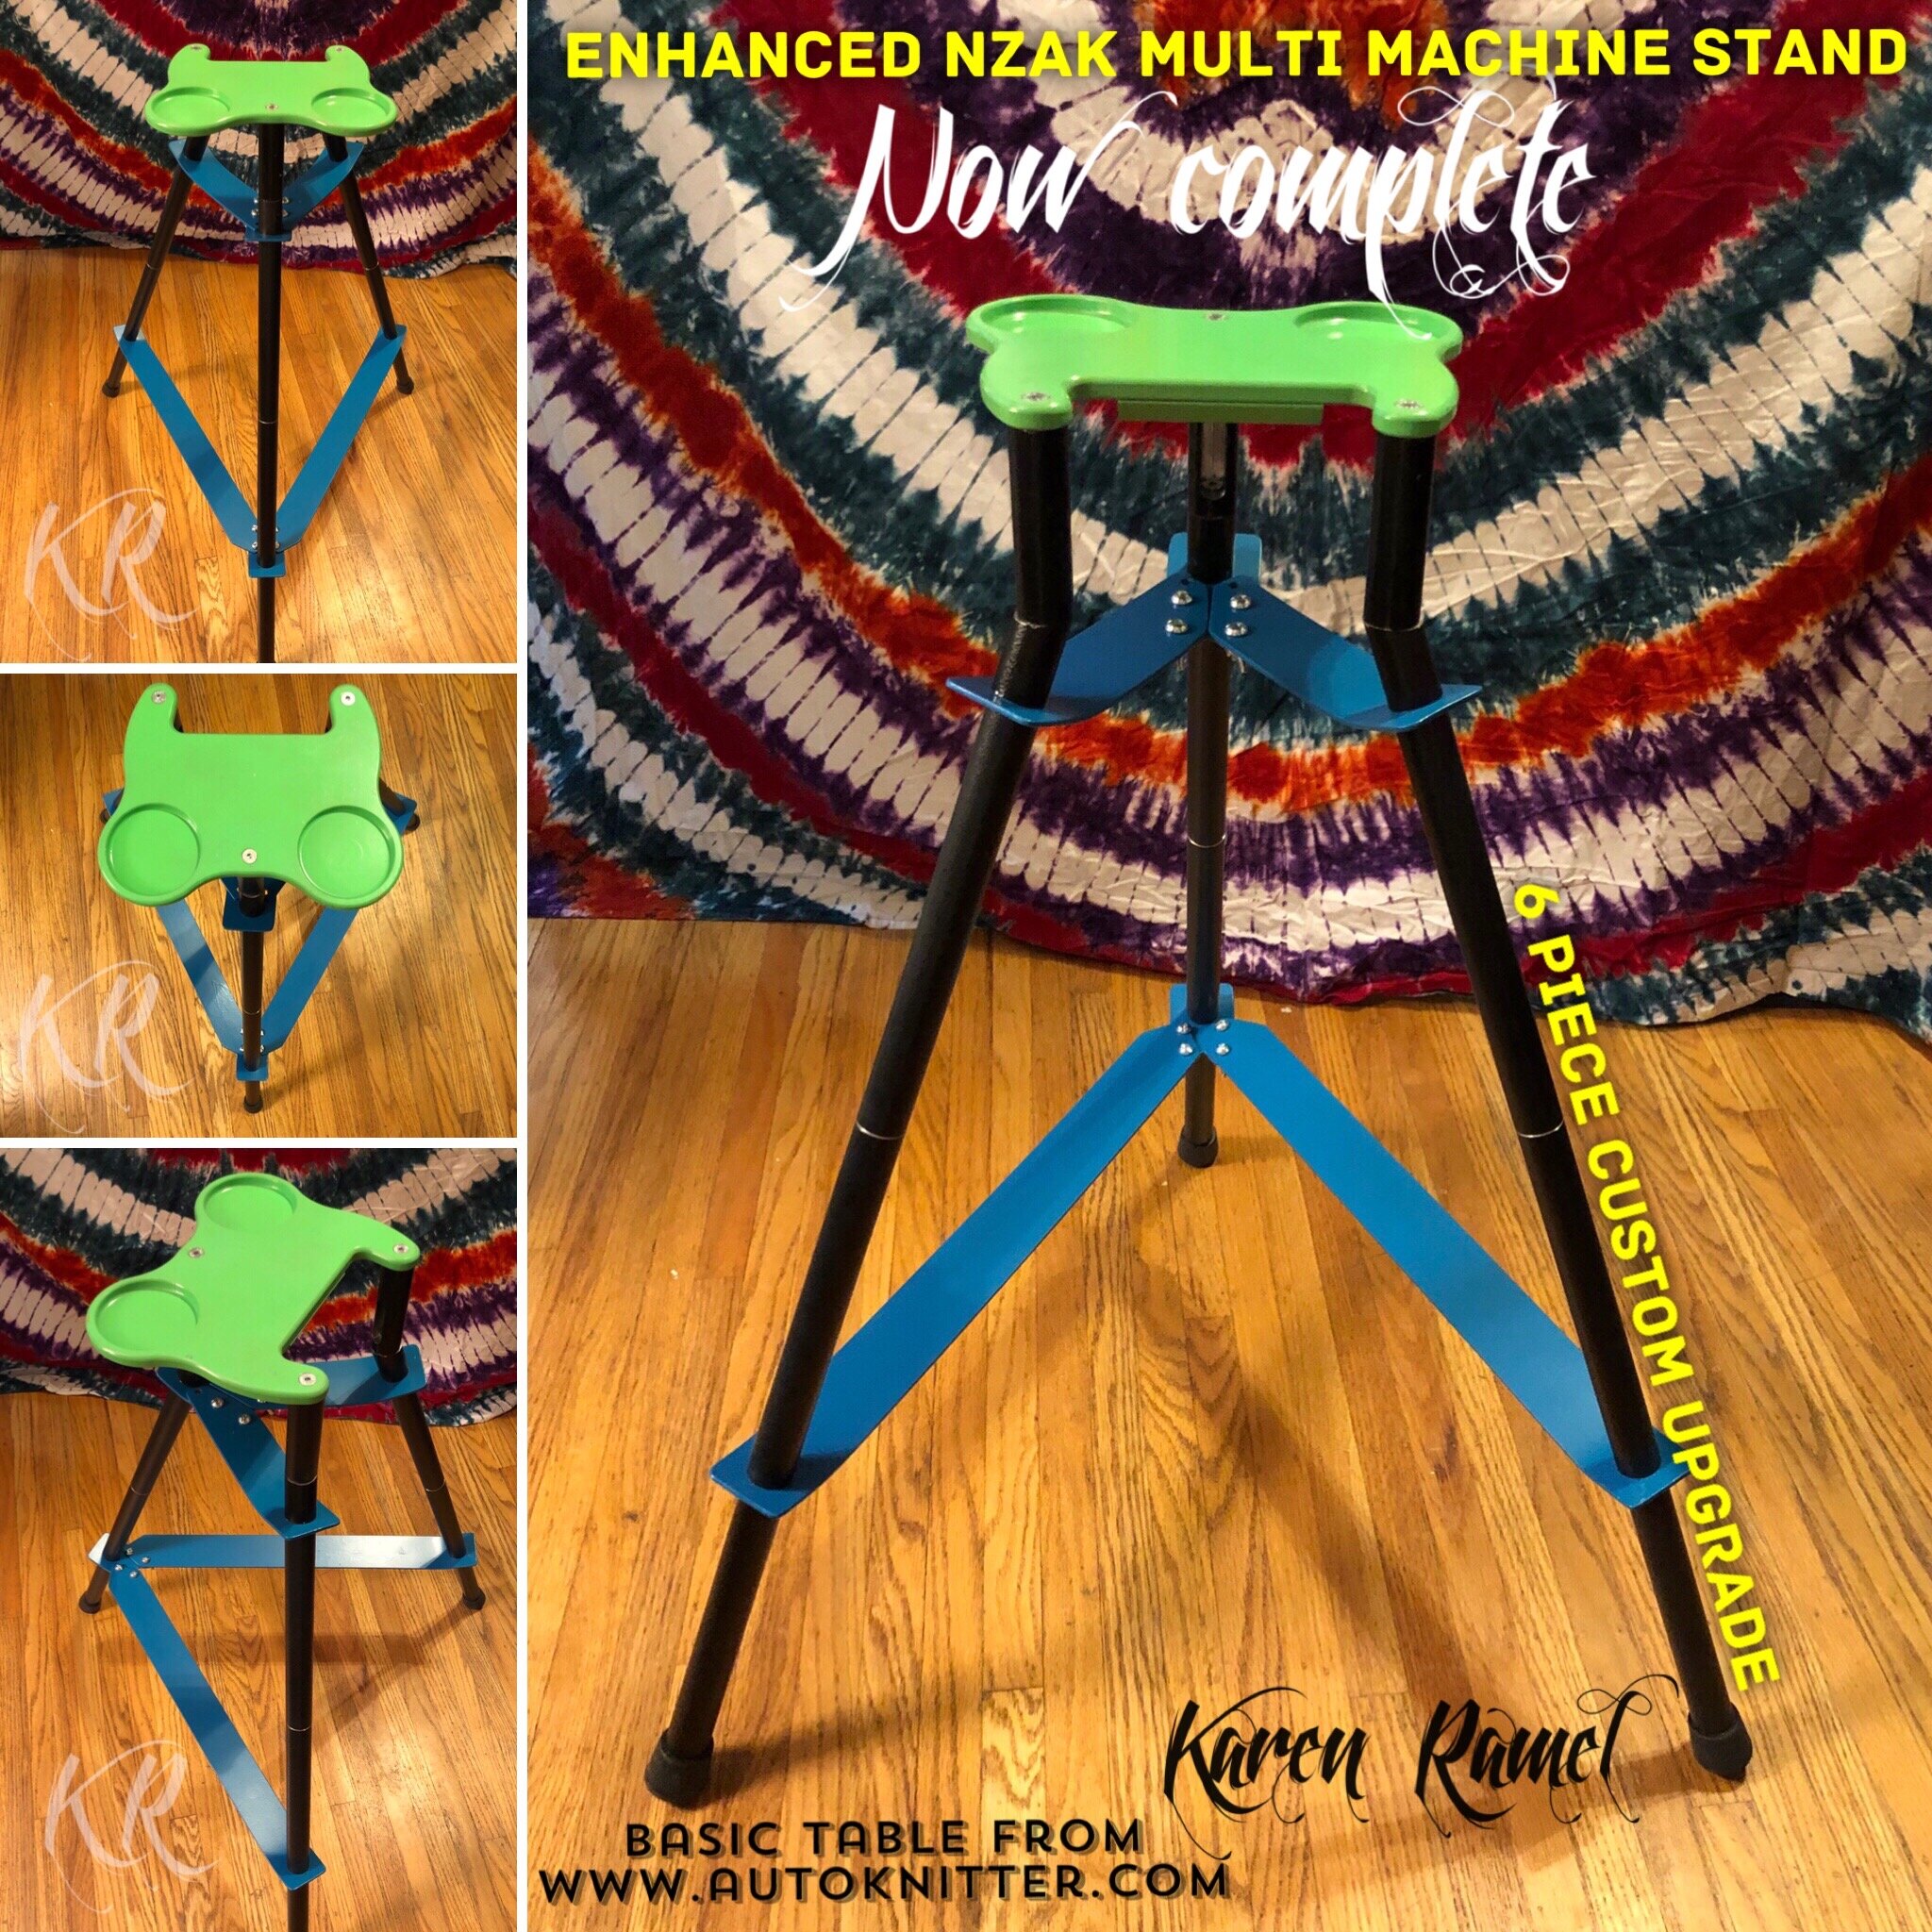
Extending my travel table to standing height - the “NZAK Multi-Machine stand”

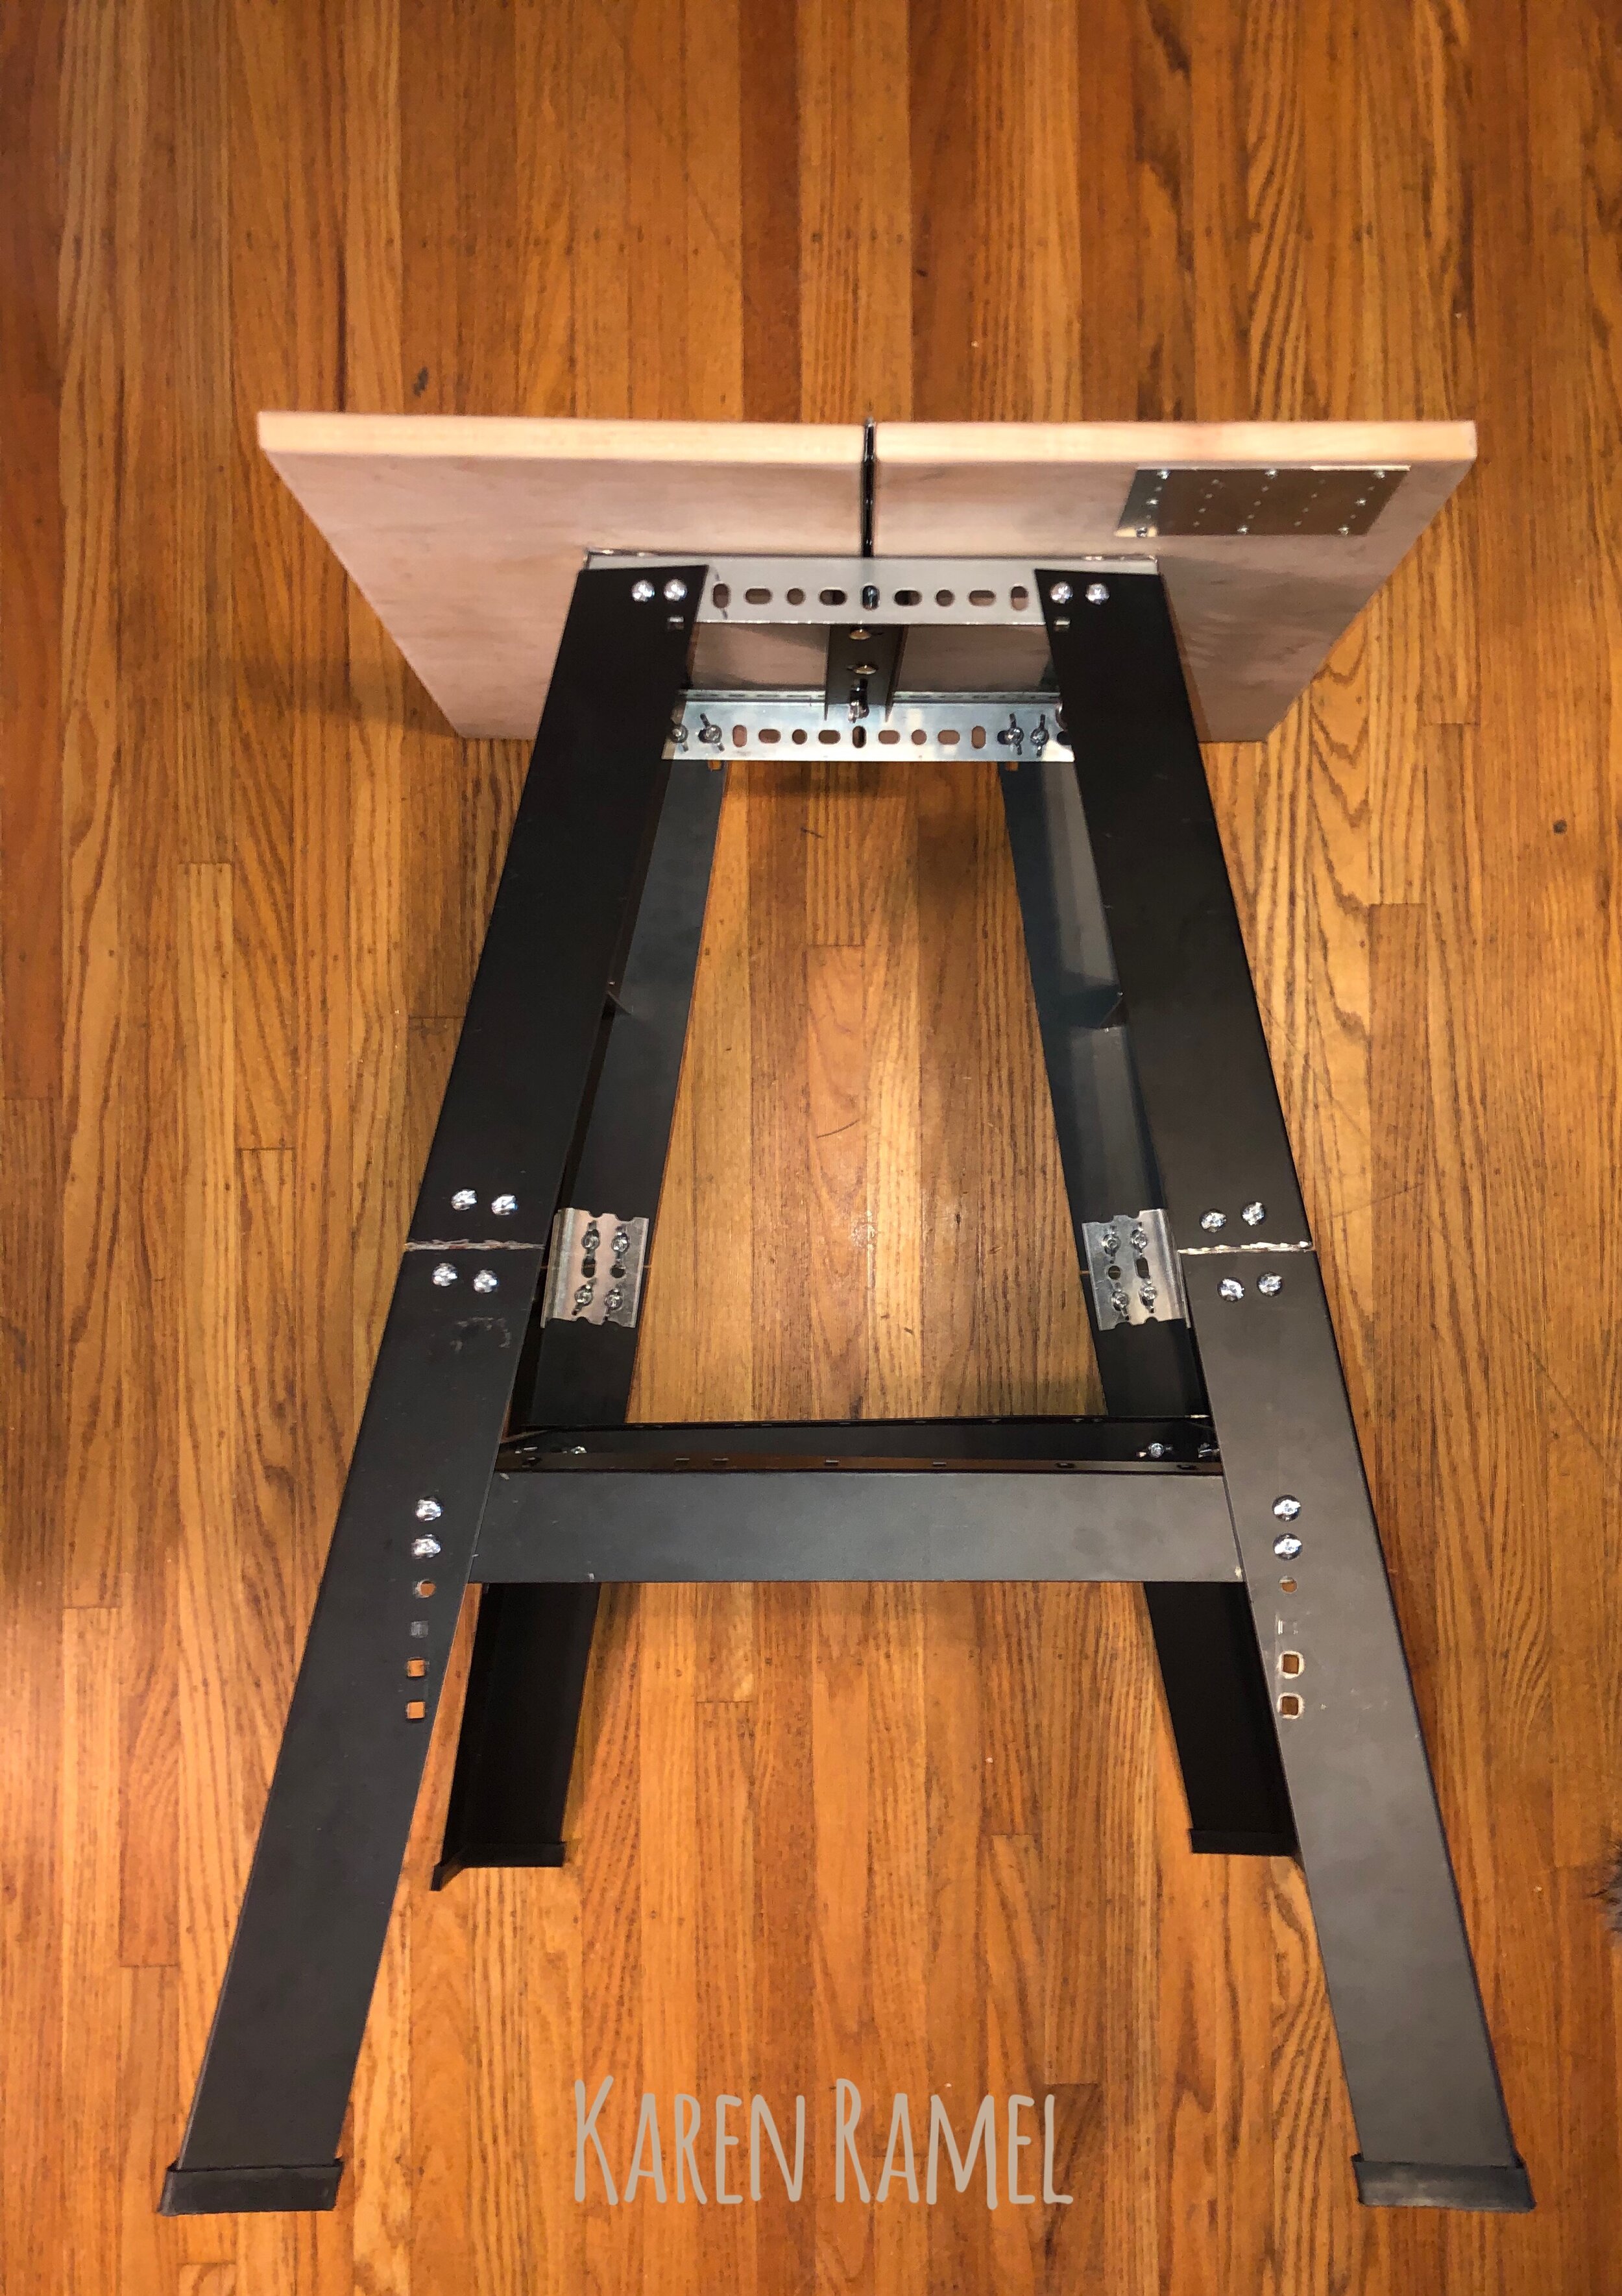
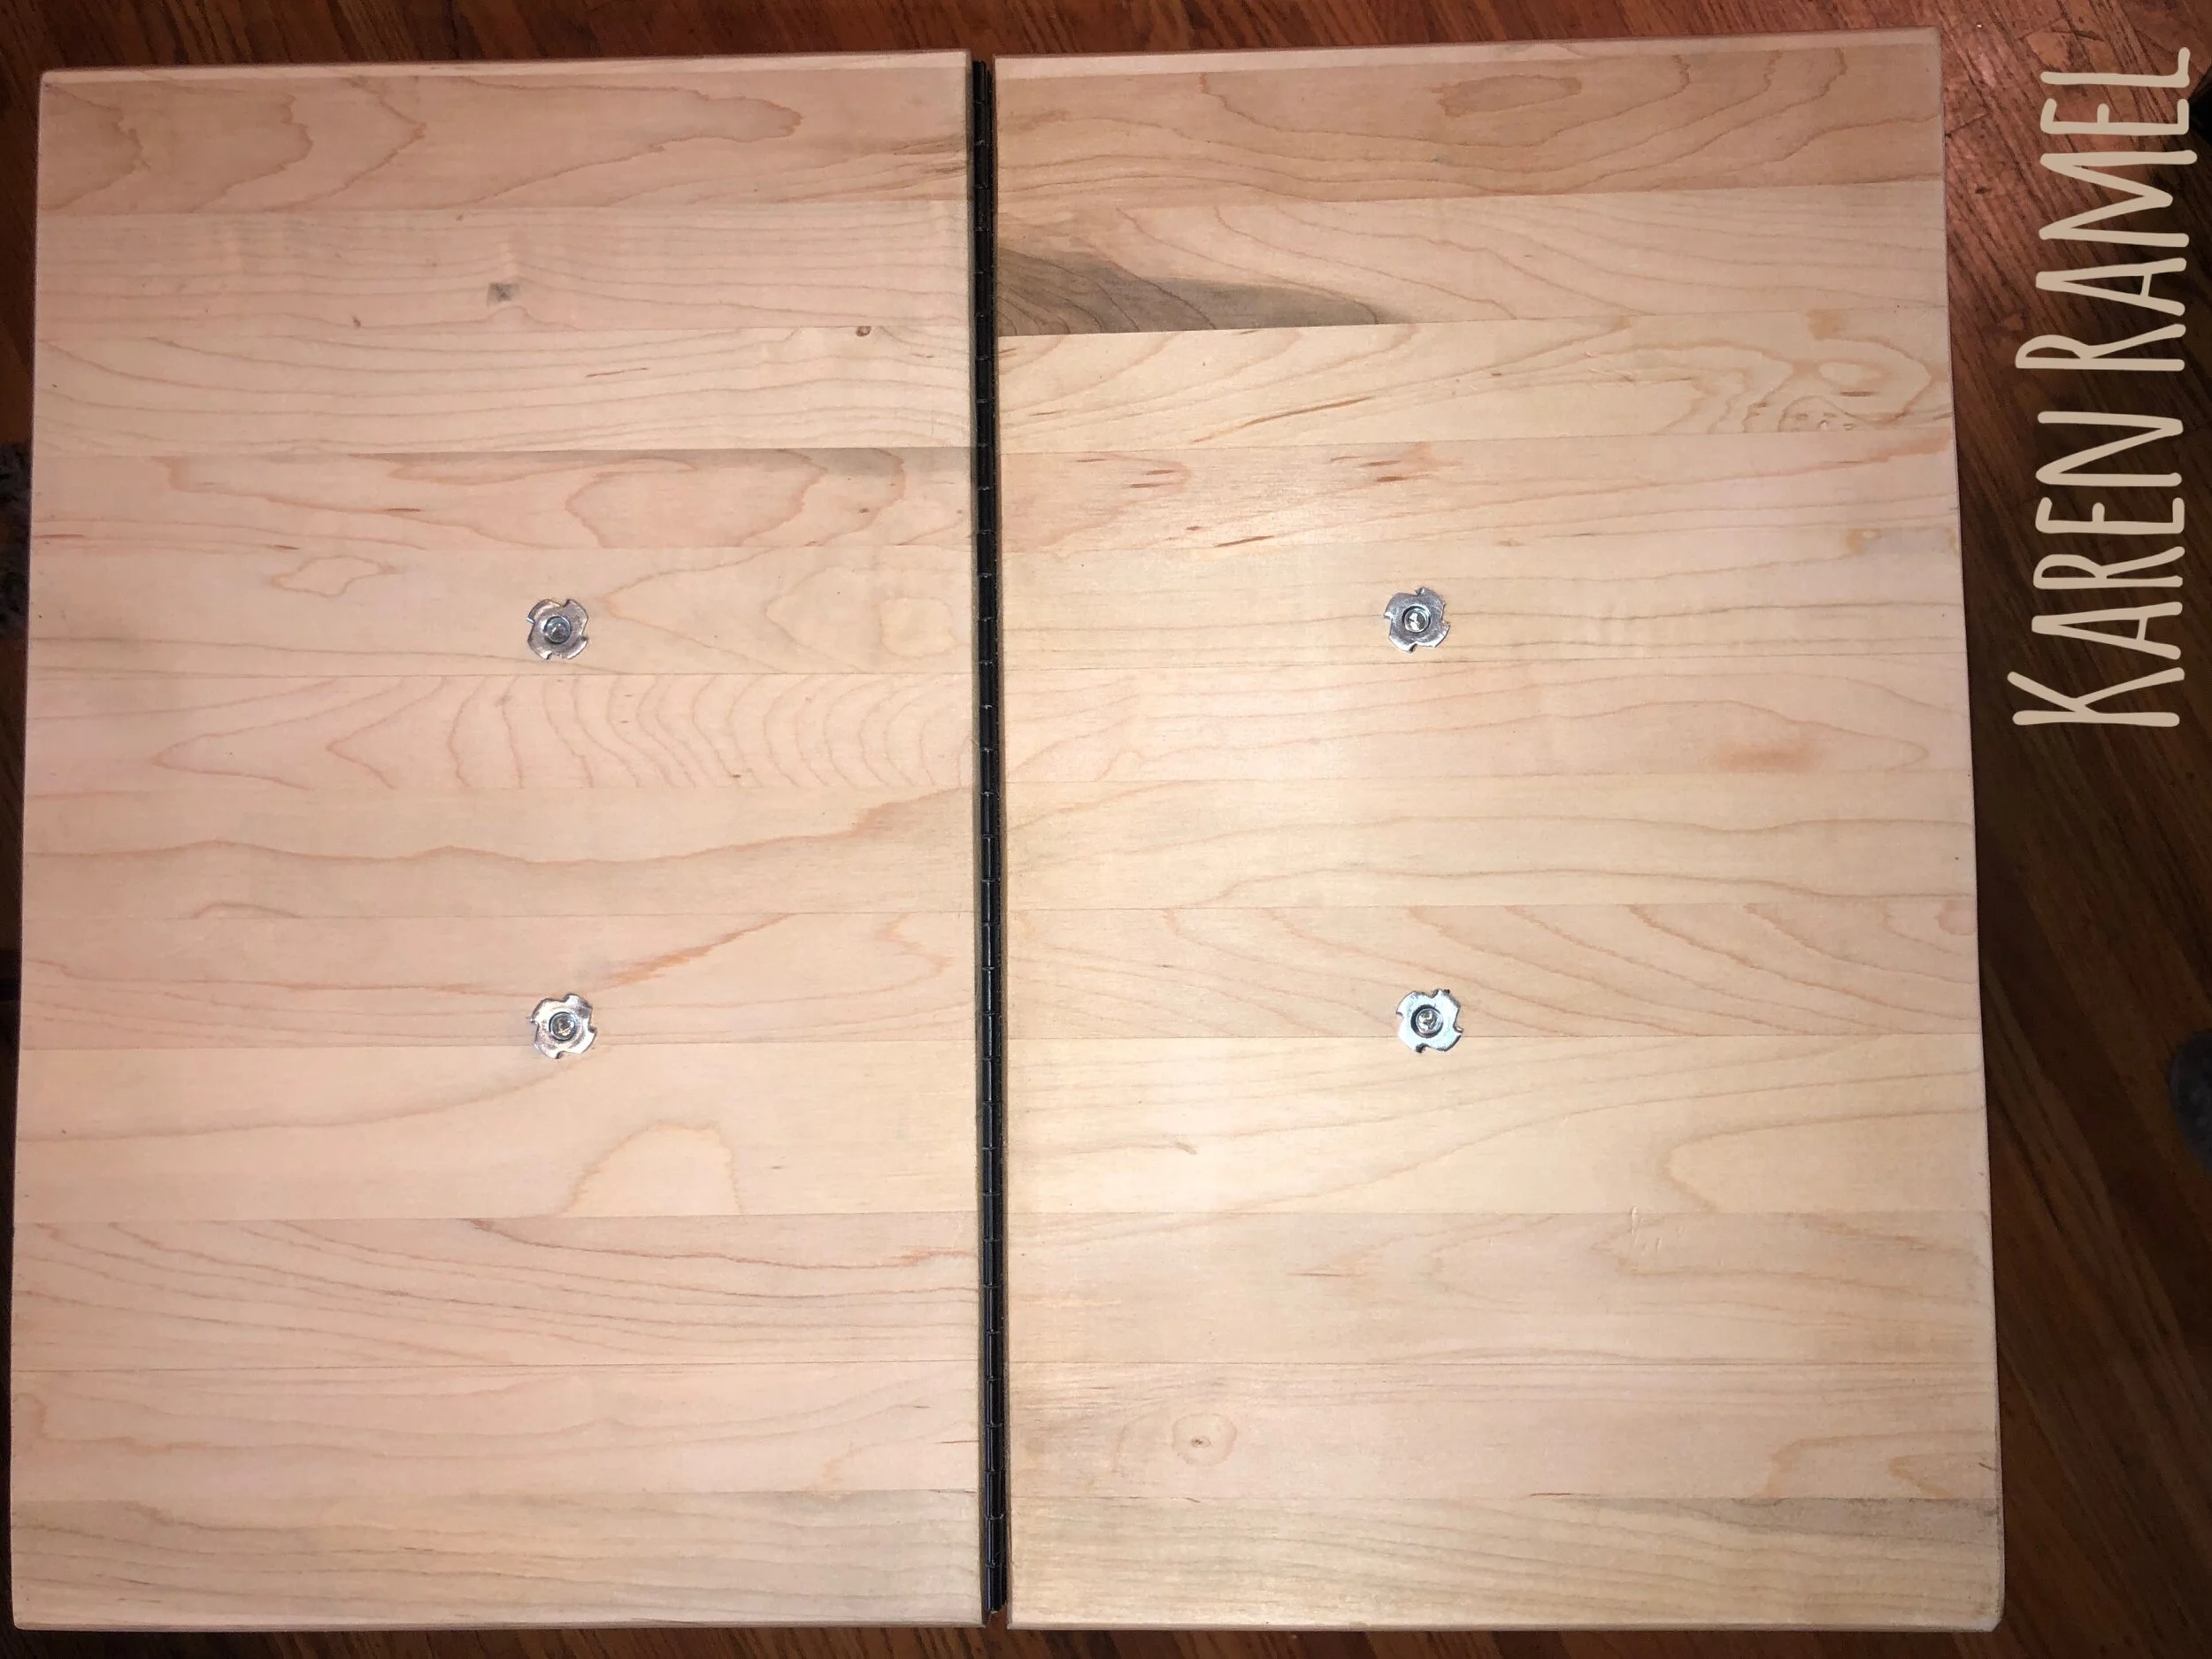
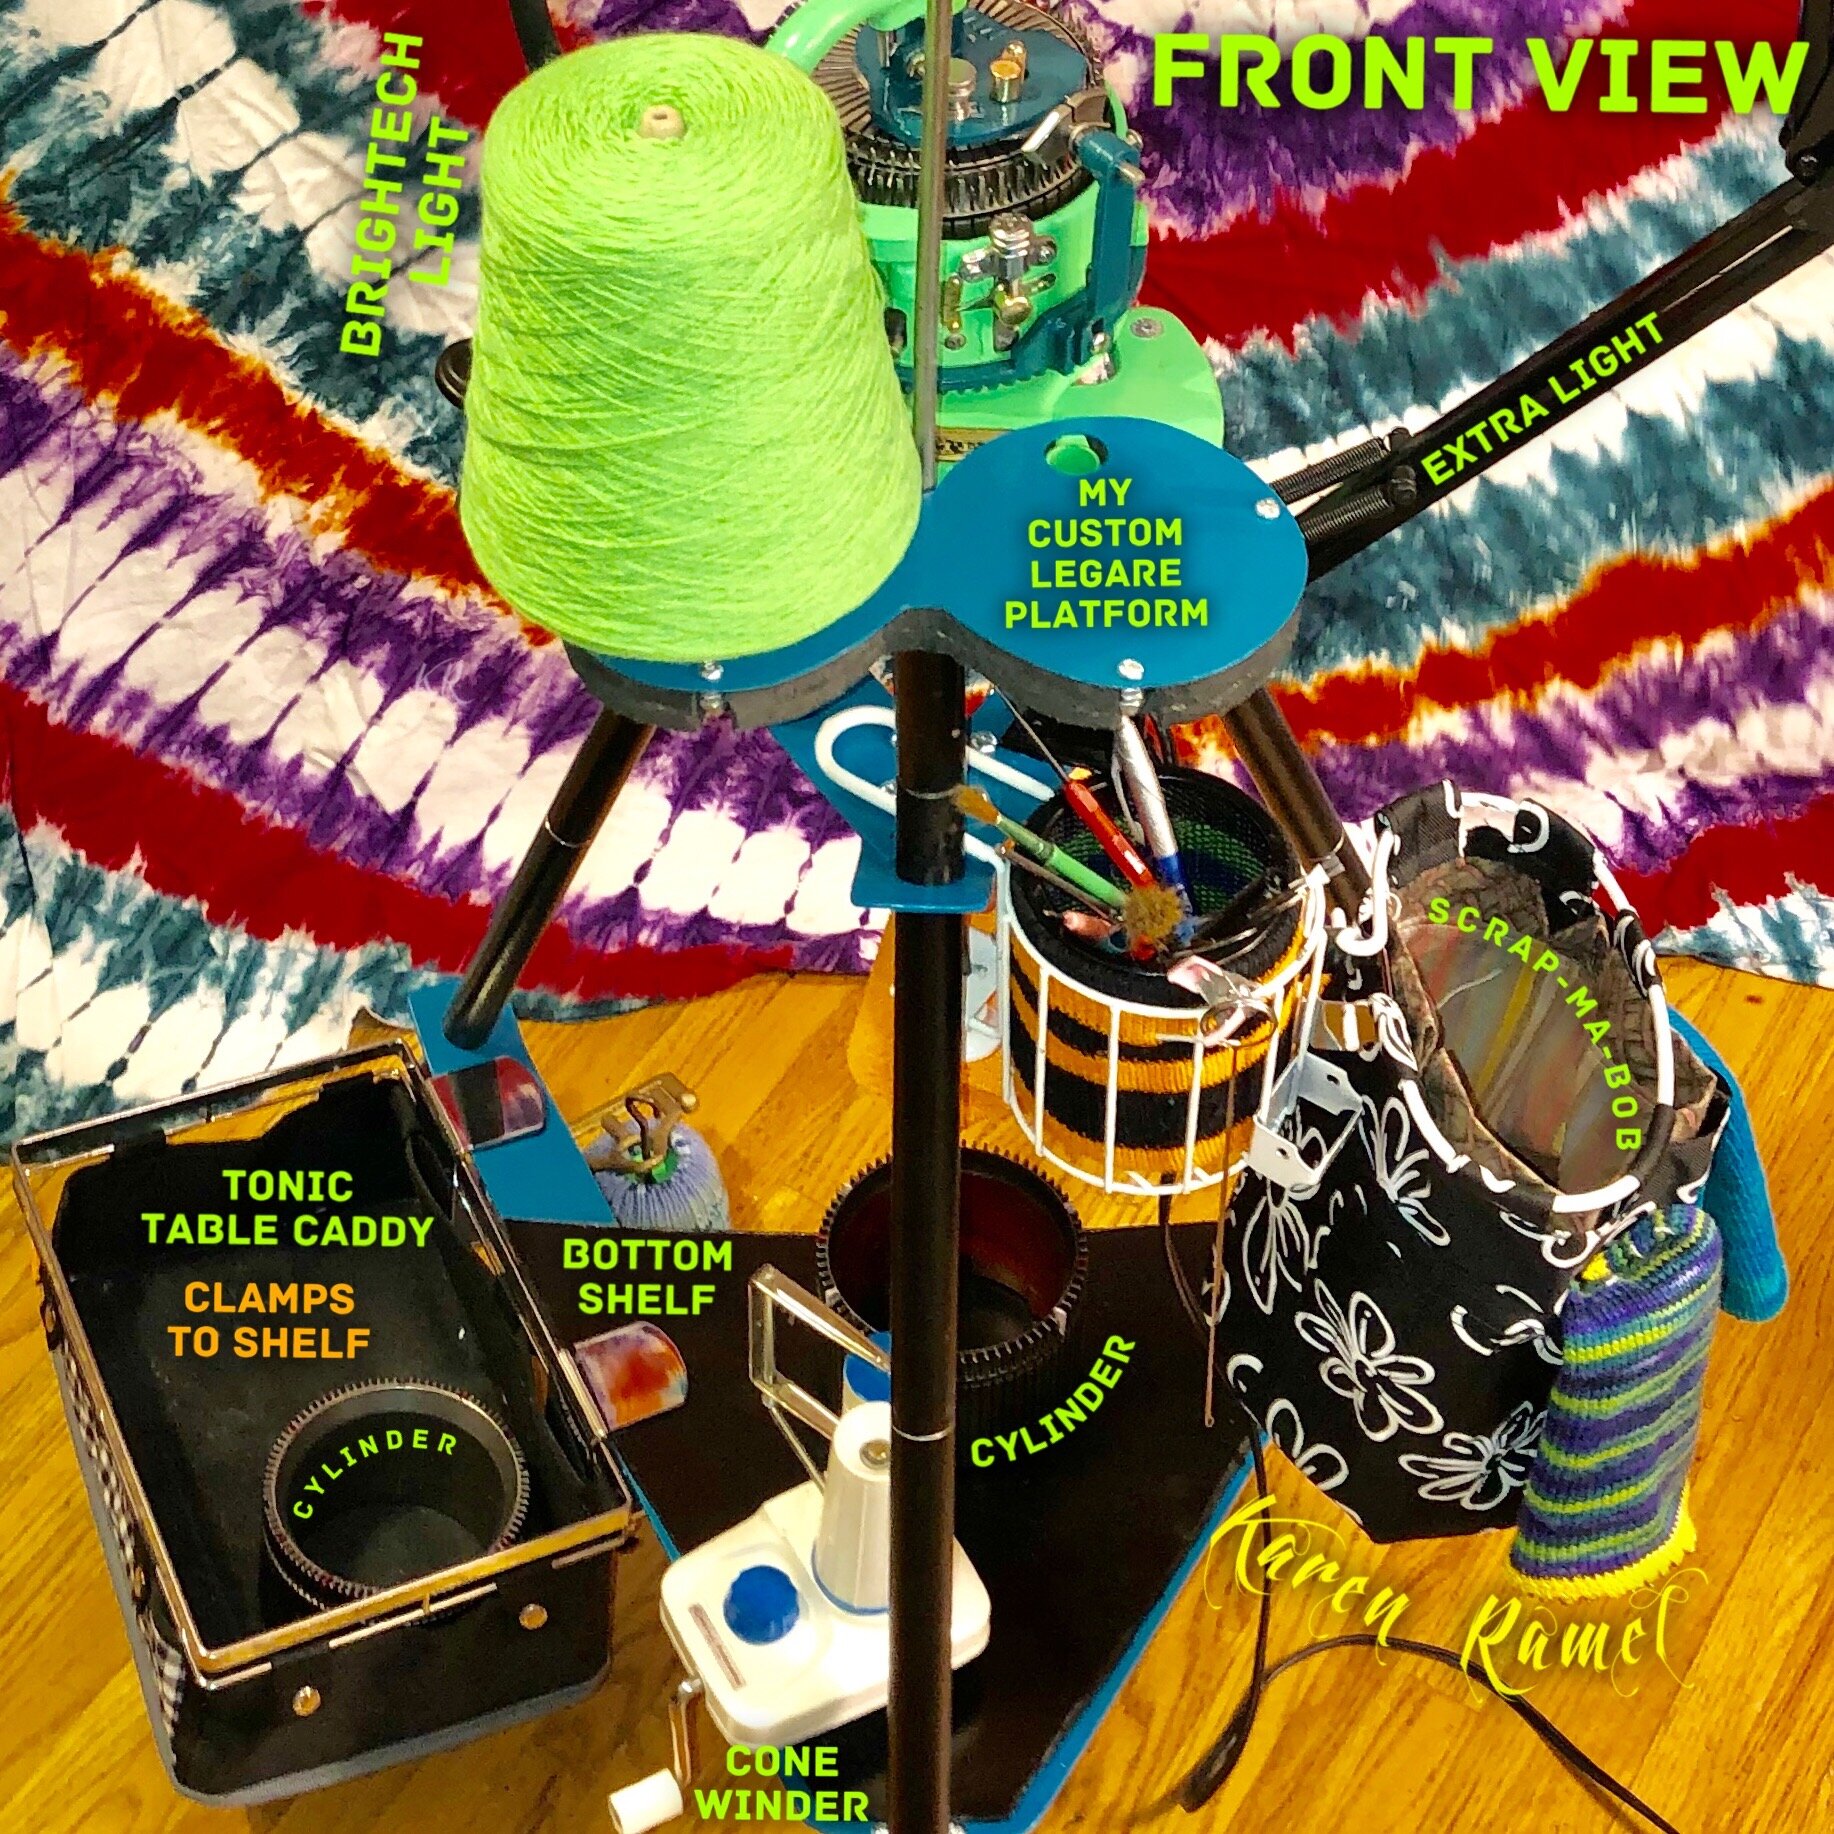
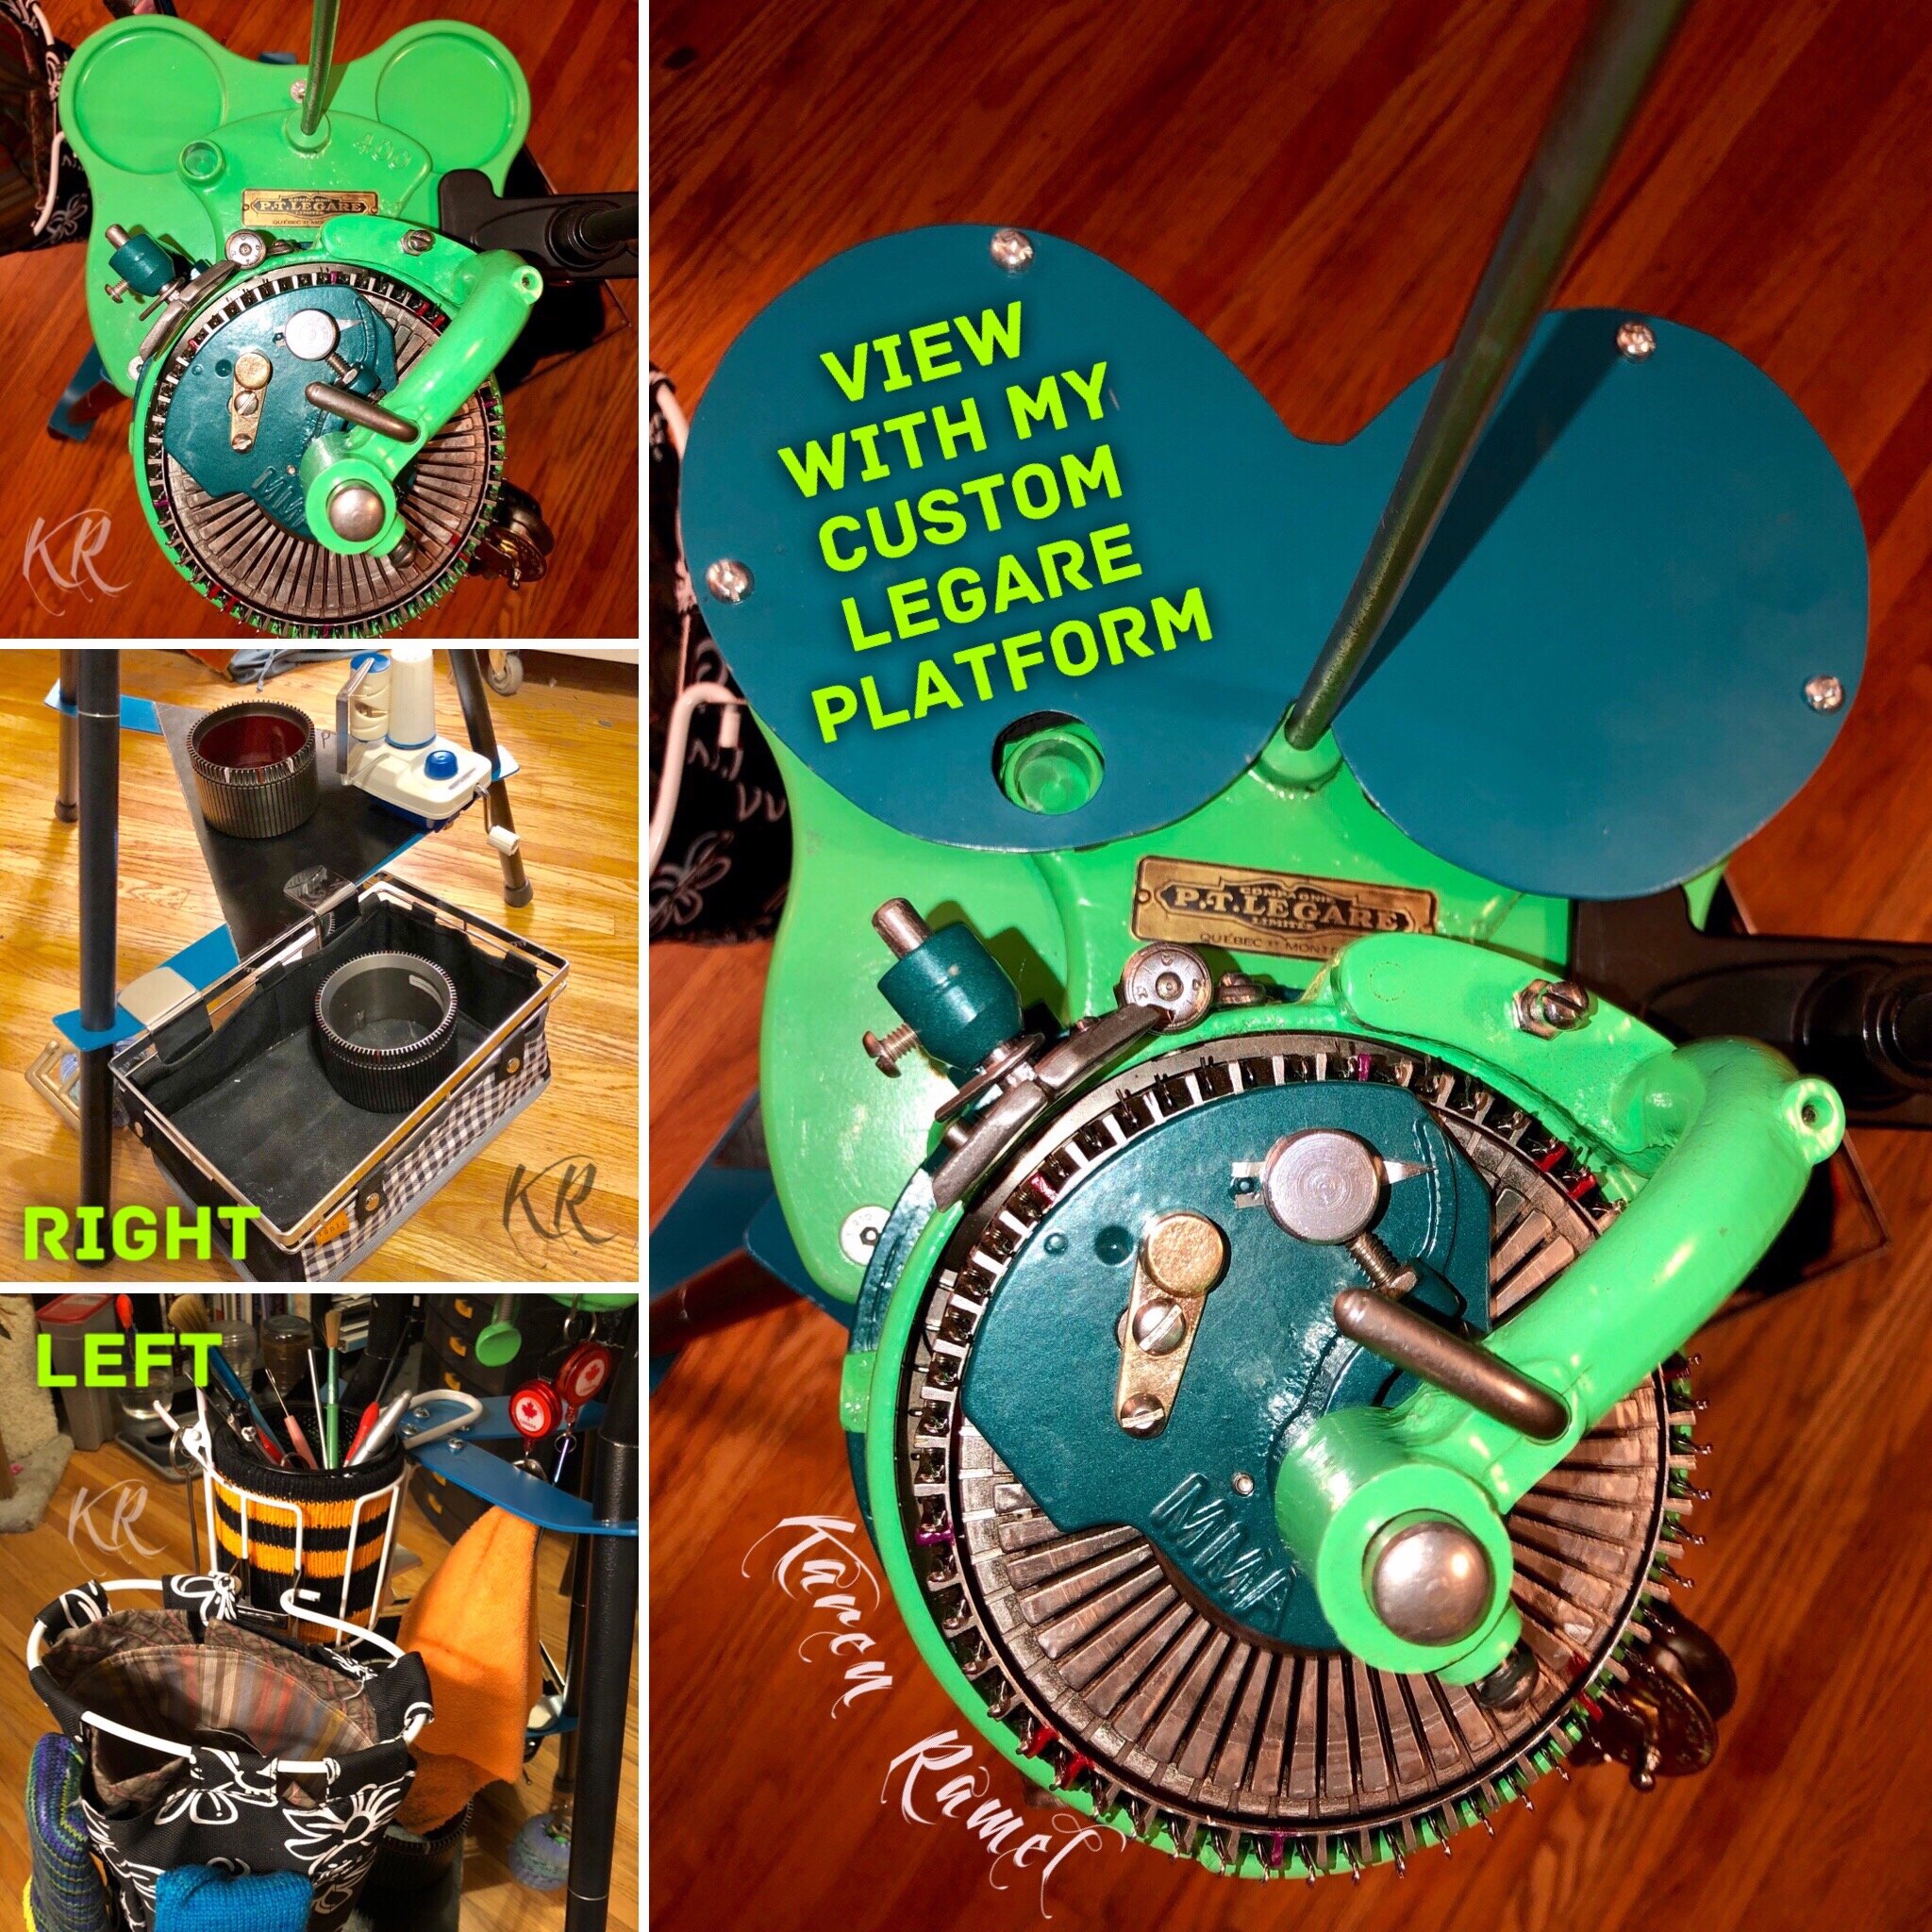
November 2019 I added easy custom horizontal segments to upgrade this table’s usability and today I better secured the elbow joints and installed the three further leg extensions to take the 30” height to a perfect 39” inch. I don’t always use the modified components I made but they’re great when used.

The original table alone weighs slightly over 6lbs and easily dismantles although this option isn’t low cost CAD$420.56 (noted March 2021)+$78.16 - however sometimes one has to invest in the better options. Table supplies are hit and miss so check back regularly - see Hokitika Sock World - New Zealand on the NEW CSM MACHINES page.

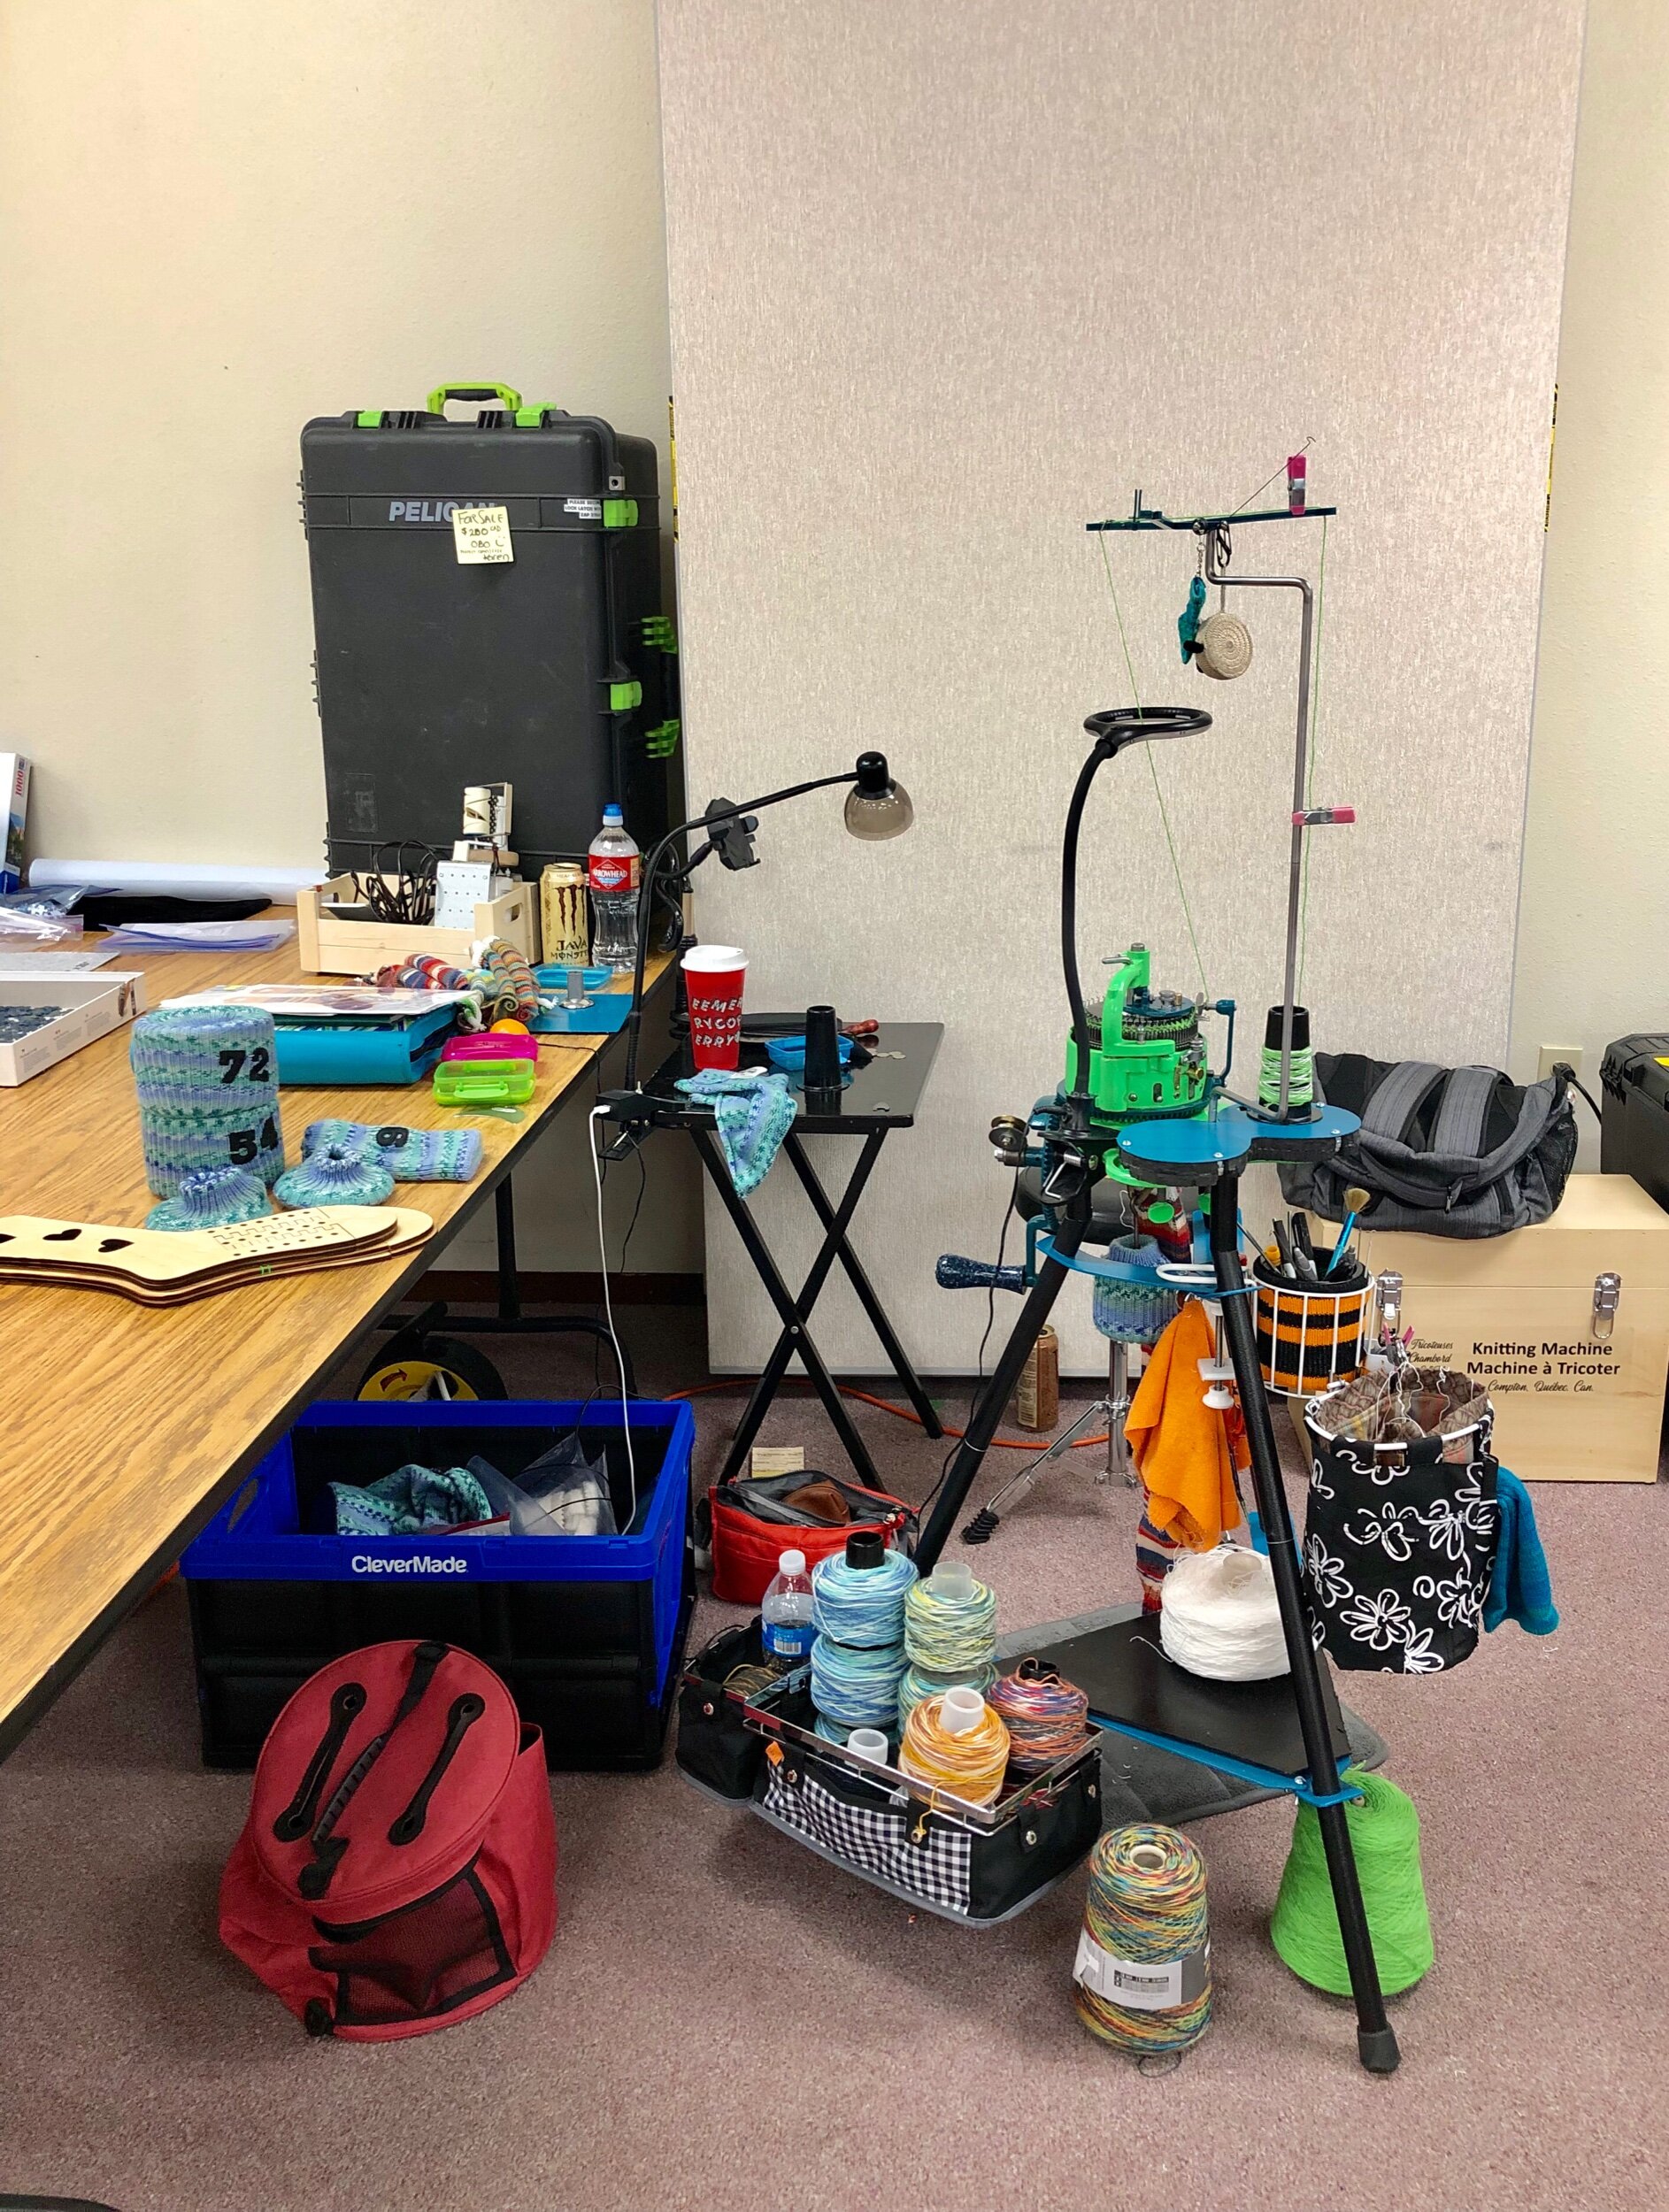
This table wobbled a bit when setup as the screws in the three elbows loosened with use but with a little removable lock-tight all is awesome again. This table allows for a minimal pack up and event go - I’ve gone with a backpack and my machine in a box. Easy.

For more table info see my INDEX page under that category.

*Be prepared to buy rubber feet for this table from the hardware store as they are not provided.

REFERENCES: Instagram: 1, 2,


SEE ALL BLOG ENTRIES ON THE BLOG INDEX PAGE | Follow us on a variety of social sites see TAPLINK | Interested in Circular Sock Machines? See the CSM START Menu first page. | Seek something specific? Checkout the Index page.


2019 July 6 - Harbor Freight Table

My Goal: Configure a Pelican 1510 to secure my CSM and also contain a sturdy but lightweight table.

JULY 6: Inspired by the idea to have a lighter CSM travel with table option, today my boyfriend and I are overnighting in Bellingham, Wa to pickup a Harbor Freight inexpensive and light but sturdy table.

Photos of the modifications and timeline steps

I never seem to have one thing on the go so forgive me for jumping around.

Ok back at it - I am in lust with the idea of having a table which can be assembled and stored in a secure case also holding my machine. Having this for car travel events would be ideal but being so would allow for future airplane travel event destinations as well.


REGARDING FOAM

Foam is NOT CHEAP - but if you purchase non-pluck (non-pre-cut into cubes) foam it should last with extensive wear and tear if you protect the foam from oil contact.

The only person who really spoke about foam when I was seeking info suggested 1” thick layers purchased by the Foam Mattress shop - after having done this I realized that perhaps I’d prefer some thicker layers than what I’d ordered. Darn. Using foam one has to decide how to best align the parts within the case in a 3D layout. One has to decide whether to glue layers together or to leave the multiple foam layers like a puzzle. I would strongly caution against an extensive and confusing series of foam layers as this makes putting all back inside more difficult if flying - the harder it is for airport staff to return items the less likely they will be returned safely to the case - I’ve heard stories. :(


REGARDING CASES

A couple months ago I found a great deal for a larger 1650 Pelican online so I bought it (then upgraded the latches and wheels), and then I ordered two styles of special foam for it from a foam mattress shop. I didn’t finish customizing the foam to the case as I wanted to keep my options open (room for a second machine sometime in the future?!)

Ok so about the brand of cases I have and want to plan this for….

(I went with these because I was wrongly told this case will 100% cover the contents if something should happen when using the case and flying)

**Before we go any further I have had confirmation from Pelican itself that their guarantee ONLY covers the cost of the case - not the contents - so be SURE not to over pack a smaller case with too much weight!

**One can easily purchase a similar, secure case from a store like Harbor Freight at a much lower cost**

PELICAN CASES (more info on this website)
The Pelican 1510 Interior dimensions (LxWxD) 19.75"x11"x7.60" (50.2 x 27.9 x 19.3 cm)
The Pelican 1650 Interior dimensions (LxWxD) 28.57"x17.52"x10.65" (72.6 x 44.5 x 27.1 cm)

Looking at costs the new Pelican case 1510 was quoted at CAD$207.


REGARDING TABLES

The table I was using that the time - the popular adjustable height Ridgid table frame ‘travel table’, has a very wide table frame that can’t be reduced in size. See BLOG ENTRY ON THESE TABLES HERE. When in stock this table frame, a “Ridgid Flip Top Portable Work Support Stand” can be purchase from many sources including Home Depot, Amazon and eBay.

Ridgid table frame dimensions: (Height x Width x Depth) 7.50” x 21.70” x 30.60’. Weighs 24.29lbs (as per Home Depot).

So then I broke down what I wanted and how I could make this happen.

I noted that the wonderful Lamb Tuttle (correctly referred to as the Lamb LT-150 which is bundled with a beautiful reinforced metal table). Sadly the table alone was outside of my budget, quoted at $410 USD (plus shipping/customs).

I also noted that the build for a table like this doesn’t appear difficult so I gave thought to making one perhaps completely from hardware supplies. Unfortunately for the cost for one metal leg I could instead buy a similar mostly finished similar design table from Harbor Freight in the States - they don’t have Canada shipping. Weekend adventuring yay! From home to the store it’s slightly over a 2 hour round trip drive if done in one visit. Harbor Freight sells this table for USD$35 with an additional 20% off coupon.

While planning our trip I continued to do my homework - I fell in love with the (Universal CSM Table) “NZAK Multi Machine Stand” offered by Jacquie Grant of Sock World however it lists at $349 CAD (plus shipping/customs). It is VERY lightweight. I need to win the lottery.

Ok back to the idea of the Harbor Freight table - the idea of a metal, easy-to-assemble style of table has been bouncing around in my head for a couple months.

Alas I discovered the American retail store “Harbor Freight”. They are a tool focused multi-location shop that does not ship to Canada. However after viewing their “29’ Heavy Duty Tool Stand” for USD$34.99 my boyfriend and I decided to make a romantic overnight trip on the weekend. When we drove the 2.5 hours to get to the nearest location (Bellingham, Washington), they had one on display and one unopened package on the shelf. (We had called ahead - they’d said they had 5 in stock). Their website even offered a 20% off coupon shown at the cashier. SCORE!

FANTASTIC!

We even picked up a totally useful Folding Platform Truck for USD#39.99

We had such a lovely time in Washington - I had my first Olive Garden visit - we walked around a near a large park with nature trails - we shopped at Trader Joes - AND we went to Bellisfair mall where we discovered a store called TORRID. We got my honey a new pair of kicking runners and three wonderful dress shirts at JC Penny.

Once we were back on home soil we stopped at home depot again and upgraded from the imperial screws used to metric to be able to also use wingnuts instead of the regular connectors that came with the table.

I am now eagerly awaiting the Pelican 1510 case that I ordered.

FOLLOW-UP: The table is complete and as amazing as hoped.With the wooden top I found the table to weigh 15-20lbs - sadly more than hoped. Assembling this table takes approximately 20 minutes however considering all I am still very pleased.

Also on INSTAGRAM - REF1,


SEE ALL BLOG ENTRIES ON THE BLOG INDEX PAGE | Follow us on a variety of social sites see TAPLINK | Interested in Circular Sock Machines? See the CSM START Menu first page. | Seek something specific? Checkout the Index page.


2018 Sep 9 - Newly up-styled CSM stand

Original wood bar-stool purchased from Canadian Tire hardware store (shown below as 1.0 - now upgraded and wood stained). I do not recommend wood stools such as this (even with cutout for the machine) as it becomes top heavy and easy to tip.

Here is the results to upgrading Table 1.0. After upgrading this setup it gained the stability it lacked - widening the supports and reinforcing them, increasing the table top work area.

I donated this wood stained upgraded table at the Spokane, Washington - USA Crank-In Sep 20-23 2019 as I switched to a new style - the adjustable height Ridgid table top system that Erlbacher Gearhart uses in their tables sold on their website.

See my Ideas and Upgrades. | For more info on supplies I like see here.

Posted also on Instagram

INSTAGRAM: REF1, REF2, REF3,

My first table/setup - Table 1.0

My first table/setup - Table 1.0


SEE ALL BLOG ENTRIES ON THE BLOG INDEX PAGE | Follow us on a variety of social sites see TAPLINK | Interested in Circular Sock Machines? See the CSM START Menu first page. | Seek something specific? Checkout the Index page.


2018 Aug 21 - CSM Travel Storage Stand

Each of the photos can be viewed bigger if clicked

When I had this idea as it appears above in the images, it was inspired by the need to travel locally by bus with my machine and to ensure upon arrival that I can still use my machine - even if the local tables are too thick to mount the machine to their tables. Video summary of this cool idea.

This project began with the inspiration of a hardware store wood ‘crate’ which had the holes cut into each side as a handle. Basically I removed all the ineffective slats and up-cycled those handle pieces, replacing all other sides with wood I then purchased.

Featuring:
-an inner vertical shelf (reinforced with a sheet of metal) to clamp and protect the machine within
-a top horizontal surface to clamp the machine onto for use on the stand, anywhere (without buckle weights)
-without the machine clamped to the top surface, the left and right clasps open to allow the top to completely flip up and open on a horizontal hinge on the back of the stand (an extra unecessary feature it was later decided however it is nice to be able to check the machine easily if needed while clamped on the inner vertical shelf).
-rubberized strips were applied the bottom of the stand for secure use on any surface

FUTURE IDEAS:
-design a new version of the stand so that the buckle and buckle weights can be used on the stand with the machine while not unbalancing it.

INSTAGRAM: REF1,


SEE ALL BLOG ENTRIES ON THE BLOG INDEX PAGE | Follow us on a variety of social sites see TAPLINK | Interested in Circular Sock Machines? See the CSM START Menu first page. | Seek something specific? Checkout the Index page.


2012 CSM Introduction

While attending a regular friday knitting night event sometime in 2012, we had a CSM brought in and demonstrated - a Canadian autoknitter.

My first table I made for my setup. I do not recommend this basic setup as its easy to tip.

My first table I made for my setup. I do not recommend this basic setup as its easy to tip.

It was ever so exciting to see it in person as before that evening I’d only seen similar machines on YouTube.

Seeing this machine lit a fire under my butt for the want to also own one - that evening I looked high and low for any info on CSMS and where to obtain one. My only finding was one on eBay for under $1000. After communicating to the seller (who said the machine functioned as it should) and setting up a off eBay payment plan (it was a lot of money after all) - I DO NOT RECOMMEND DOING THIS - I bid on the listing.

Once the payments were complete the seller sent me the machine - it’s components were well wrapped in its heavy wooden open-topped original box. The machine when assembled, did not work as it should when the handle was turned. I was crestfallen and put it aside to be re-evaluated again on another day.

42926089755_385fea8705_o.jpg
43781690732_66891a9b3e_o.jpg

HISTORY of CRAFTING:

It’s 2012 and while I crocheted most of my life, I learned to knit in 2010 at a geek coffee shop get together. I once owned and used both the bigger and smaller Addi Express King Size plastic machines and I explored many different crafts. Prior to fiber I dabbled with bead and wirework, which I made a vast array of creations from 1990-2007. I moved to Switzerland in 2004 with my then husband, and returned divorced March 2007. I chose to donate my massive bead and wire work supplies to the Cancer Camp for Children so that I could positively help others. My marriage was a hard and lonely one and I had used my crafting to keep my sanity so being able to have it go somewhere positive was a personal choice.

2012 - My first hand knitting project was a knitted Mobius - the how to use knitting needles taught at a geek event in a coffee shop. PROJECT

2011 - While not my first project made on my plastic Addi Kingsize, first posted PROJECT

2010 - My first project added to Ravelry was a very large kingsize one piece crocheted blanket. PROJECT


SEE ALL BLOG ENTRIES ON THE BLOG INDEX PAGE | Follow us on a variety of social sites see TAPLINK | Interested in Circular Sock Machines? See the CSM START Menu first page. | Seek something specific? Checkout the Index page.