
Today we further delve into creating a CSM Sweater :) (See our first version here)
We are continuing with the largest slot numbered cylinder on my Legare 400 - although knitting can be done on ANY cylinder - the smaller the slot count, the more the segments to hand seam. Future plans include showing other cylinder built sweaters, potentially including the different seams into design elements.
Today’s approach will be to create a better sleeve seam at the shoulder, only put slip stitch edges on the neckline (edges where no seams will be joined) and will slightly change the front neckline of the sweater. Potential idea on the waist segment currently is to create a narrow strip that can be mock ribbed perhaps with one side slip stitch edged and the other to be joined on the bottom edge of the sweater - acting like a mock ribbed segment.
Panels on the 96, depending on fiber used, work up to approximately 12” wide.
Sleeves at their widest point will be where they contact the sweater from the neck to the armpit thus I feel I will need two panels worked at less than 96 stitches wide - perhaps at 2 inches less on each width, shaped to accommodate slanted join on sweater join and as worked towards the elbow, reduced in width about 6 inches over the segment for a gradual reduction in the pieces.


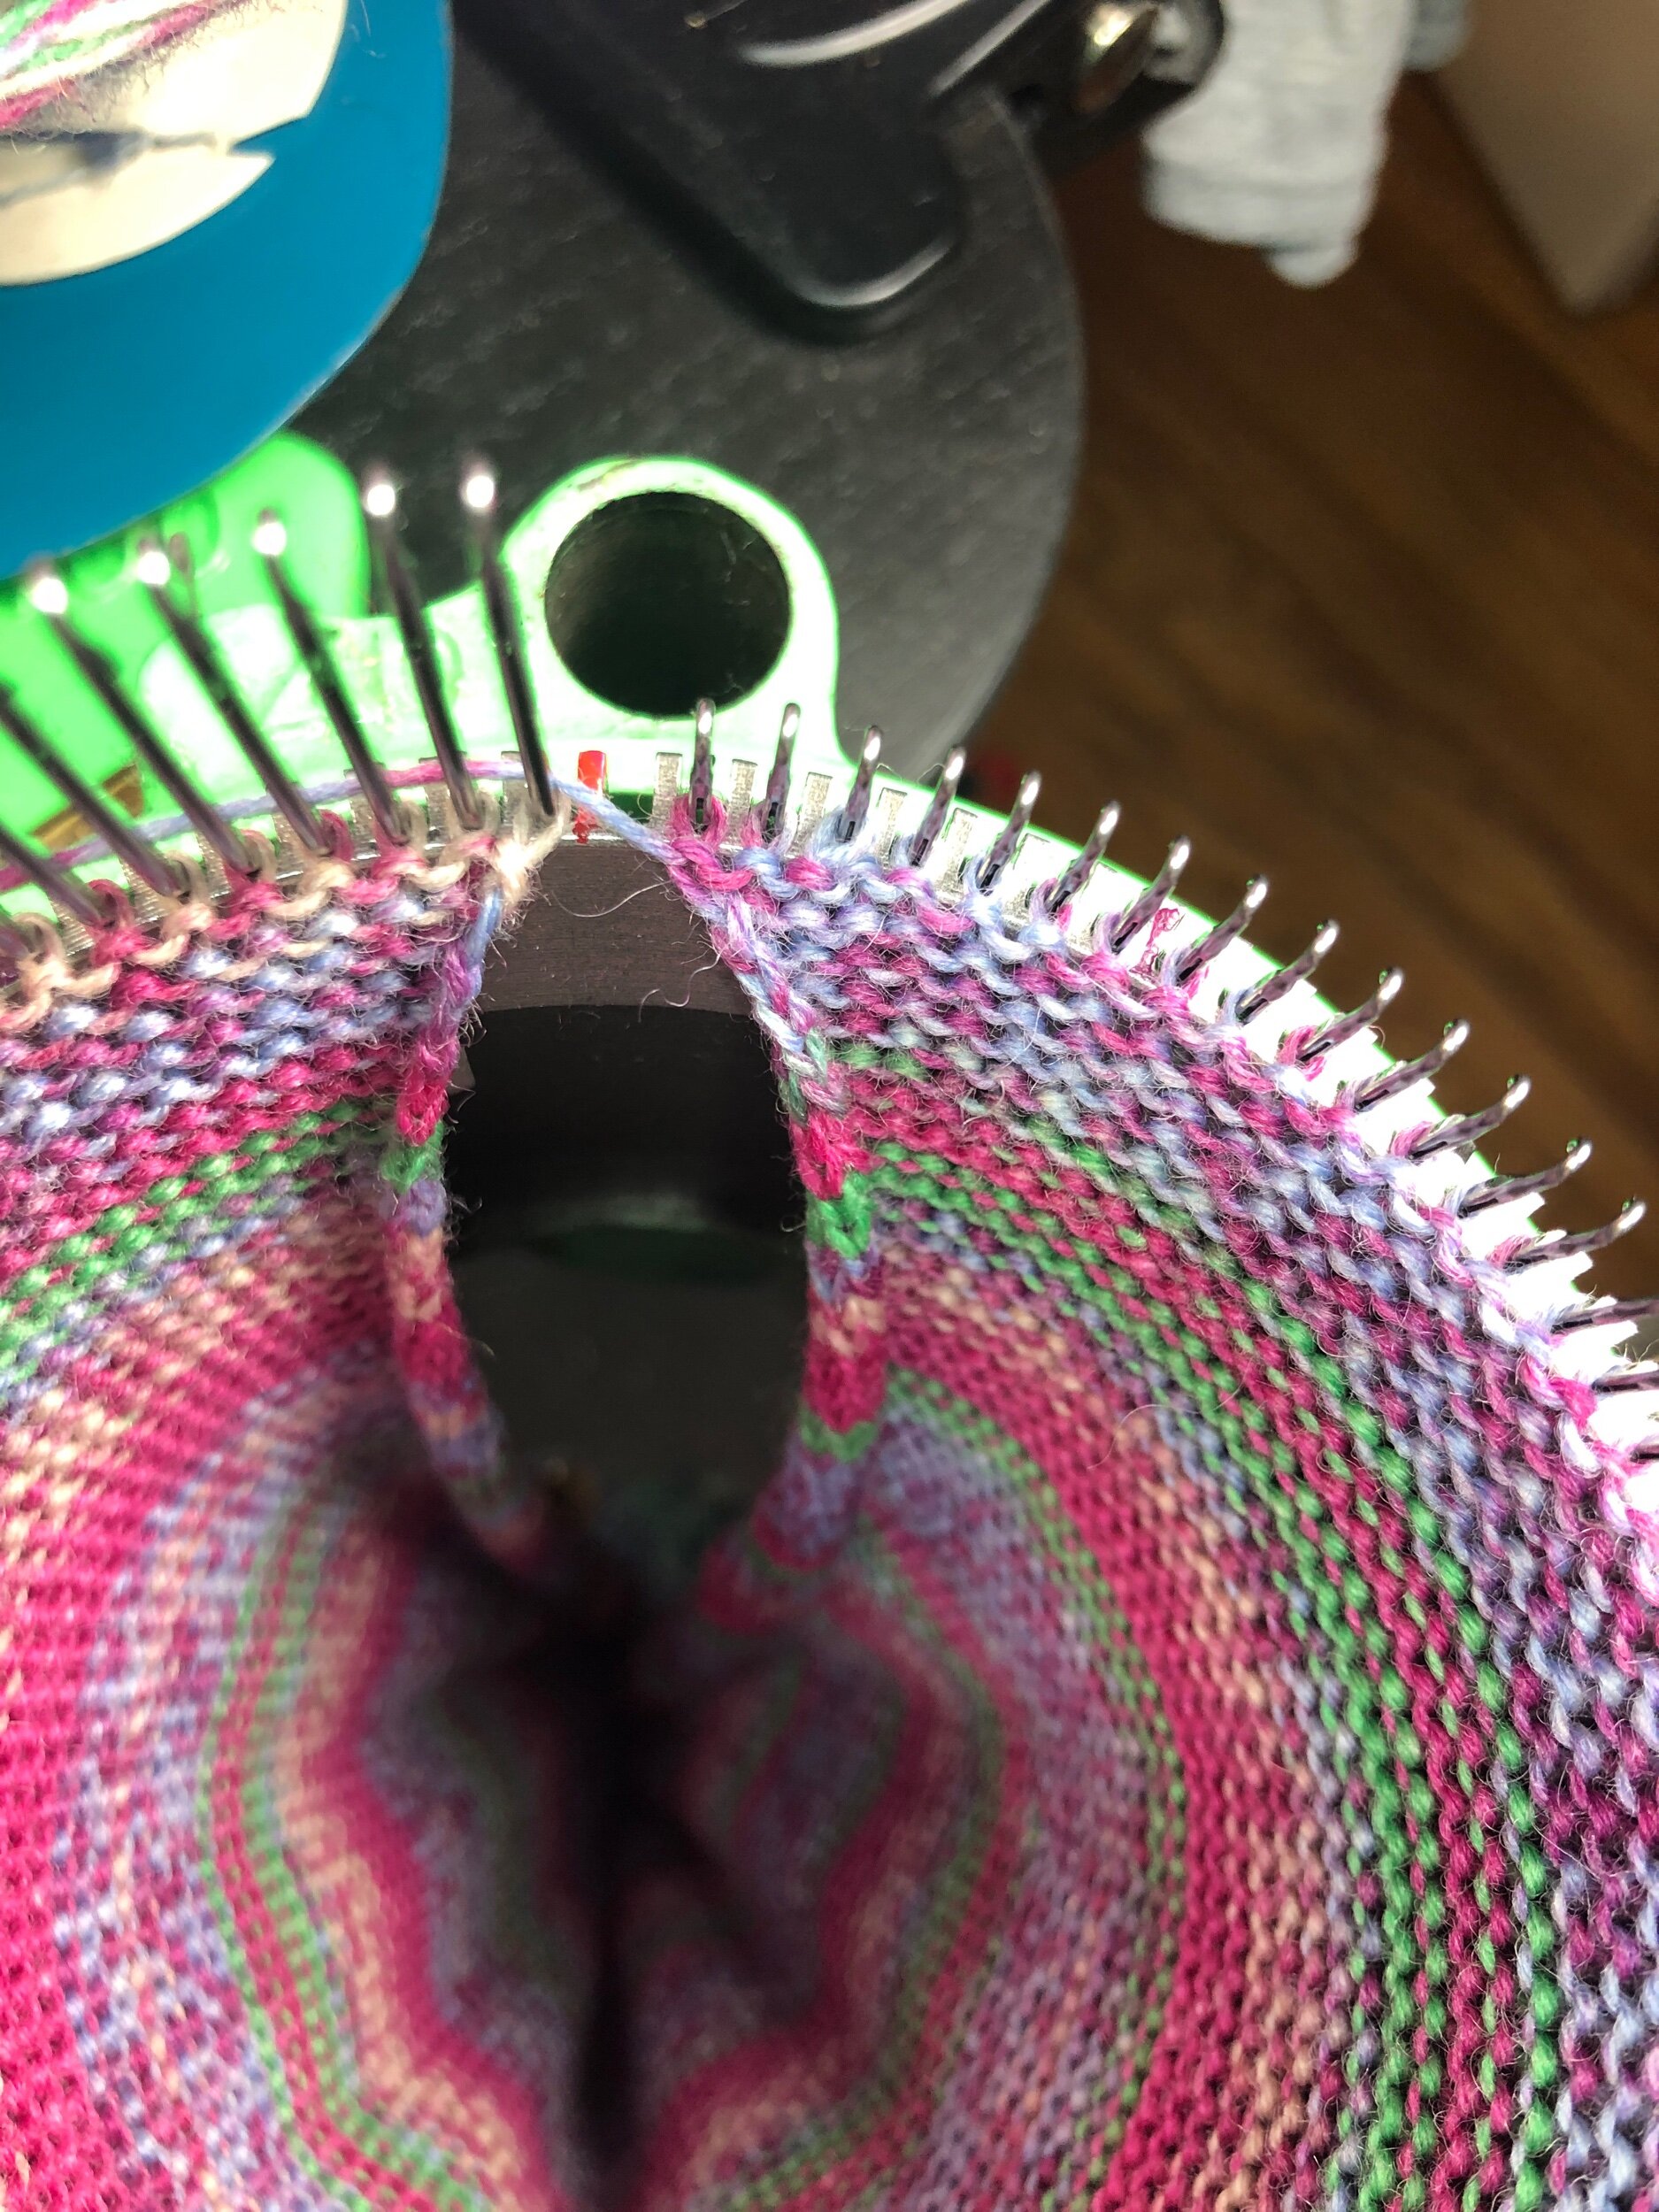


We’ve finished the waist to the armpit/neckline. Yarn carrier on the right waiting at 10 o’clock we will now decrease the sleeve side on each row by one needle. Method: third needle from sleeve side edge at 12 is added to fourth needle. Third empty needle removed and now first and second needles are moved both to the right. This allows for a seamable edge and “hidden” decrease sleeve seam later. (Photo).
Now we will address the midline side where we plan the neck line. Without moving the yarn carrier after dealing with the sleeve side decrease. Lower the last 6 needles on the midline side. Move fifth stitch to sixth needle. Move third stitch to fourth needle. Remove empty needles and shuffle all remaining needles over two positions away from 12 o’clock. (Photo) Be sure to raise the left four lowered needles and align the yarn back to the correct path so that row one of this first changed row can occur correctly. I then added landmark green stitch markers to help align pieces later with these pattern changes.
I then worked the first row R to L and stopped the carrier at 3pm.
Now to work same midline neck decrease and same sleeve side decrease. Before working row 2 we need to setup the midline edge with the slip stitch first stitch so lift the first needle on the midline side. Now work L to R.
Repeating decreases (2 on left, 1 on right) until 9 empty slots on R and 18 on L before stitches. Now to switch to single deceases on midline Left. (Photo).
Continue until down to 4 needles in work.

Now make the other front panel with edges reversed when it comes to the decrease. After this we will seam the front two panels to determine the correct back panel shaping.
