
Experimenting wrongly how to work my SK700 machine punch card and finding a whole new fabric. Why are the manuals so poorly written!? The manual called this a tuck pattern so I worked the card how I thought and got this. With machine cards one needs to extend the first needle closest to the carriage to D prior to working each row (I forgot once or twice and somehow also managed to snag the work on maybe four gate pegs).
I have posted on a Facebook Flat Bed group a request for translating the instructions in this pictogram.
Does anyone know if you’re SUPPOSED to be able to use ALL of the flat bed needles in a project?
ANSWER!! “Louise Hall - I have knit a couple of kimono style jackets on all the needles for the widest part on a sideways knit and it worked fine on my Studio360”


With the help of the MACHINE KNITTING facebook group and two very kind souls, I now know and have written (and tried) the exact HOW TO - when using this punch card #2. :)


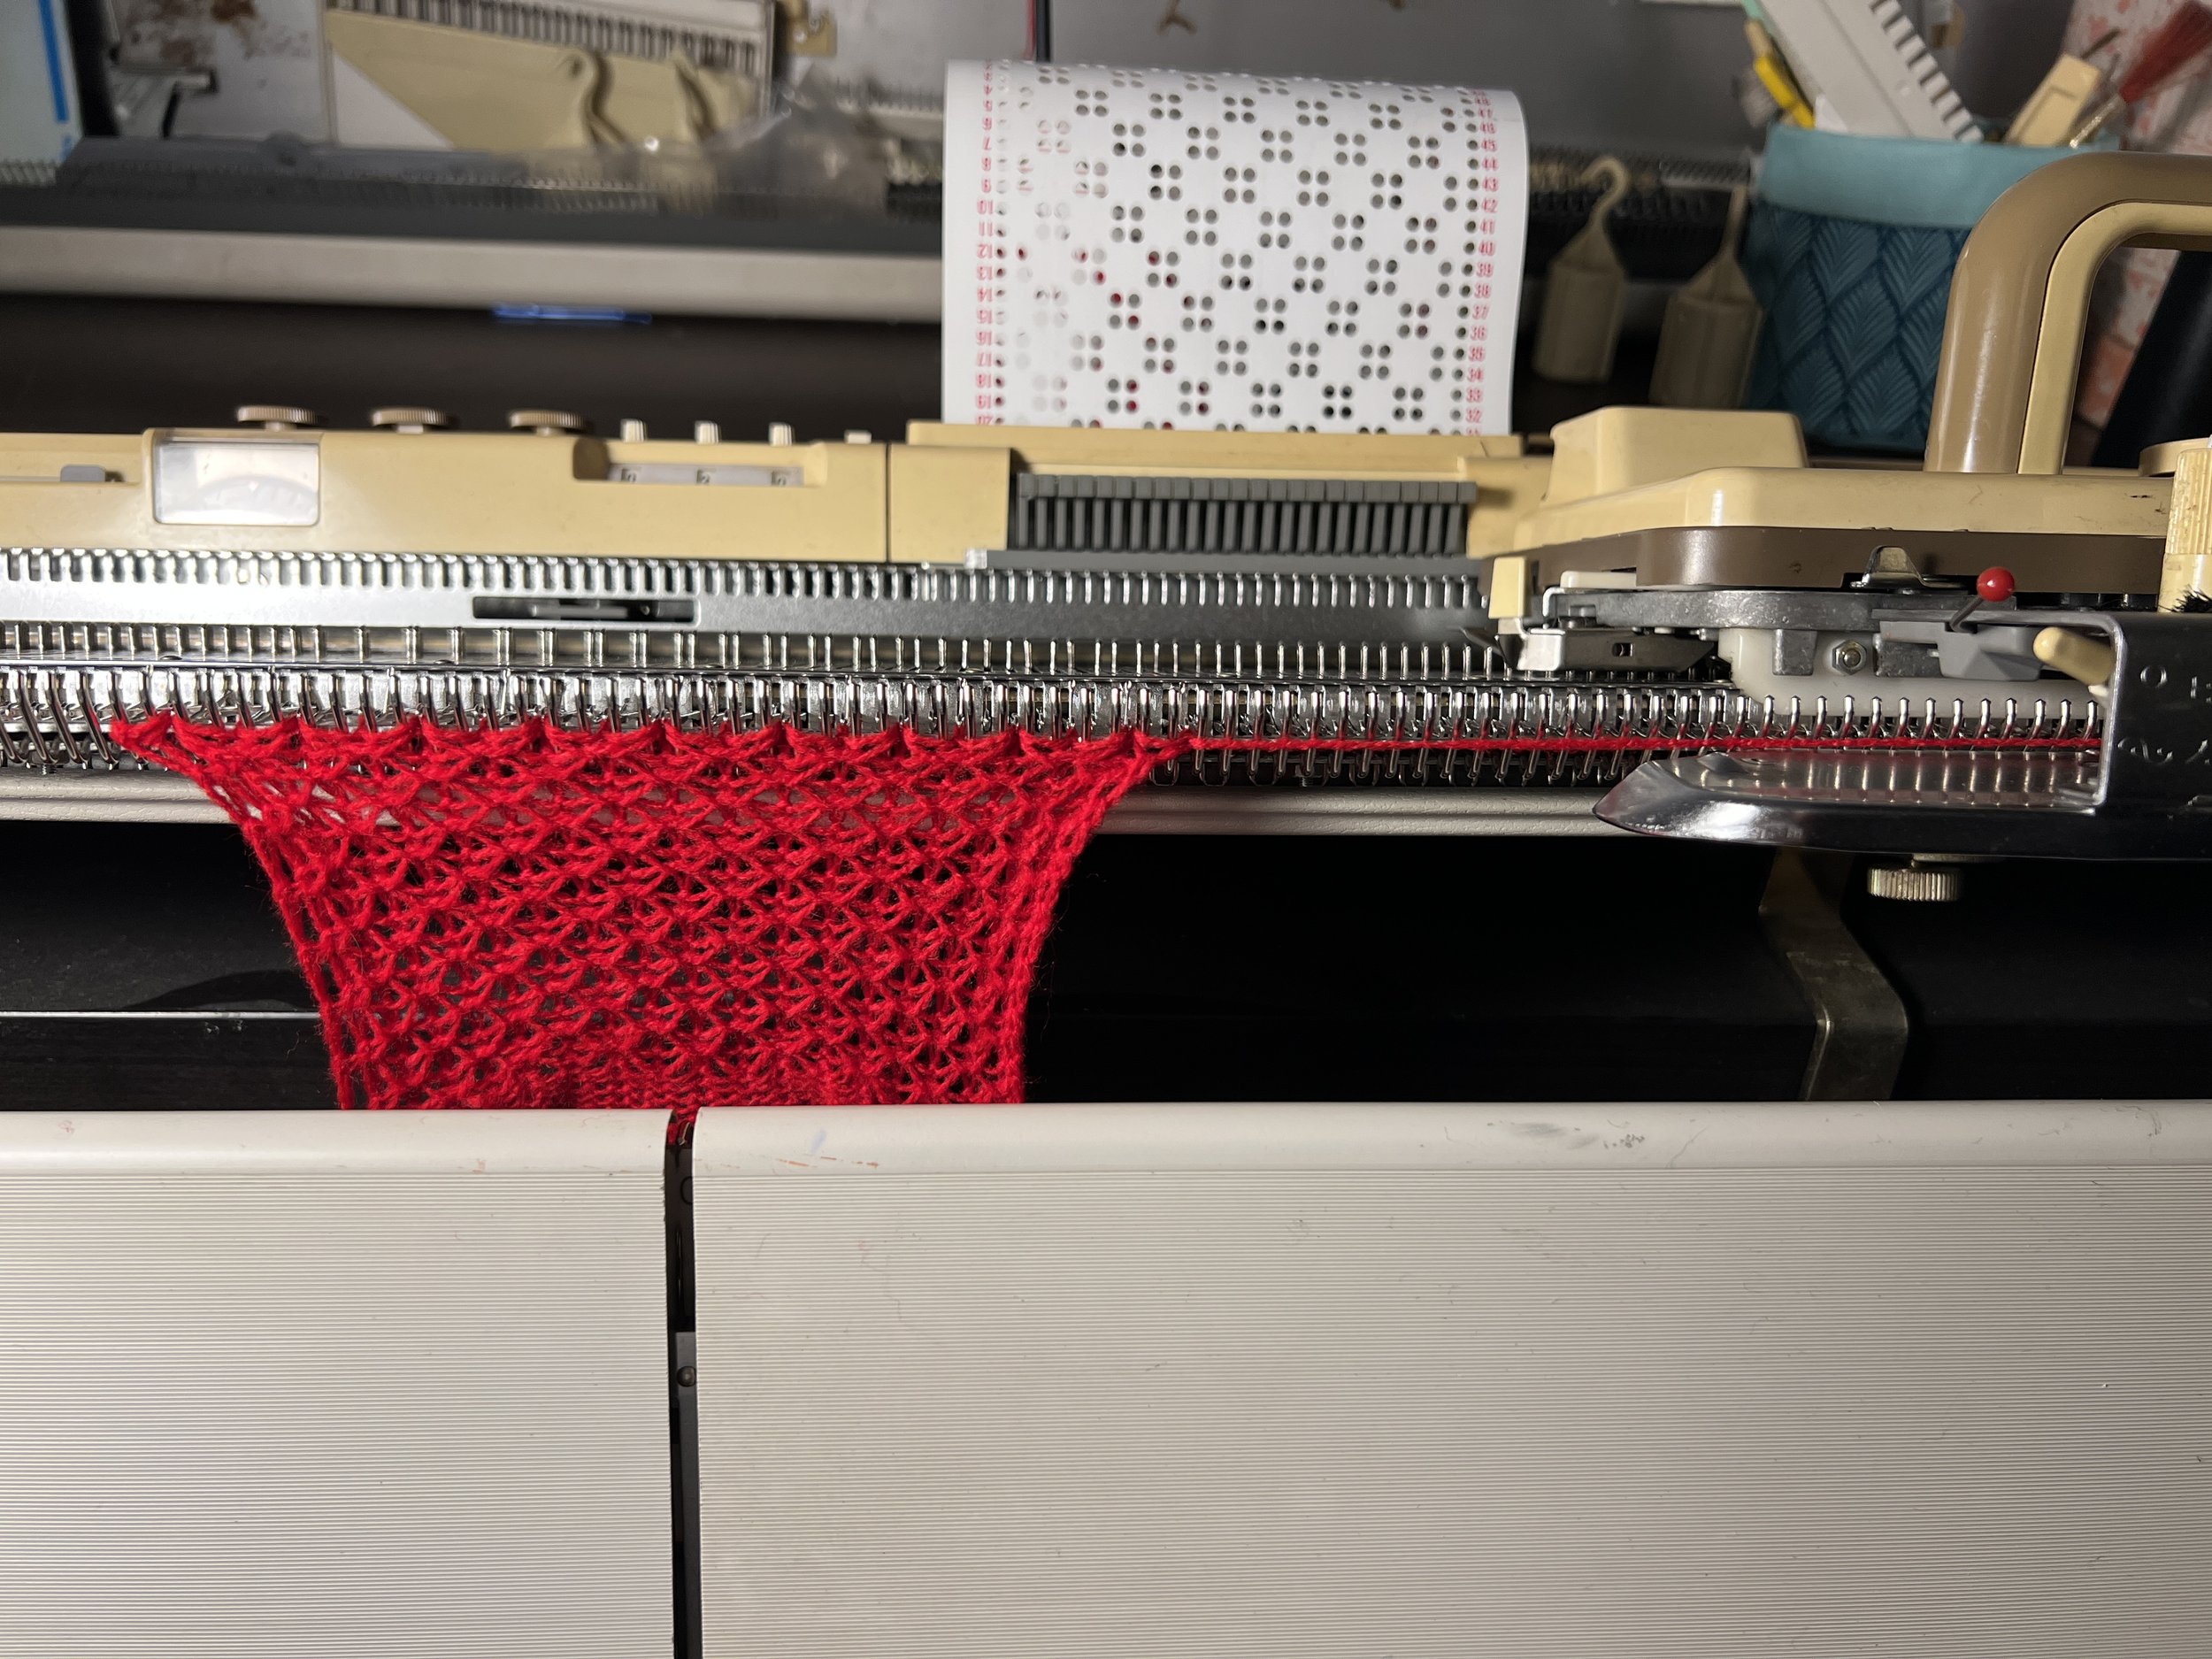


I’ve been advised this is referred to as “TUCK LACE” SK Machine Punch Card #2
HERE ARE THE COMPLETE INSTRUCTIONS to make things easier :)
I used an open cast on.
Thread machine and tie off yarn tail under machine | Carriage on the RIGHT | Dial on 5.25 (yarn) | Side levers DOWN | Stockinet (cast on) | Select 37 needles from A position and put in D position | Carriage moved from RIGHT TO LEFT | Lay Ravel Cord just behind GATE PEGS one gate peg outside of each outer needle. Hold Ravel Cord ends down and together with left hand and move carriage from LEFT to RIGHT | Repeat last step a couple times and finish with Carriage on LEFT | Remove Ravel Cord (worked knitting will unfold as cord held start) | Add claw weights | Either work more regular rows now or start the next step if you feel there’s enough weight applied
Carriage on the LEFT | Dial on Stockinet still | Side levers UP | Reader is locked - left switch DOWN “card will be ‘read’” | Move Carriage LEFT to RIGHT | Dial on TUCK | Move every other stitch to it’s neighbor. Ensure both outside needles are needles holding two stitches | Reader unlocked - left switch UP | Work as many rows as you wish | Work your preferred cast off.
UPDATE: I’ve tried this again and noted you DO NOT NEED TO TRANSFER THE NEEDLE CONFIGURATION in order to work this card.
Below is the new tighter gauge (no needle setup) compared to the looser gauge (needle setup) done in this post.

Sally Butcher confirms this in her video where she demos all the steps using punch card #3 - video
However the picture advising setup shown near the top of this post DOES show needles out and in hmmmm
I asked Sally Butcher in the comments of her wonderful video - my question and her response below:

