
Today it was asked if I could make a new Teapot Cozy.
Not owning an actual Teapot I borrowed one. :) Then I surfed the internet for ideas - WOW!
Digging through some recently donated yarn I then spent too much time winding balls into cones so that the knitting machine would be happy and the yarn tension/stitches even.
I am looking for a cover that will span 21 inches. I am using unlabeled maybe worsted weight acrylic so I approximated the width via needles and after open casting with scrap yarn using every second needle, I then switched to white project yarn, continuing with the every second needle - ensuring not to make a fabric too dense. Lets see what that does.


BUILDING THE PROJECT ON THE FLAT BED
Using Mast Tension 2, Cam Lever (Carriage) 10 tension.
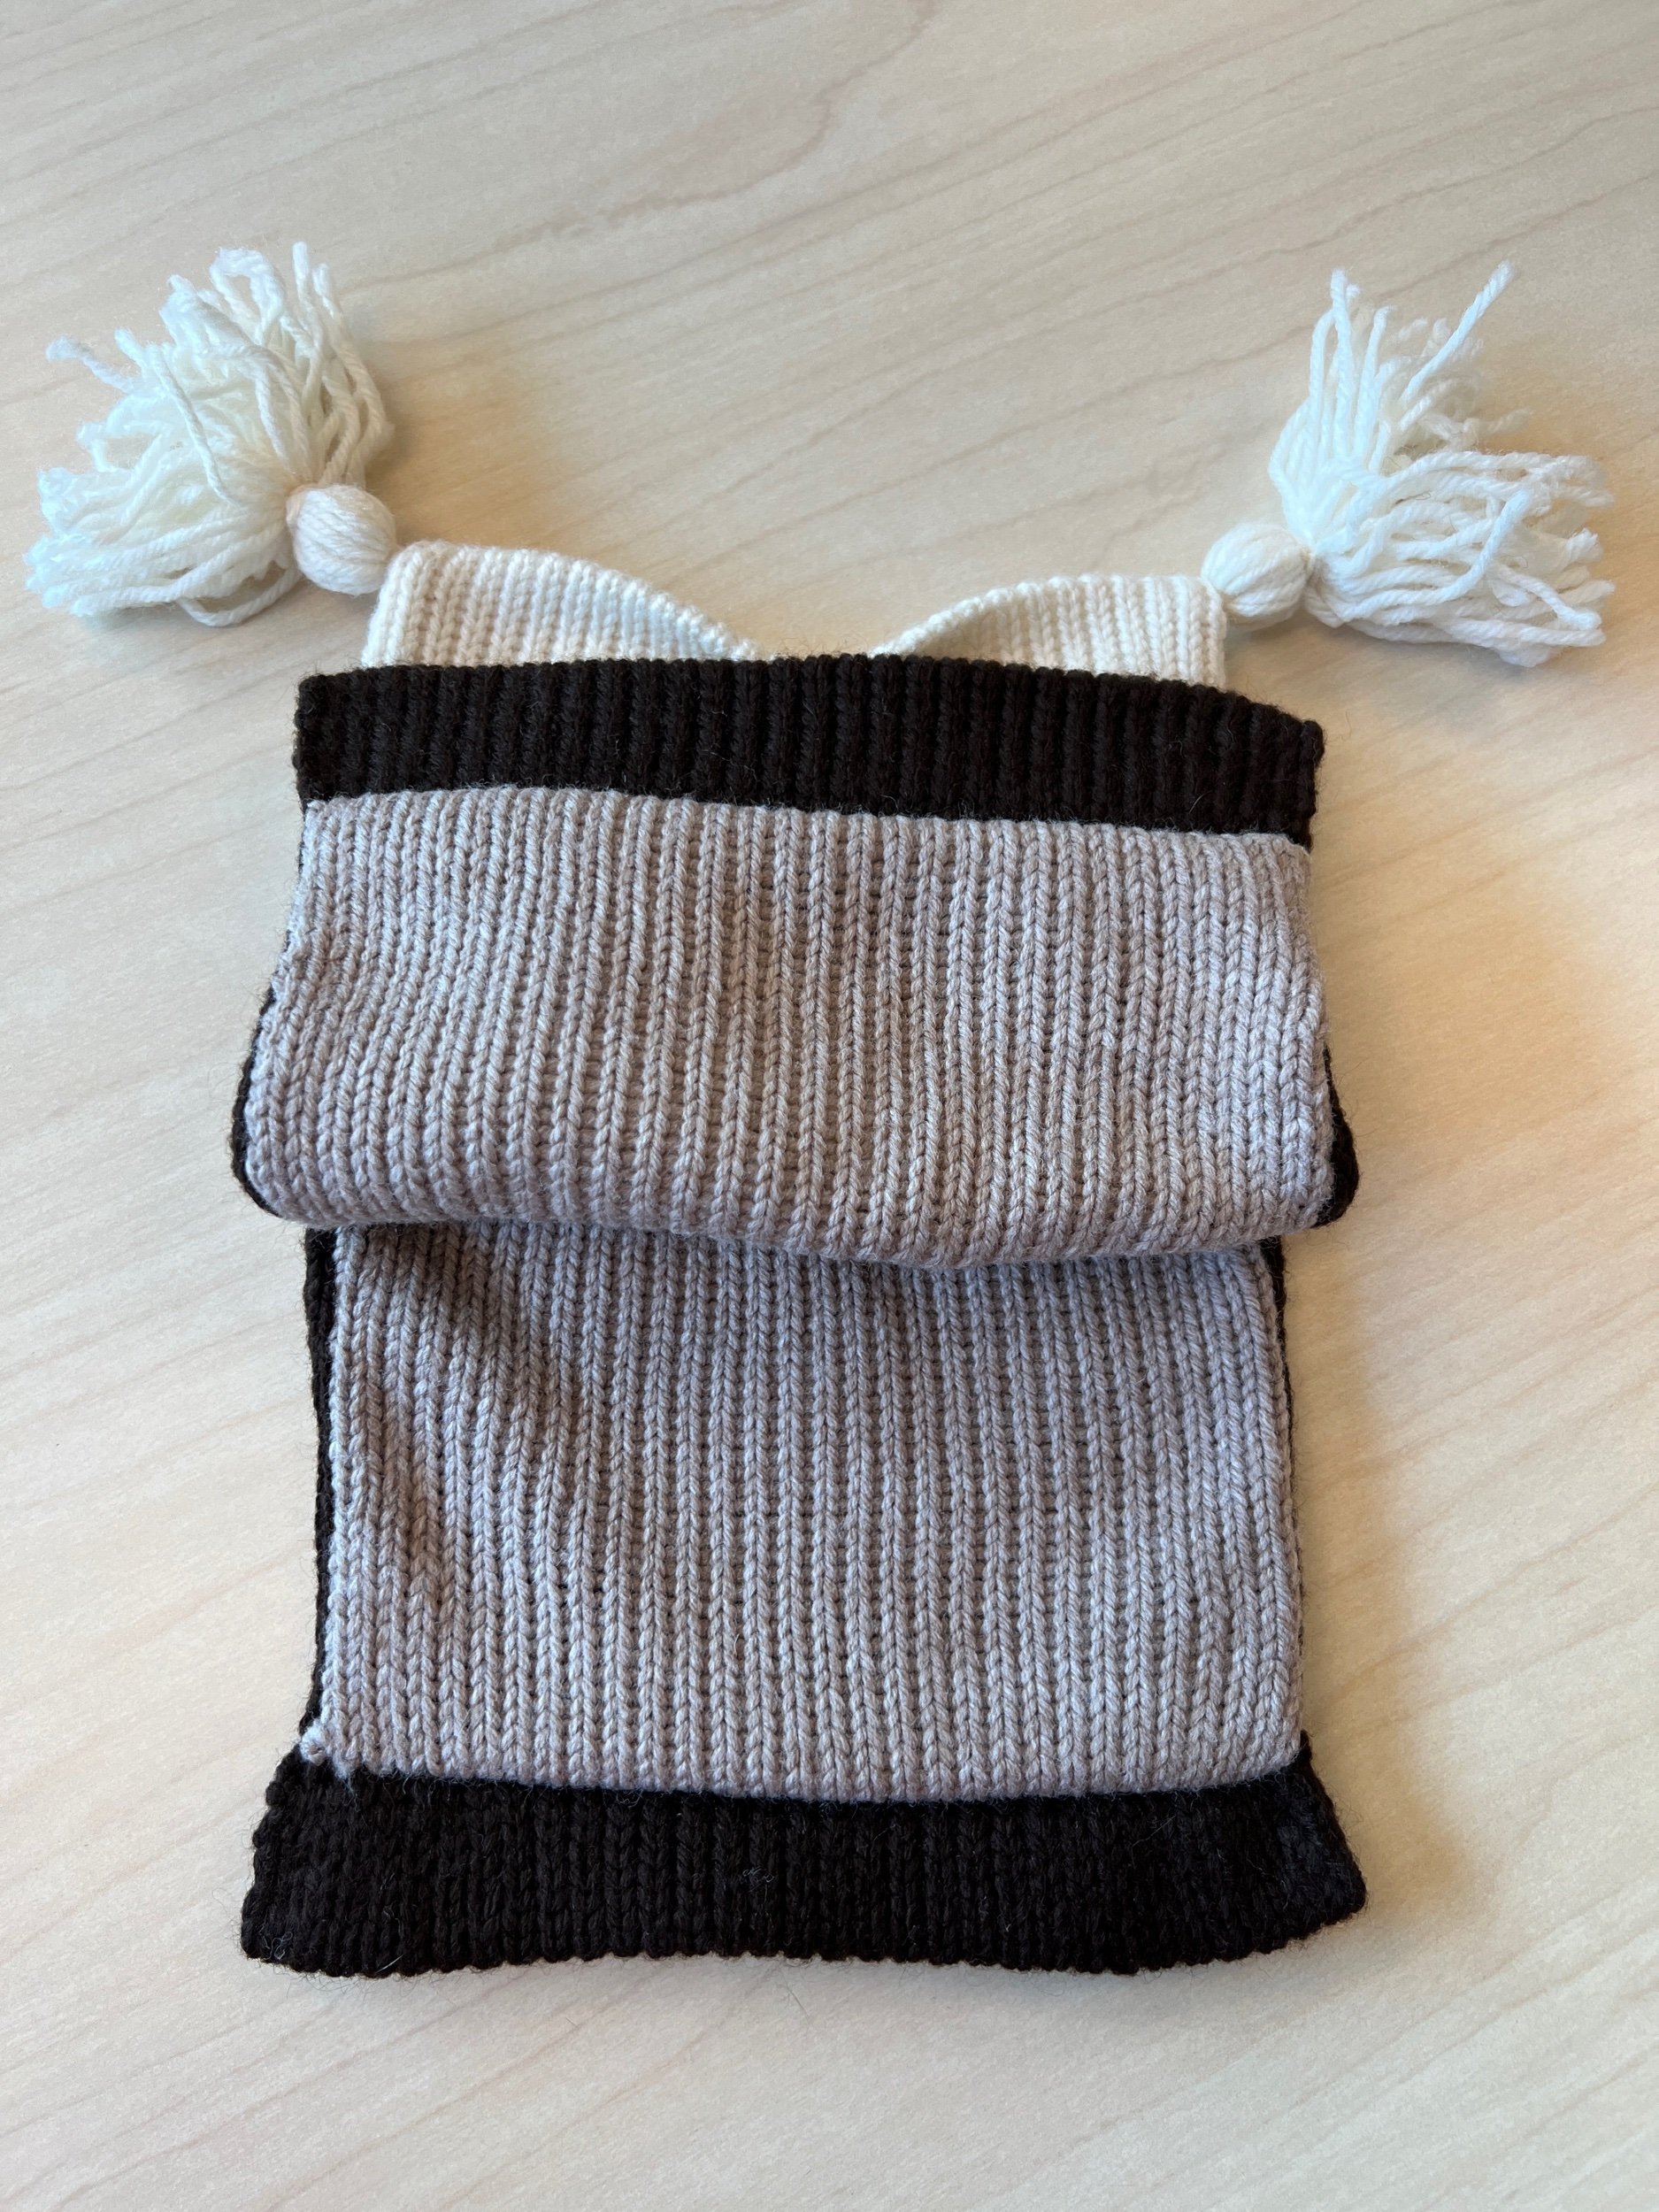
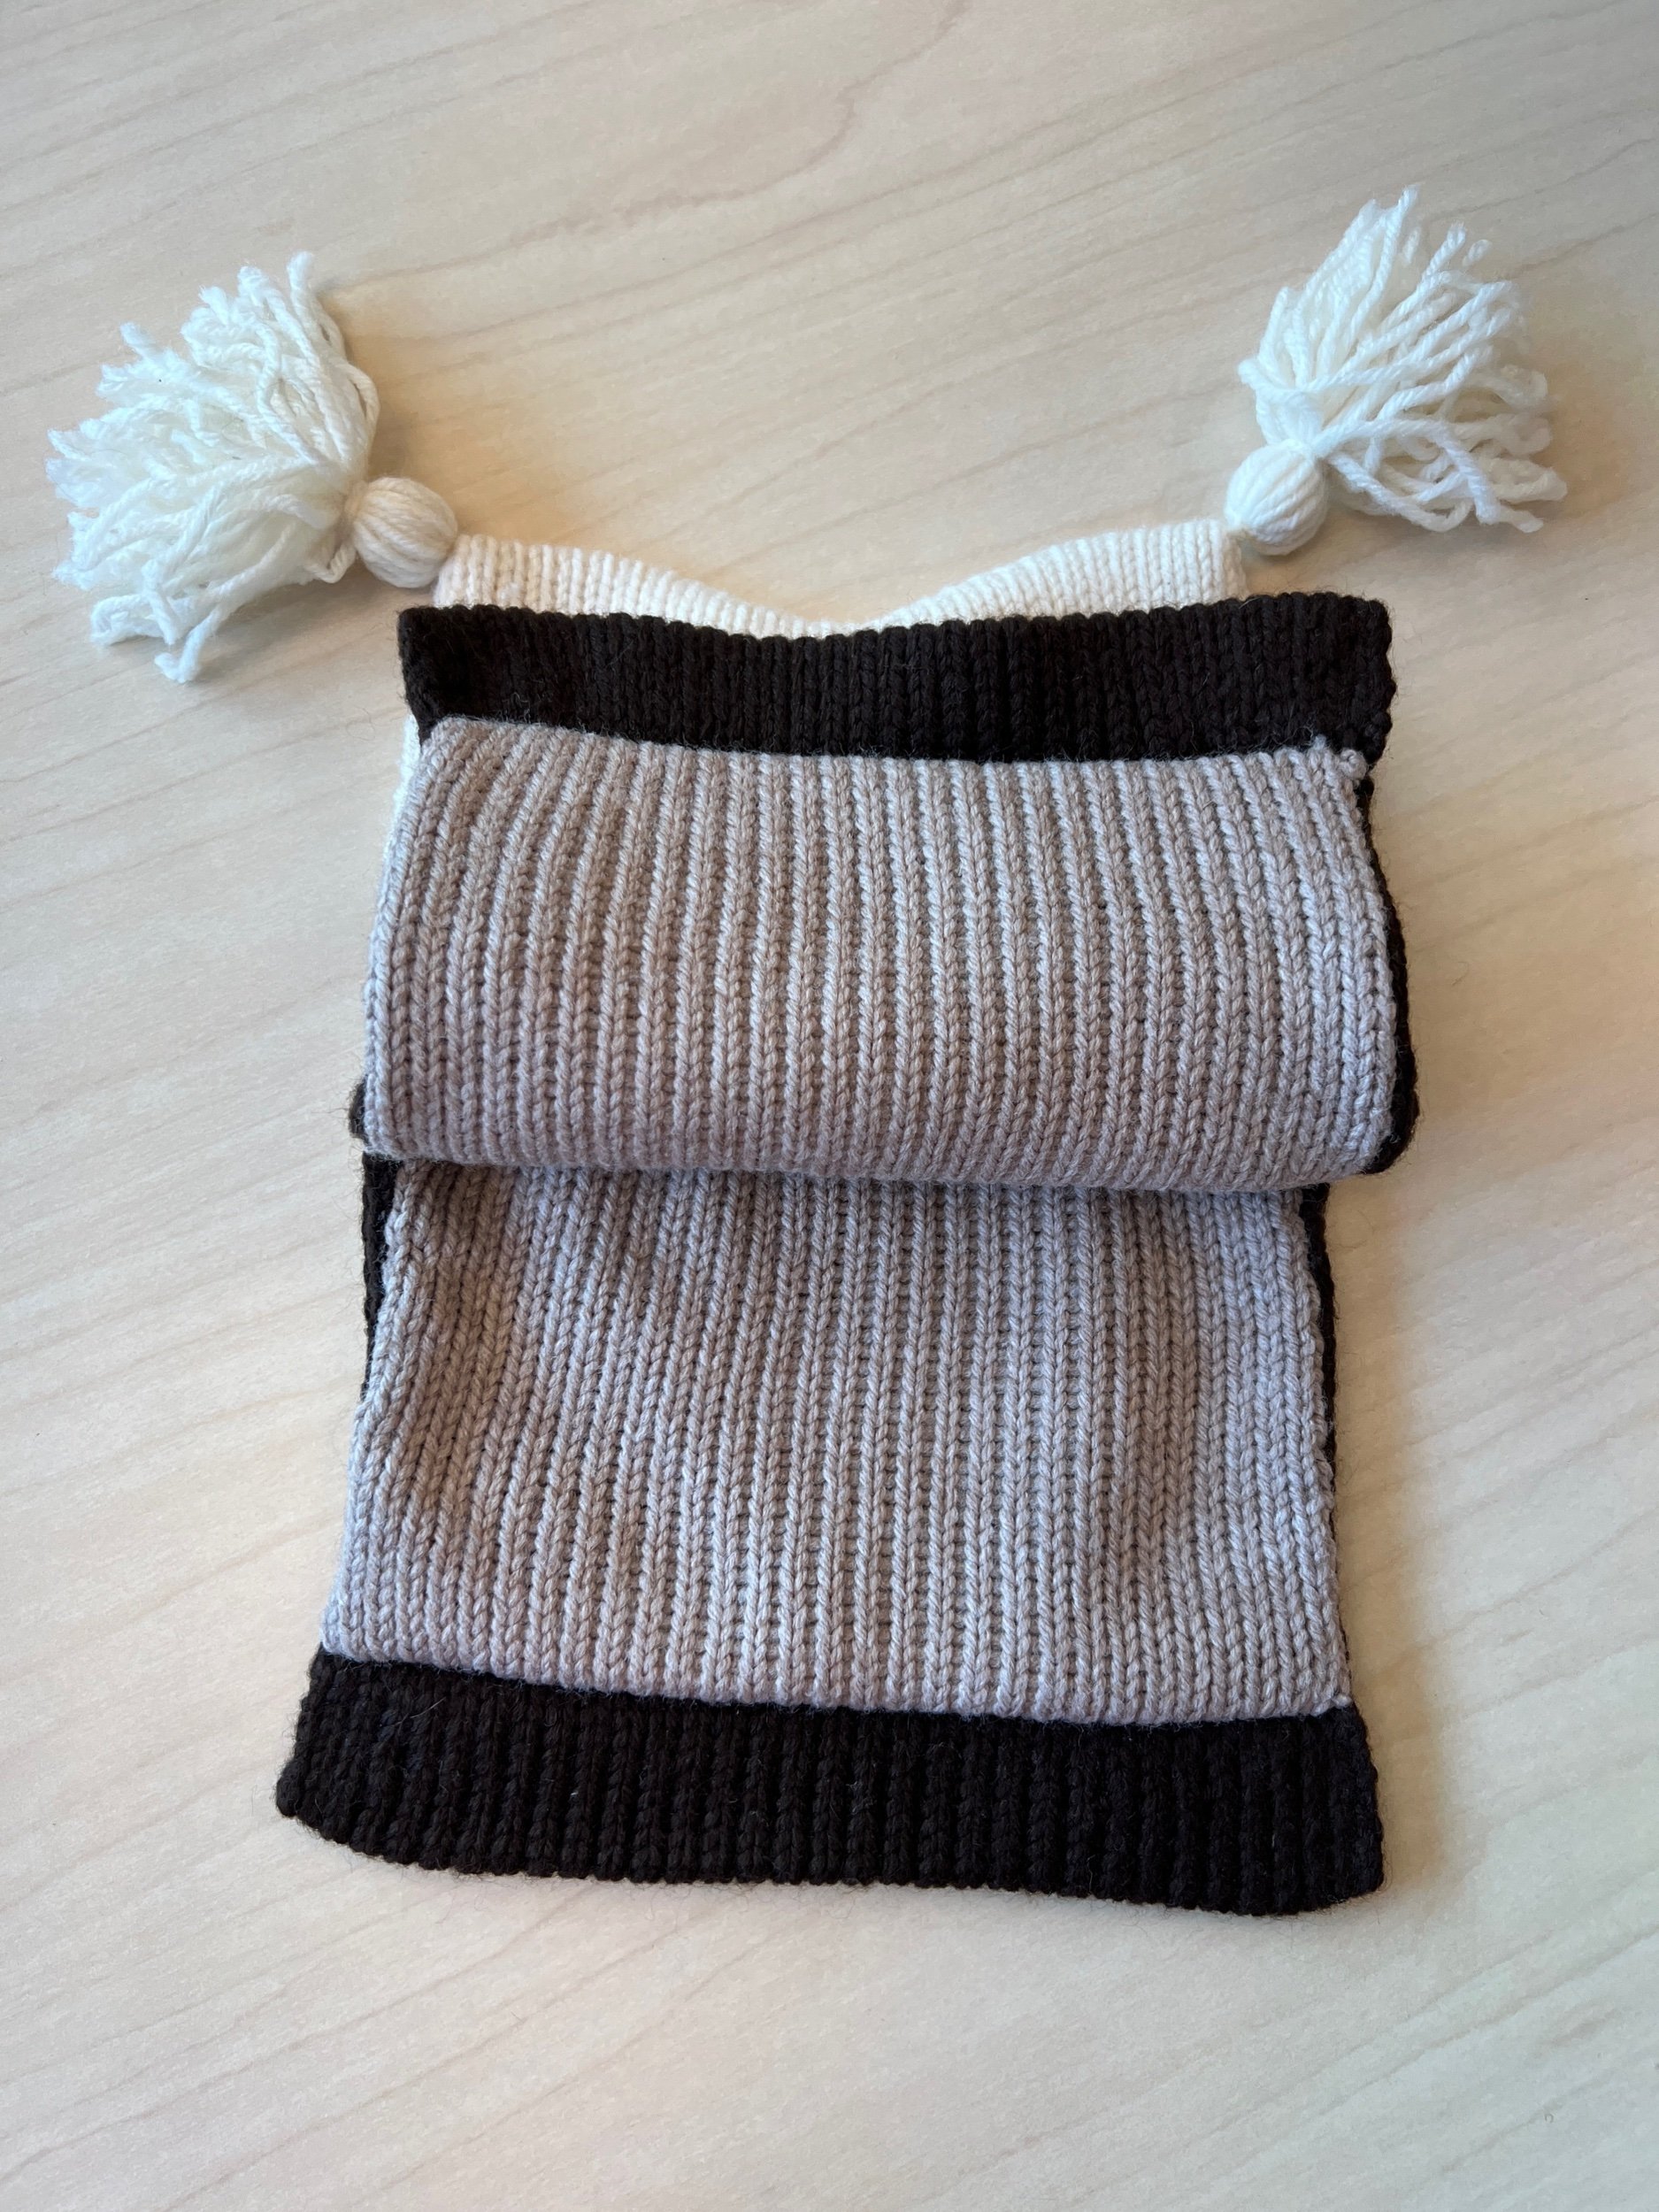
SUMMARY: Create two rectangles (every 2nd needle) using needle marks total for EACH rectangle of 60 rows THEN join/work both rectangles.
USING right side of 0 pull out every 2nd needle to 66 (33 needles). Open Cast On with scrap then switch to dark brown. Work 50 rows with assist on tension to ensure all edge stitches are even.
Switch to lighter color (beige). Work 20 rows.
Switch to white. Work 20 rows. (Total rows are now 100)
NOW to do what do did above but in reverse.
Work 20 rows white. (Total rows are now 120)
Switch to beige. Work 20 rows. (140 total rows)
Switch to dark brown and work 50 rows. (190 total rows). Cast Off with the project yarn.
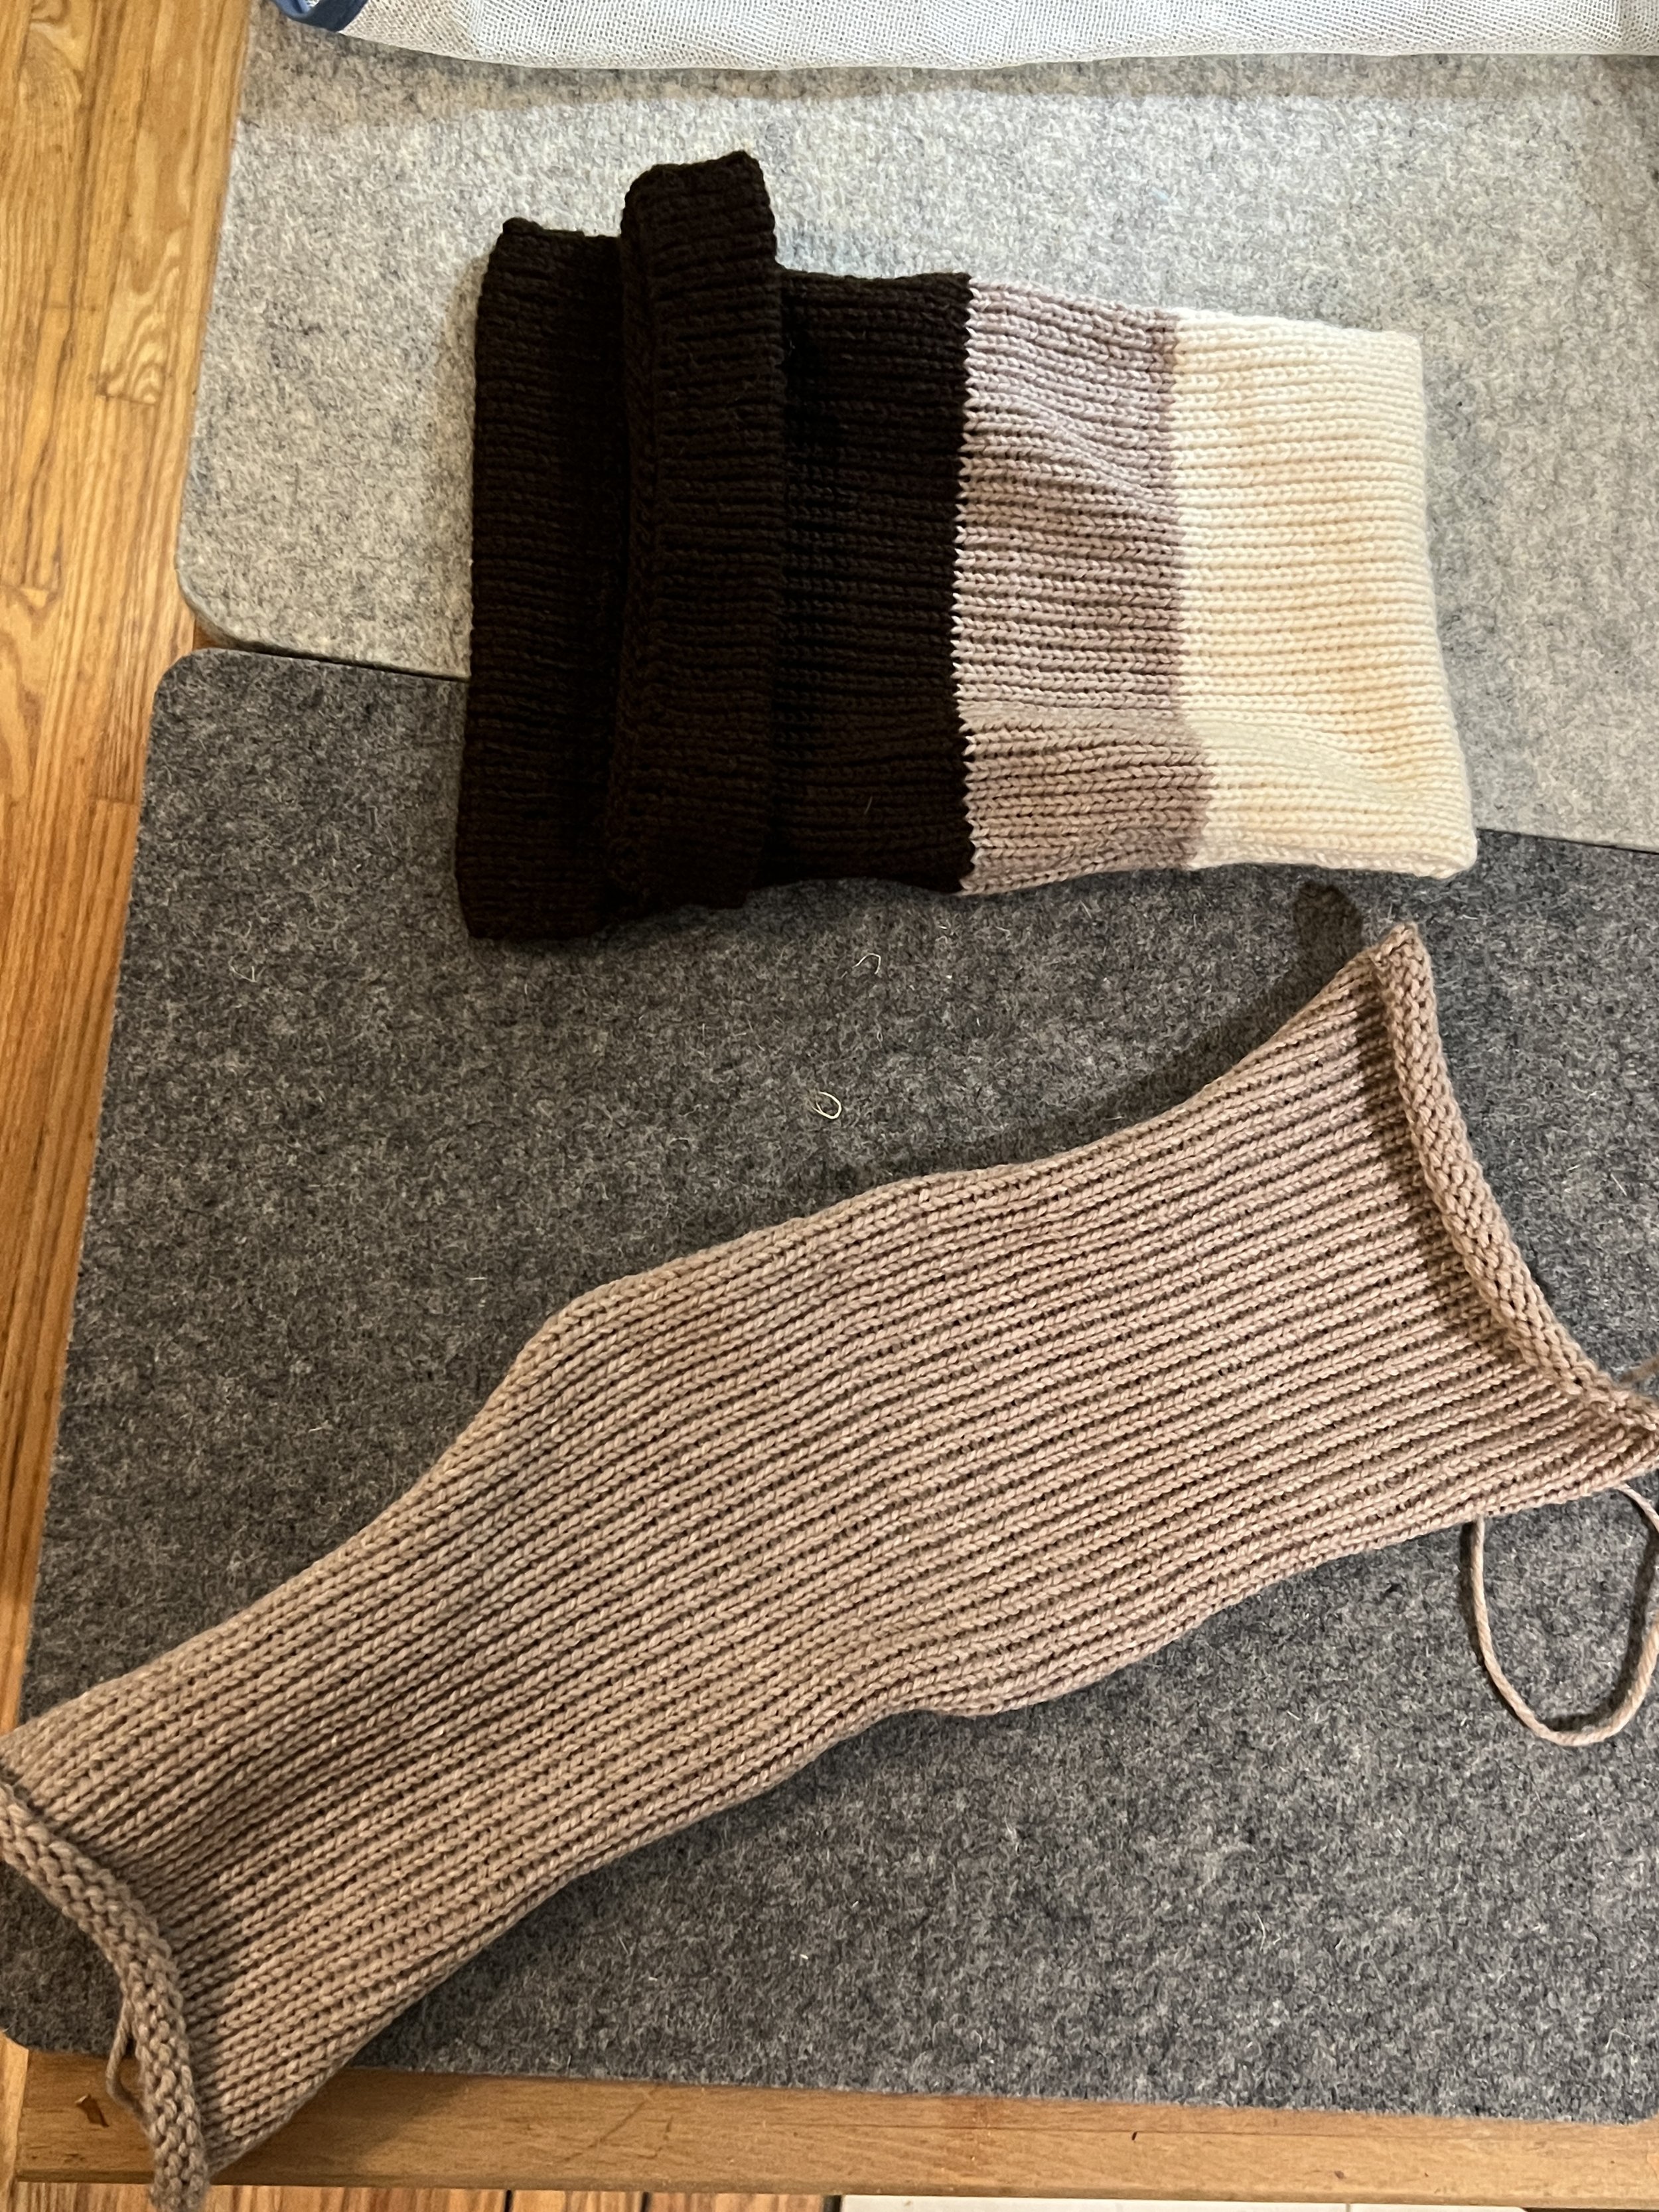
NEXT CREATE A PARTIAL LINER:
Cast on again using every second needle (but cast on with one less than above so its slightly narrower than the outer piece is) - 32 needle scrap cast on then e-wrap beige yarn cast on.
Work the number of rows used in the dark brown and beige (2x50, 2x20=140). Cast off with project yarn.
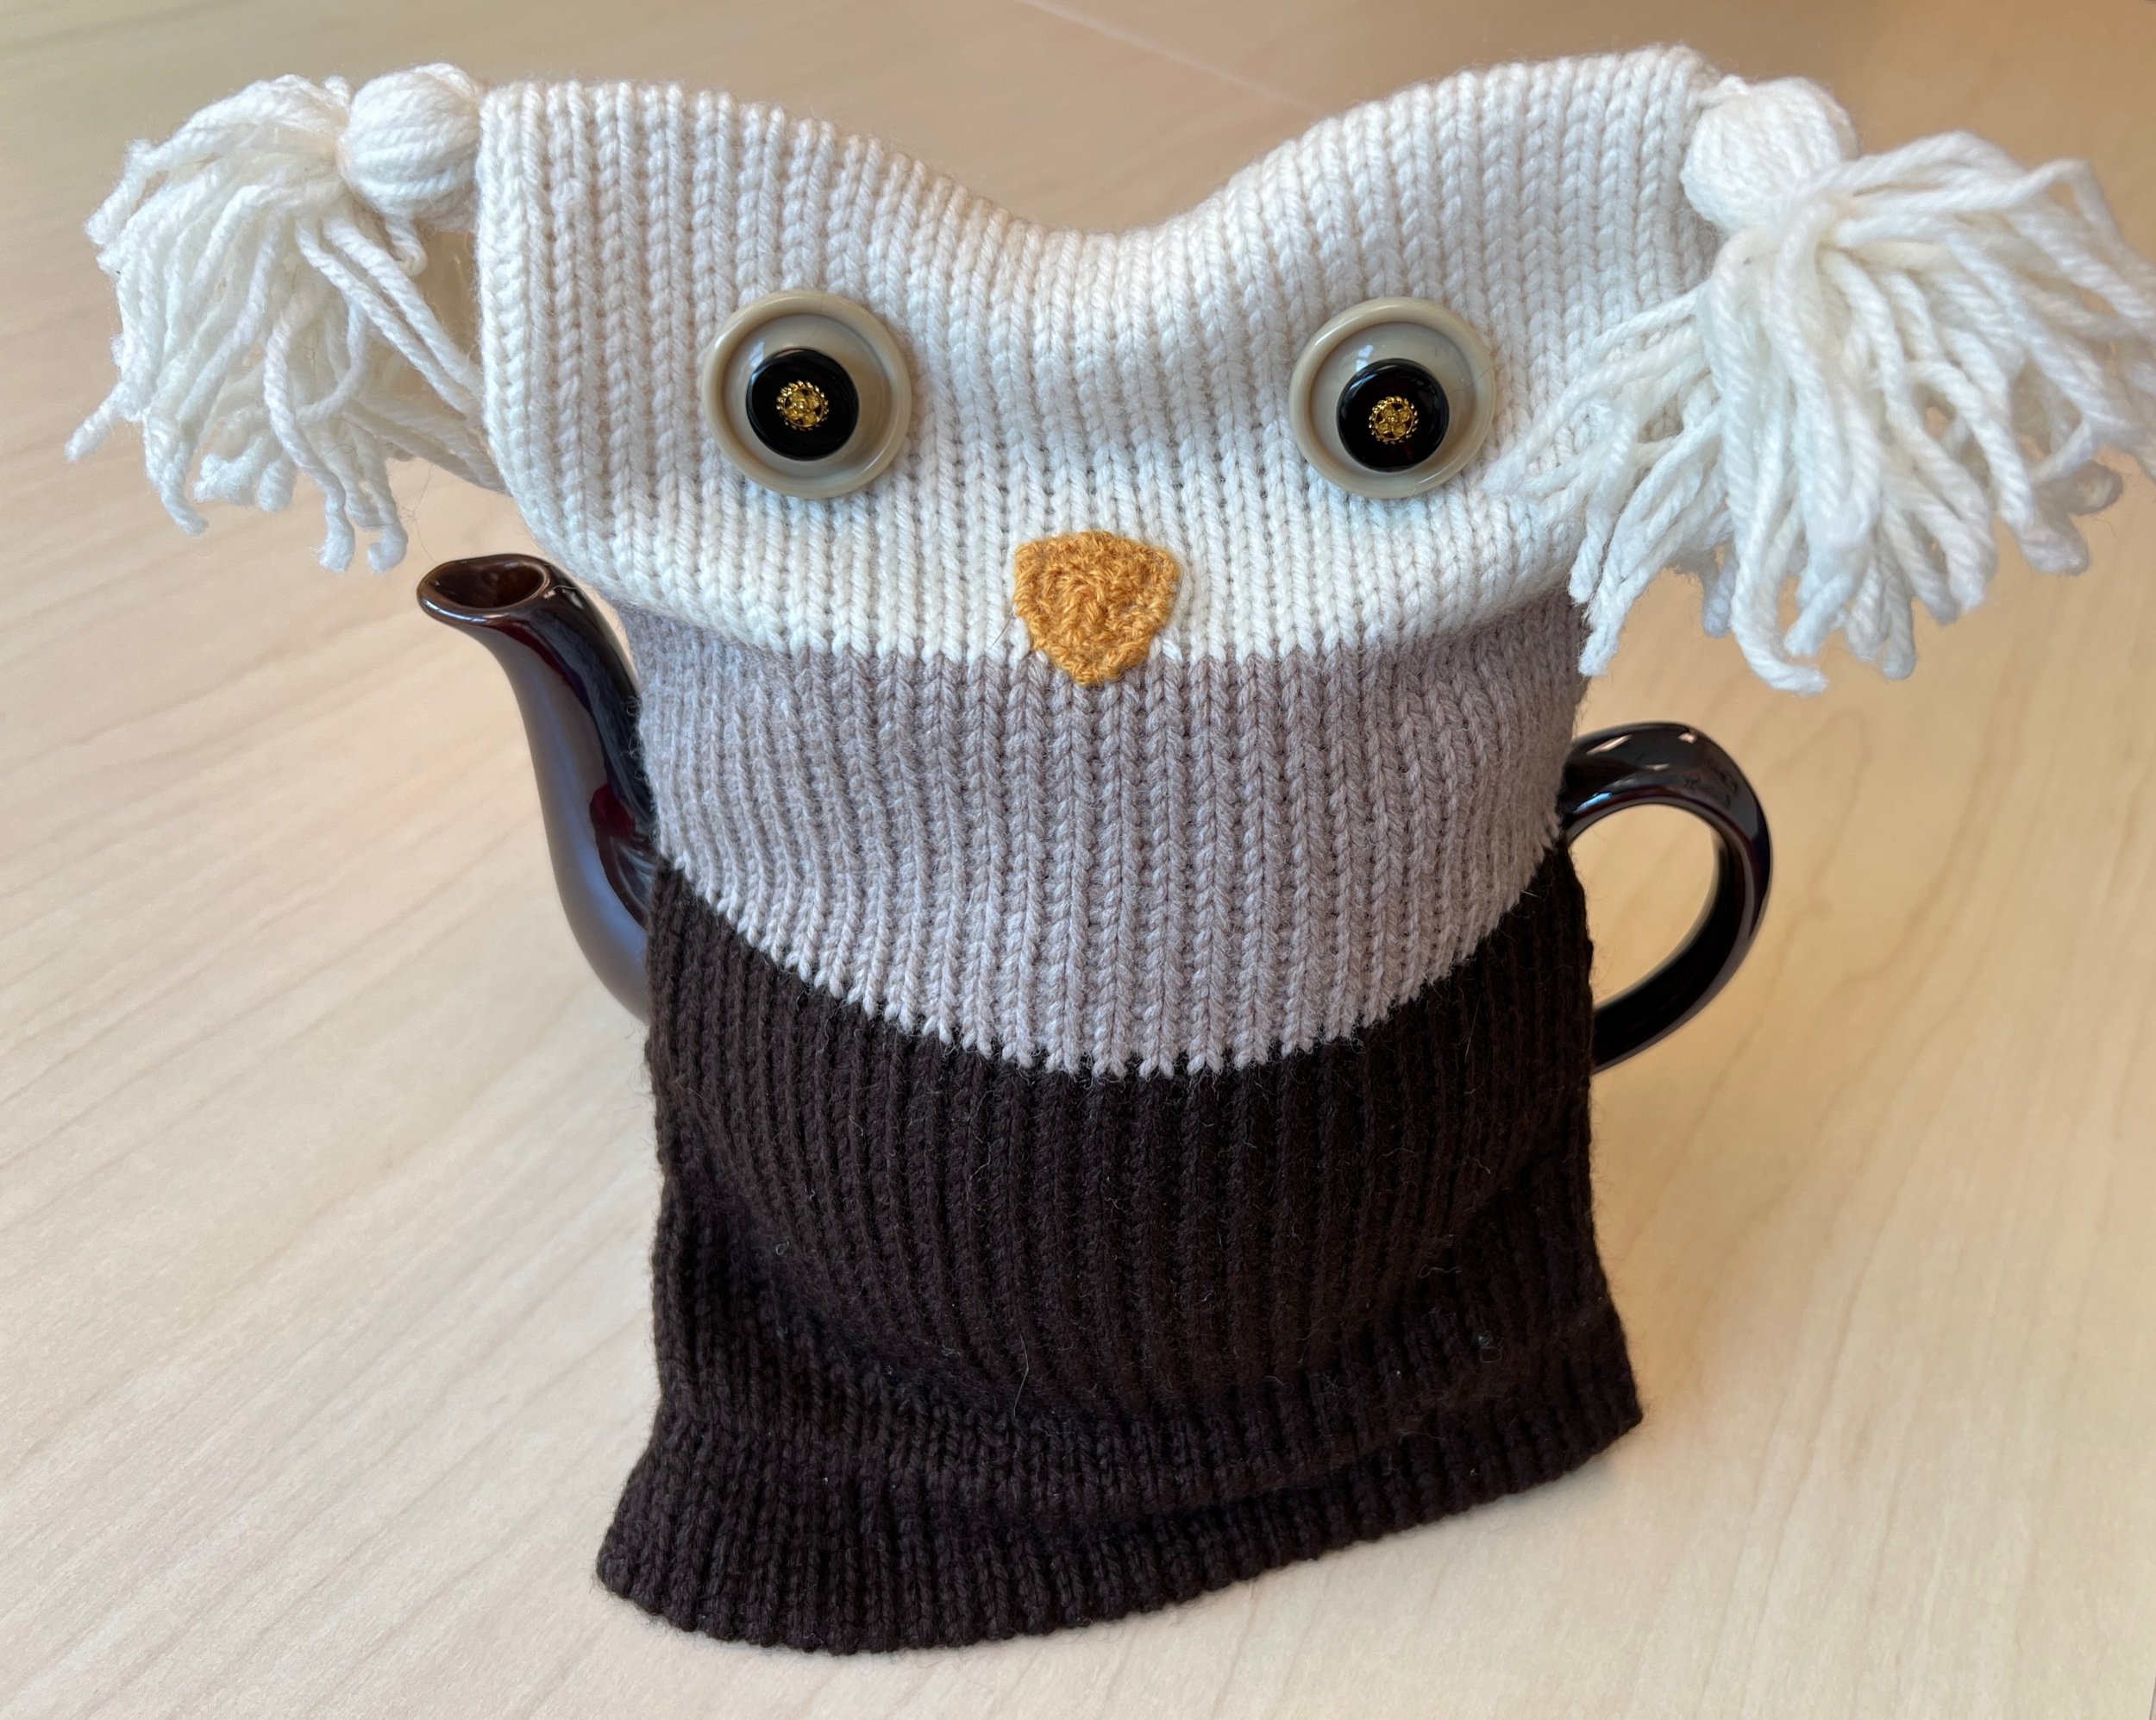
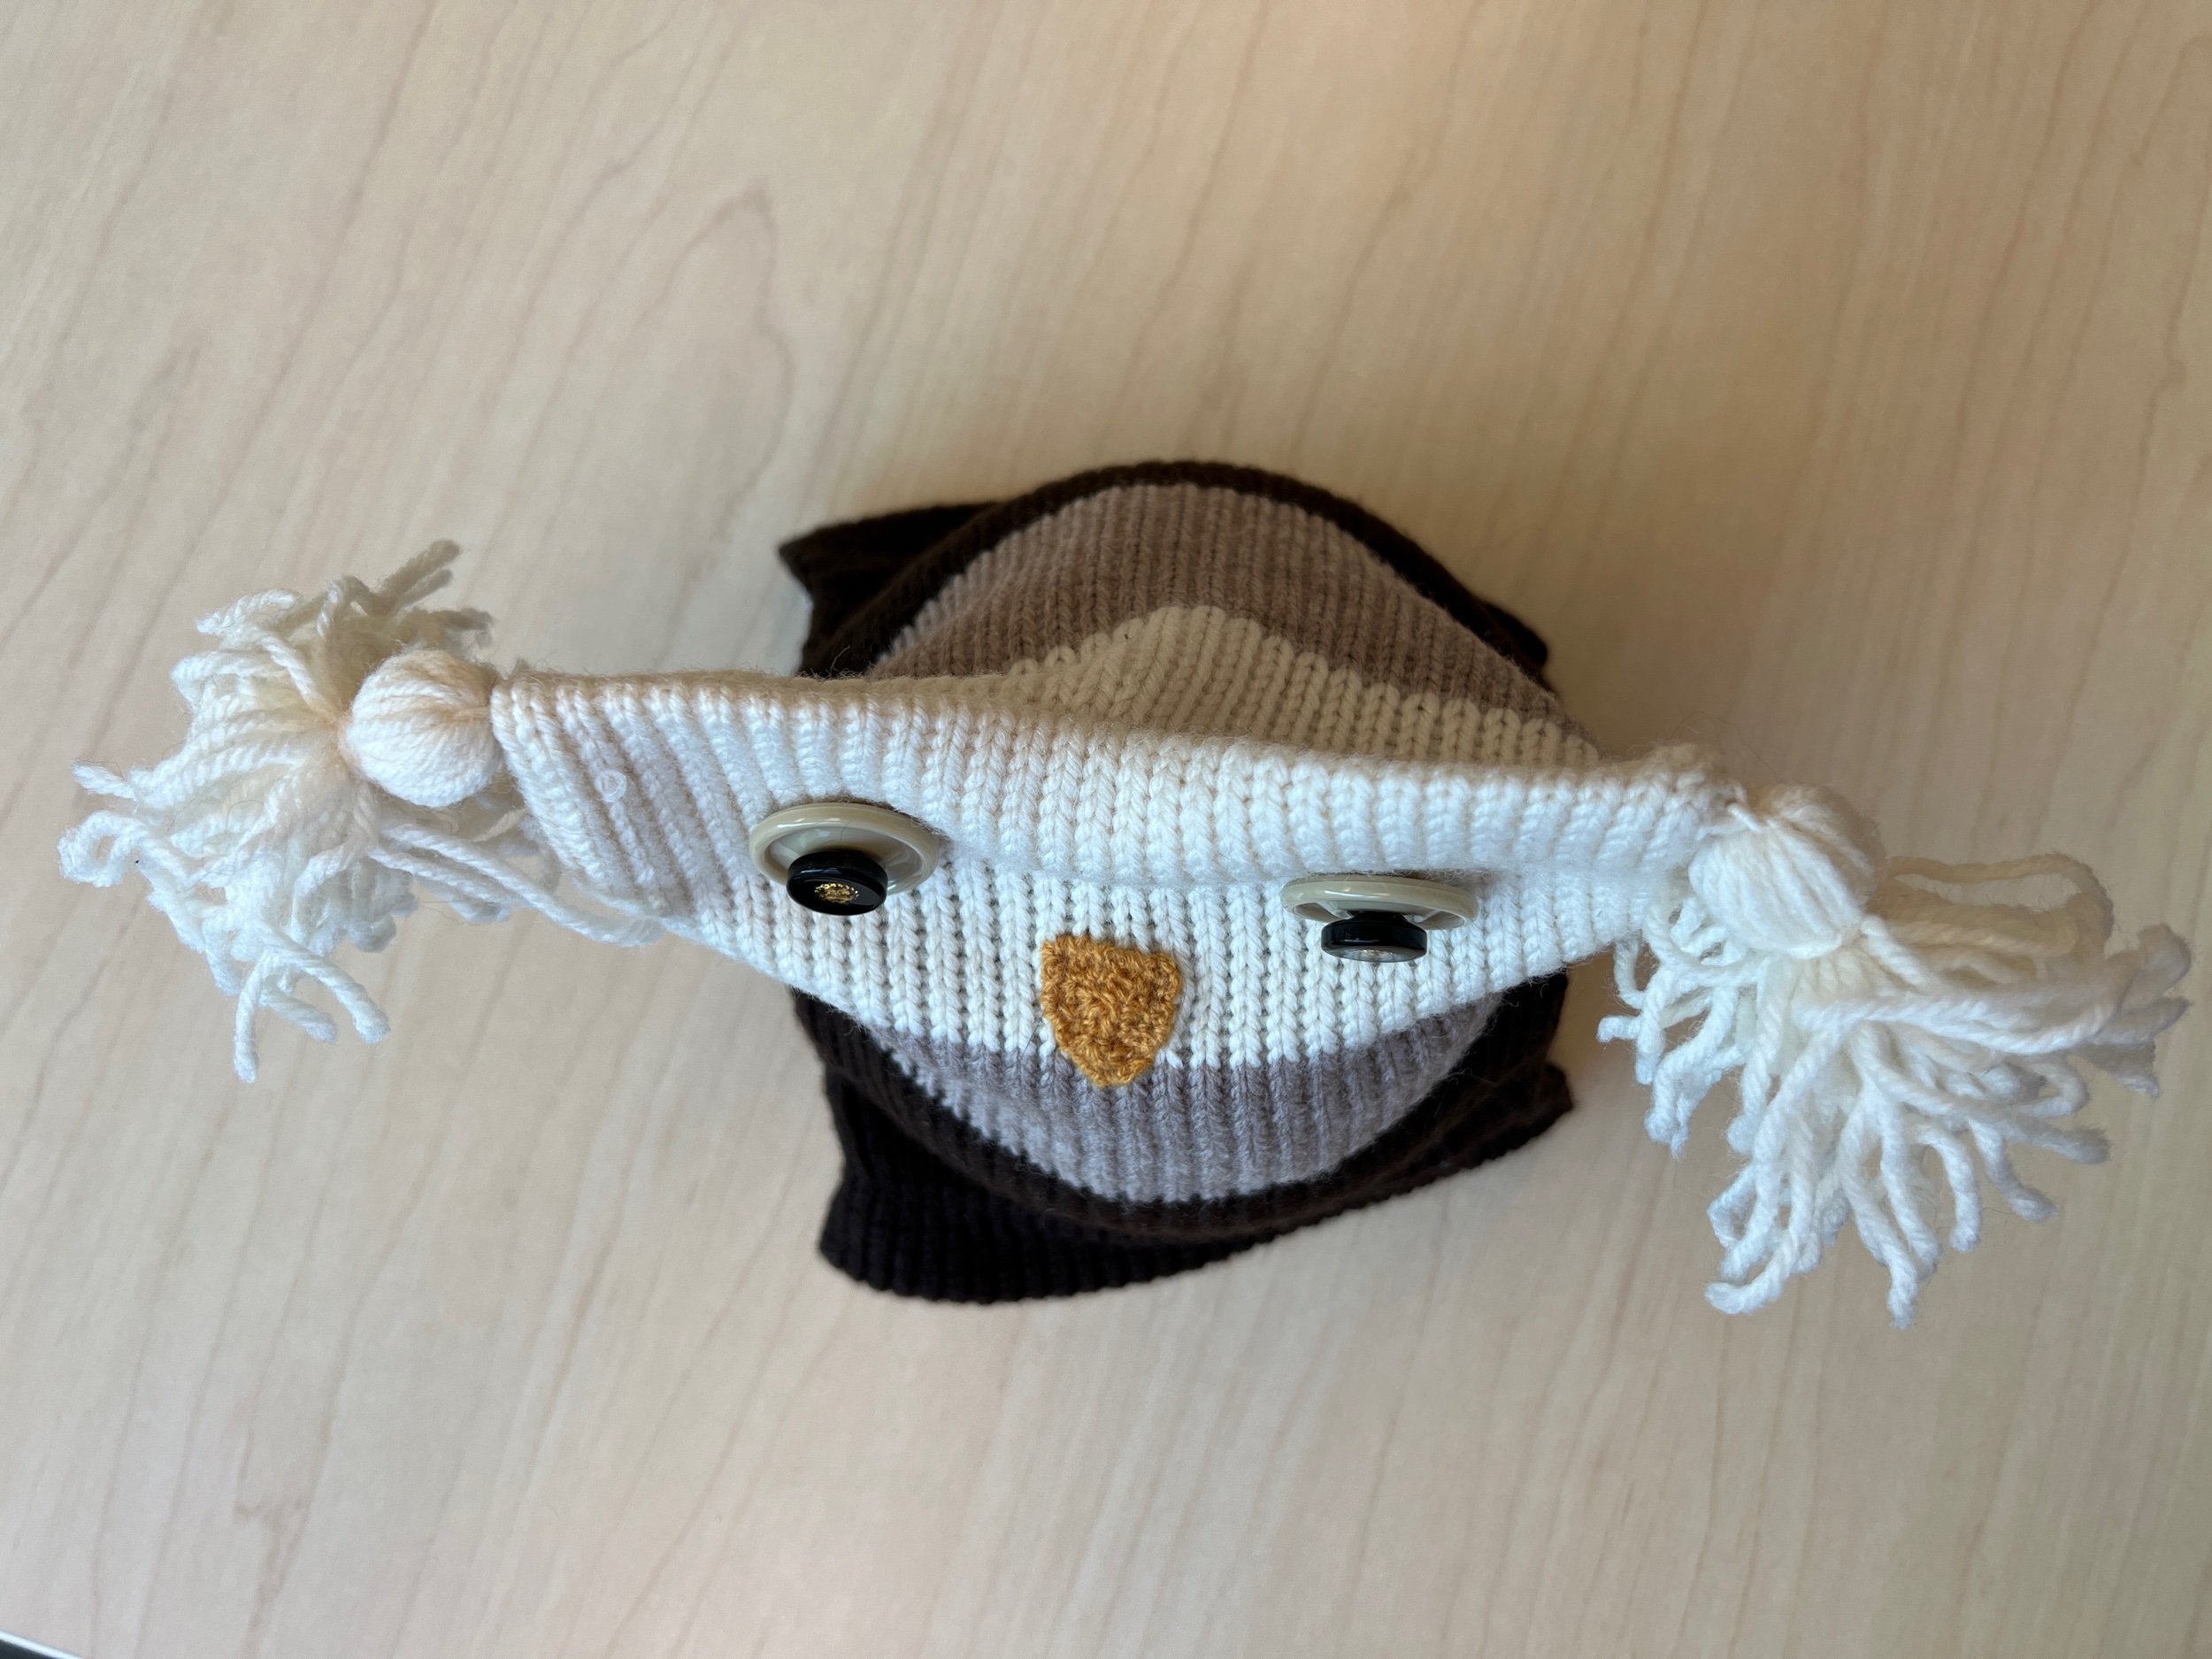
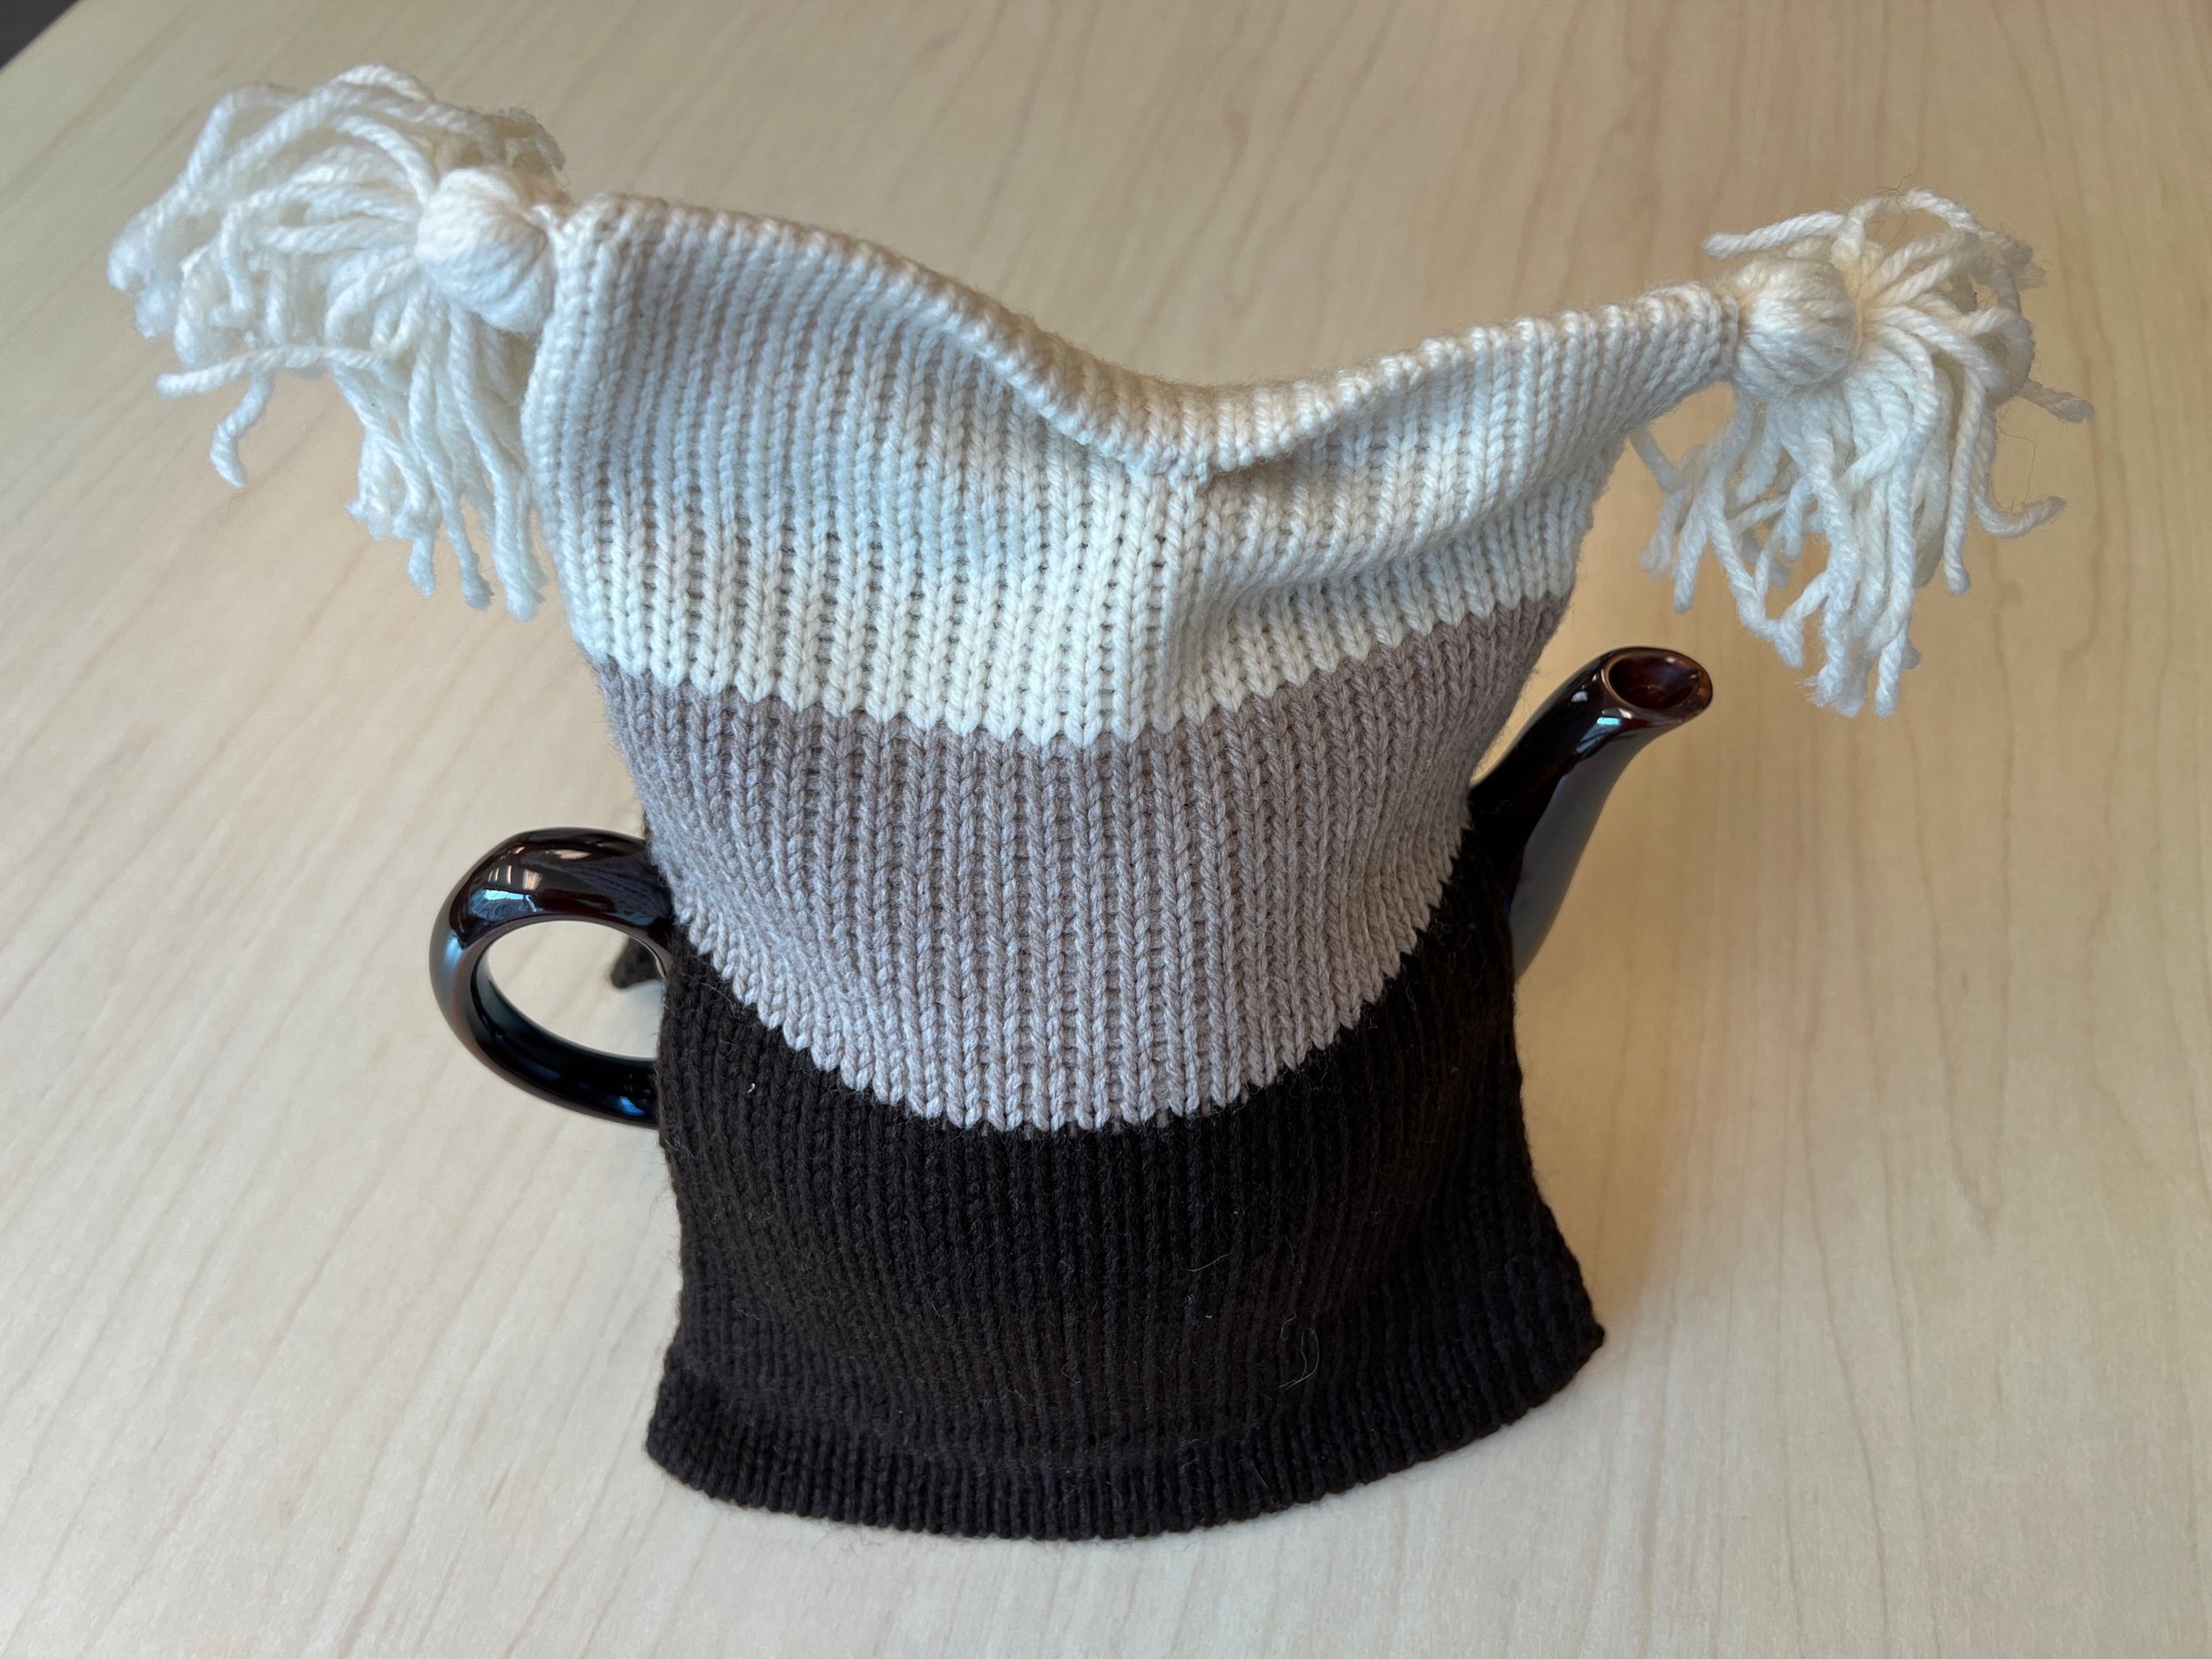
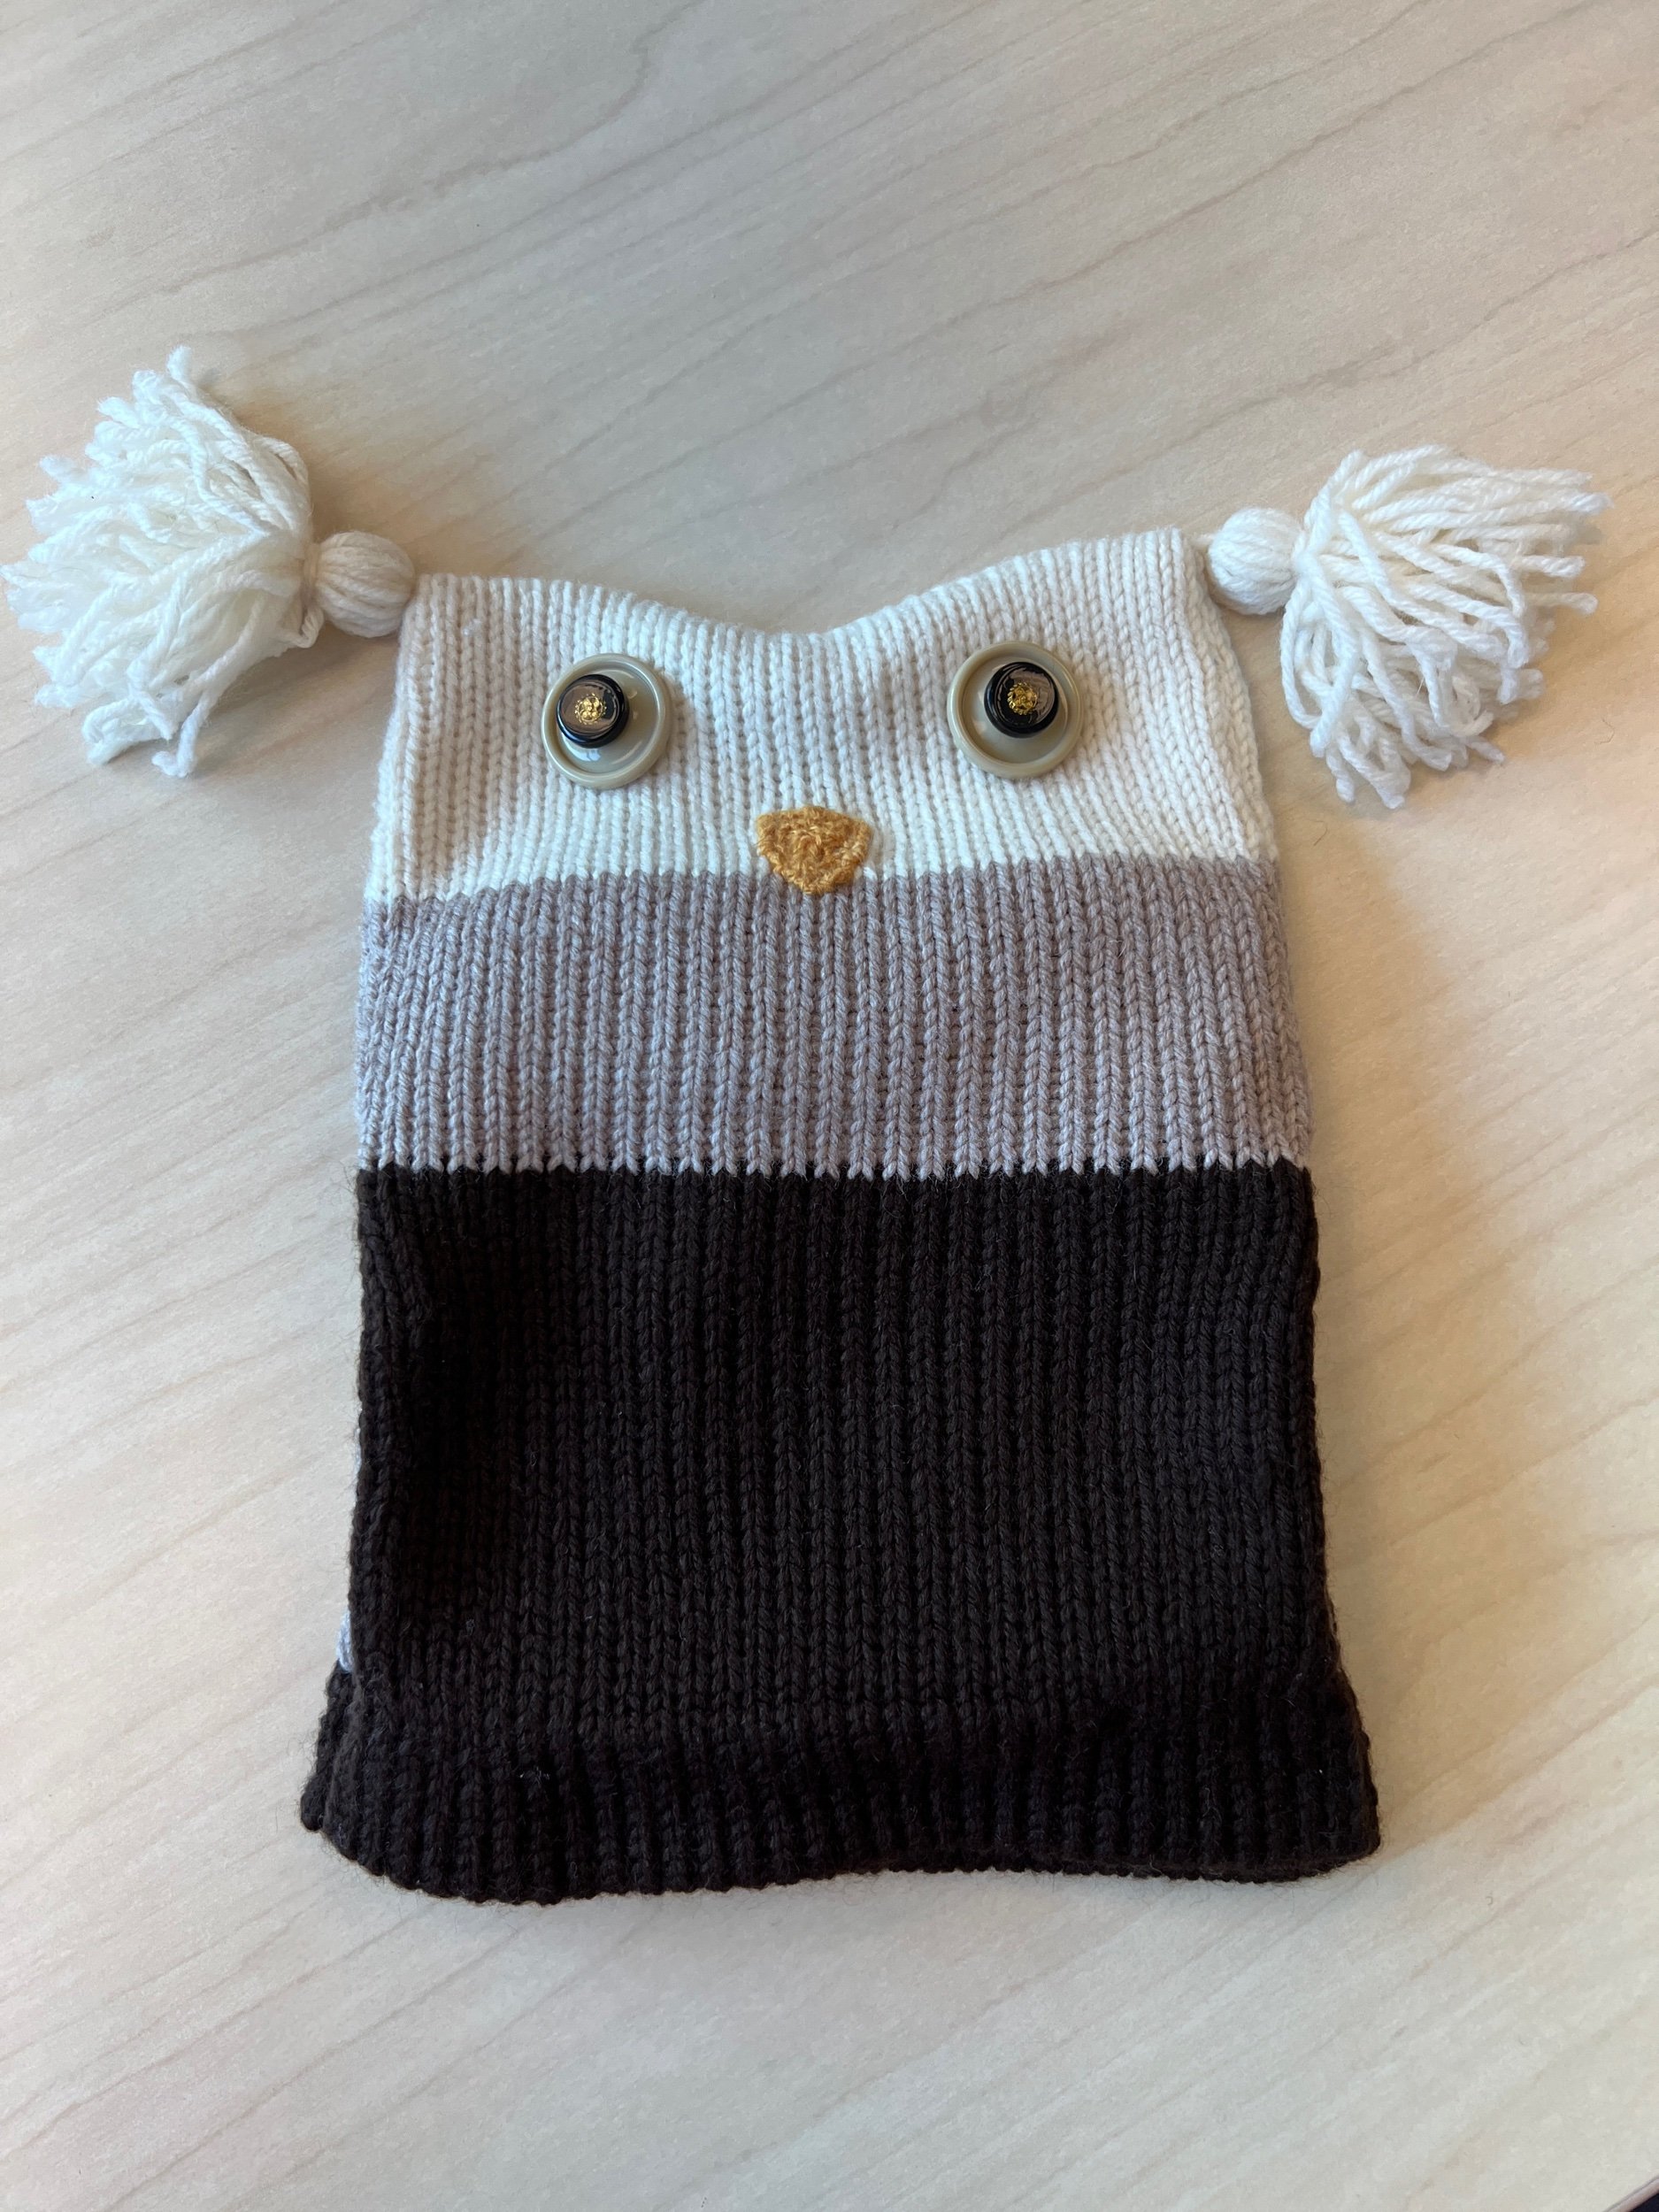
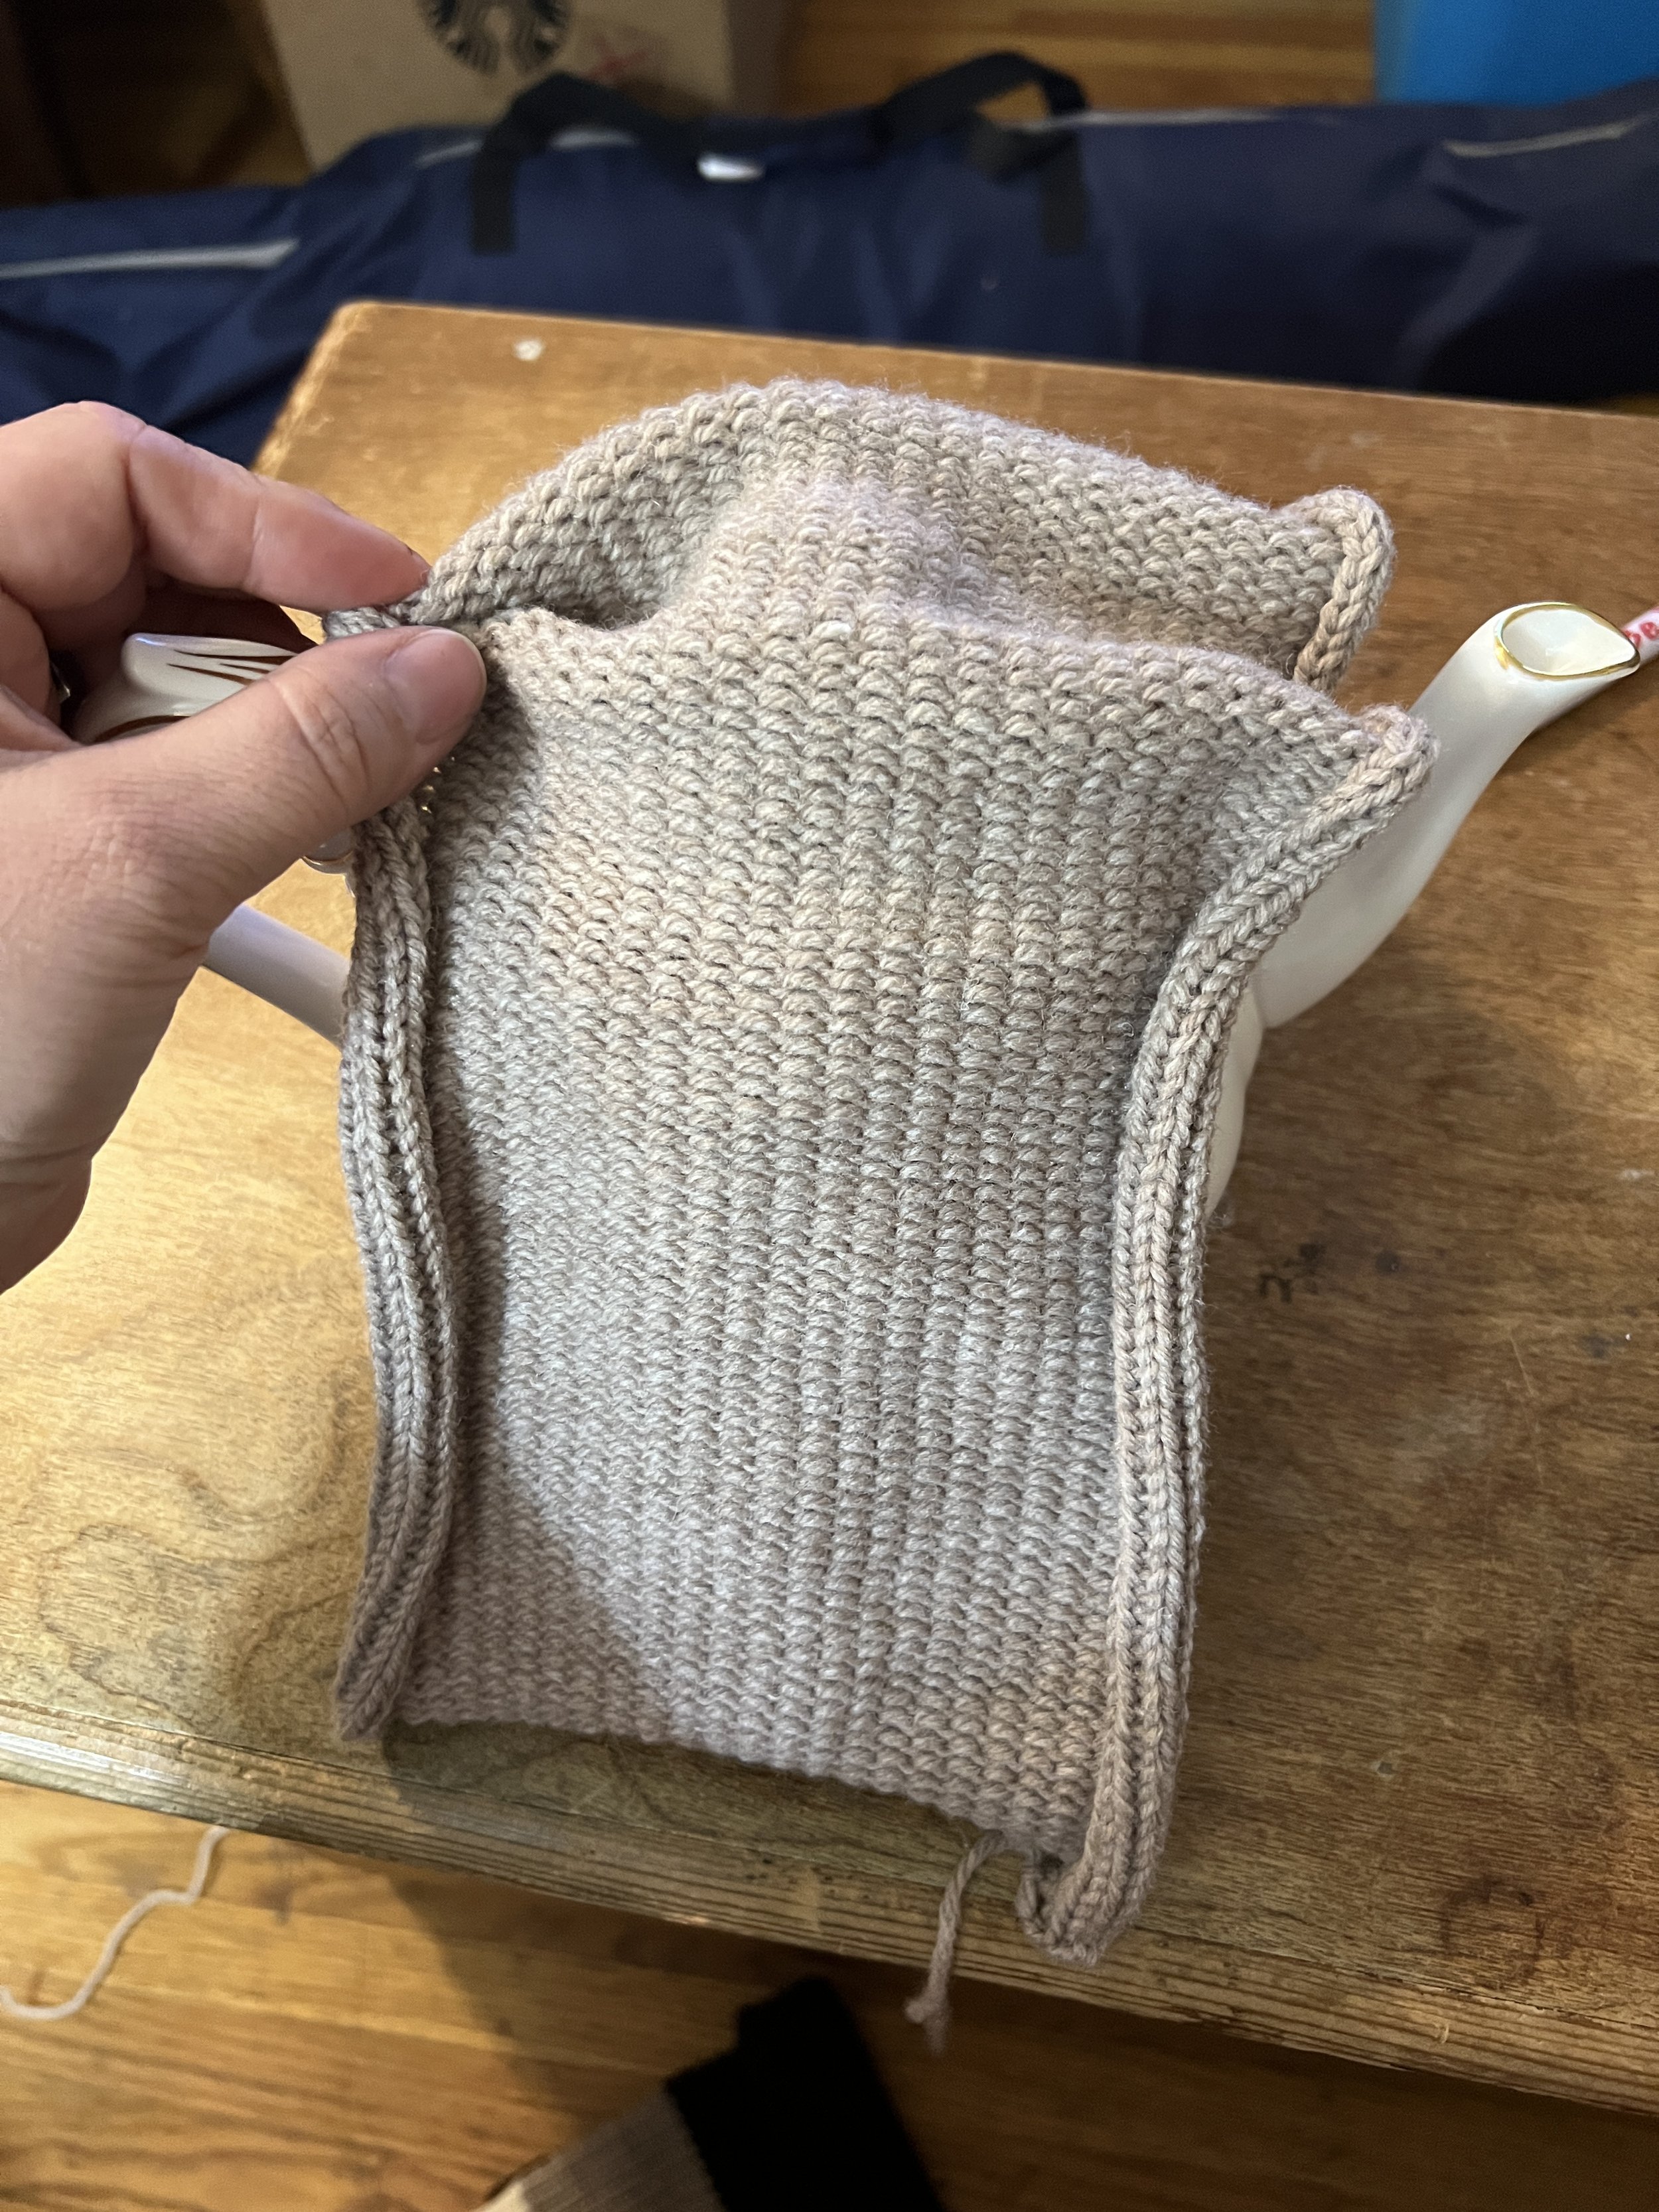
Seam both sides of the white and lighter beige - leaving the dark brown edges unseamed. Now finish both short edges of the dark brown ends by folding up inside the piece and secure the edge of live stitches with a darning needle - like a hung hem. Now attach the liner from the inside to the edge of the dark brown seam - repeat on the other side. The liner has the knit side viewable with a planned excess liner we will seam to allow a kind of pocket inside the owl head that we will first finish the face features before closing the interior. I asked persons on instagram and my facebook what eyes they preferred - almost everyone chose the THIRD (which are just two styles of buttons that I later sewed on). The nose is a crocheted piece I created then attached. :)


I added tassels to the points on the ears and after completely seaming the inside liner, decided to help shape the top of the head by seaming it there a bit.