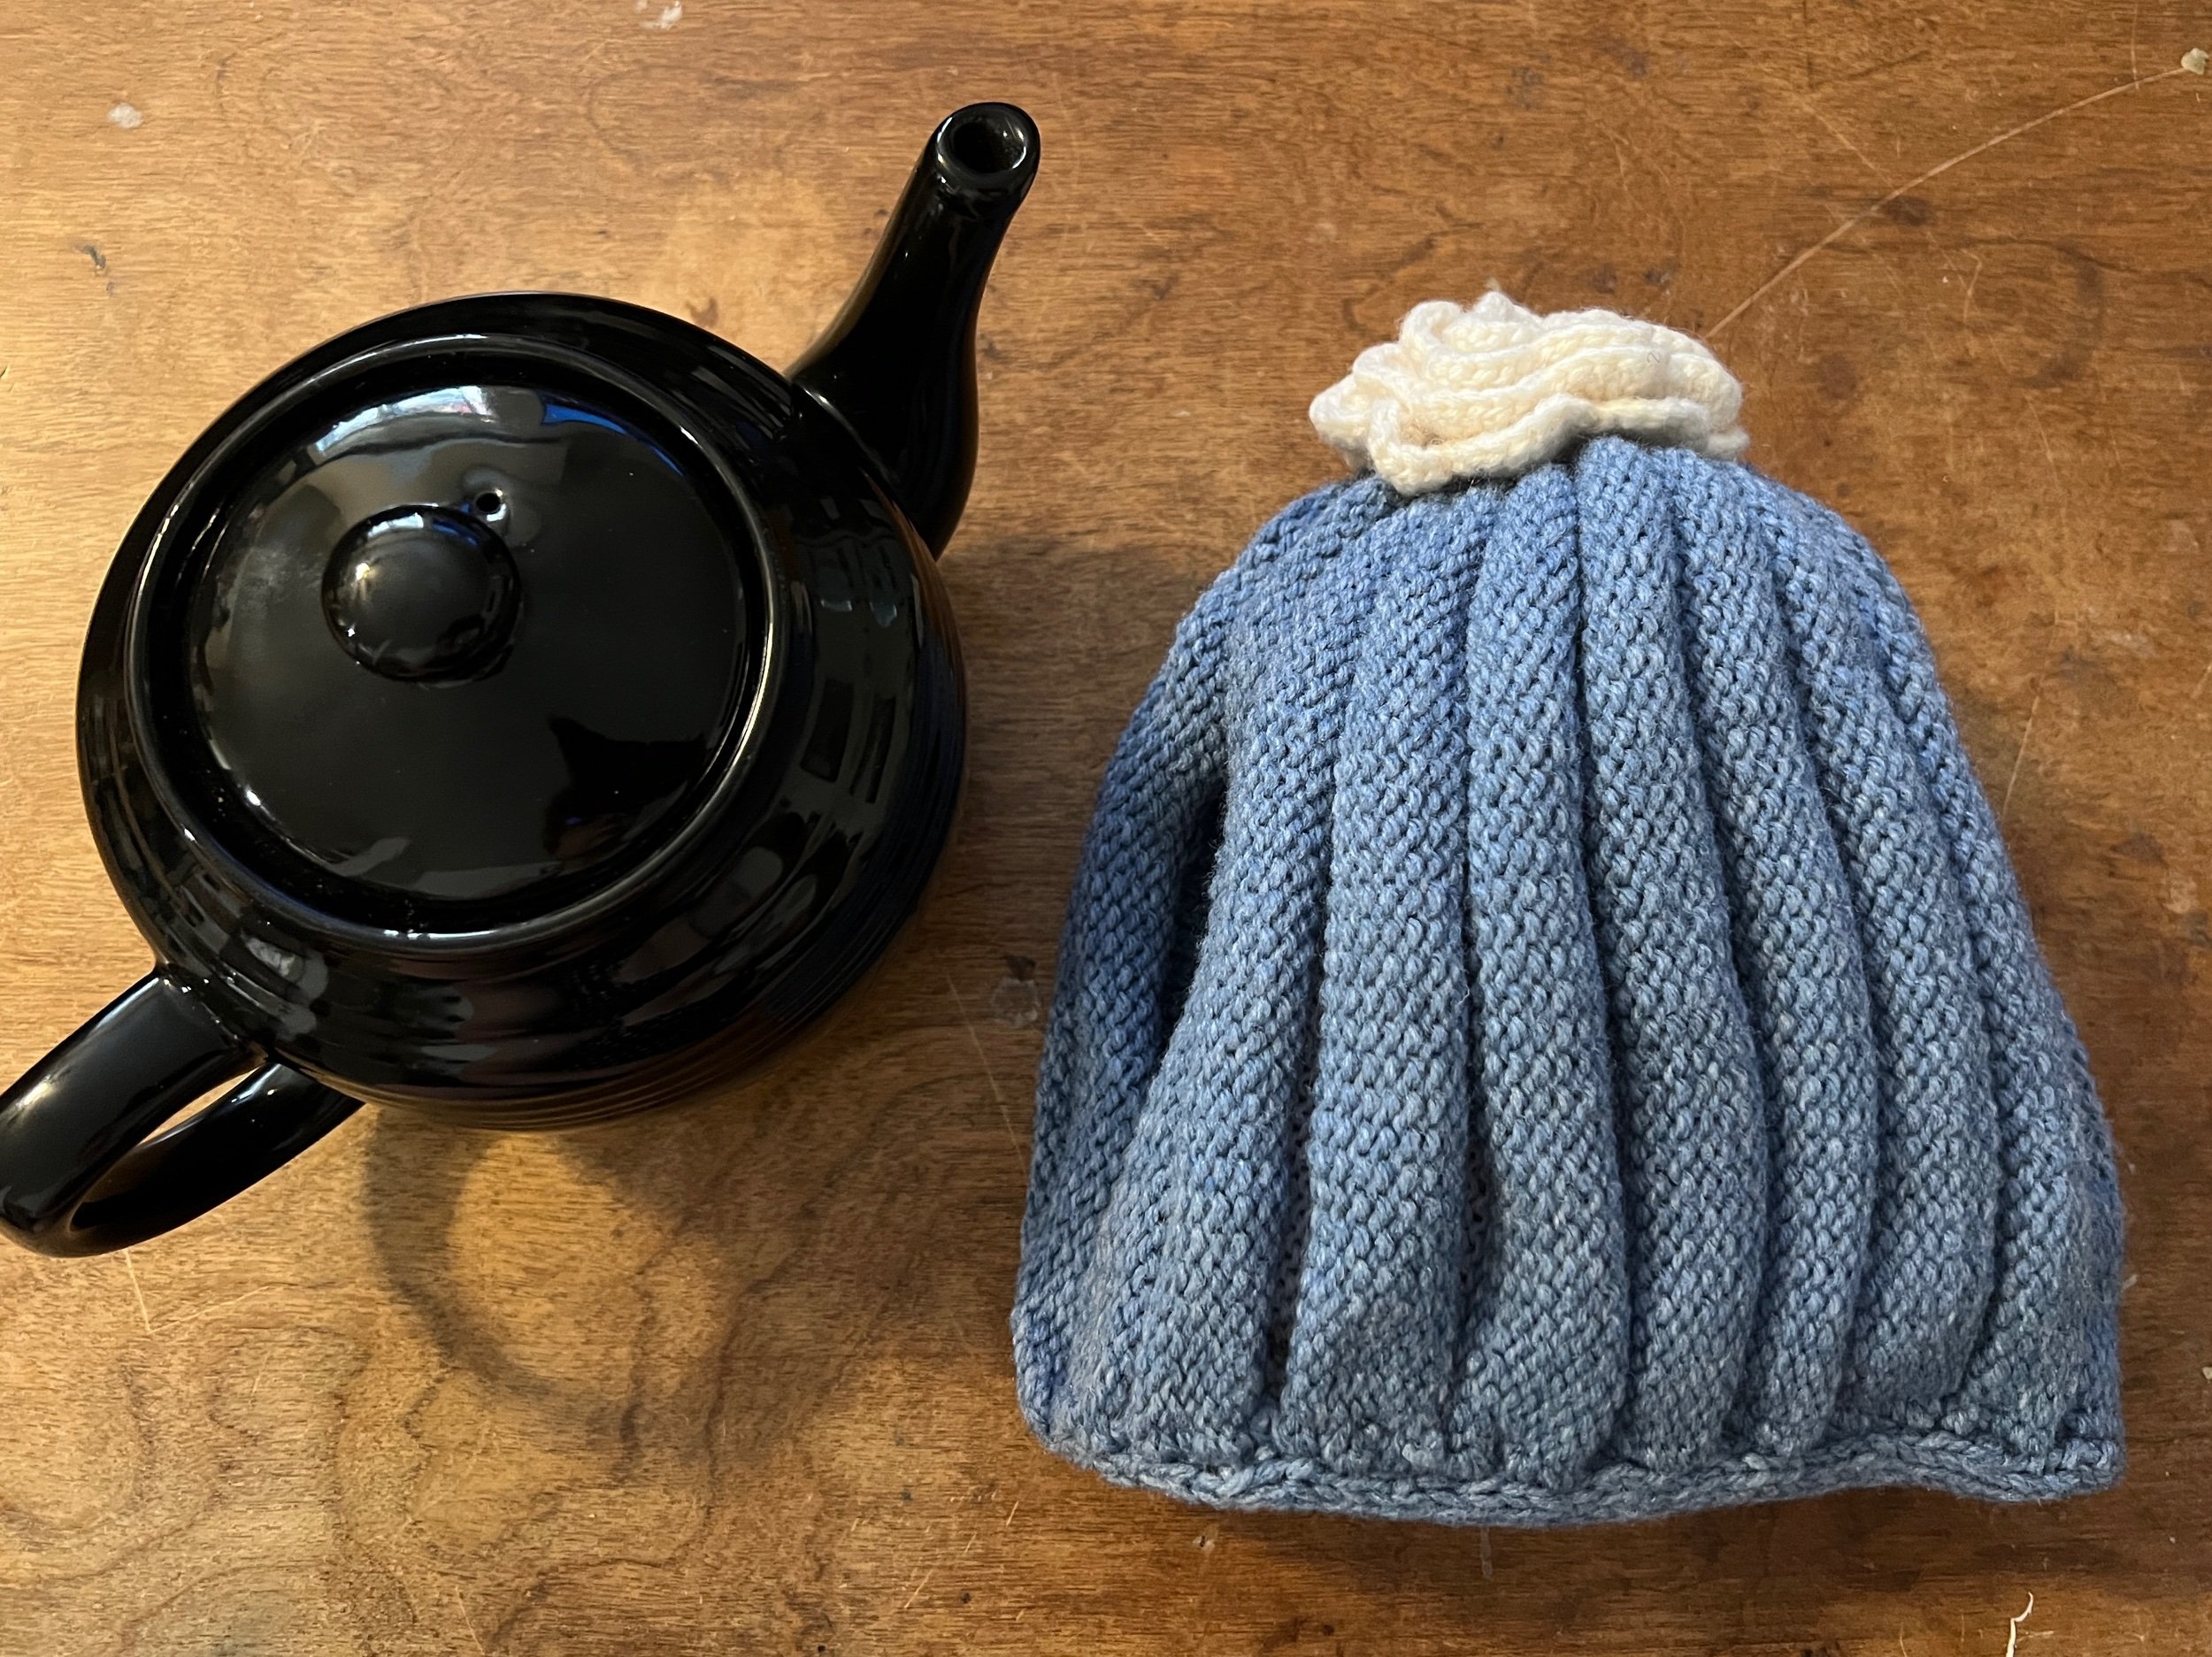
Inspired by a classic vertical pleat style tea cozy I did some online research for ideas.
One partial pattern recommended creating two exterior pleated panels and two interior plain knit panels that were an additional inch taller. The exterior and interior panels were side seamed together first then having two panels - they were only side seamed an inch from the top and two inches from the bottom side seams (leaving spout and handle access). I then came across Roni’s chunky gauge free Raverly pattern.
MEASUREMENTS:
One side of the teapot from spout to handle: 21cm
Height with slight clearance 18cm
BUILDING THE PROJECT ON THE FLAT BED
Using Mast Tension 1, Cam Lever (Carriage) 10 tension for the thicker fiber and 8 for the thinner.
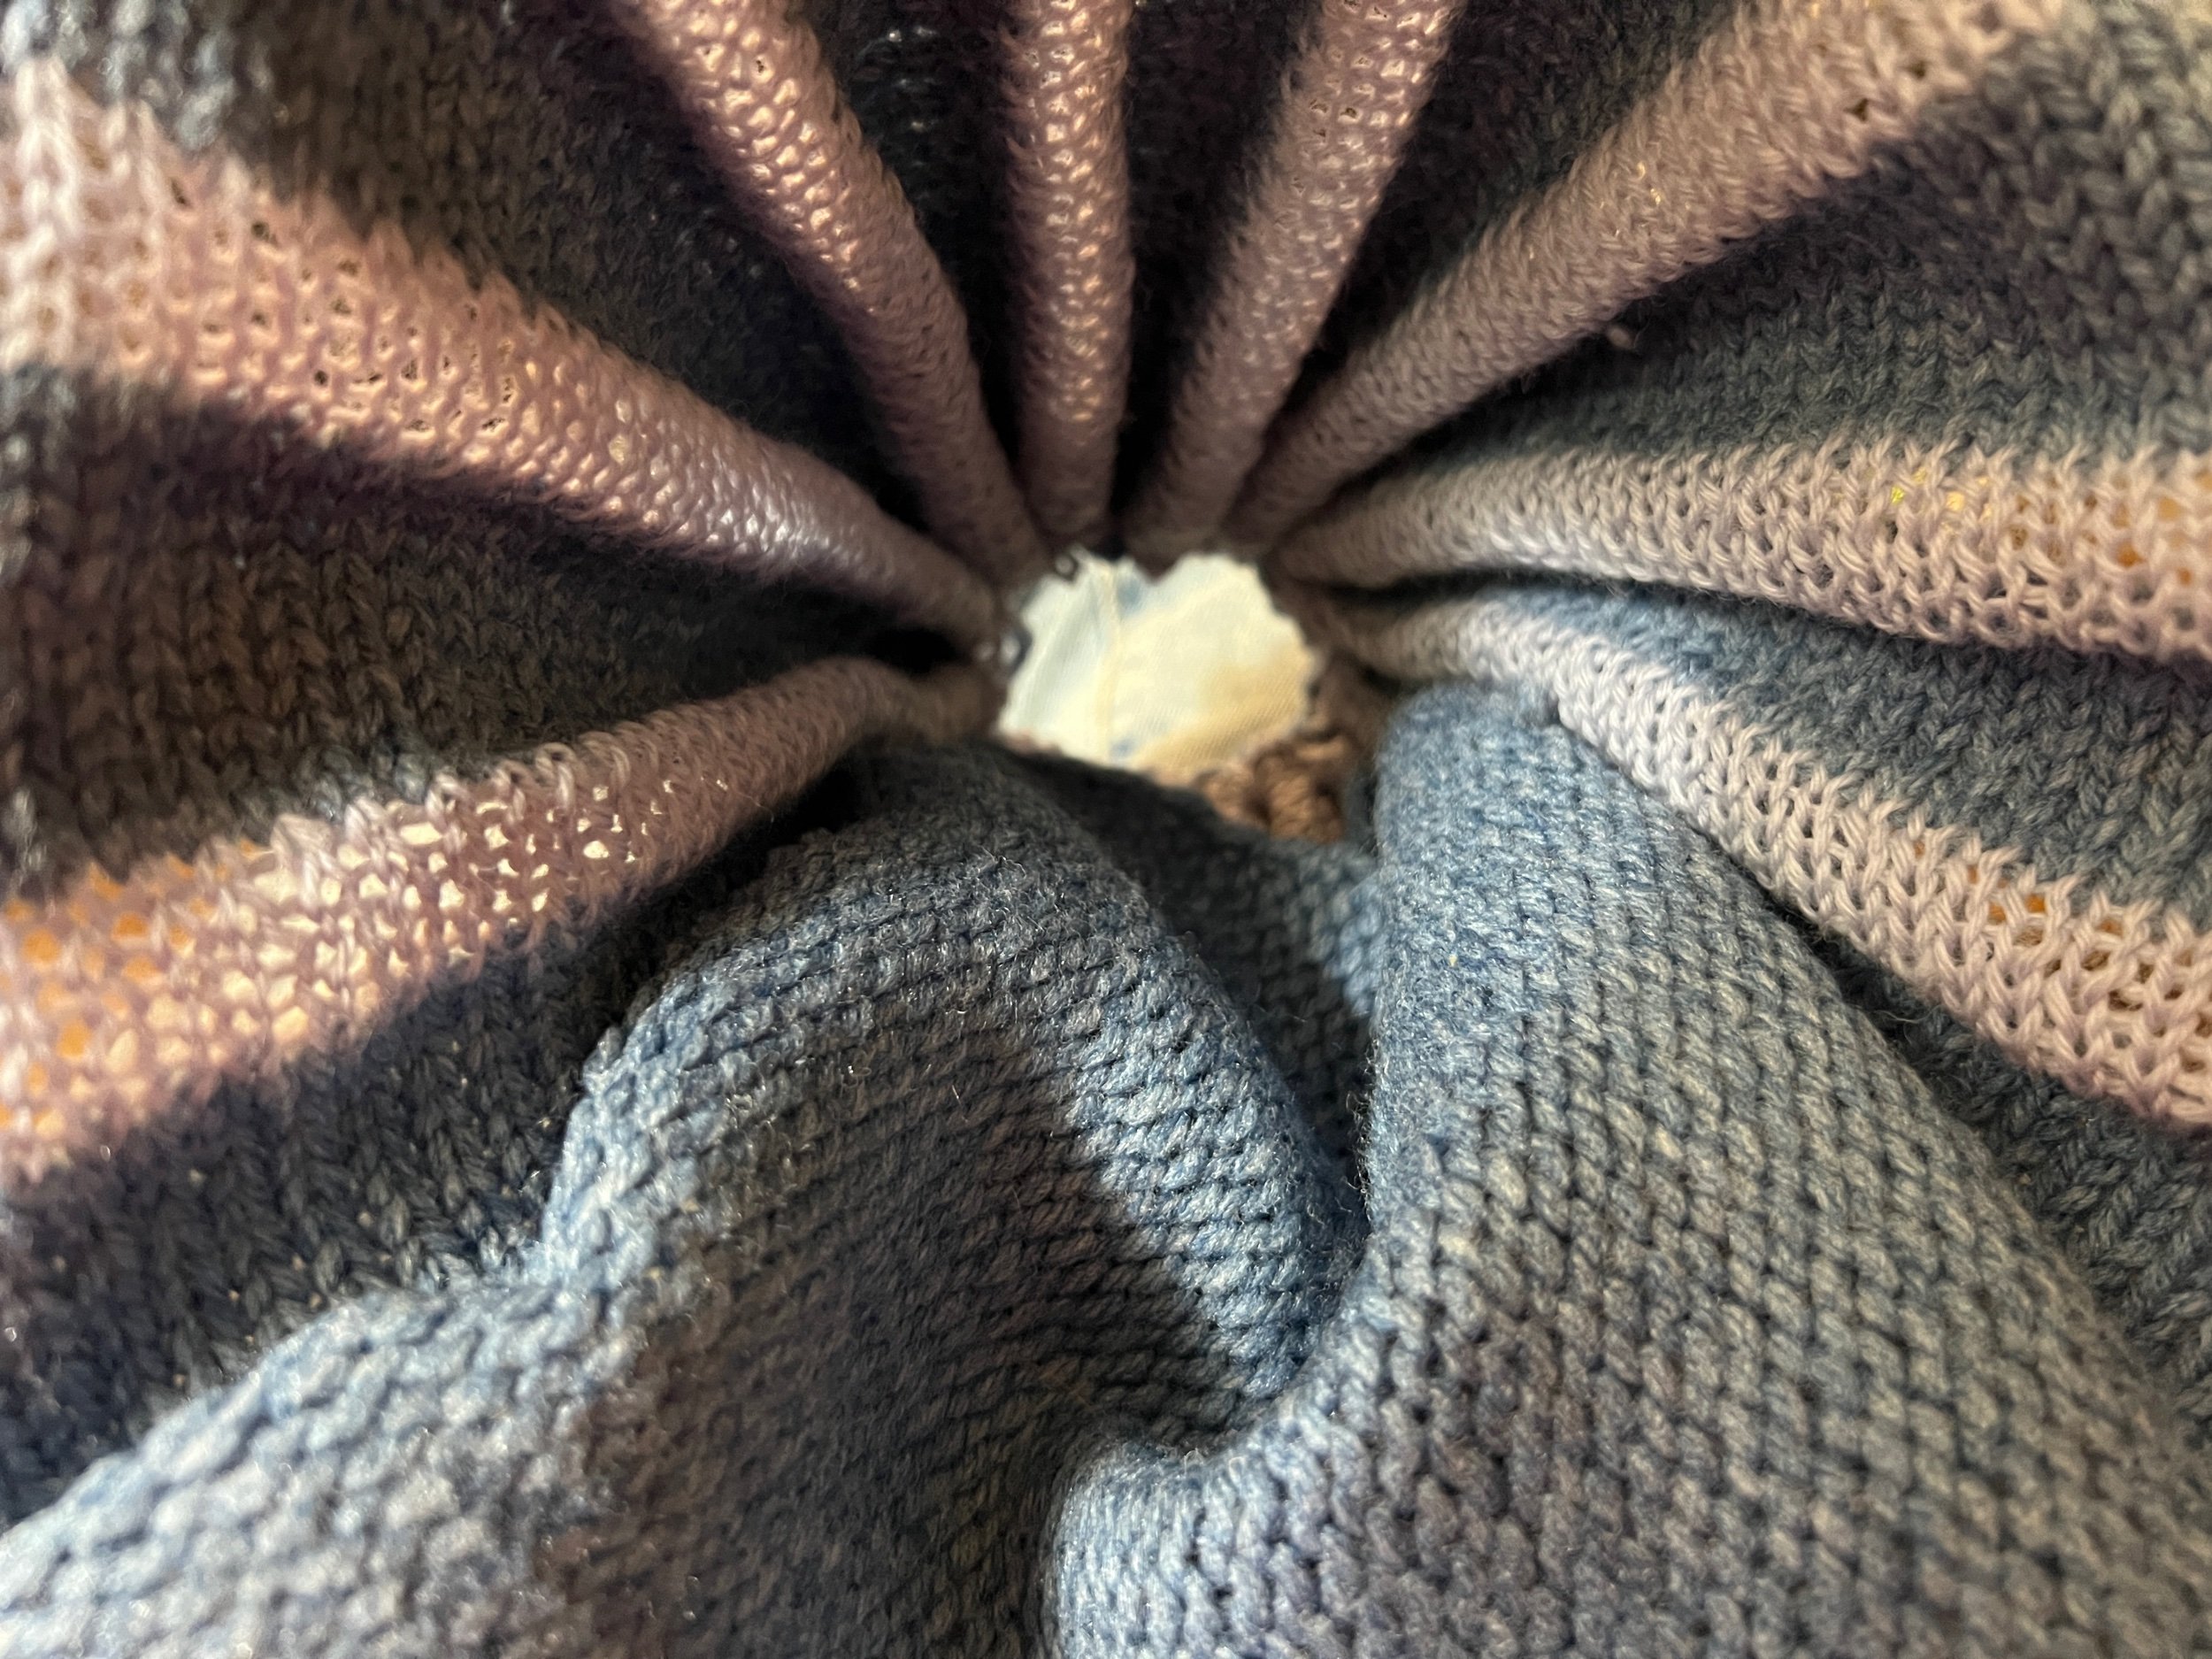
SUMMARY : The outer two panels I created had 10 rows of thicker fiber and 6 of the thinner with 9 blocks of the thicker fiber. I open cast on using scrap (every 2nd needle up to the 76 needle mark - 38 actual needles). I will then create two dense panels for the liner. This will allow for pleats from the purl side.
USING right side of 0 pull out every 2nd needle to 76 (38 needles). Open Cast On with scrap then switch to dark blue. Work 10 rows with assist on tension to ensure all edge stitches are even.
Switch to lighter color blue and work 6 rows.
Repeat until 9 thicker blocks have been created. Switch to scrap yarn, work a few rows and take the project off the machine..
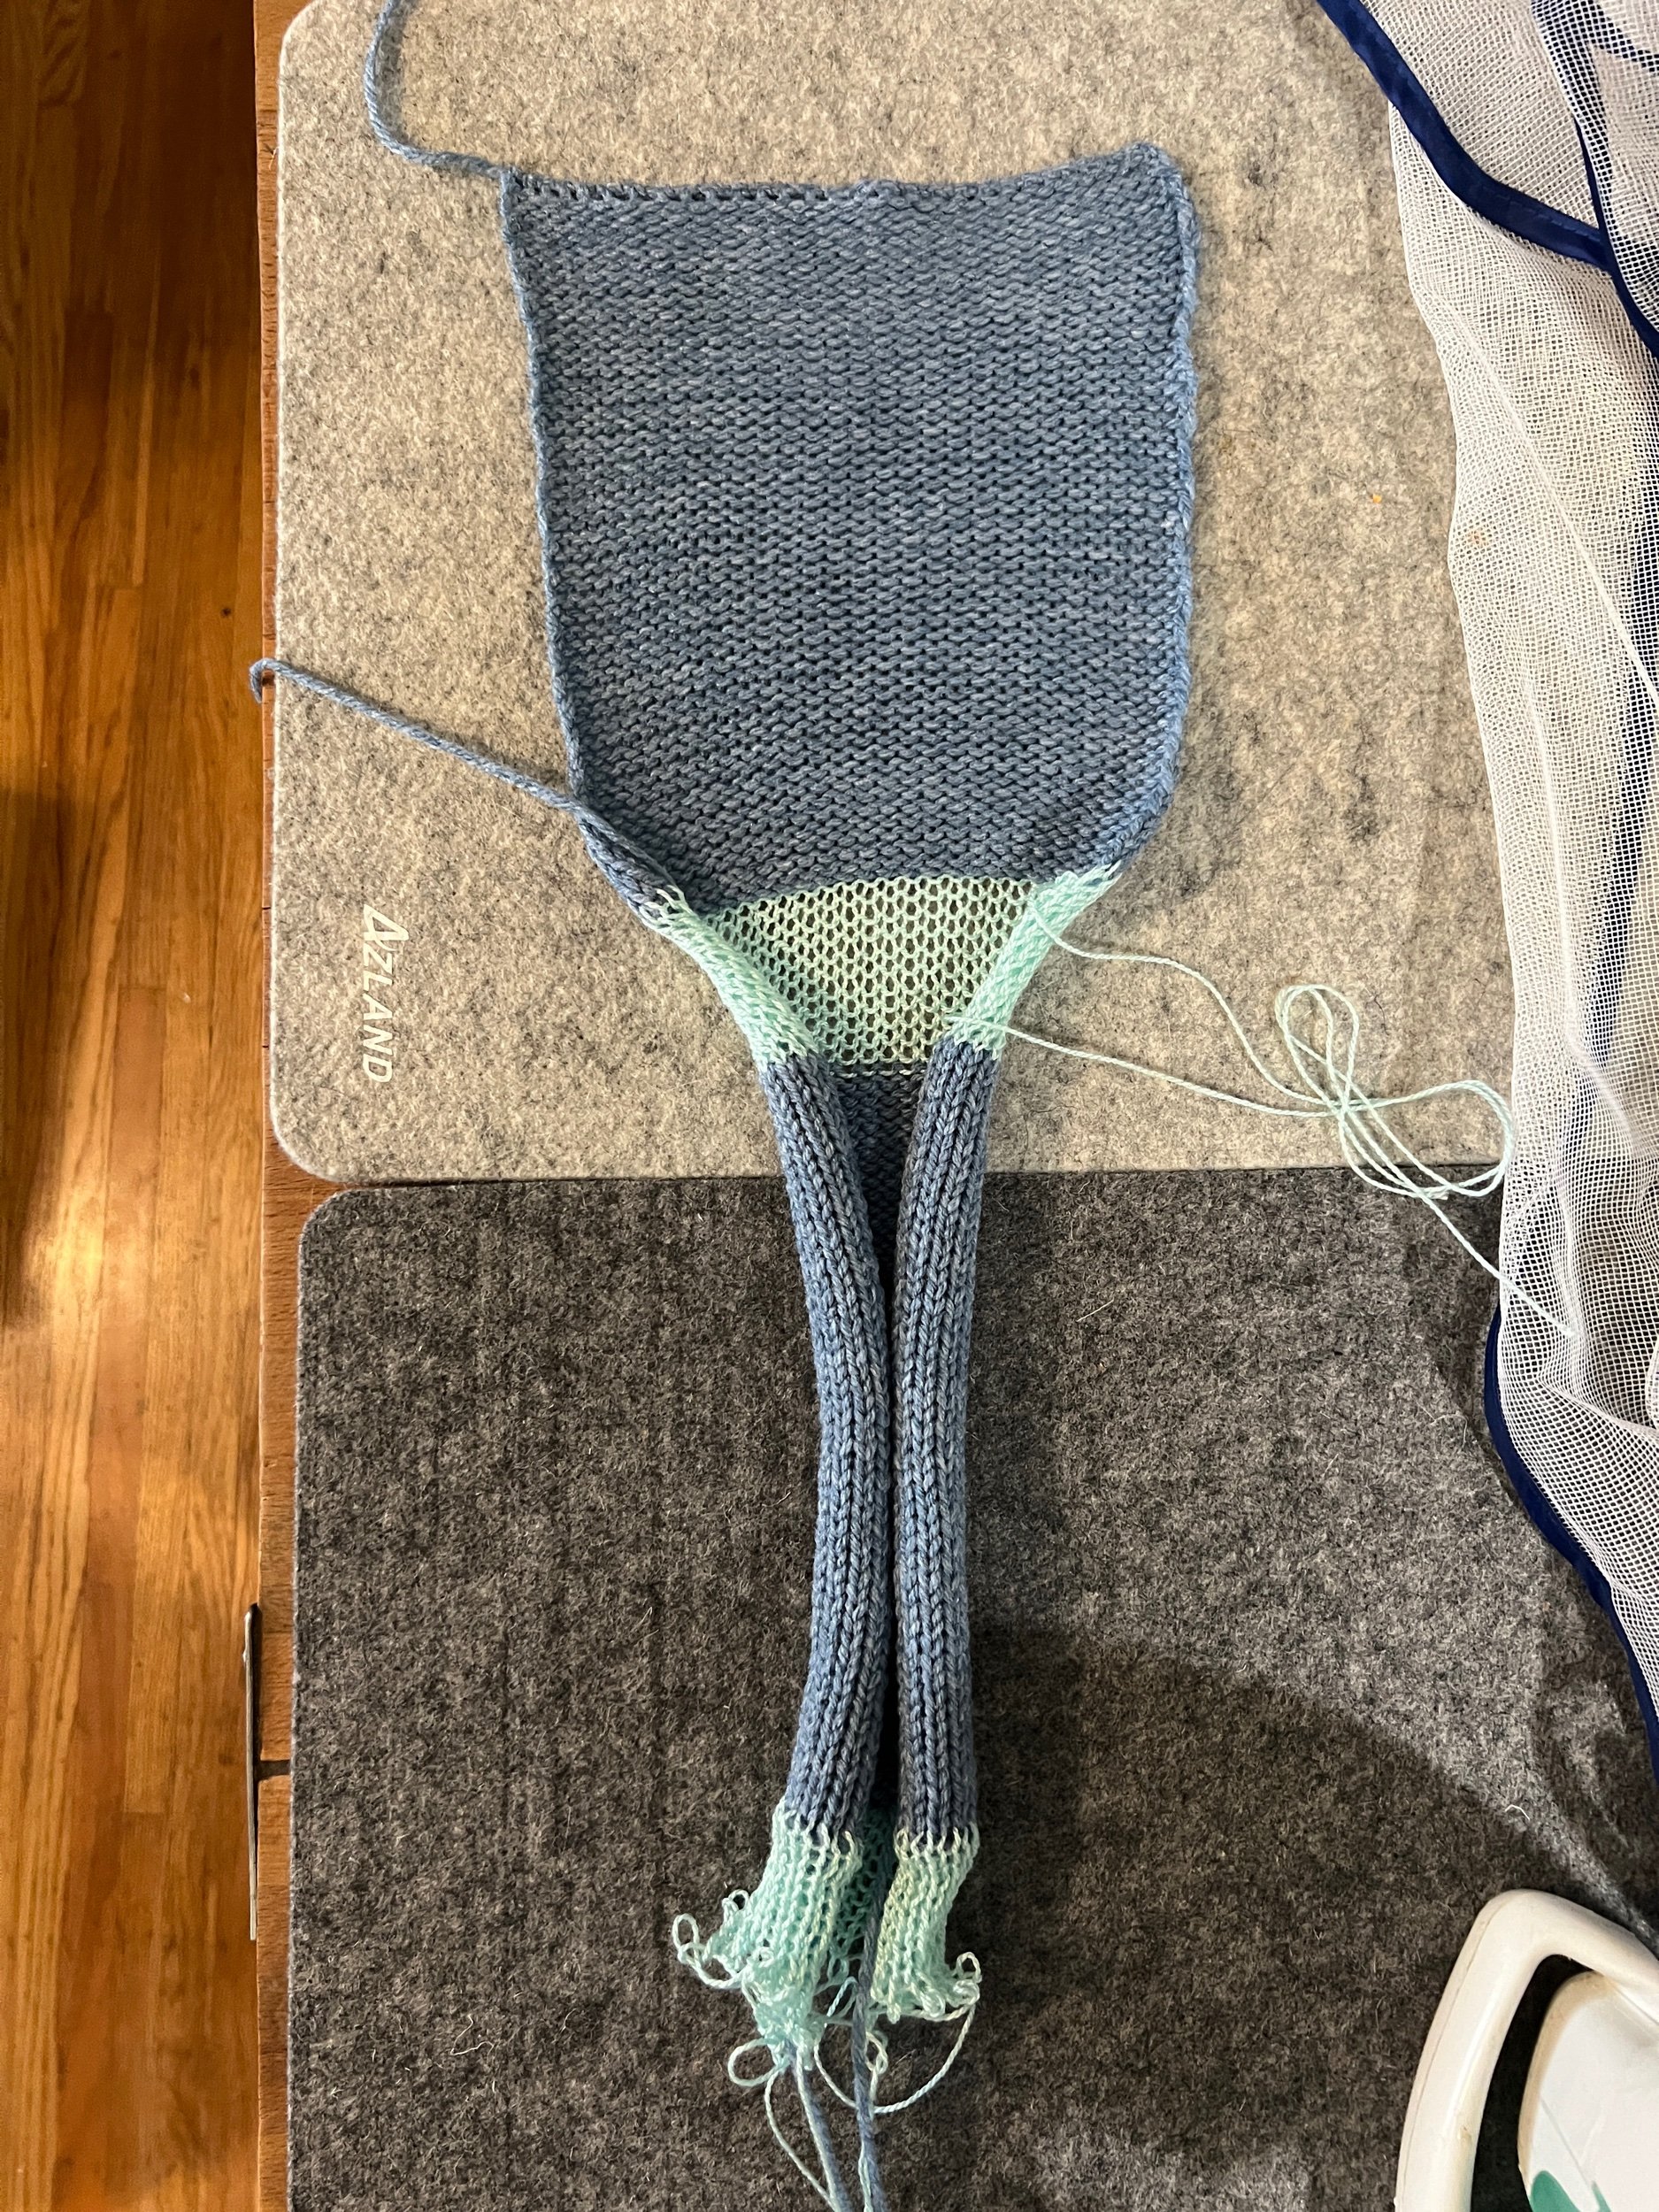
NEXT CREATE A PARTIAL LINER:
Cast on again using every second needle (using the 60 needle mark on the right side of zero - 30 actual needles). Scrap cast on then e-wrap the thicker yarn.
Work 50 rows. Make a long project tail, add many rows of scrap and then start again with the ewrap on the project yarn for the second panel (liner). Cast off with project yarn.


Assembling
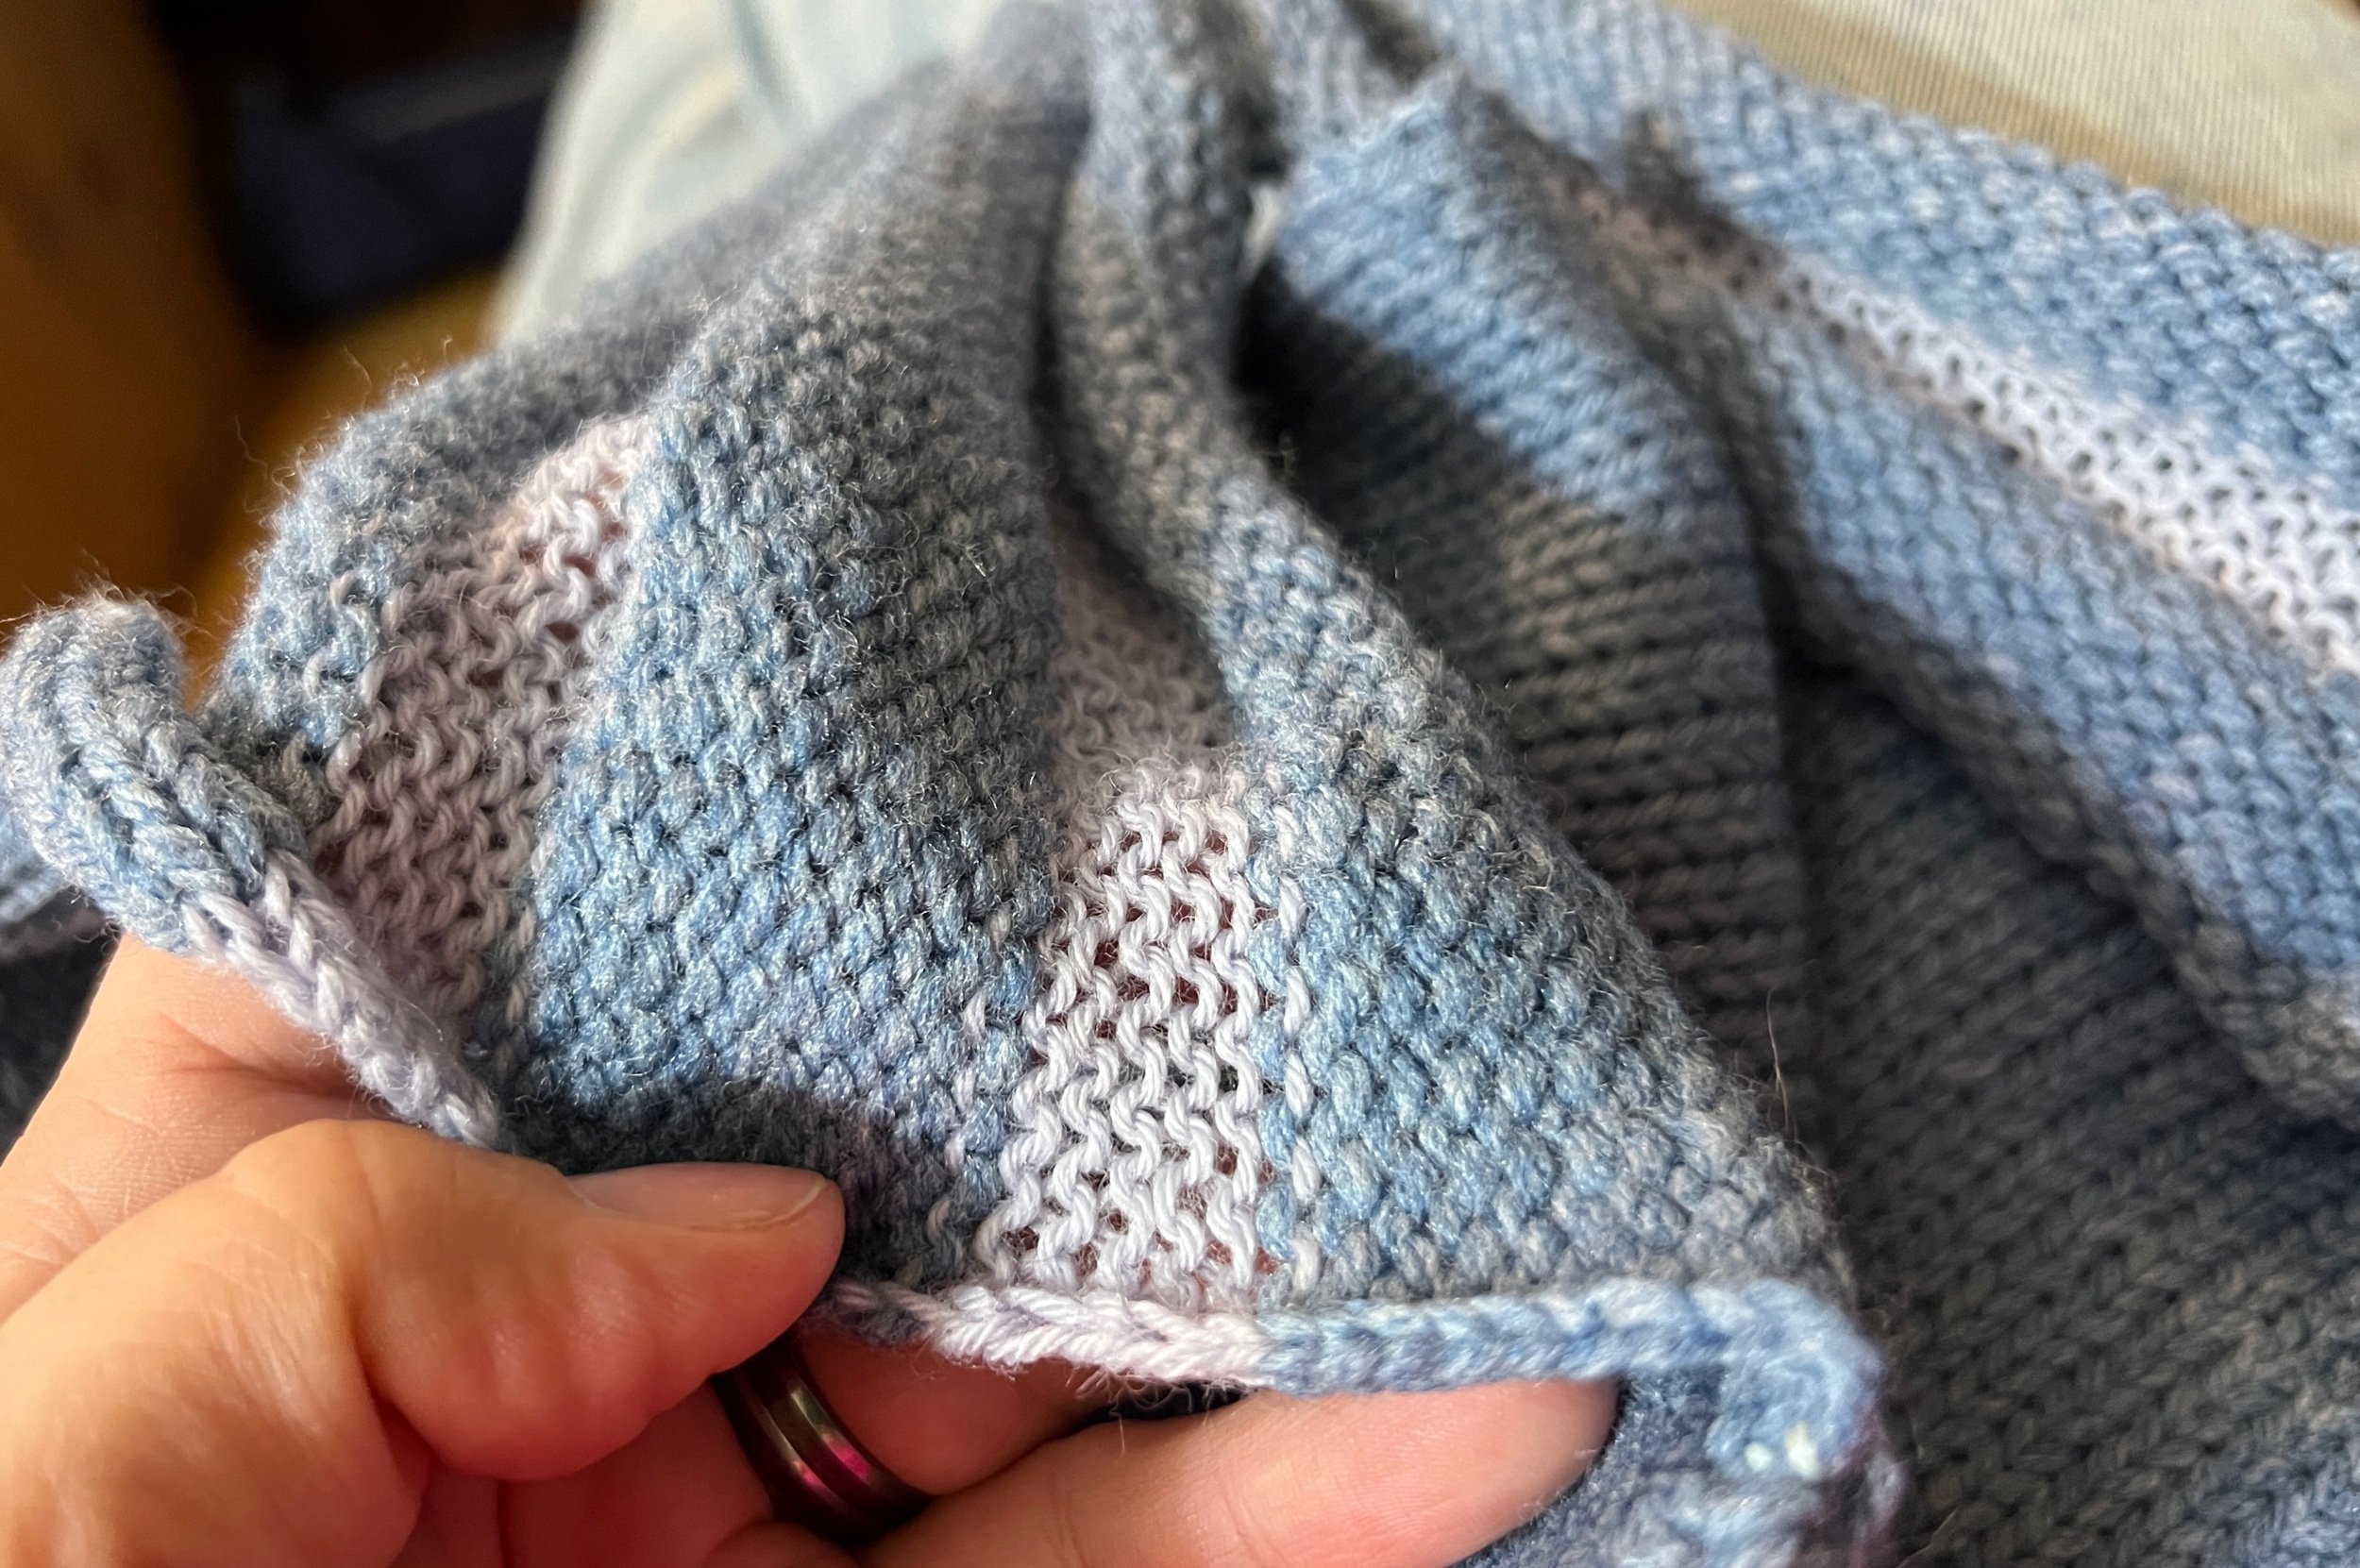
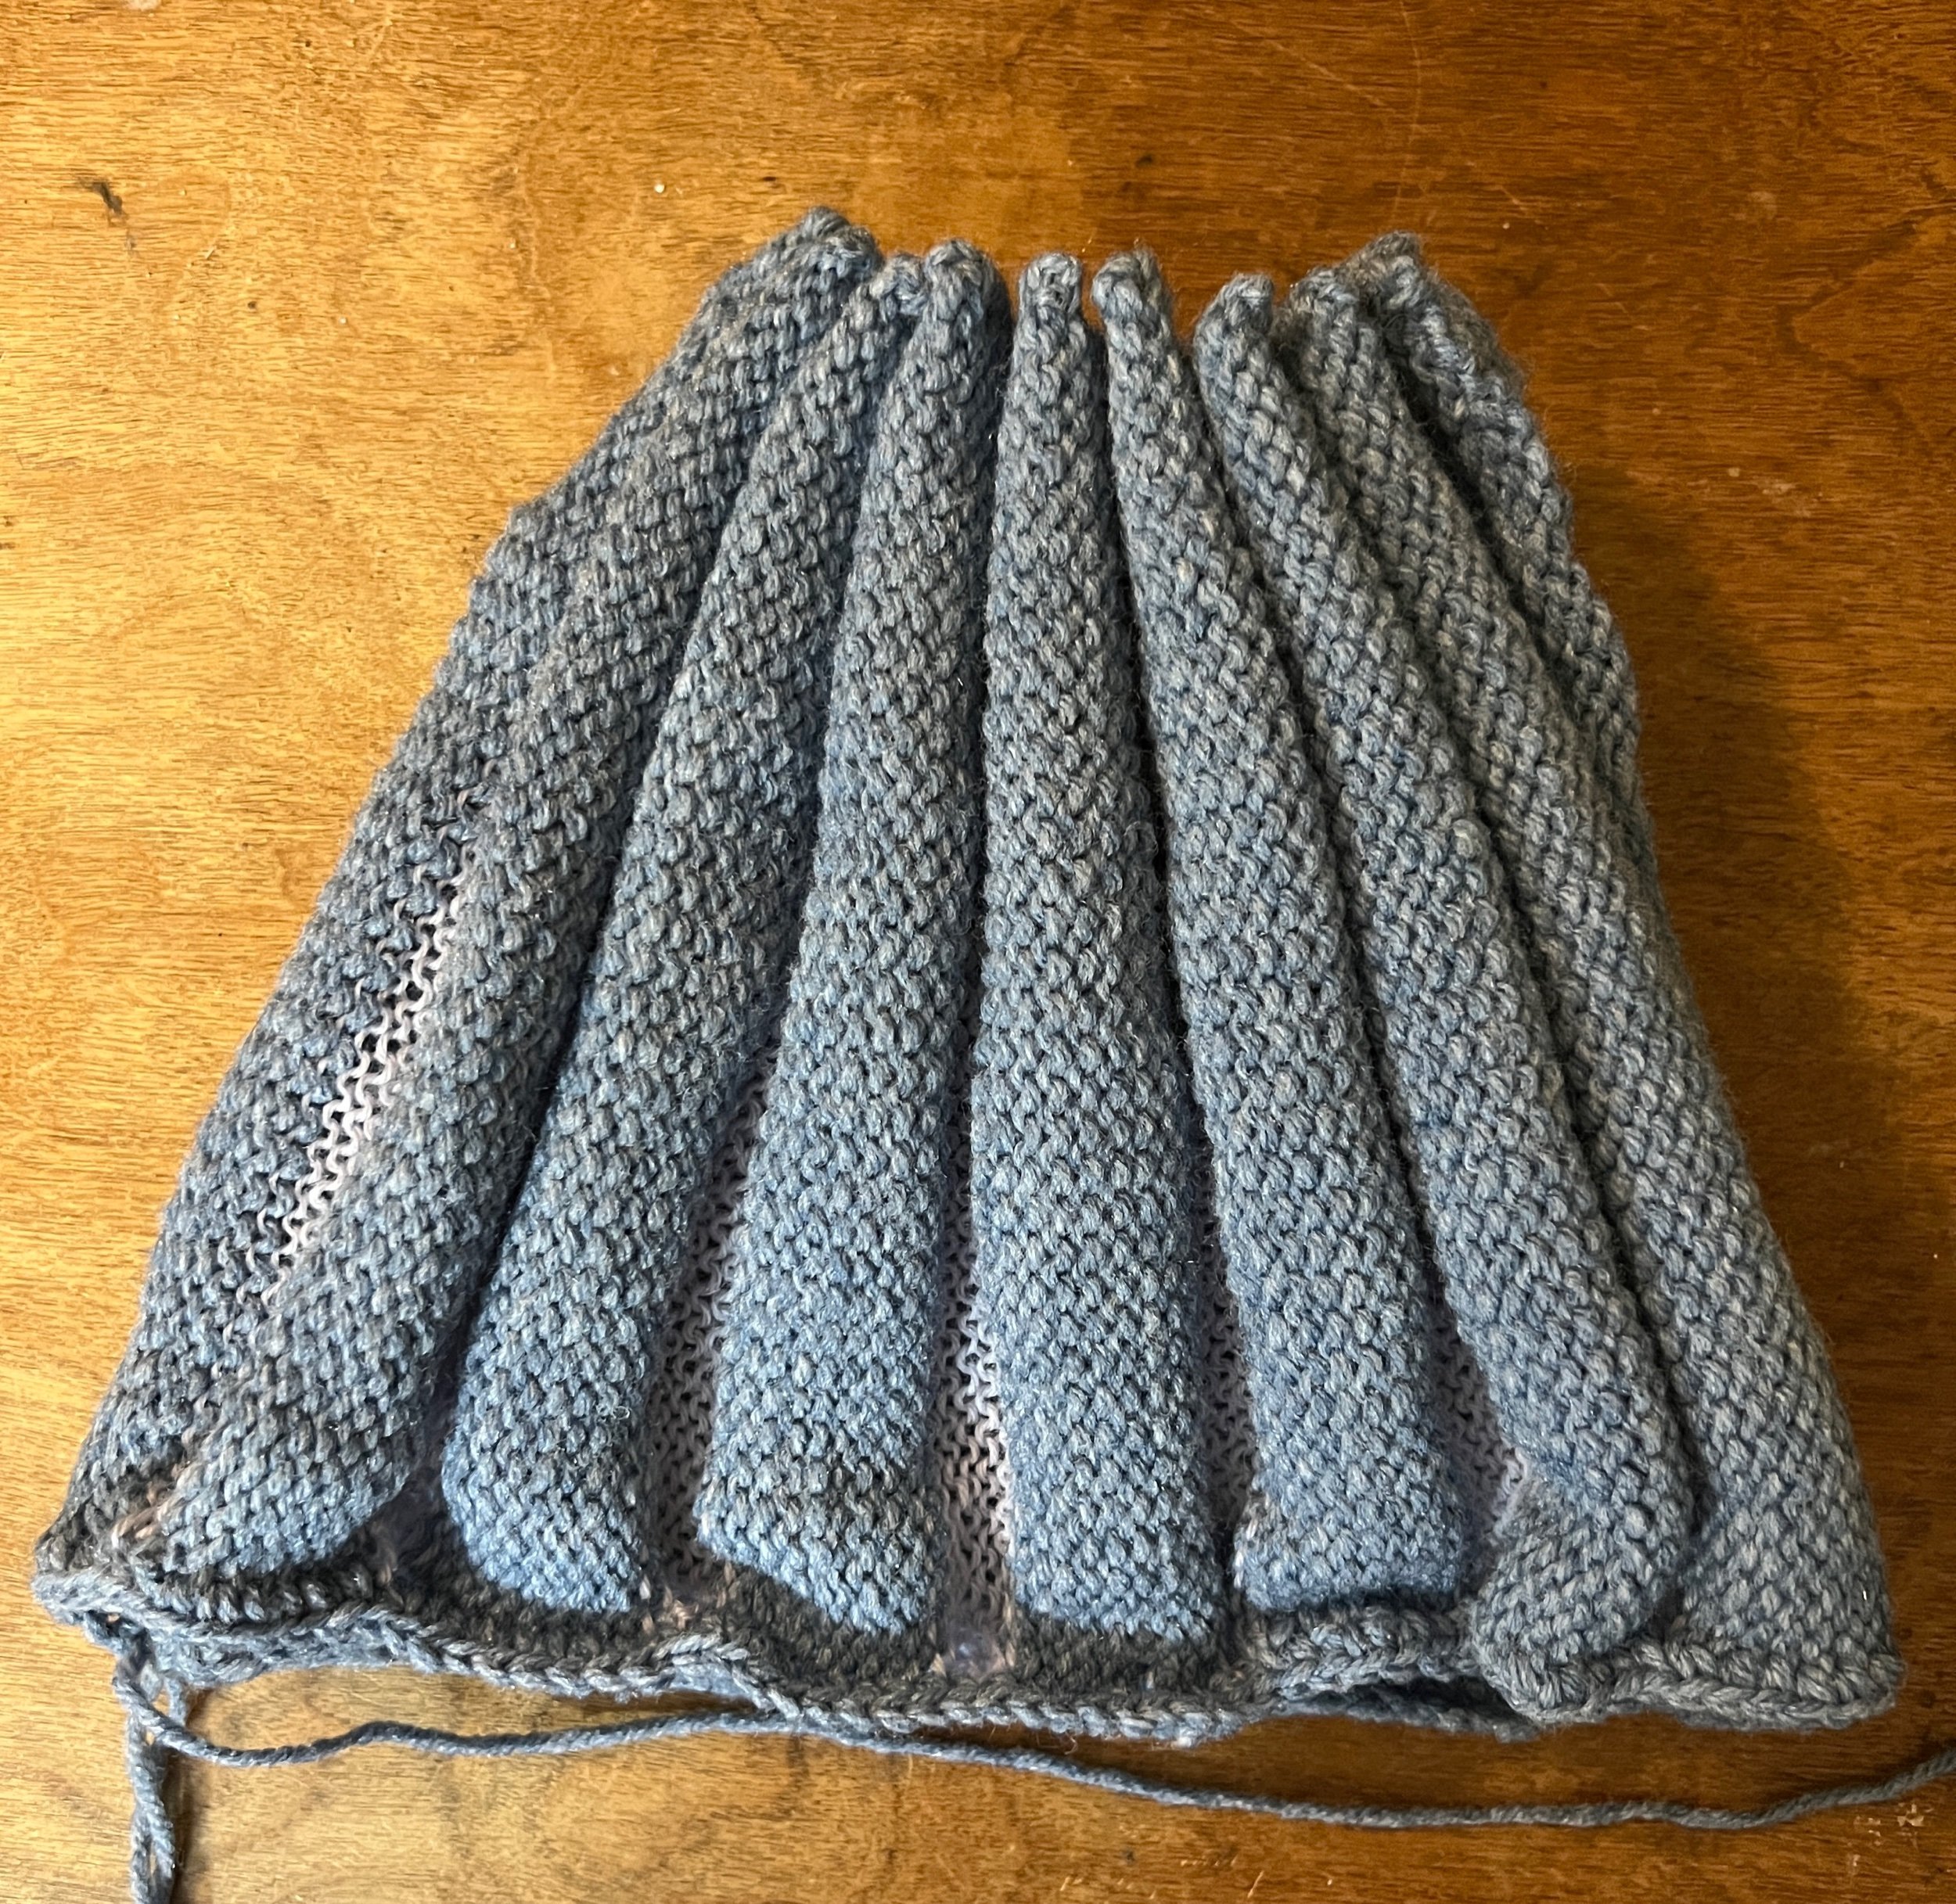
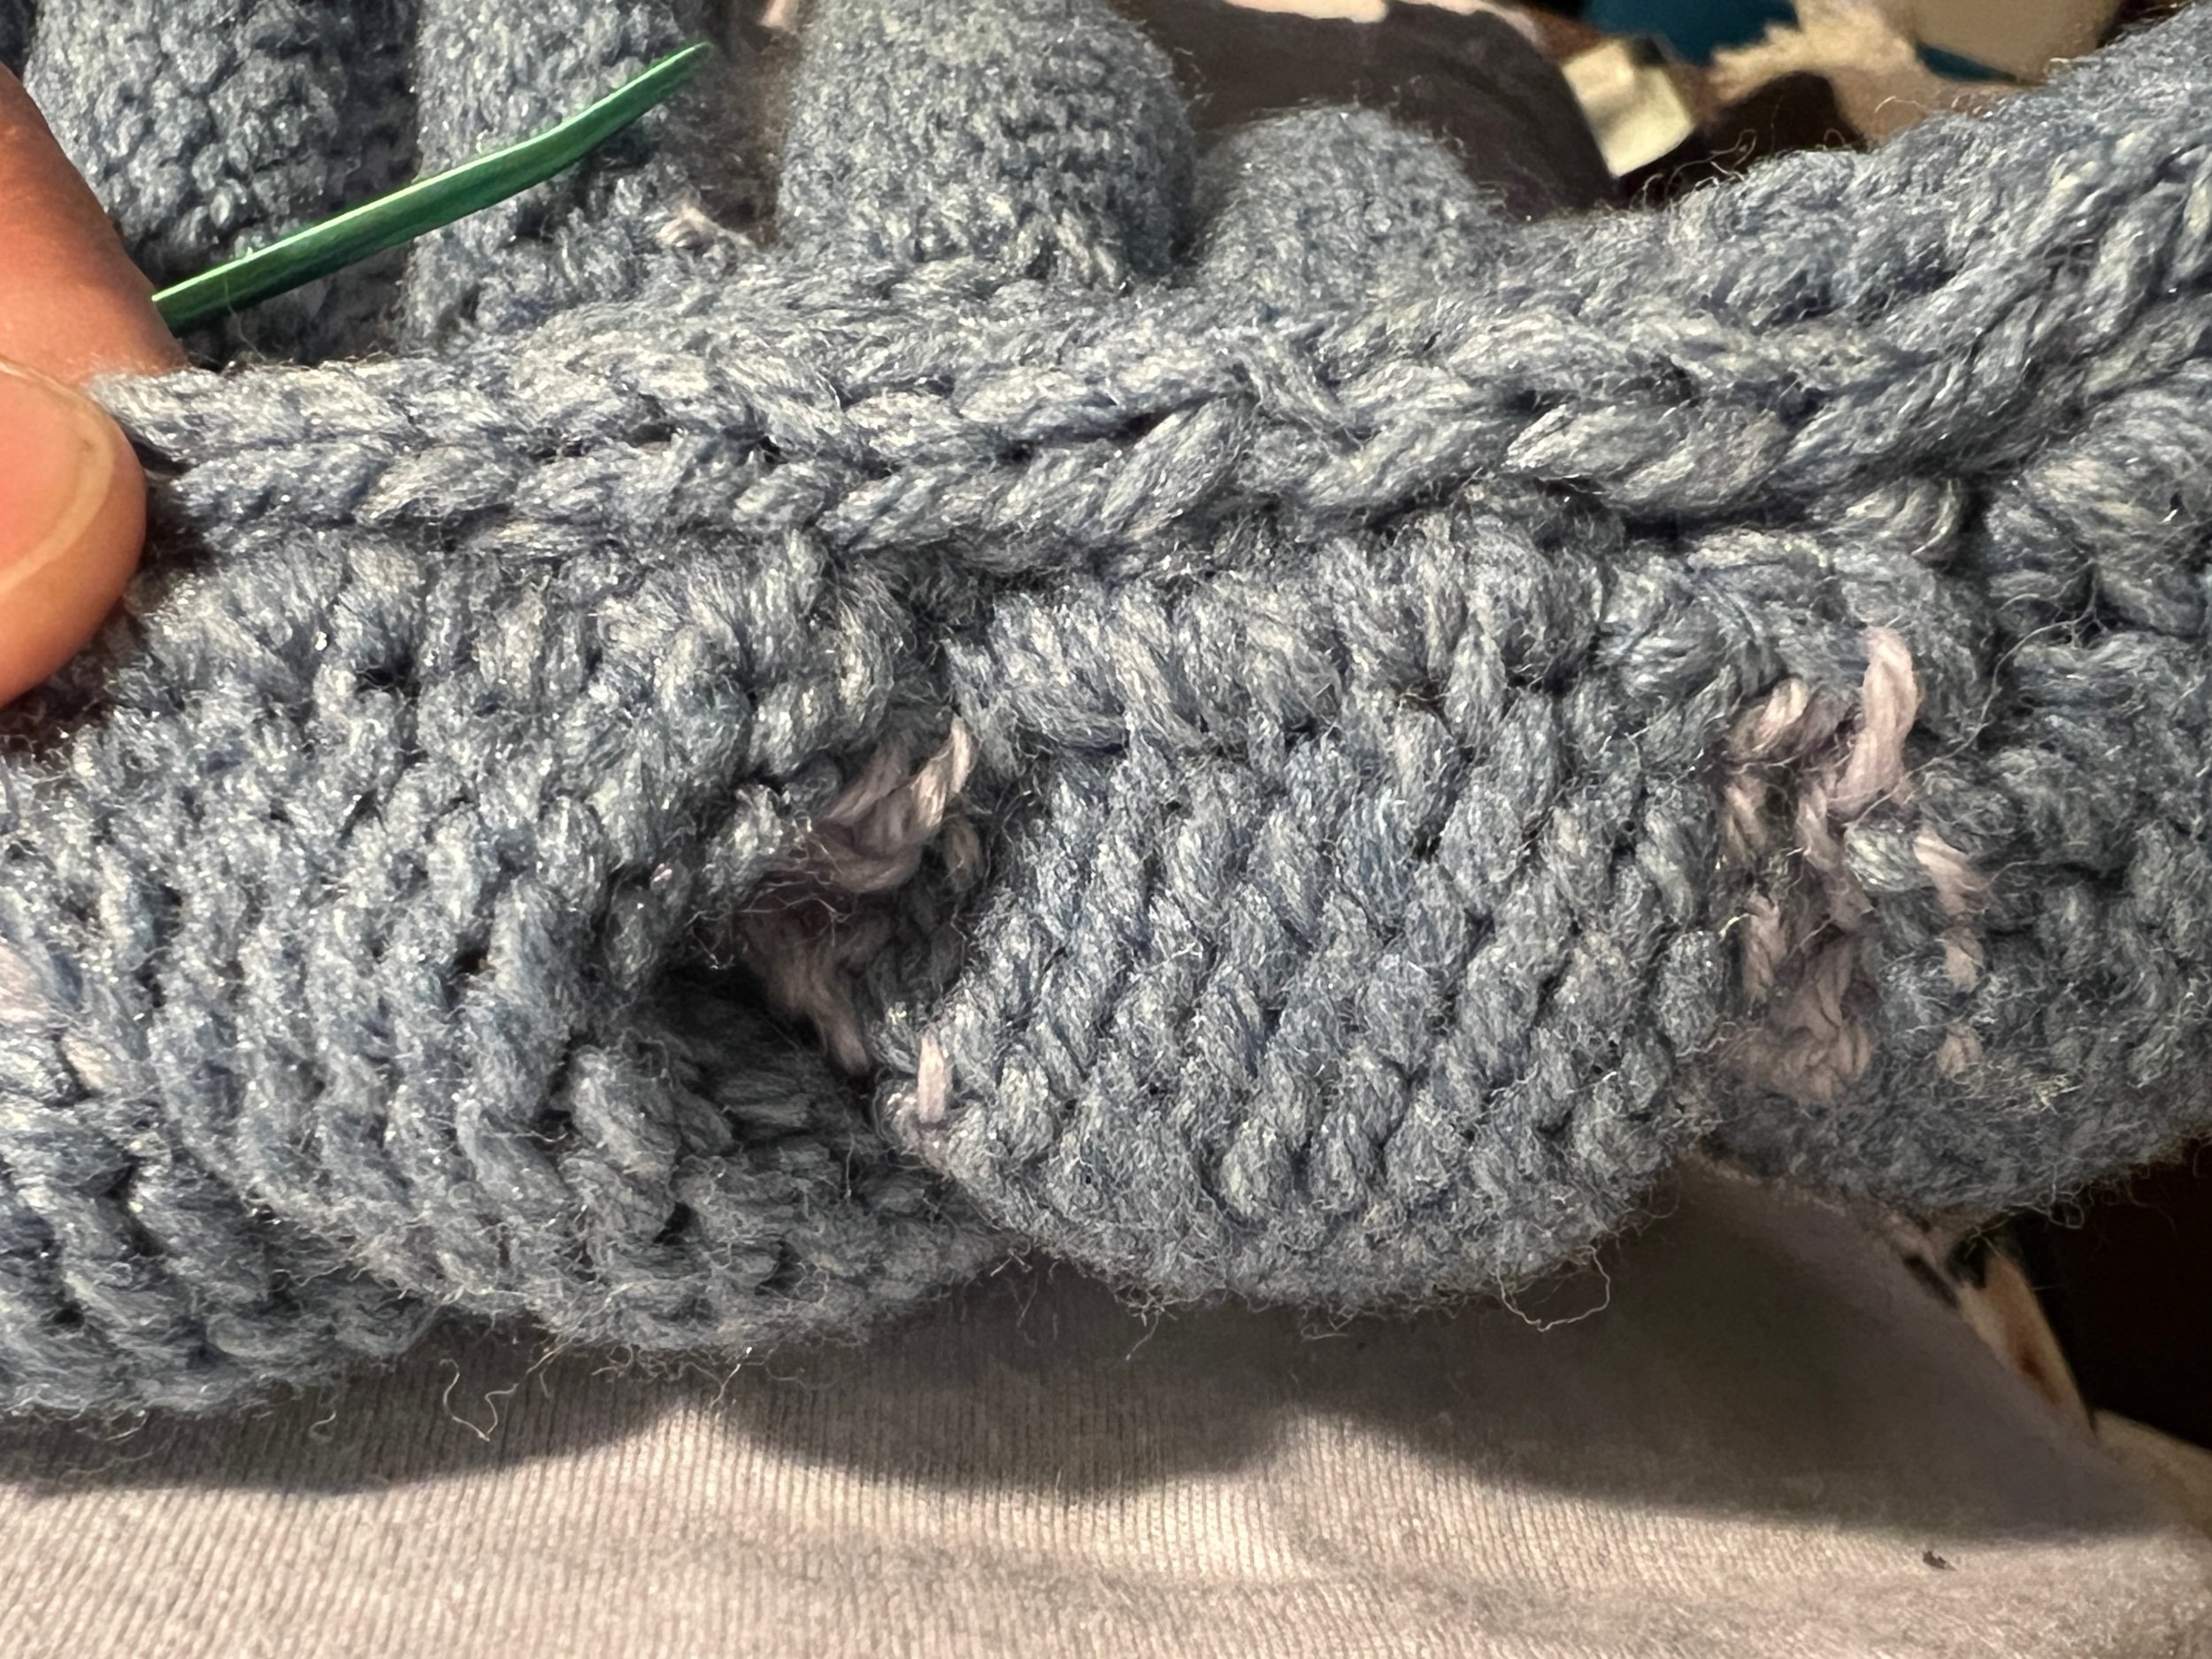
Once all the pieces are off the machine: two flat regular knitted liber pieces and two pieces which each have 9 thicker yarn (10 worked rows) stripes and 8? Thinner yarn (6 row stripes).
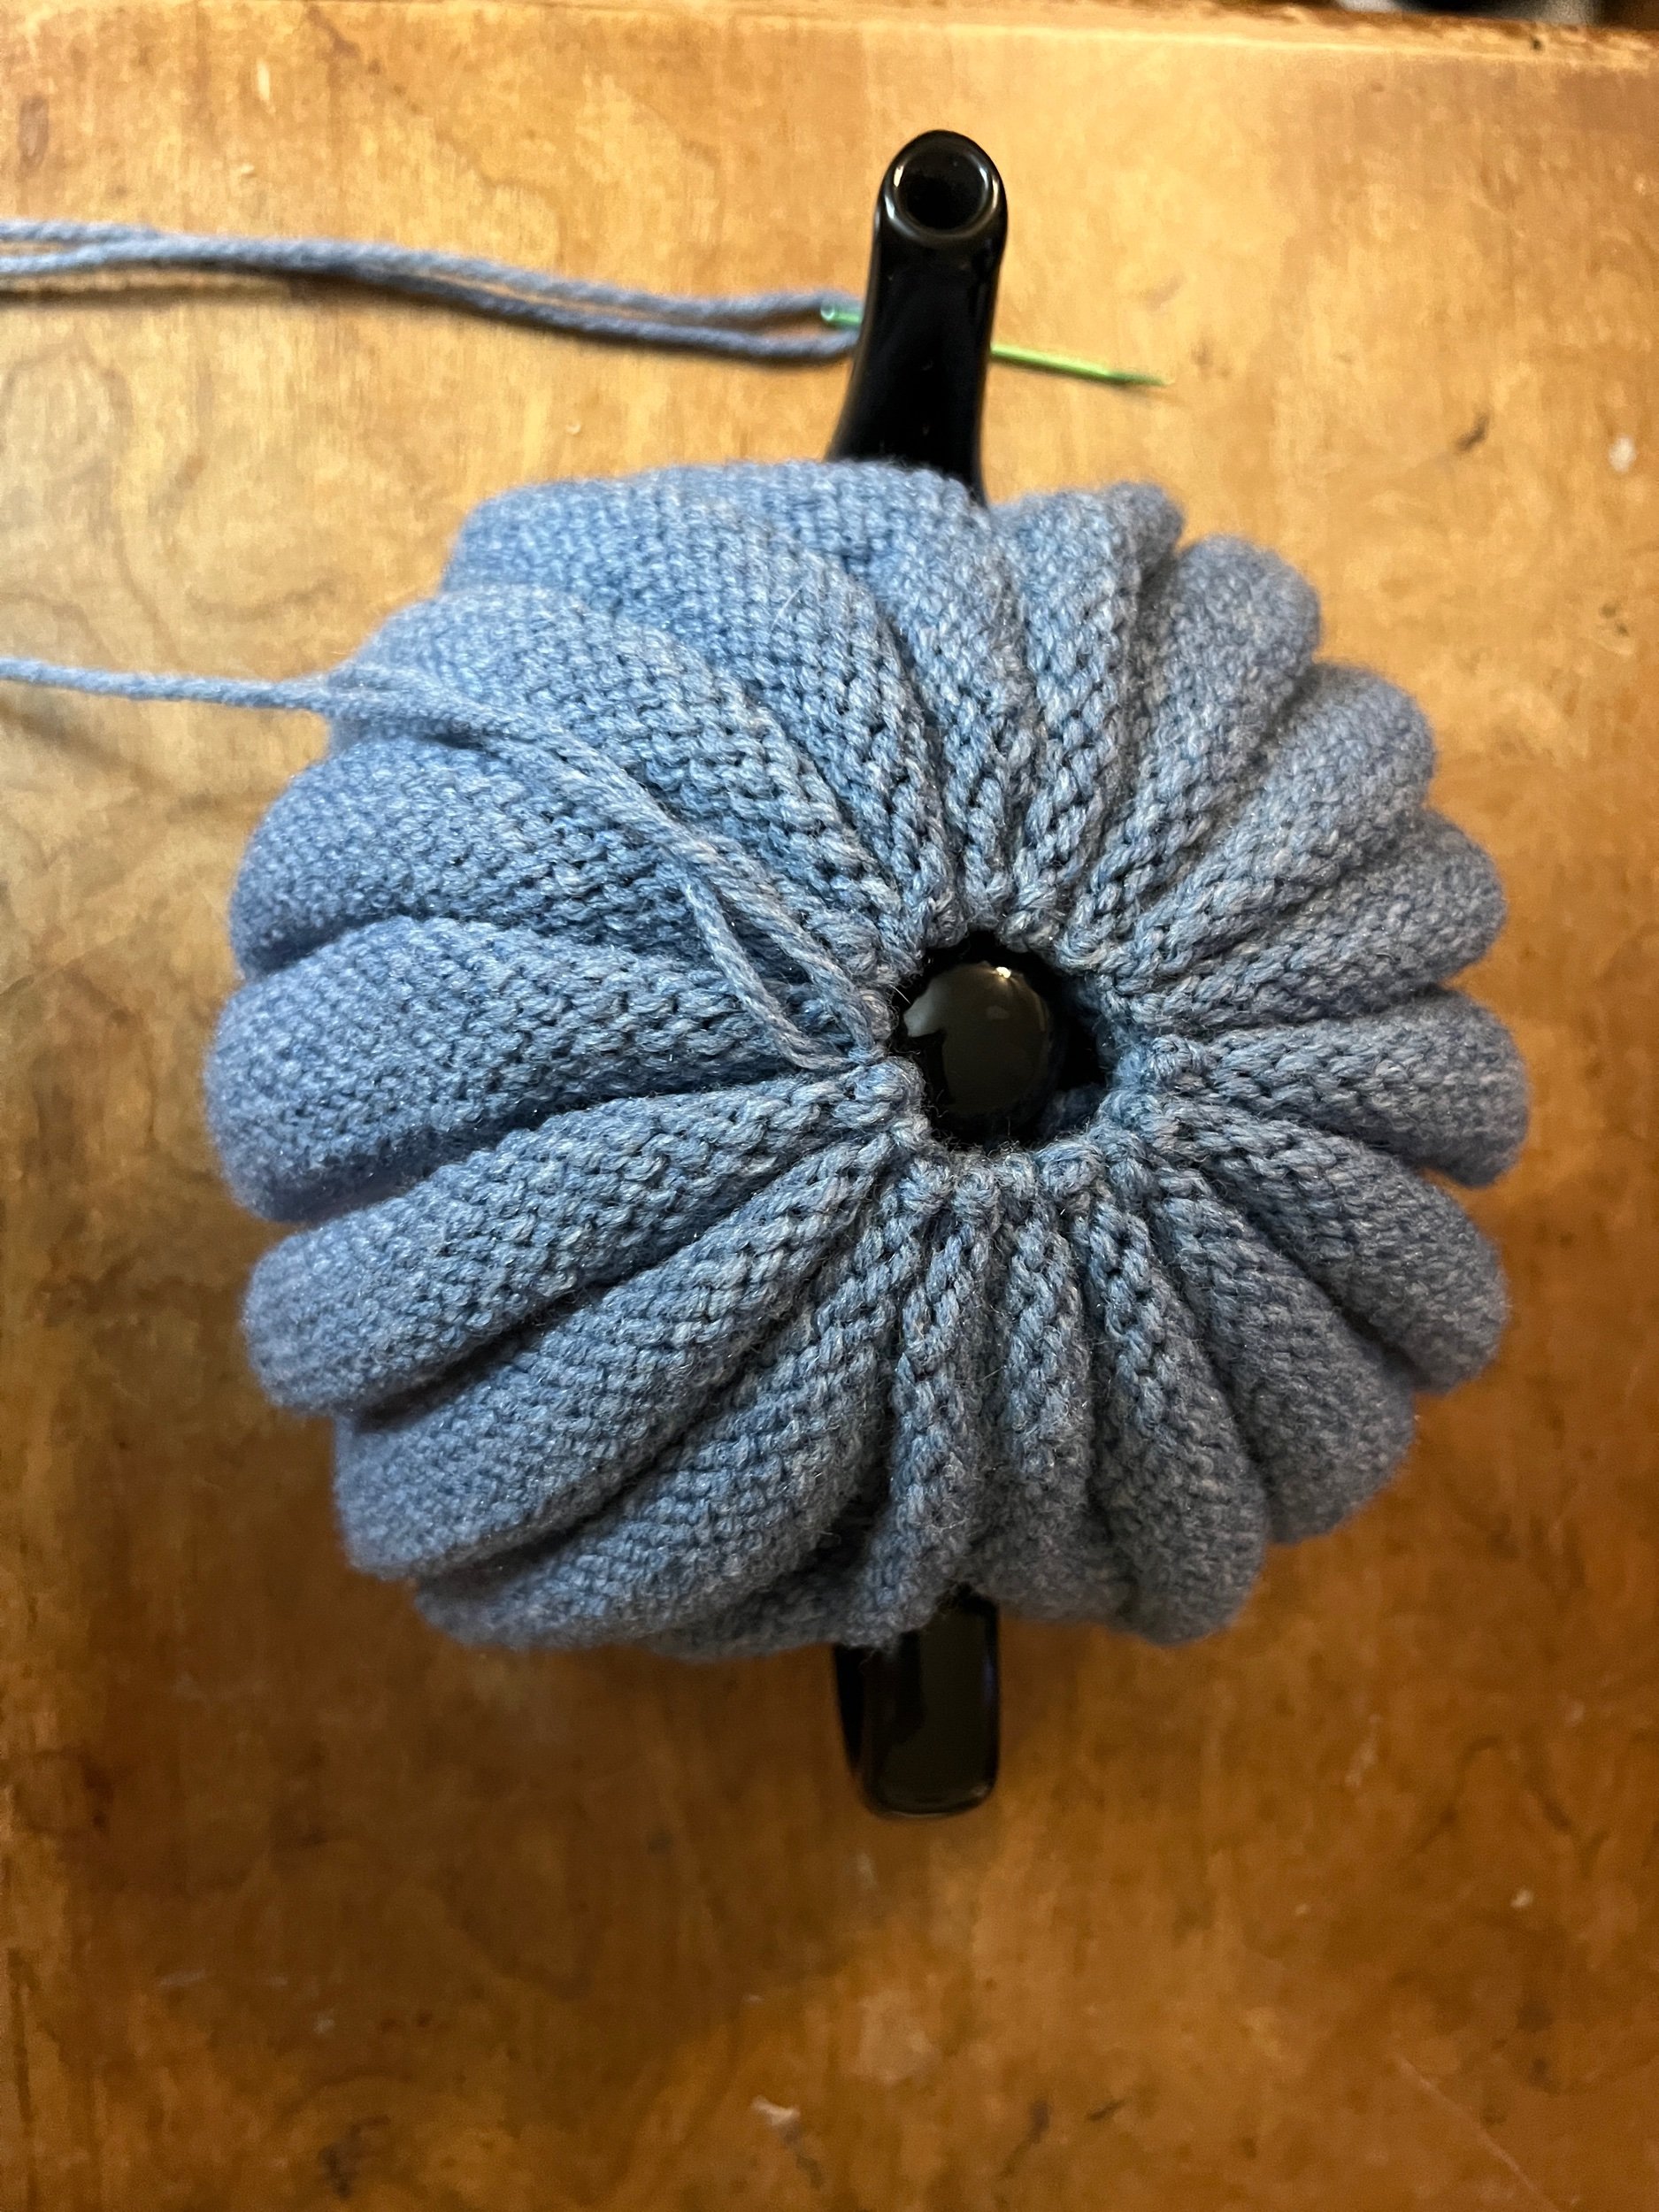
The striped pieces were made this way as they will sit nicer on the Purl side to work as pleats.
I fully steam ironed the non-striped pieces and carefully only partially steamed one side end edge of each striped piece (to ensure it doesn’t flattern completely and loose it’s natural pleating effect)
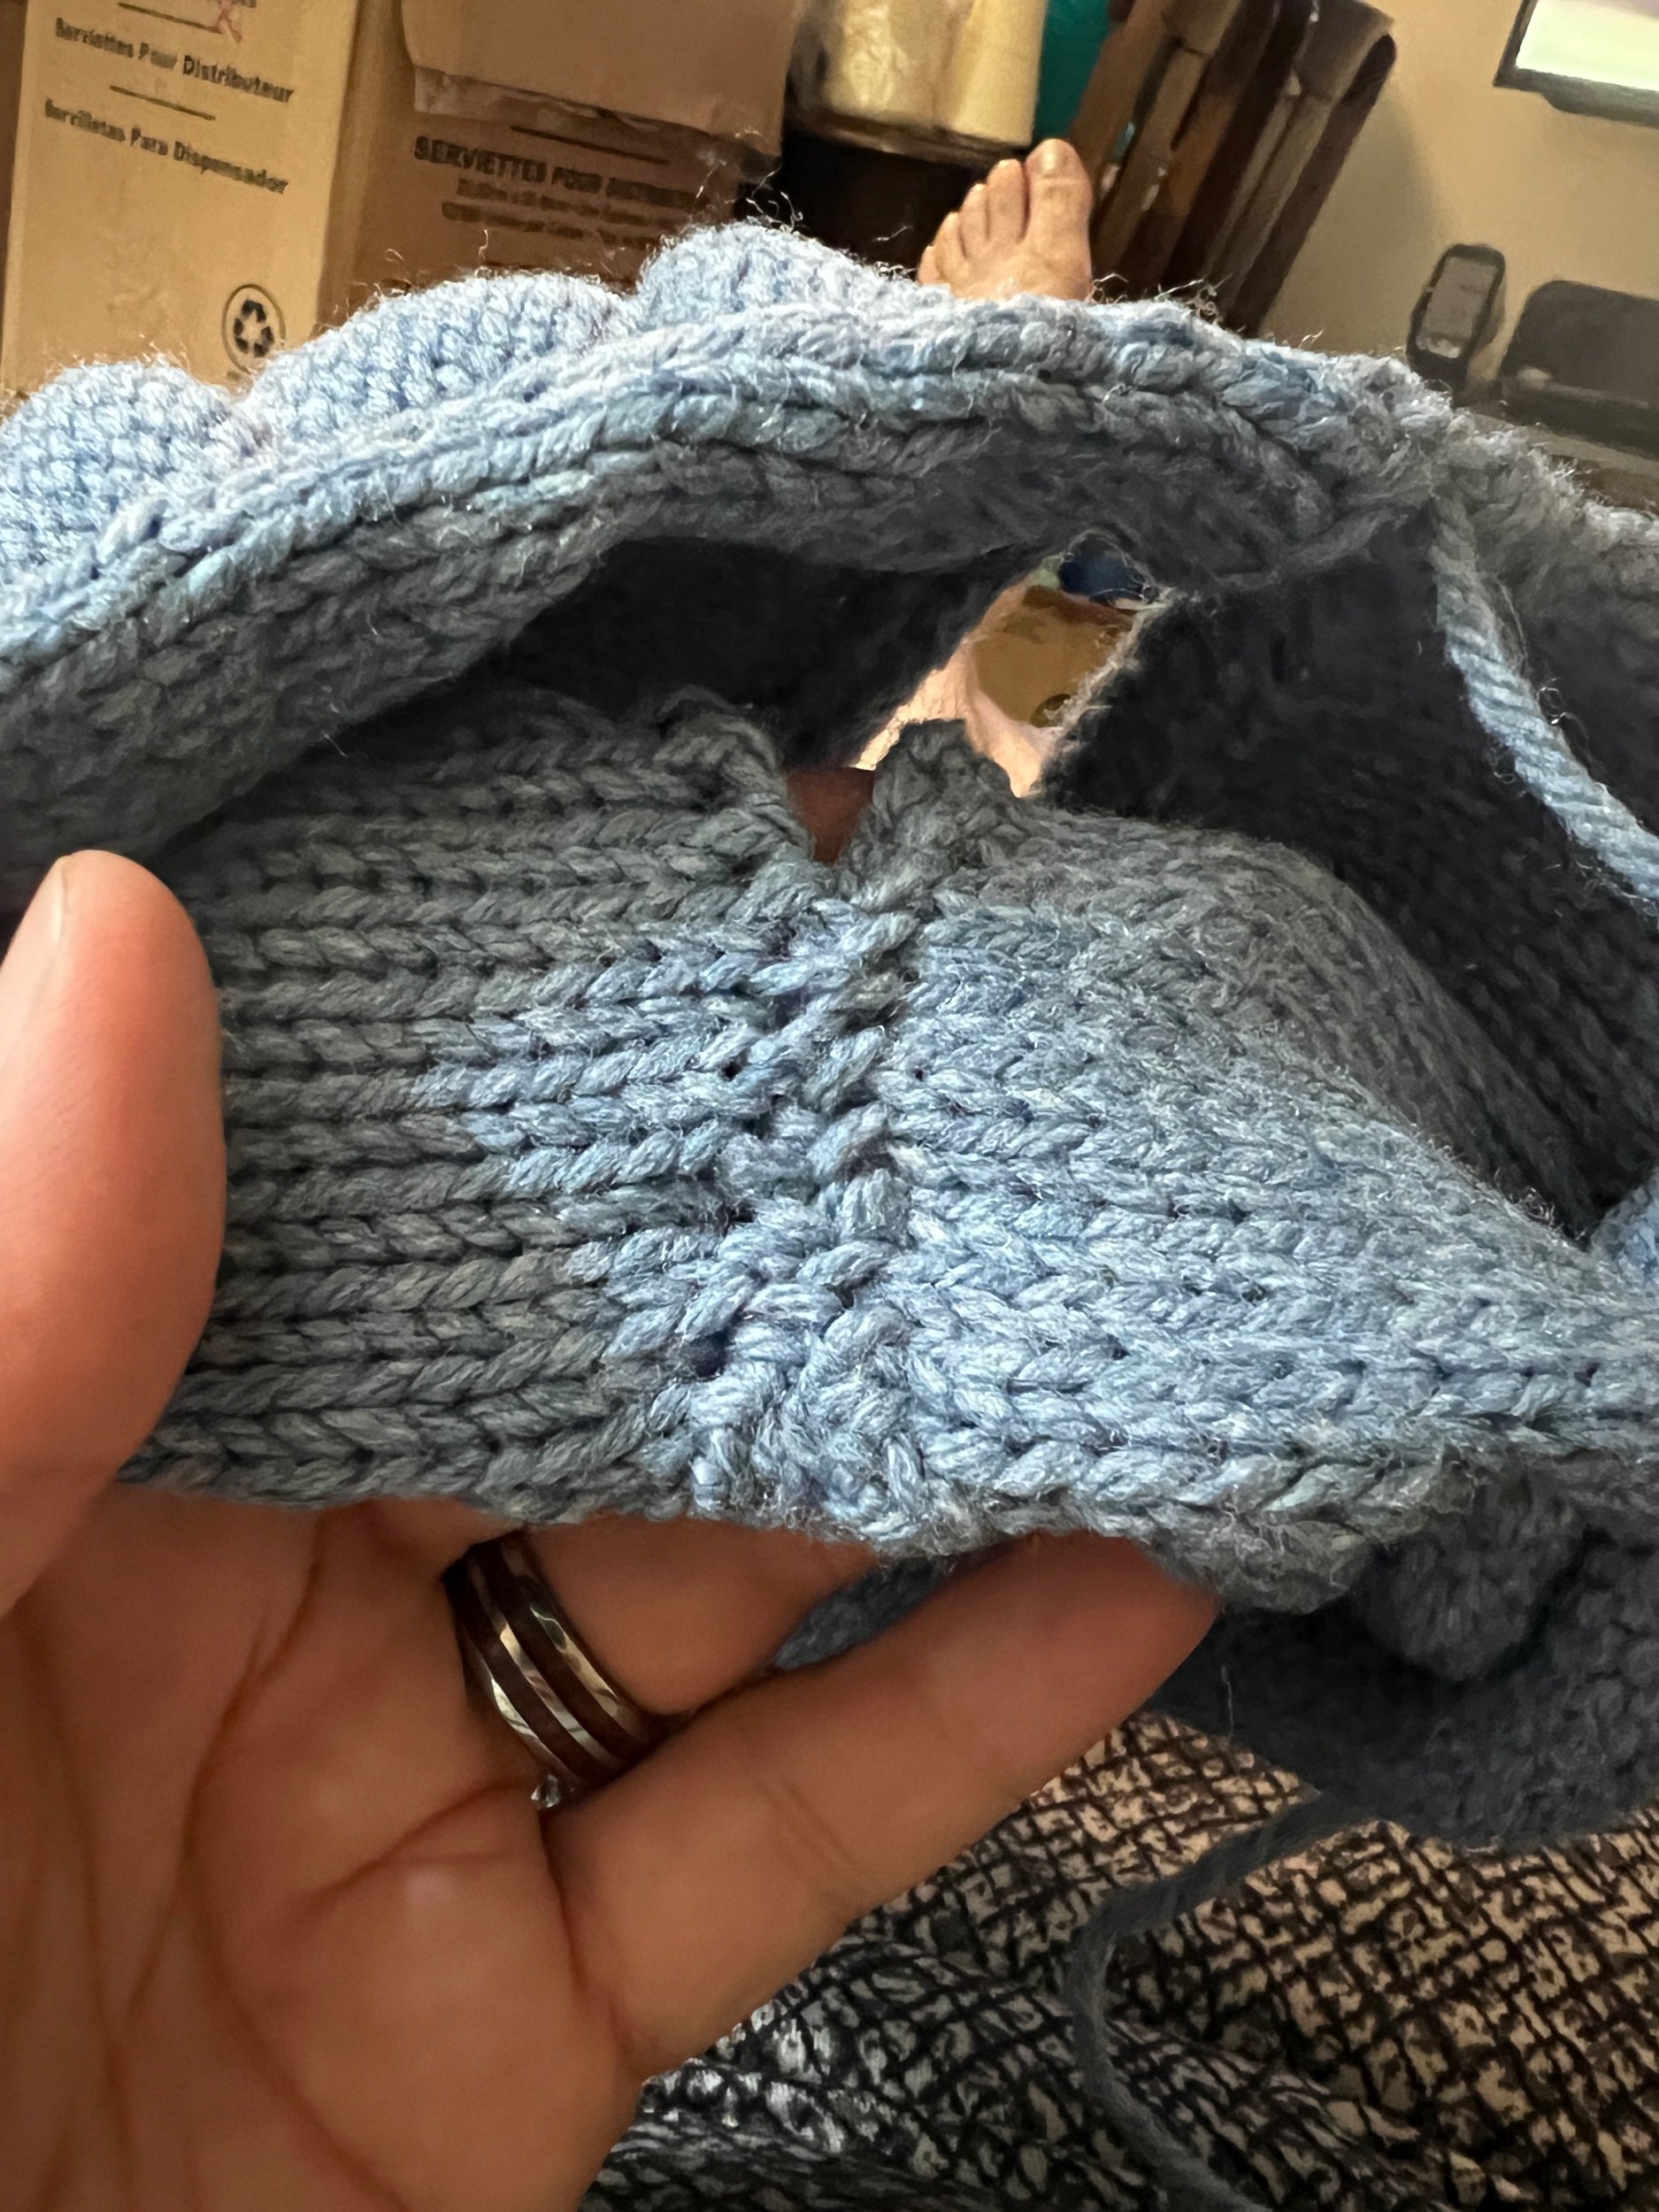
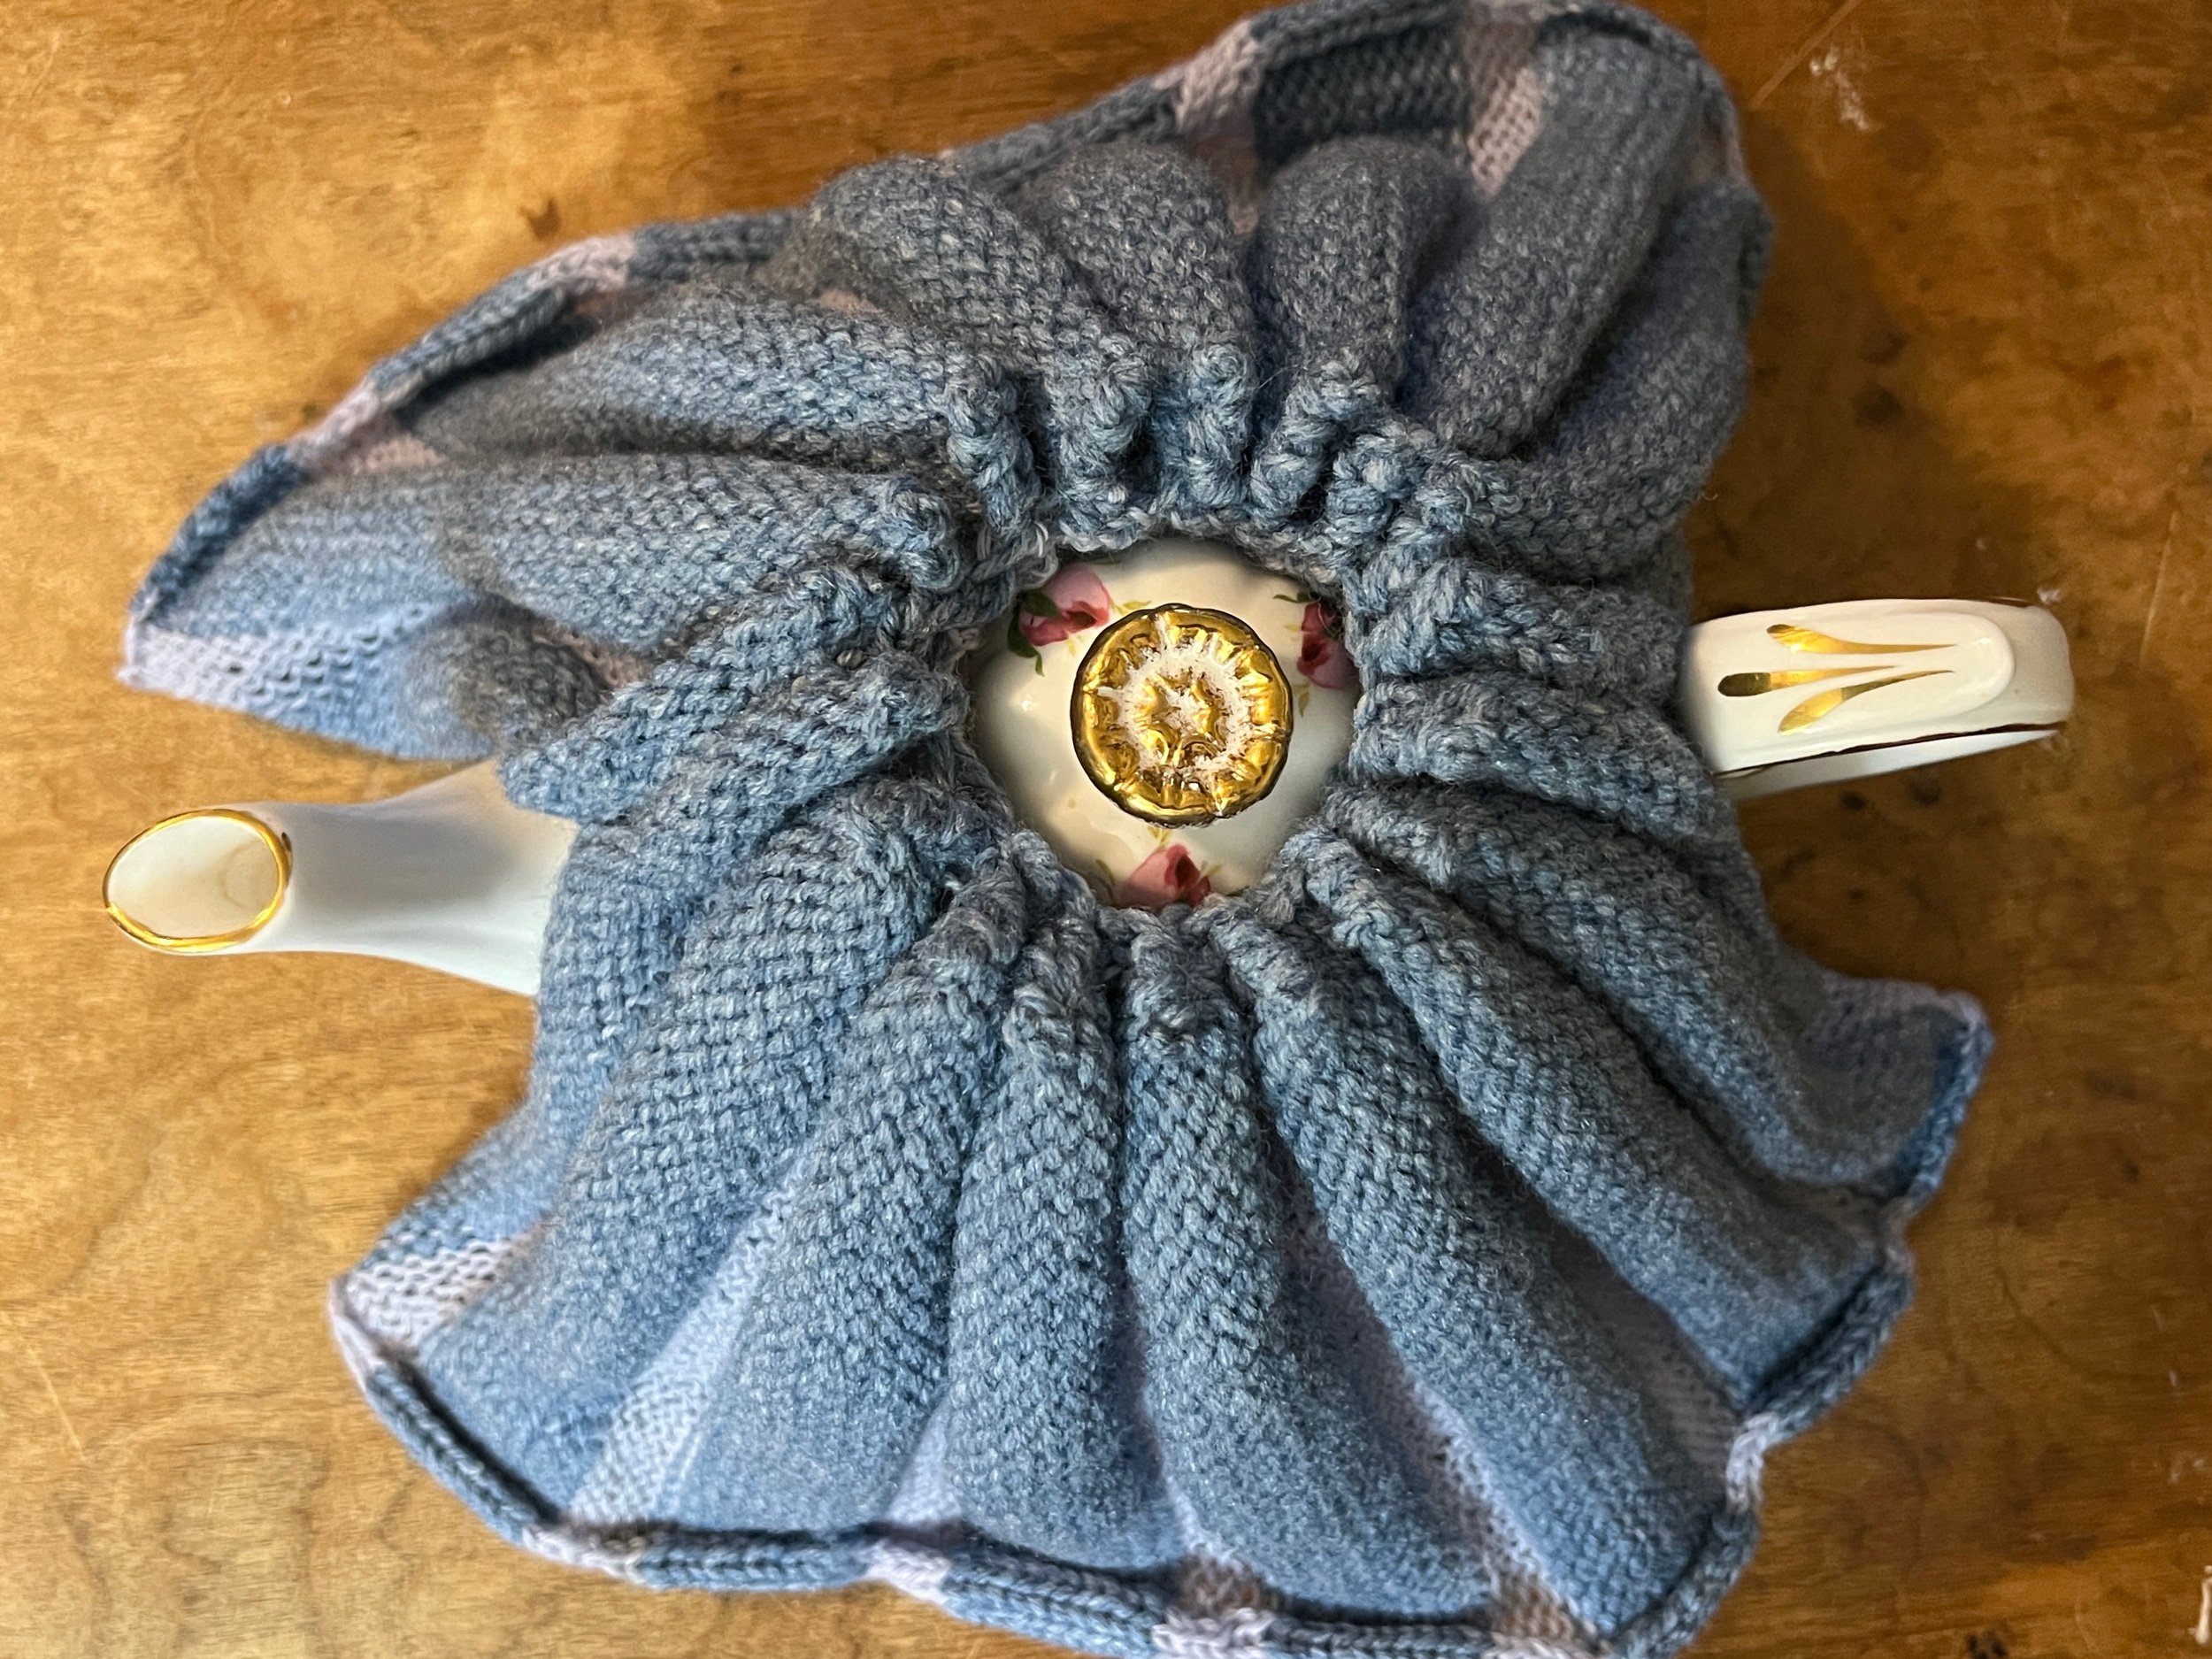
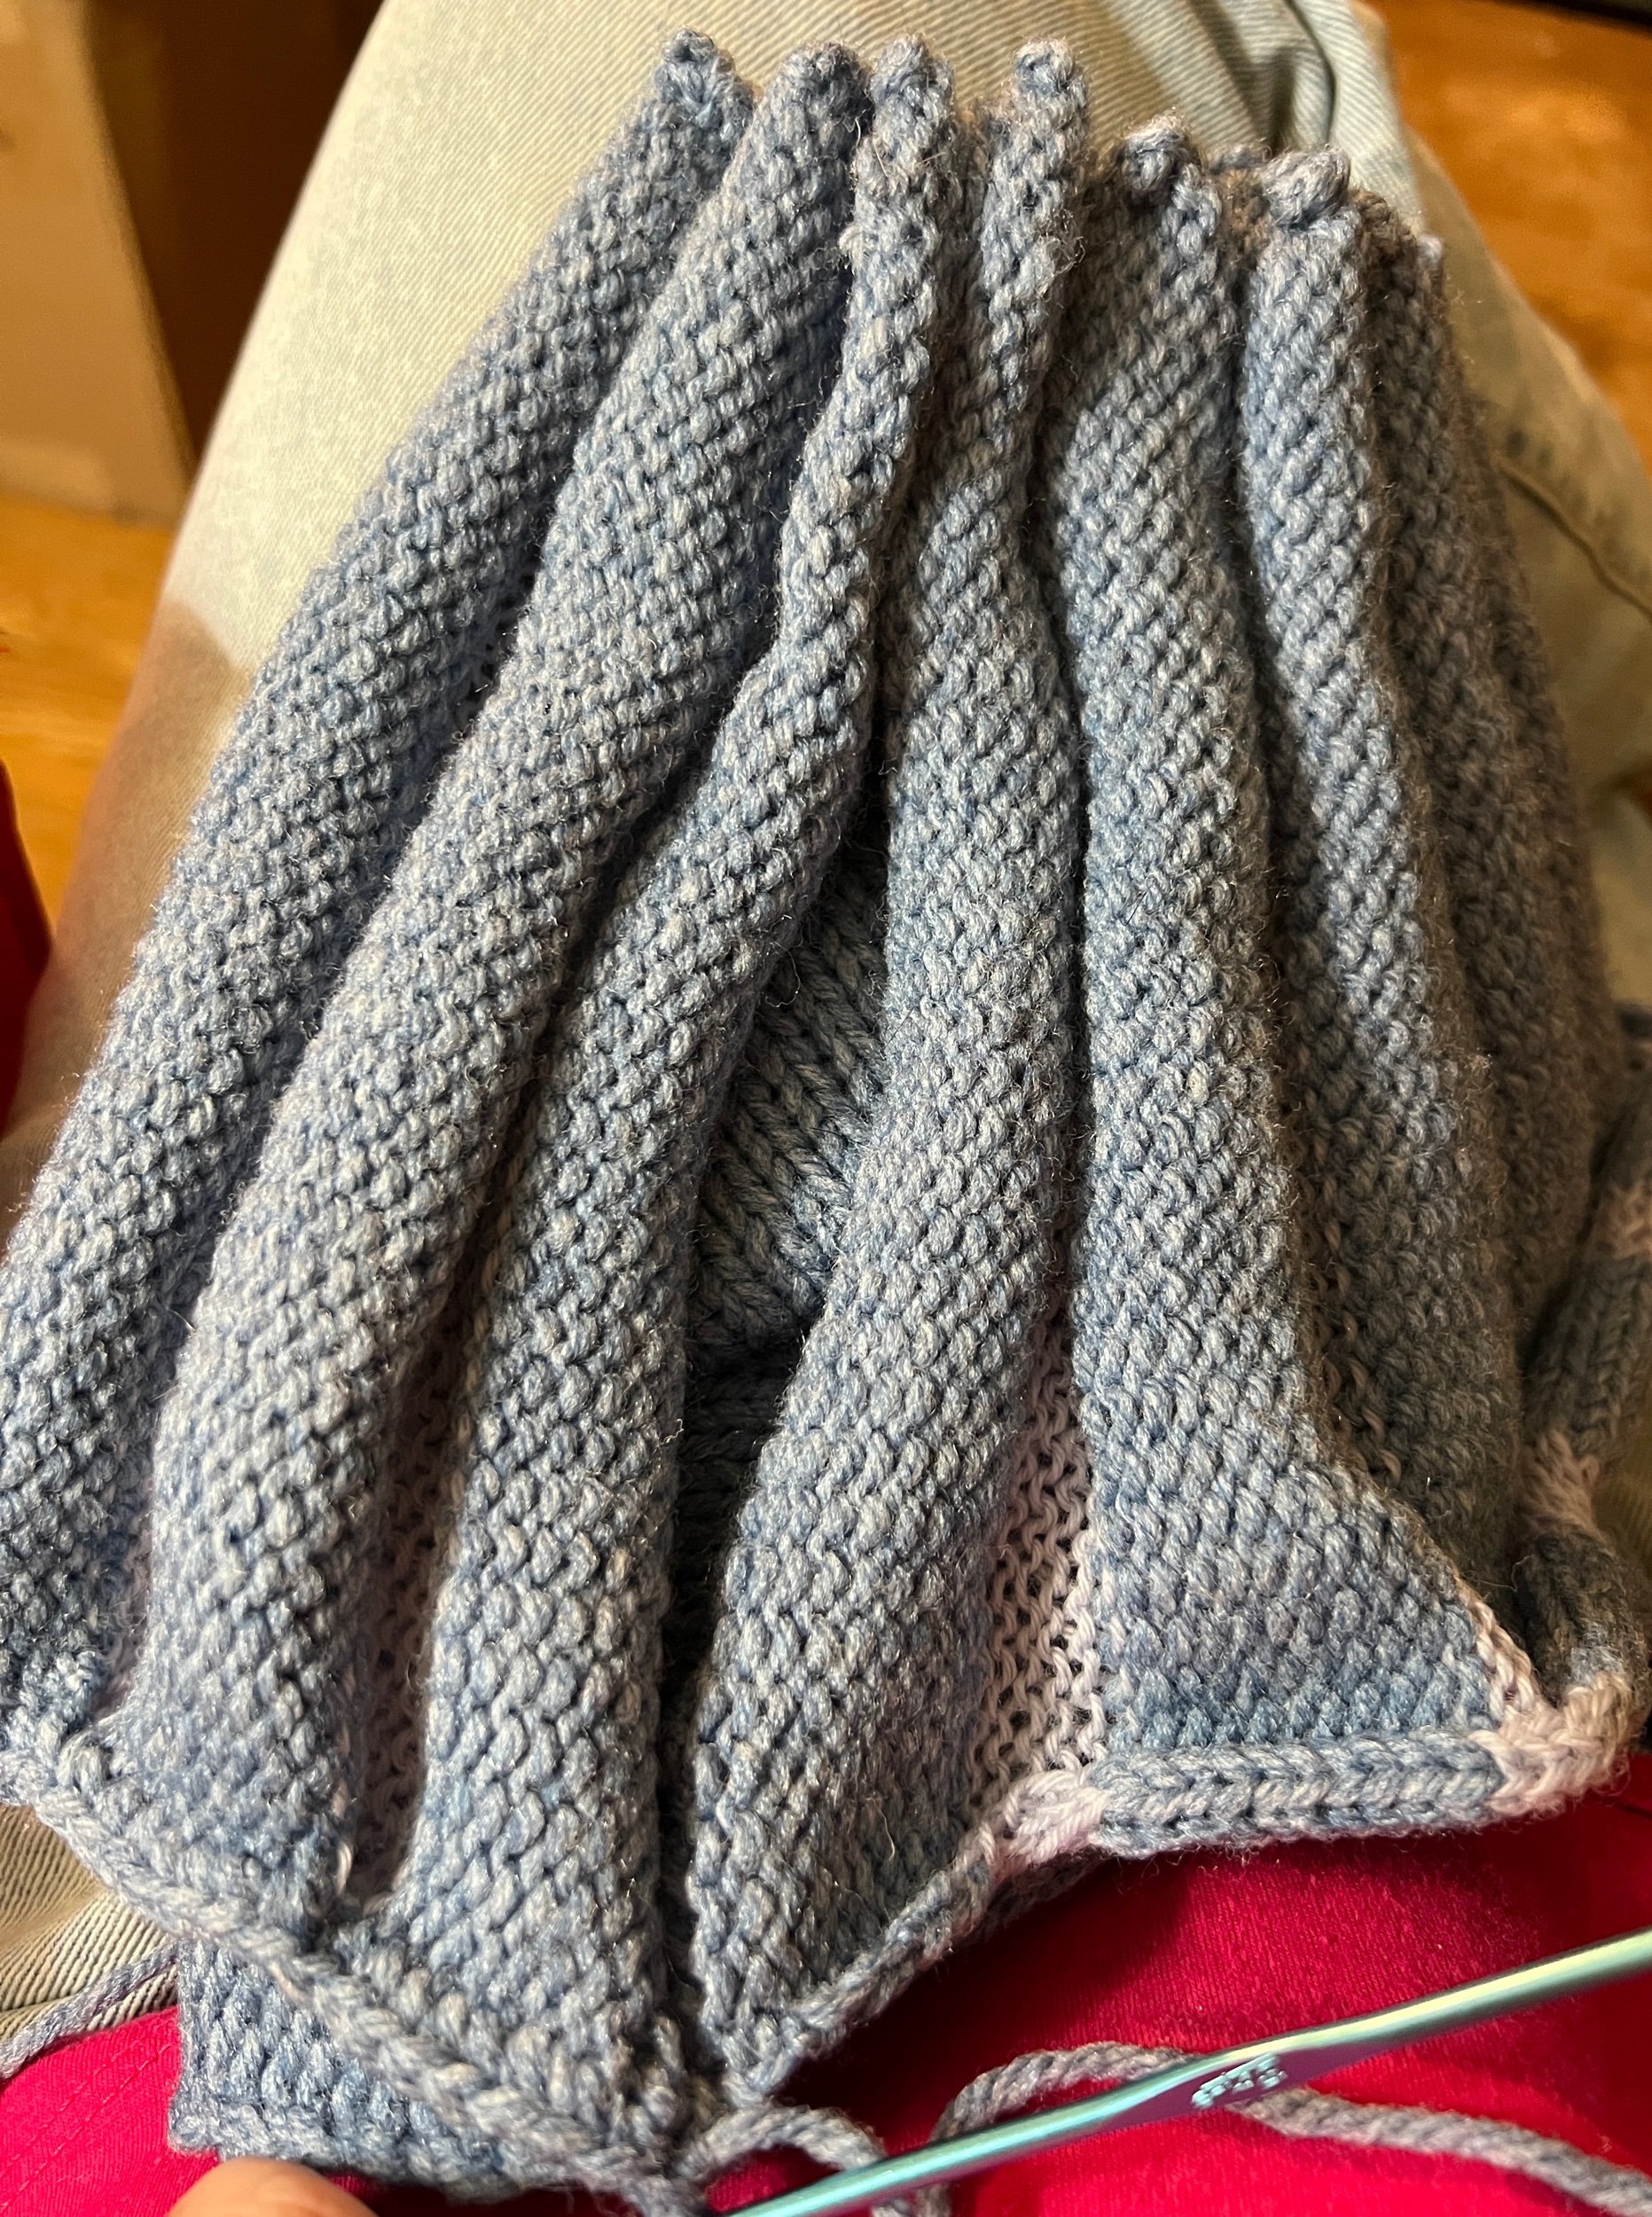
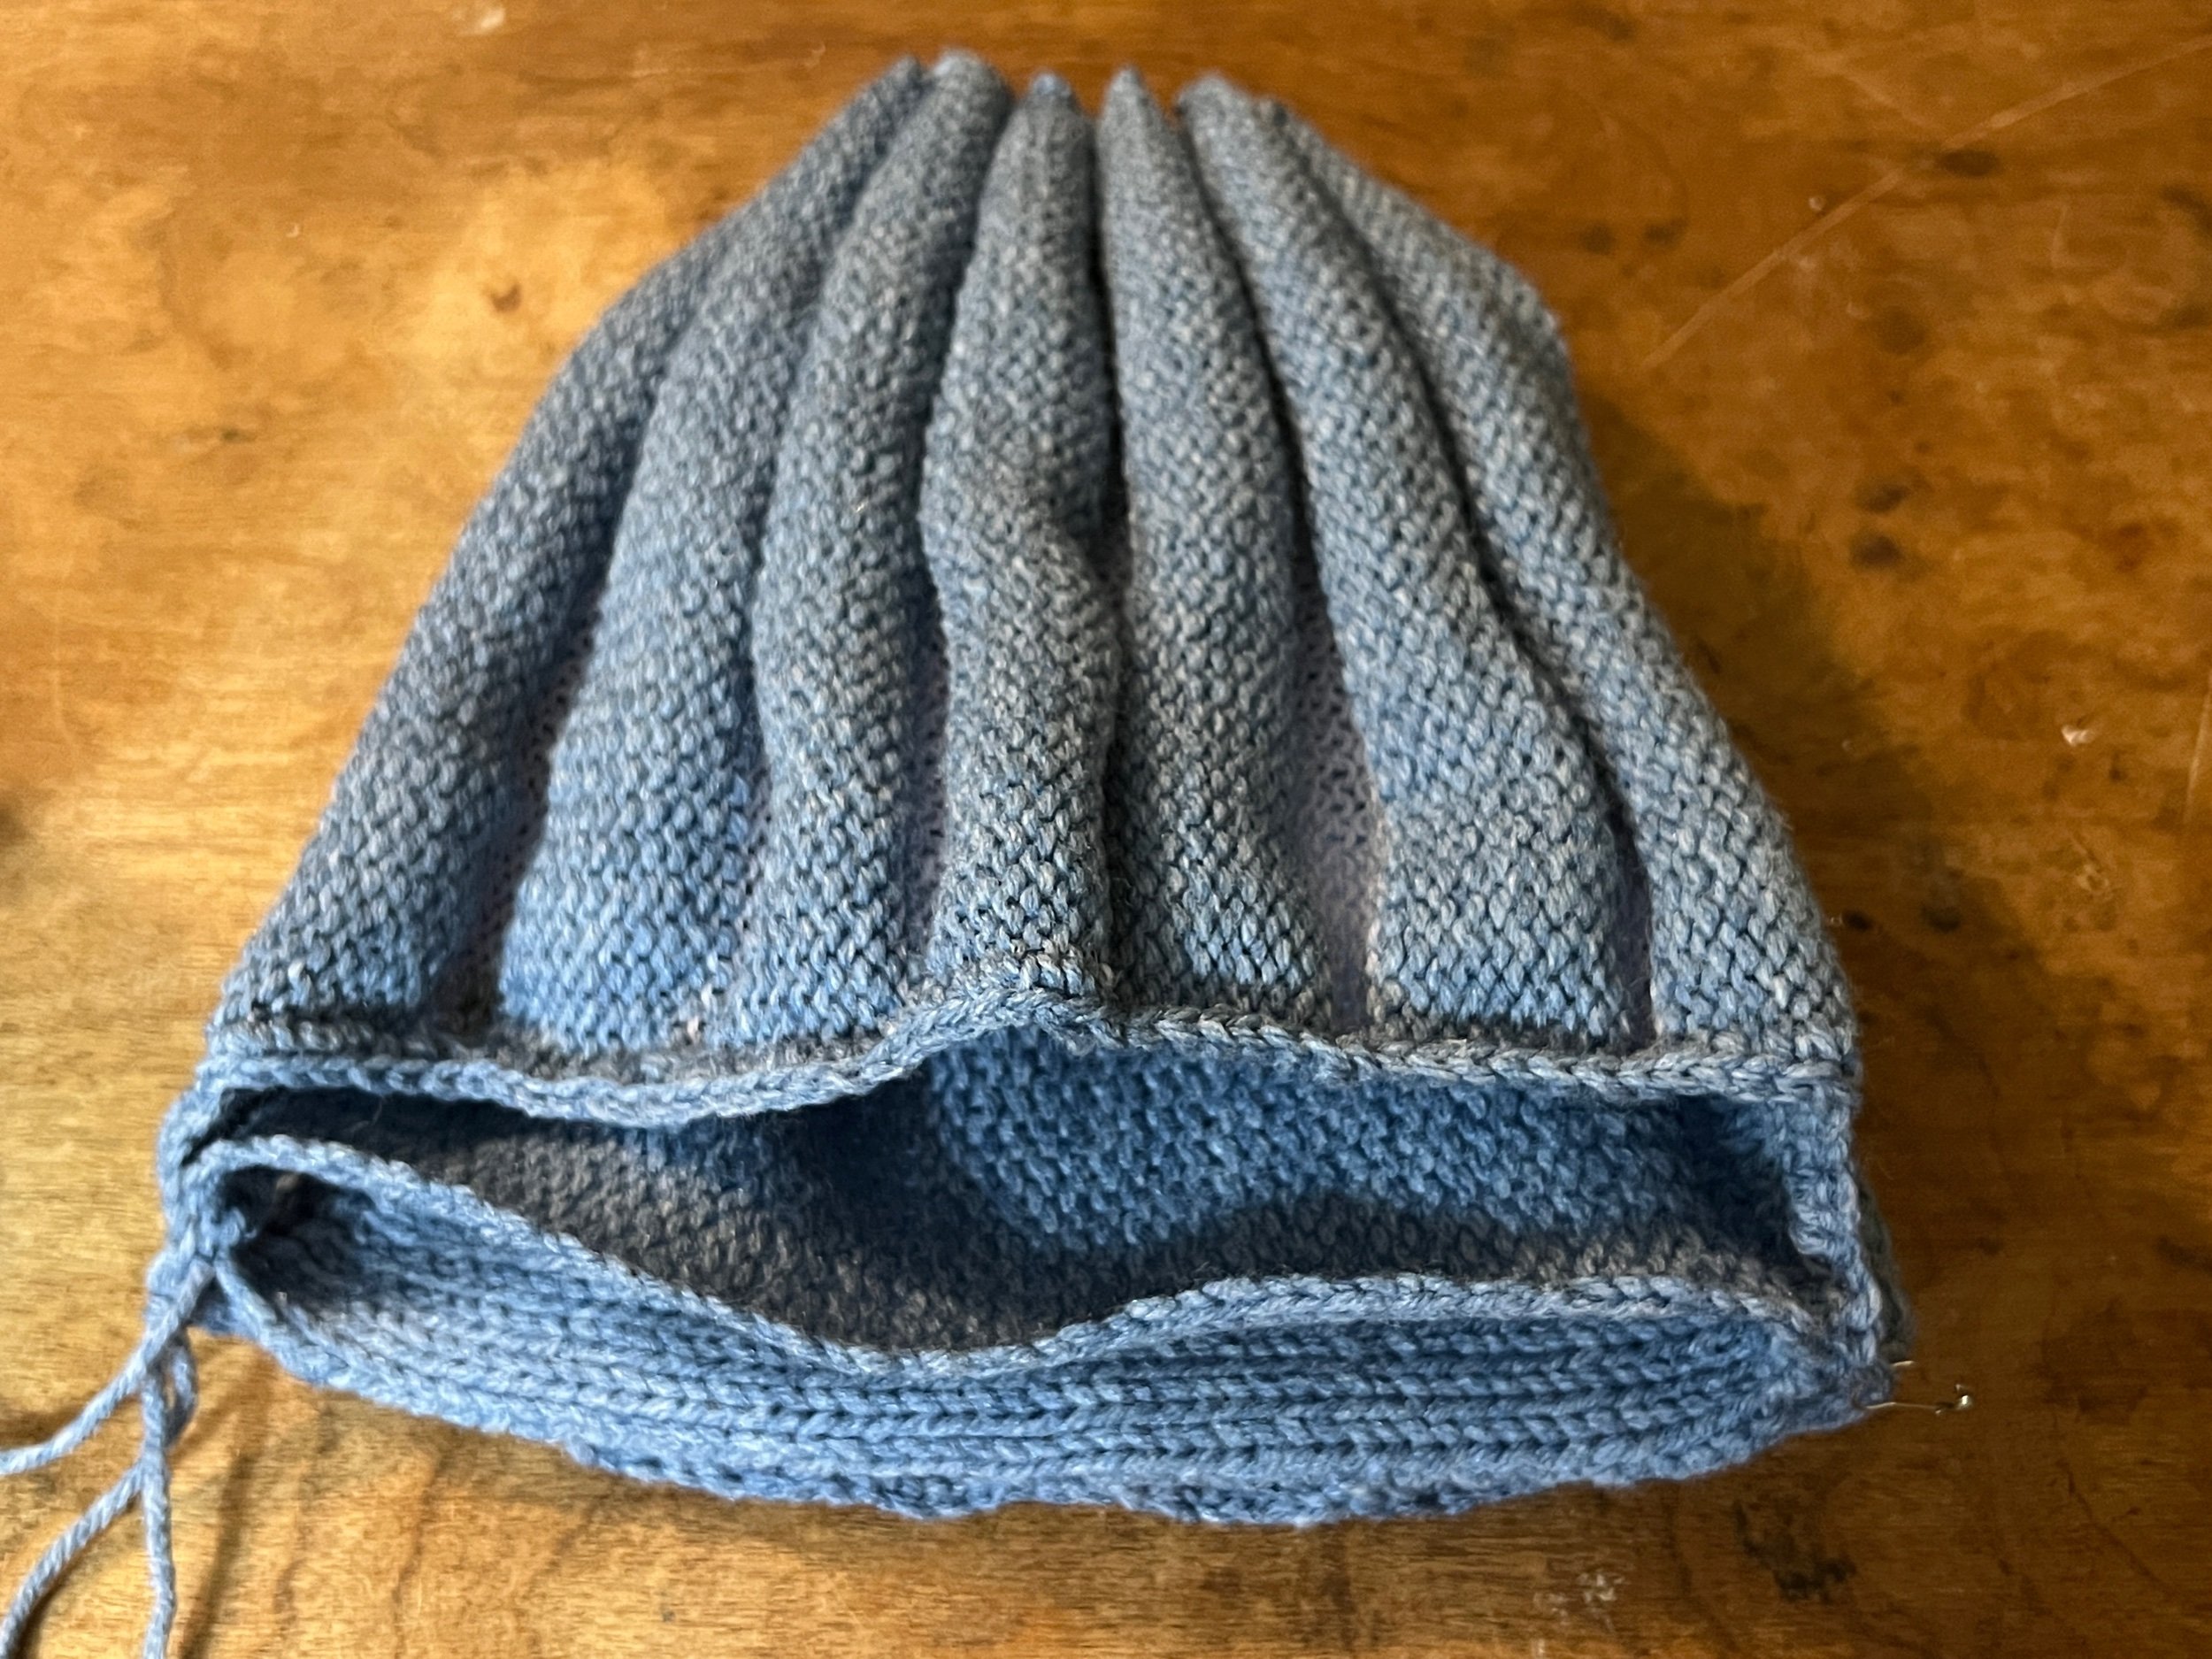
I then sewed the left and right edges of the liner to the stripped piece (stripes going vertically with the liner knit side out. The liner is about 1.5” shorter heightwise to reduce fabric area at the top of the project. I then accordion style sewed only the dark thicker striped ends (skipping the thin yarn sections) to fully gather the top of the project. I did this again with the other pieces.


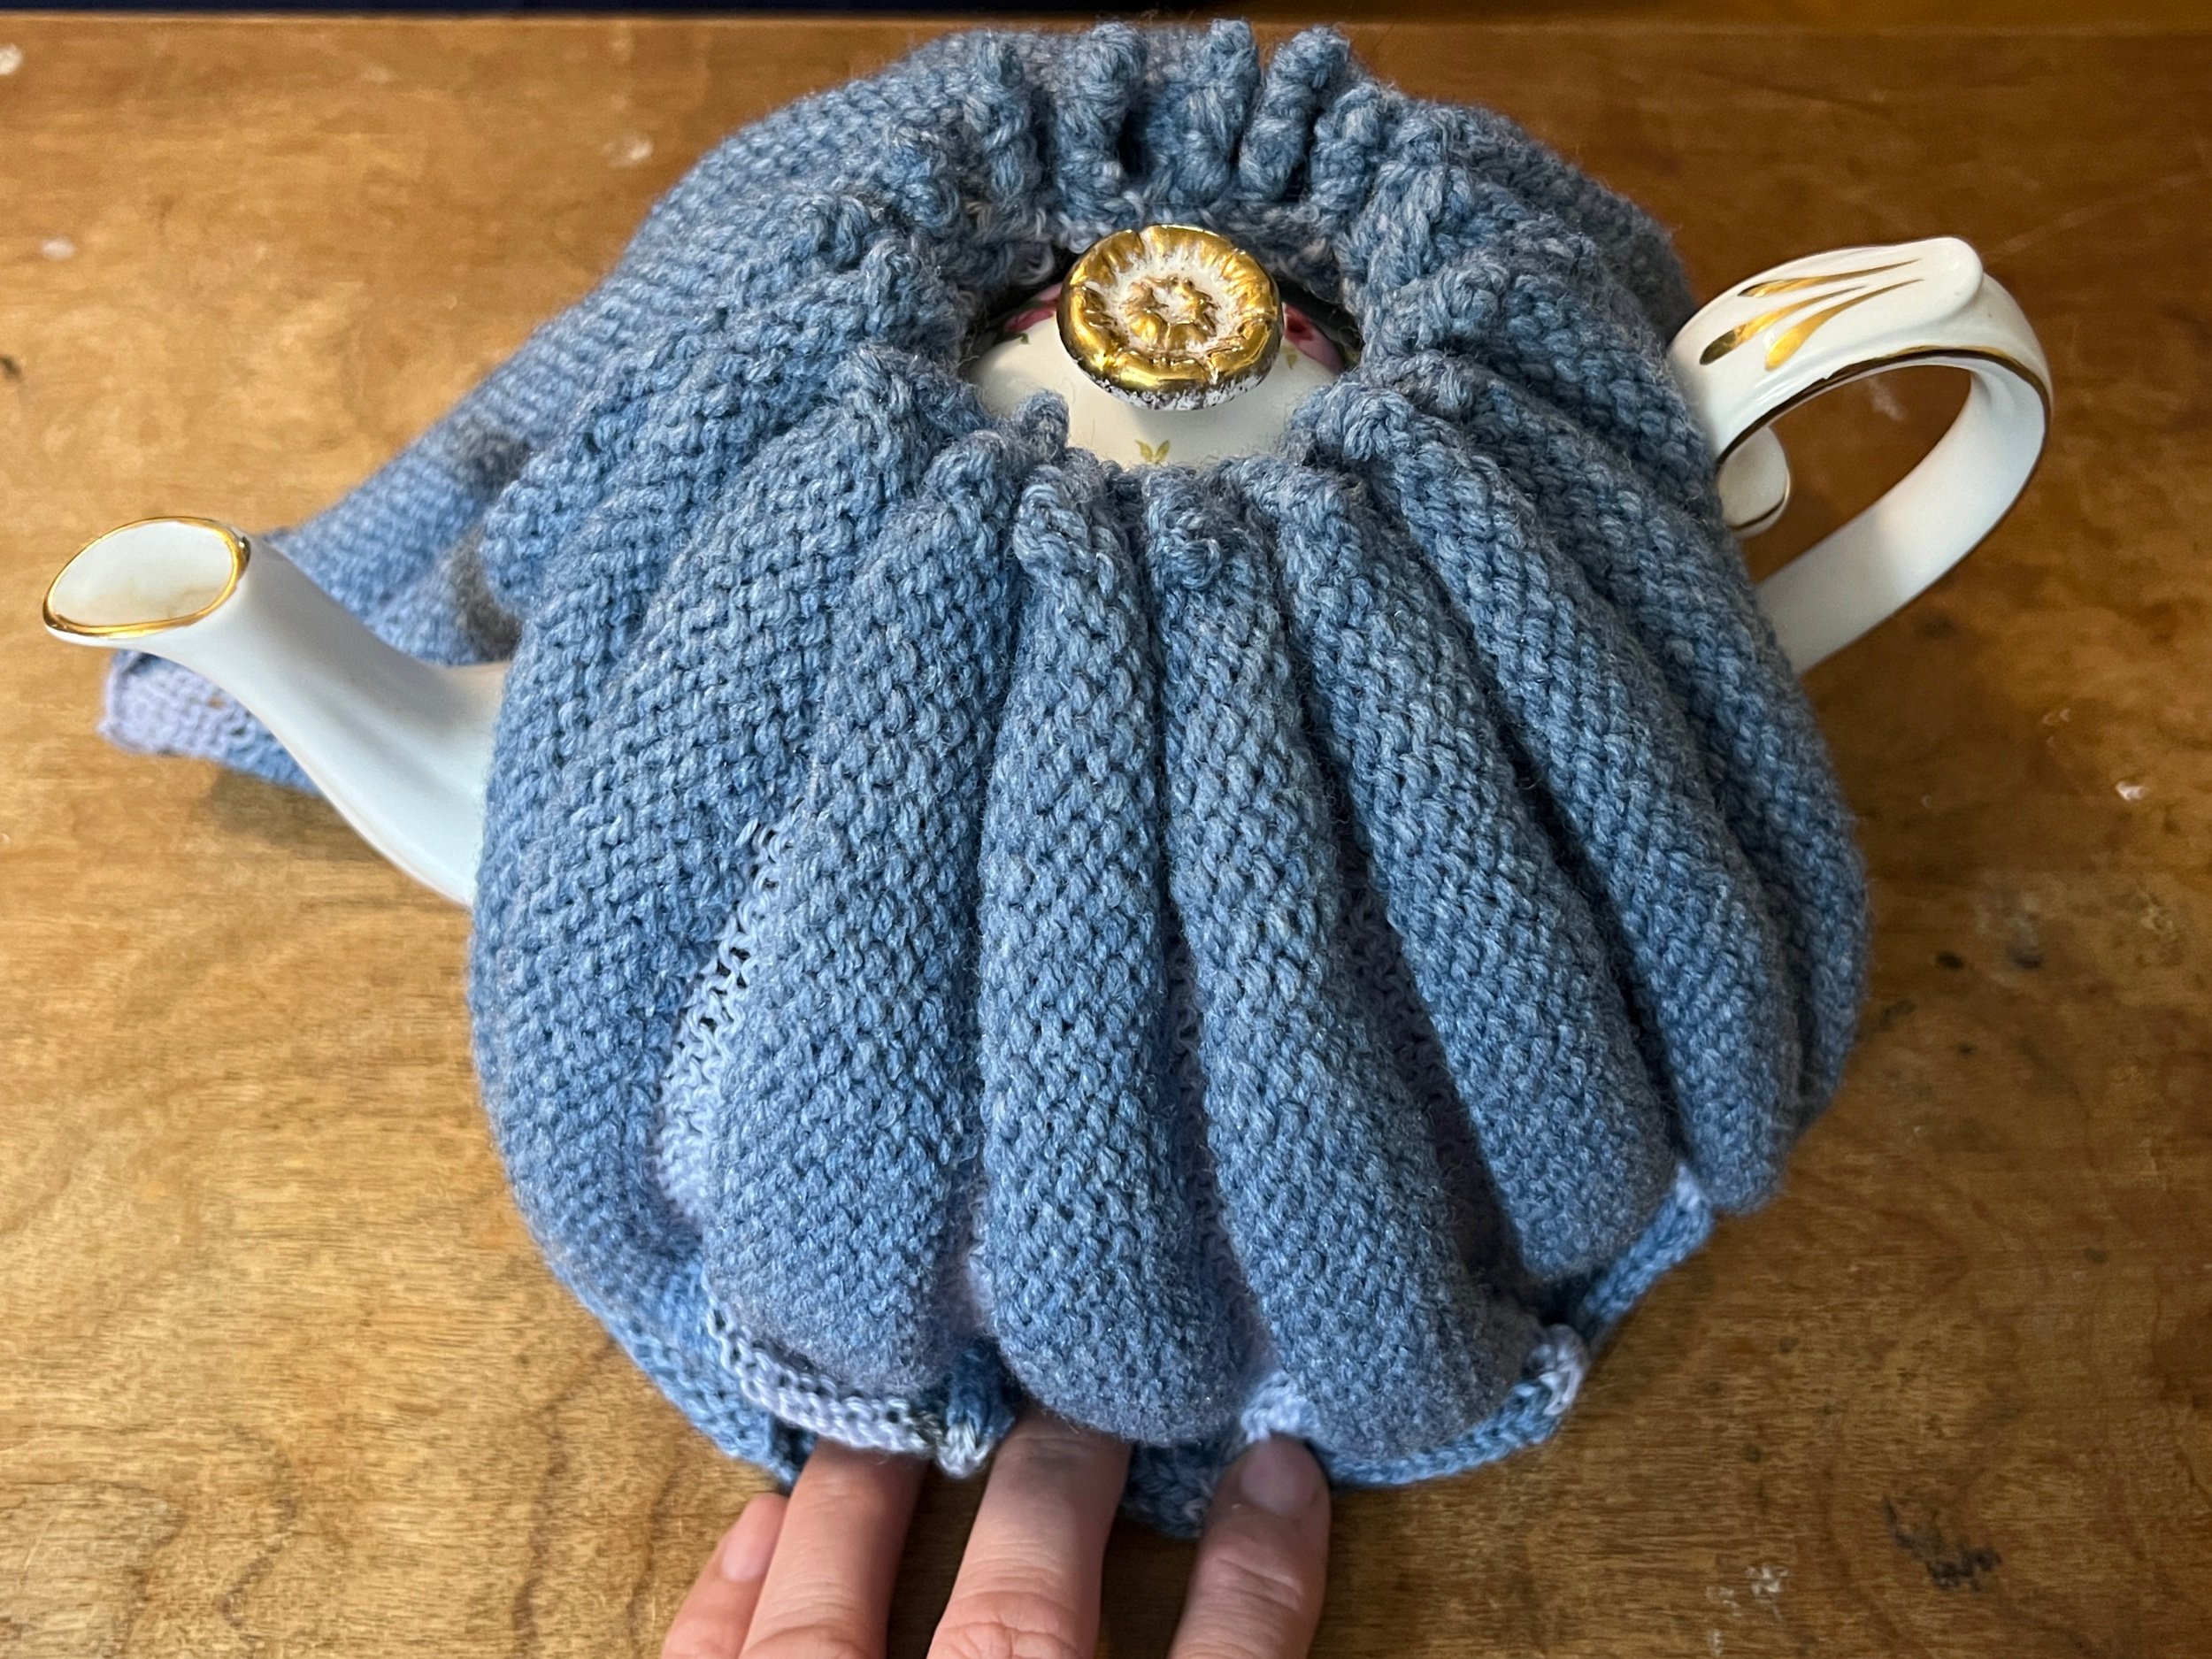
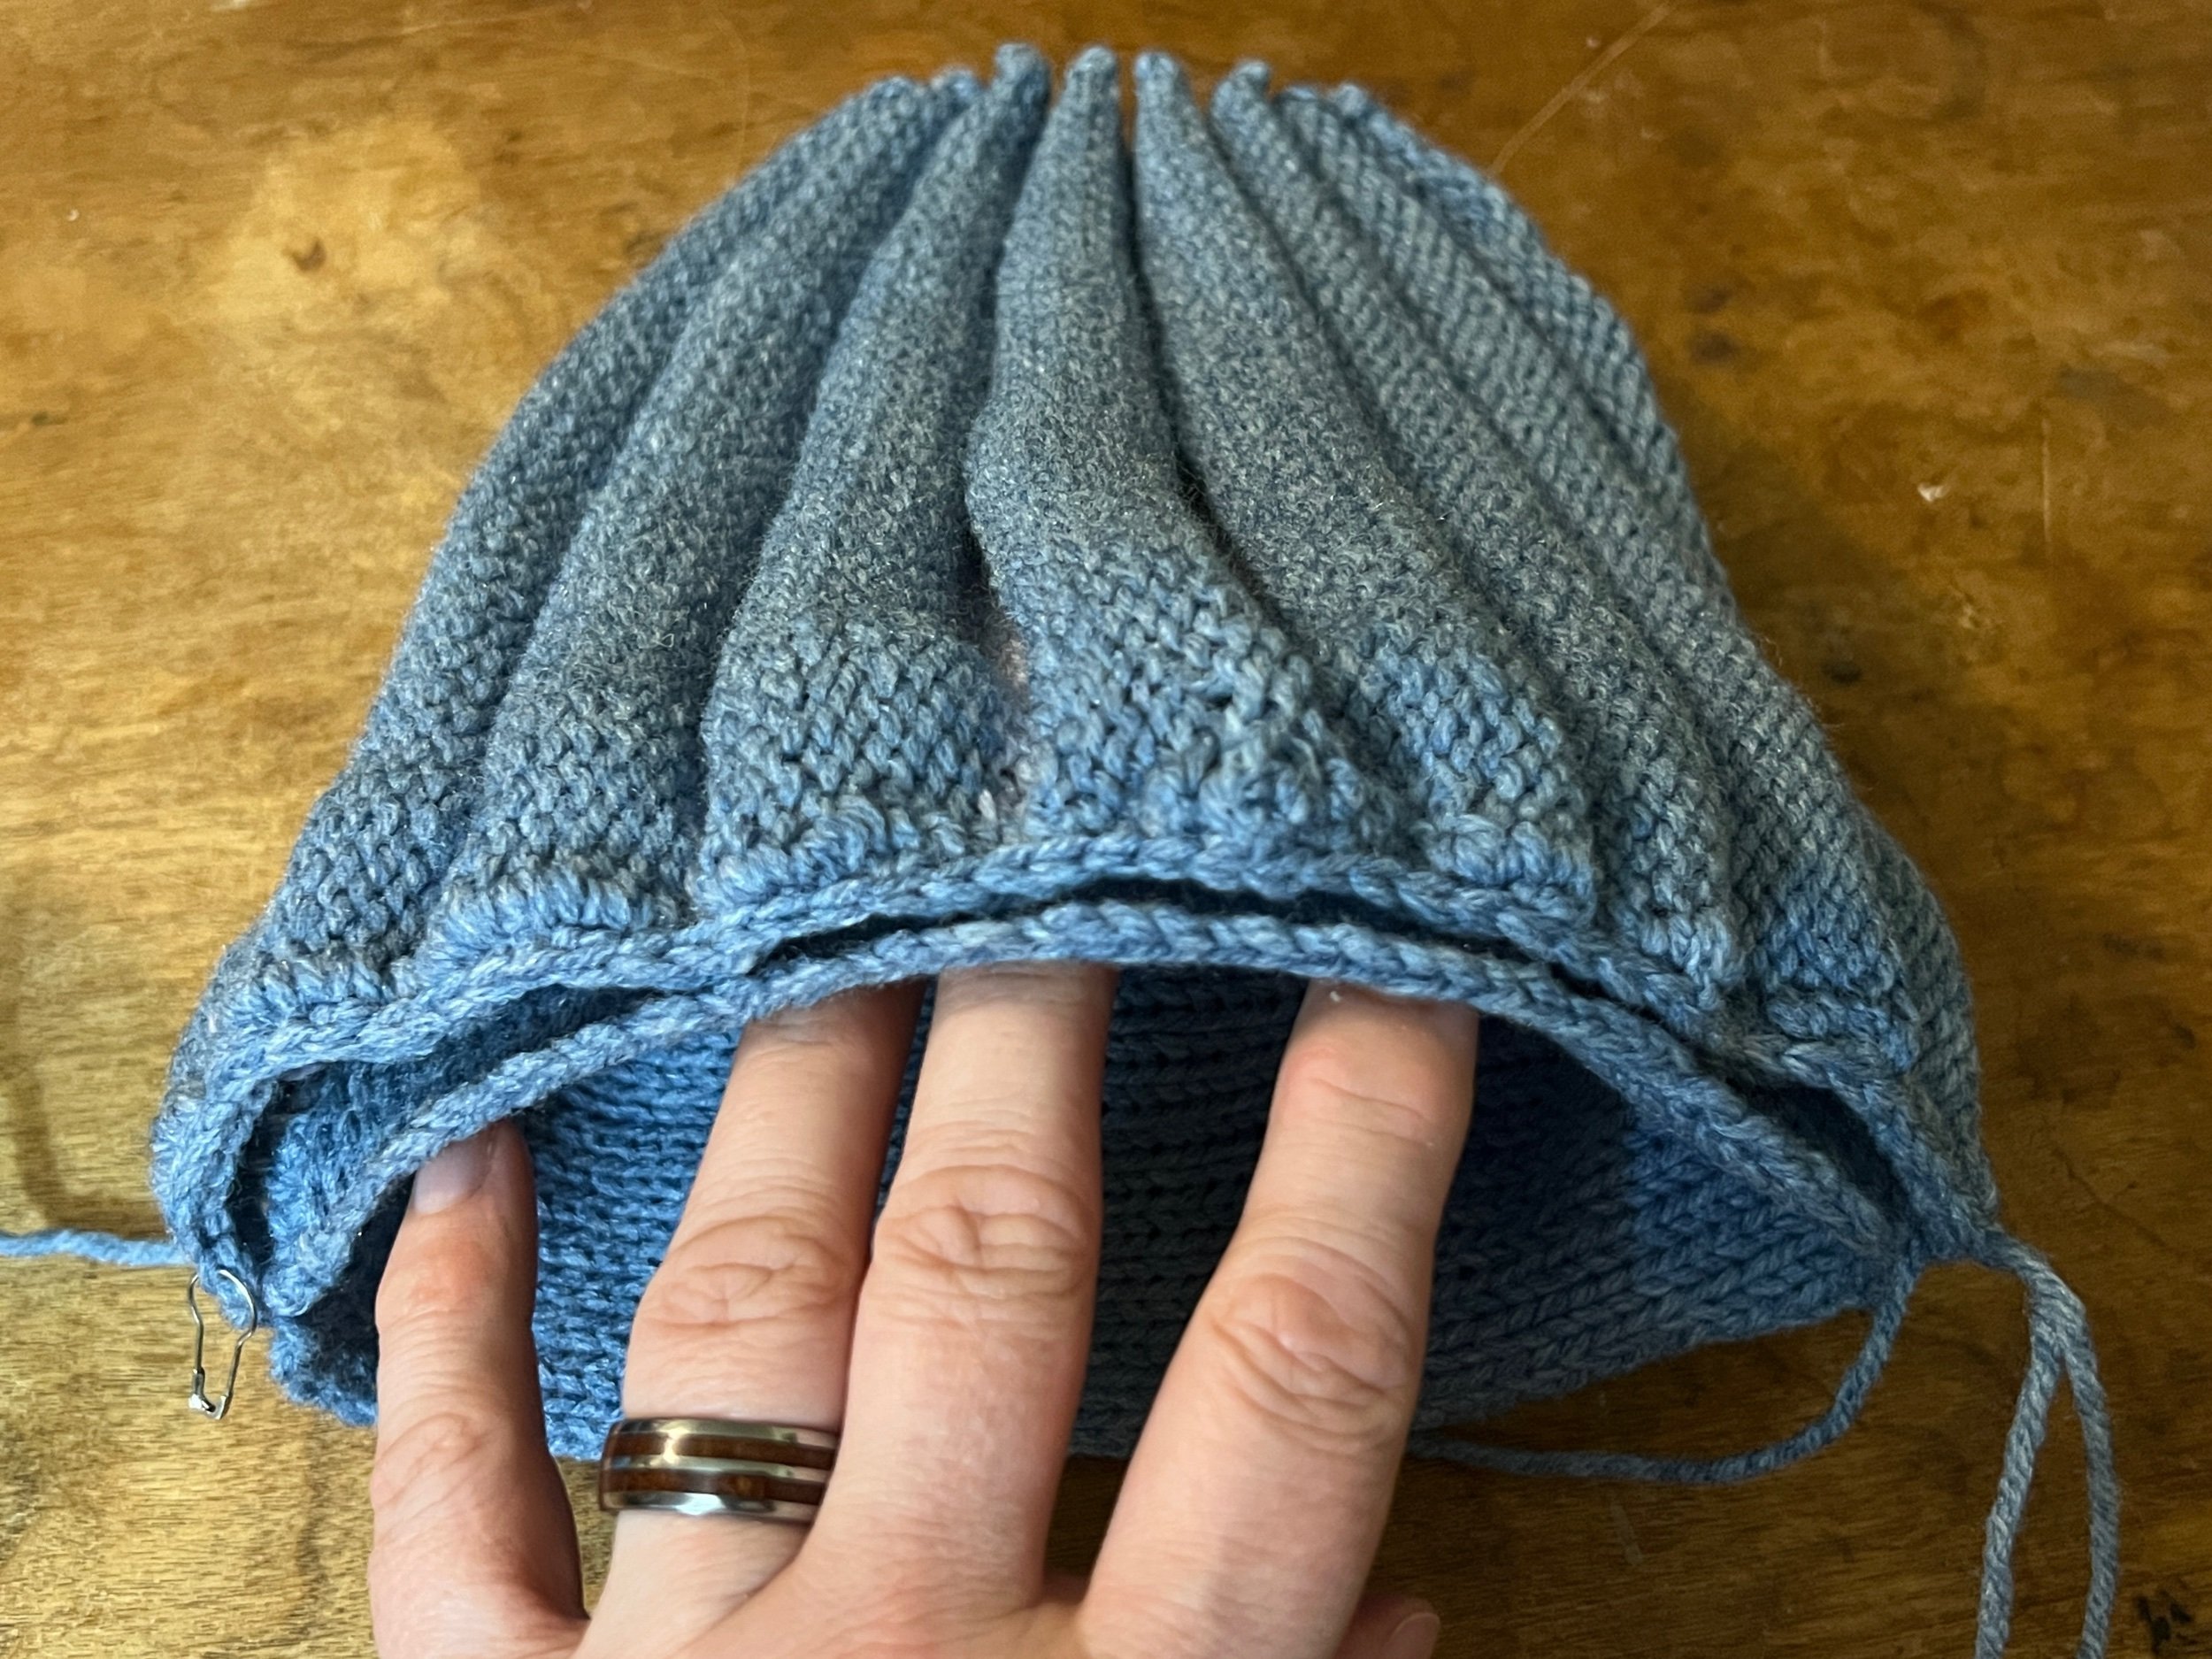
now I have two lined accordion top pieces. I seamed their sides near the top and not where there wasn’t any liner.
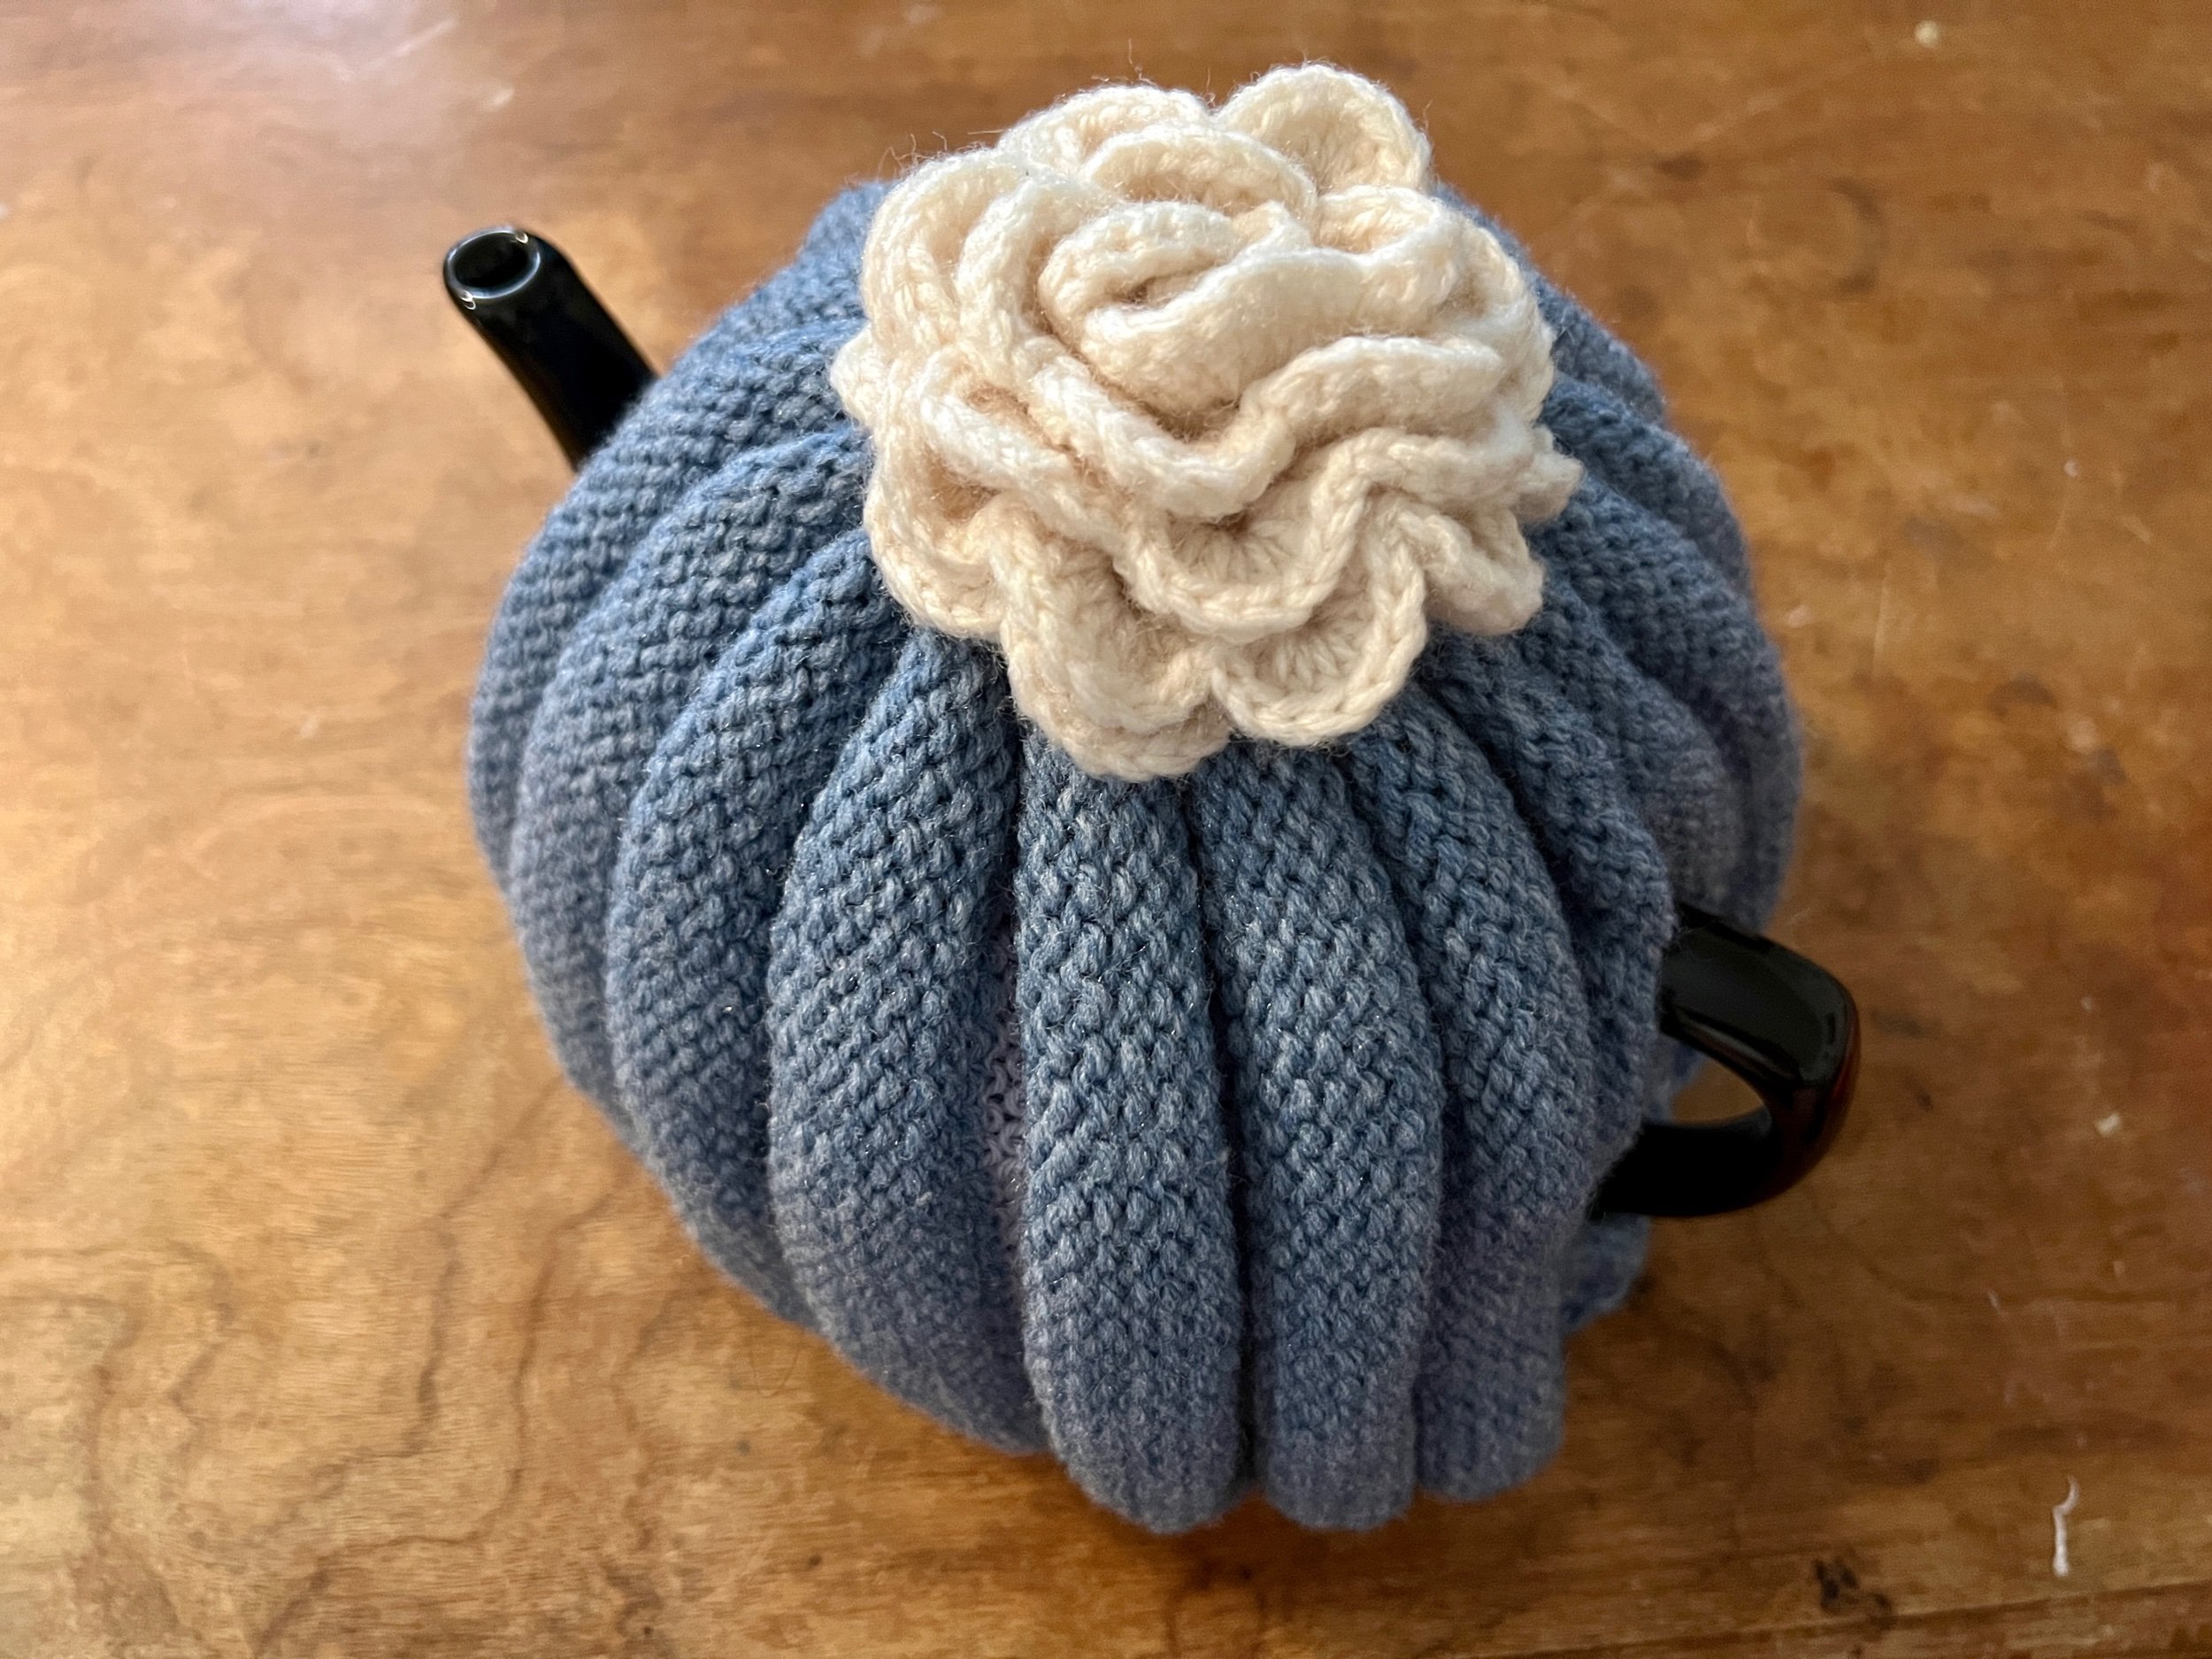
It sits now like a dress on the teapot

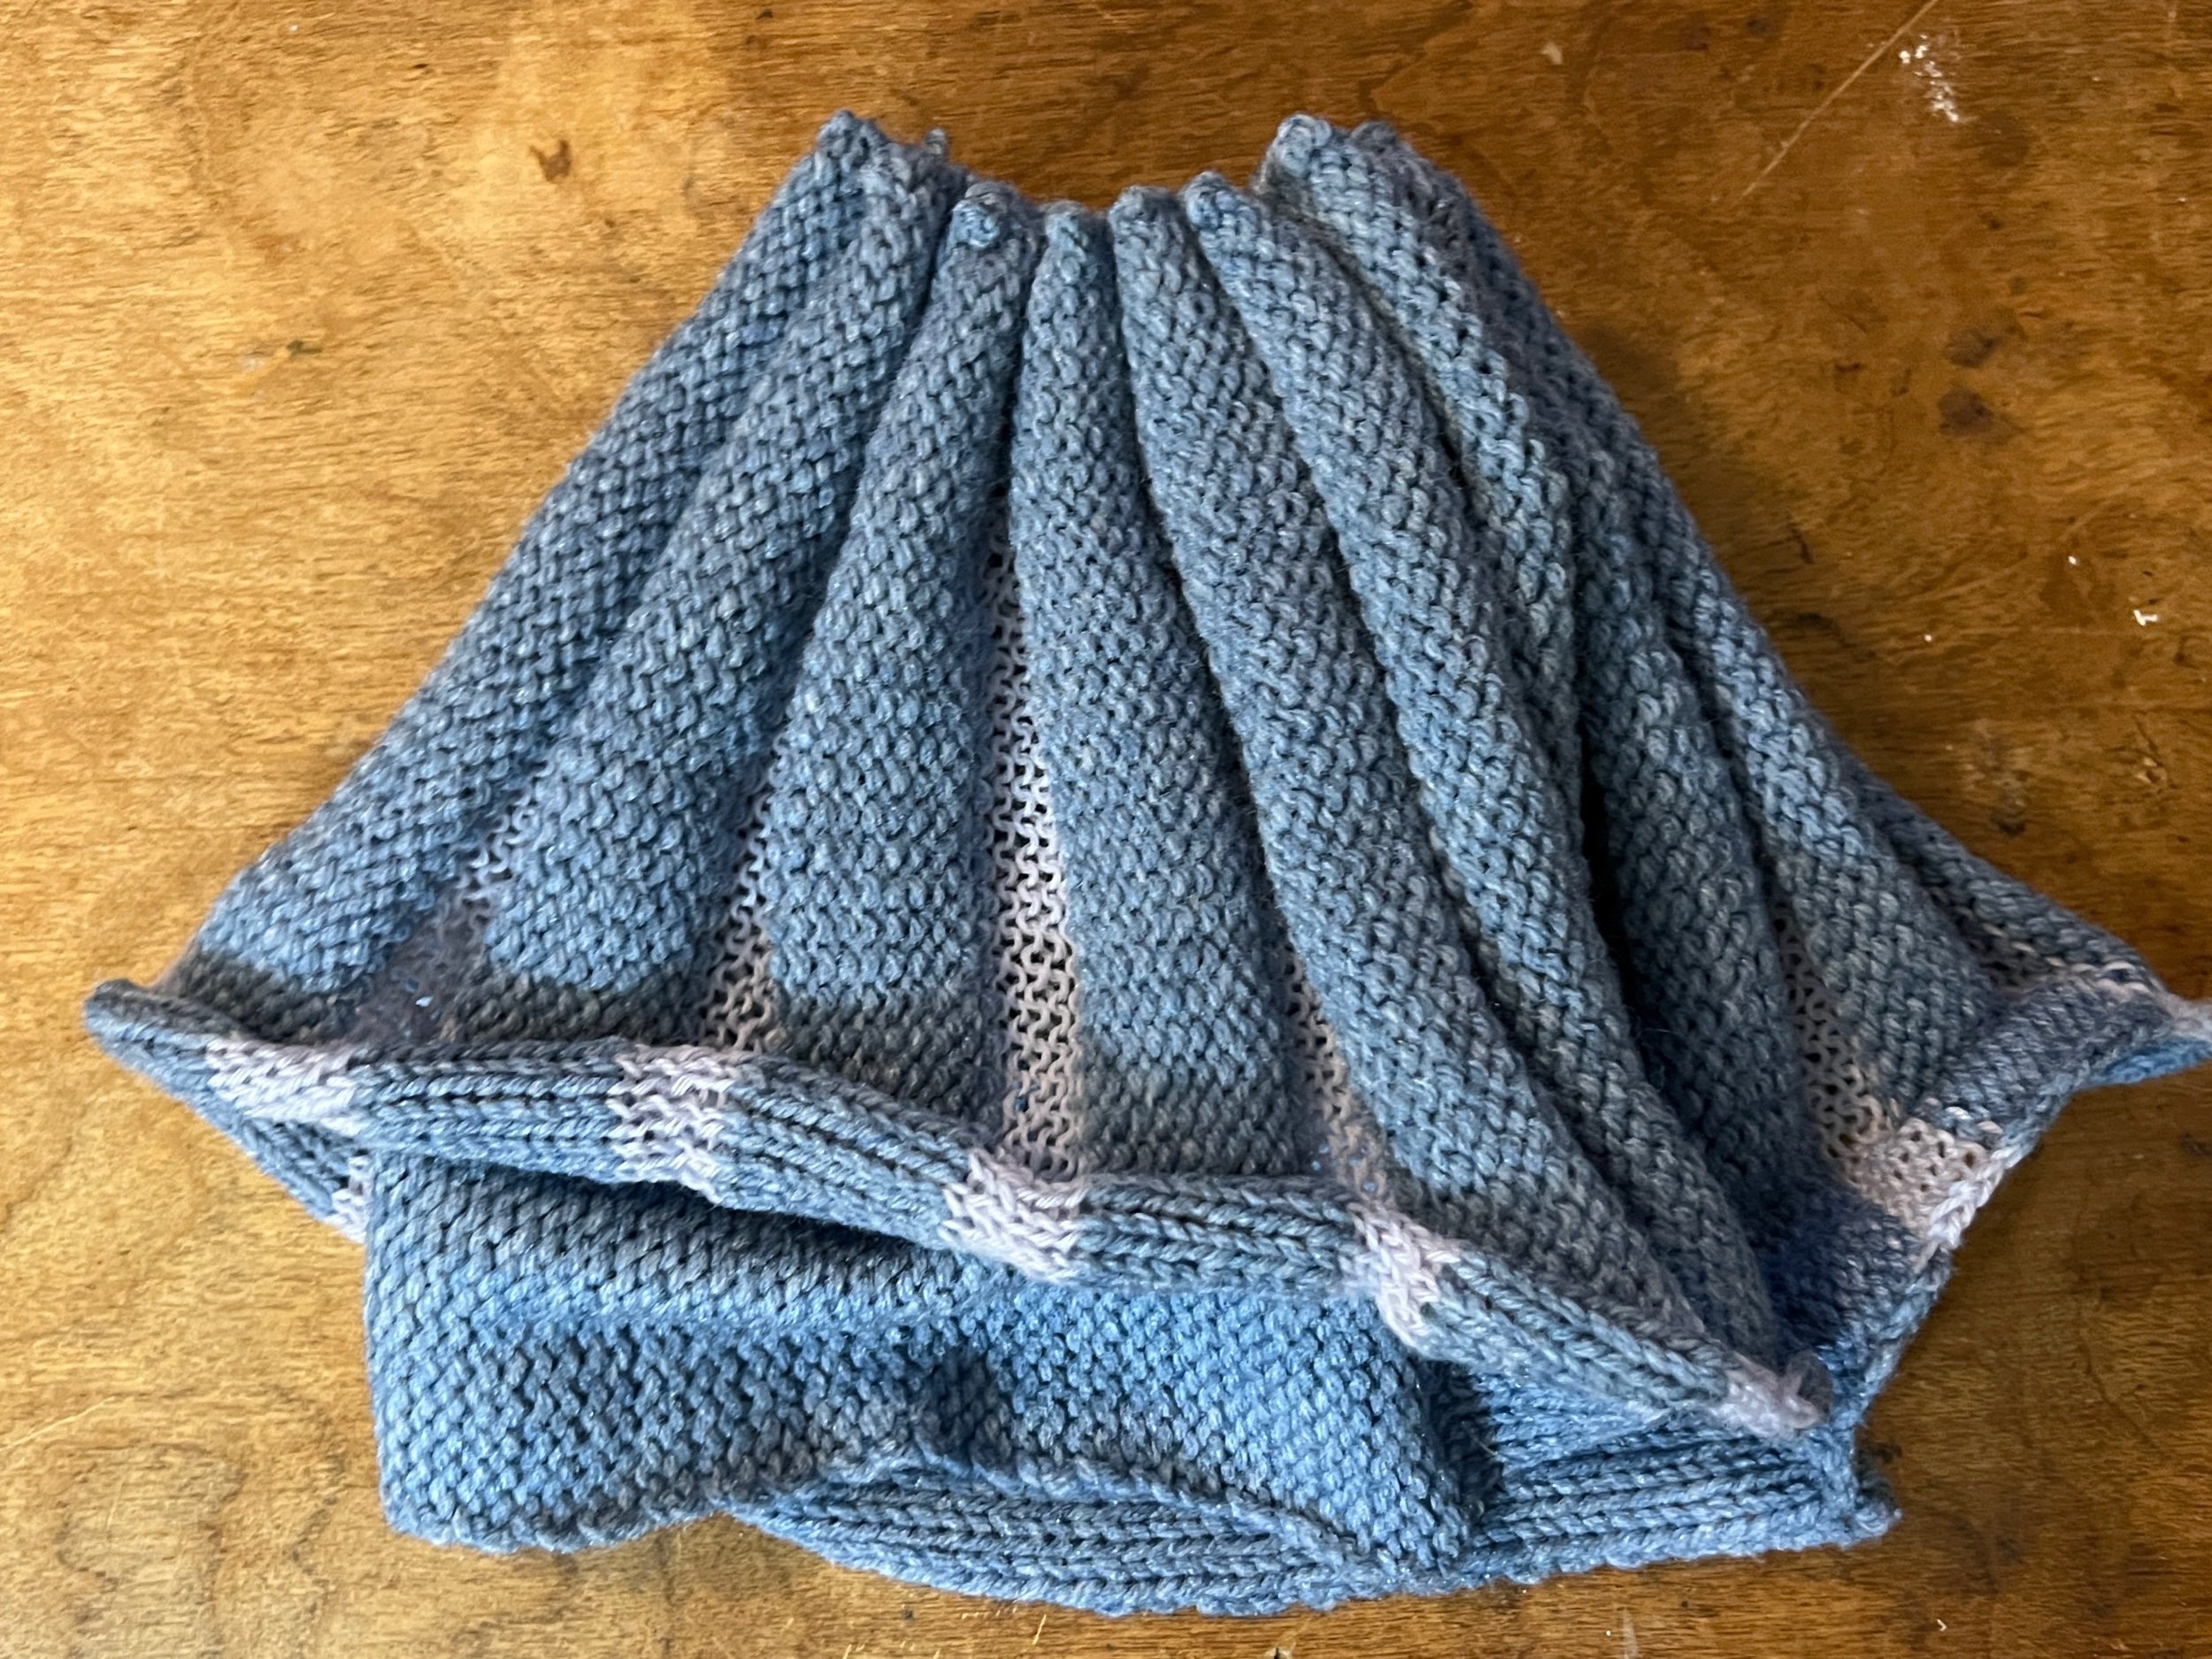
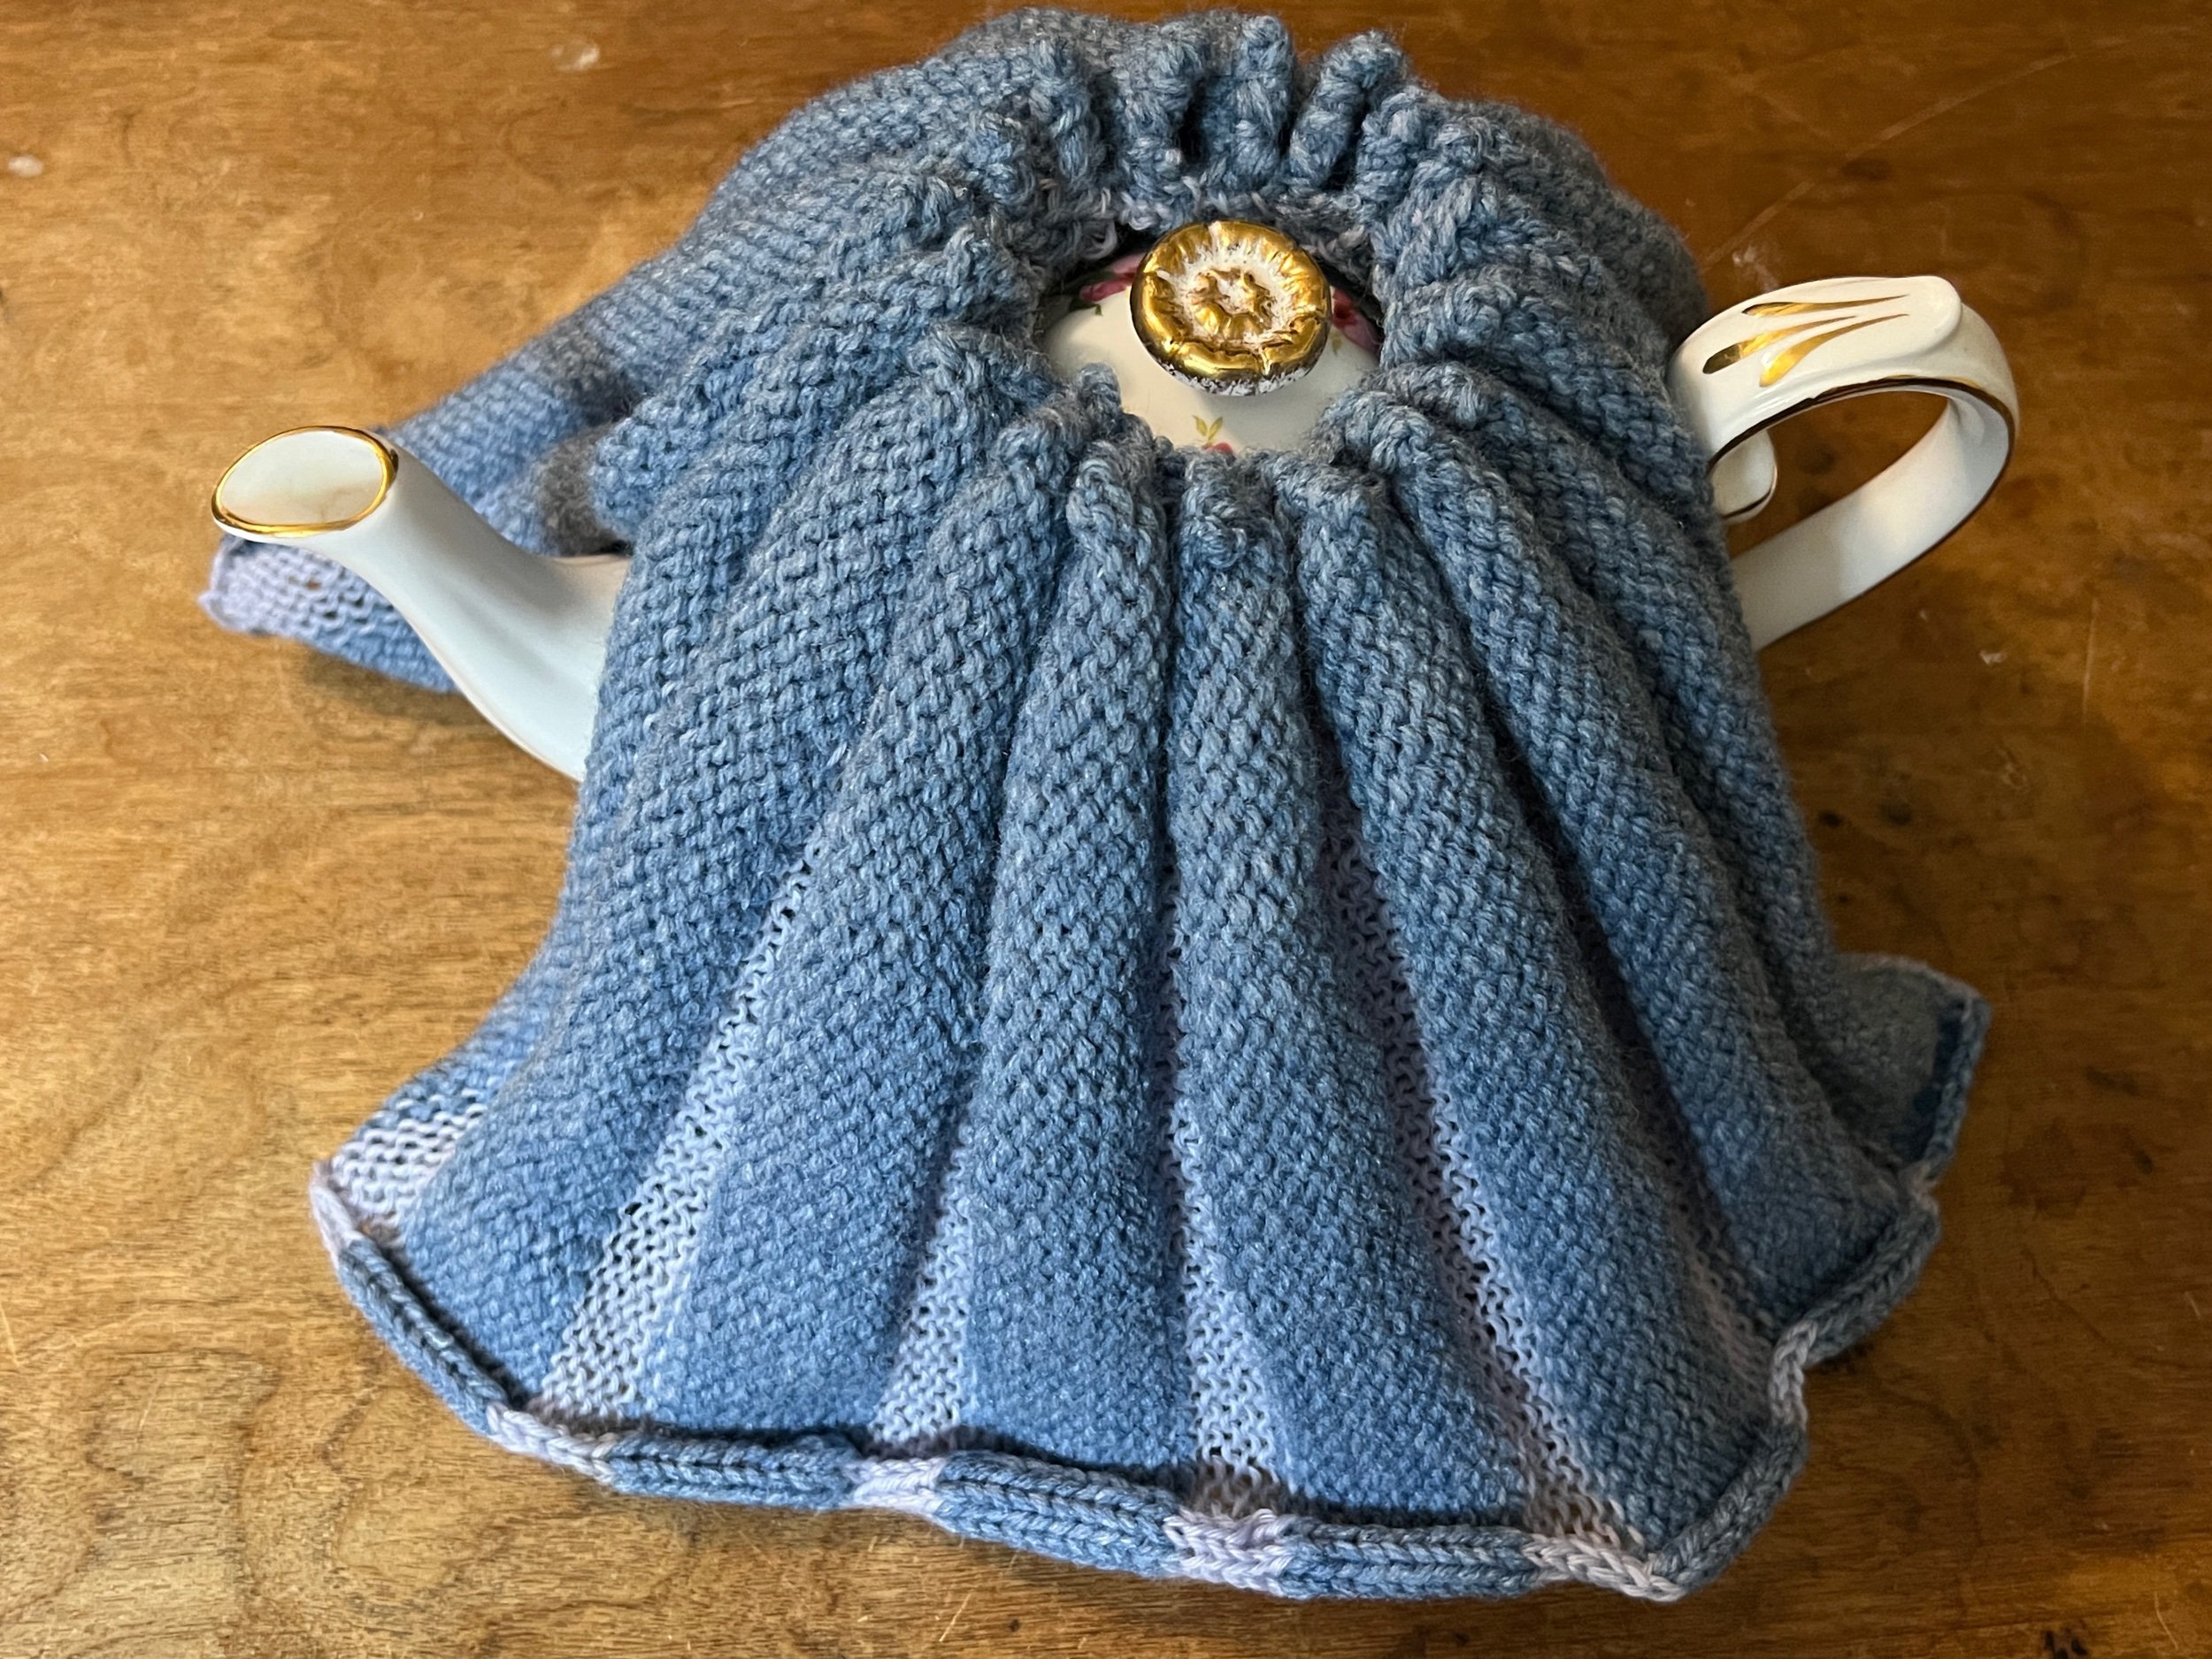
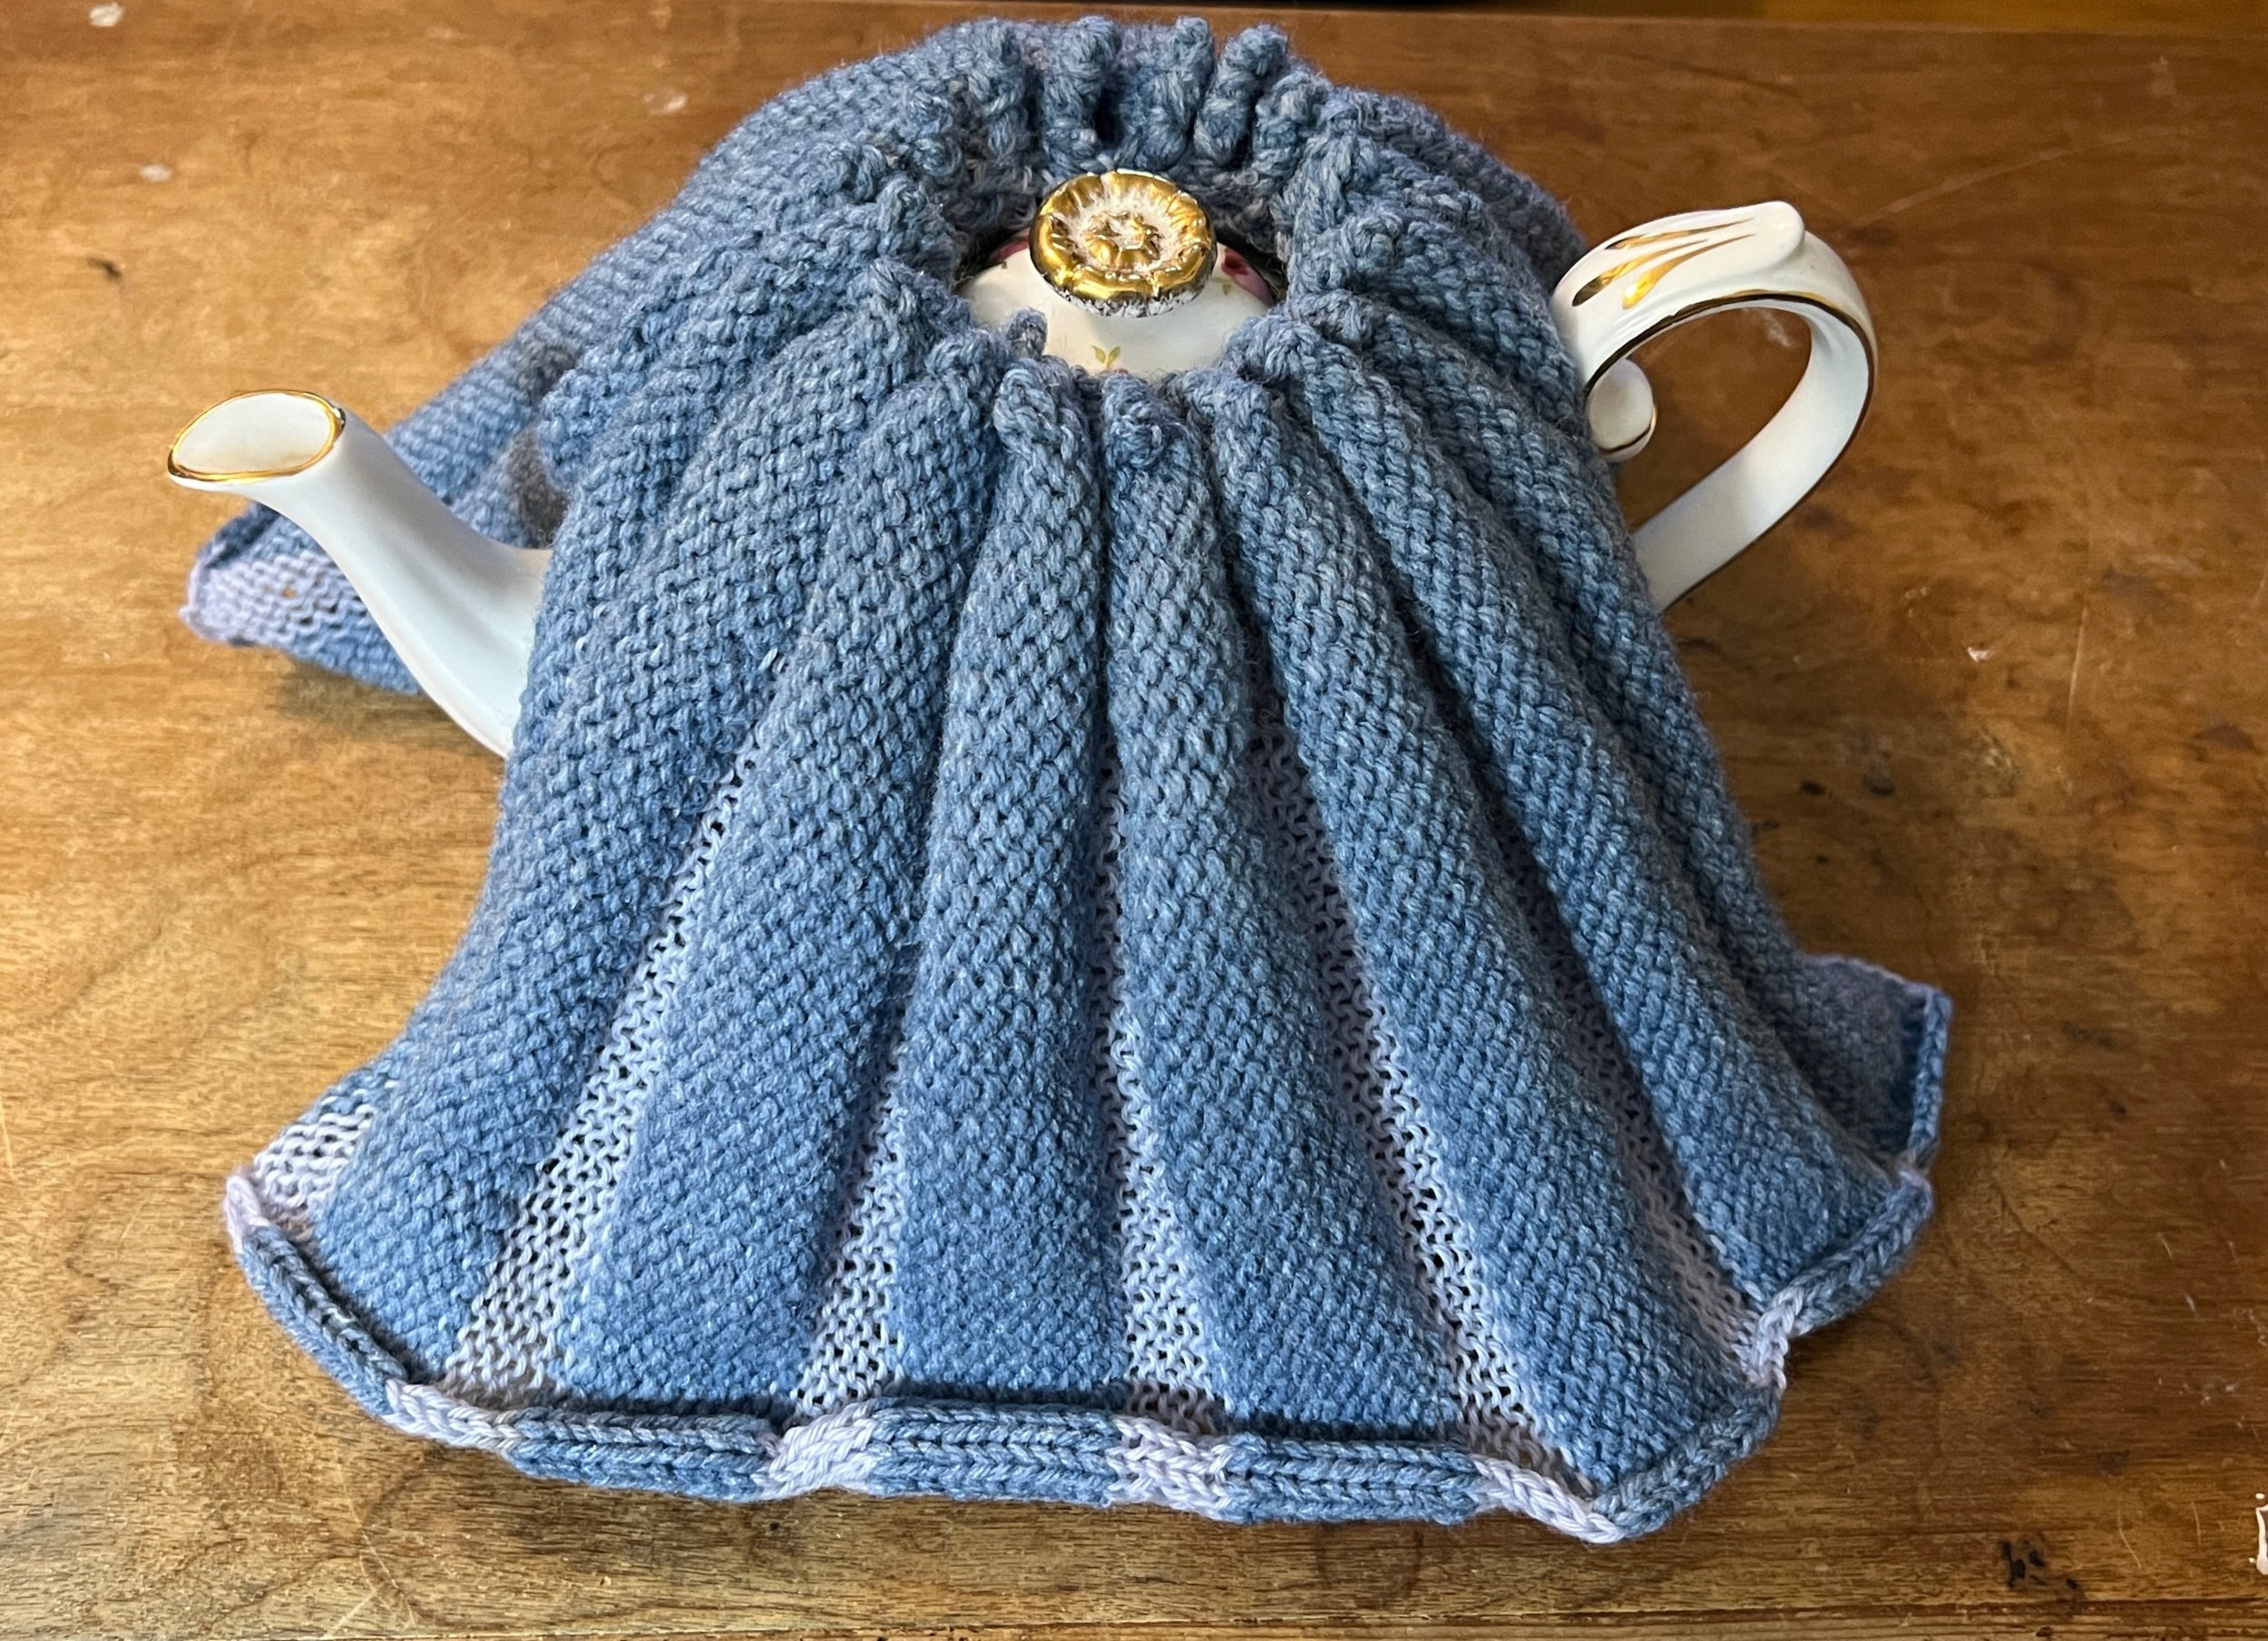
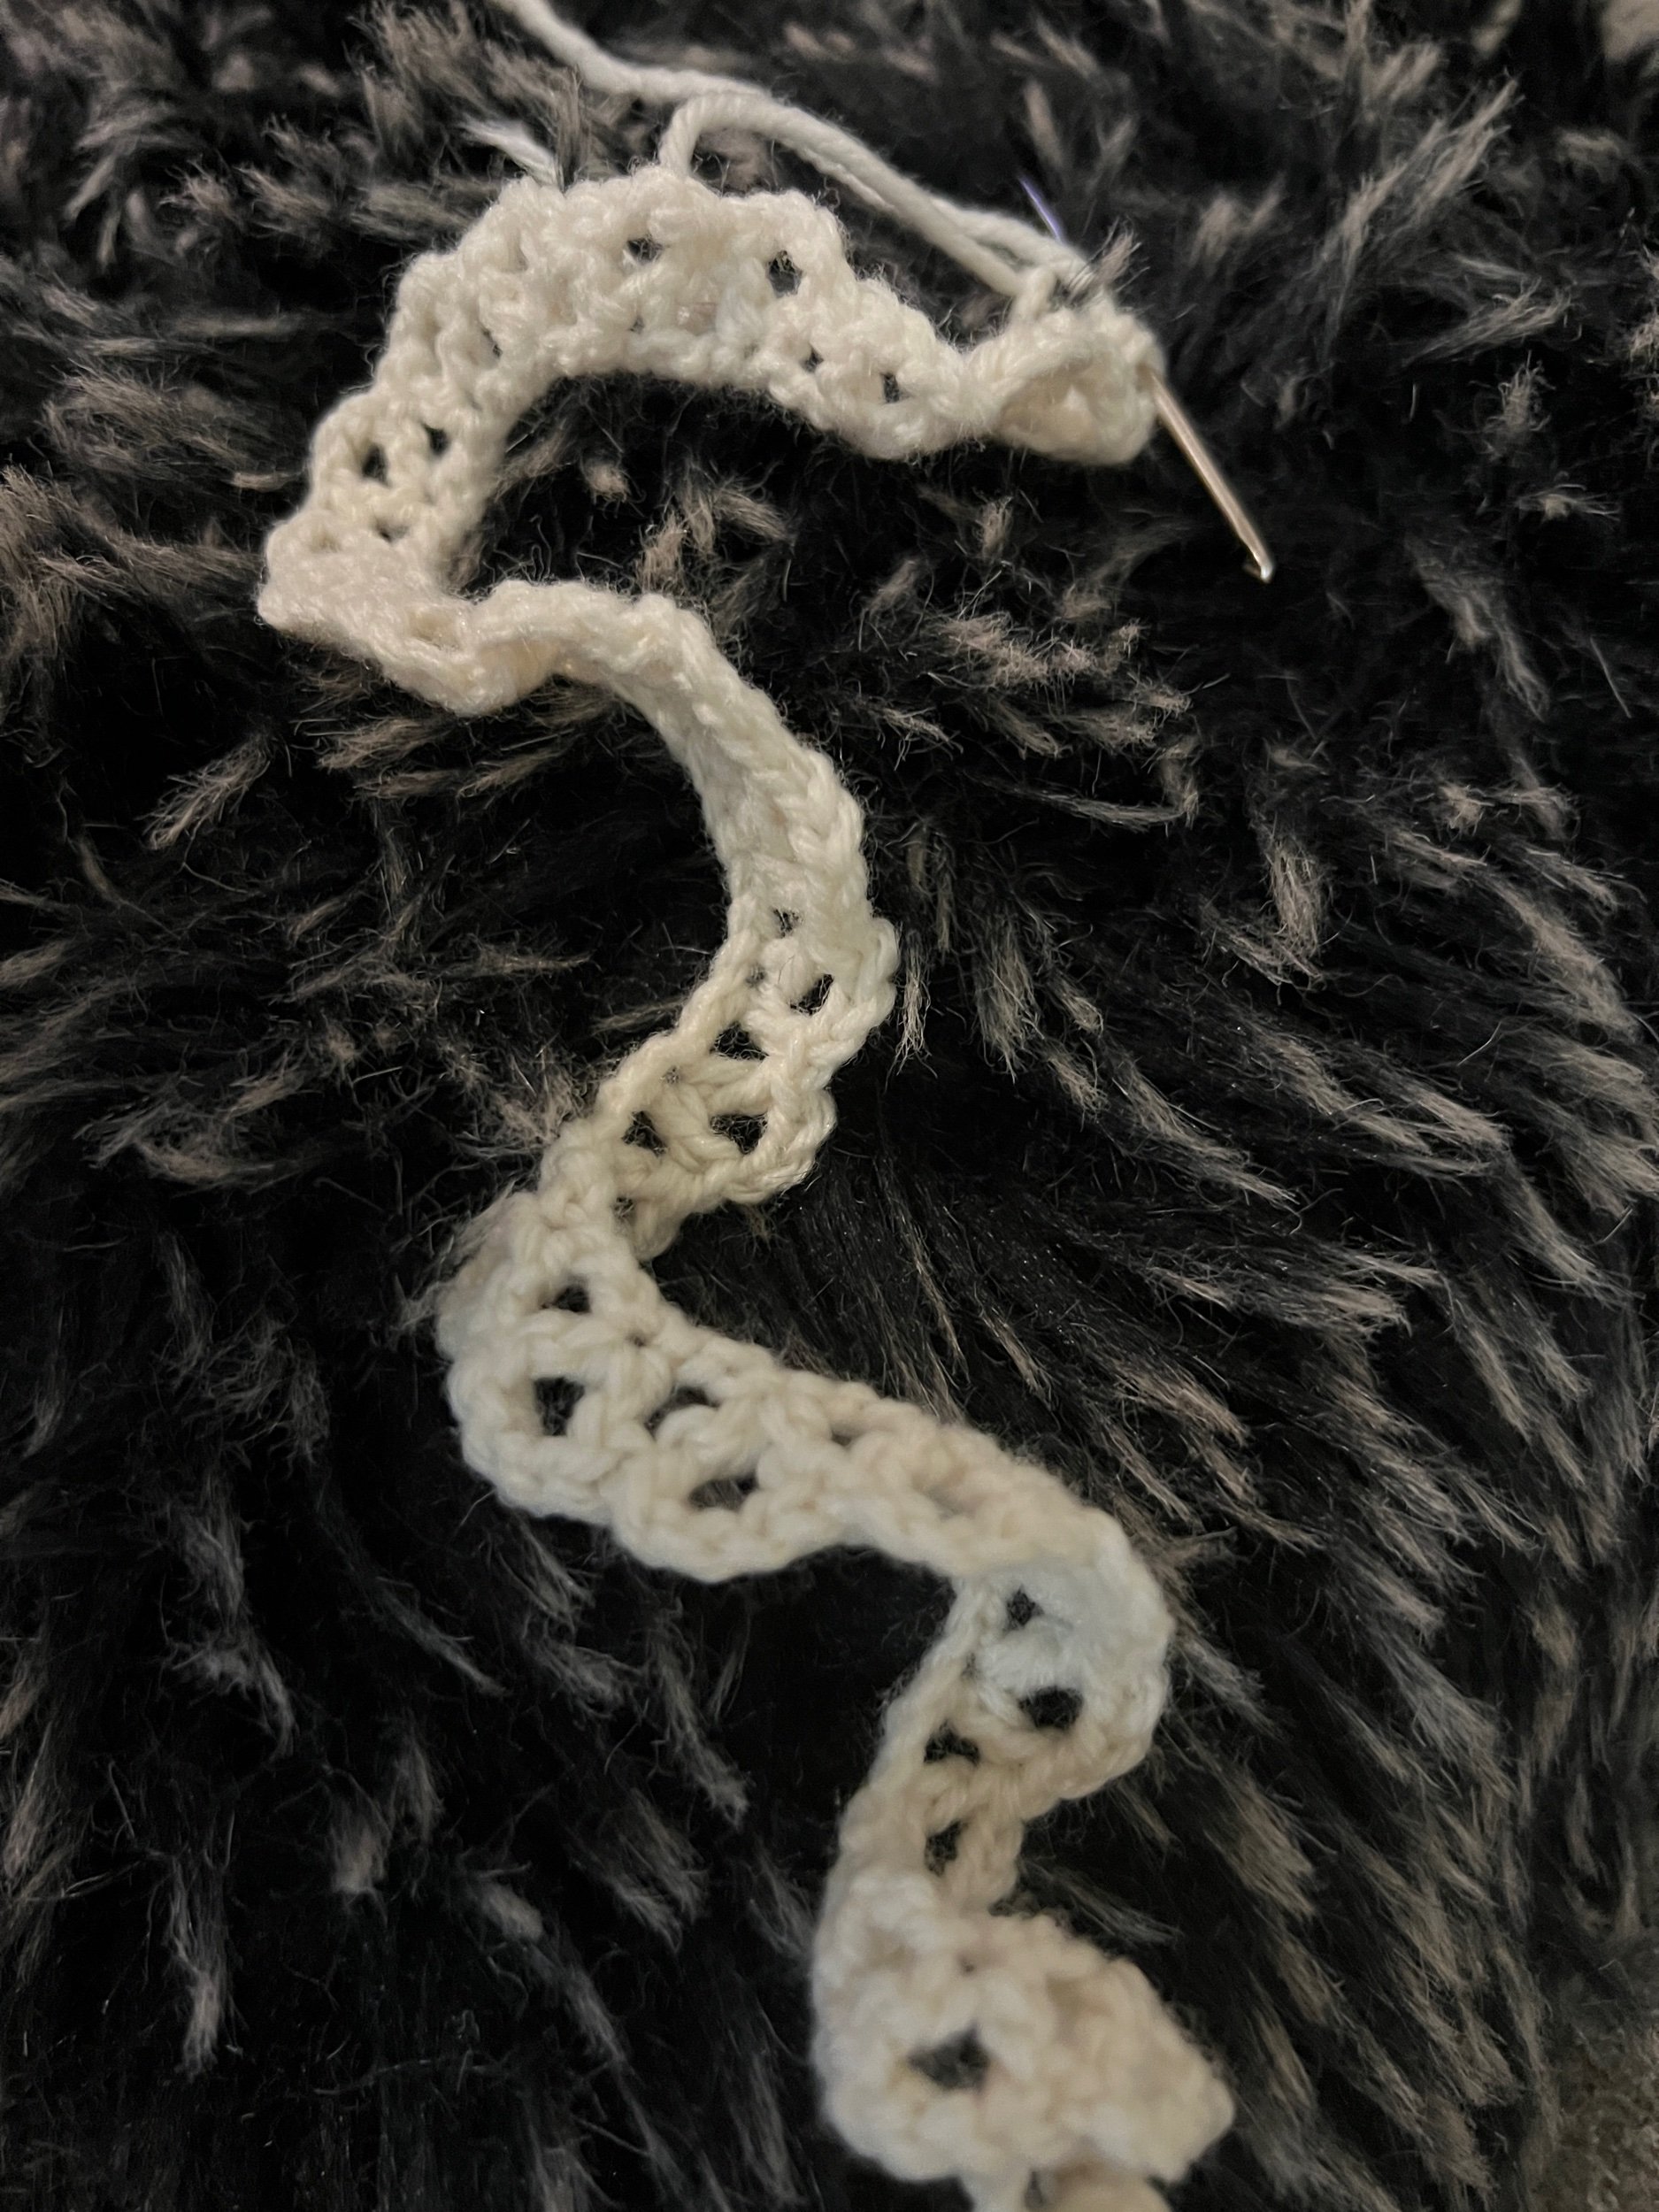
next to I will join the bottom edges of the thicker fibre stripes without making an accordion so that that edge will go more snug against the bottom or side of the tea pot. I used crochet to bring the thicker segments together on the bottom of this project and to join the two panels on the sides.
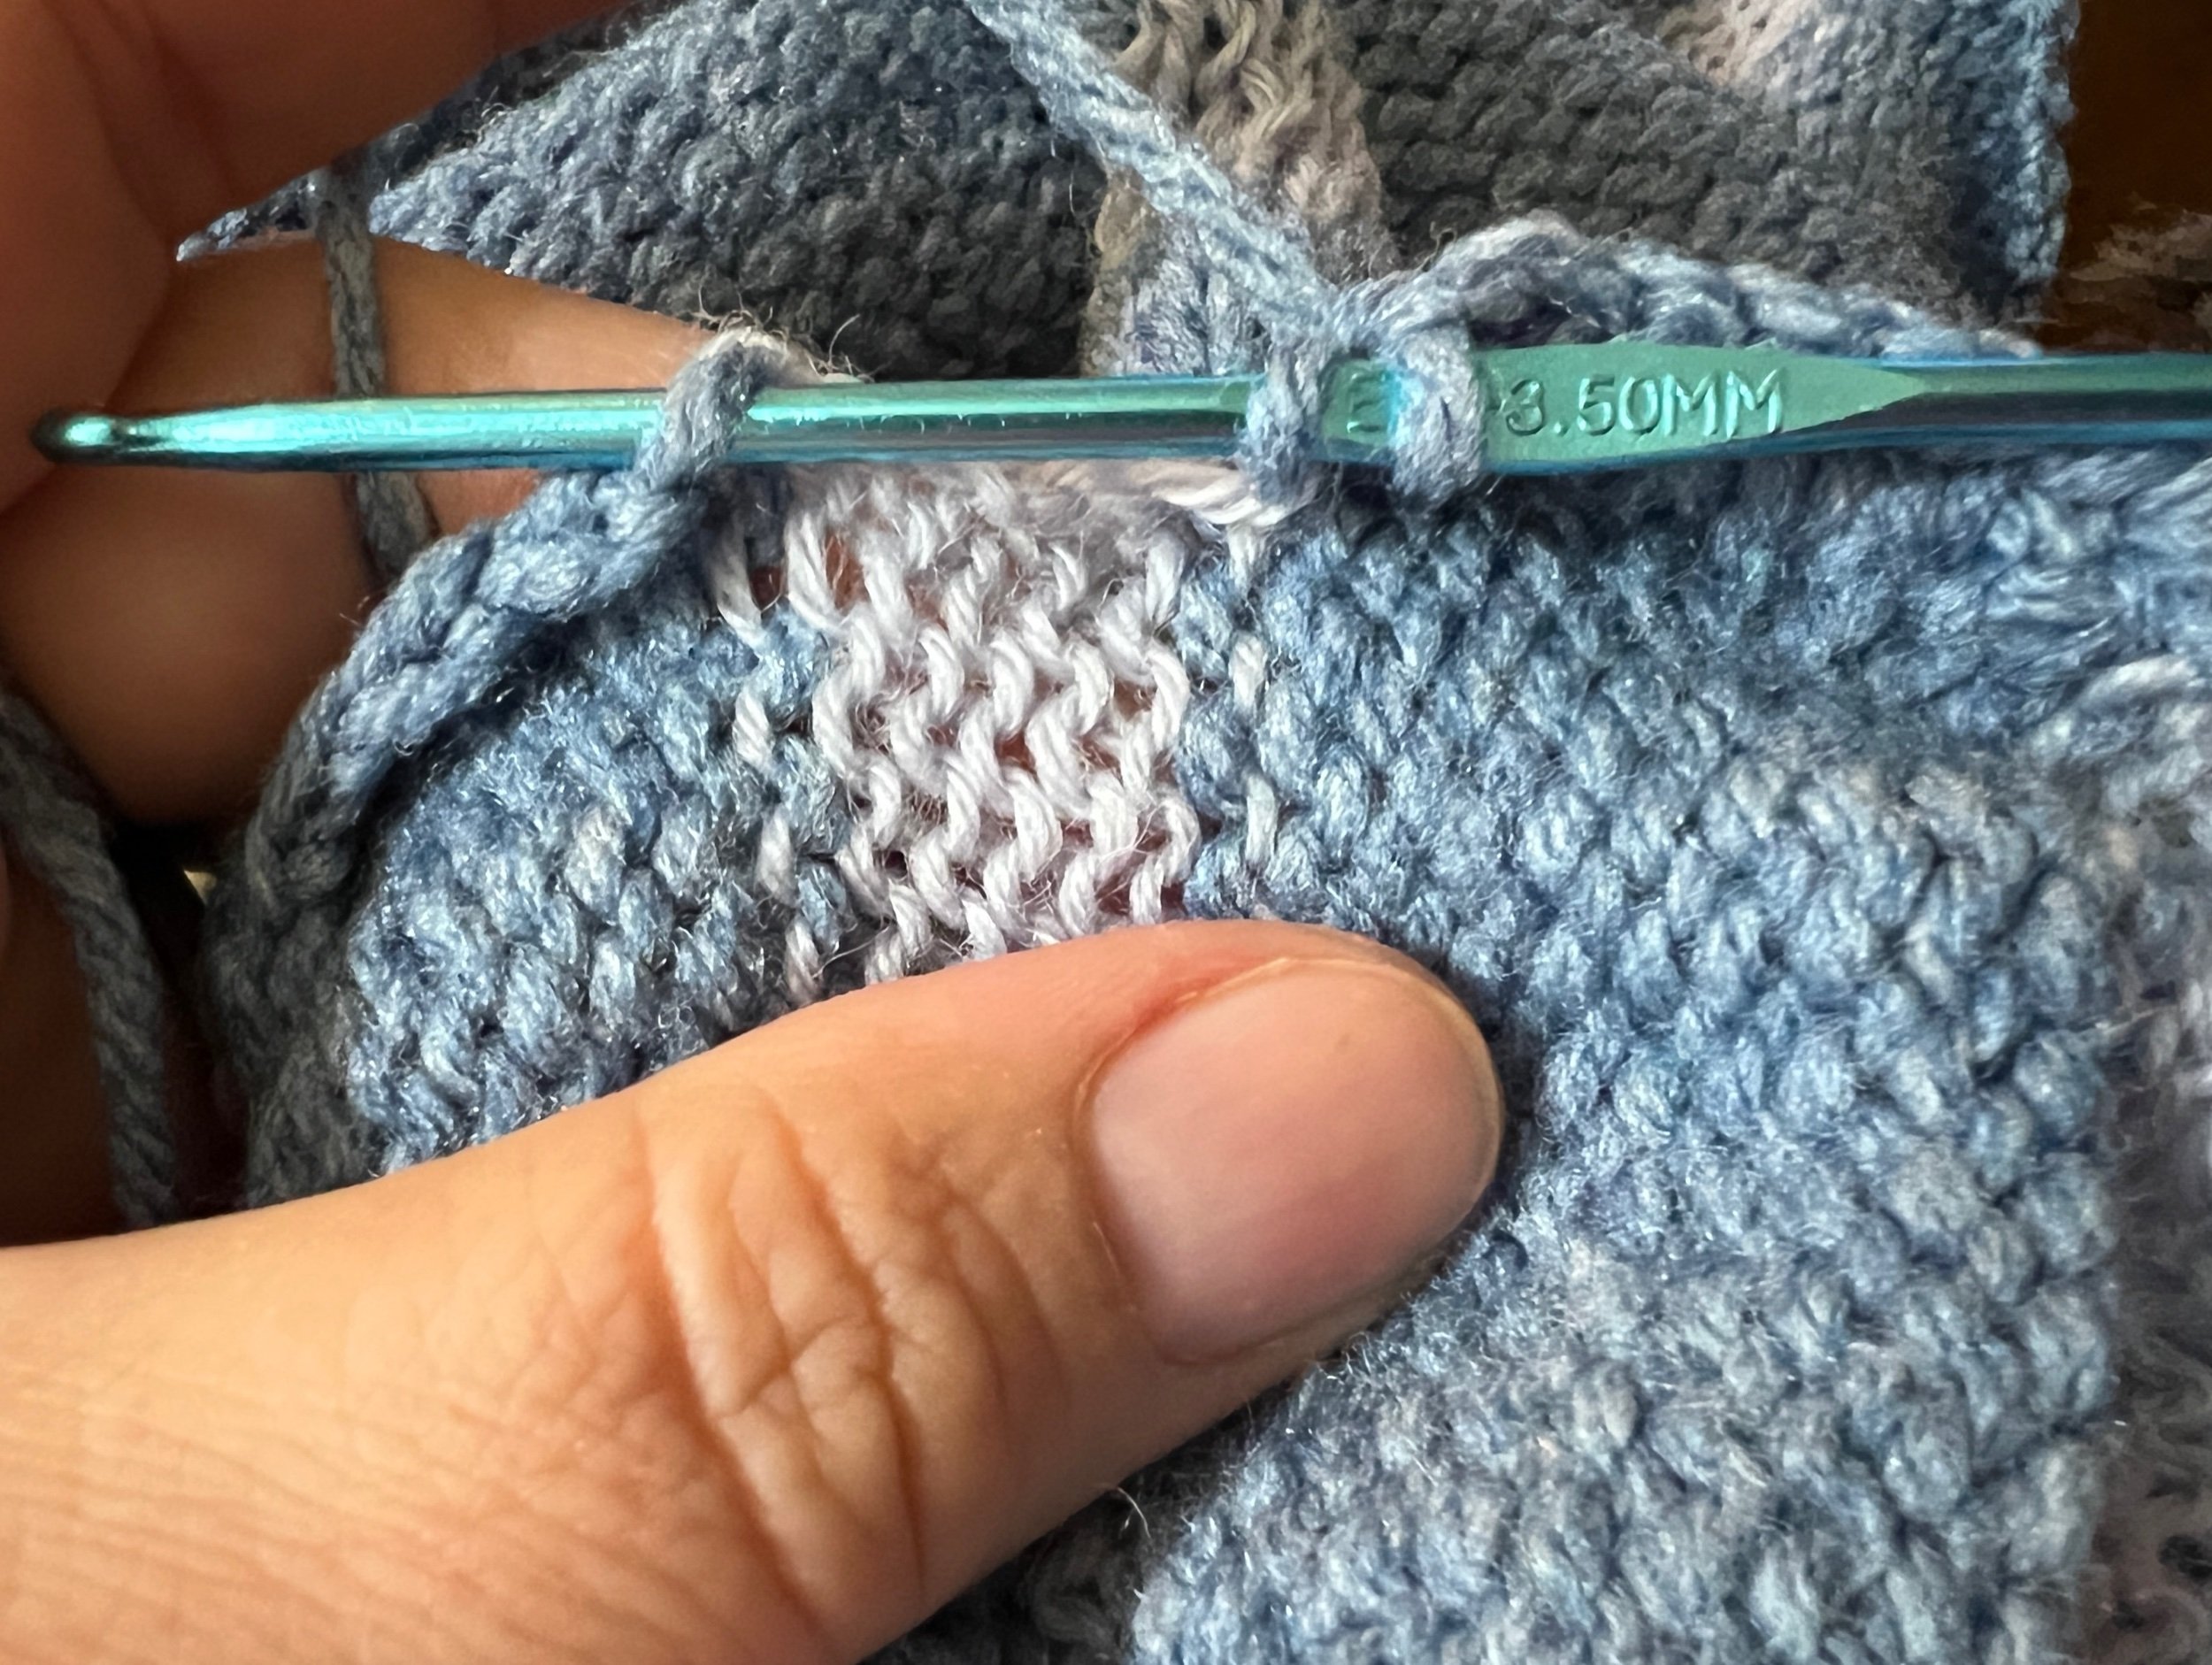
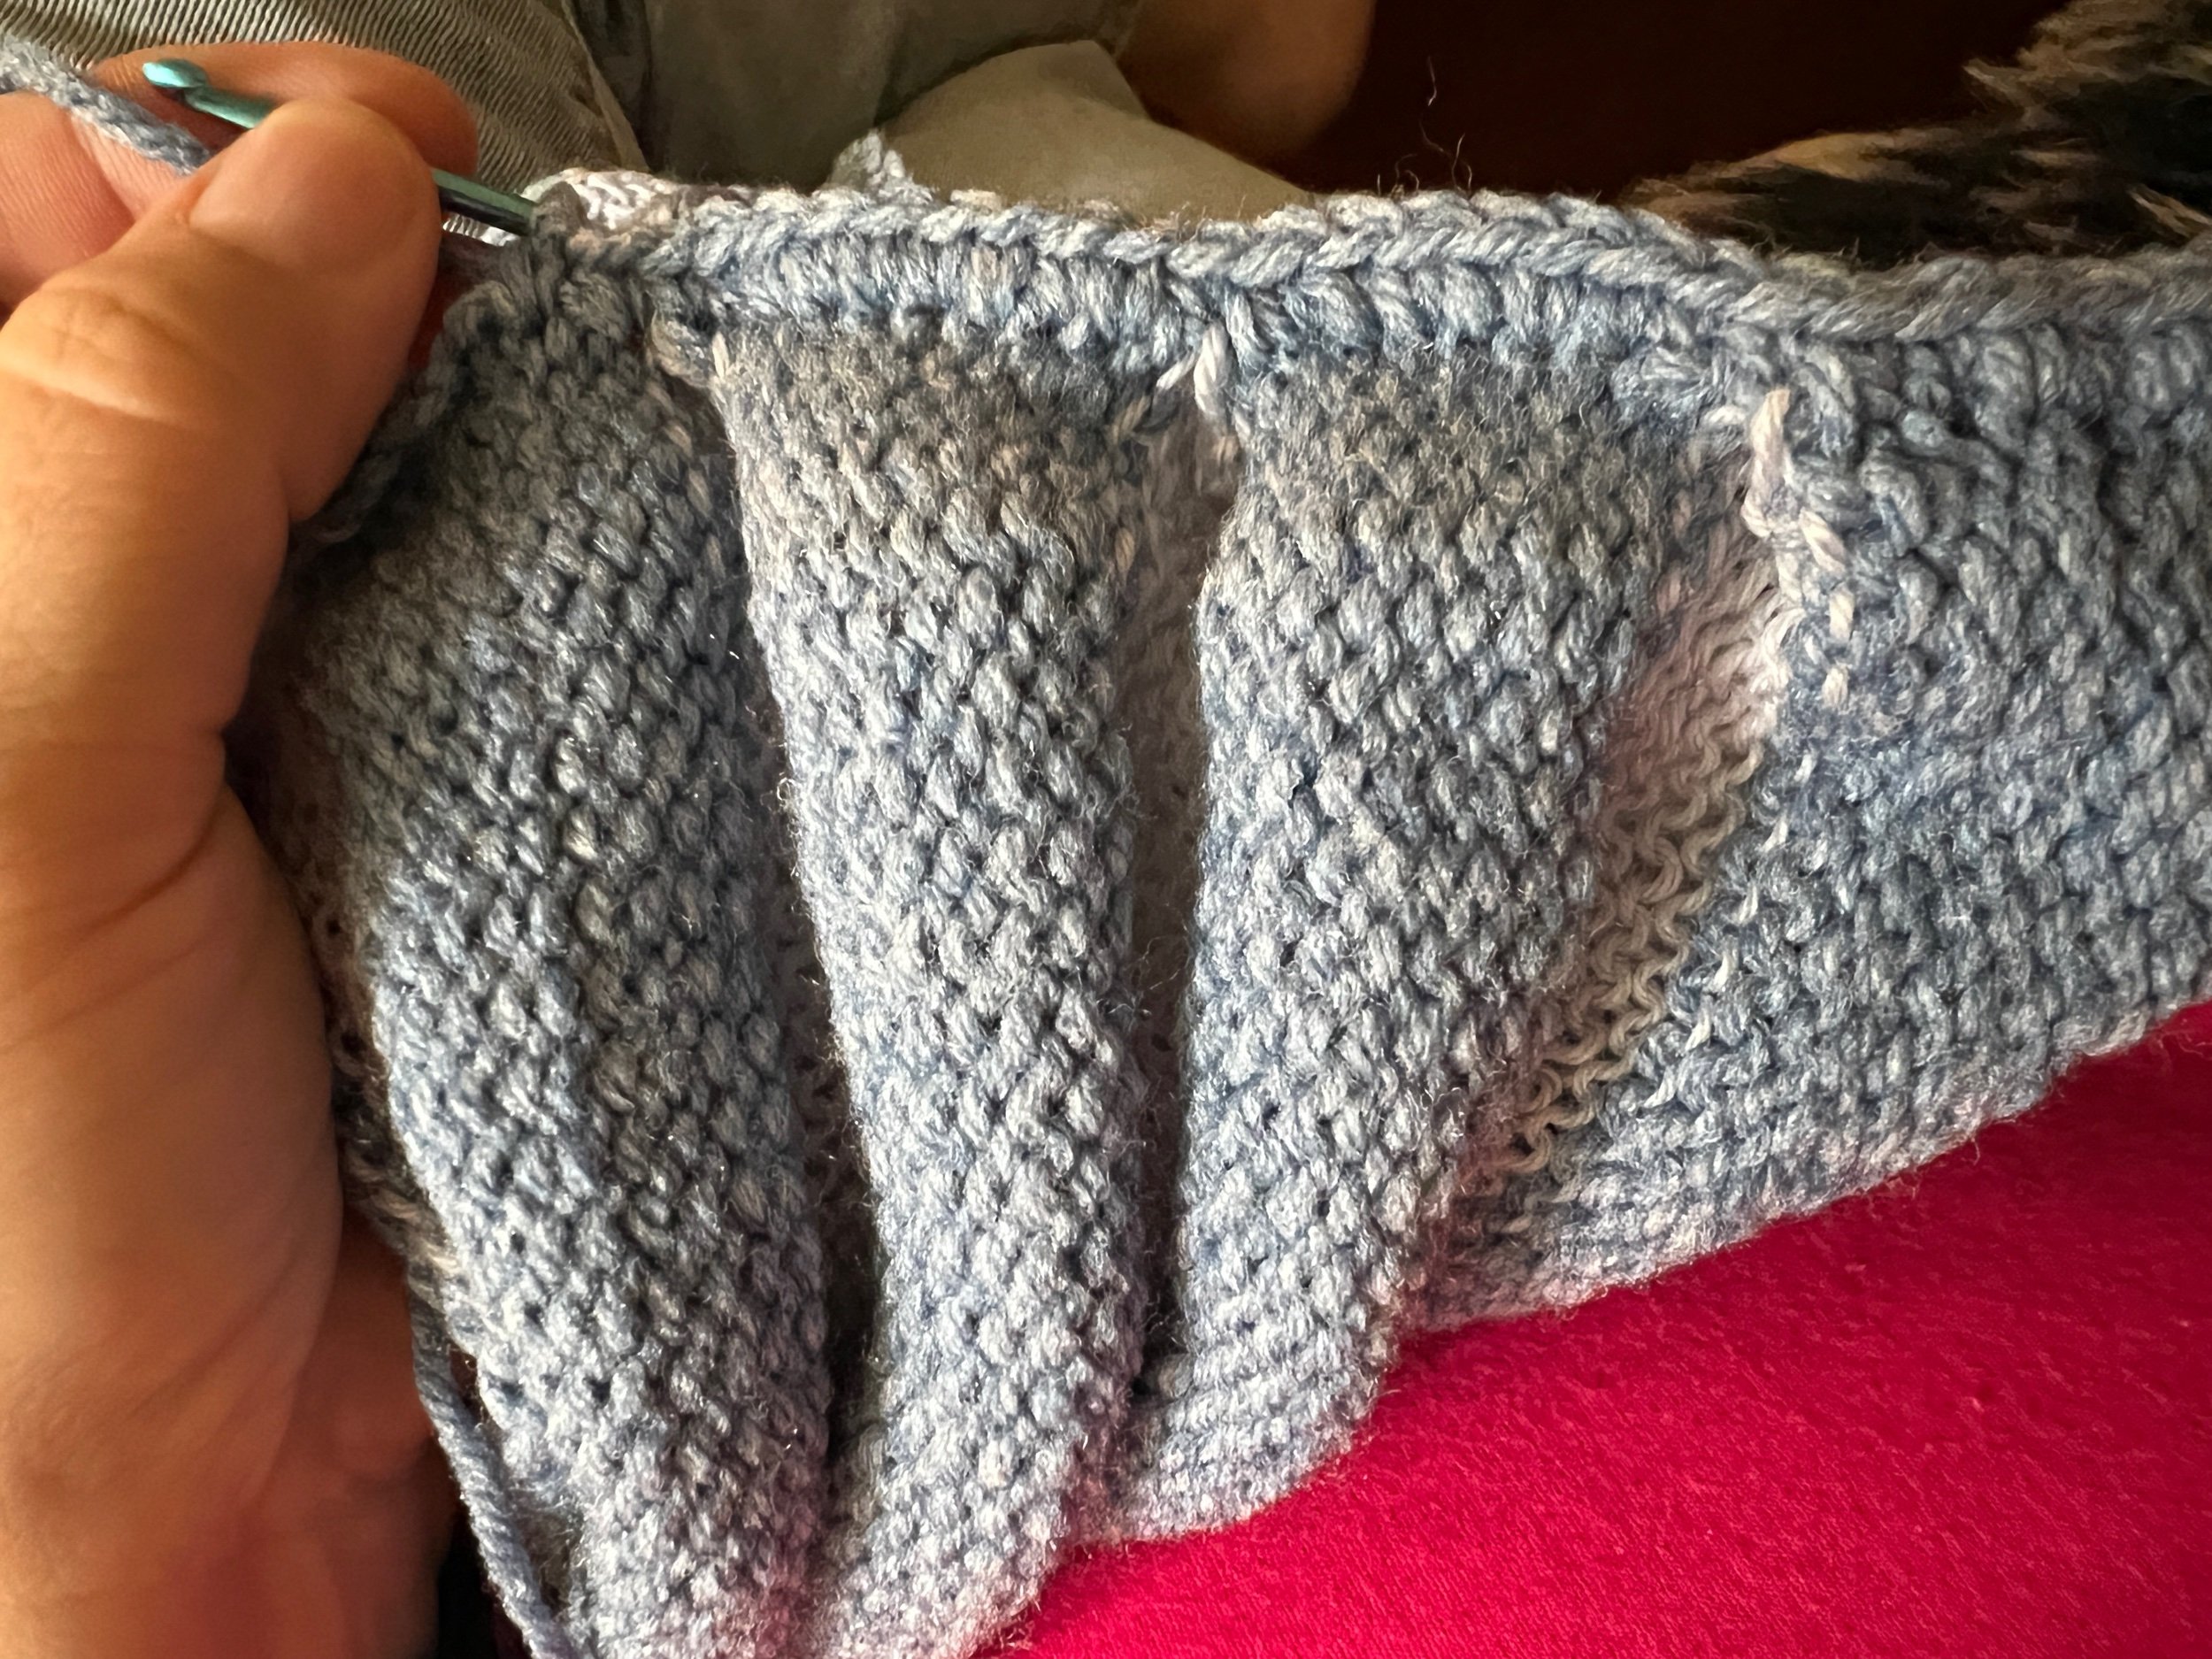
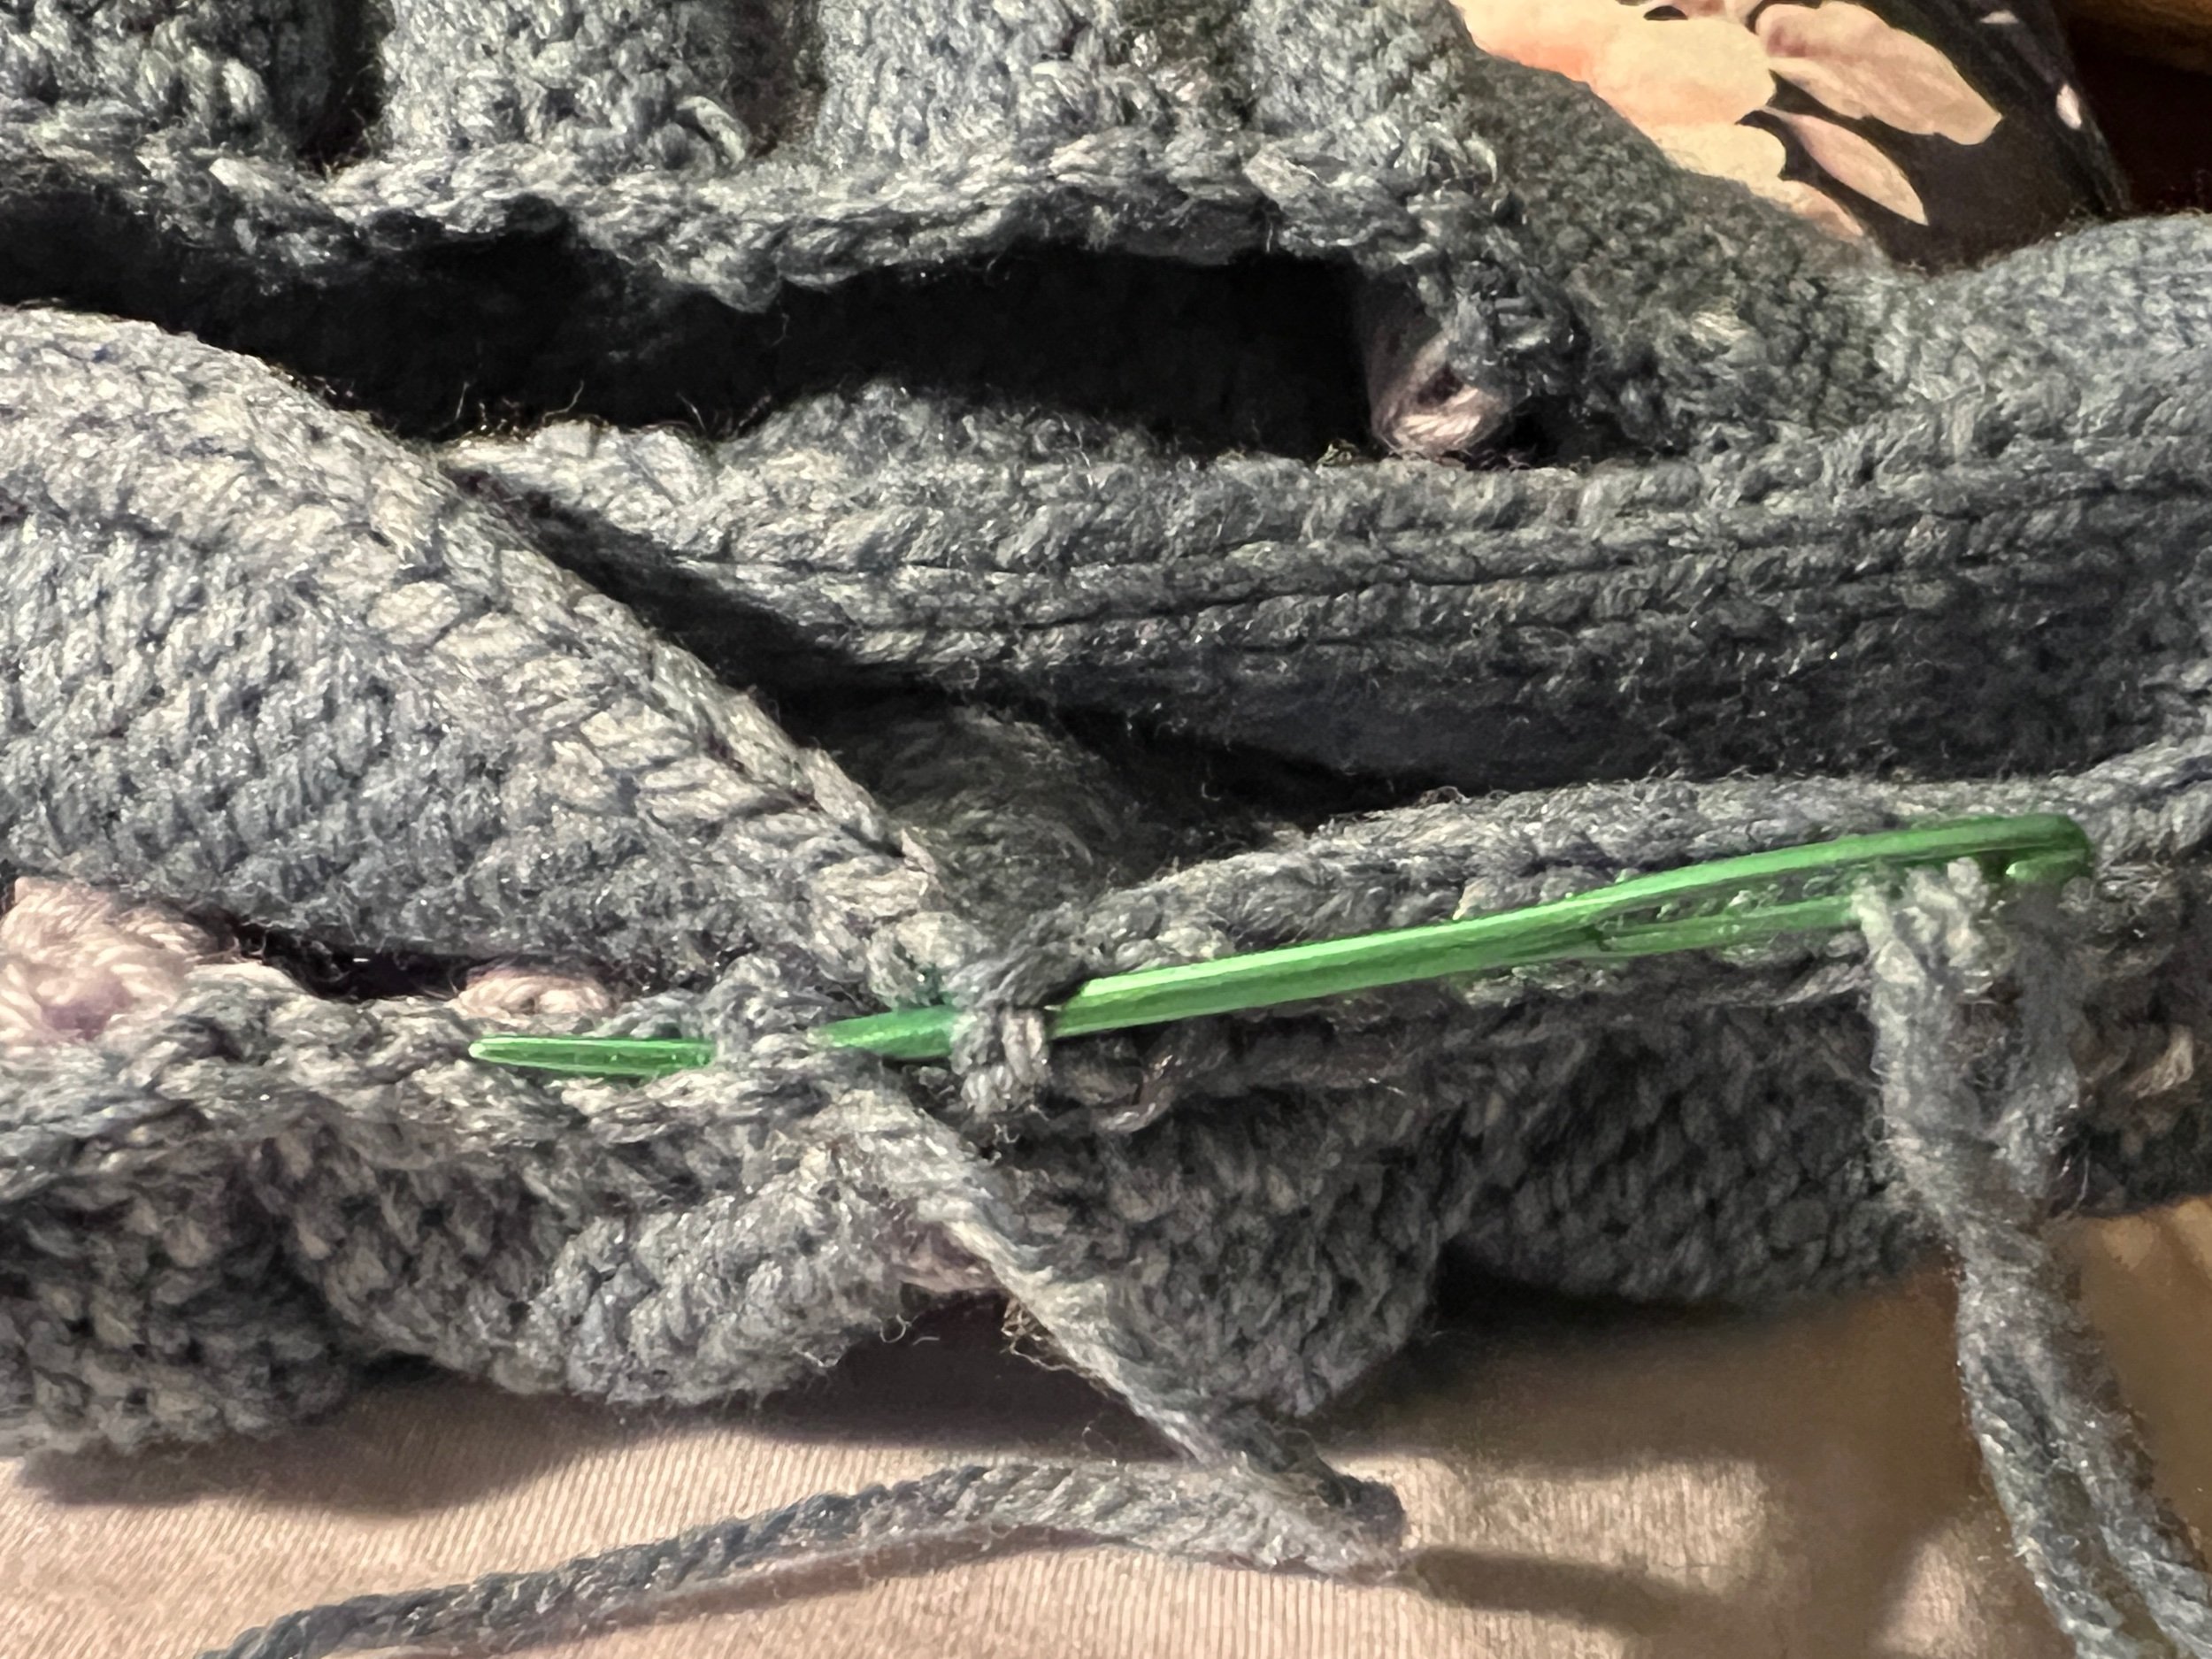
Now with the bottom edge of the outer panels reinforced with a row of crochet it’s time to consider how to connect the liner on the bottom to the flared outer work. I chose a slip stitch reduction row: slip Stich the first stitch then for the second, skip a stitch and slip. Repeat. This brought the edge of the outer work closer to the same size as the edge of the liner there.
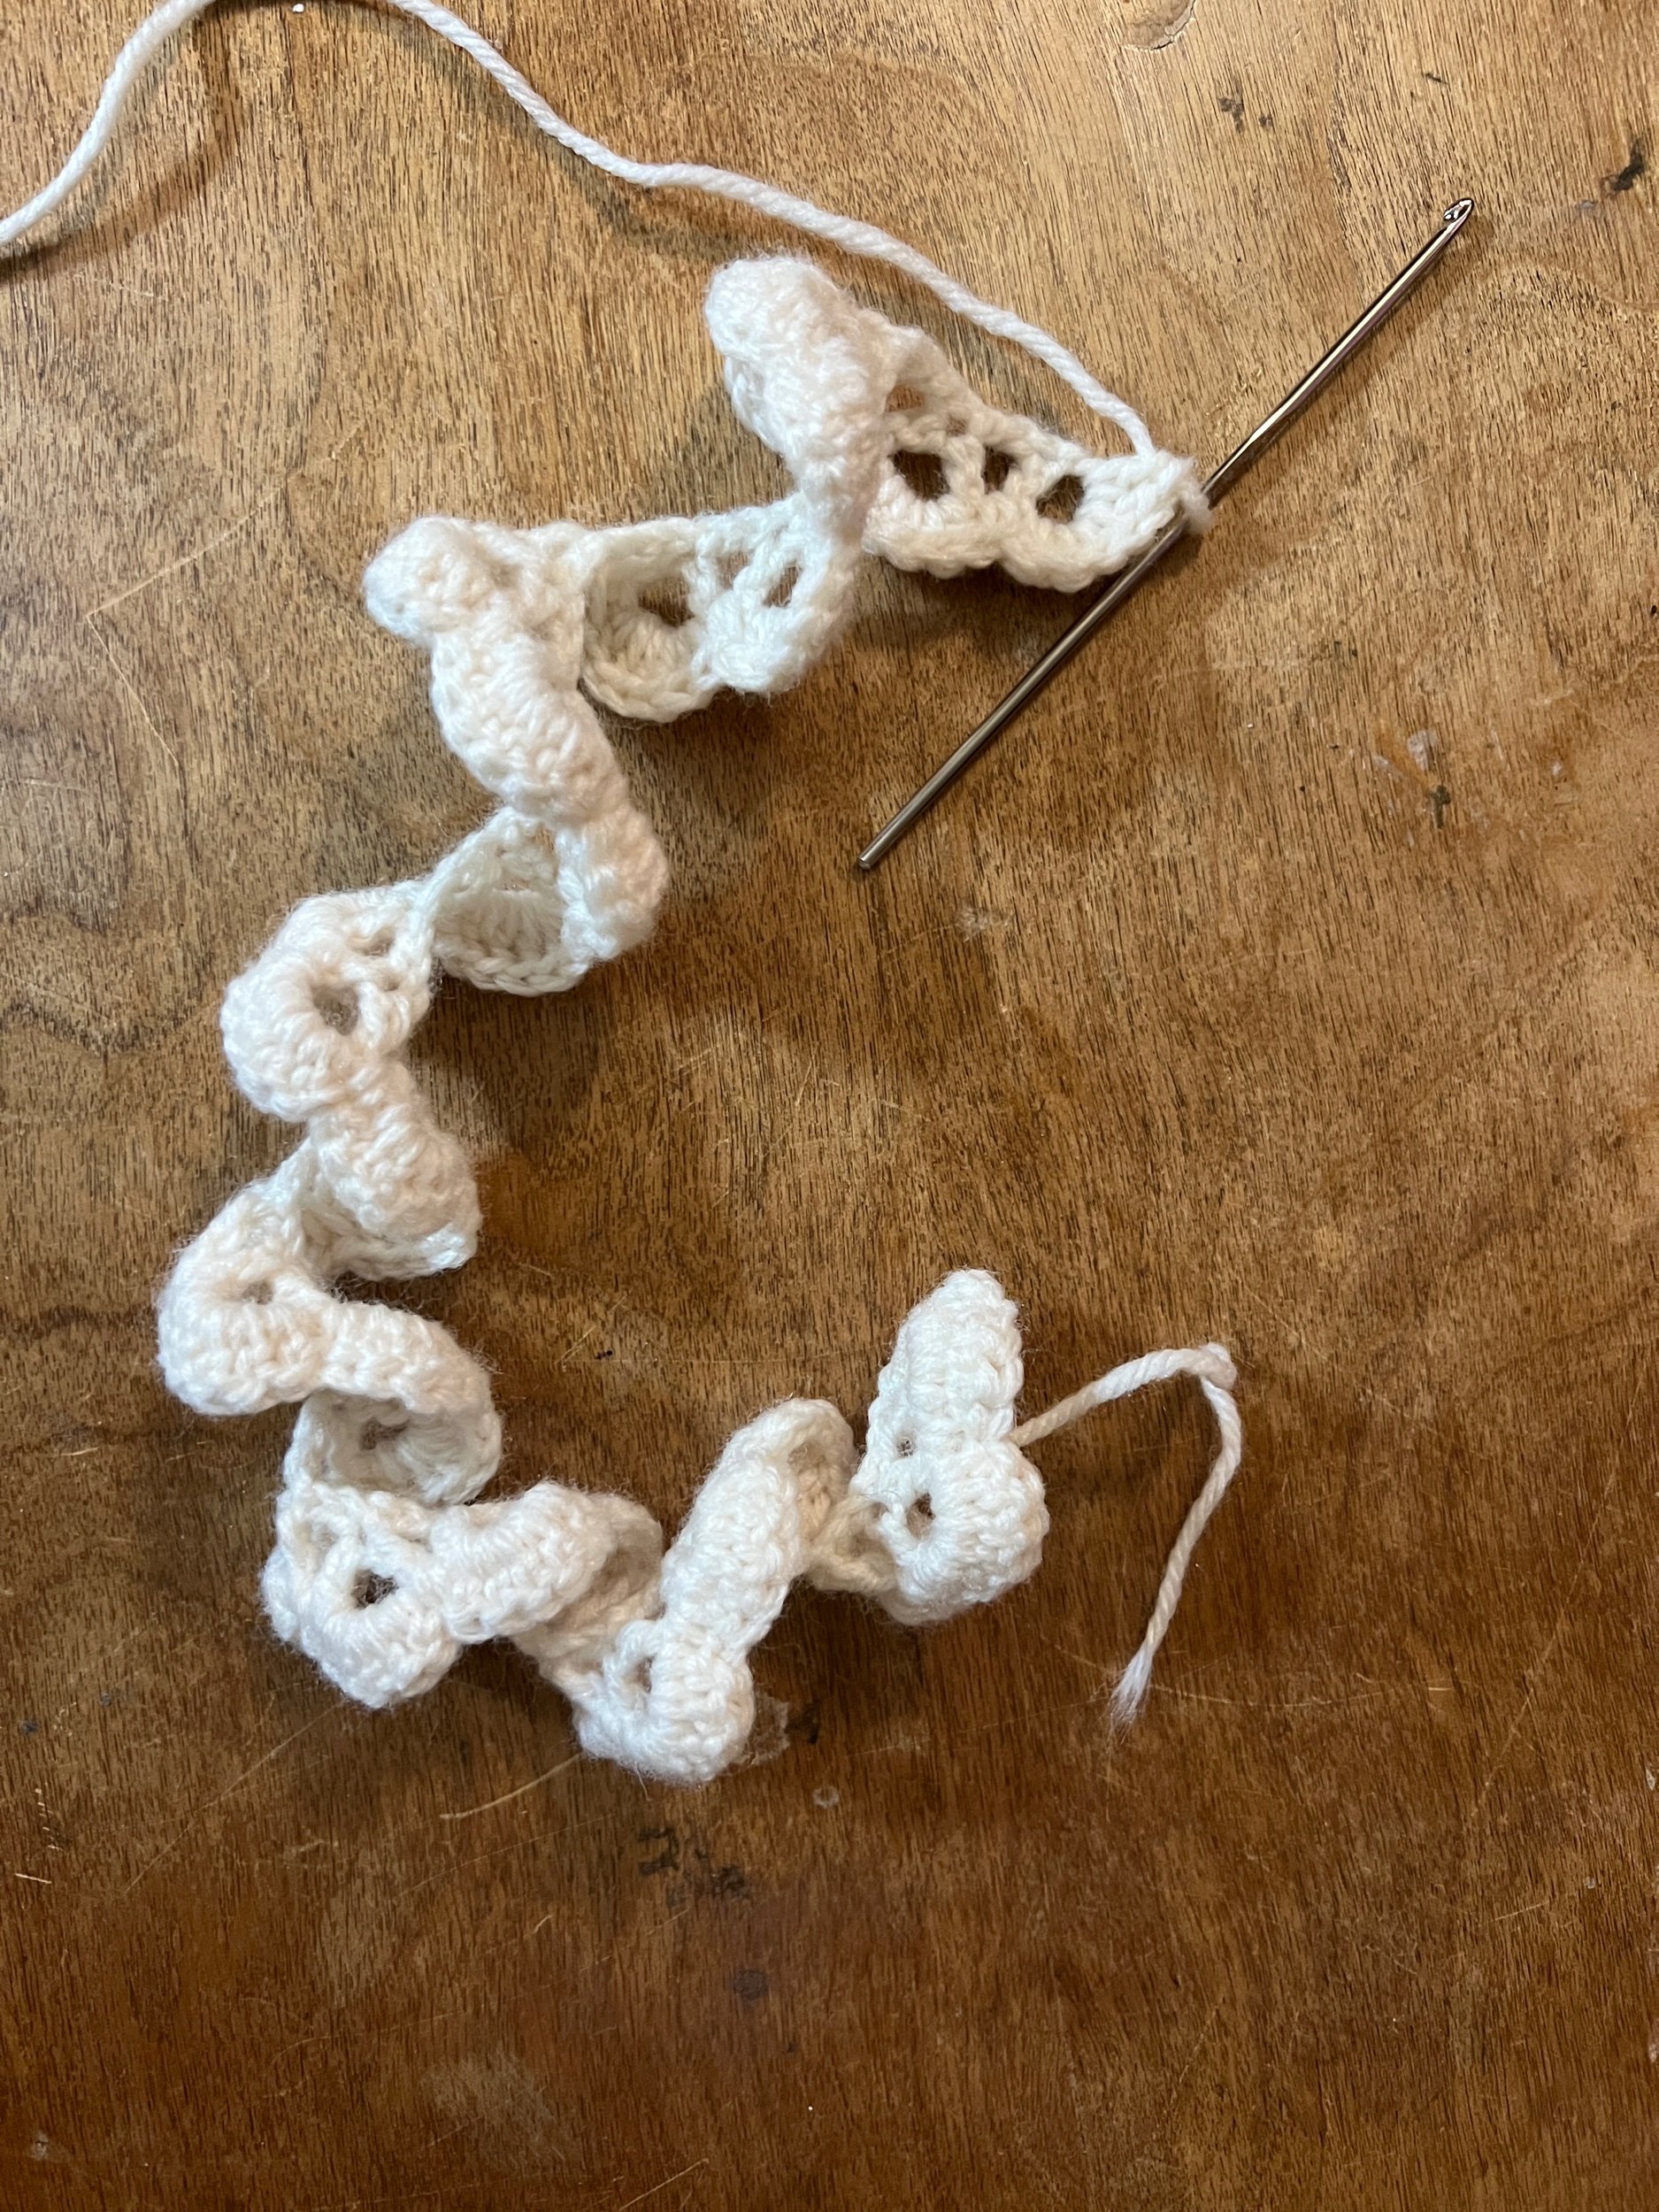
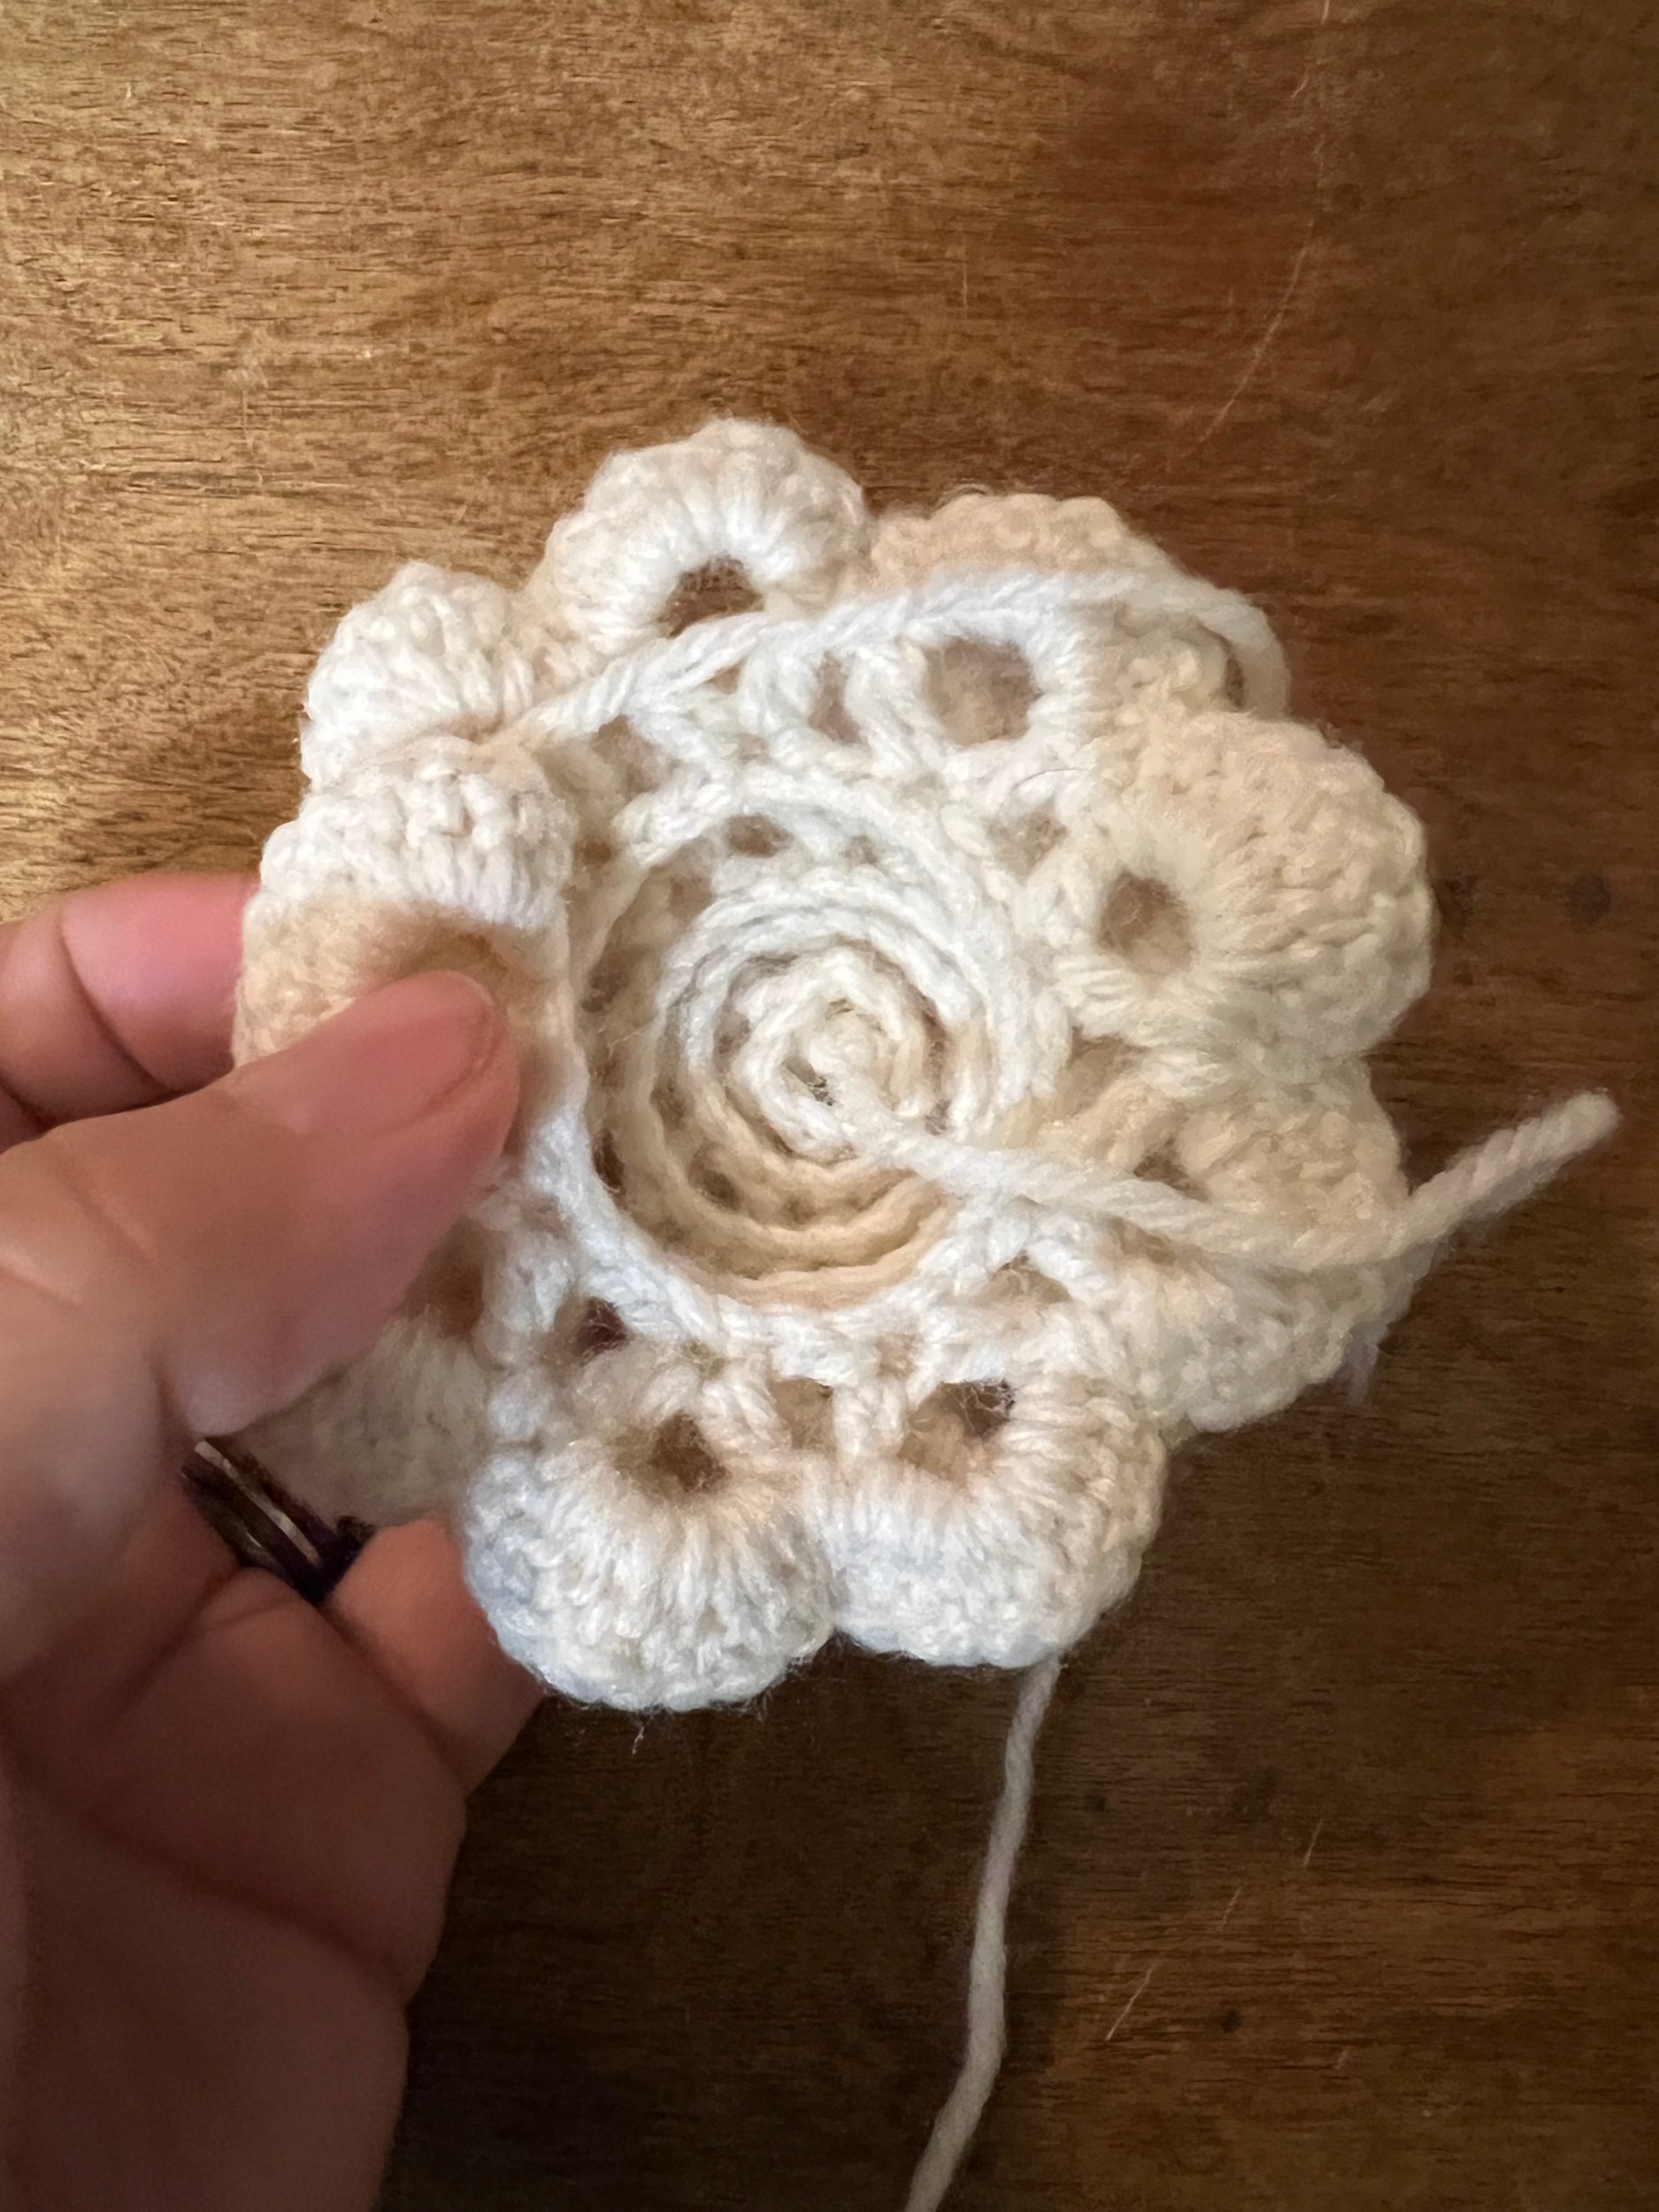
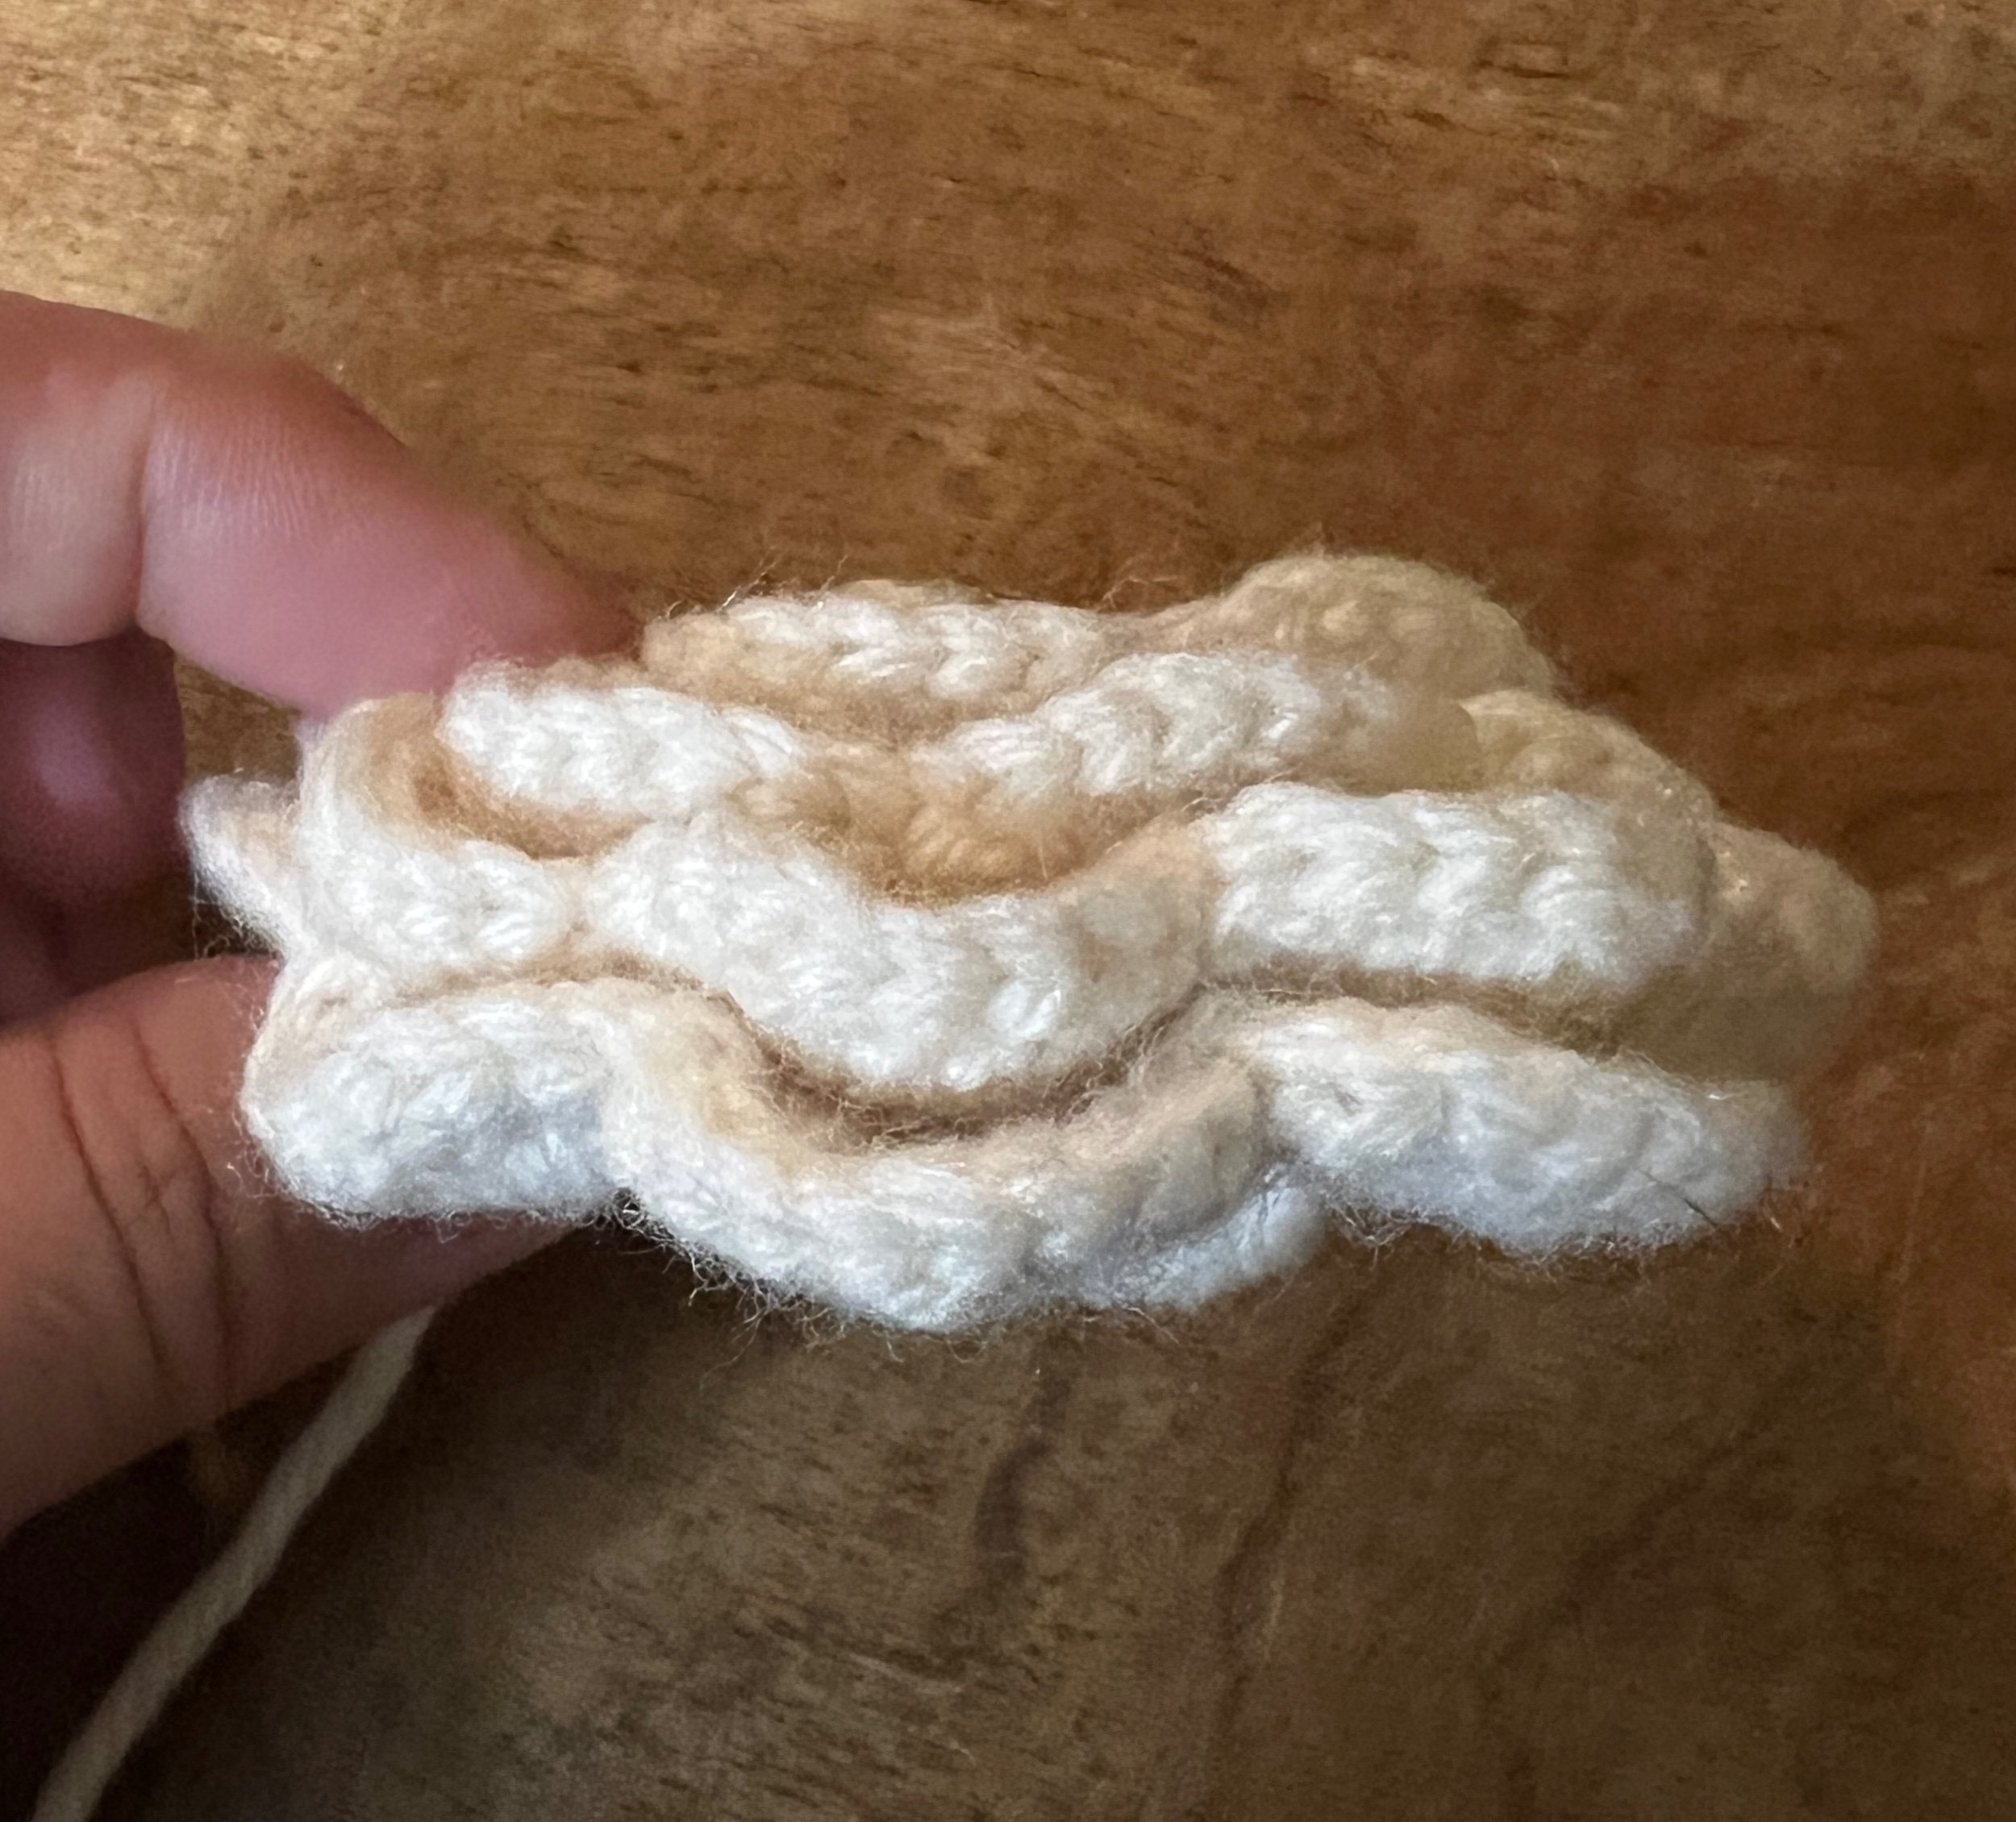
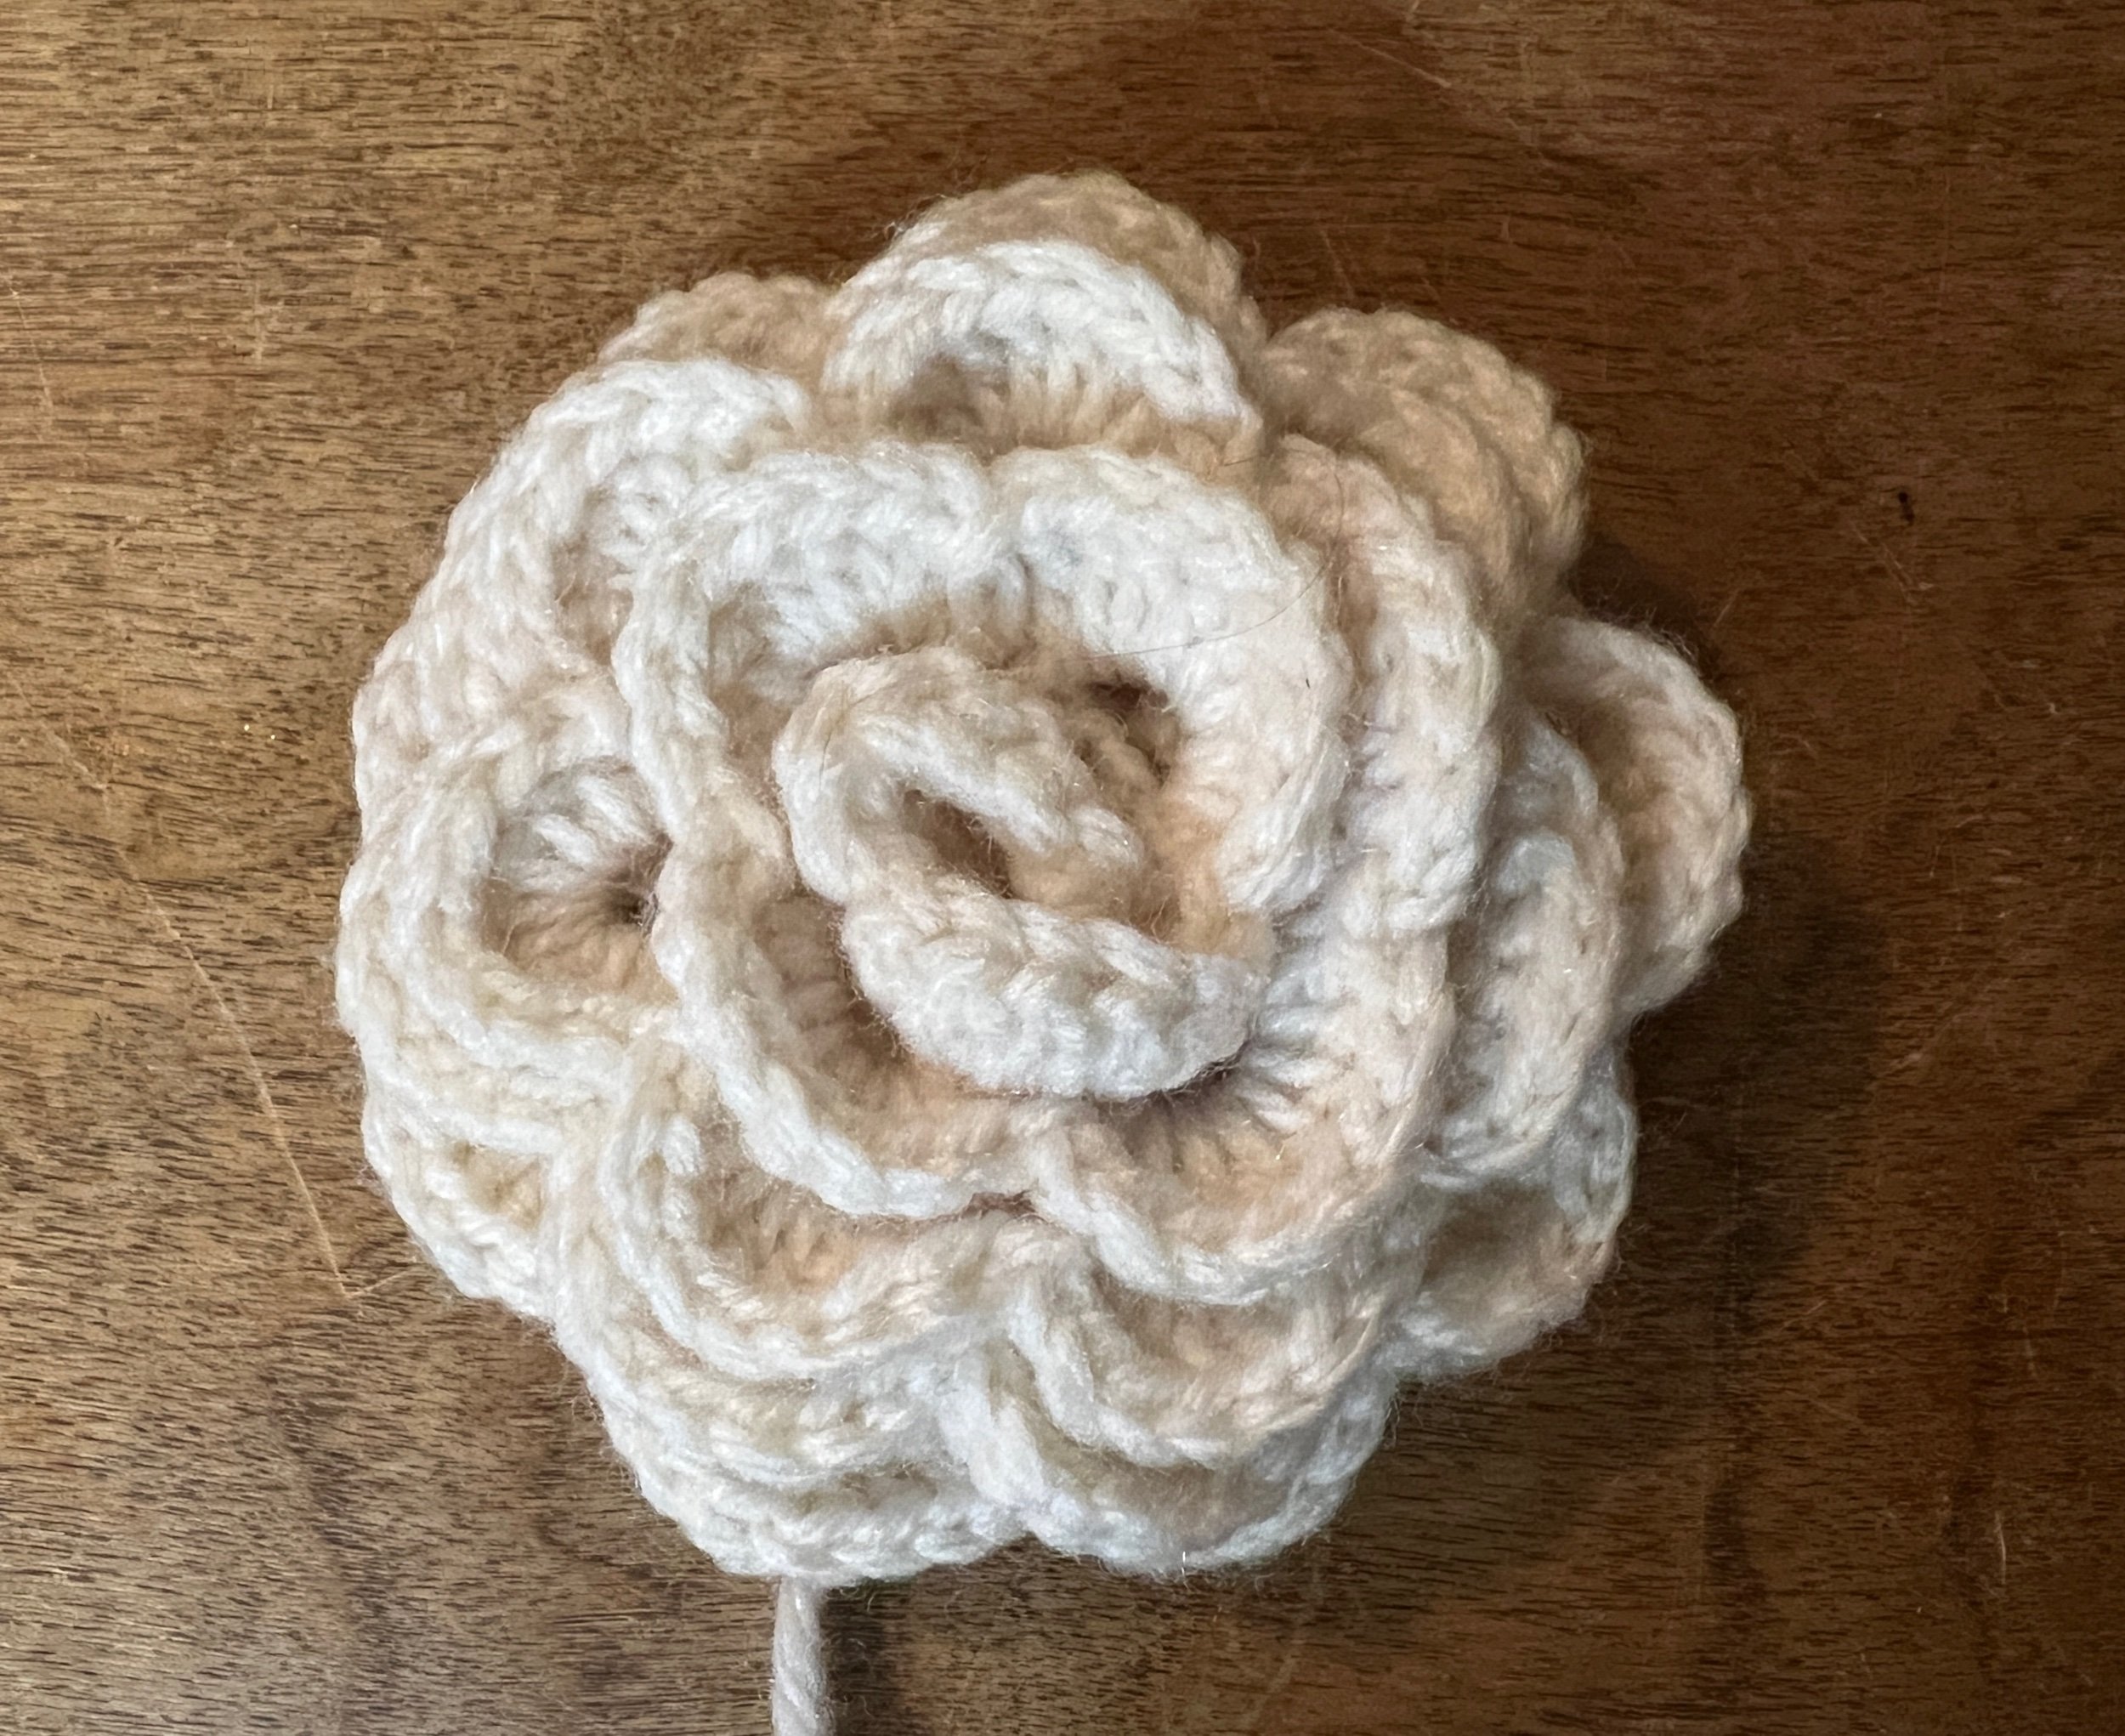
I then seamed the inside edge of the liner to the edge of the outer work and joined the lower openings at the handle and spout to about three fingers high from the bottom edge of the project. I further reinforced the inside top and outside top area, created a crocheted flower and attached it.
The crocheted flower was created using https://youtu.be/_VkHJUT73y0