


How to cat proof your working yarn while stepping away from your CSM
2018 Nov 23 - CSM Event - Lacey, Wa
This is my SECOND CSM EVENT!
Fri, Nov 23, 201812:00 PM Sun, Nov 25, 20183:00 PM
Gwinwood Christian Conference Grounds and Retreat Center (map)
This event is held at Grinwood, Lacey, Washington, USA organized by Pat Fly of angoravalley.com
Event name “Sock Machine, Knitting Machine, Quilting and Crafts Retreat”
For more info please contact Pat Fly at pat@angoravalley.com
For more venue info see: https://www.gwinwood.org/ or https://www.facebook.com/GwinwoodCC/
SEE ALL BLOG ENTRIES ON THE BLOG INDEX PAGE | Follow us on a variety of social sites see TAPLINK | Interested in Circular Sock Machines? See the CSM START Menu first page. | Seek something specific? Checkout the Index page.
2018 Nov 10 - Mini-Mast!
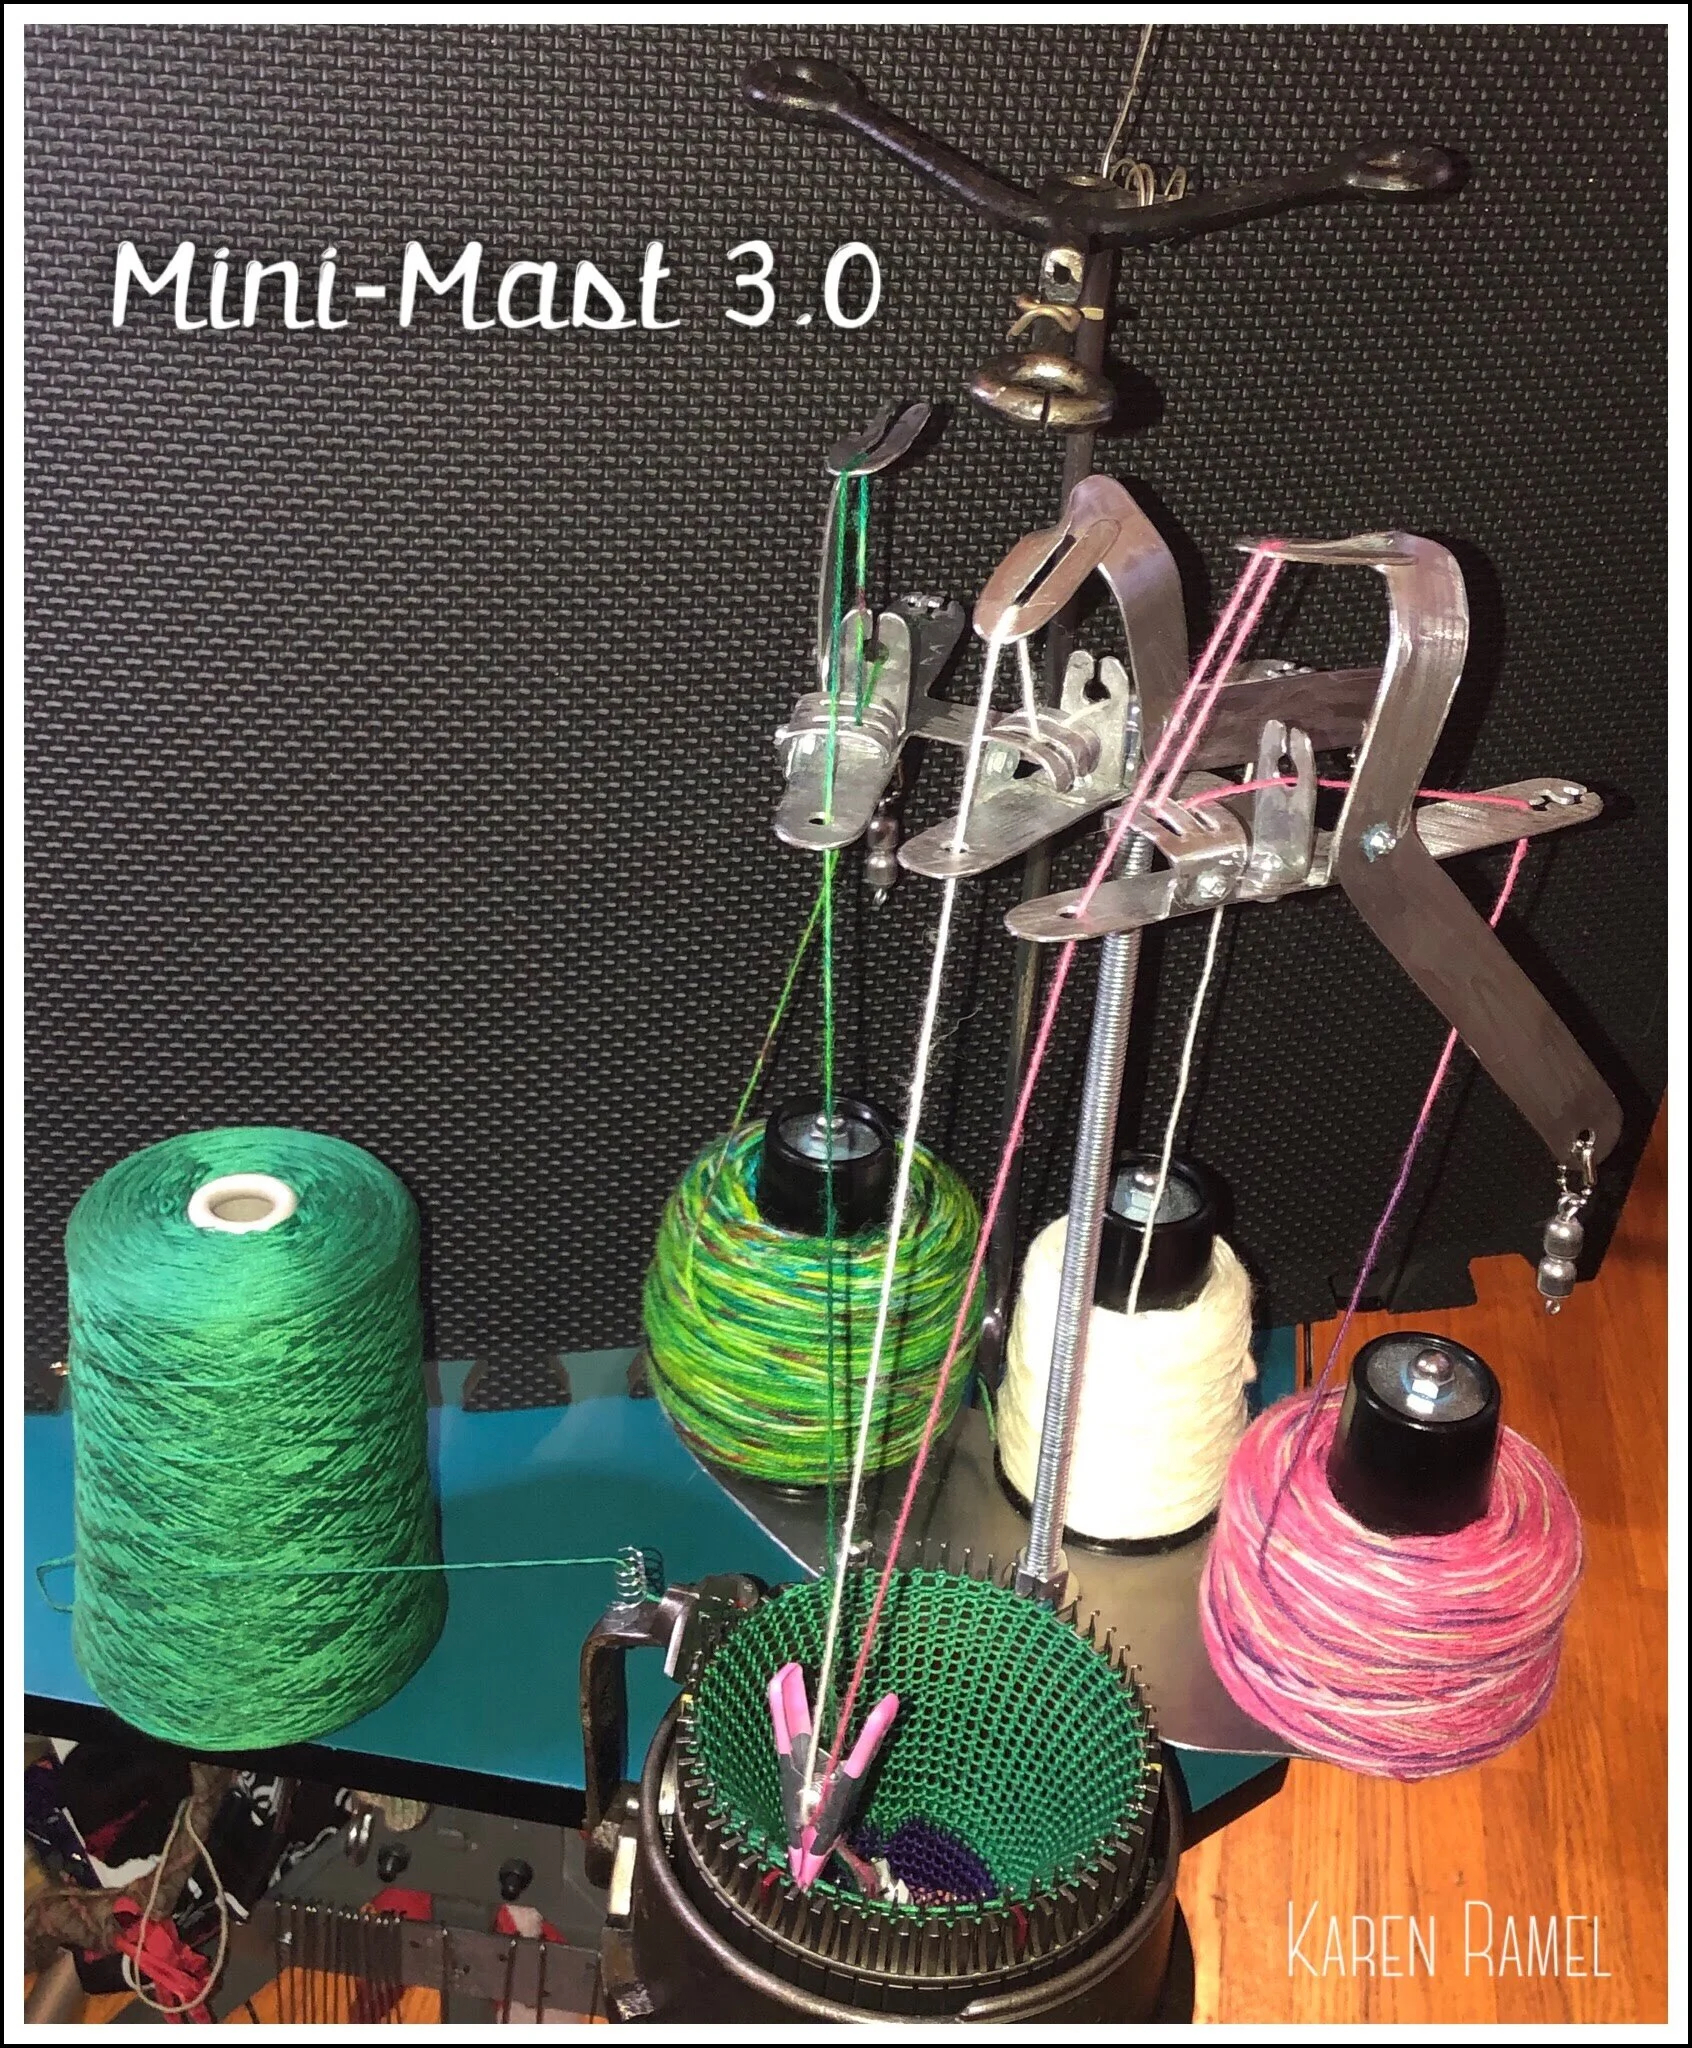
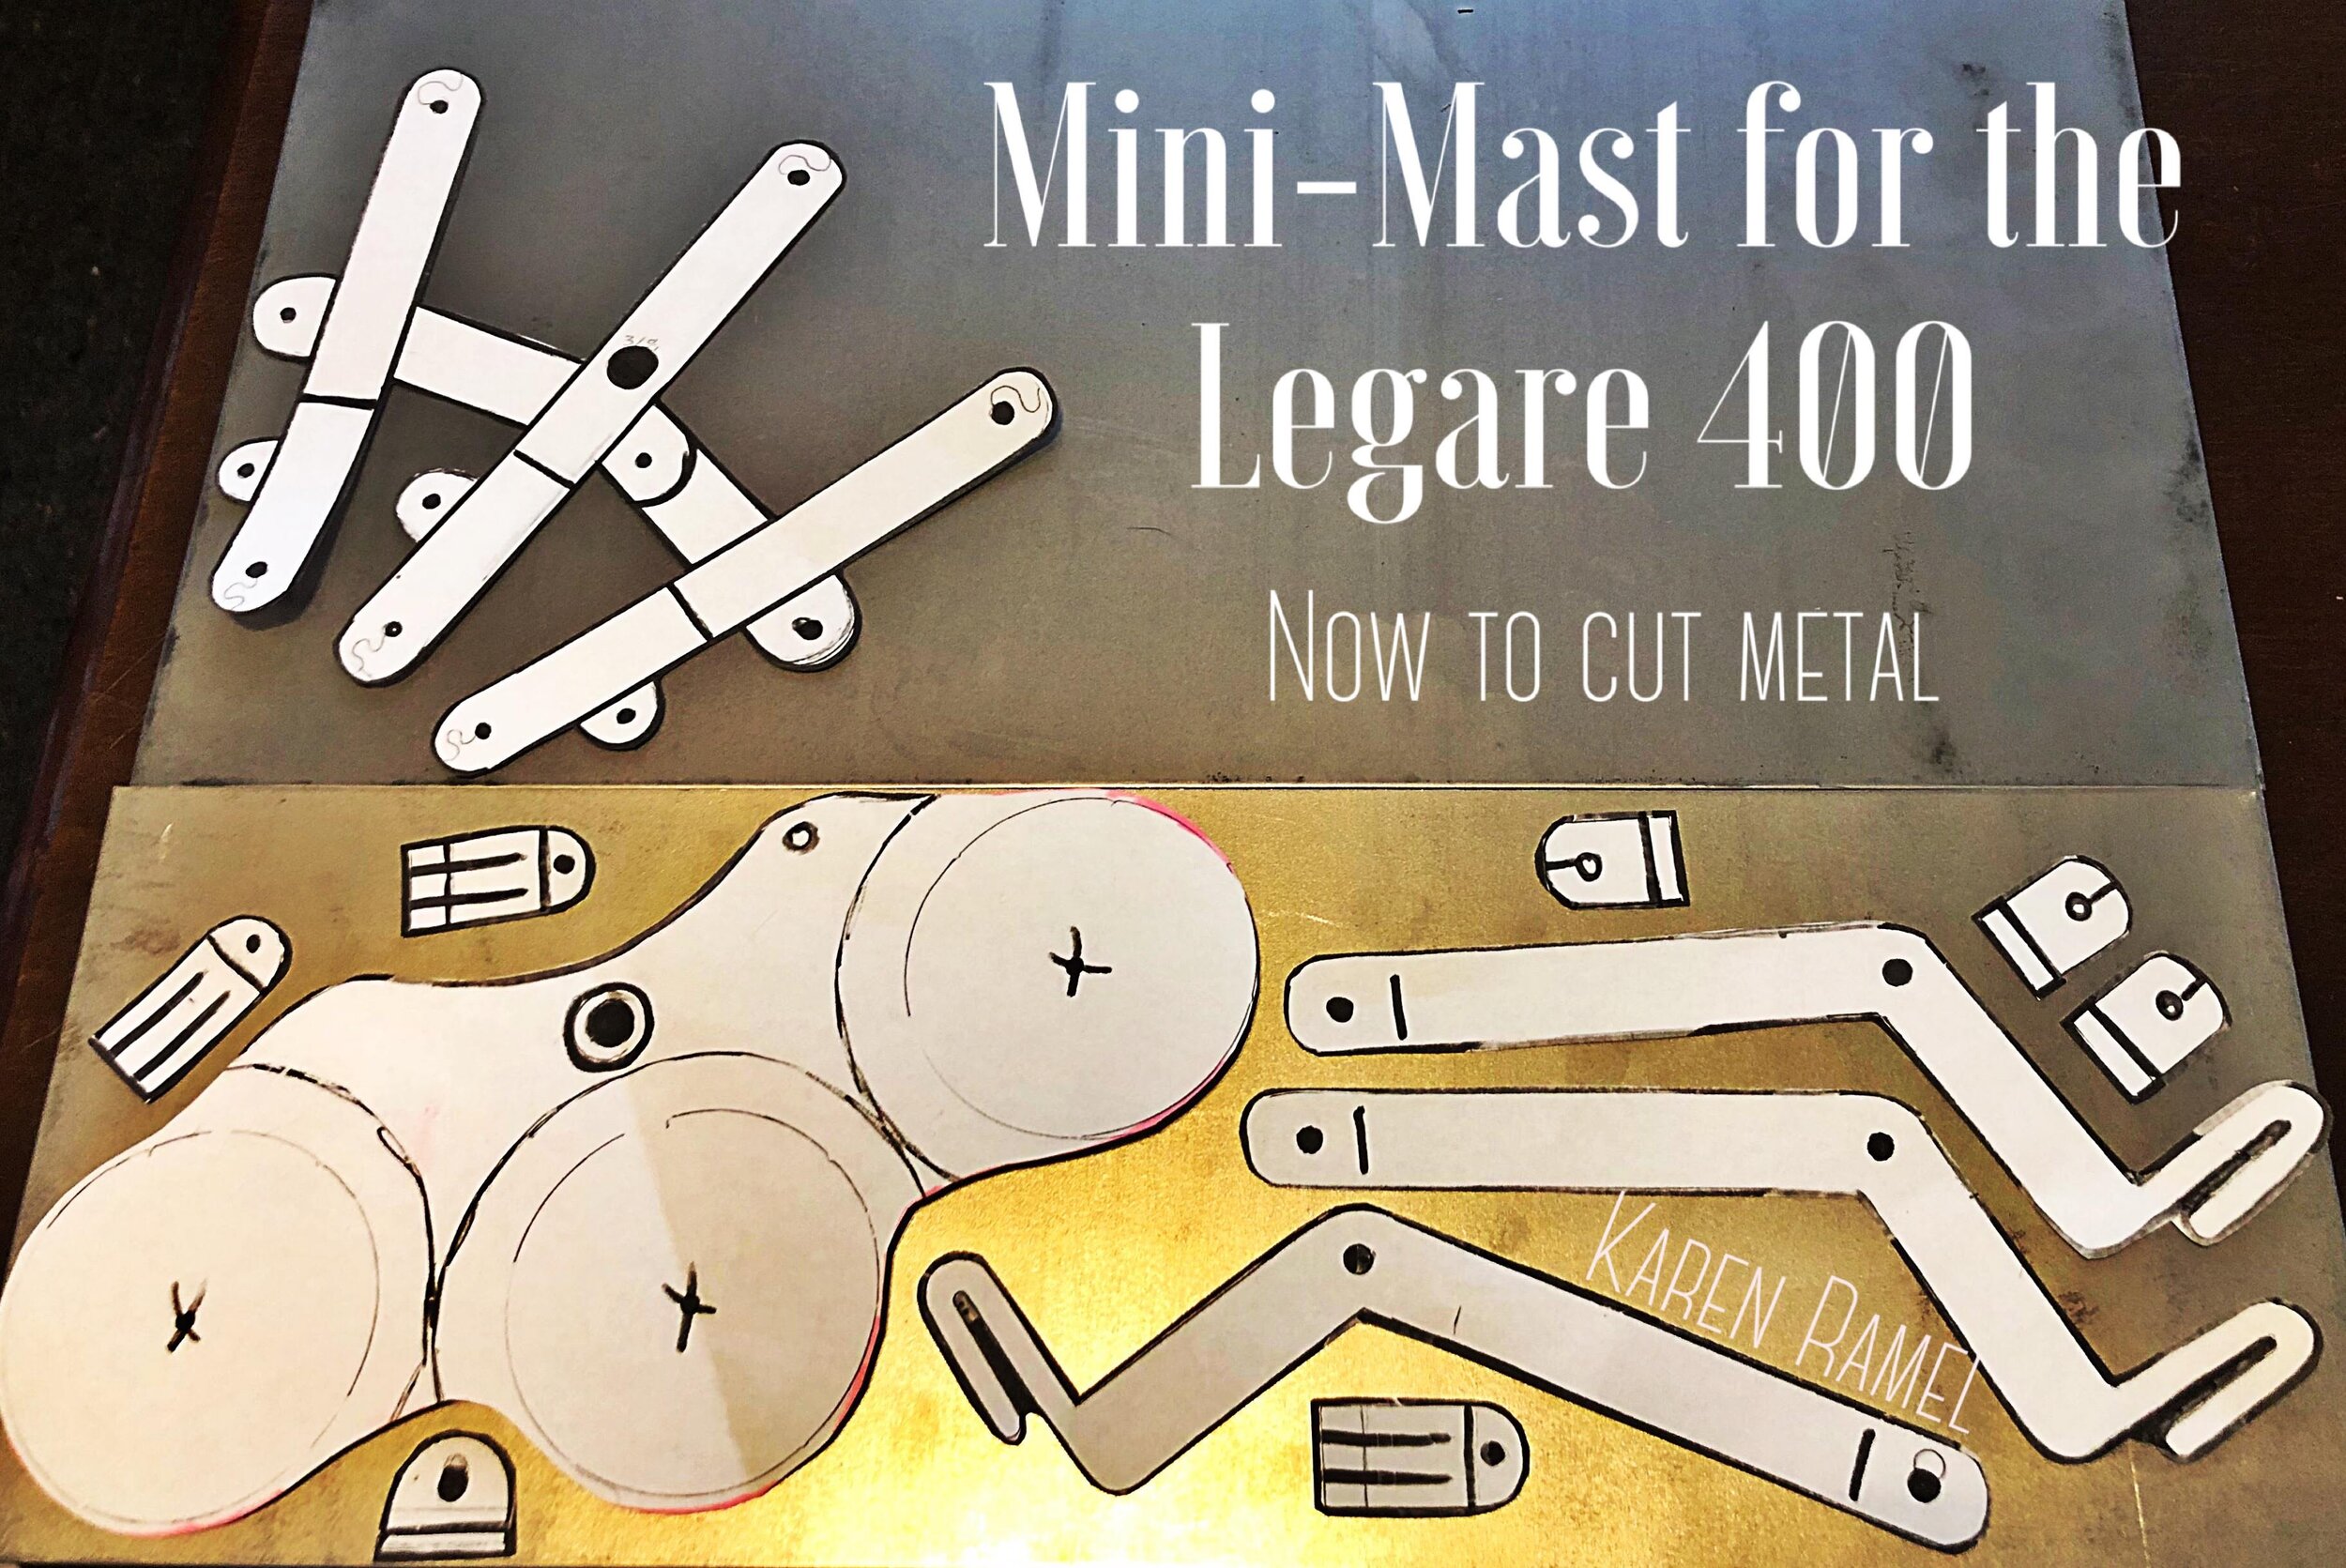
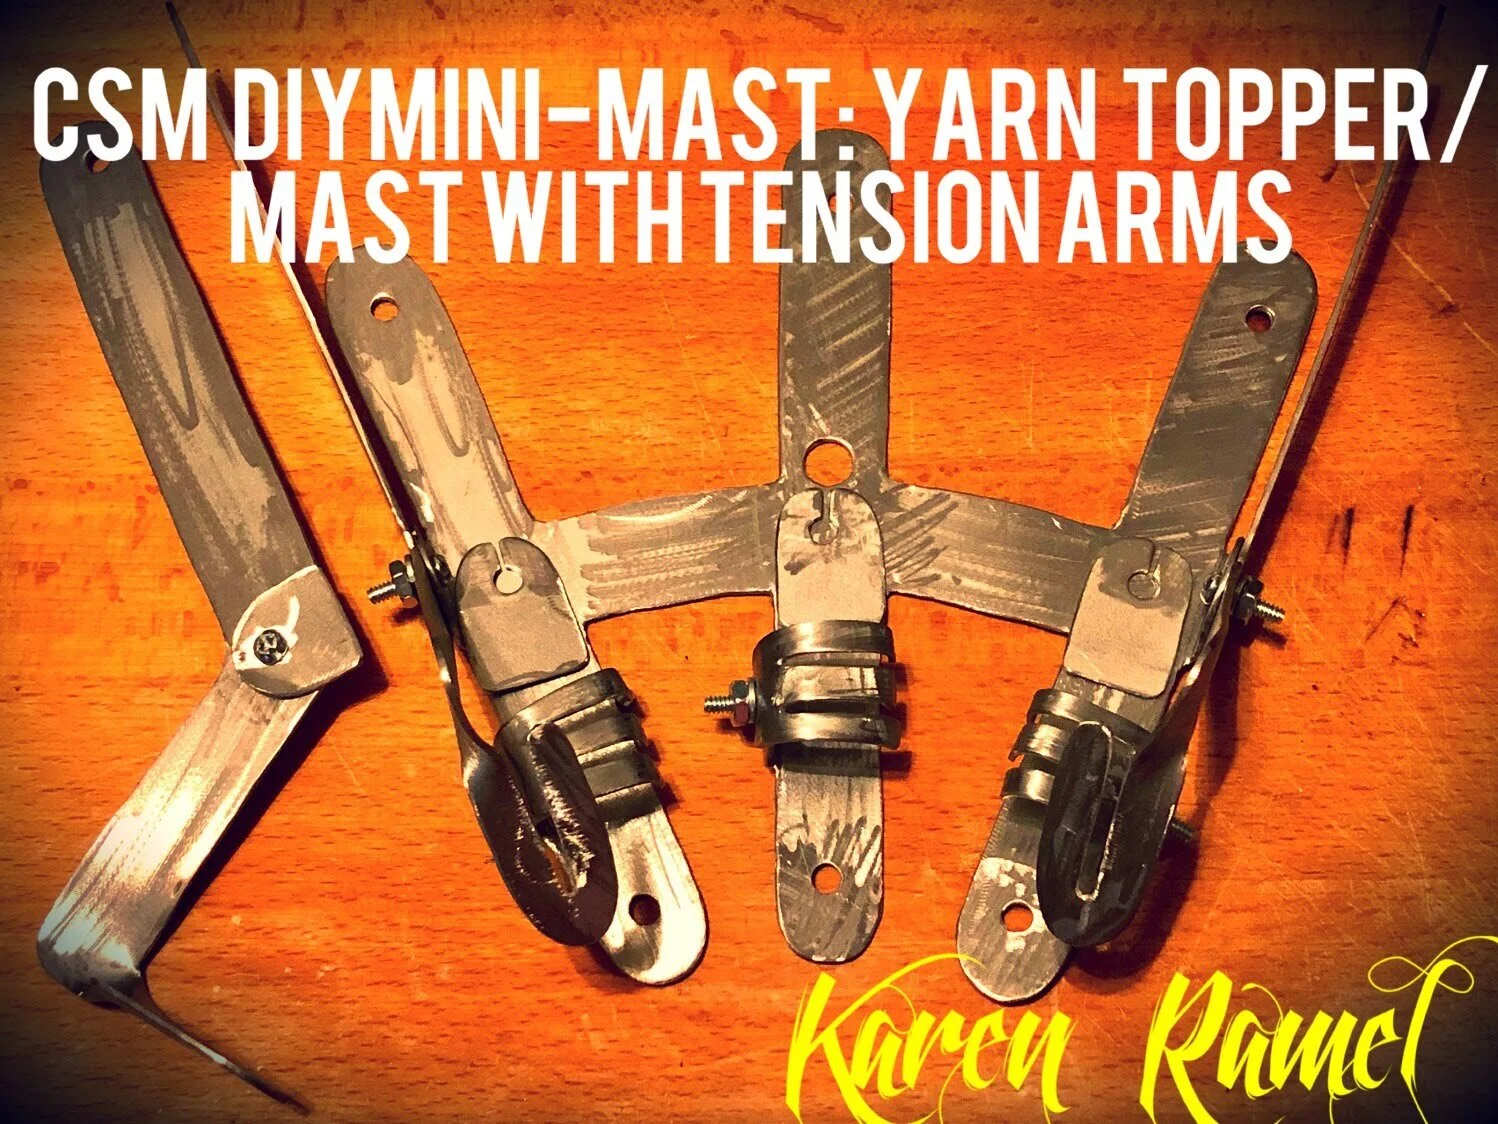
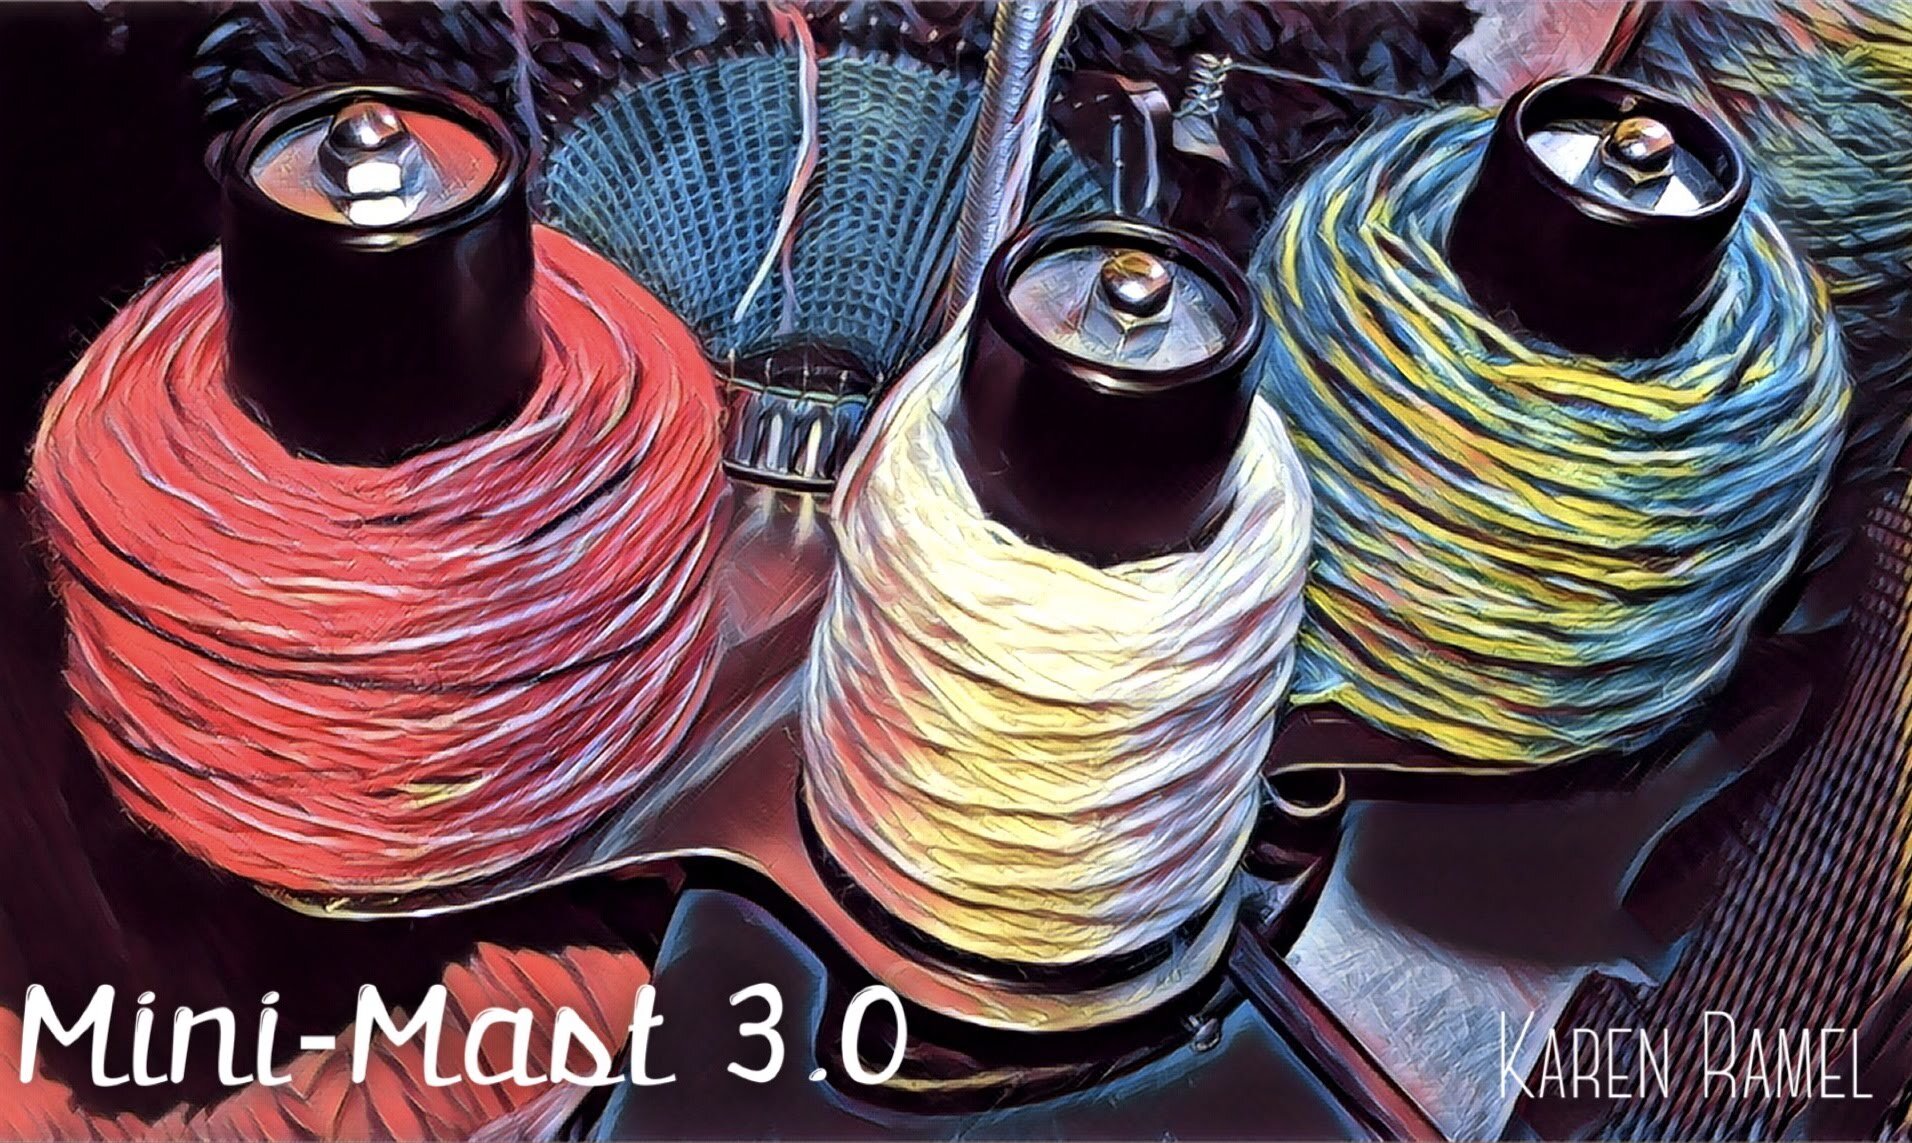
Final Mini-Mast
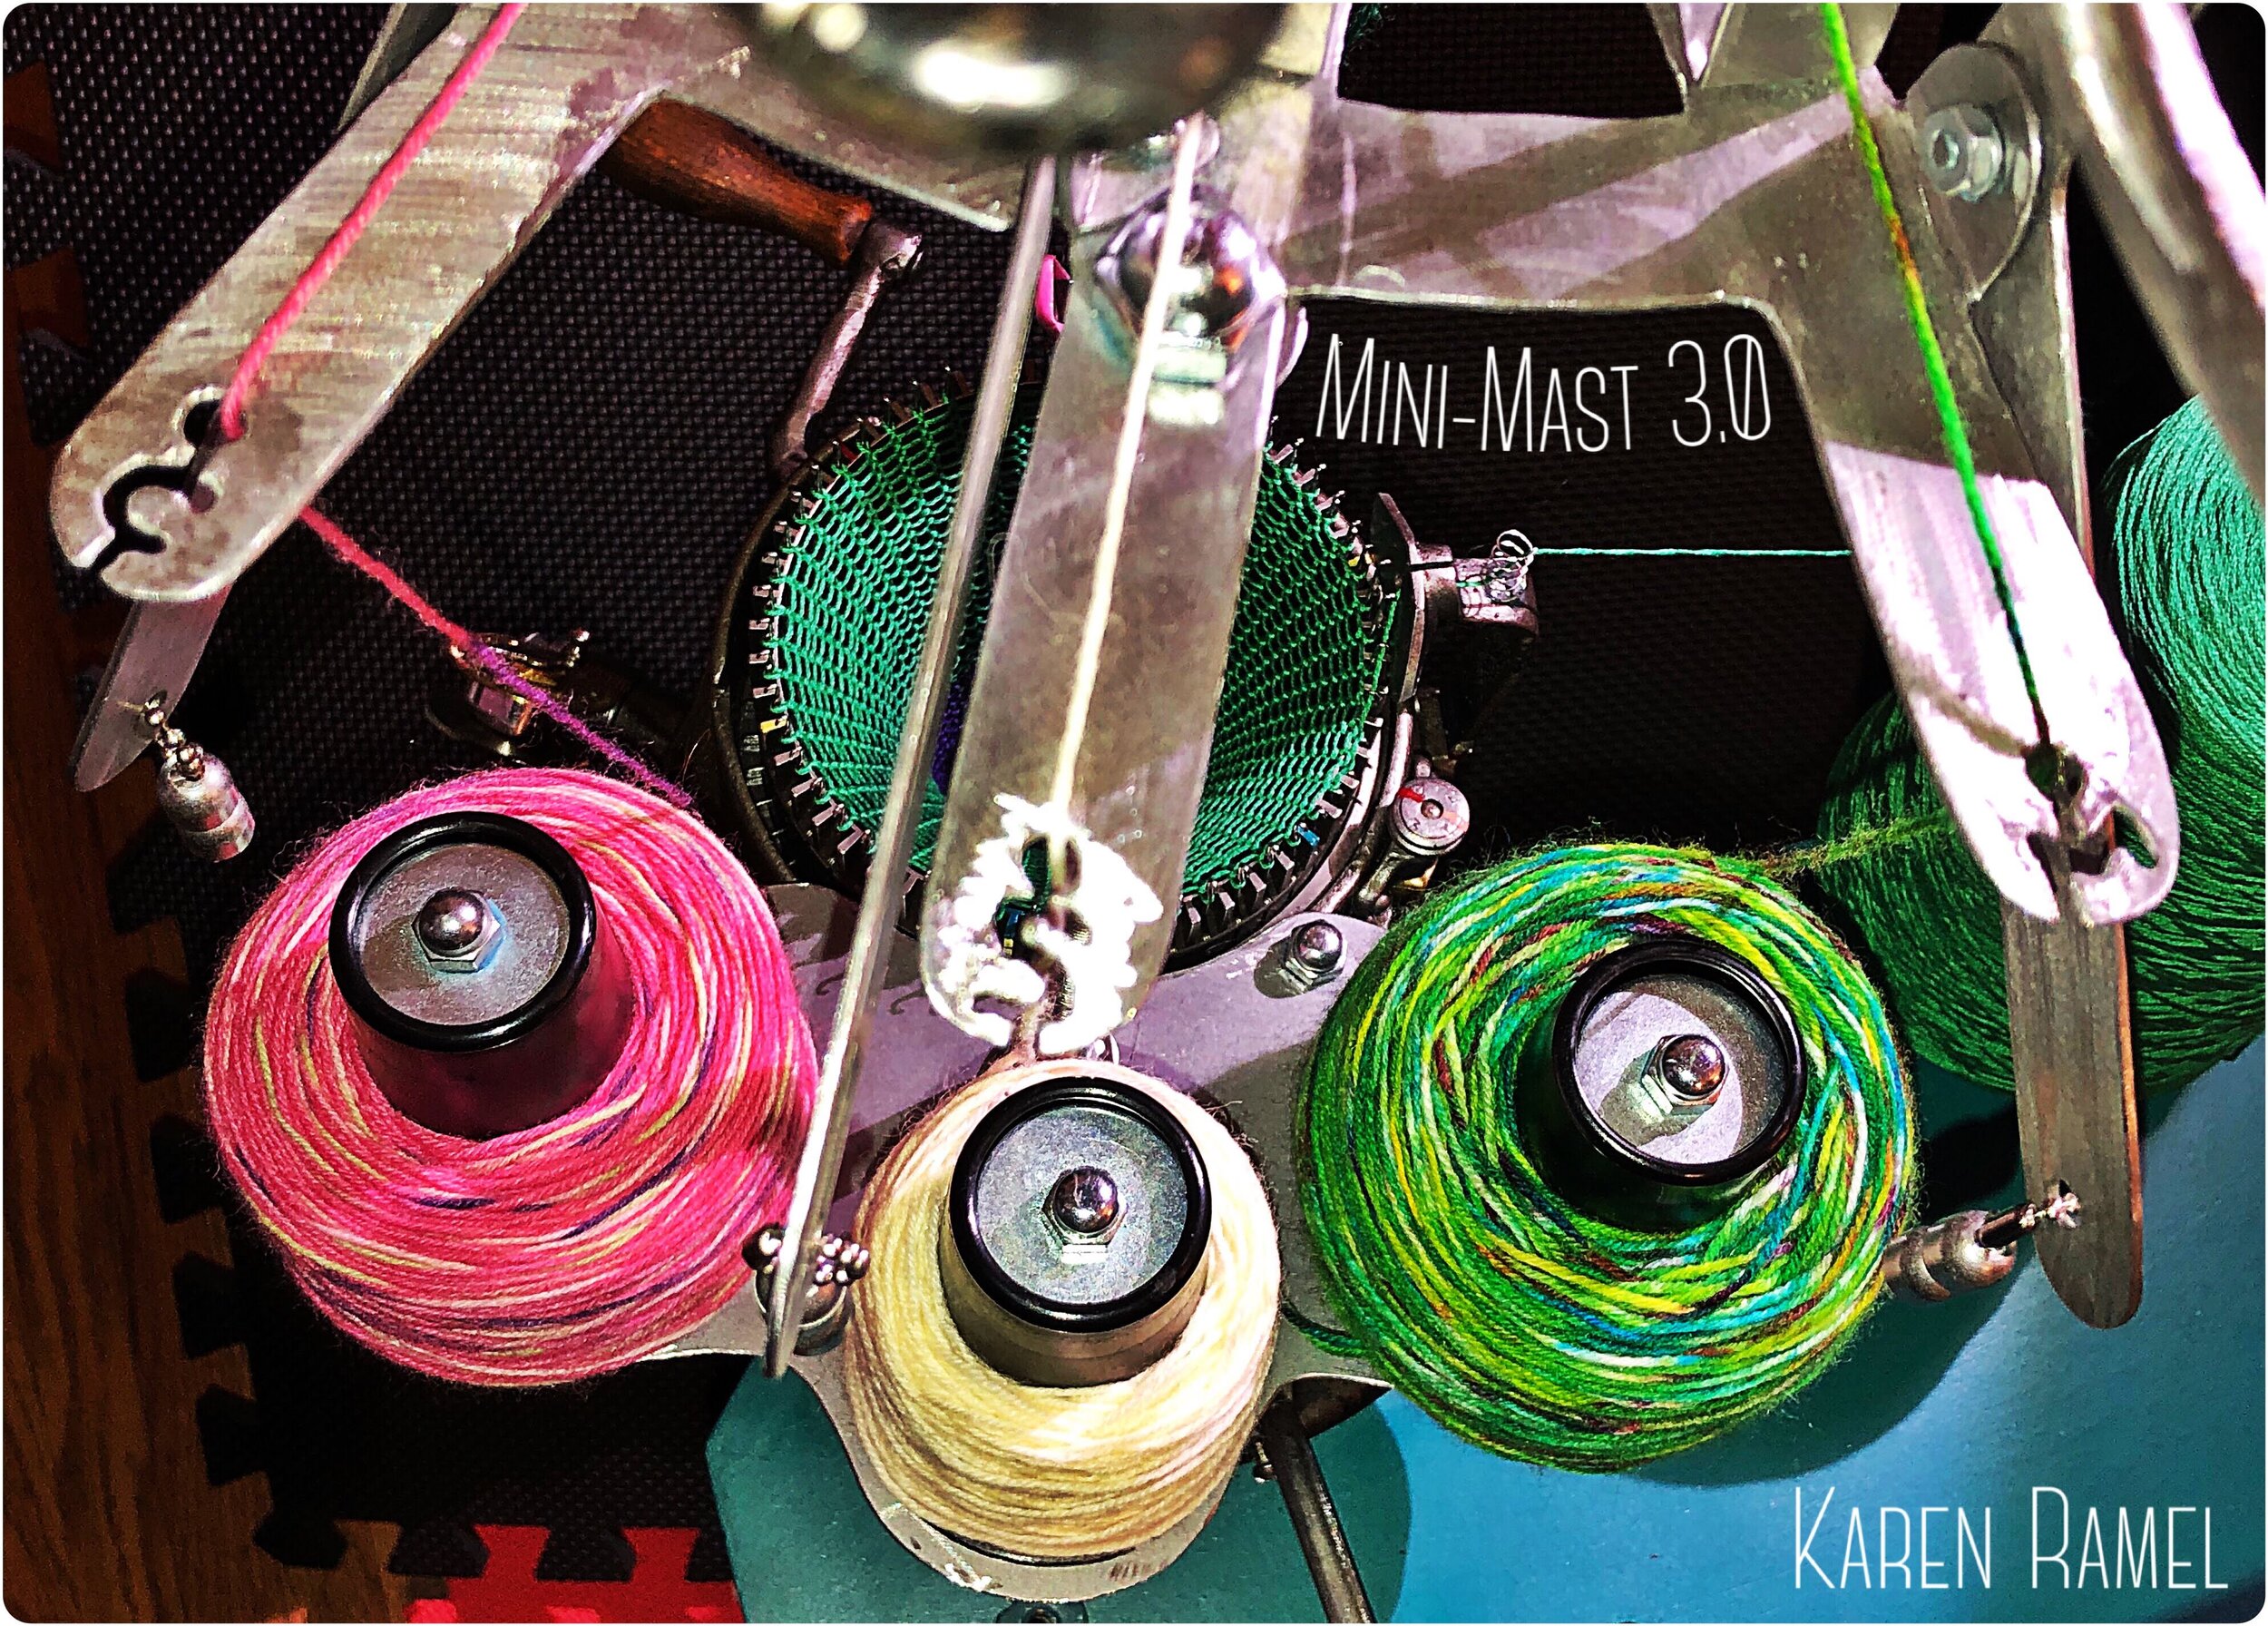
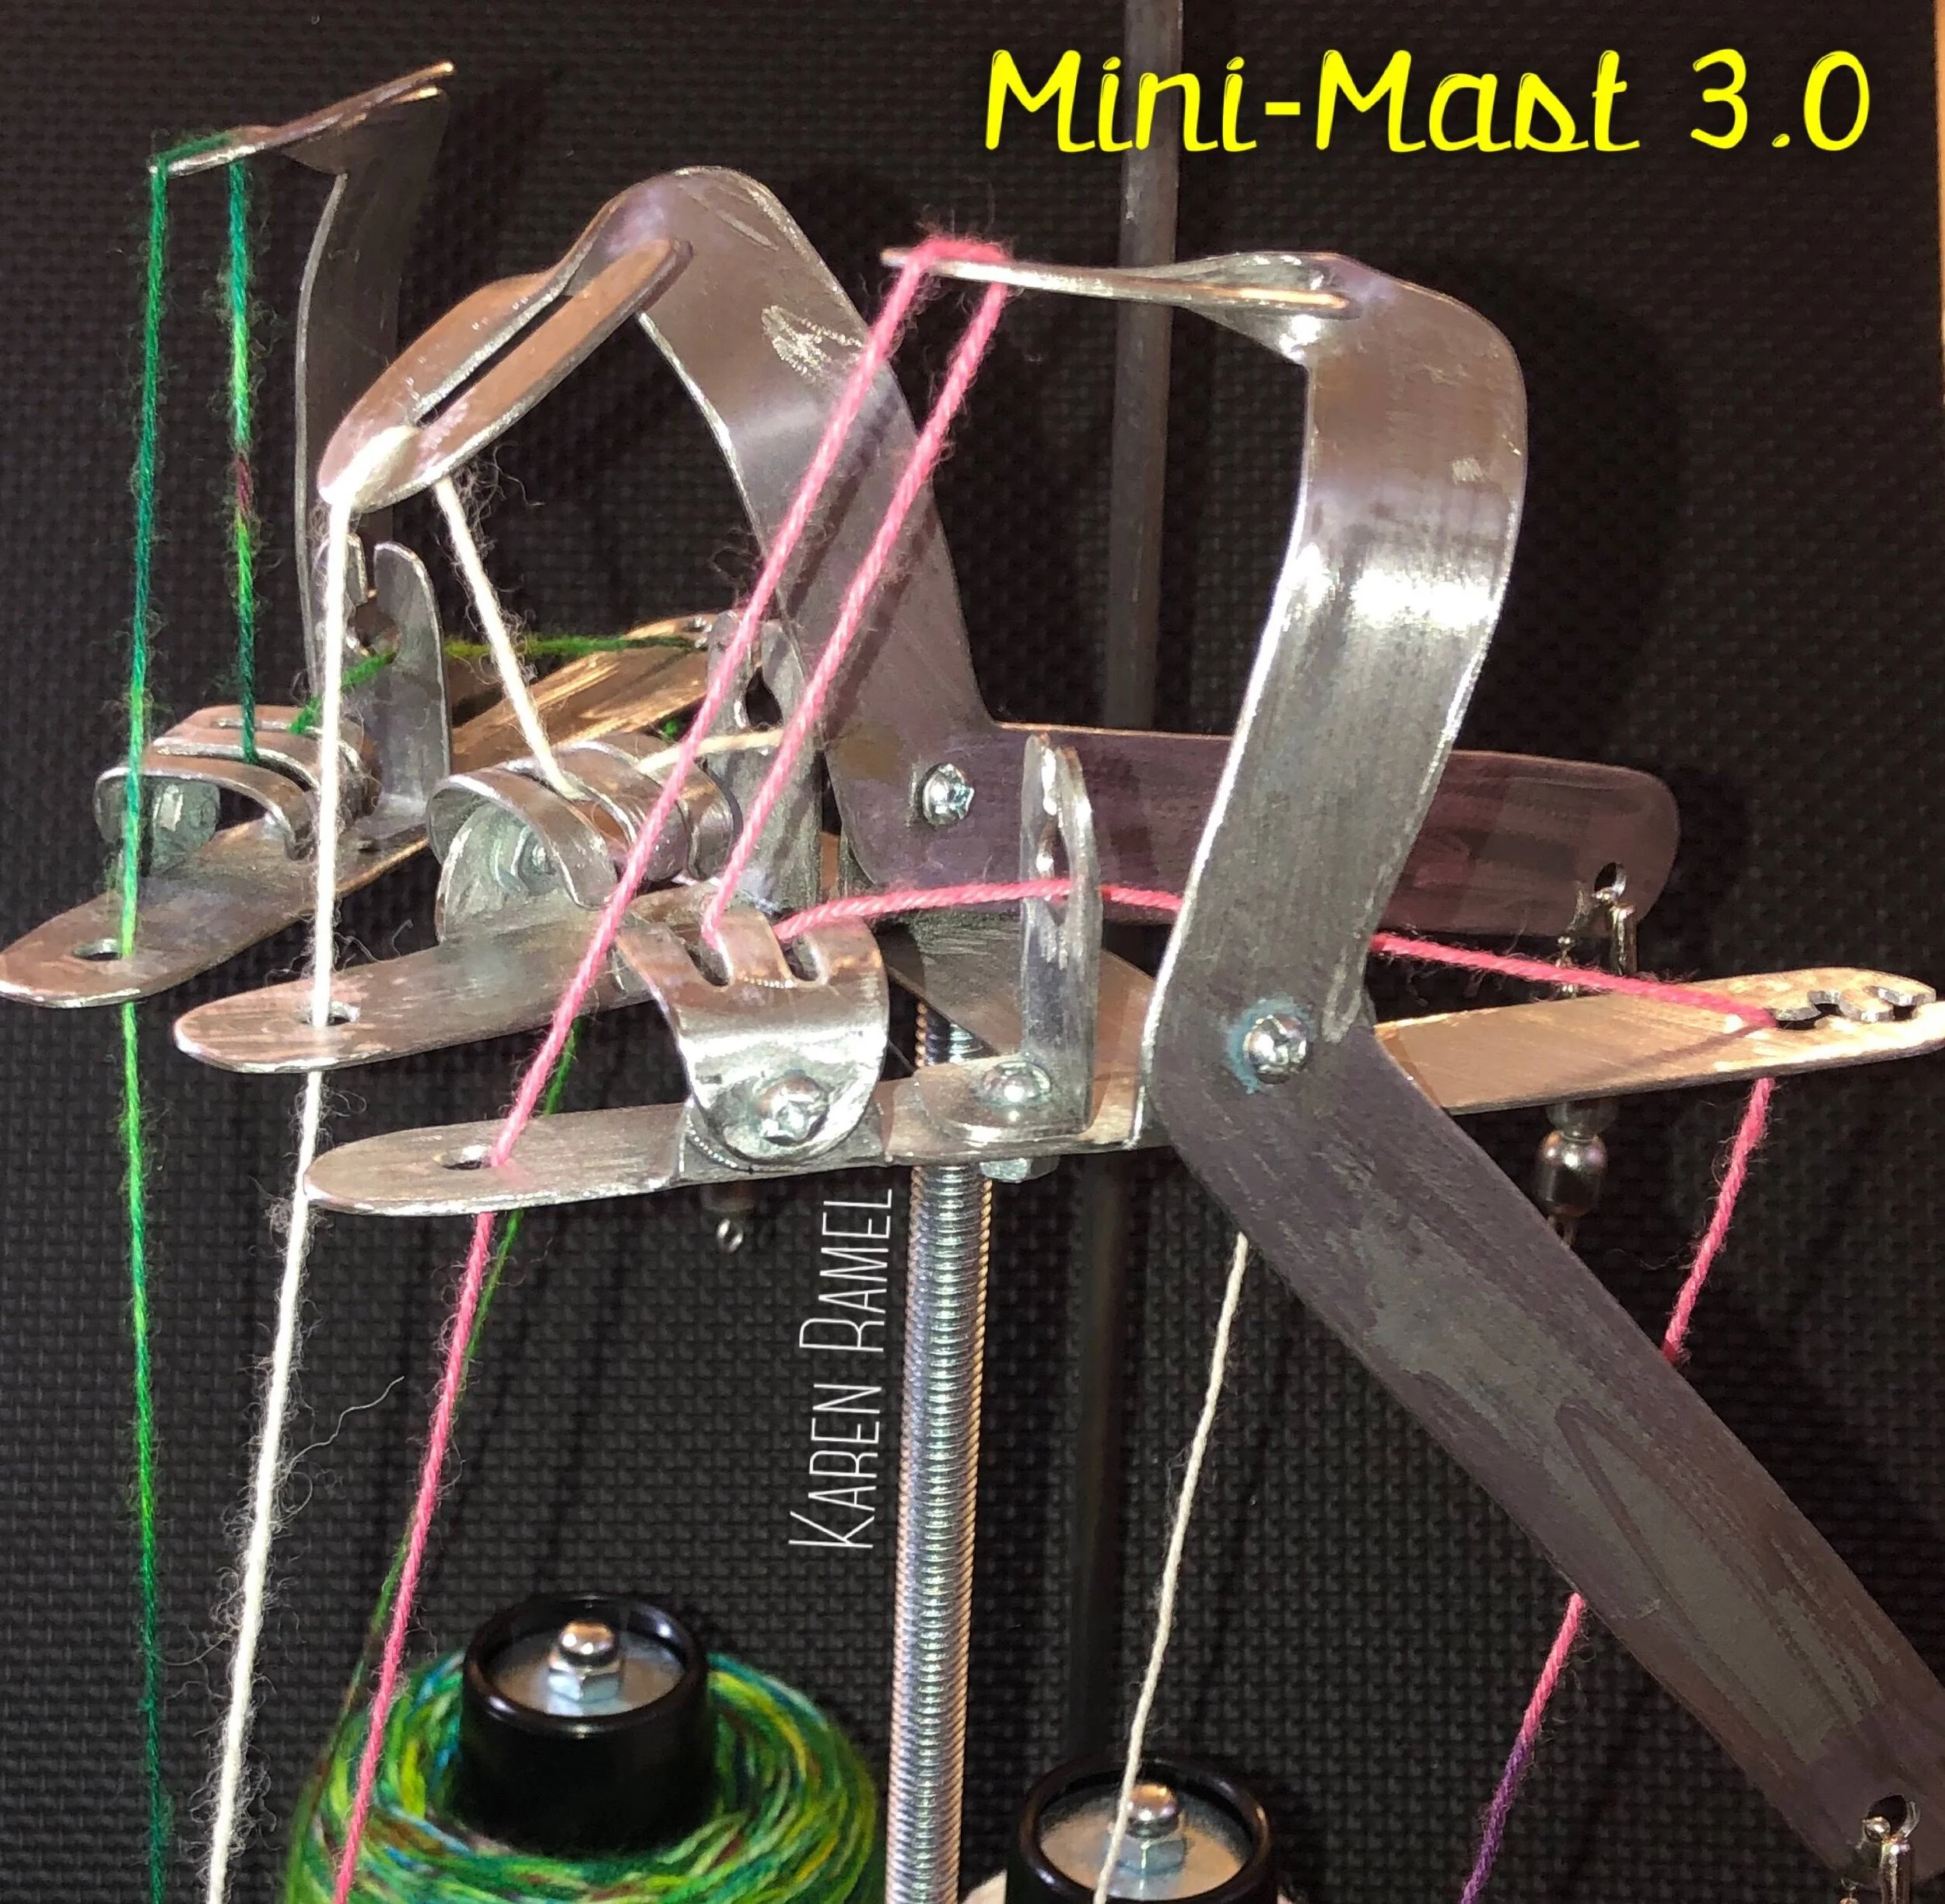
Mini mast planning - I call this my Mini-Mast 3.0
This is not for sale but for my own use. Special thanks and appreciation to Heidi Bears/Heidi Capatos and Egelantier Sokken.
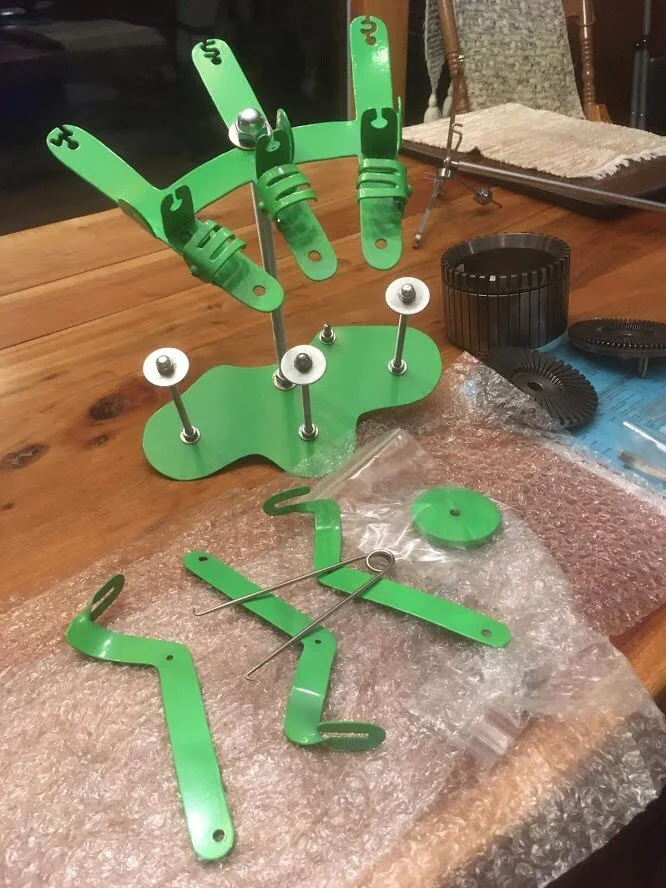
November 2020 My Mini-Mast was sent to Dave Lord / Chambord CSM for Powder Coating!
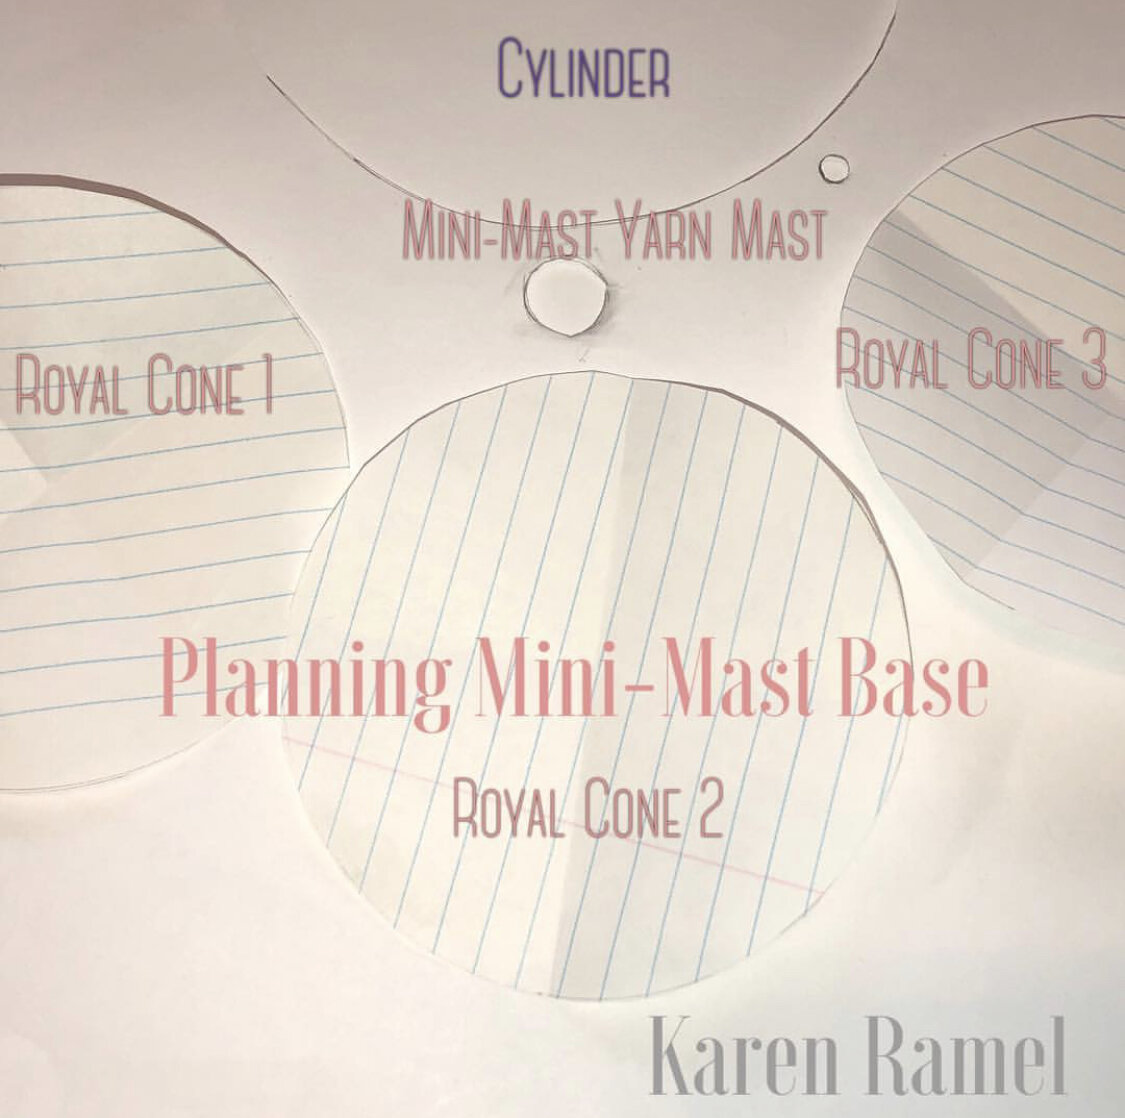
This began with visual inspiration by seeing Heidi’s and Egelantier’s Mini-Mast versions. Leap frogging with a base outline in paper format, I modified the paper components a few times prior to hand cutting their design out of sheet metal with my dremel. I modified my version so that nothing needed to be soldered and so that my royal cones can be used to hold yarn.
This Mini-Mast can work with three different color and still accommodate a fourth if using the main original machine mast.
WHY THIS IS COOL : All color work is manually done on the CSM - this allows for ease of yarn maintenance while working on the machine.
Also on INSTRAGRAM REF1, REF2, REF3, REF4, REF5, REF6, REF7, REF8, REF9, REF10, REF11, REF12, REF13
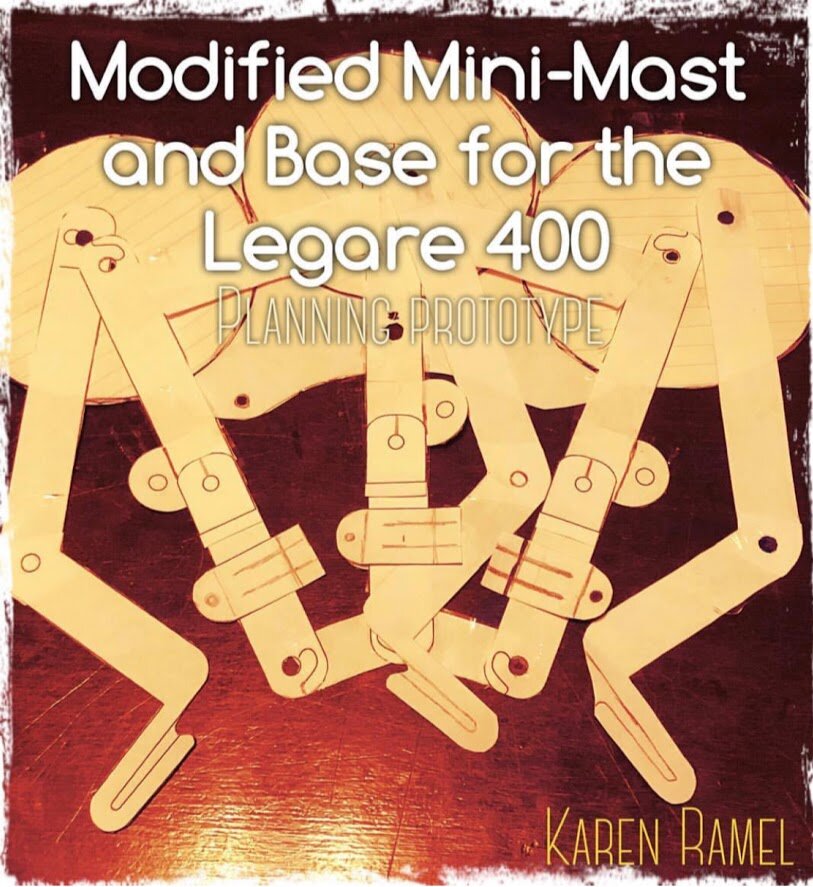
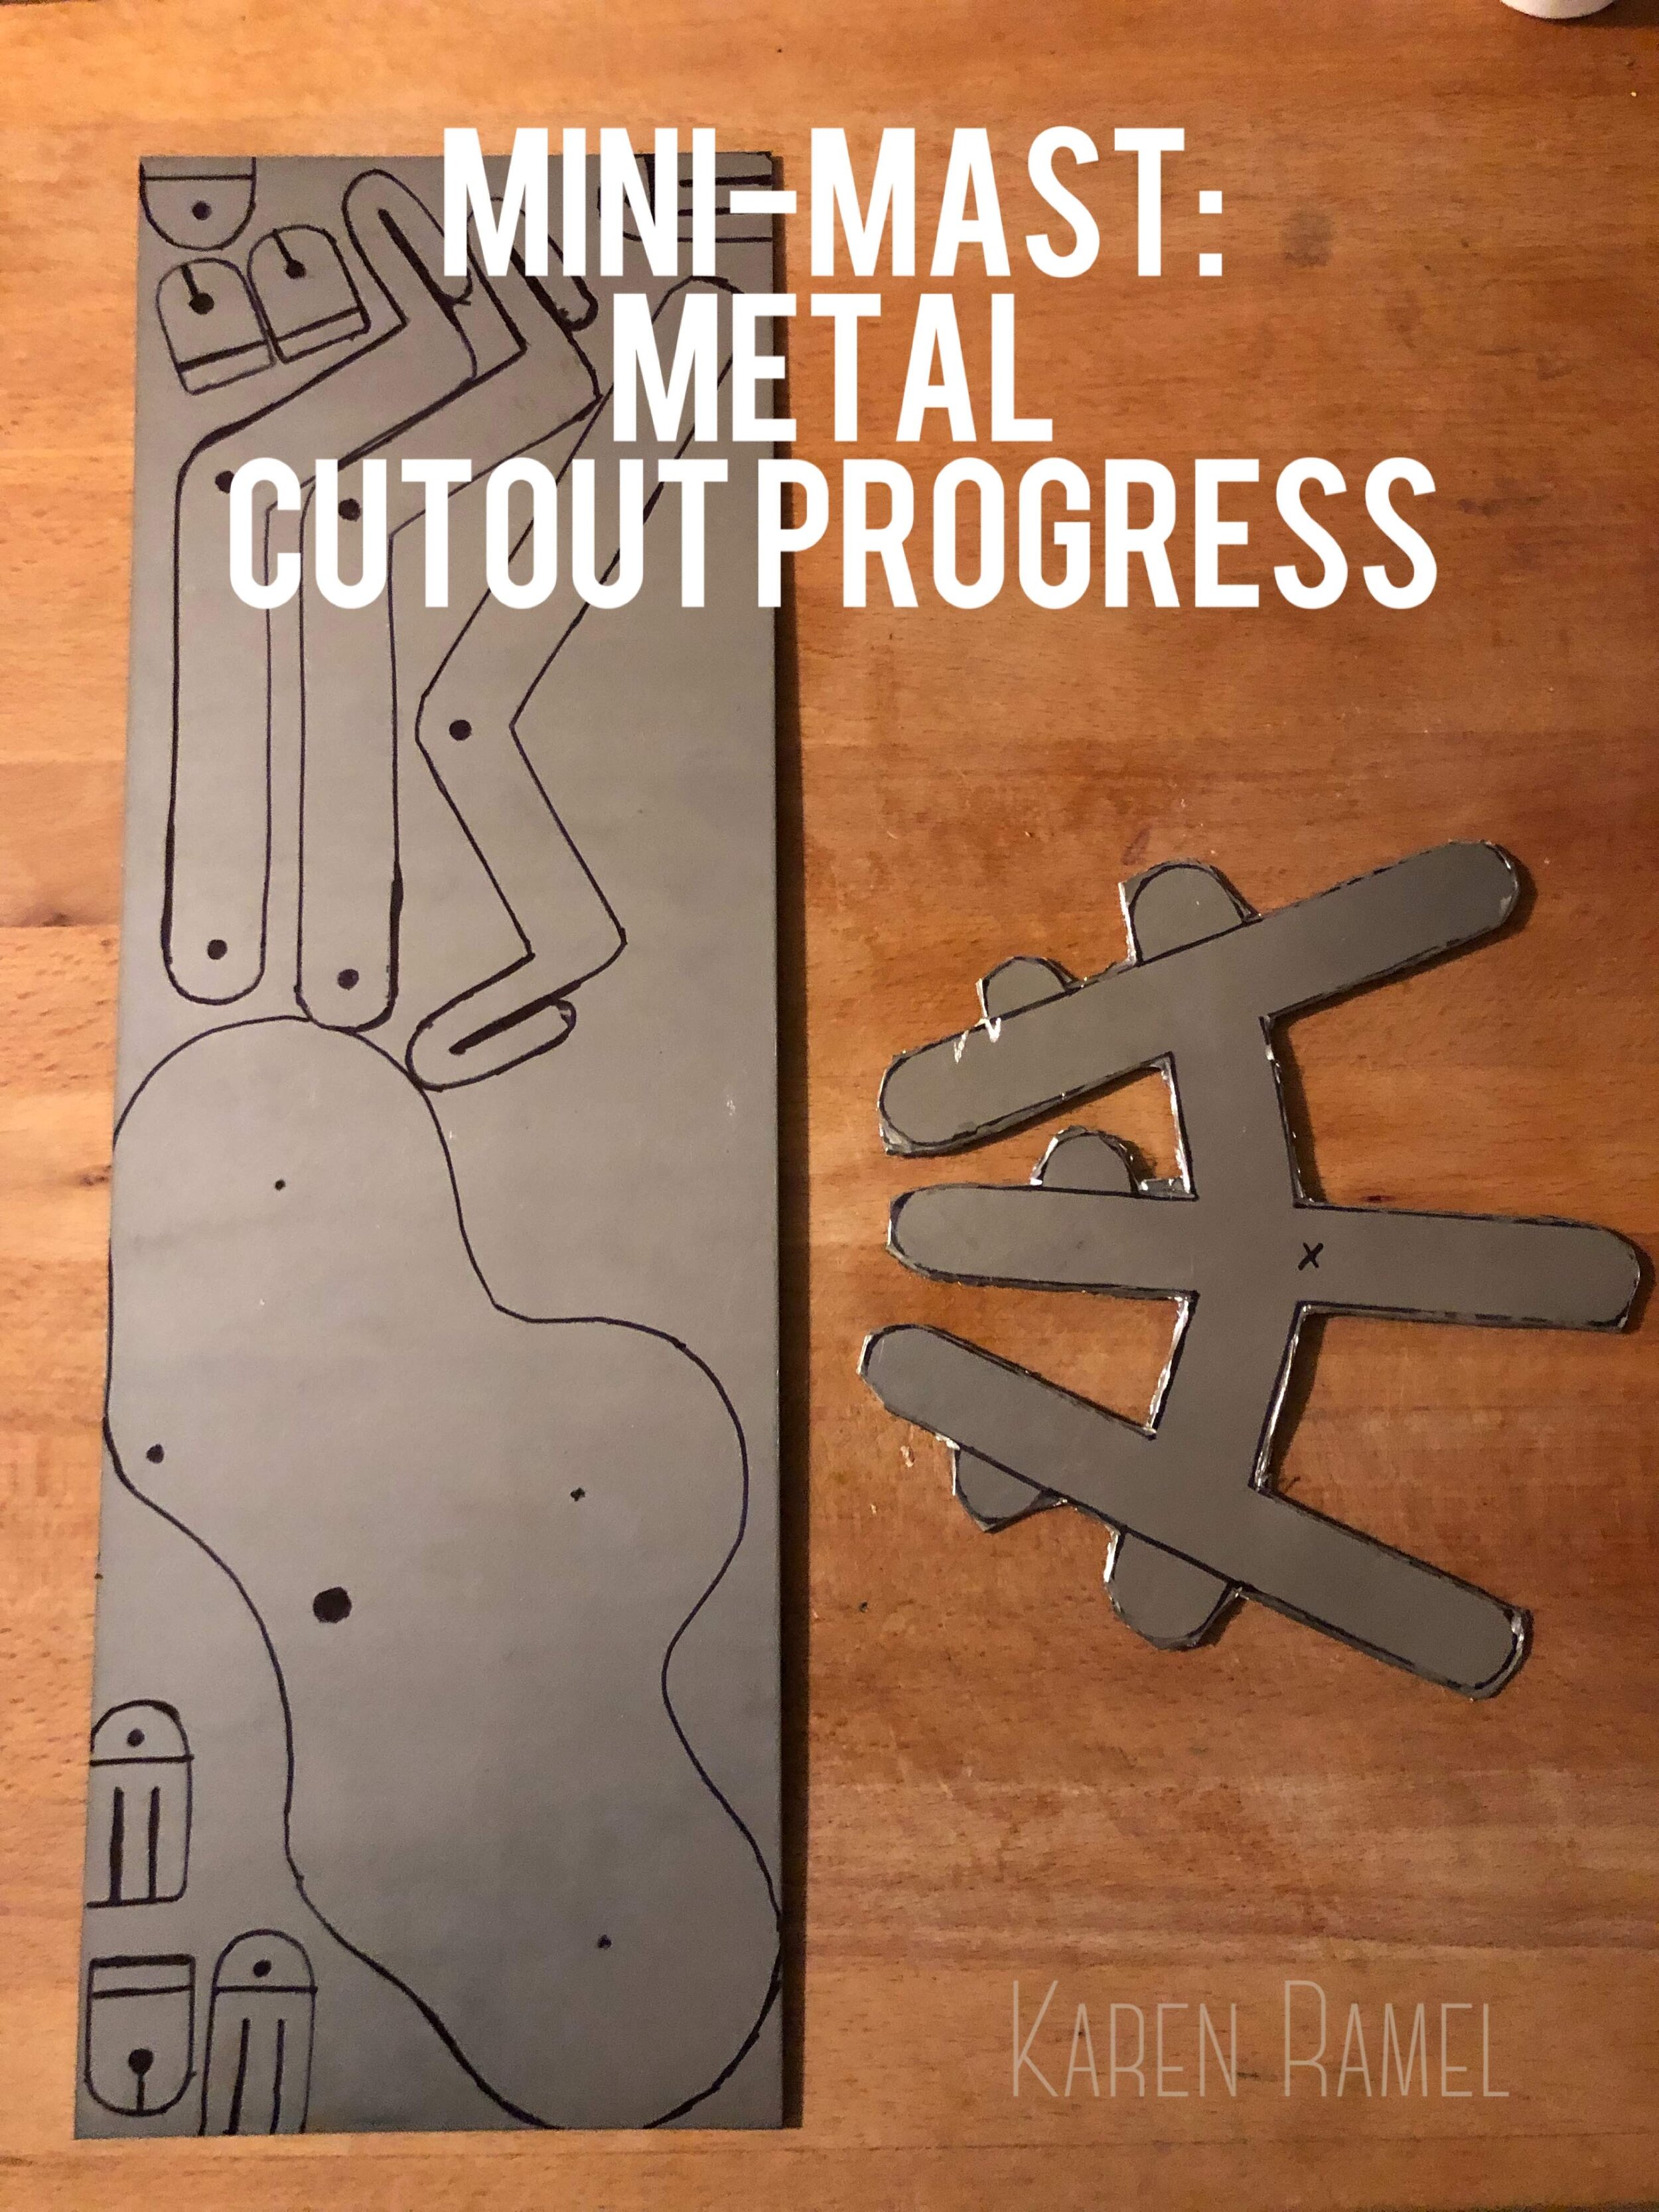
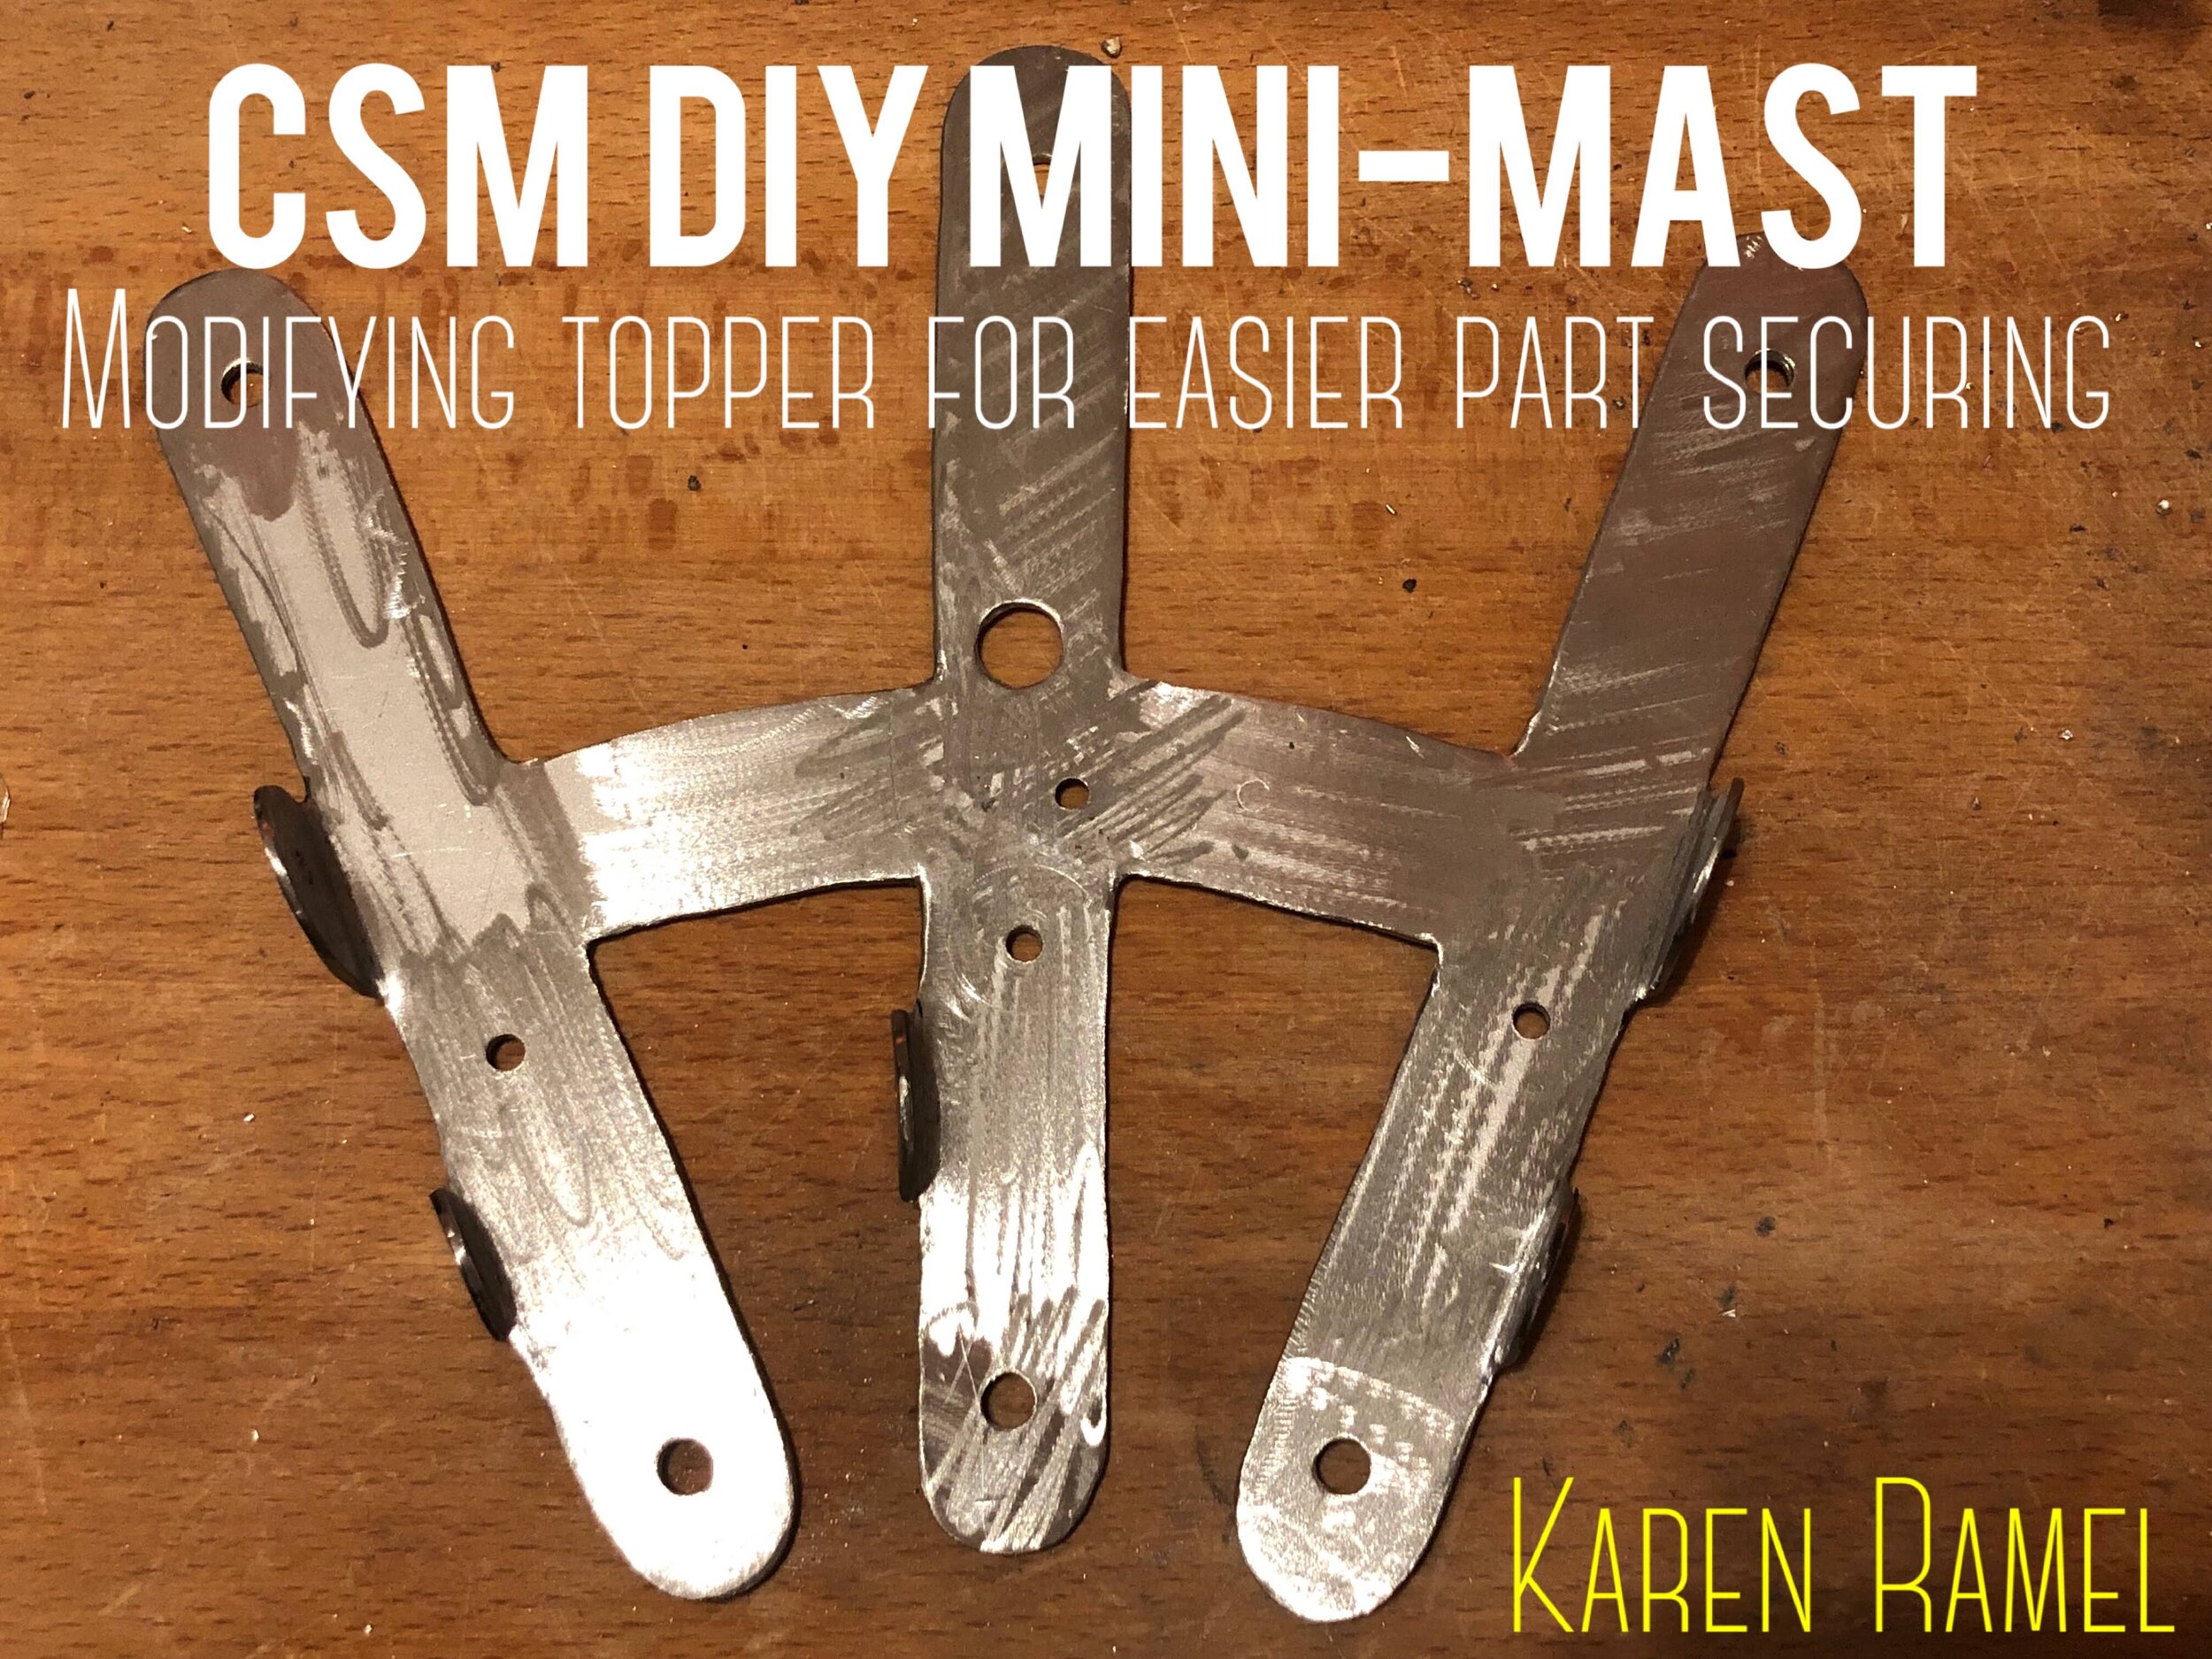
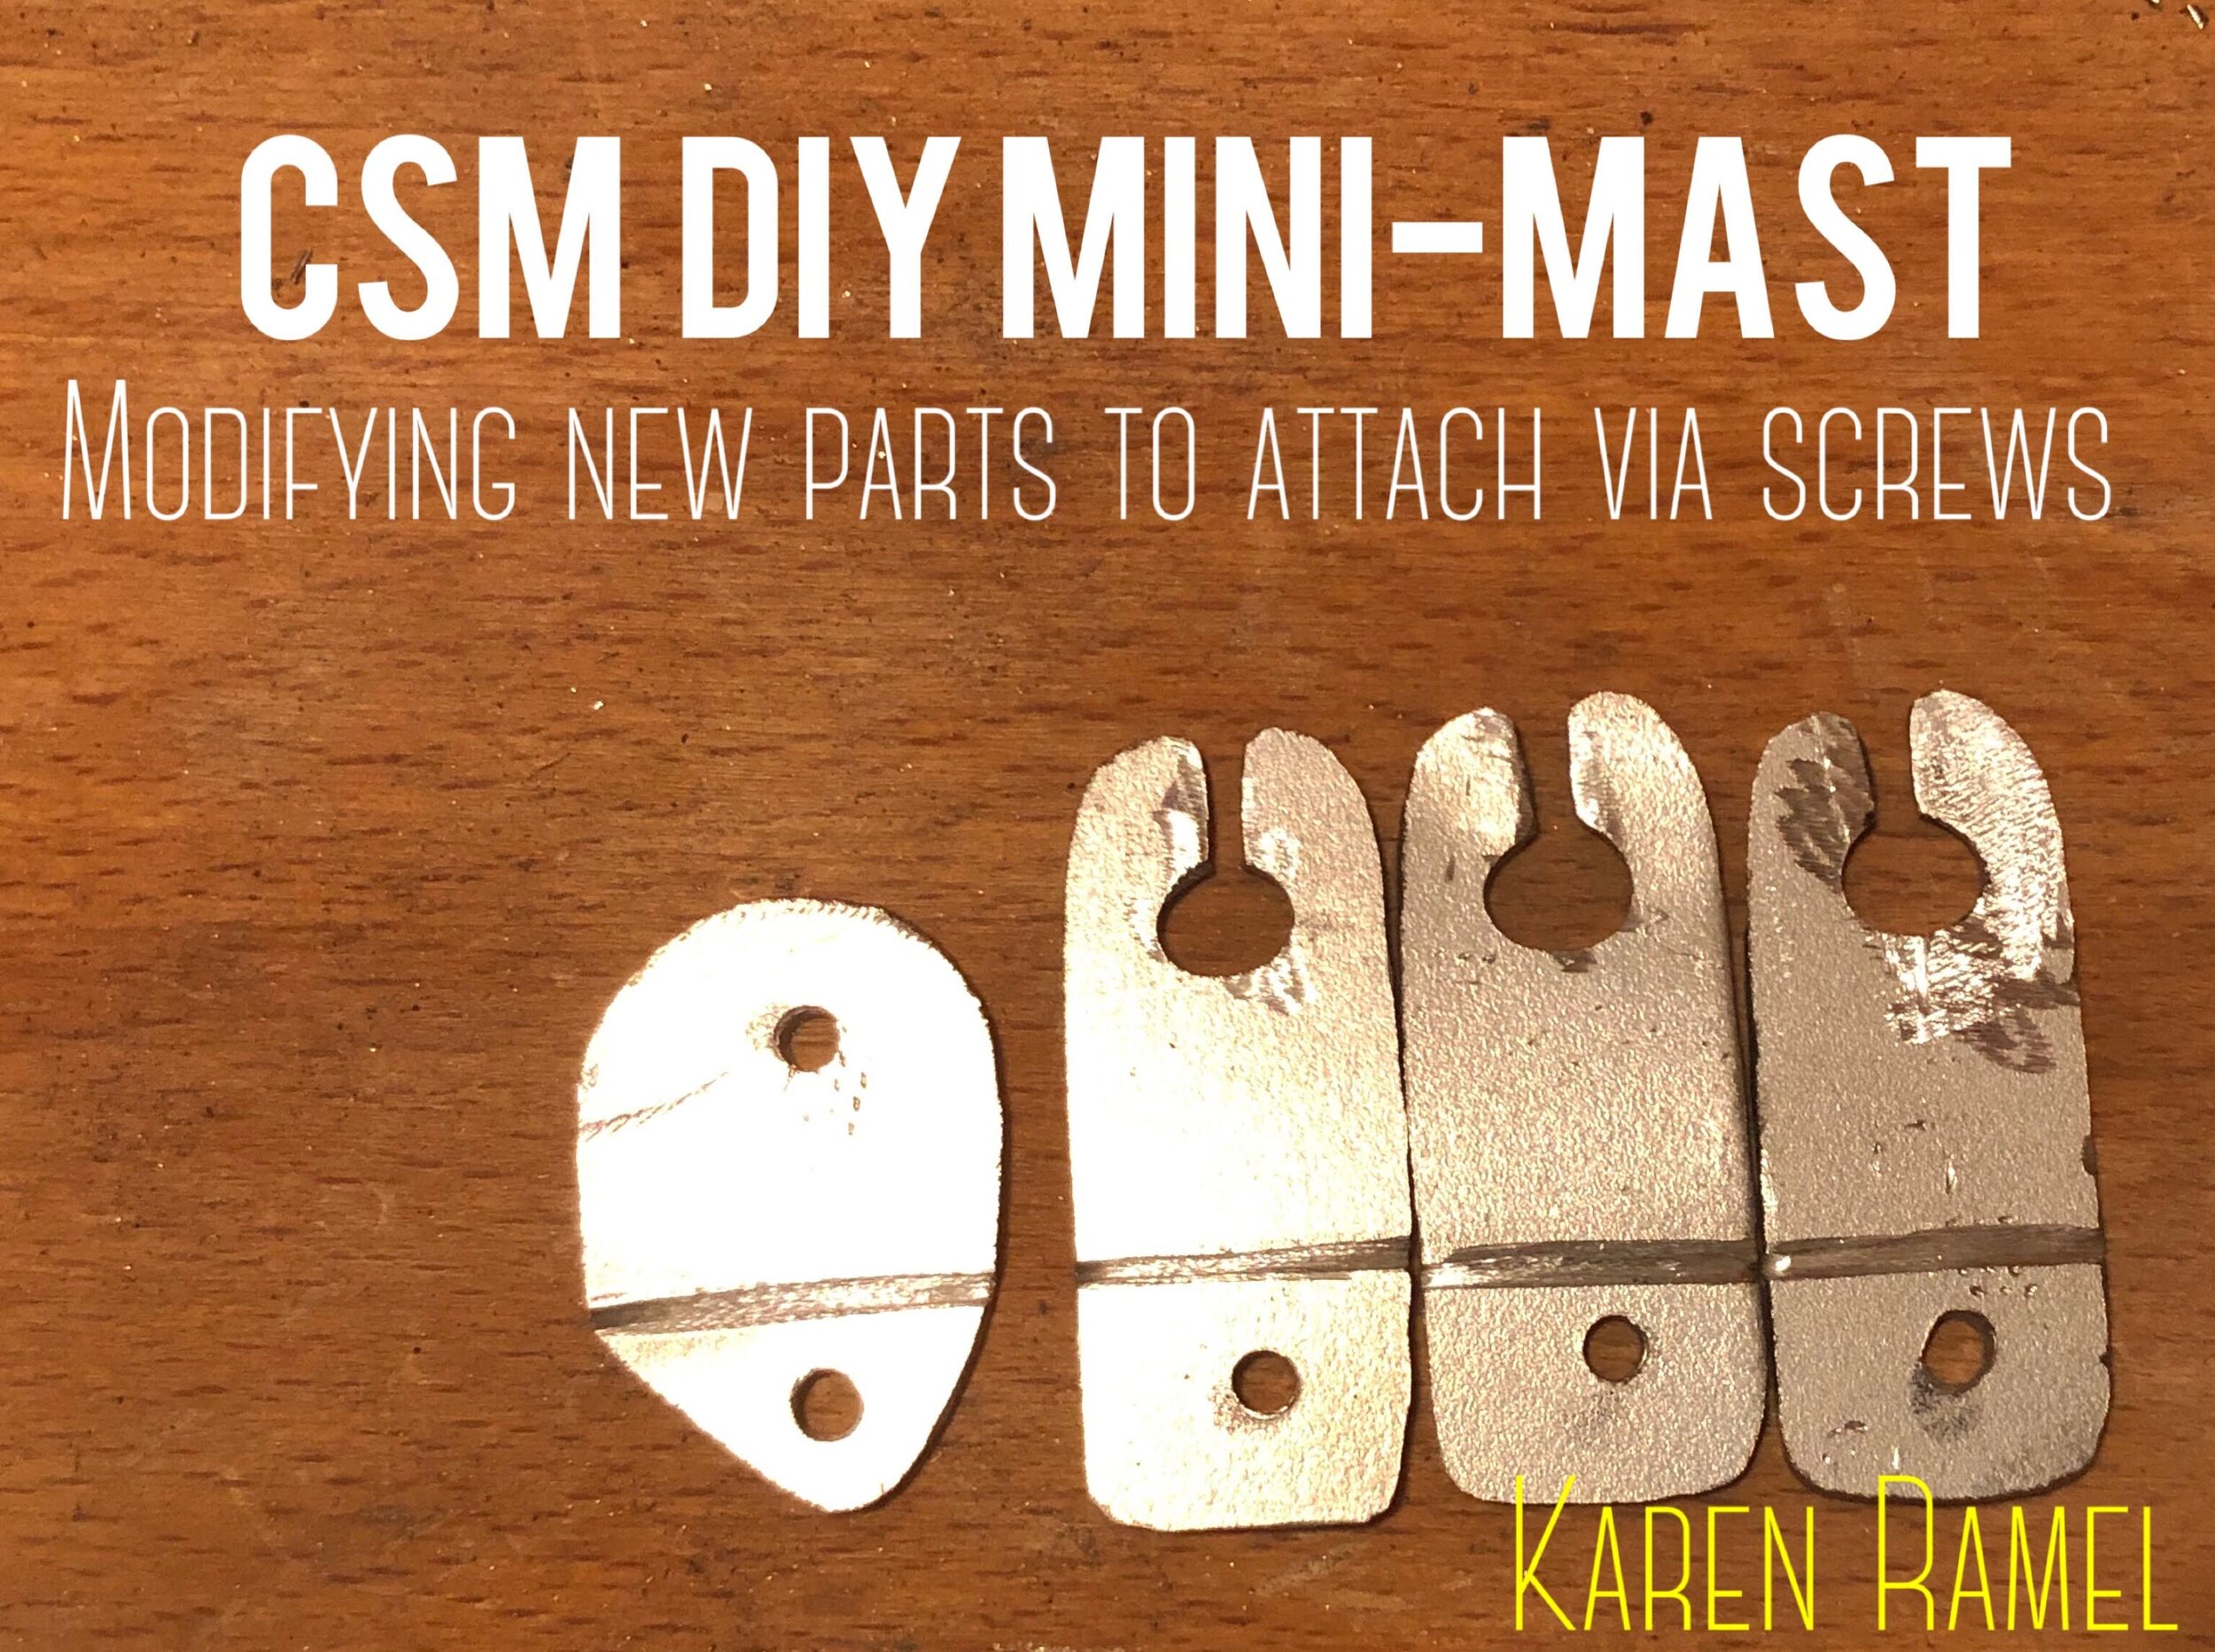
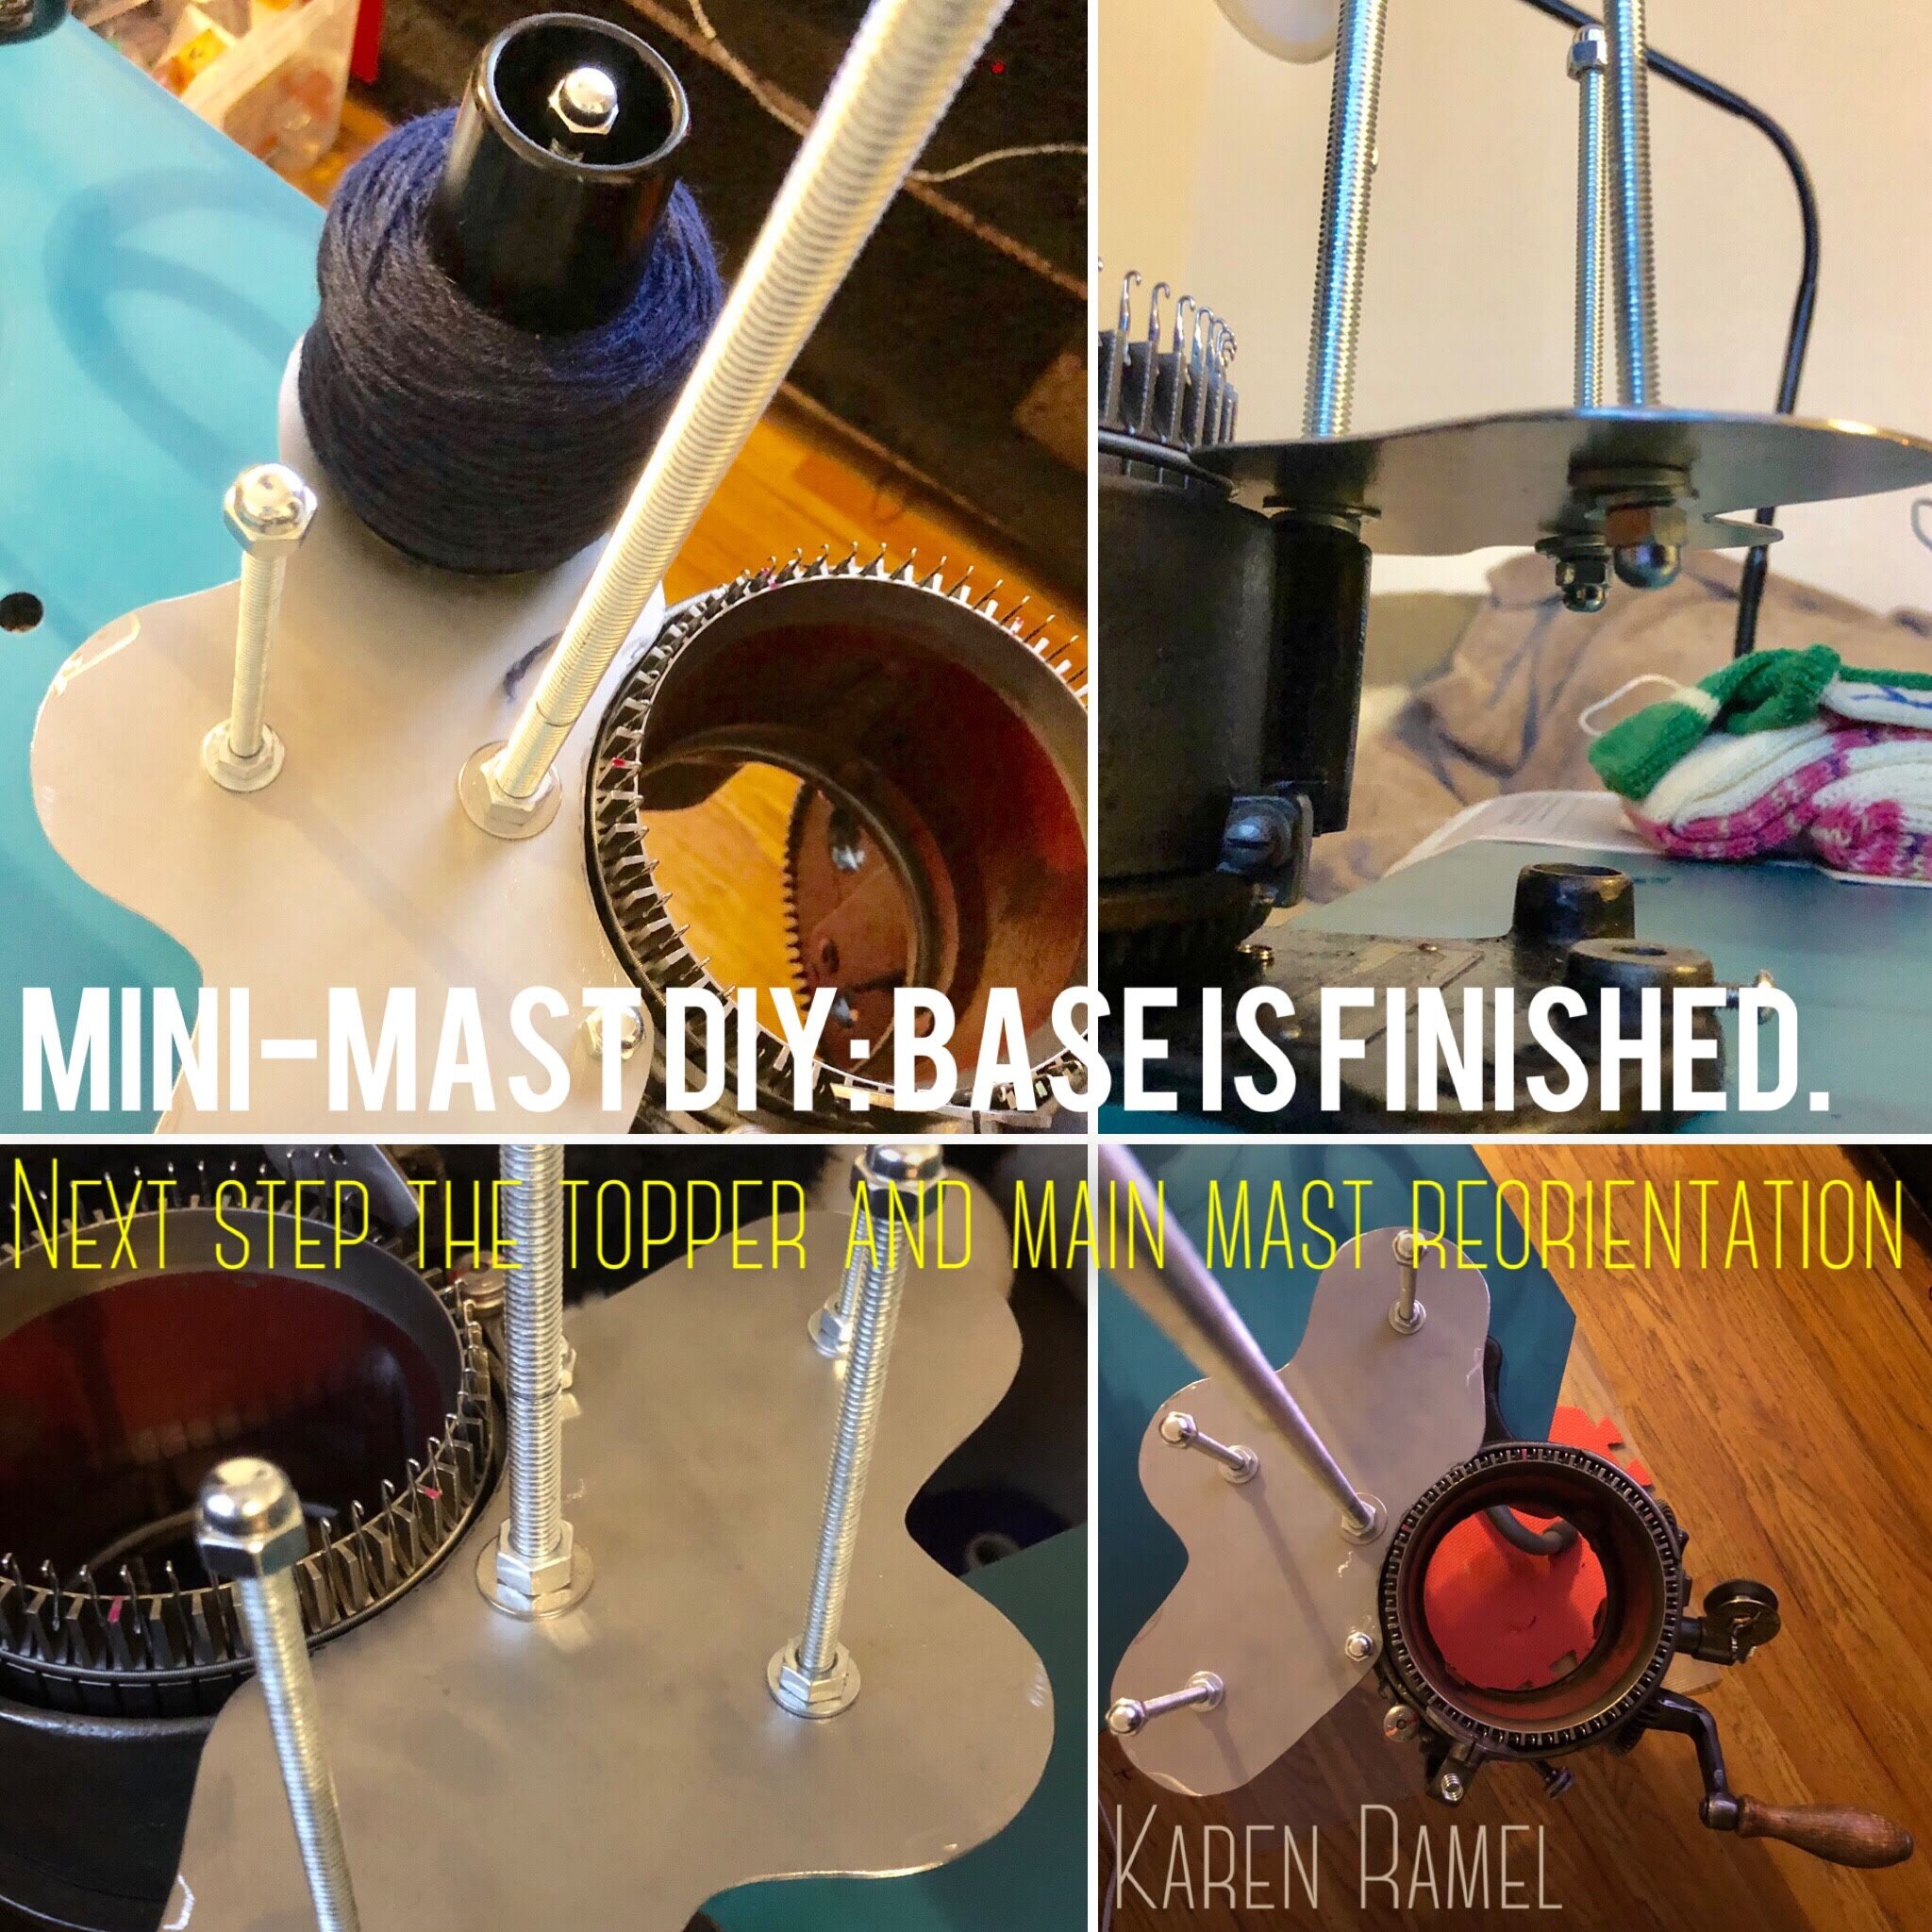
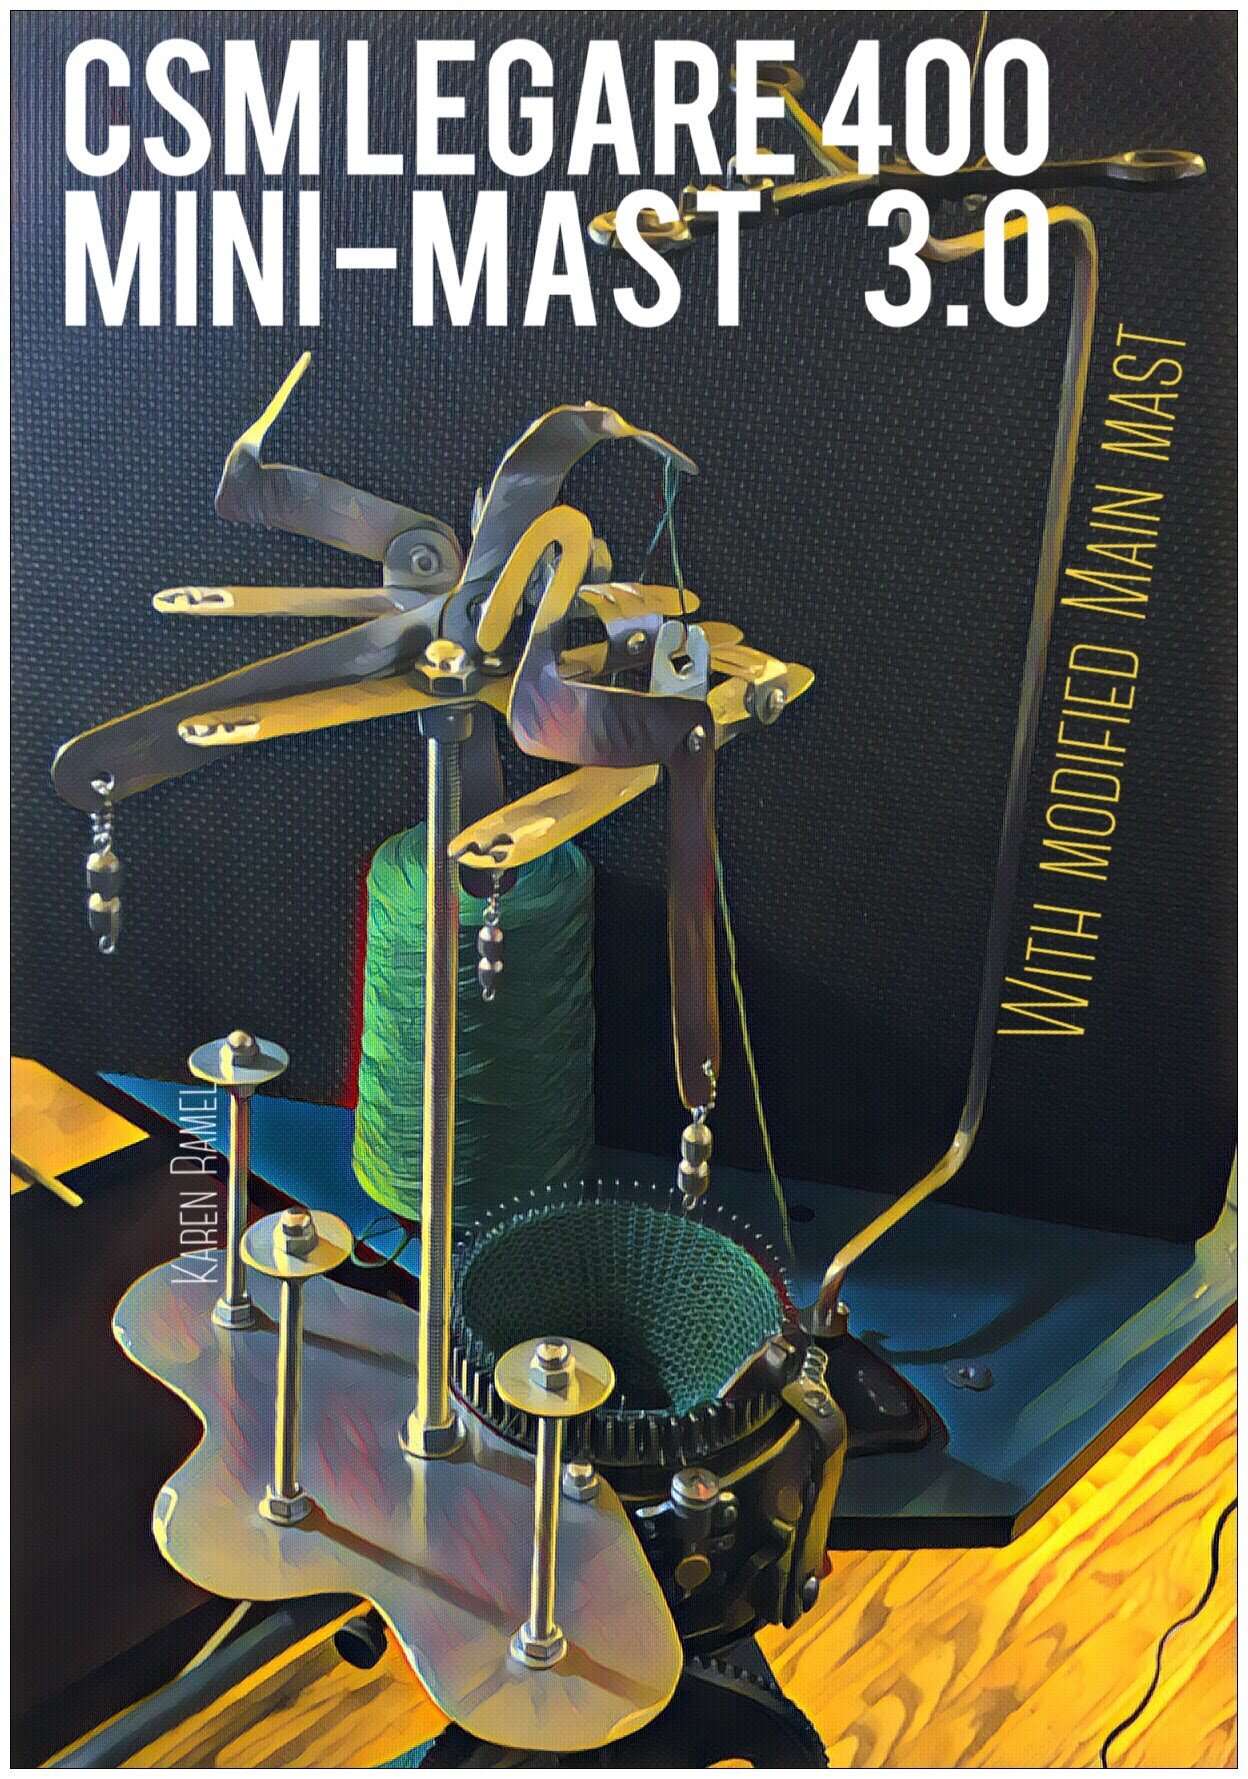
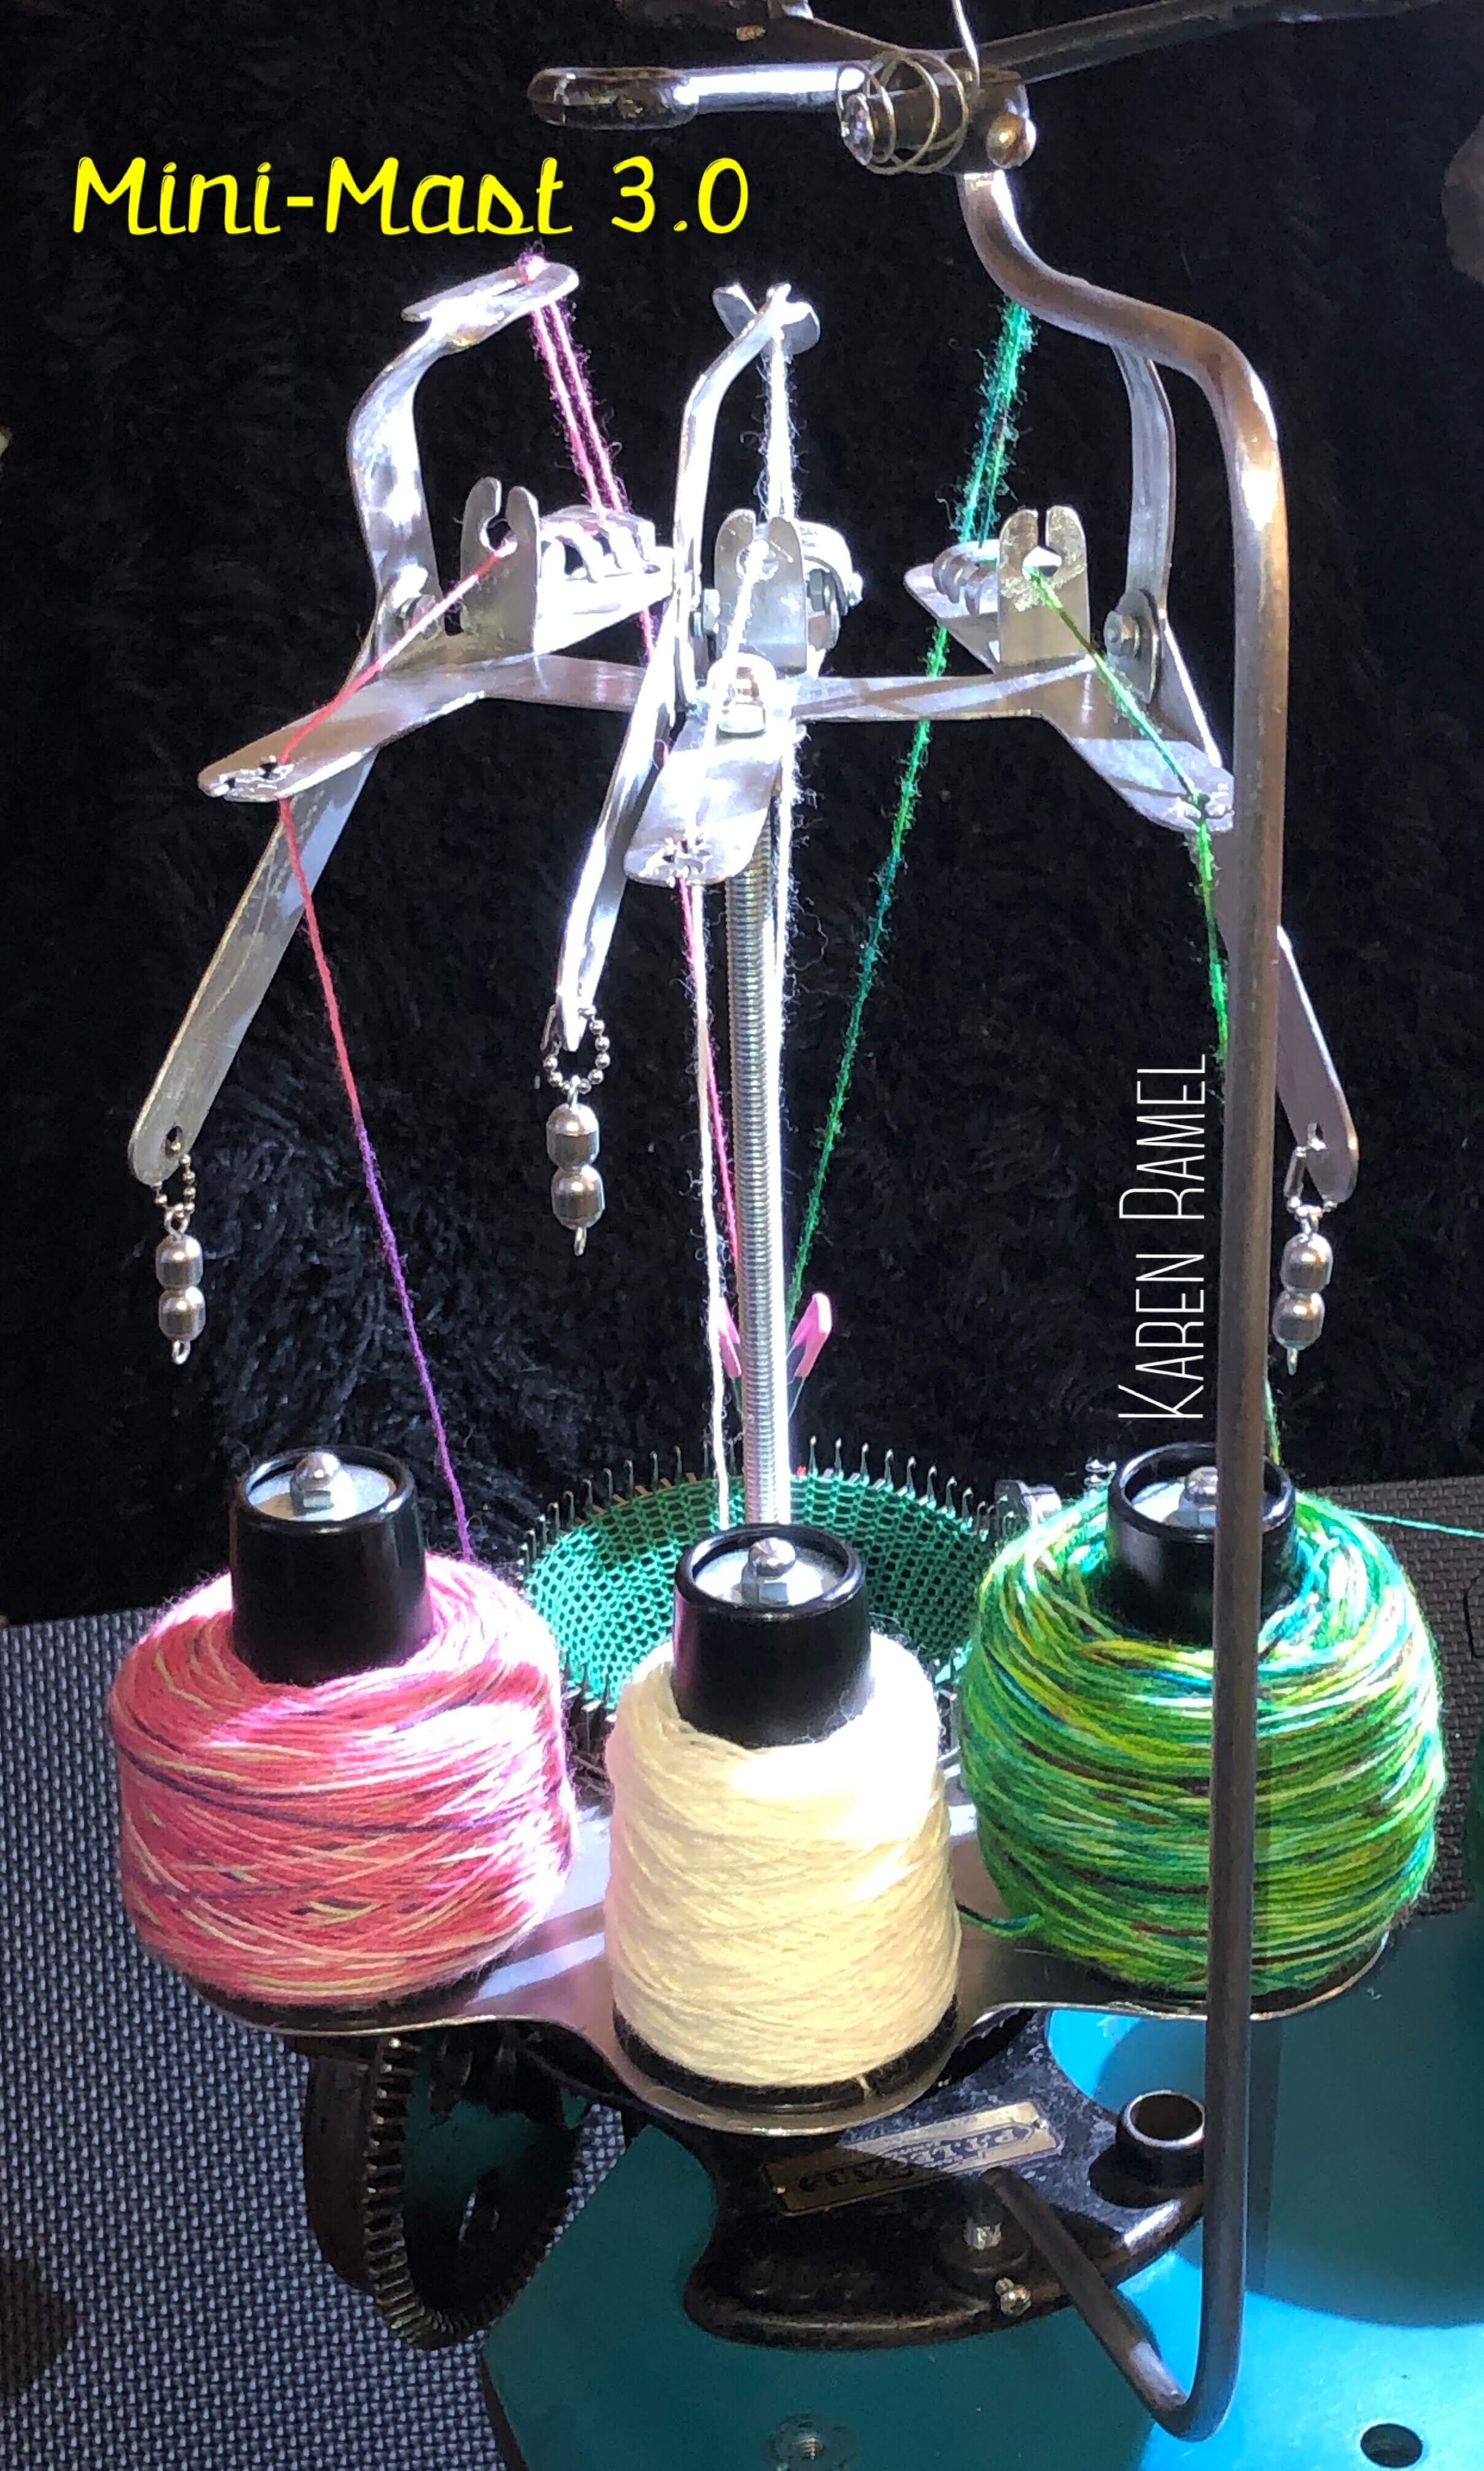
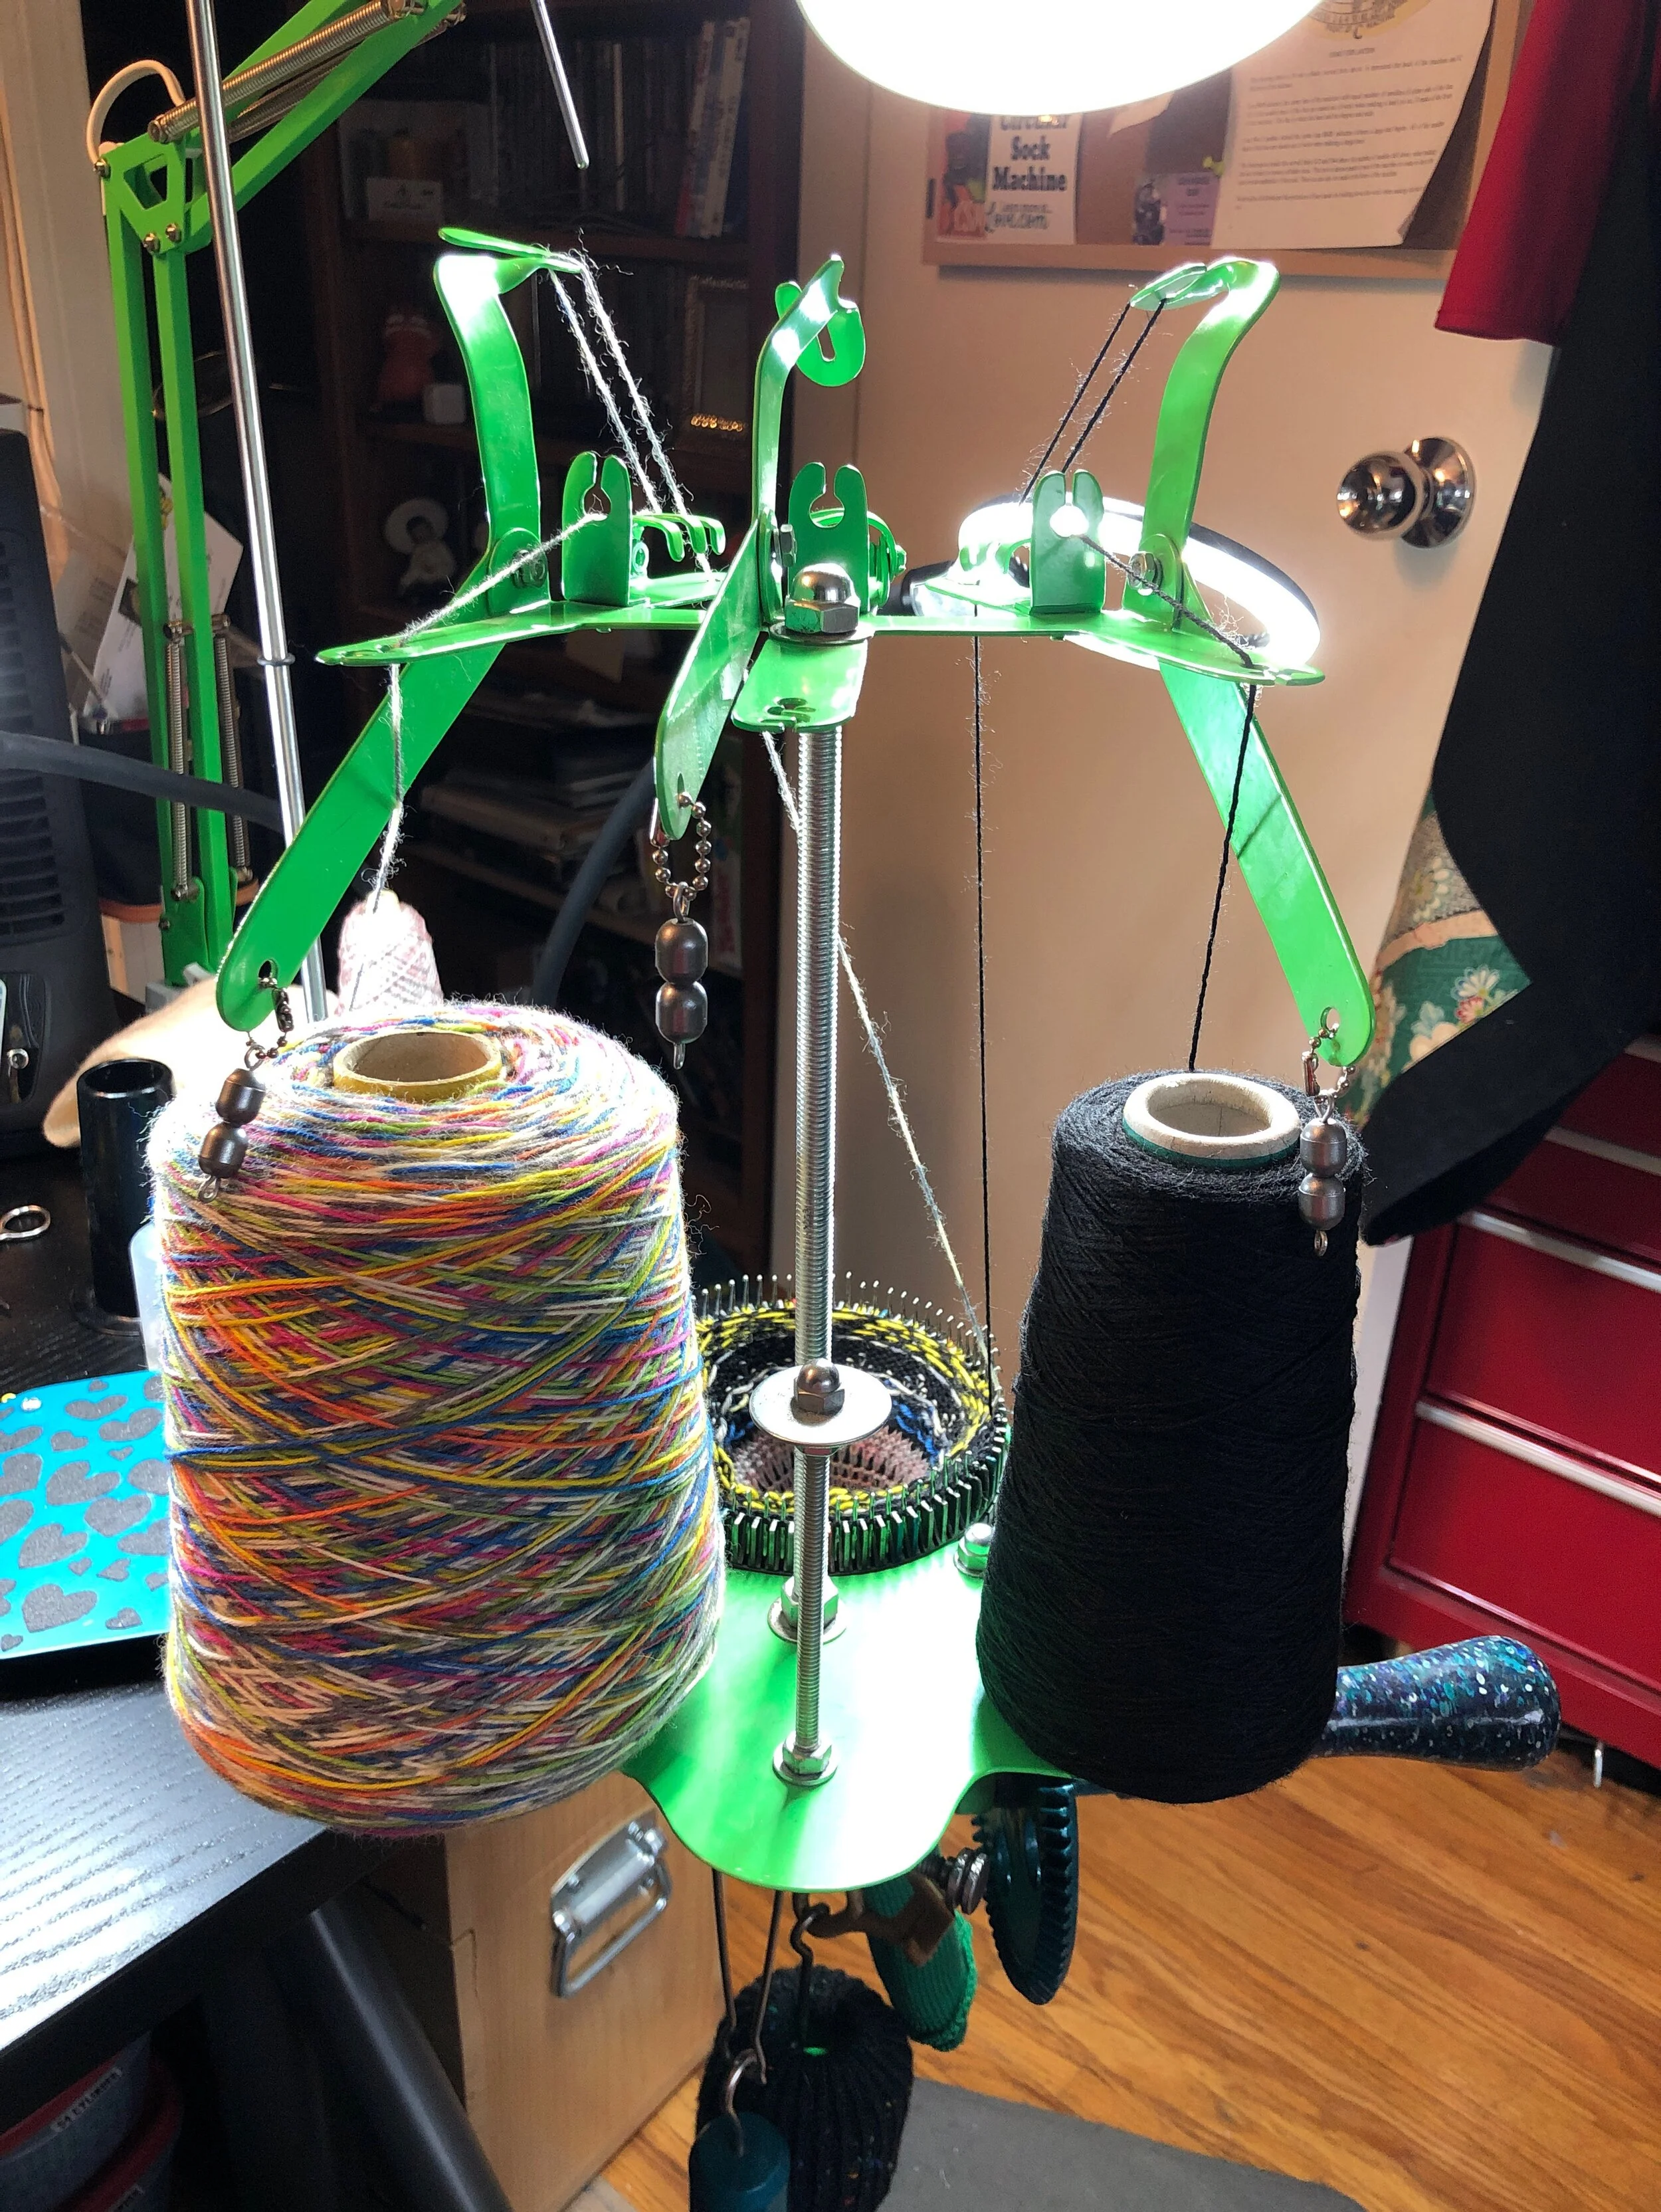
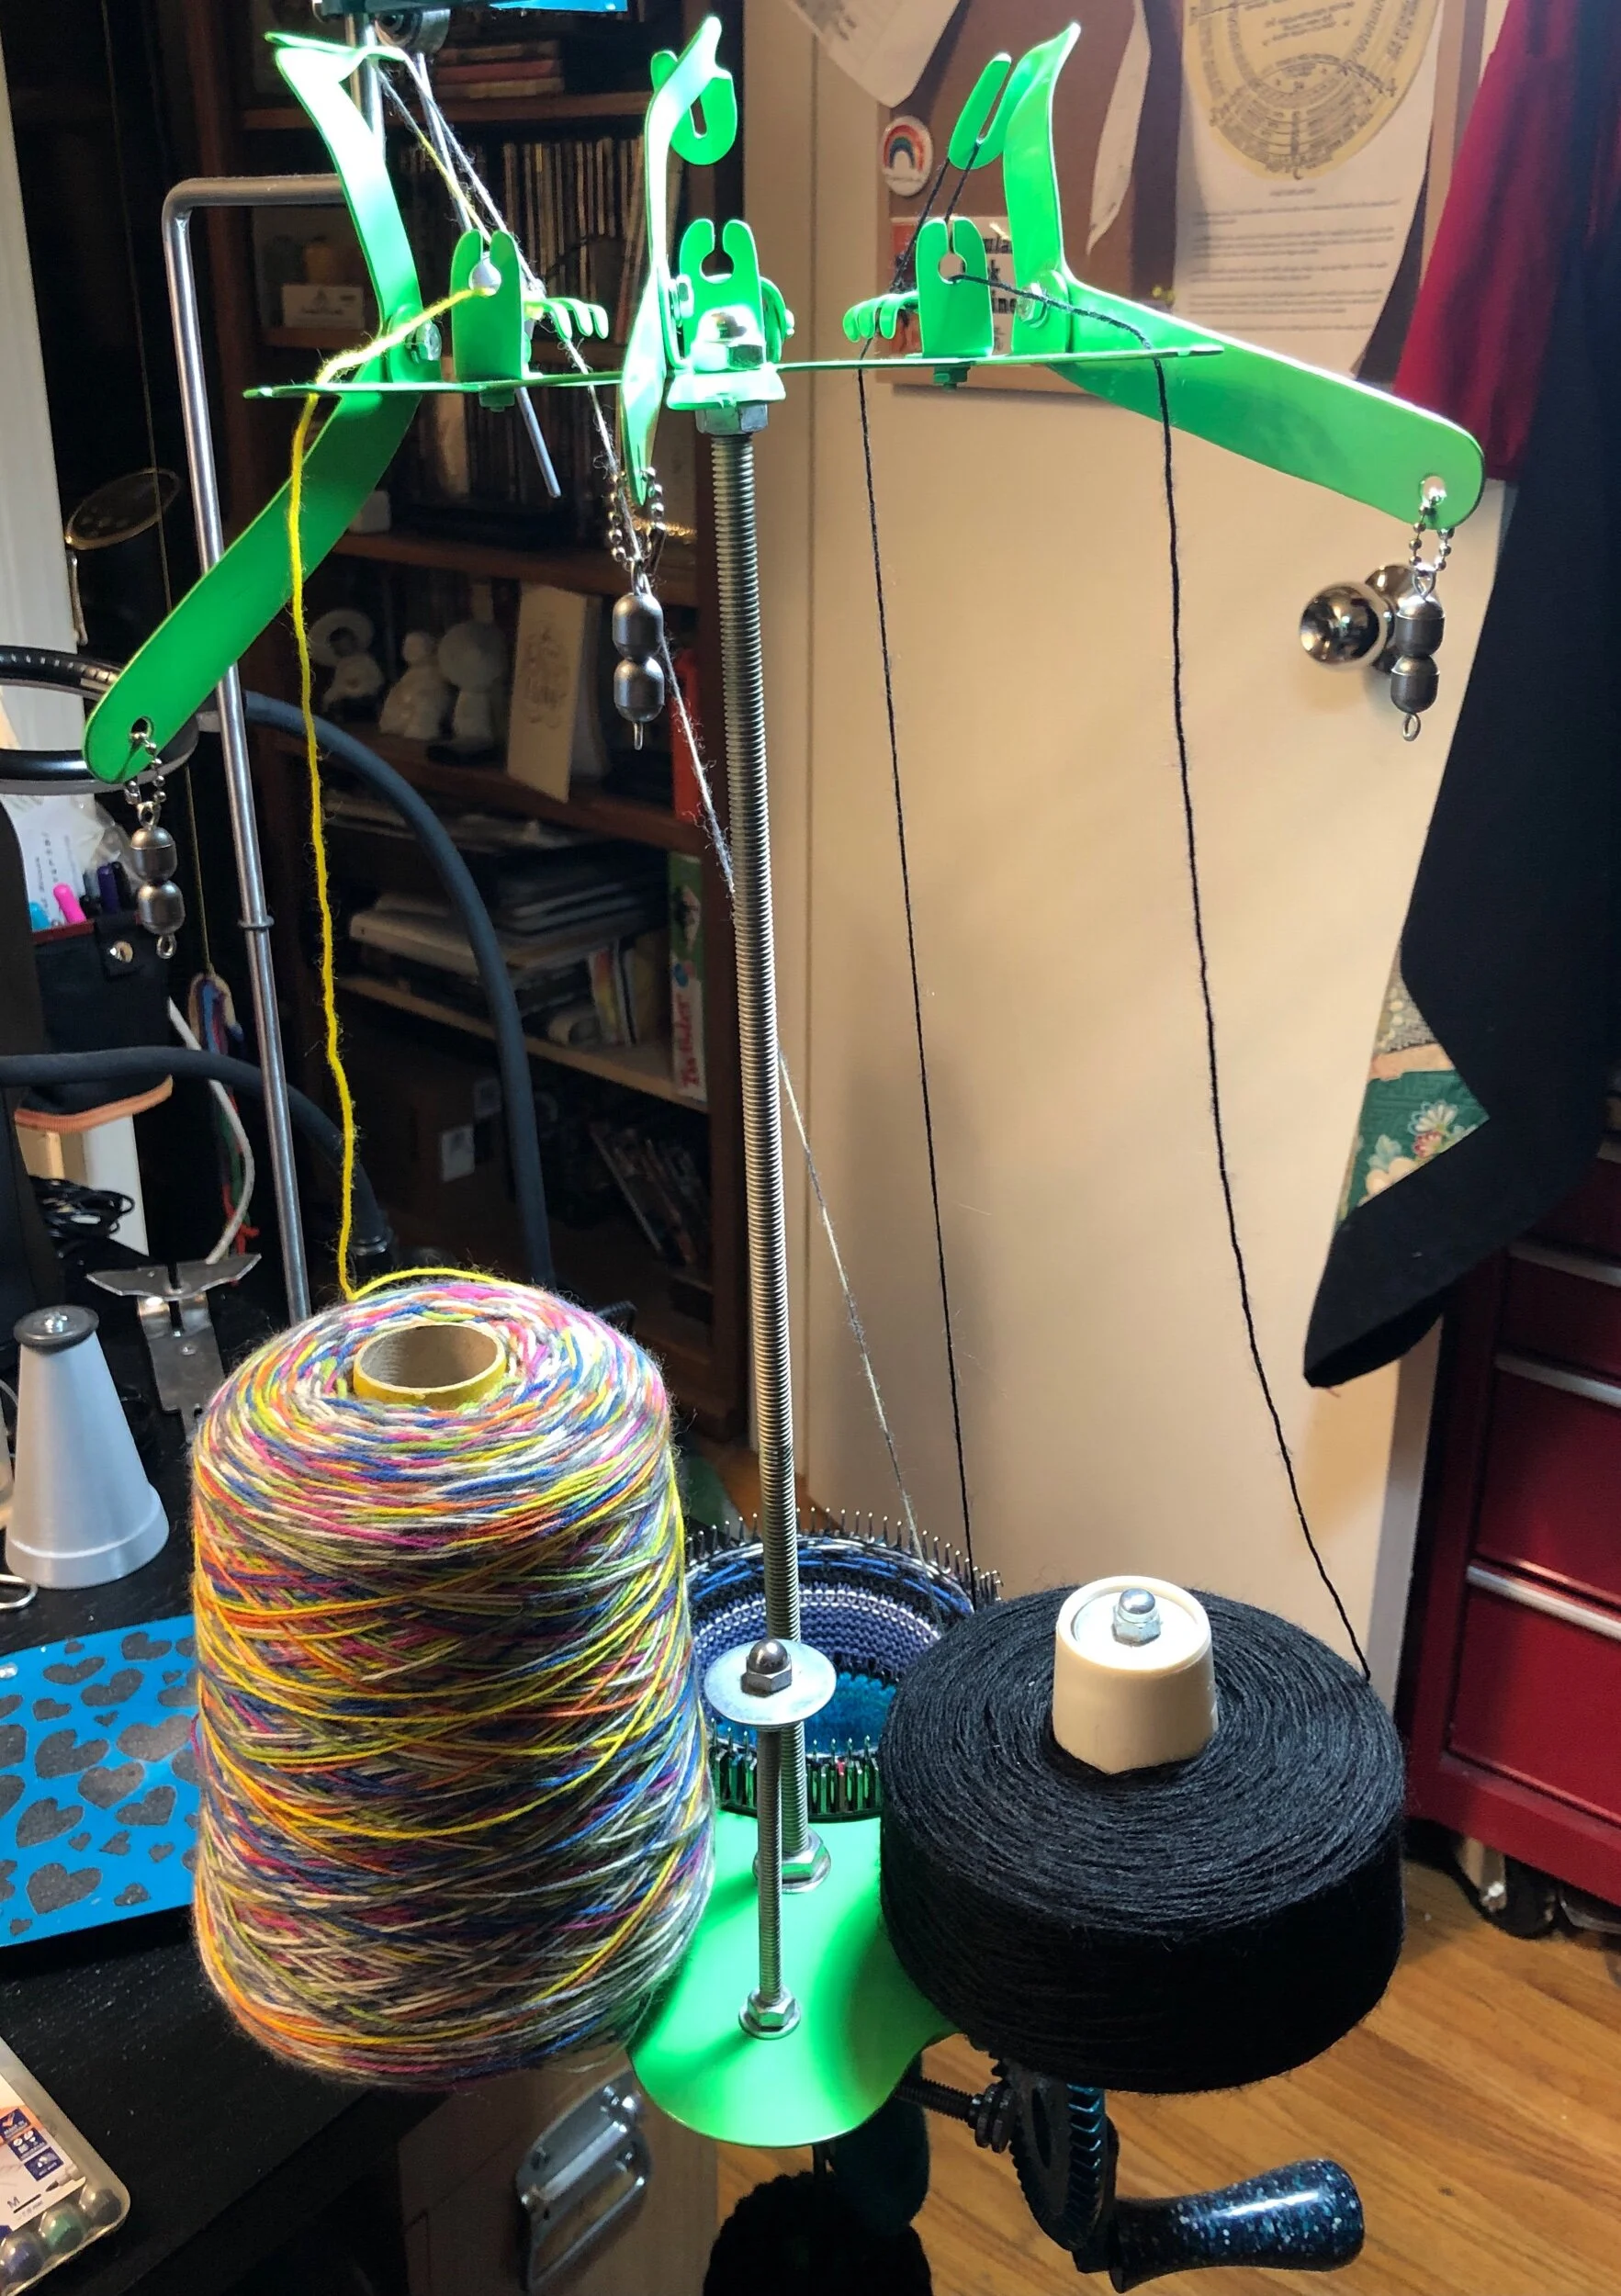
AN UPDATE: June 12, 2021 I changed the vertical mast from the 11” from the platform to the top to a new piece now measuring 16.5’ above the platform to better accommodate the Supergarne Aktiv yarn cone and still allow correct tension arm use.
Want a 3D printed mini-mast? He may only have those that work on an Erlbacher machine. Contact David Kettman - Lemont, Illinois - USA | his contact info and Etsy page are listed on my SUPPLIERS page
SEE ALL BLOG ENTRIES ON THE BLOG INDEX PAGE | Follow us on a variety of social sites see TAPLINK | Interested in Circular Sock Machines? See the CSM START Menu first page. | Seek something specific? Checkout the Index page.
2018 Nov 9 - Stem Weight Covers
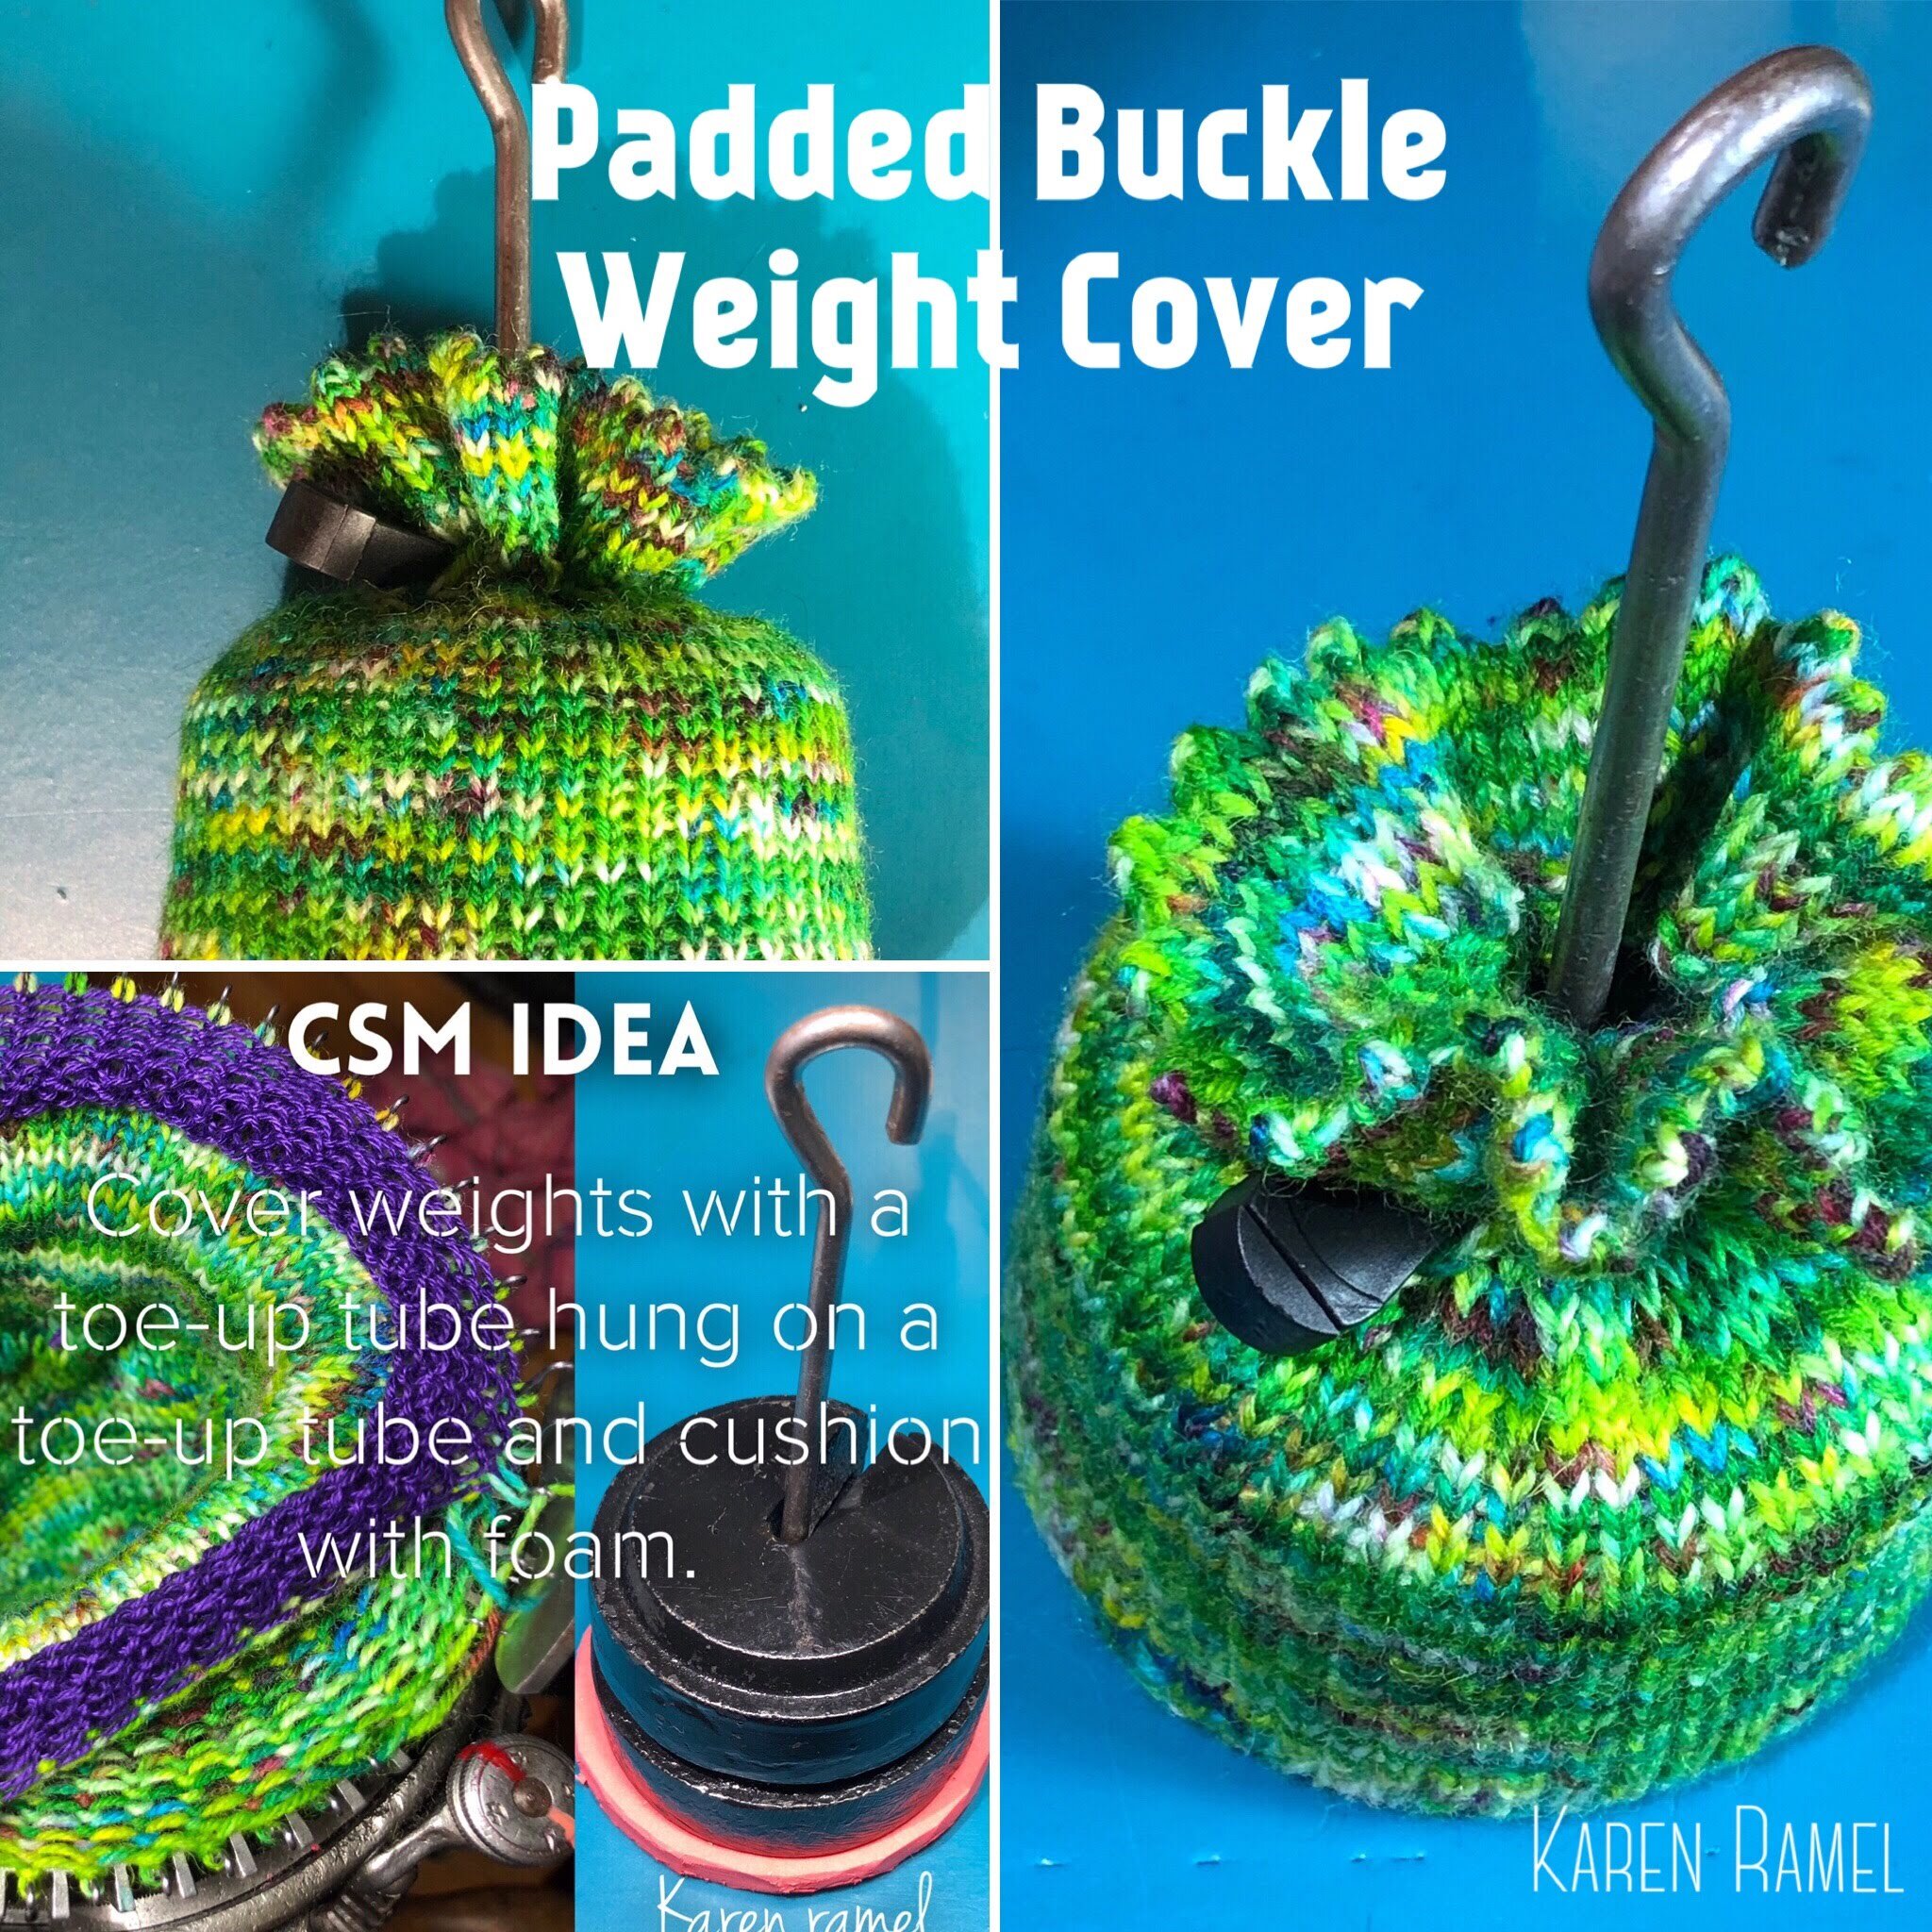
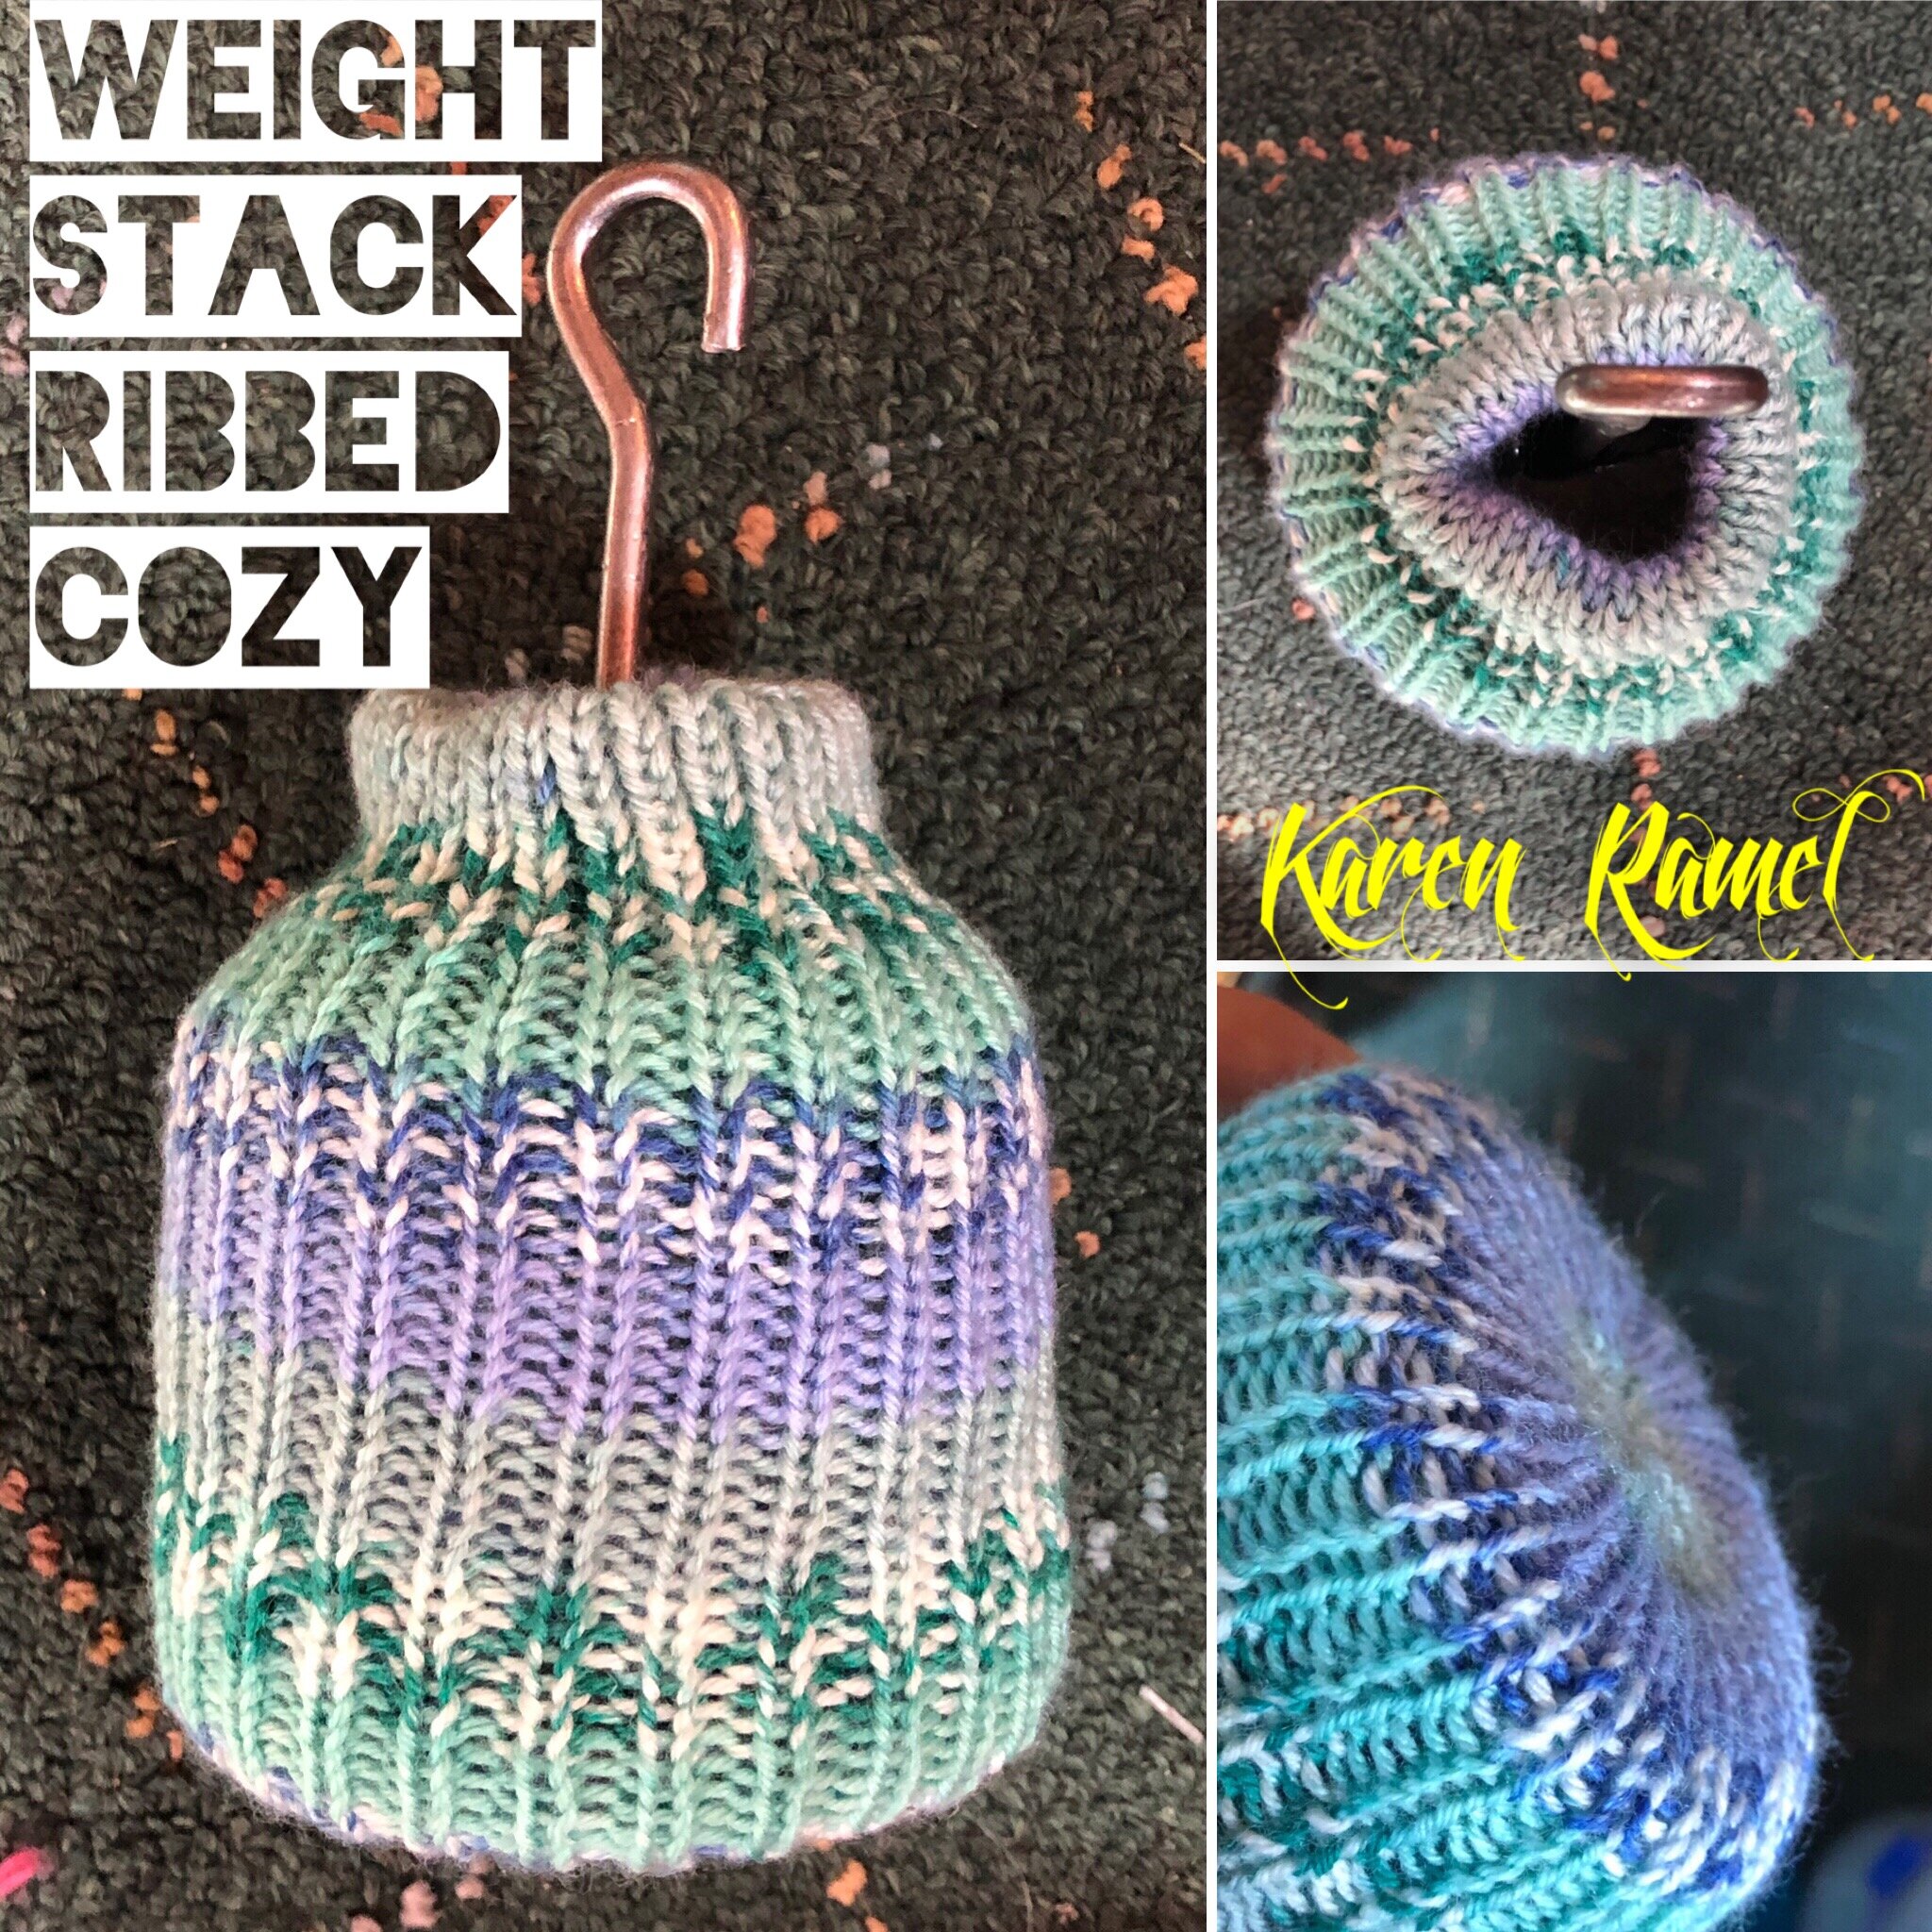
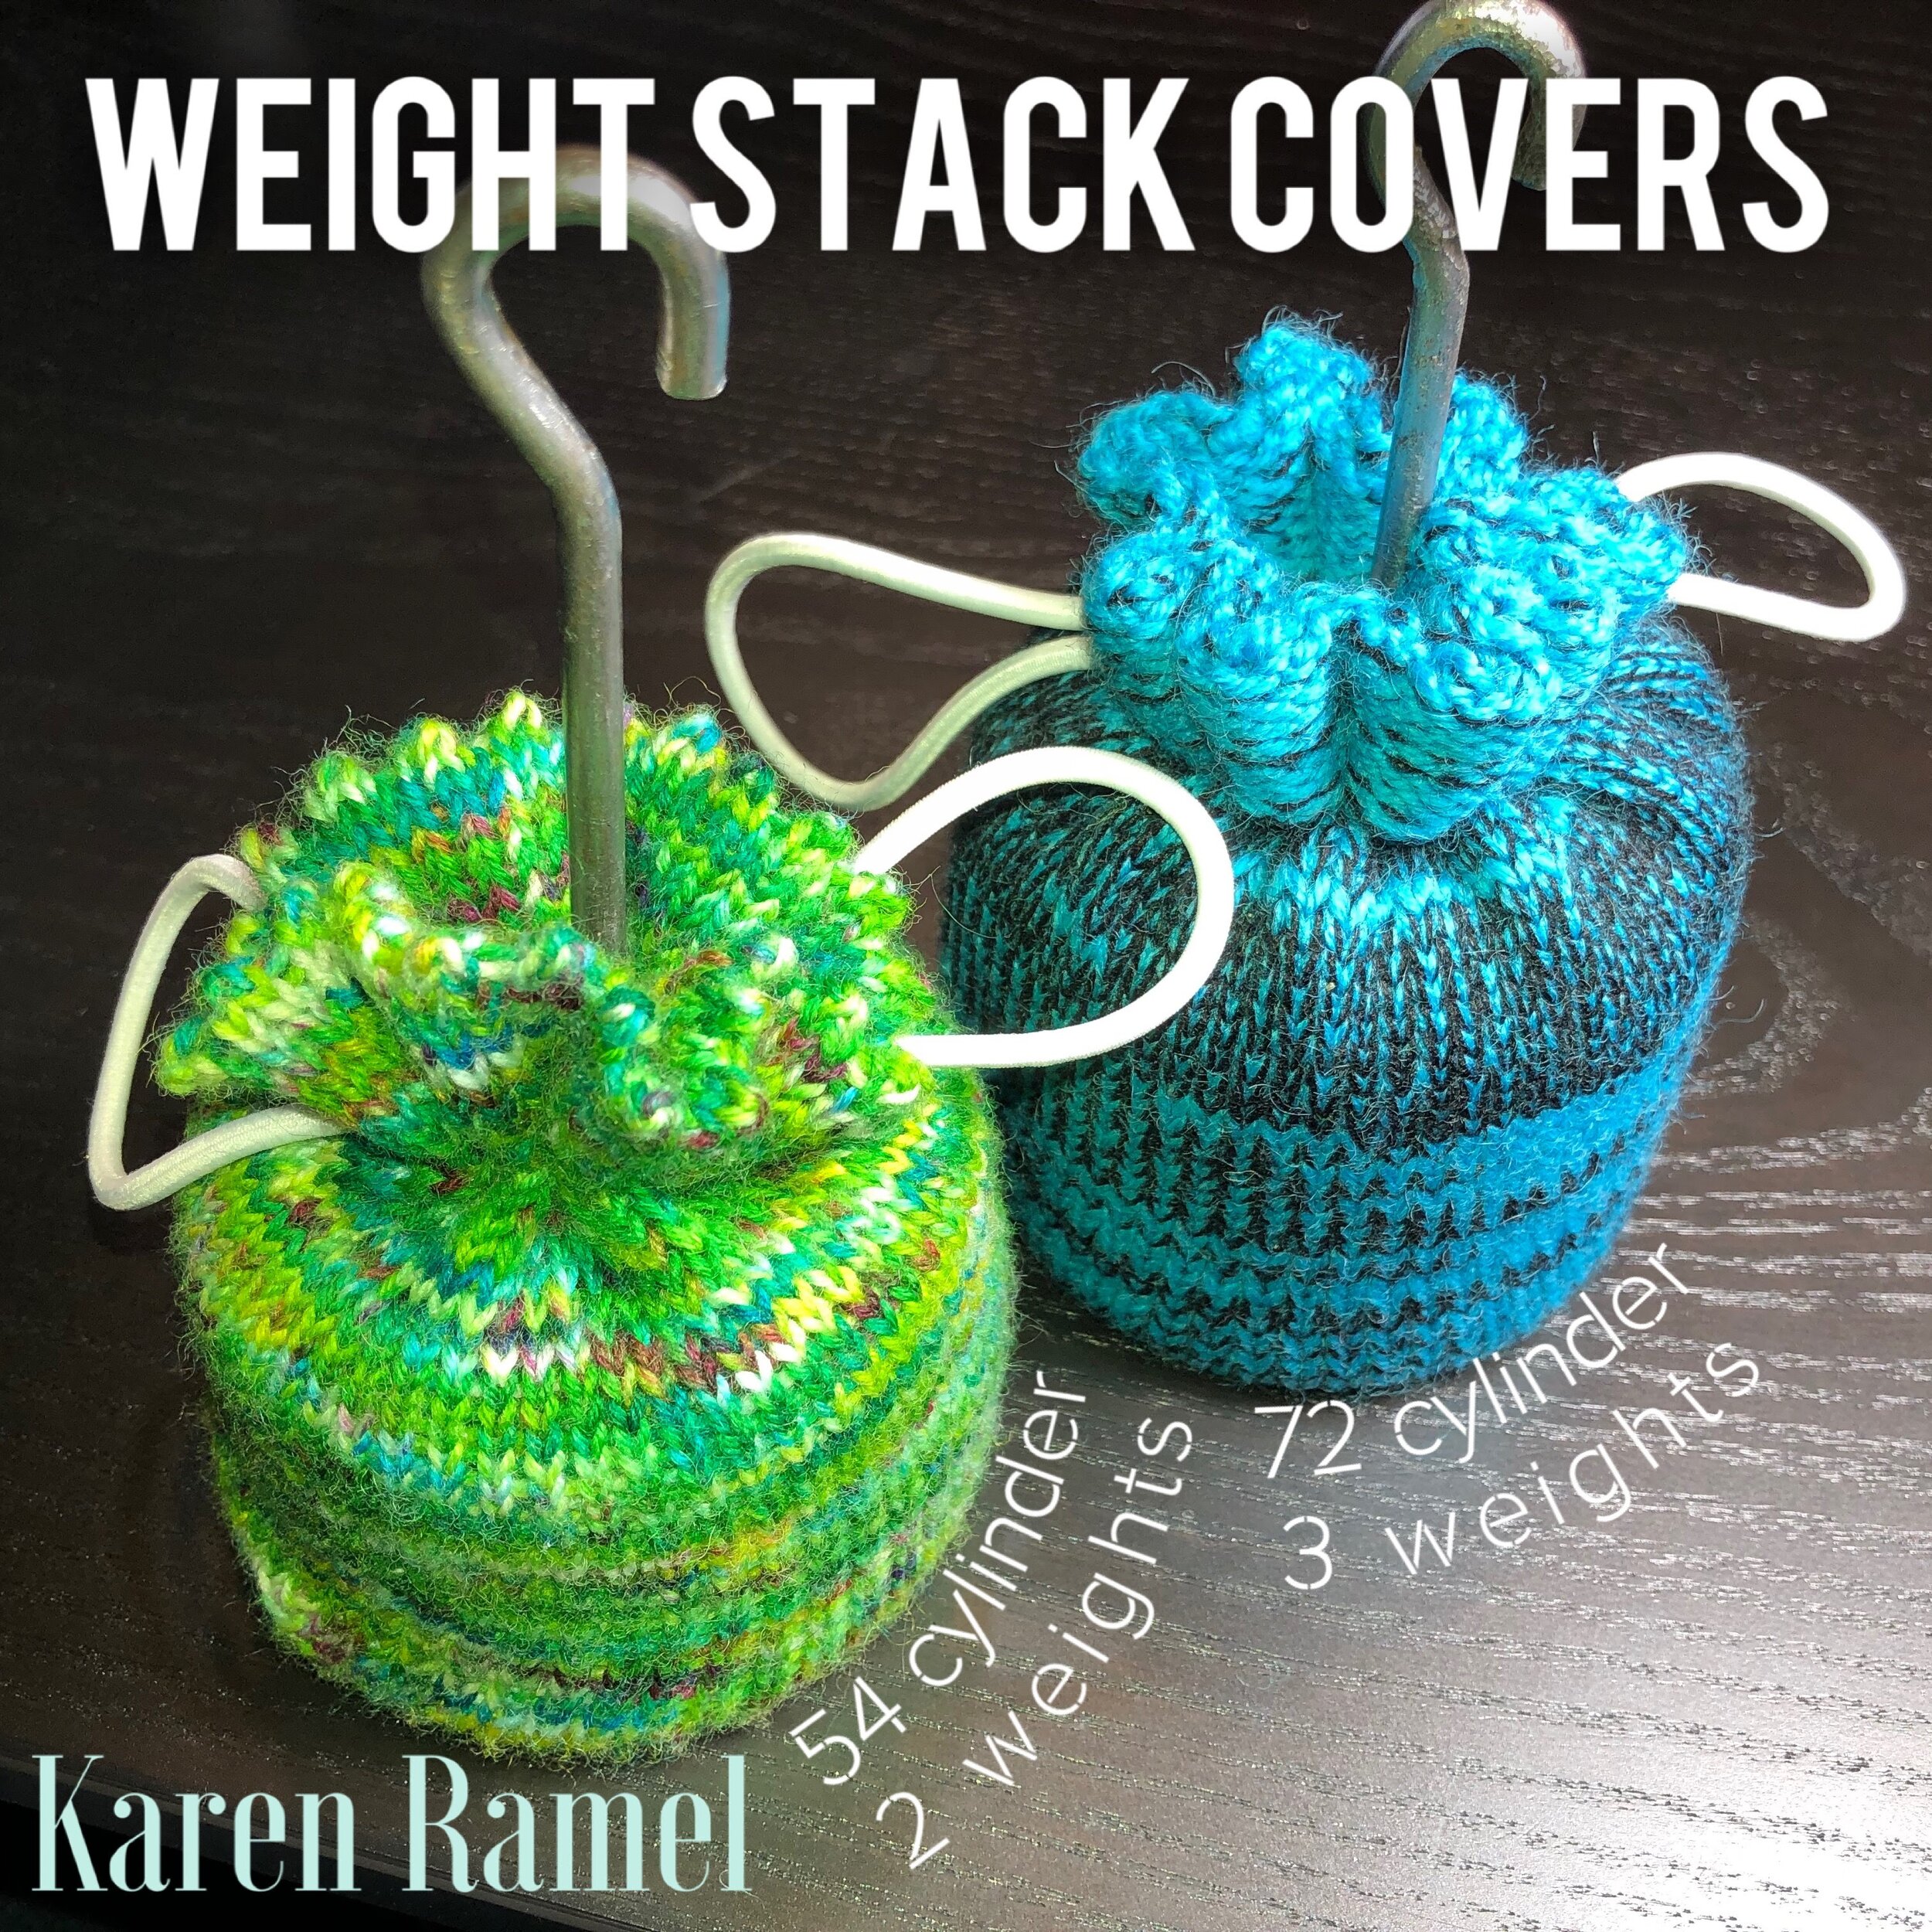
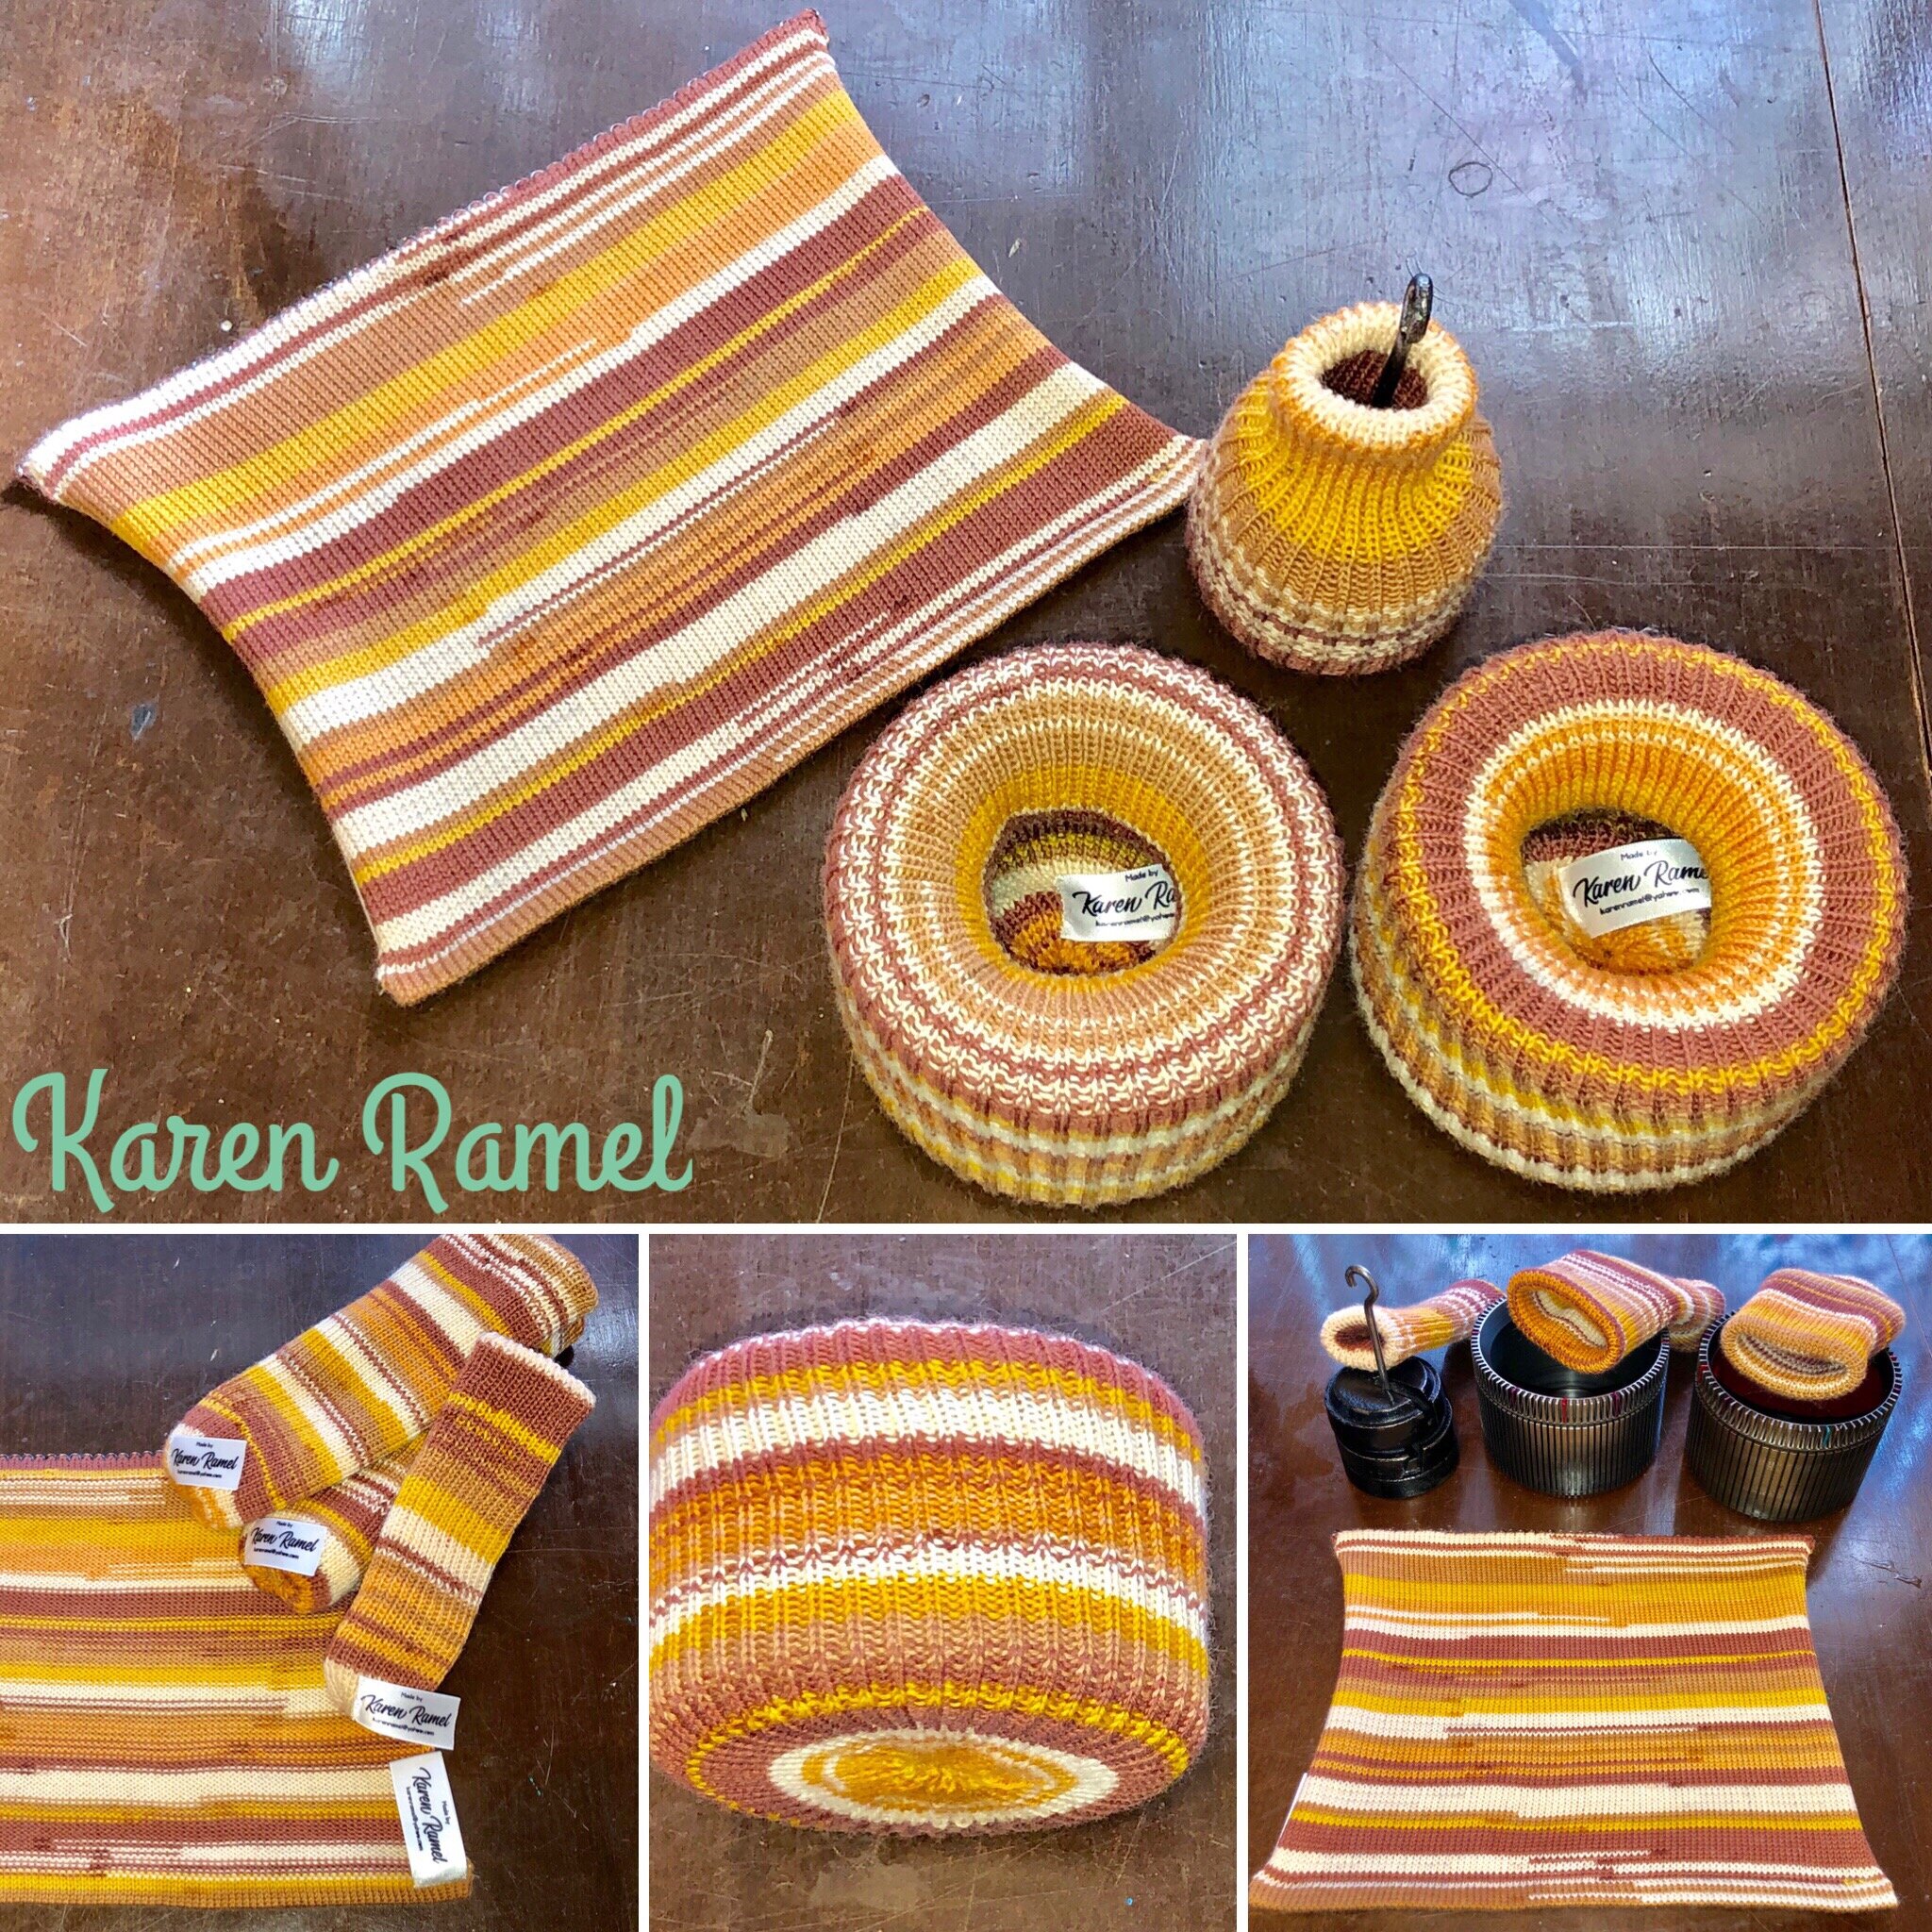
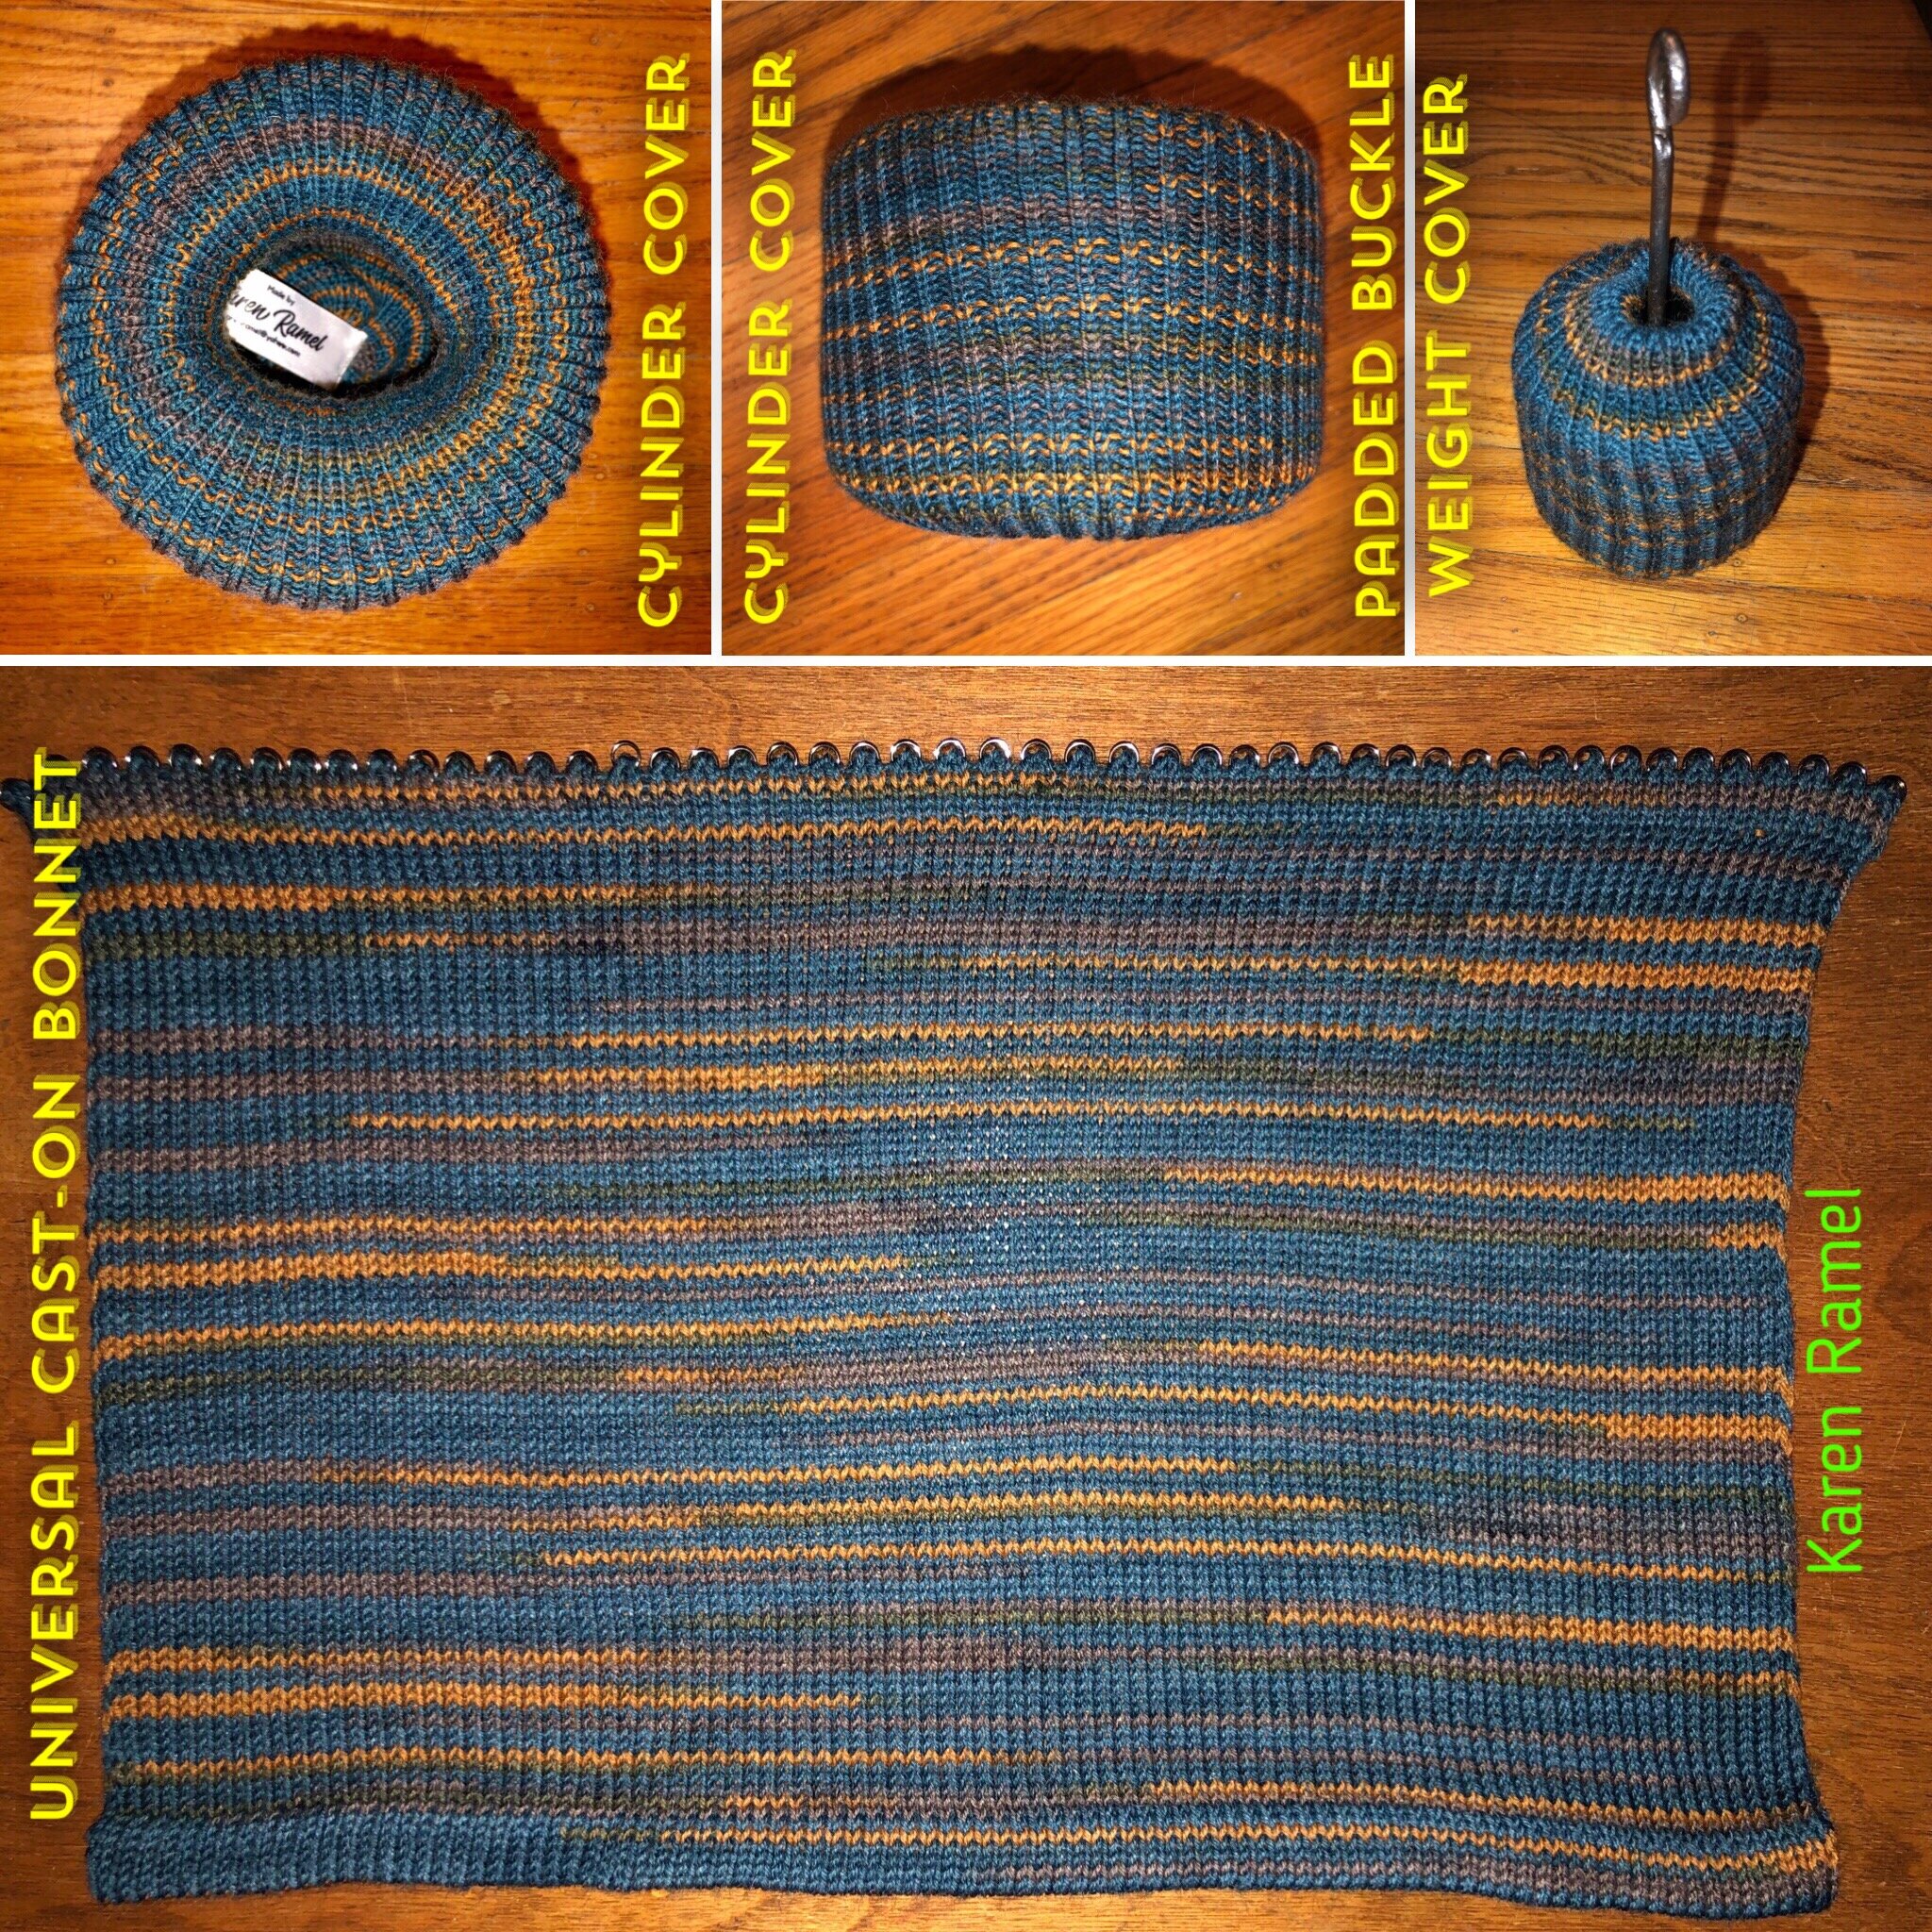
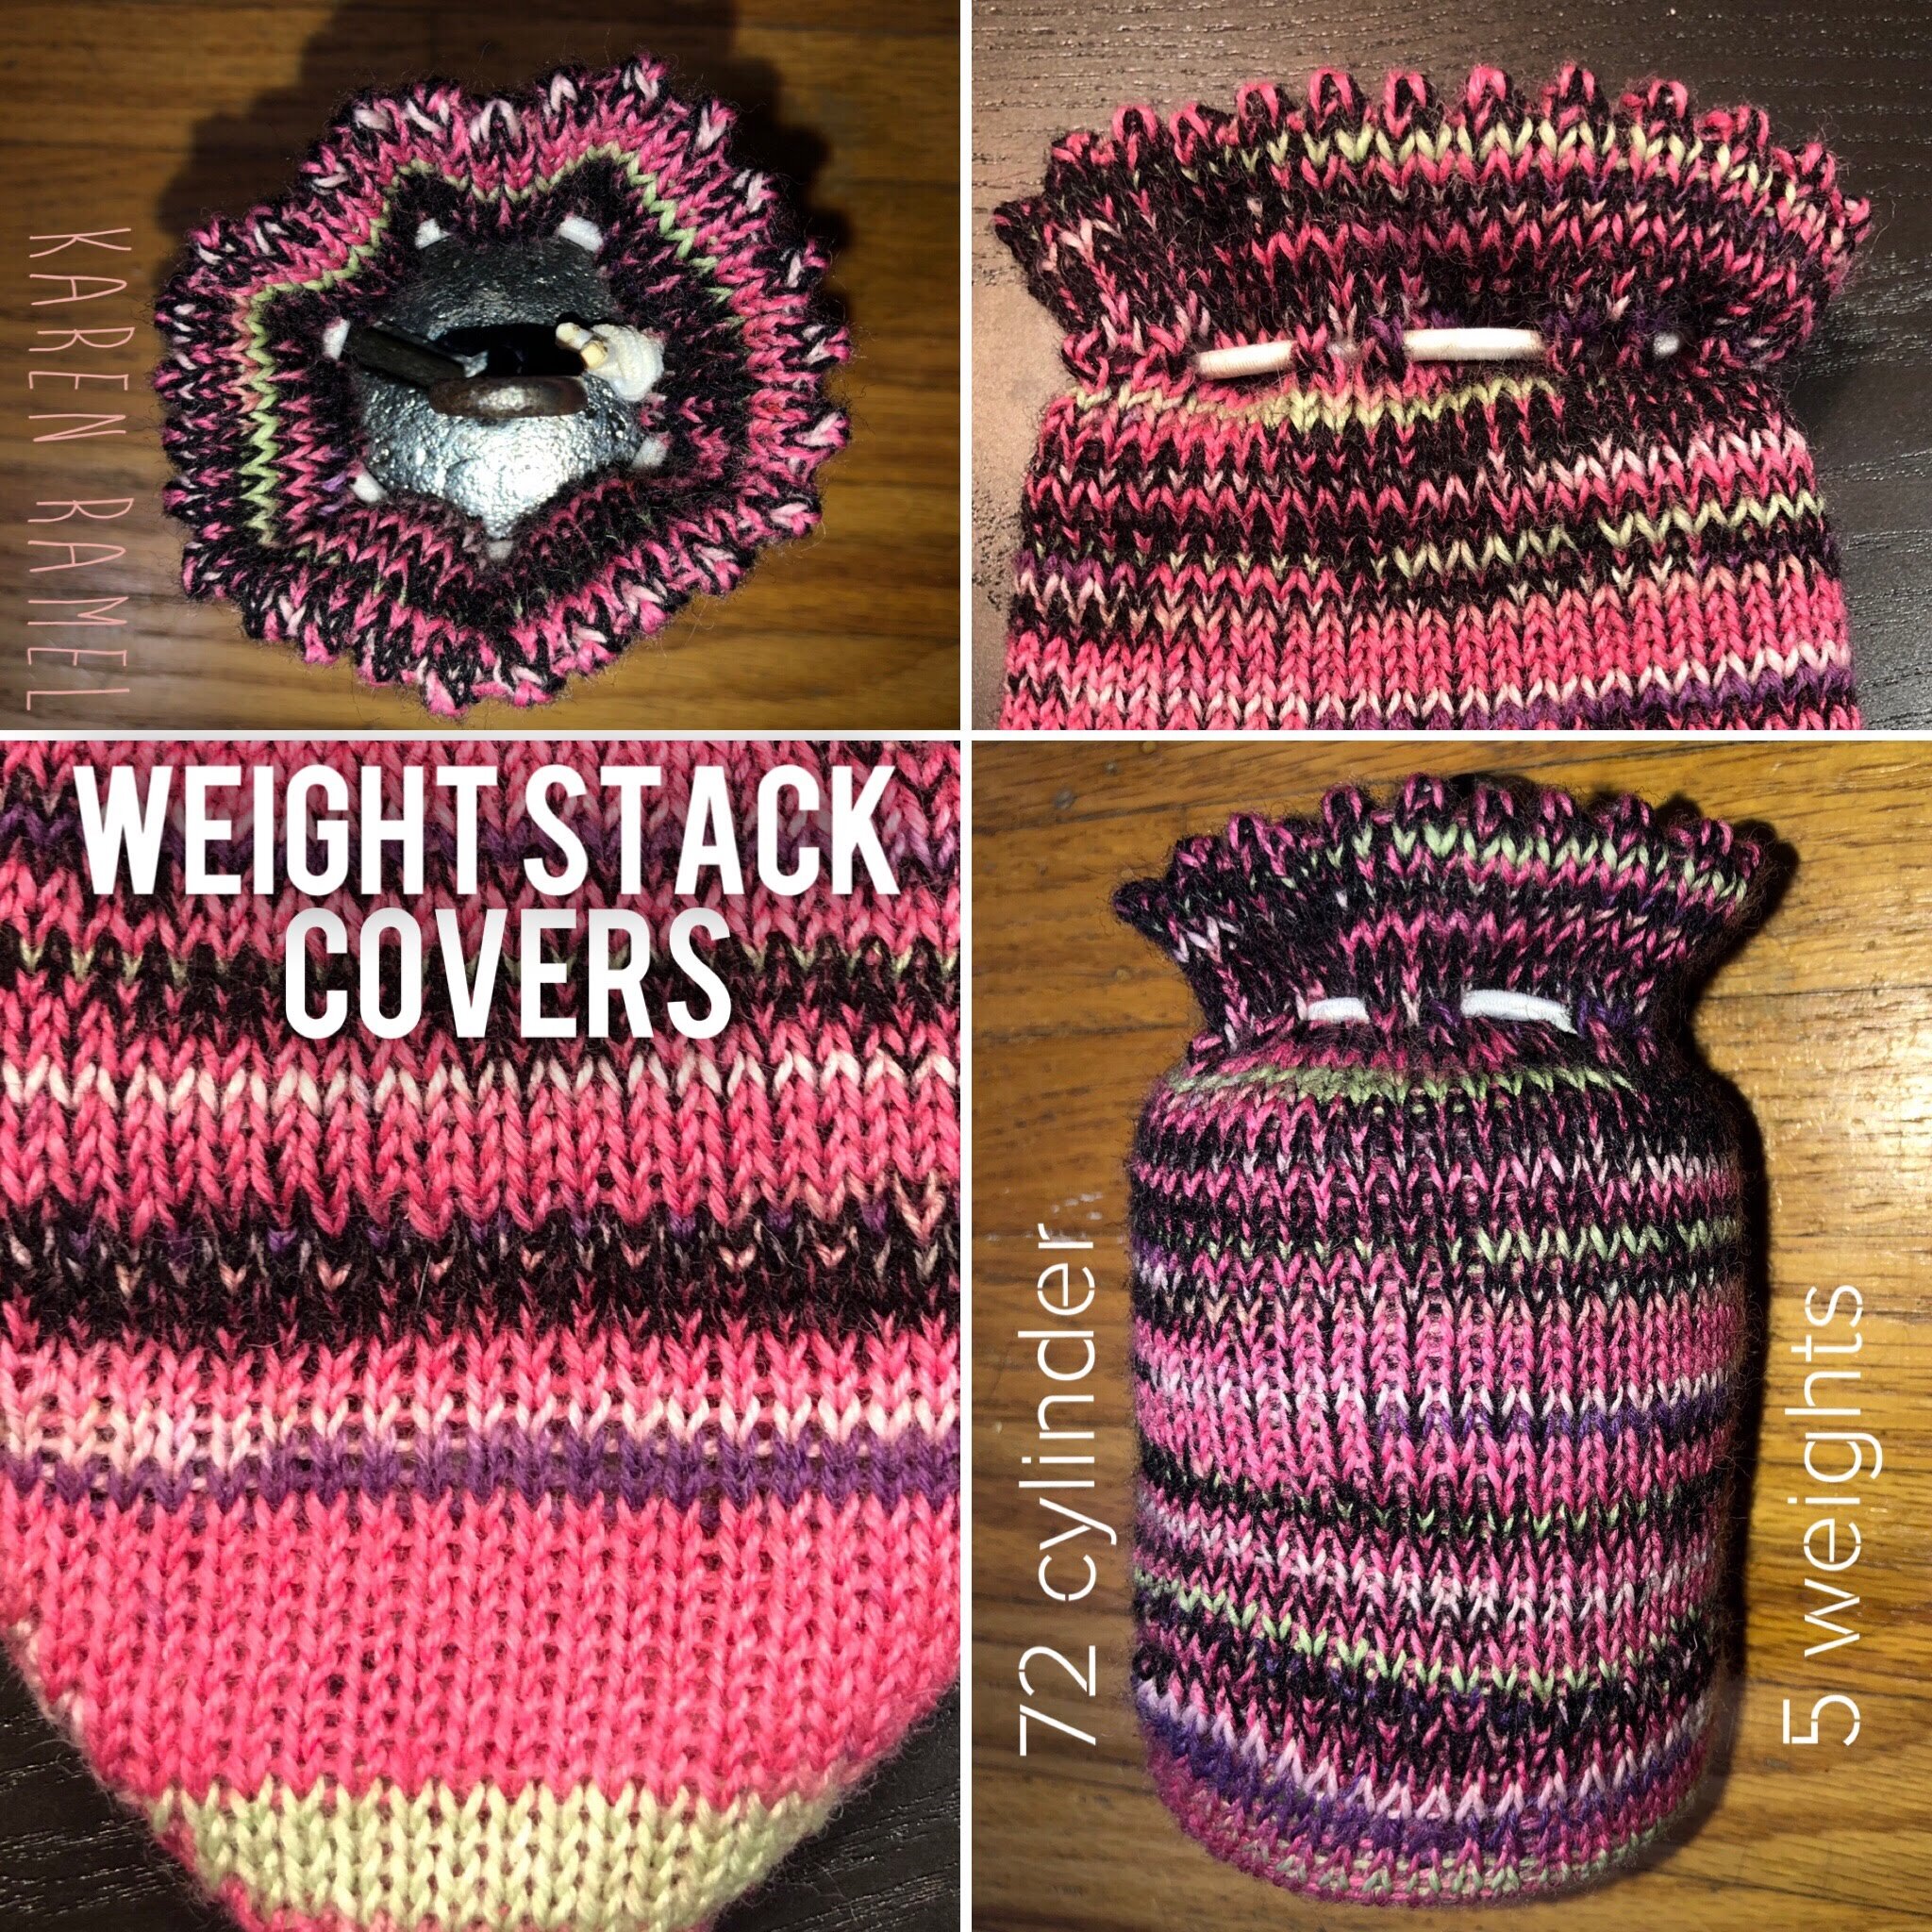
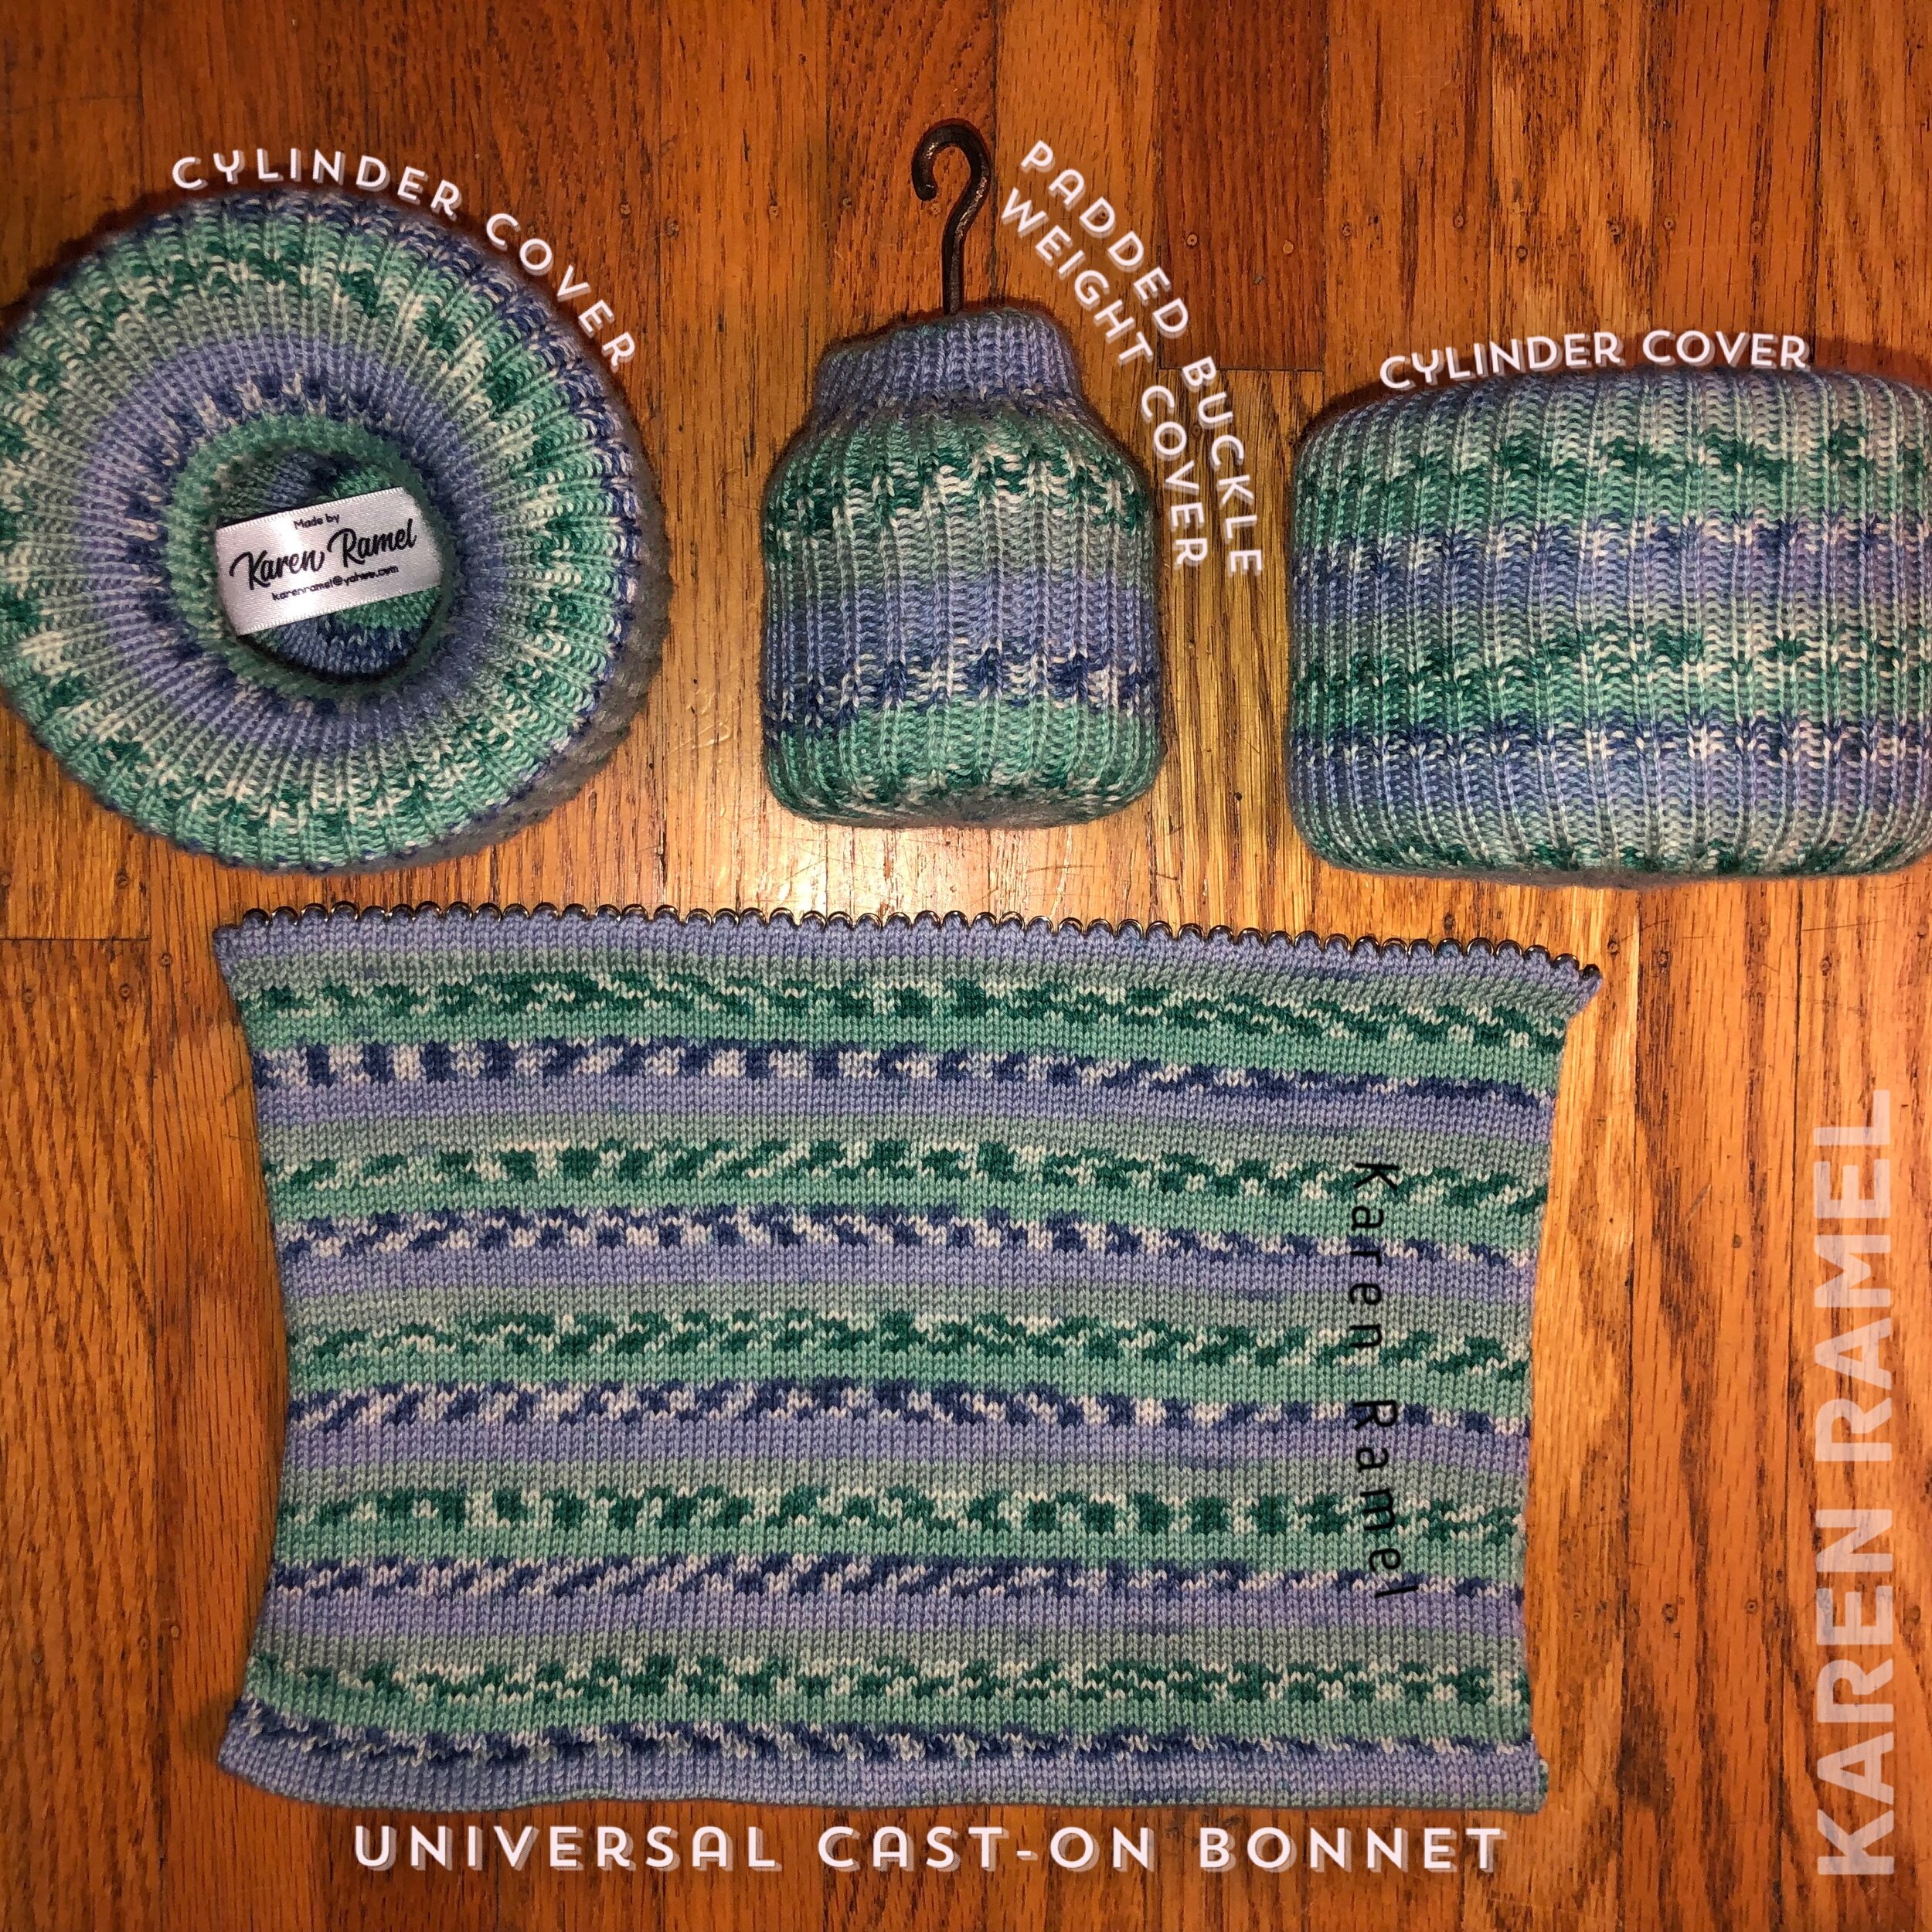
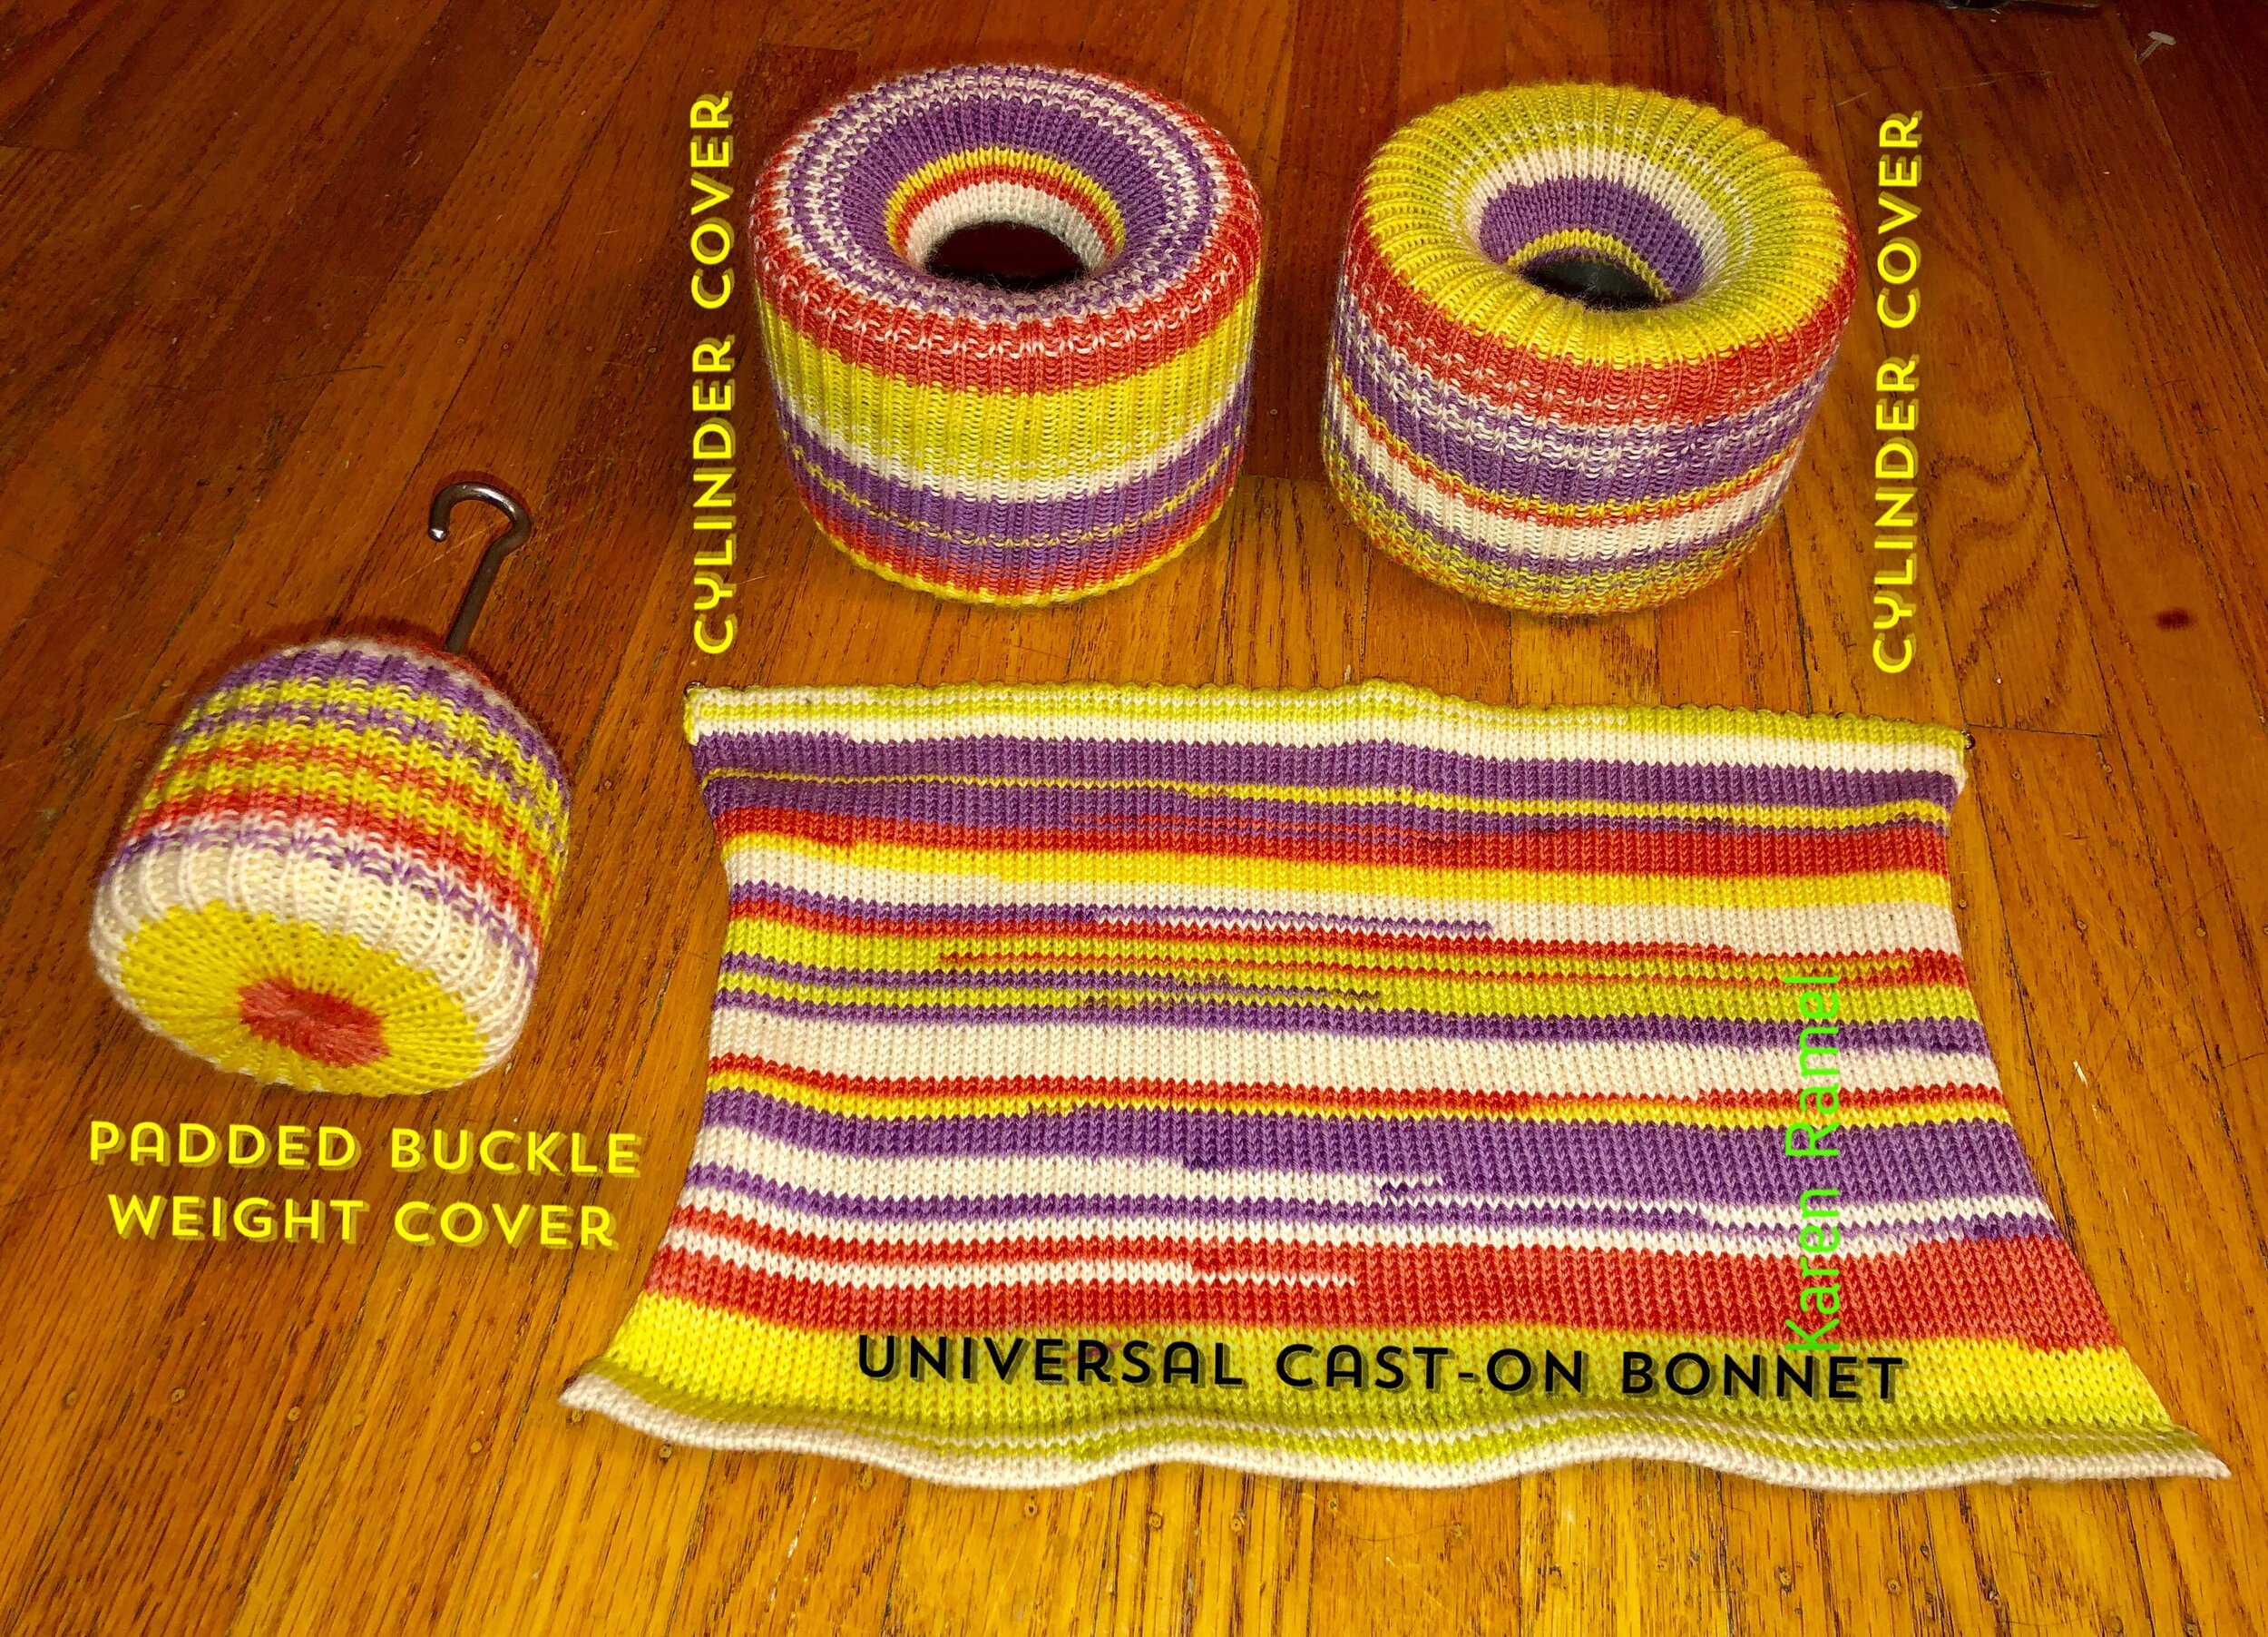
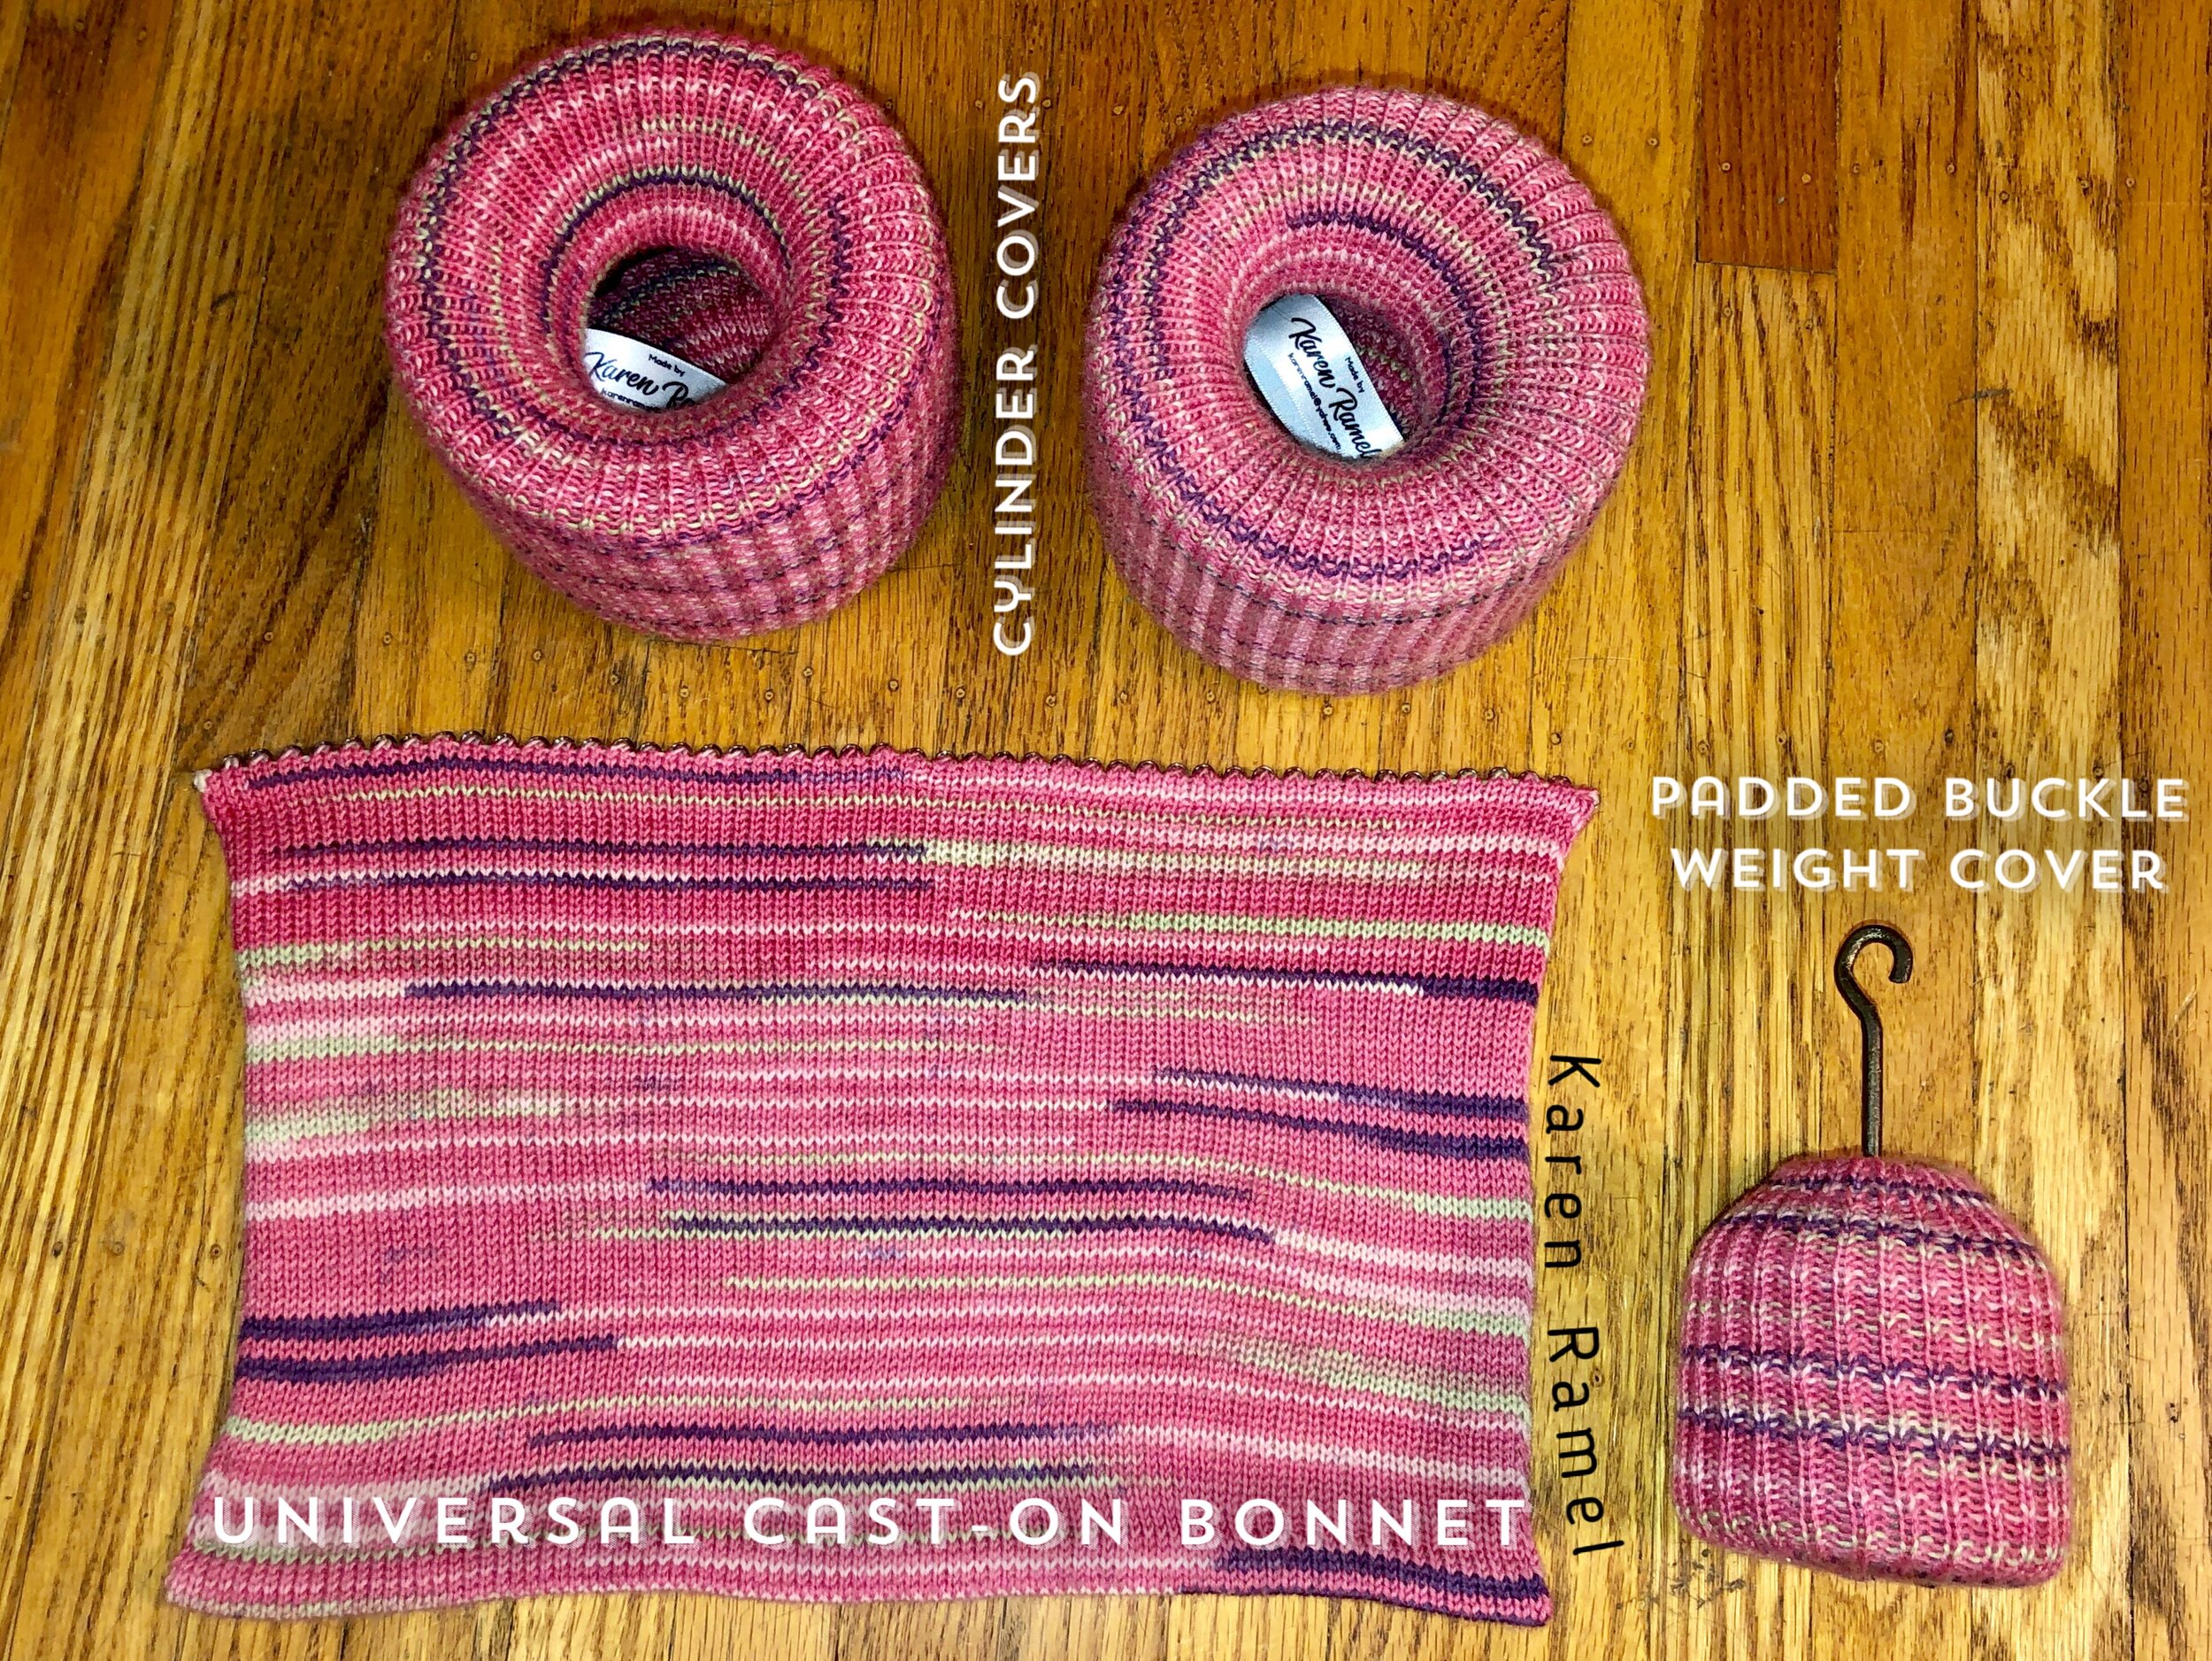
It occurred to me how easy the stacked weights can sometimes mis-align and drop to the floor. Deciding to make something on the CSM which would hold a piece of foam for florr impact padding, I ventured into trying a Toe-Up pouch, working a double project and joining the two as one just before the draw string area of the cover.
See the RAVELRY PROJECTS HERE and HERE
Tonight I finished the CSM: Padded Buckle Weight cover with drawstring.
How: Built by first cranking a Toe-Up tube then adding scrap and taking it off the machine, a second same height Toe-Up tube was cranked and then the first was reversed (knit side up) and hung back on the machine. I then cranked 8 rows, did picot (will be drawstring), cranked 10 rows, did picot, cranked 10 rows and hung hem, finished with scrap yarn. Took off machine and bound off stitches. Added a base circle piece of foam then placed the two buckle weights I usually use on the double layer padded bottom cover.
Added stretchy black shoelace style elastic as drawstring. Done. Made on a 54 cylinder Legare 400 without mock ribbing. Lion Brand Sock-Ease in “marshmallow” that I dyed myself.
Photos included below include newer creations for the same purpose and more. :)
SEE ALL BLOG ENTRIES ON THE BLOG INDEX PAGE | Follow us on a variety of social sites see TAPLINK | Interested in Circular Sock Machines? See the CSM START Menu first page. | Seek something specific? Checkout the Index page.
2018 Nov 8 - Topper or Yarn Stand Top
Want to see how to thread or slot your yarn carrier? SEE HERE.
SLOTTING YOUR VINTAGE YARN TOPPER (Feb 11/19)
My csm yarn topper (yarn stand top) was effort to use so I slotted it. Tonight I finished the upgrade by cutting into the bar guide and installing a custom metal 1.5 turn pig-tail.
Why make something slotted? To be able to remove yarn without cutting the yarn.


THREADING THE YARN TOPPER (Nov 8/18)

Most Yarn Toppers have a ‘brake’ of some kind. This style once the yarn comes out of the tunnel, is braked by the horizontal wire so the correct heel spring application is to hook the yarn after the wire brake and before it leaves the topper all together. (A).
On the B photo the brake has no real effect on the yarn as the heel spring lifts the yarn too soon.
Also on INSTAGRAM


SEE ALL BLOG ENTRIES ON THE BLOG INDEX PAGE | Follow us on a variety of social sites see TAPLINK | Interested in Circular Sock Machines? See the CSM START Menu first page. | Seek something specific? Checkout the Index page.
2018 Nov 8 - Dropped Stitches - how to latch

Sharing a just completed video on how to fix a dropped CSM stitch. See YouTube Video (Dropped Stitch Fixing #1 with two pick tools)
Also on INSTAGRAM
SEE ALL BLOG ENTRIES ON THE BLOG INDEX PAGE | Follow us on a variety of social sites see TAPLINK | Interested in Circular Sock Machines? See the CSM START Menu first page. | Seek something specific? Checkout the Index page.
2018 Oct 20 - Toe Up Socks (ways to add weight on the CSM)
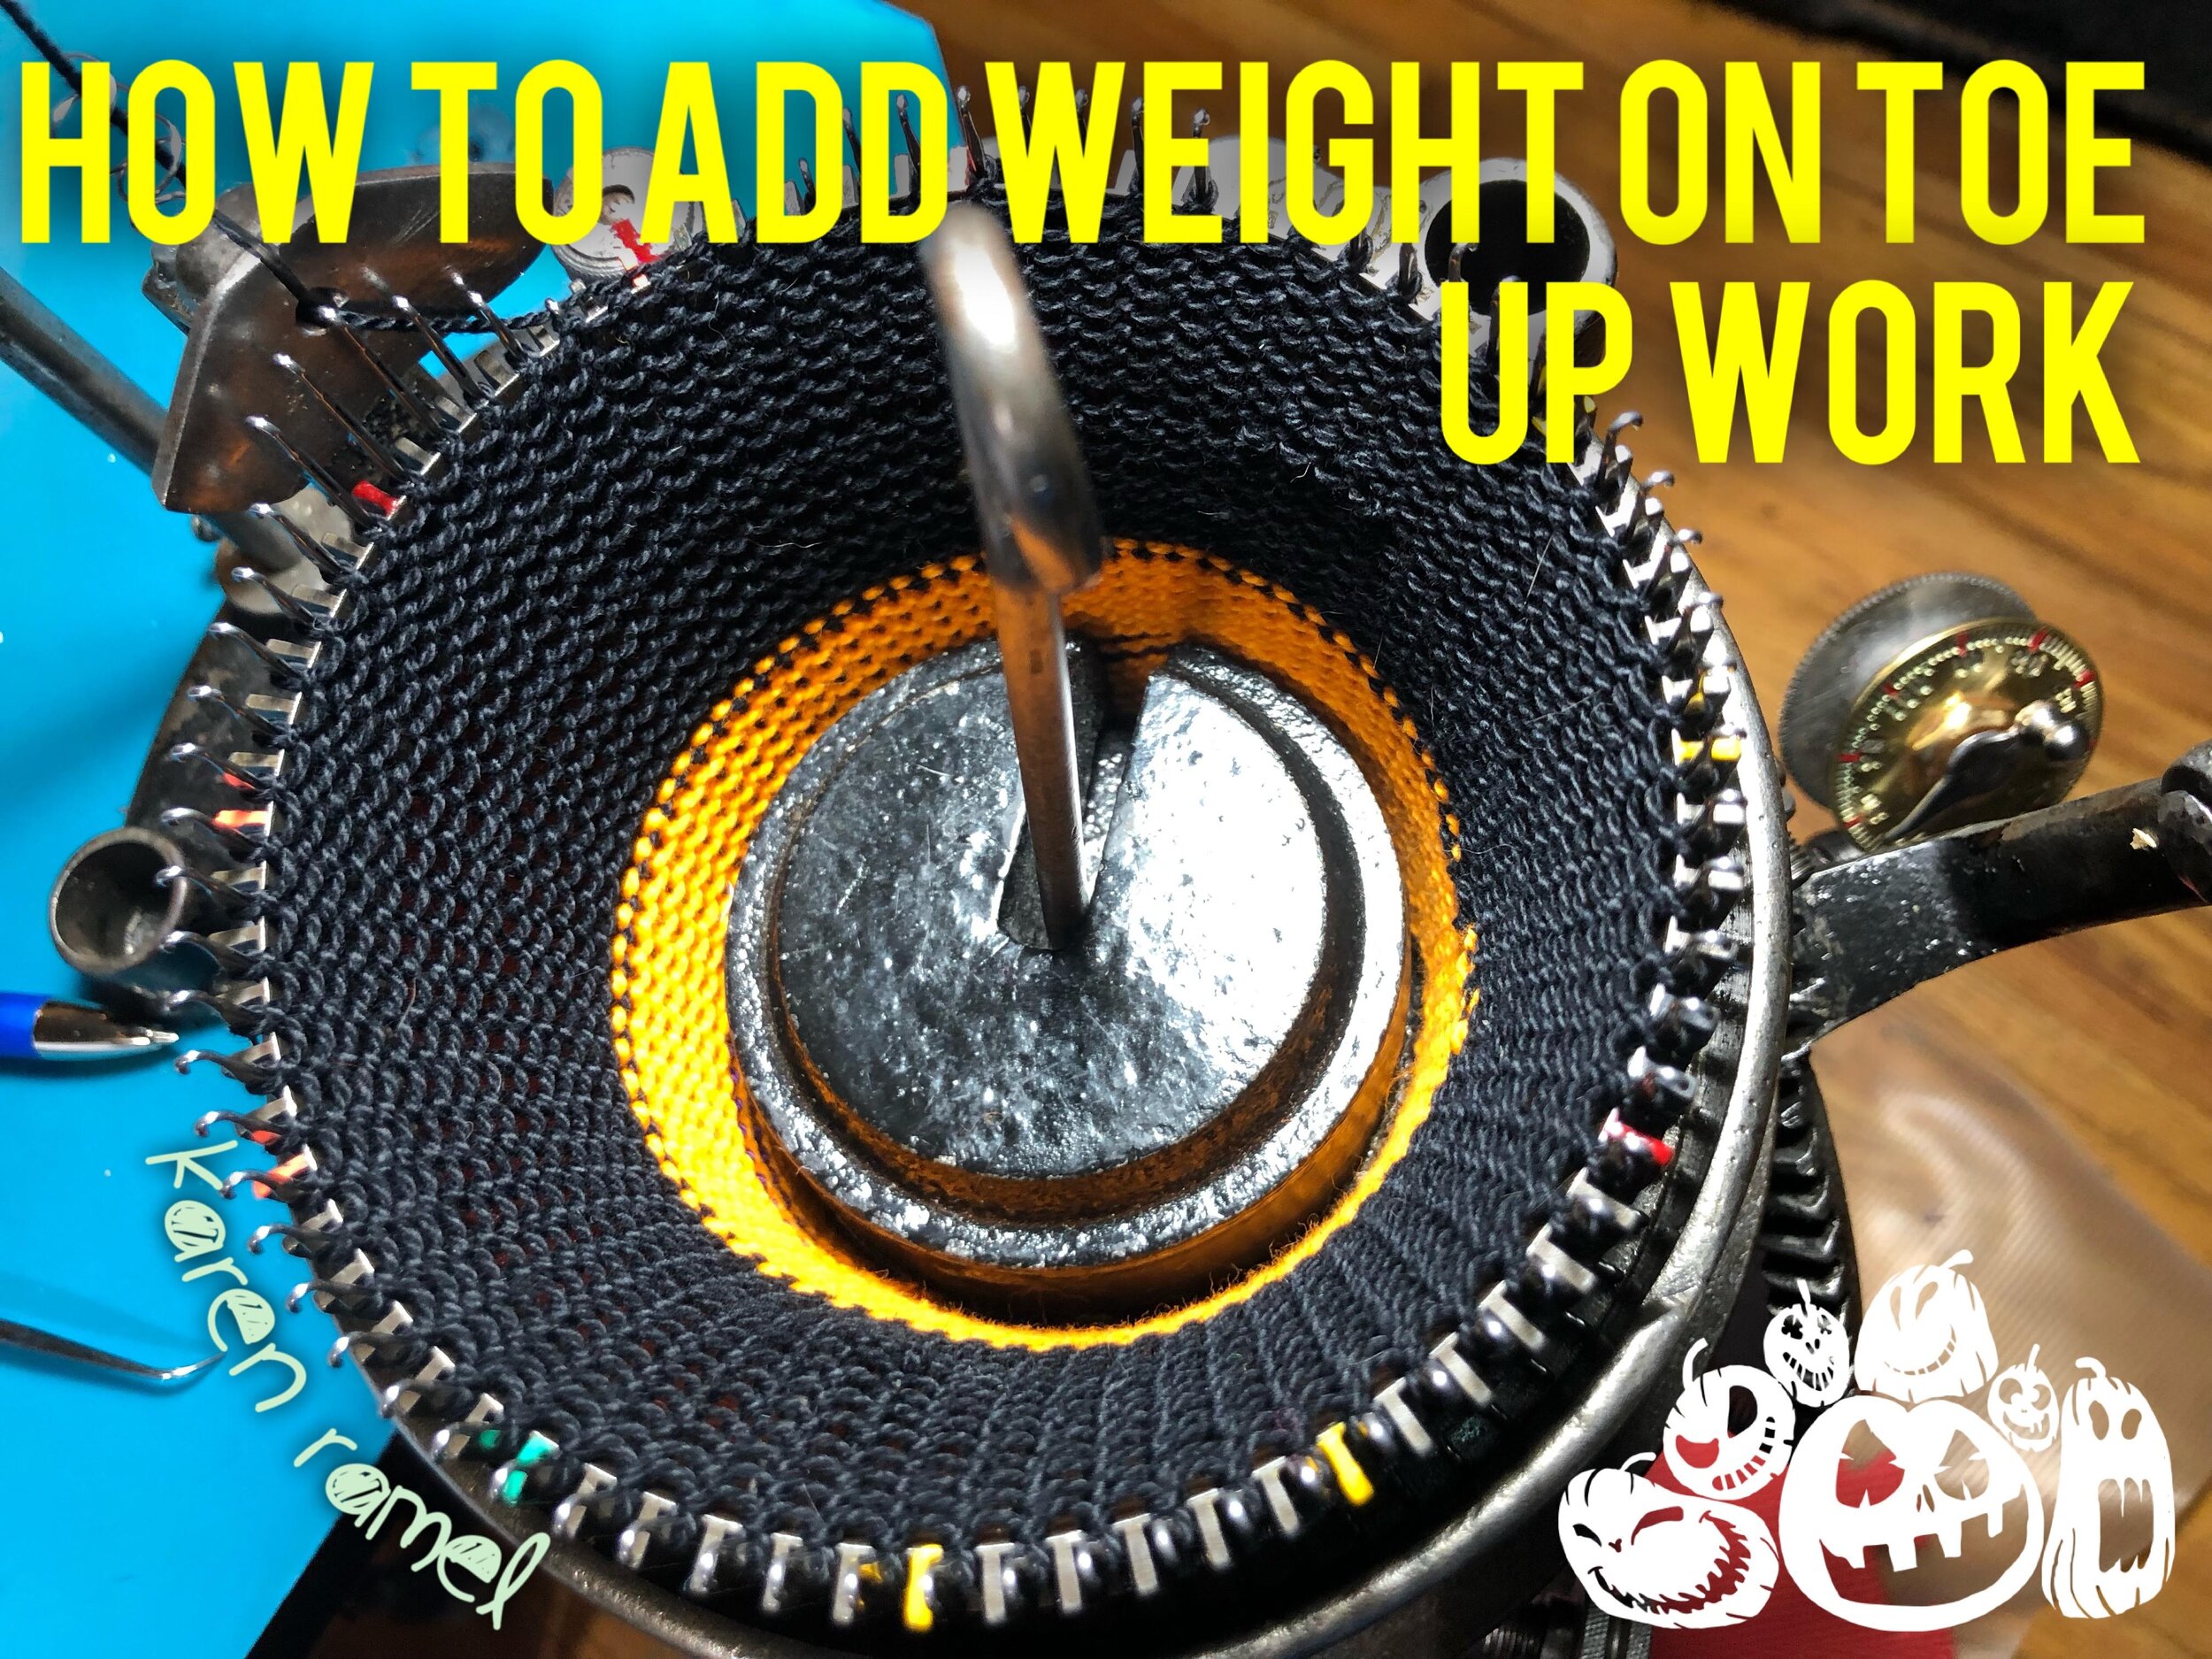
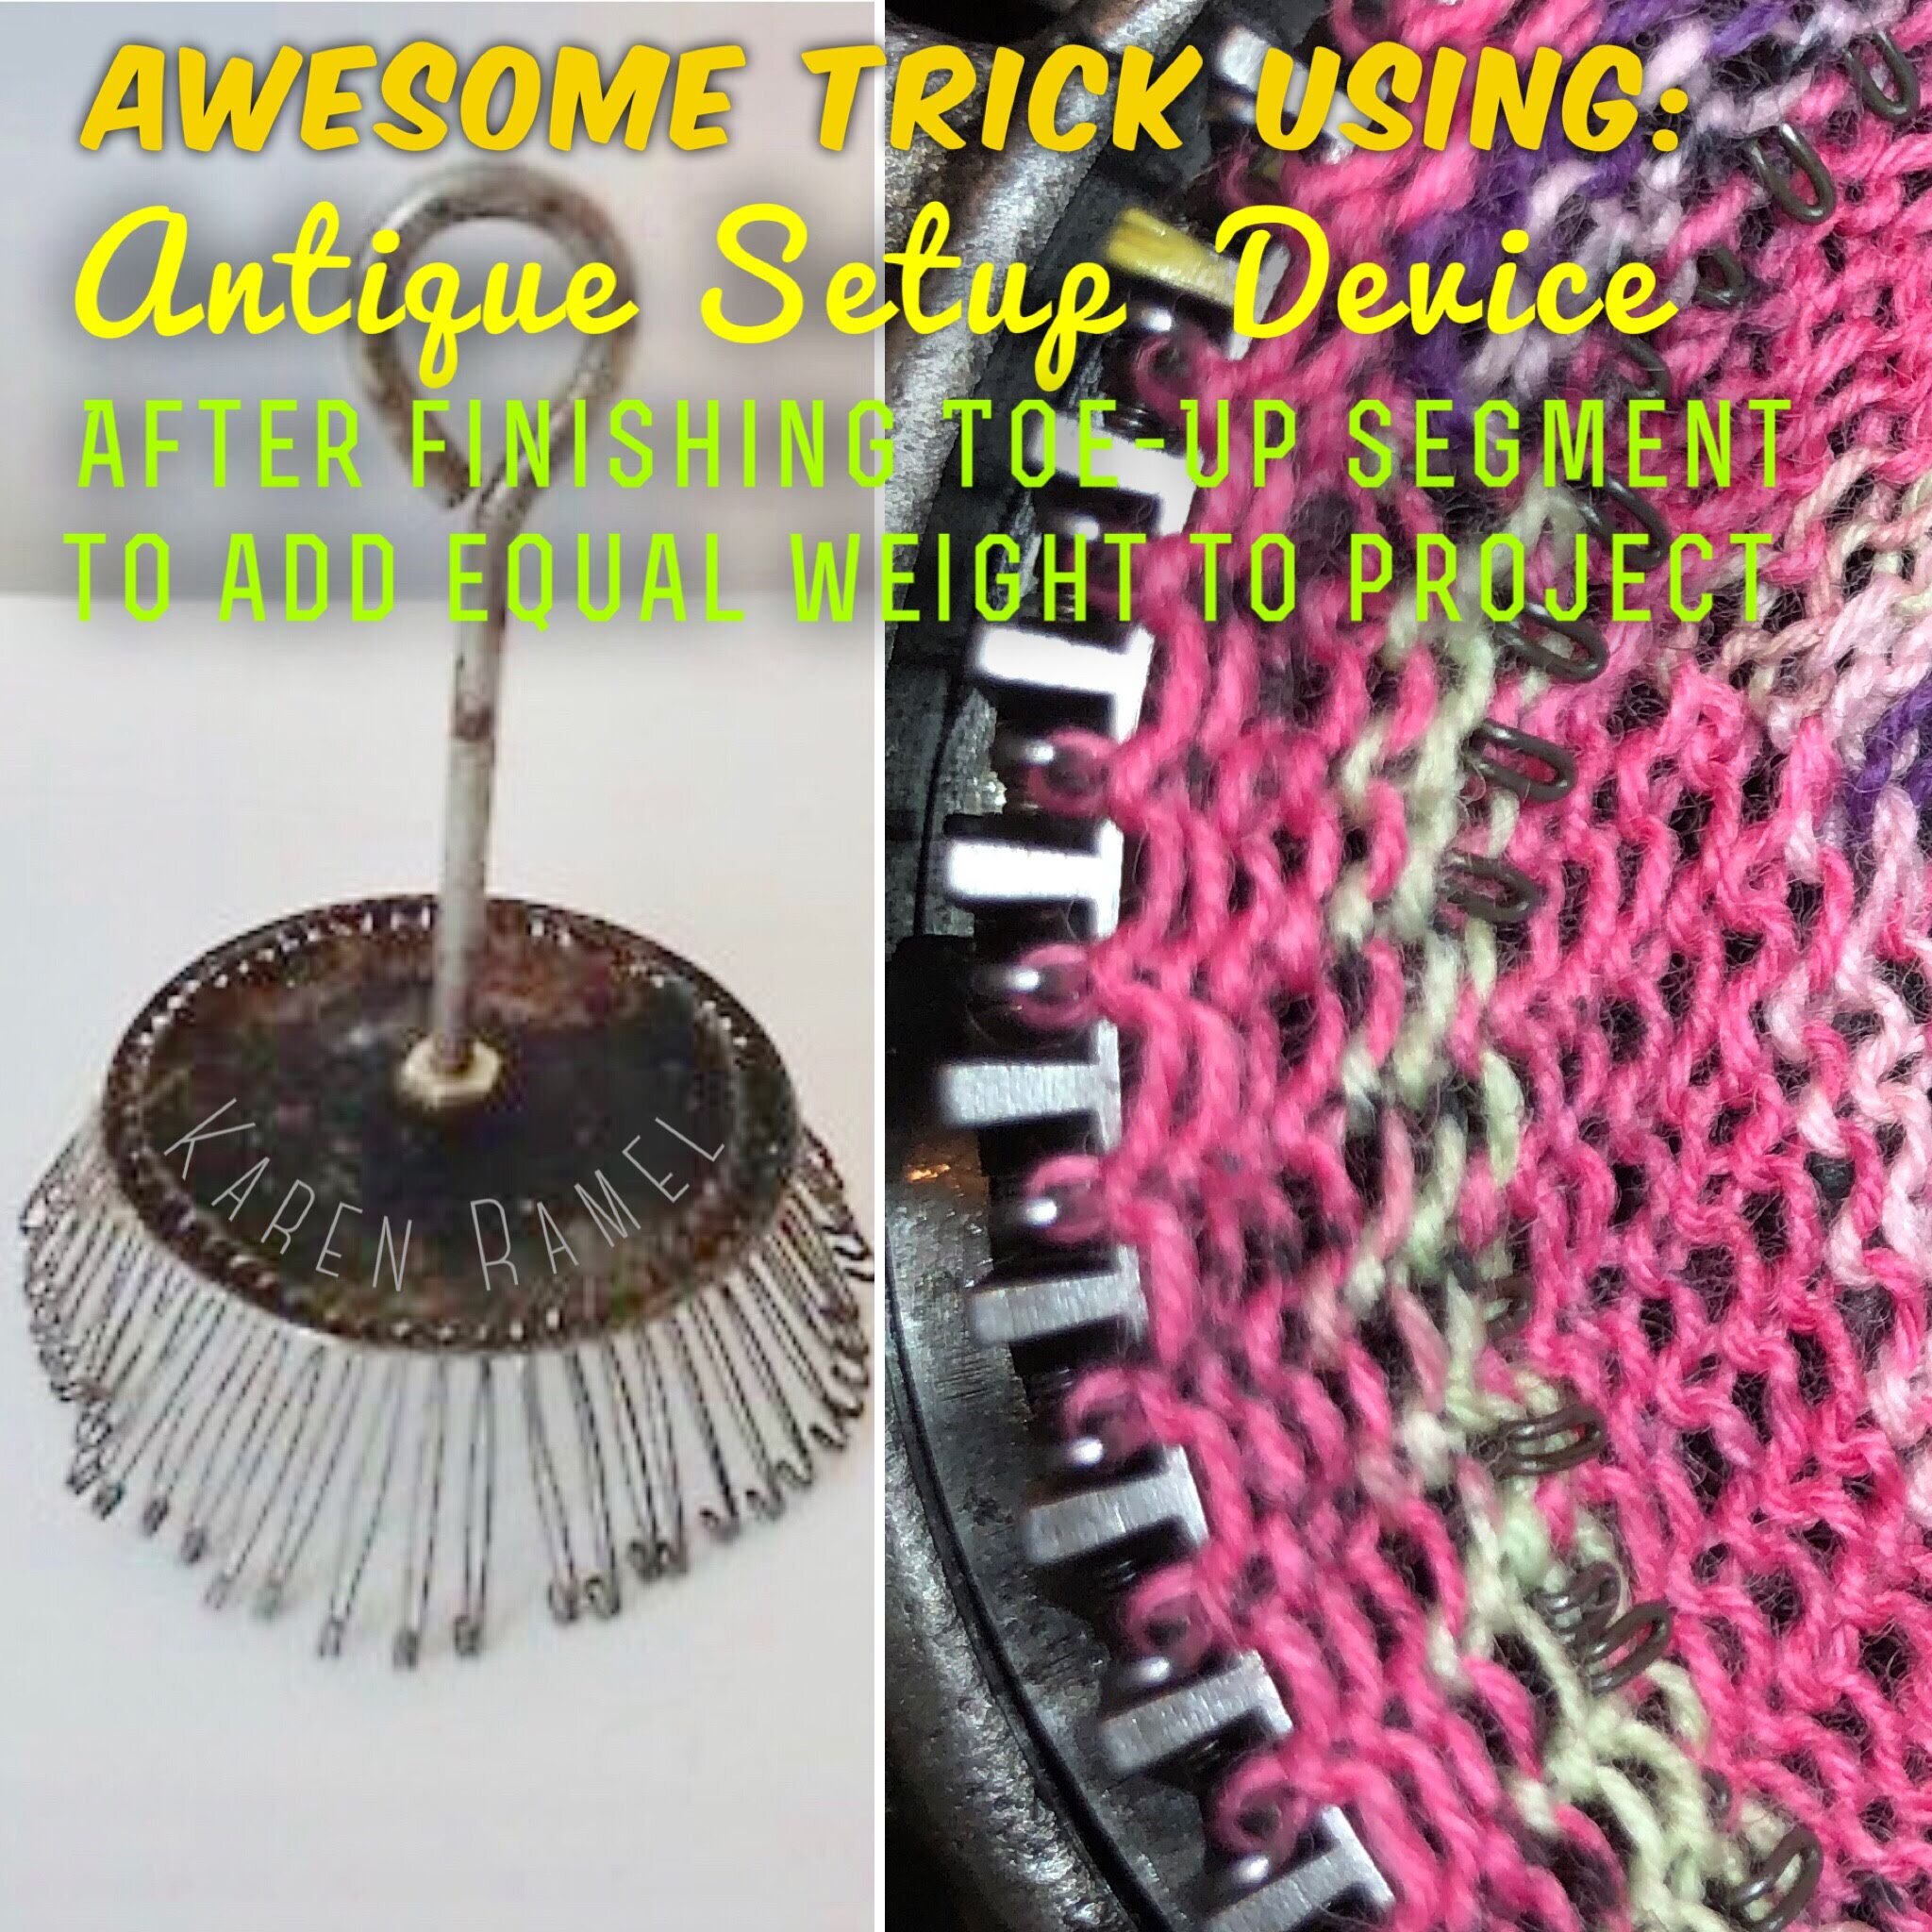
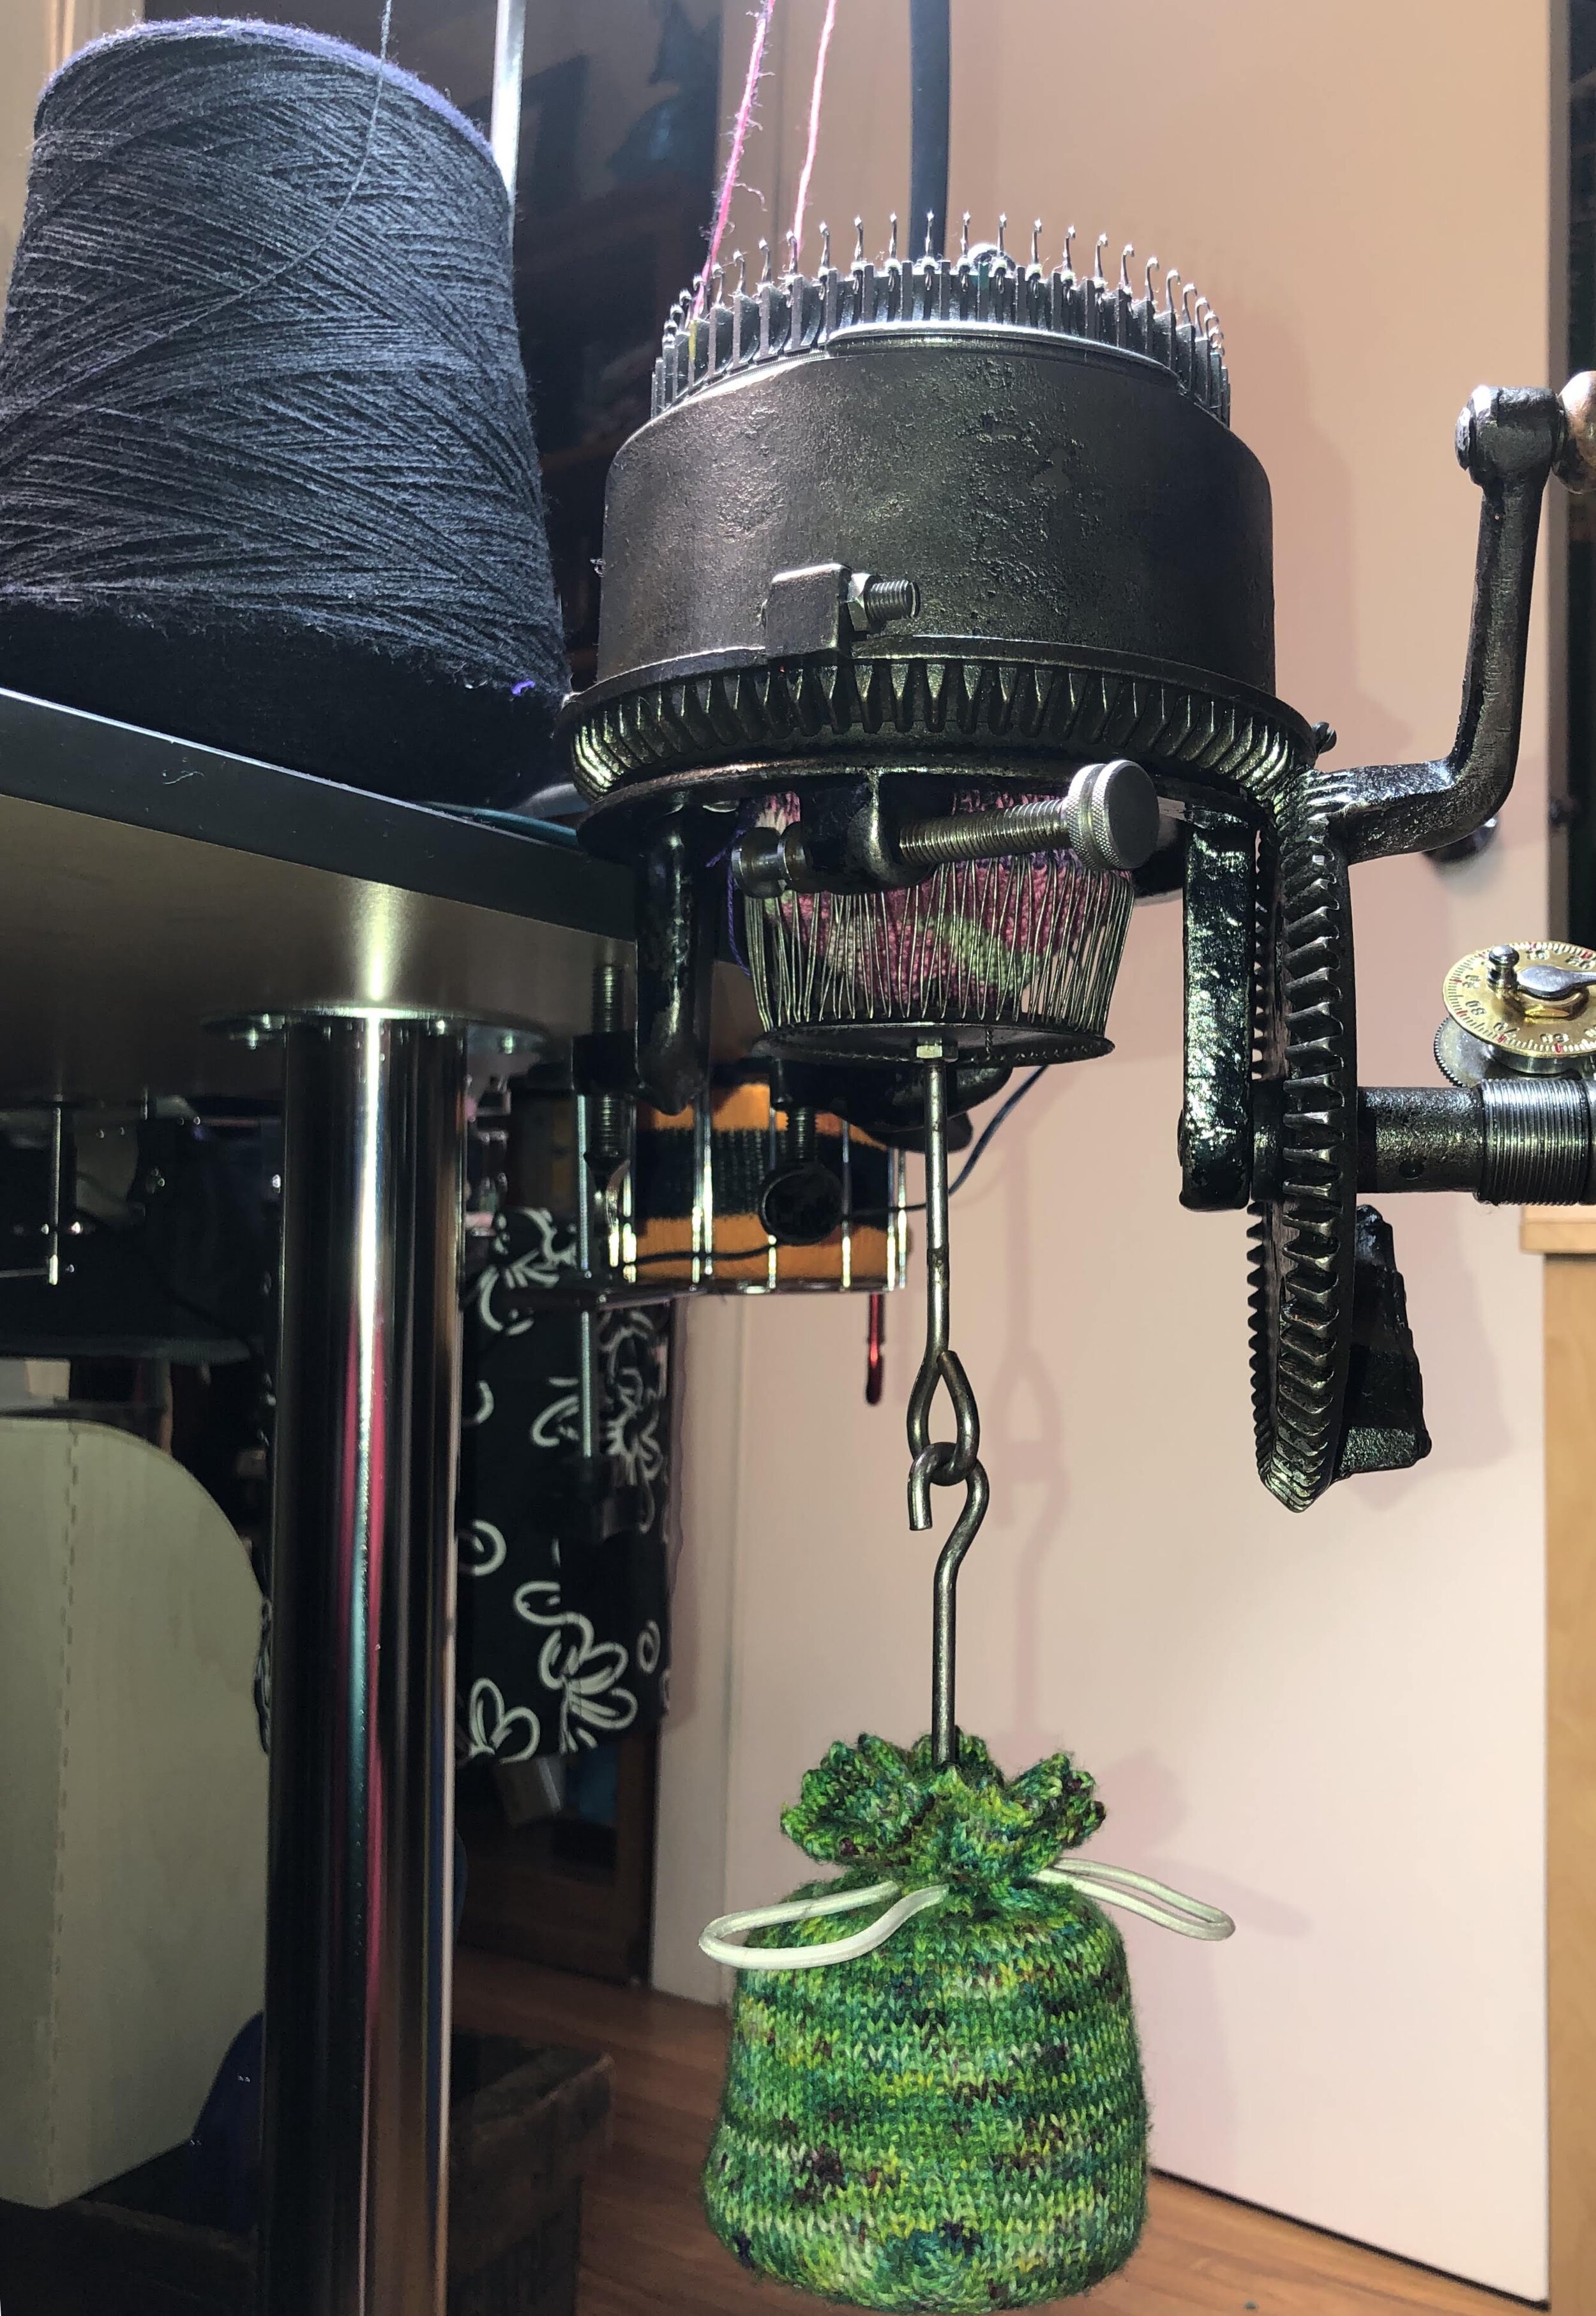
Ways to add the needed weight when working a TOE UP Sock on a CSM…
CSM Tips & Tricks (why a antique easy to remove setup device is extra awesome): Any method of adding even, sturdy weight more to the hung toe underside than the inside of the machine is preferred.
If one is very careful you could even use your heel for and/or heel weights if you apply them just to the u see side very center of the toe and be careful not to jostle.
Once you work the foot enough you will remove and switch to the buckle and stem weights.
EDIT: we now have the Tip Toe Tool Set available through Chambord CSM - this allows for efficient minimal height allowing for almost immediate ribber use (as it doesn’t interfere with the ribber fin). This item is featured in my Trine Toe Up Sock video and written step by step pattern - all sock videos can be found on MY YOUTUBE SOCK VIDEOS.


SEE ALL BLOG ENTRIES ON THE BLOG INDEX PAGE | Follow us on a variety of social sites see TAPLINK | Interested in Circular Sock Machines? See the CSM START Menu first page. | Seek something specific? Checkout the Index page.
2018 Oct 20 - BIND OFFS
OFF MACHINE
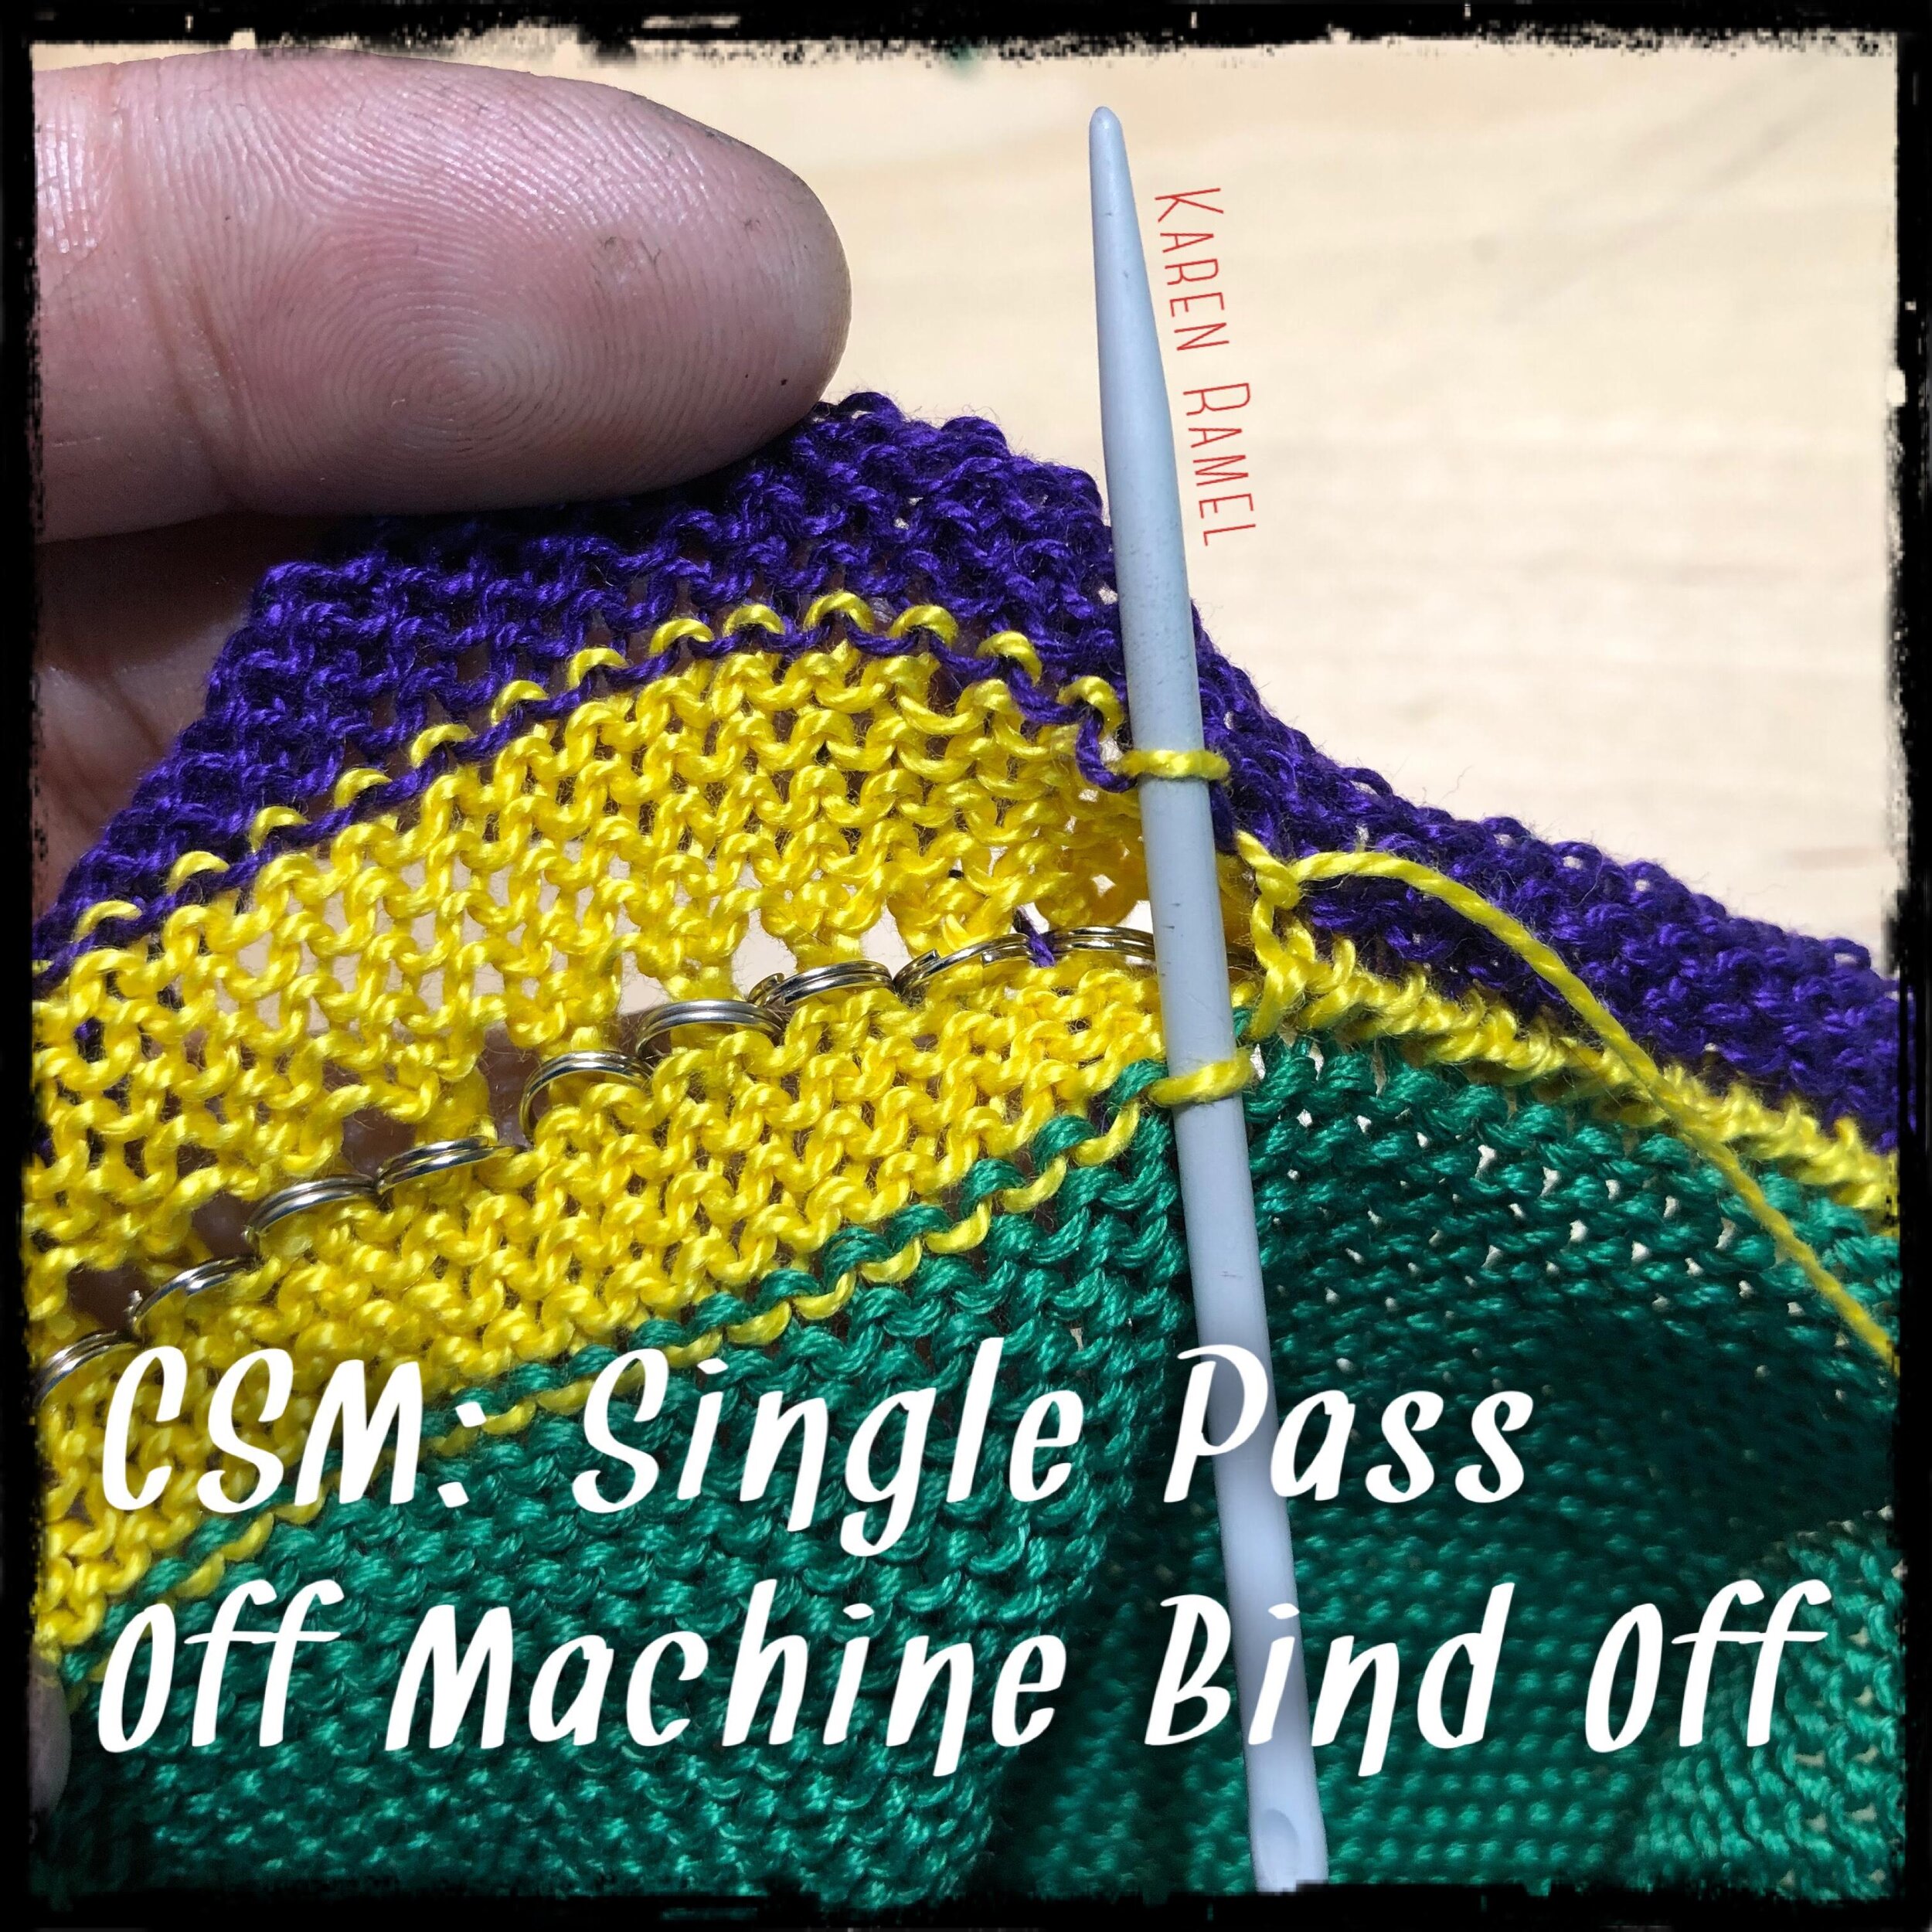
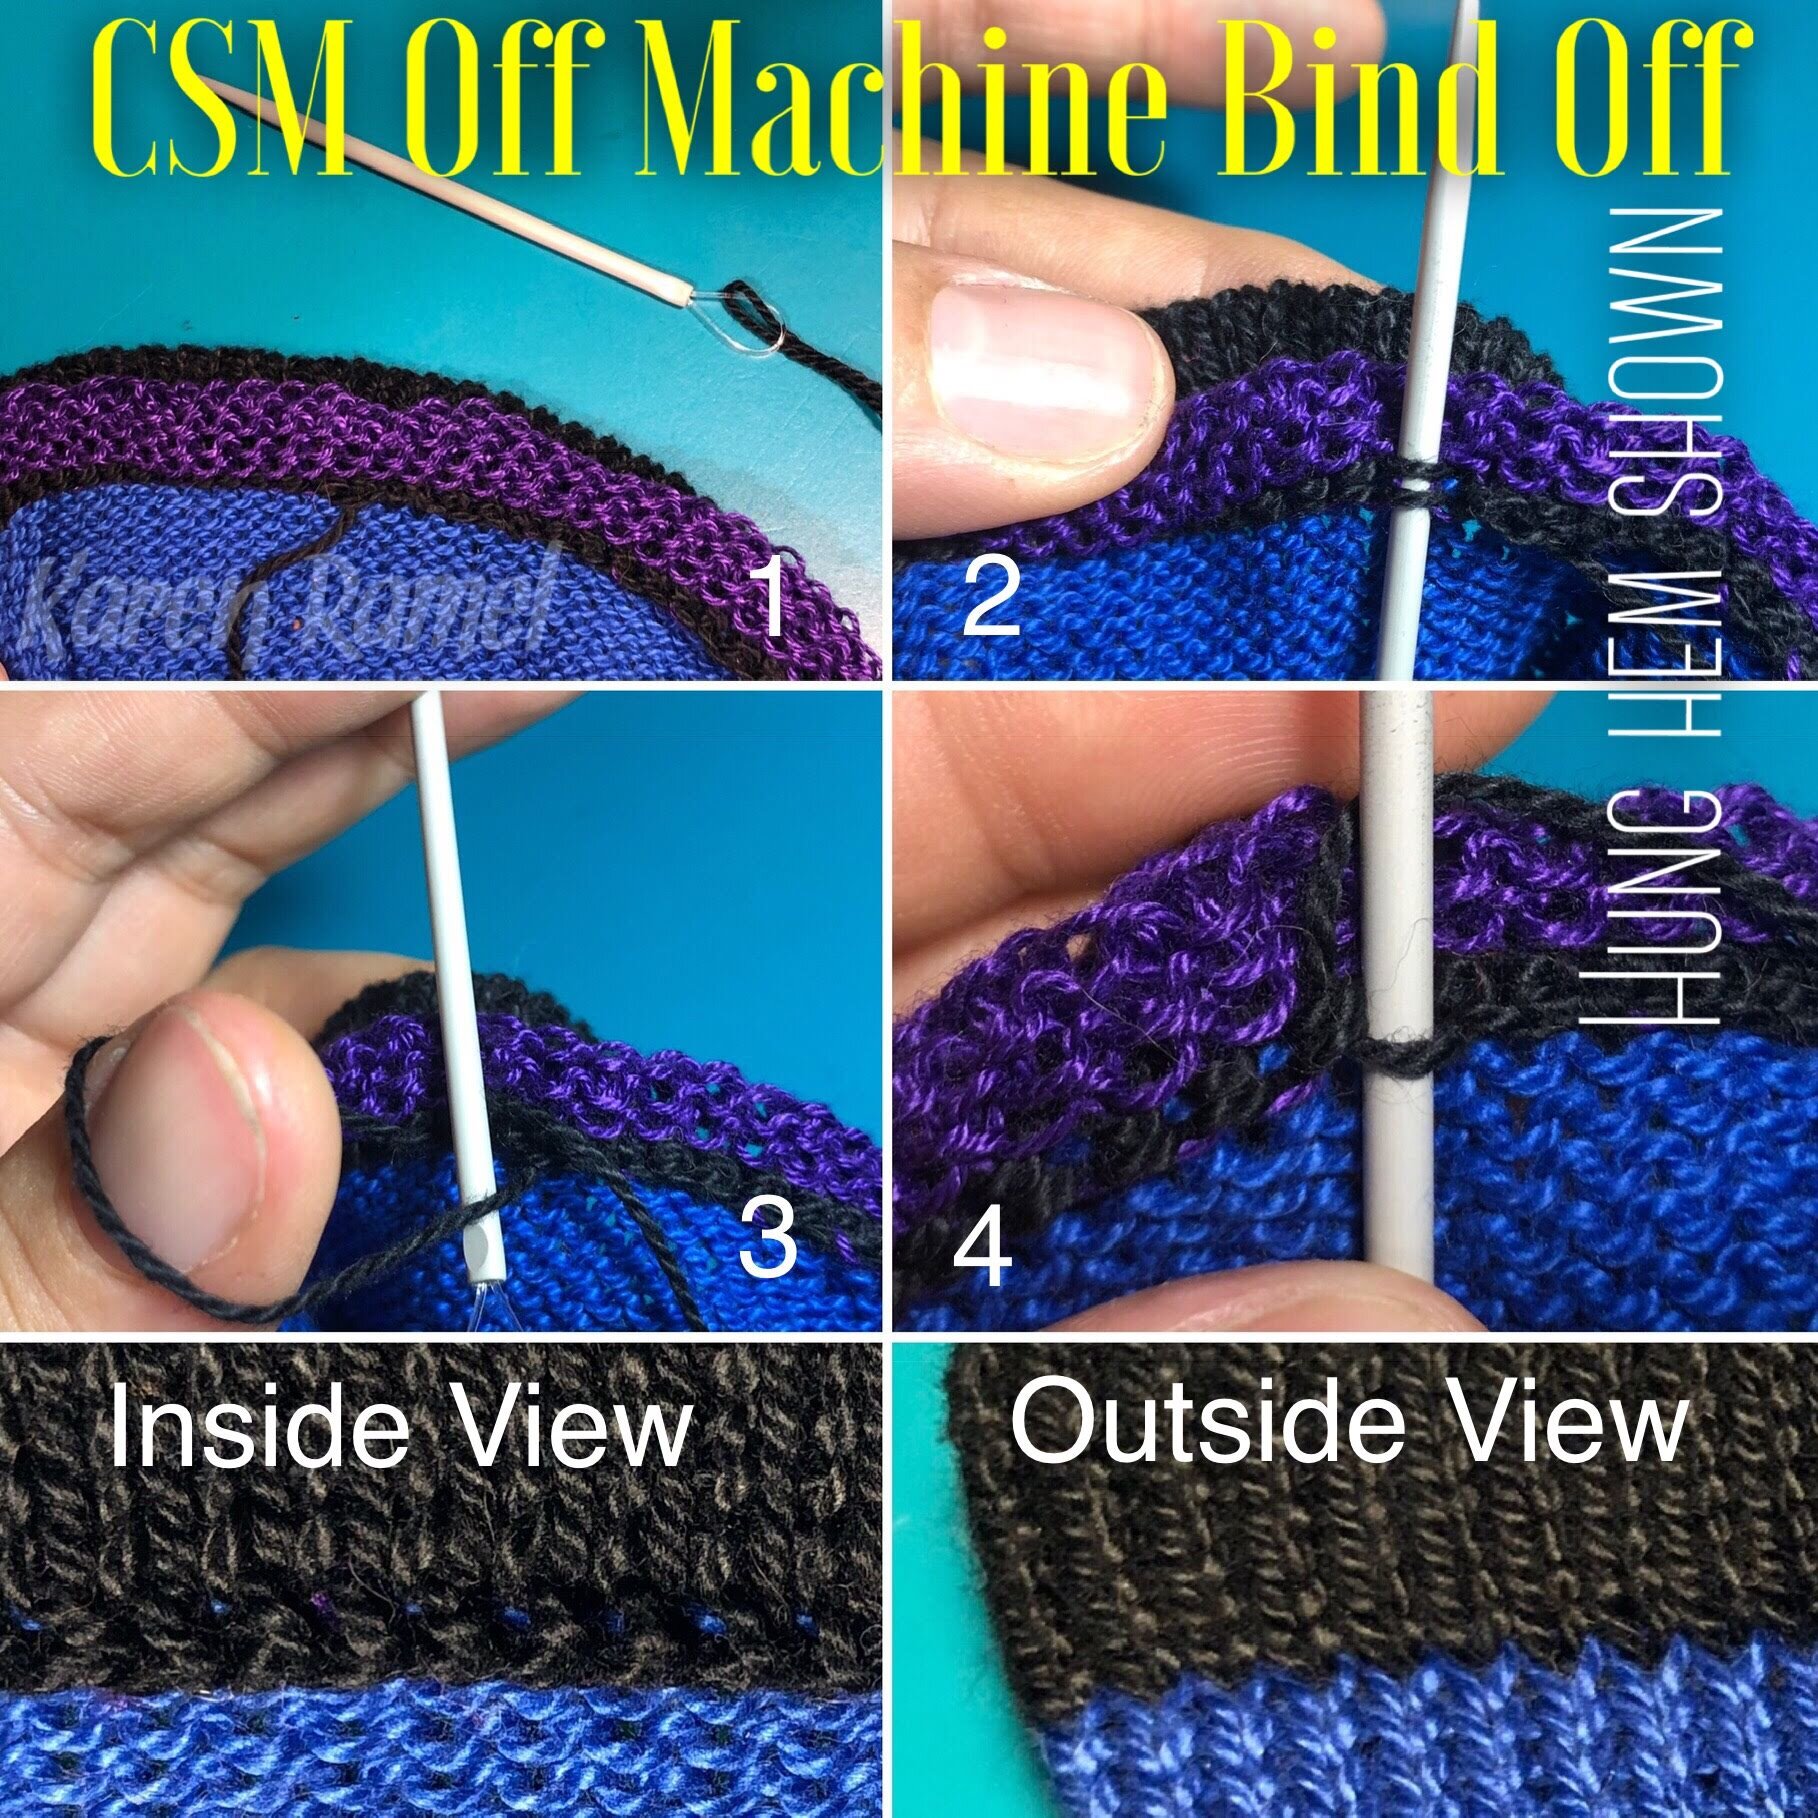
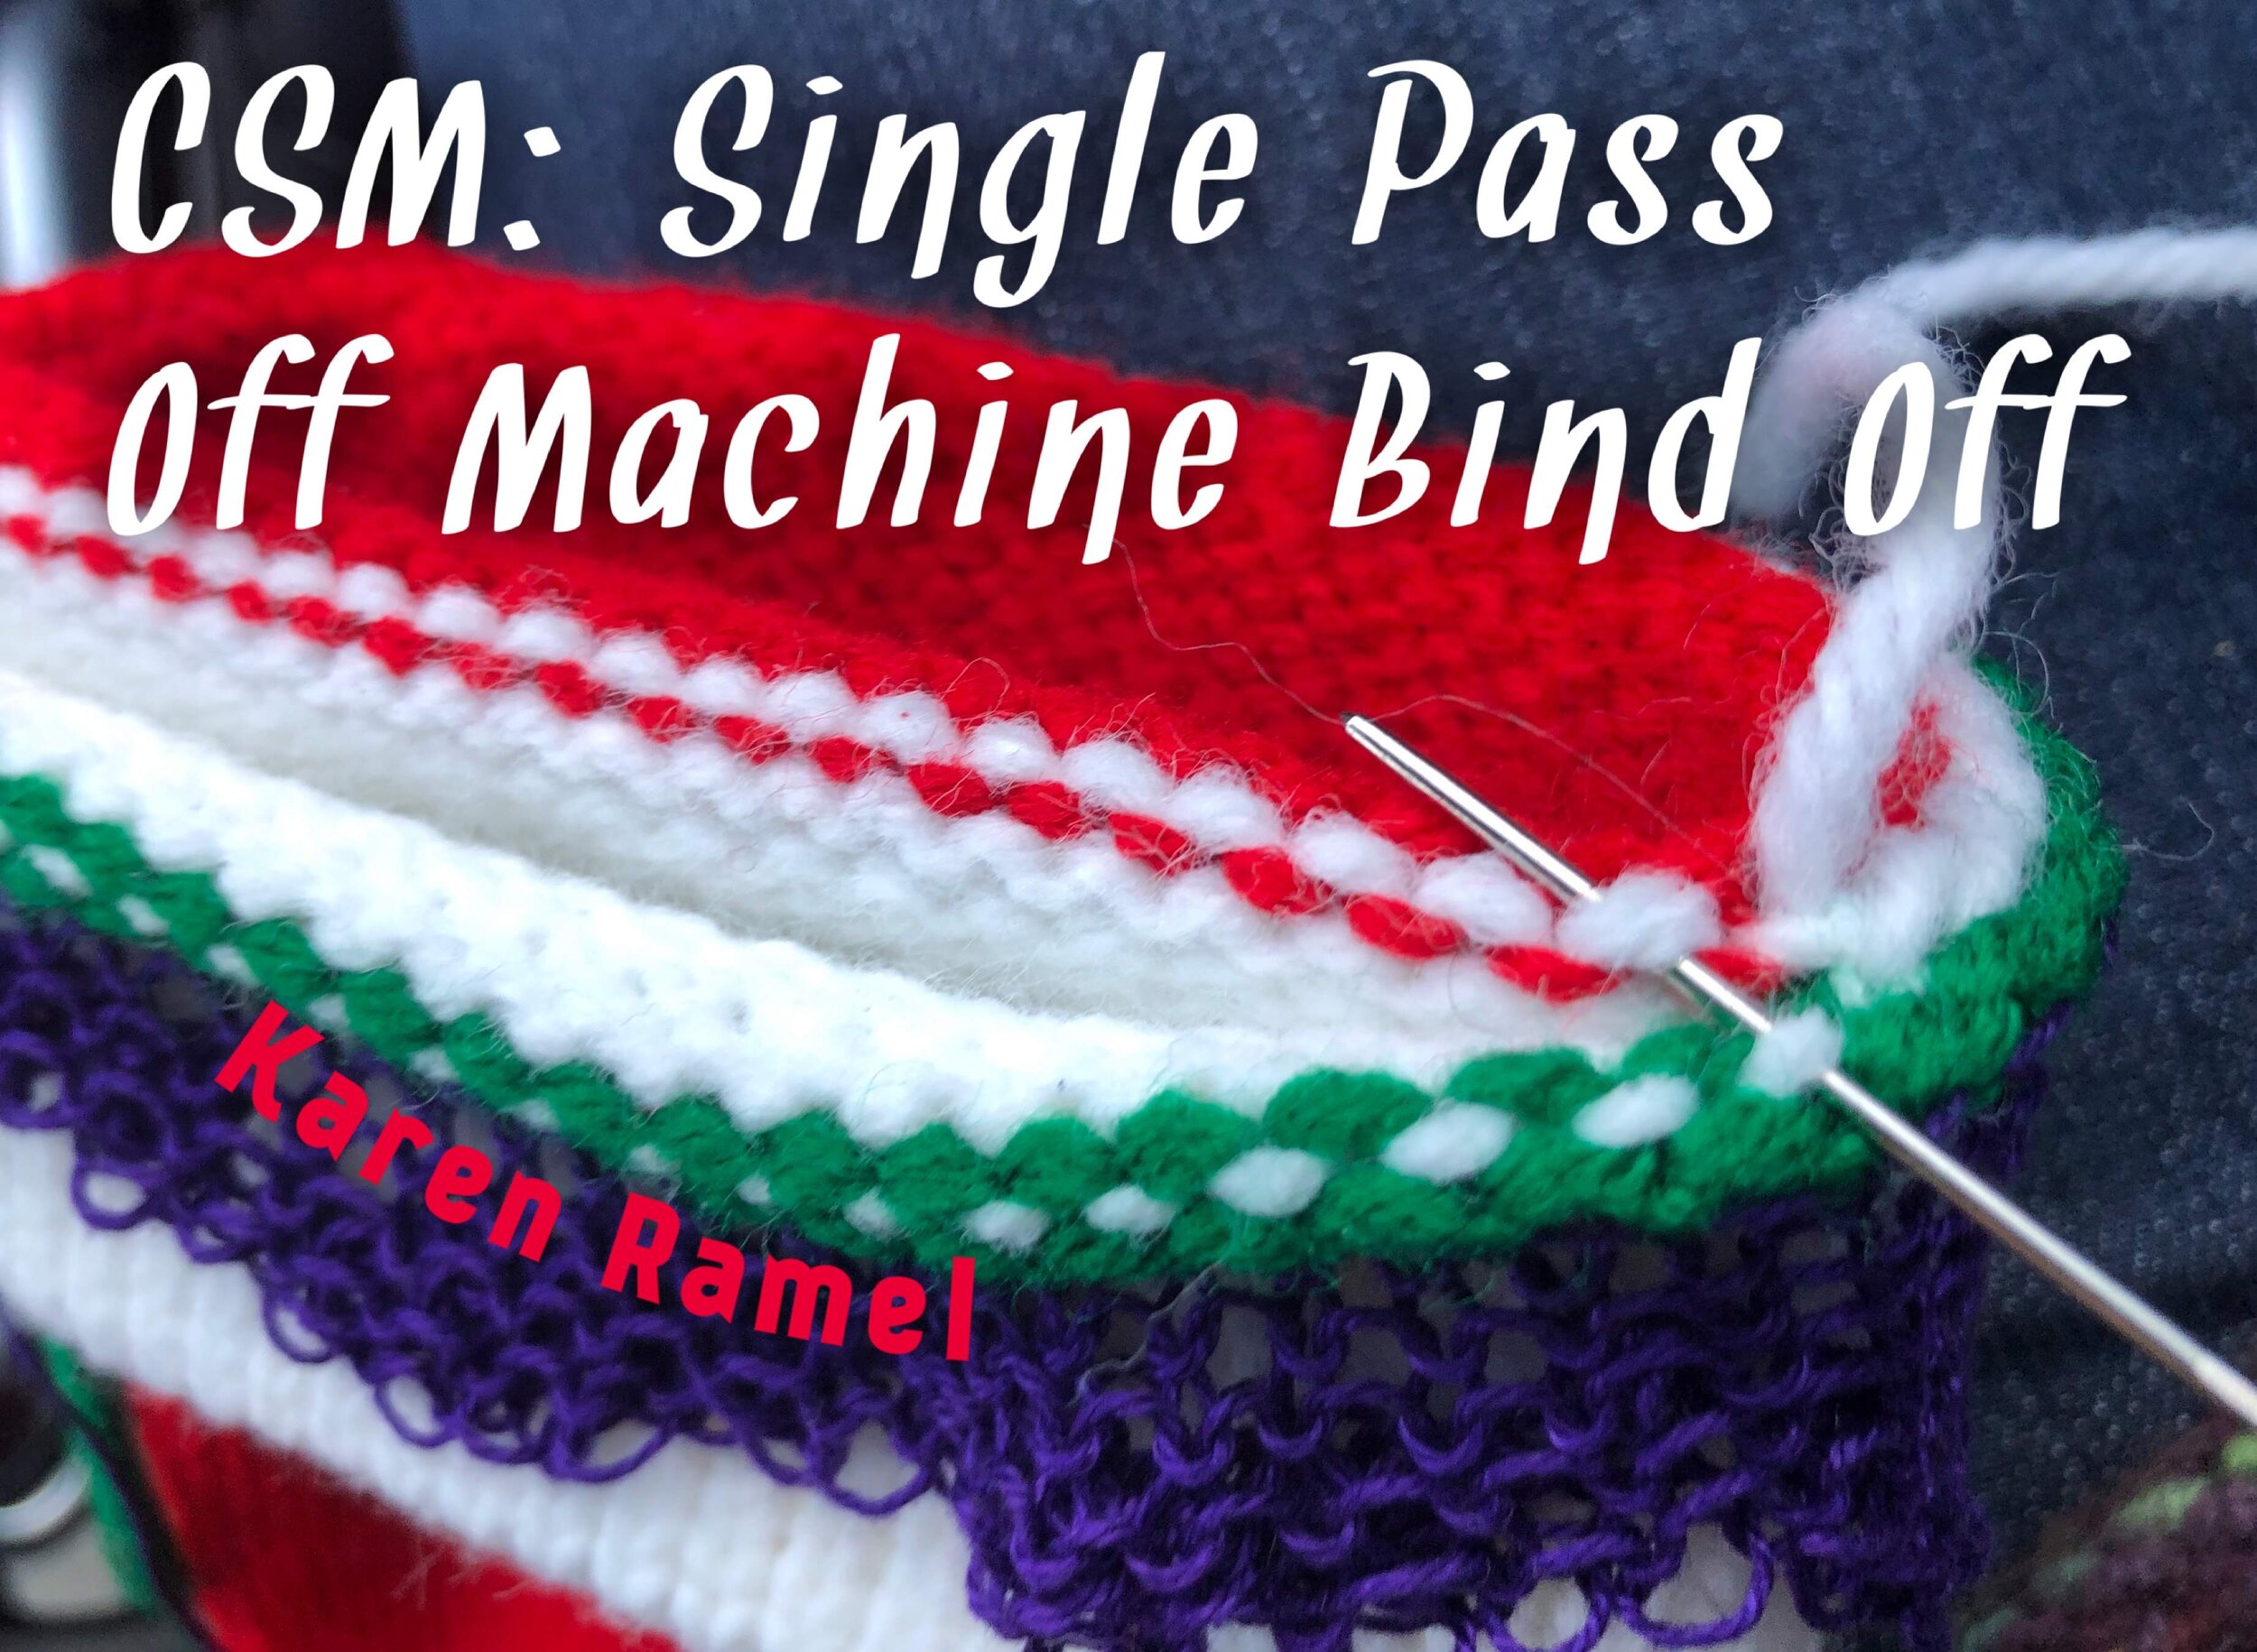
Single Pass OFF MACHINE Bind Off (my preferred method)
See the YouTube video
This is my favorite go-to OFF MACHINE bind off. This can be done with or without a hung hem (hung hem leaves two stitches on one needle). Most of the time I end my project with scrap yarn and then use this method to fold over the work to secure live stitches to the project. Its easy, fast and stretchy.
In this example, after hanging hem I cut the sock yarn after leaving an extra long tail then threaded purple scrap yarn and cranked 4-6 rows of scrap. I removed it from the machine
Photo 1) threading the sock yarn on a darning needle
Photo 2) I passed the needle through the two hung hem stitches
Photo 3) then went under and through the the single yarn before the two passed hung hem stitches (kind of like a lasso).
Photo 4: gently tighten very minimally.
Repeat with each hung hem set of stitches all the way around, knot and hide ends by threading in.
ON MACHINE

AKA - Double Pass ON MACHINE Bind Off
A quick, easy double pass way to bind off your live stitches on a circular sock knitting machine - whether it’s after hung hem as shown (resulting in two stitches on each needle) or whether single live stitches on each needle.
Also on INSTAGRAM

SEE ALL BLOG ENTRIES ON THE BLOG INDEX PAGE | Follow us on a variety of social sites see TAPLINK | Interested in Circular Sock Machines? See the CSM START Menu first page. | Seek something specific? Checkout the Index page.
2018 Oct 15 - Addi-Express Stitch Tool Upgrade
Addi-Express Stitch Tools are AWESOME - they are two ended and oh so useful (although personally it would be nice to use each end as a separate tool in my opinion).
What IS NOT COOL is how easily they break.
The red middle plastic part is a weak point of this tool - I’ve had two break. When my first tool broke I re-purposed both end pieces with WaterPik dental end tips. The bonus to doing this however is that you now have working tools which have specialized brushes to aid in cleaning fiber from the machine.

Also on INSTAGRAM
SEE ALL BLOG ENTRIES ON THE BLOG INDEX PAGE | Follow us on a variety of social sites see TAPLINK | Interested in Circular Sock Machines? See the CSM START Menu first page. | Seek something specific? Checkout the Index page.
2018 Oct 15 - Double ended cast on bonnets and other alternatives
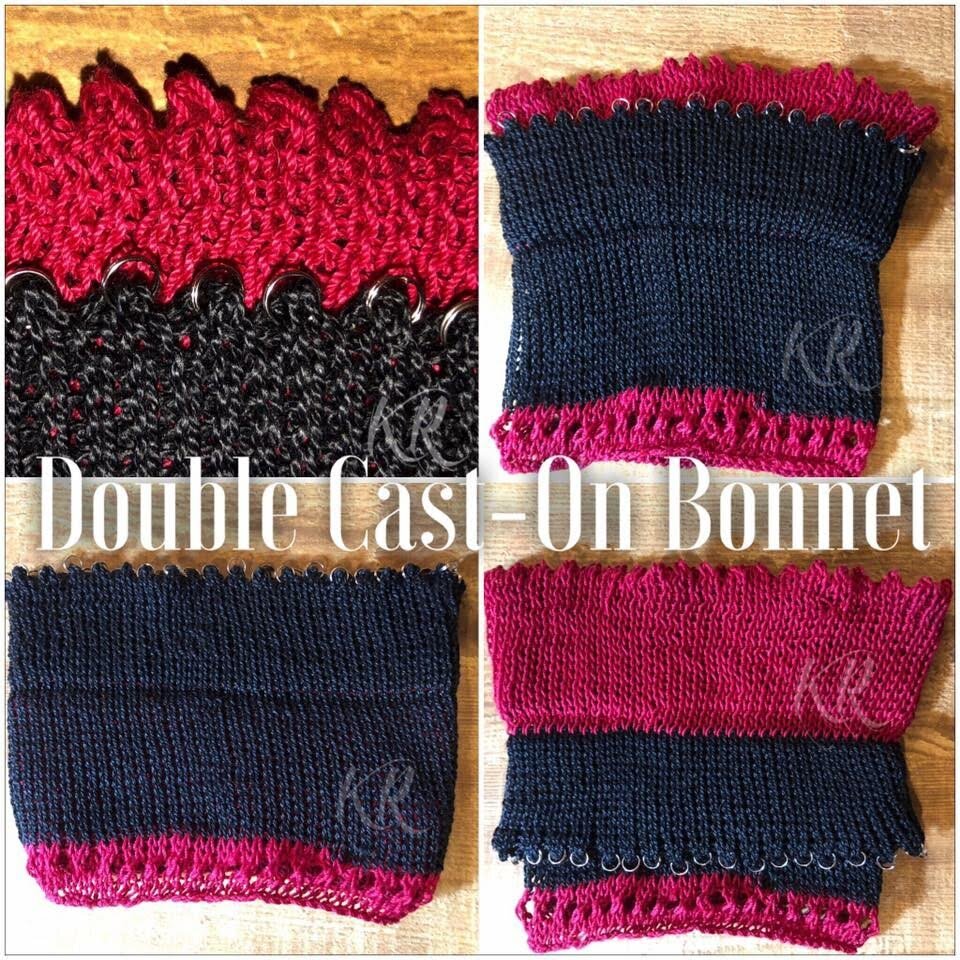
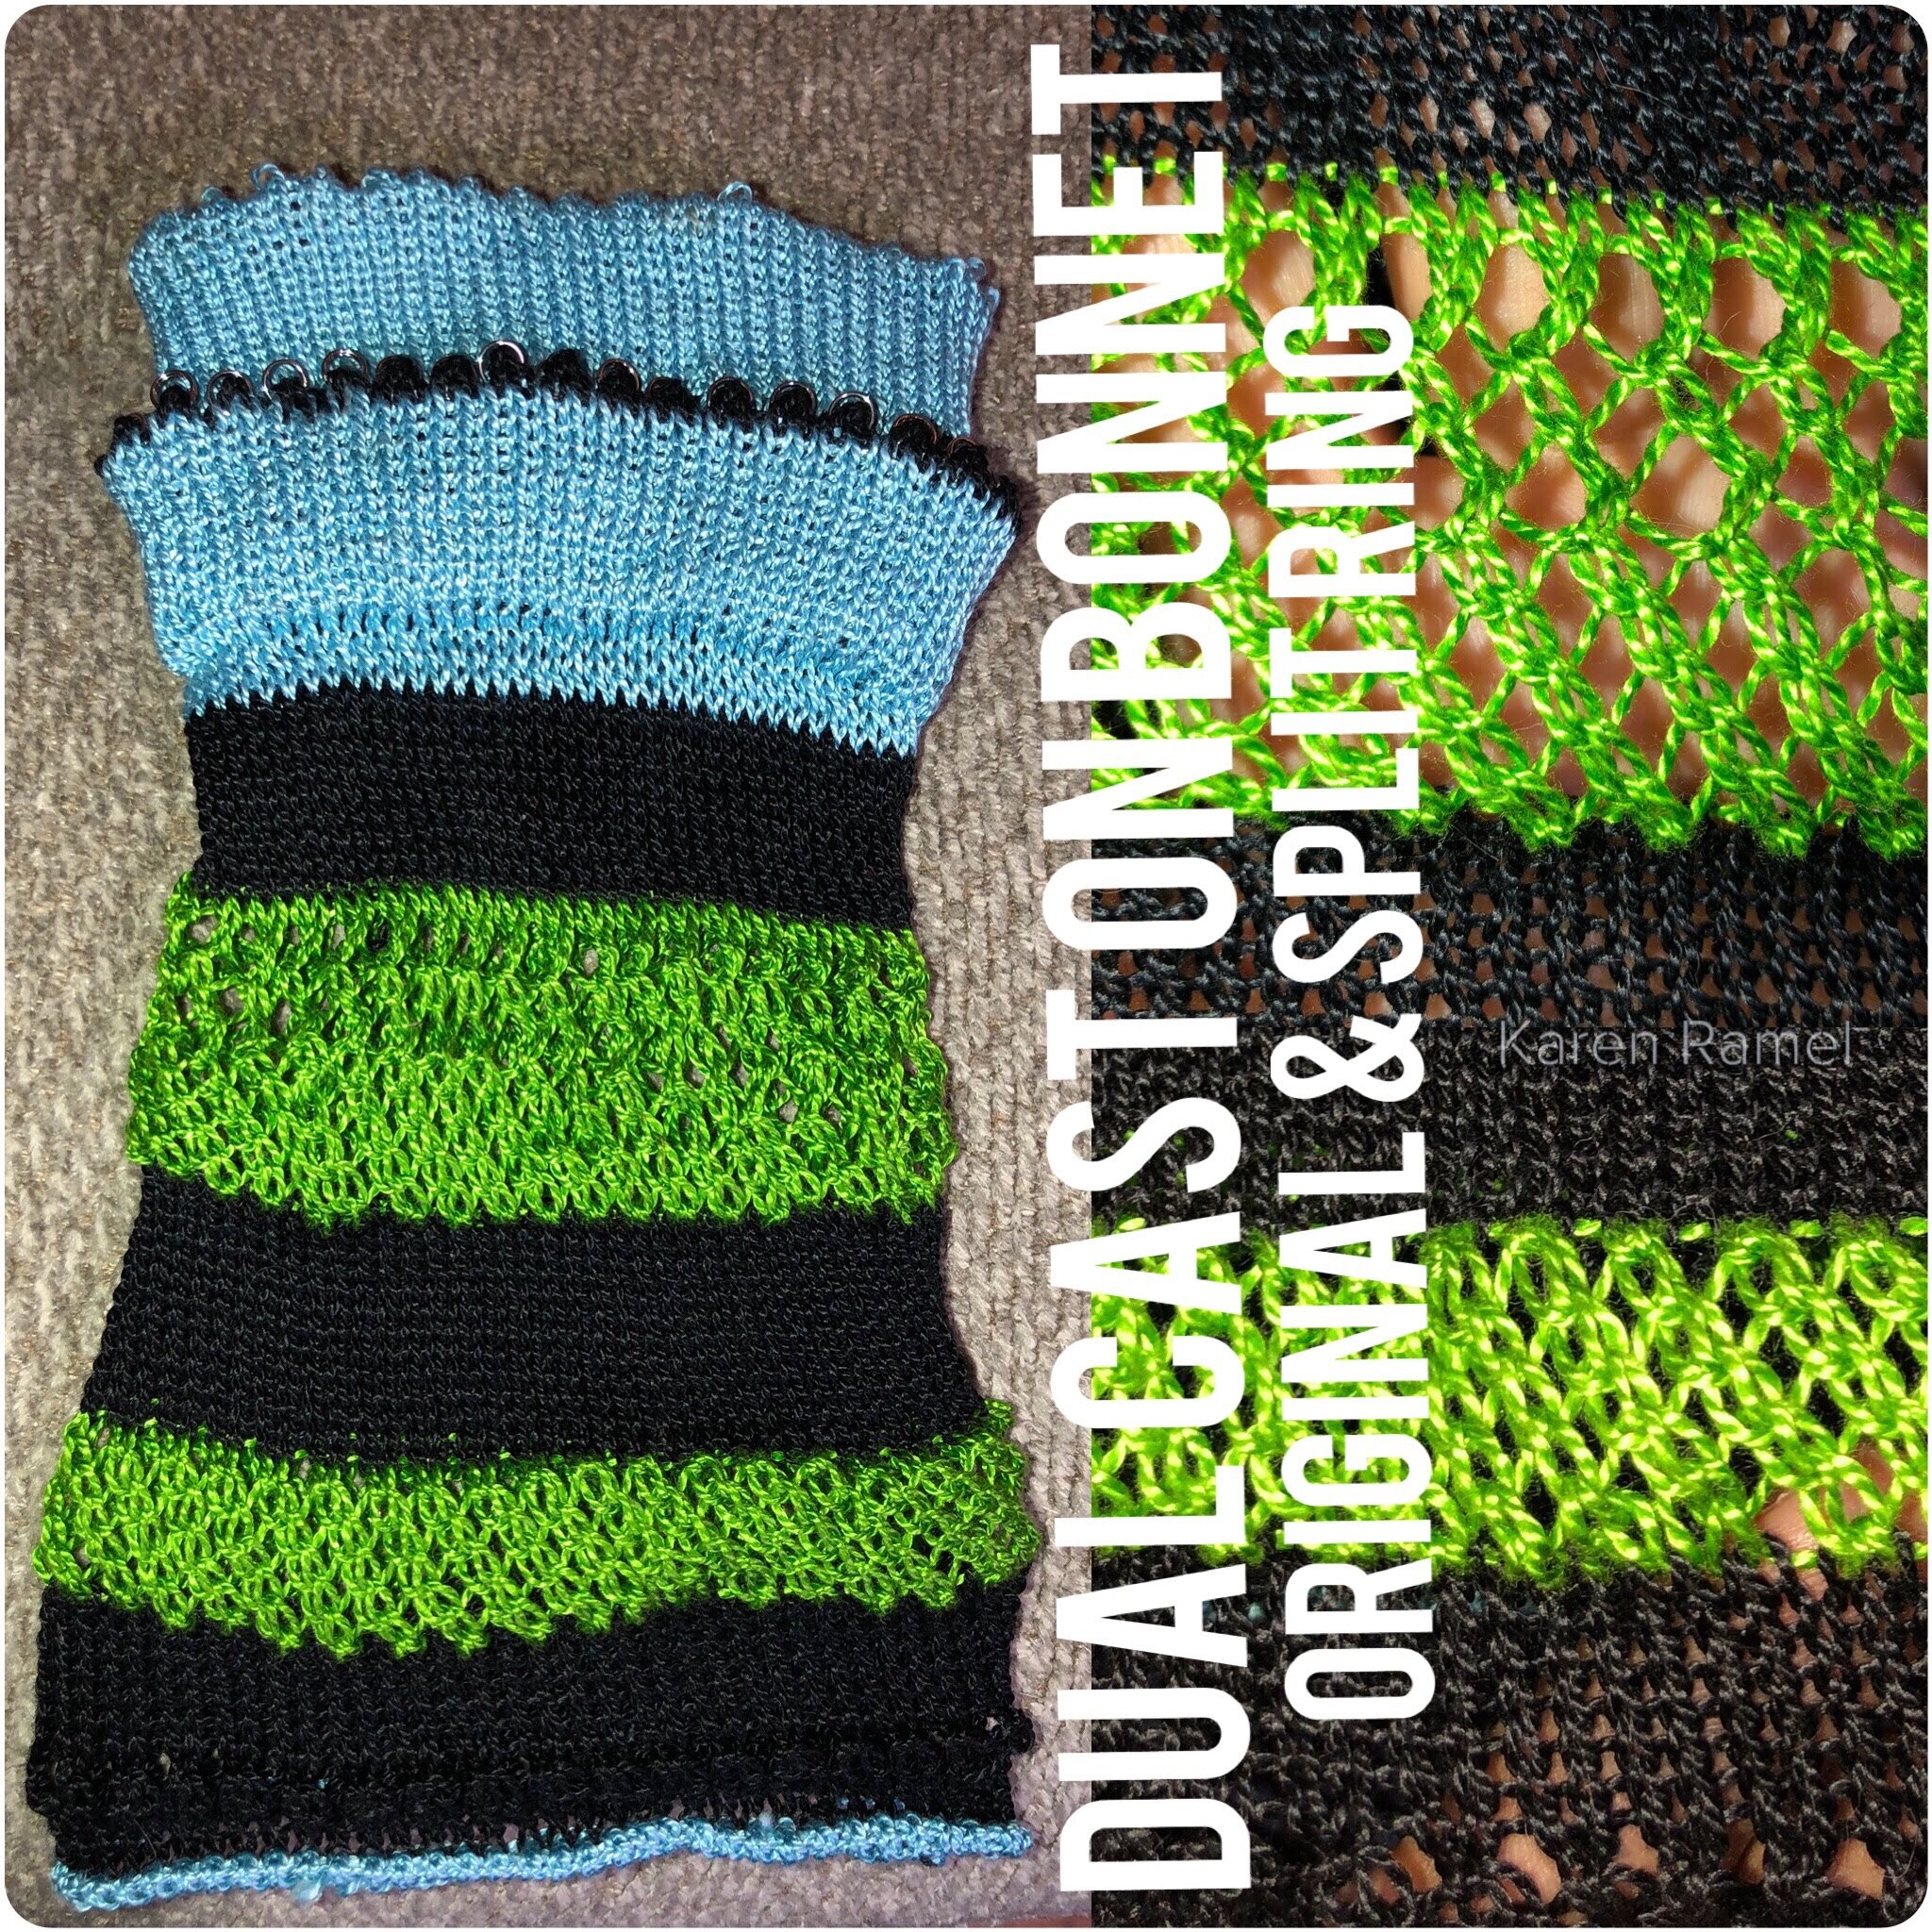
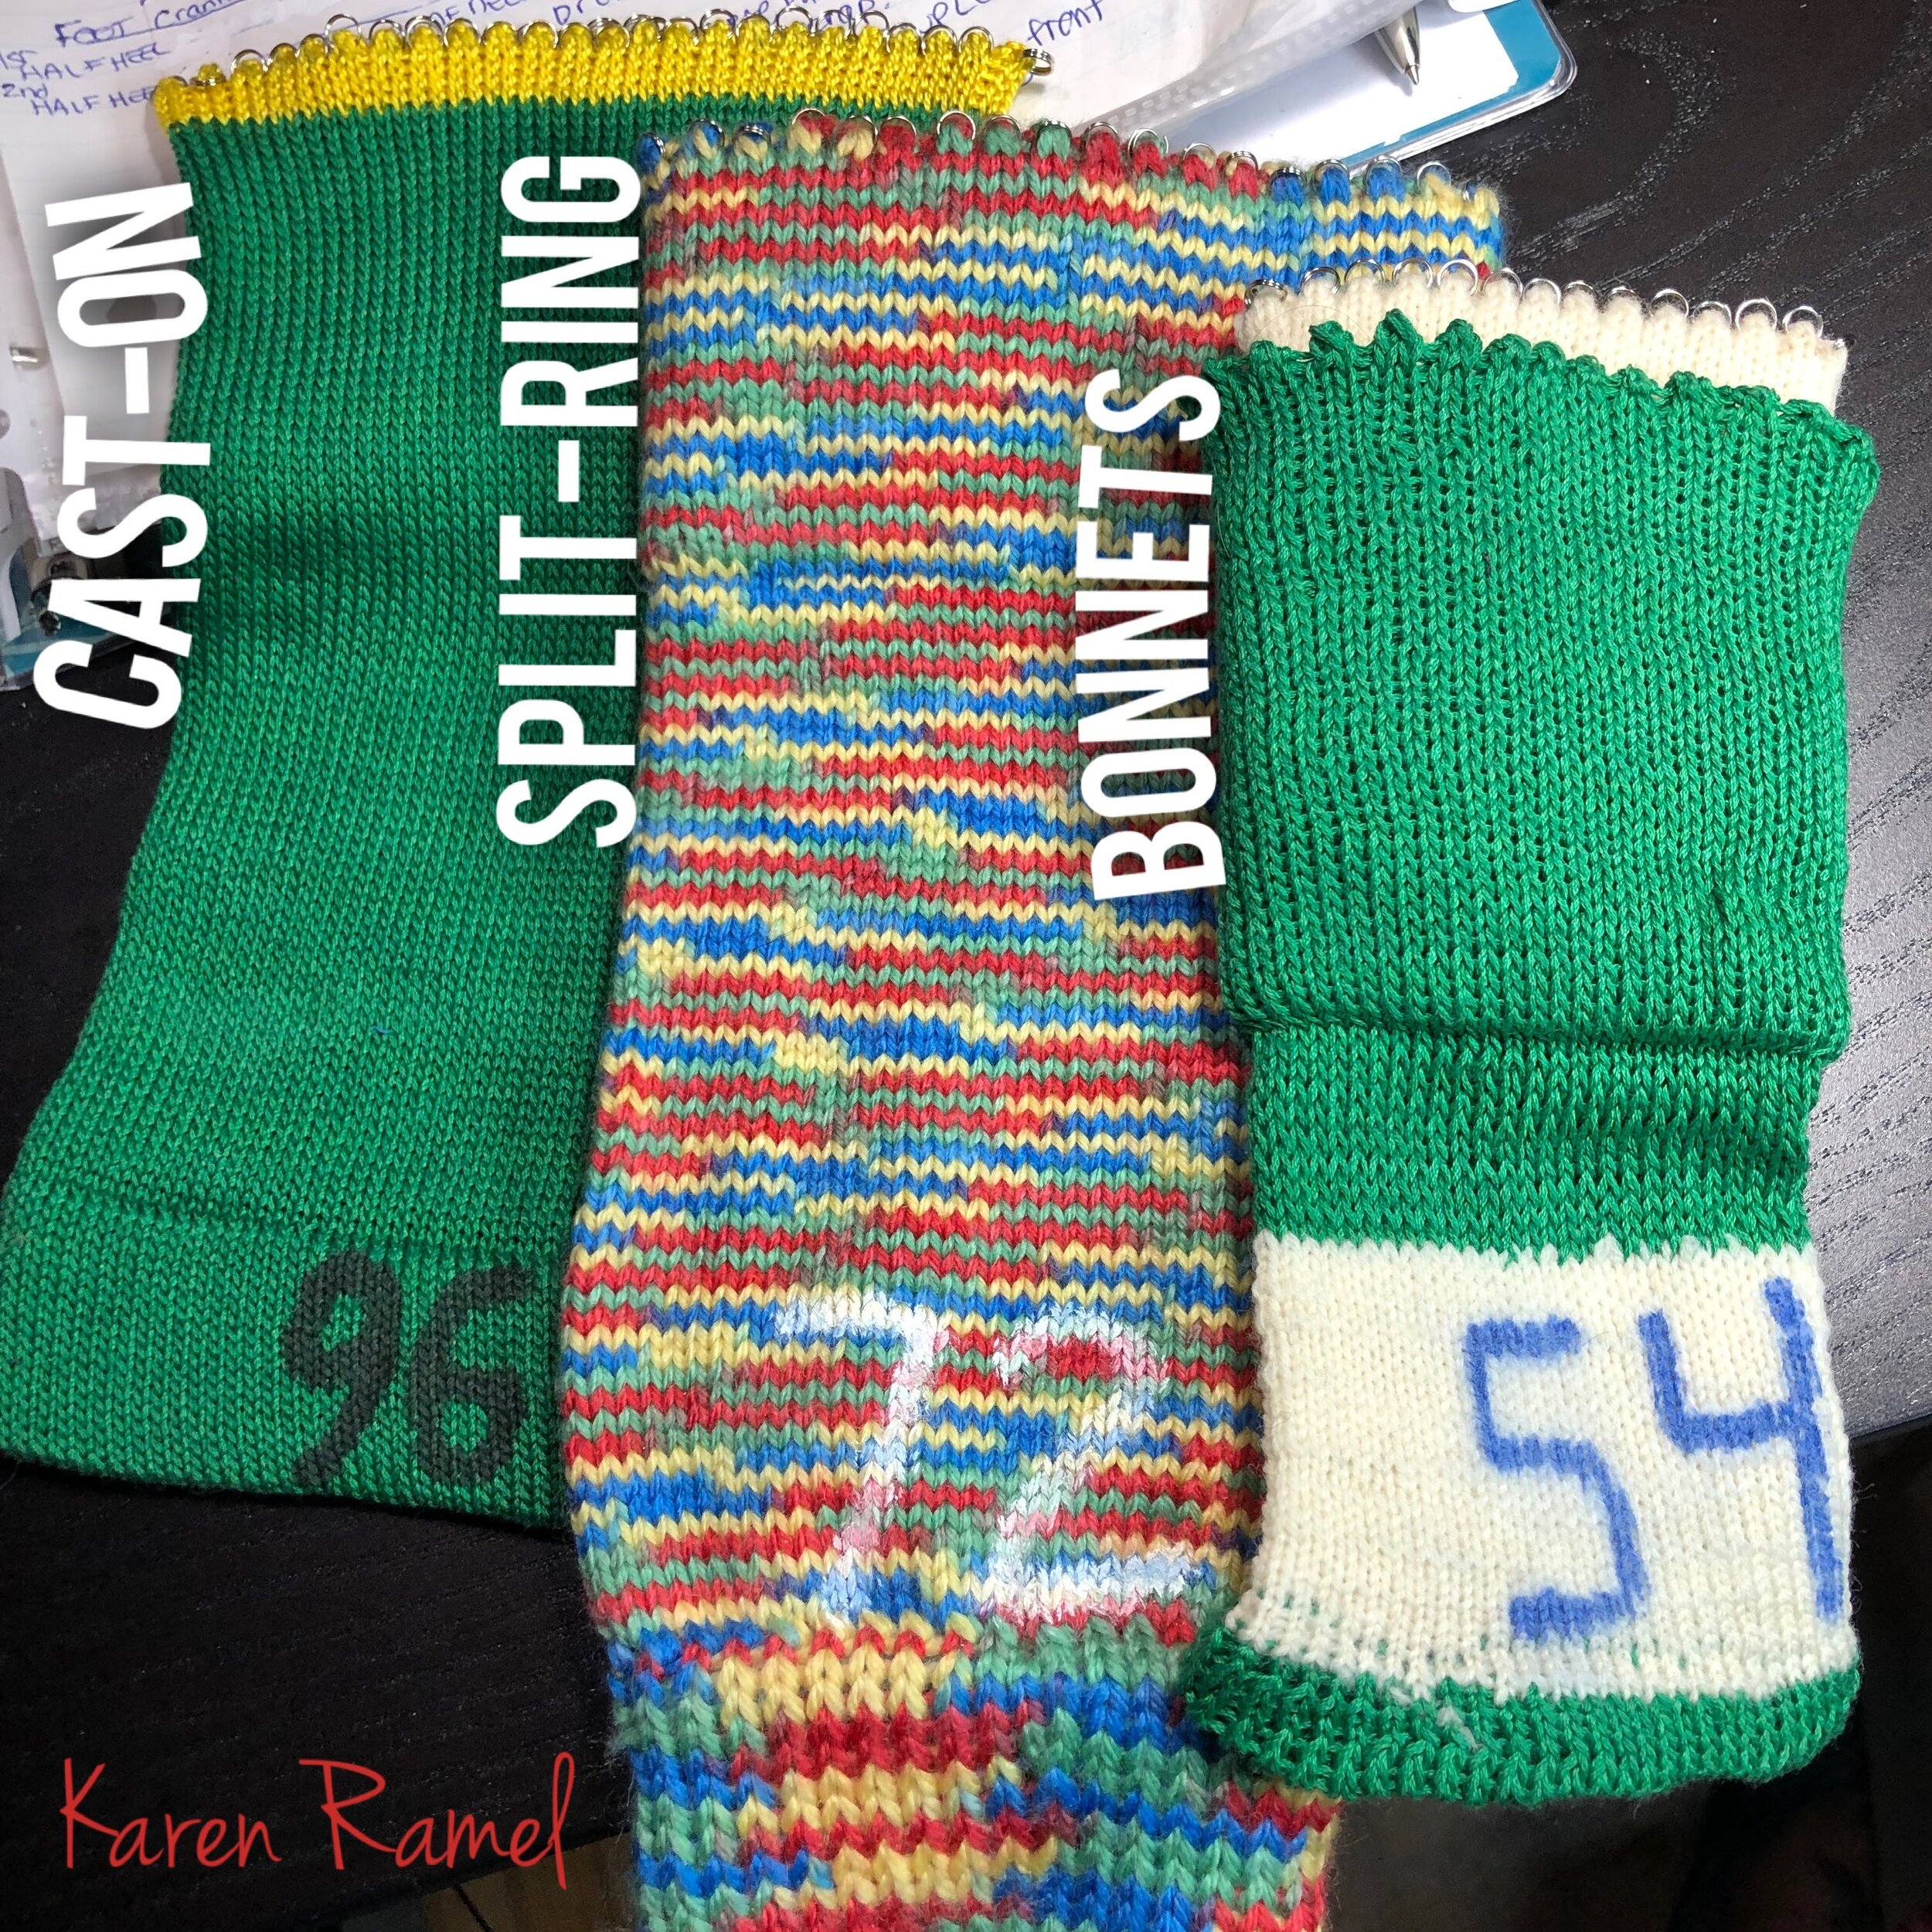
Also on INSTAGRAM
SEE ALL BLOG ENTRIES ON THE BLOG INDEX PAGE | Follow us on a variety of social sites see TAPLINK | Interested in Circular Sock Machines? See the CSM START Menu first page. | Seek something specific? Checkout the Index page.
2018 Oct 13 - Determining CSM Gauge
CSM Gauge - Why do we recommend it and how is it useful?

Often one of the very first questions people have is HOW MANY ROWS do I need to make a sock - this actually depends on how many rows per inch are worked on the machine by its settings and fiber used (which responds to the settings sometimes in different ways).
For example, at my preferred setting I like to knit quite tightly and by doing so I can knit a 8.5 women’s sock using 80 rows on the machine for the foot. I recently received a pair of socks from someone else using looser settings - they used 50 rows.
HOW TO SET YOUR VINTAGE MACHINE TO DETERMINE GAUGE?
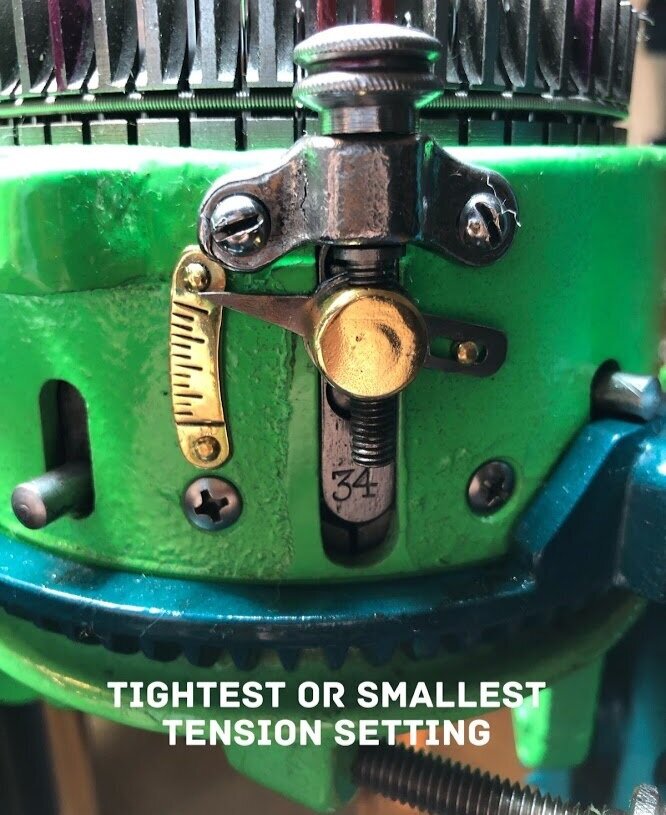
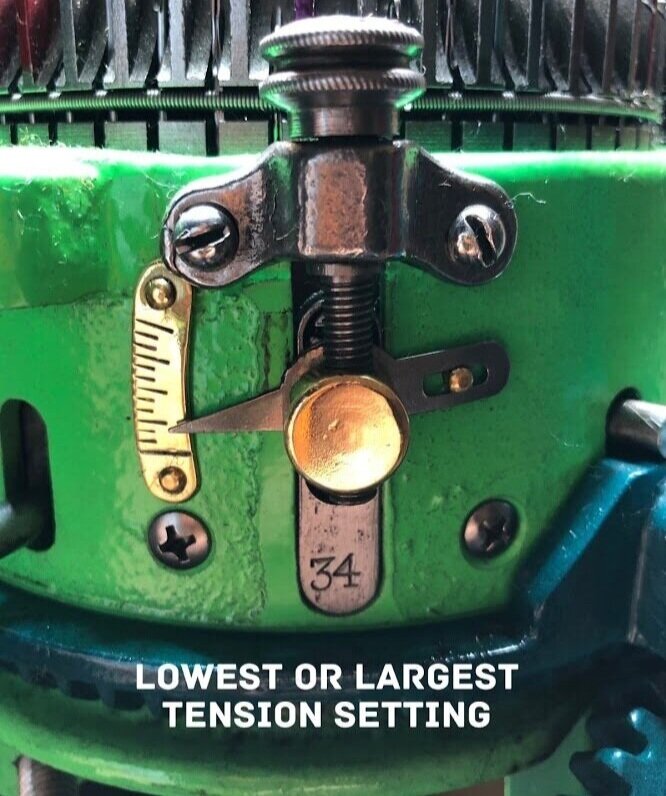
To CORRECTLY determine gauge you MUST have fiber loaded onto the machine and the dial turned all the way tight or all the way loose. Mark on your dial the place on the dial closest to the cylinder at 6 o’clock. Note which way you turn the dial to loosen or to tighten.
I like to also mark the opposite side of the dial (it represents half a turn when aligned with the 6 o’clock position on the cylinder).

Now consider that this gauge swatch is going to be a permanent swatch (not one you undo and reuse). Be sure to use fiber which has not already been used on the machine as it might react differently and indeed choose fiber most like the fiber you will most often use. I chose Michaels craftstore purchased Lions Brand Sock Ease in two different colors. This is what I DID.
My swatch starts with a hung hem and then I did each setting using a different color working 30 rows of each color. I repeated on the machine changing sections by only half a turn of the dial. 0= tightest setting, 0.5=half a turn etc. Work through all the possible settings on the machine until the dial cannot be turned any further. Finish with a hung hem with what I call the single pass live stitch securing/bind off. Your swatch needs to rest and be washed/dried (you can choose to air dry like I did or be naughty and toss in the dryer for the ultimate fiber reaction for testing).
Once the swatch is dry you can count the rows per inch and the stitches per inch. These numbers are your bread and butter. Knowing and recreating socks using the same settings will allow you to predict how this and similar fiber will respond when worked with the same settings. Similar fiber may involve a few more or a few less rows. You no longer have to GUESS.
For more info see this page for “GET TO KNOW THE TENSION SETTINGS OF YOUR MACHINE WITH A SWATCH!”


USING DIGITAL CALIPERS
If you choose to not actually mark the dial of your vintage machine you can instead attempt to use digital calipers. I personally did not get identical readings when measuring in sequence so I scrapped using these calipers shown below. Note the correct readings can only be achieved with fiber loaded onto the machine.
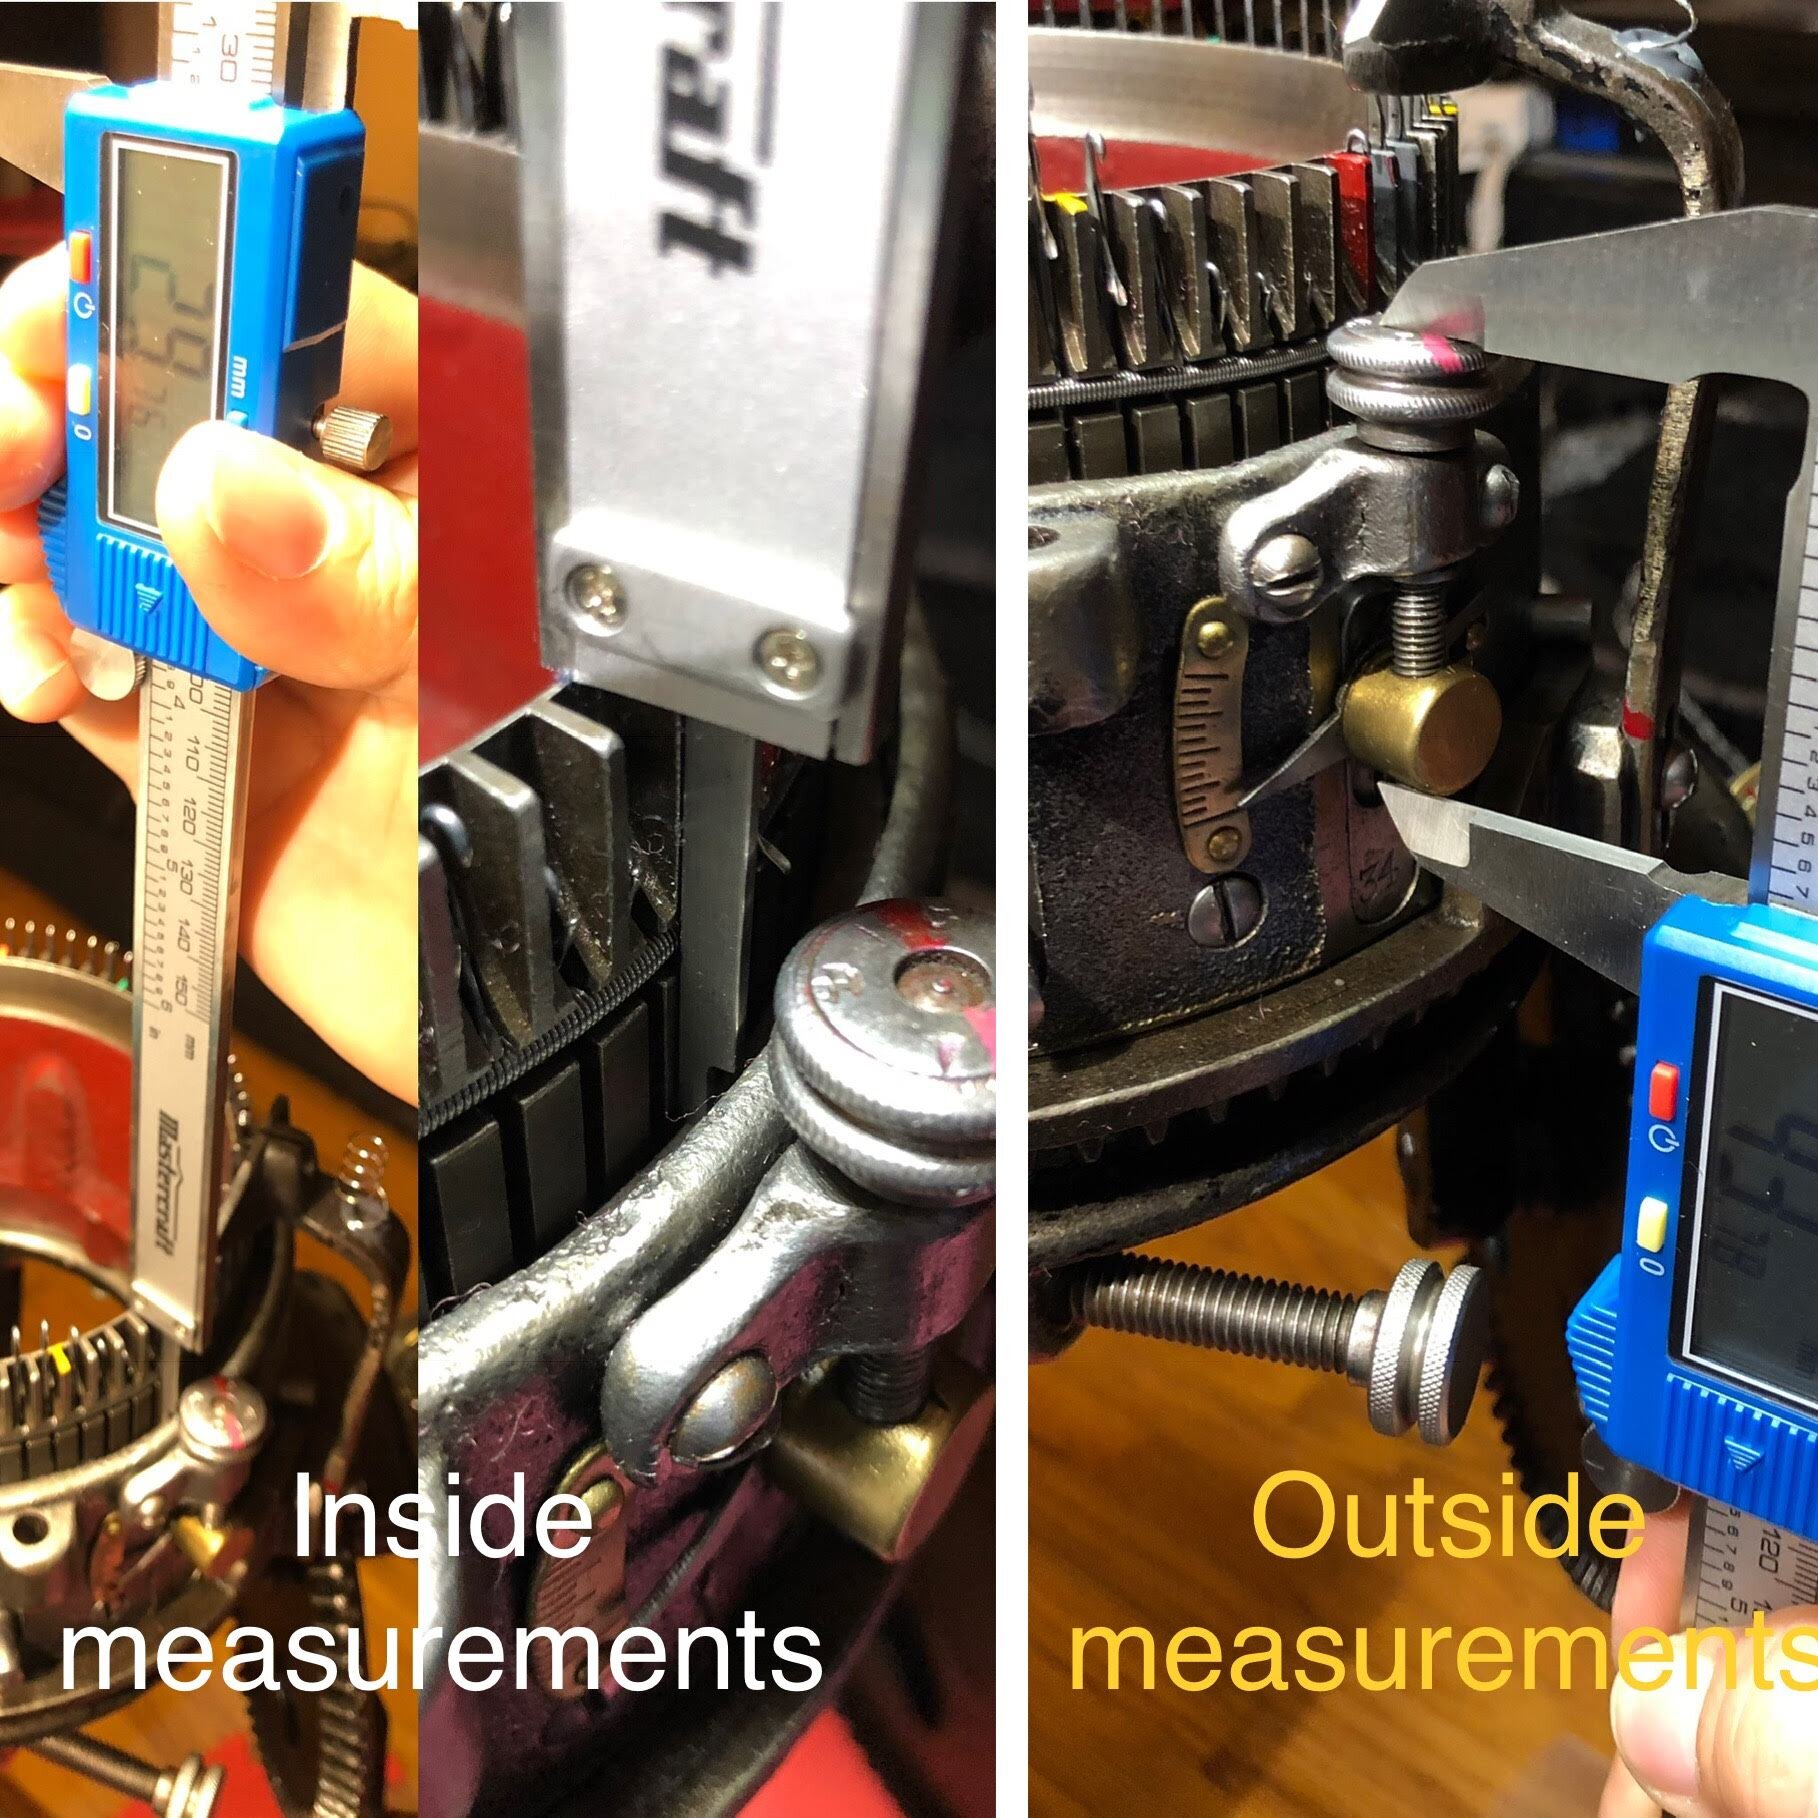
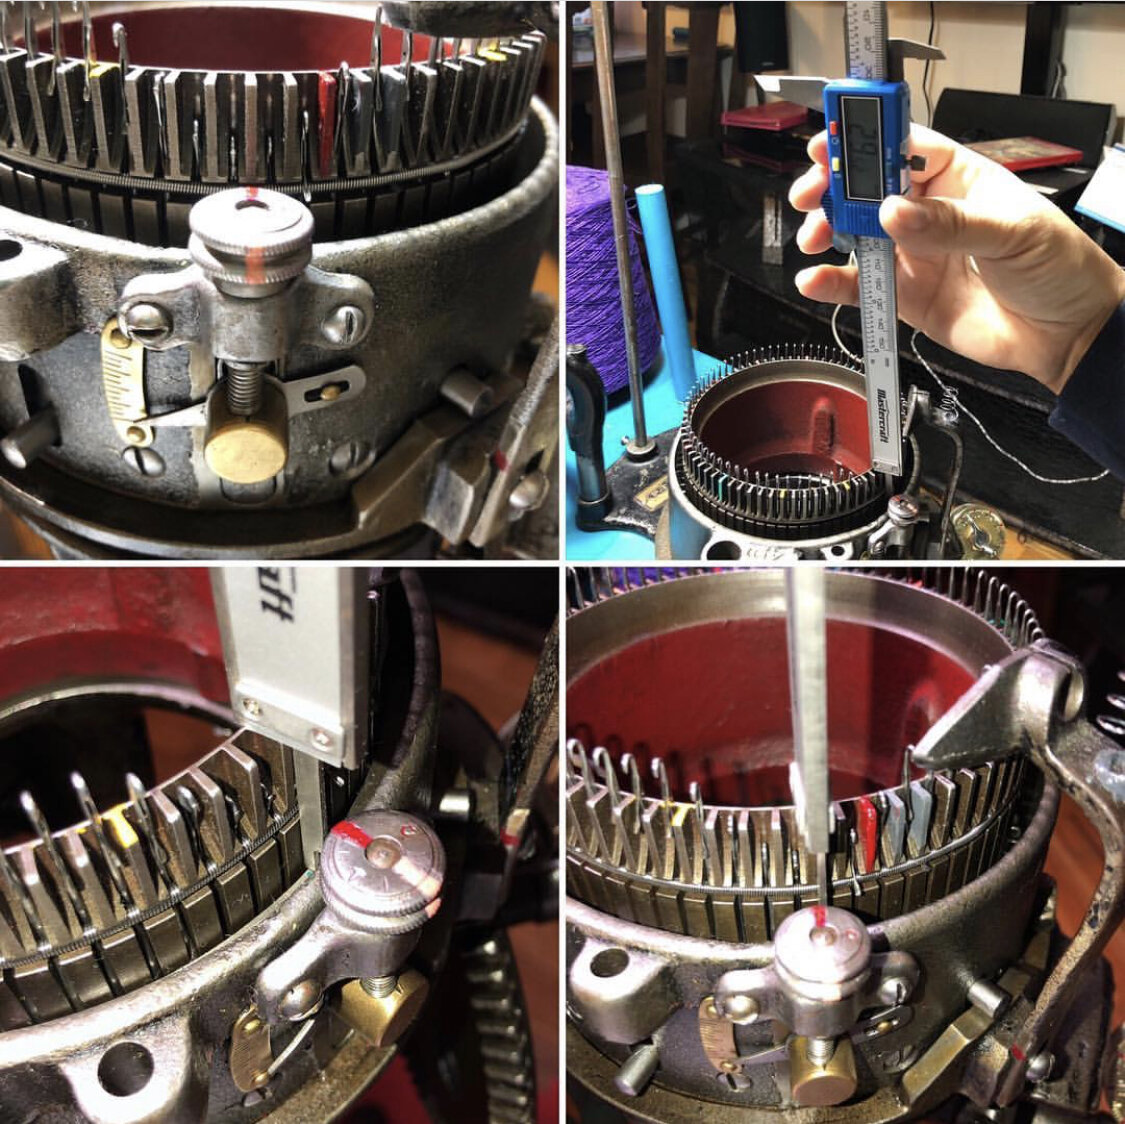
SEE ALL BLOG ENTRIES ON THE BLOG INDEX PAGE | Follow us on a variety of social sites see TAPLINK | Interested in Circular Sock Machines? See the CSM START Menu first page. | Seek something specific? Checkout the Index page.
2018 Oct 11 - New Easy Split Ring / Picot How To
I discovered an easier way to add split rings while also doing the required PICOT (two stitches on one needle) for ease in making a cast-on bonnet. Here I share it with you all. :)
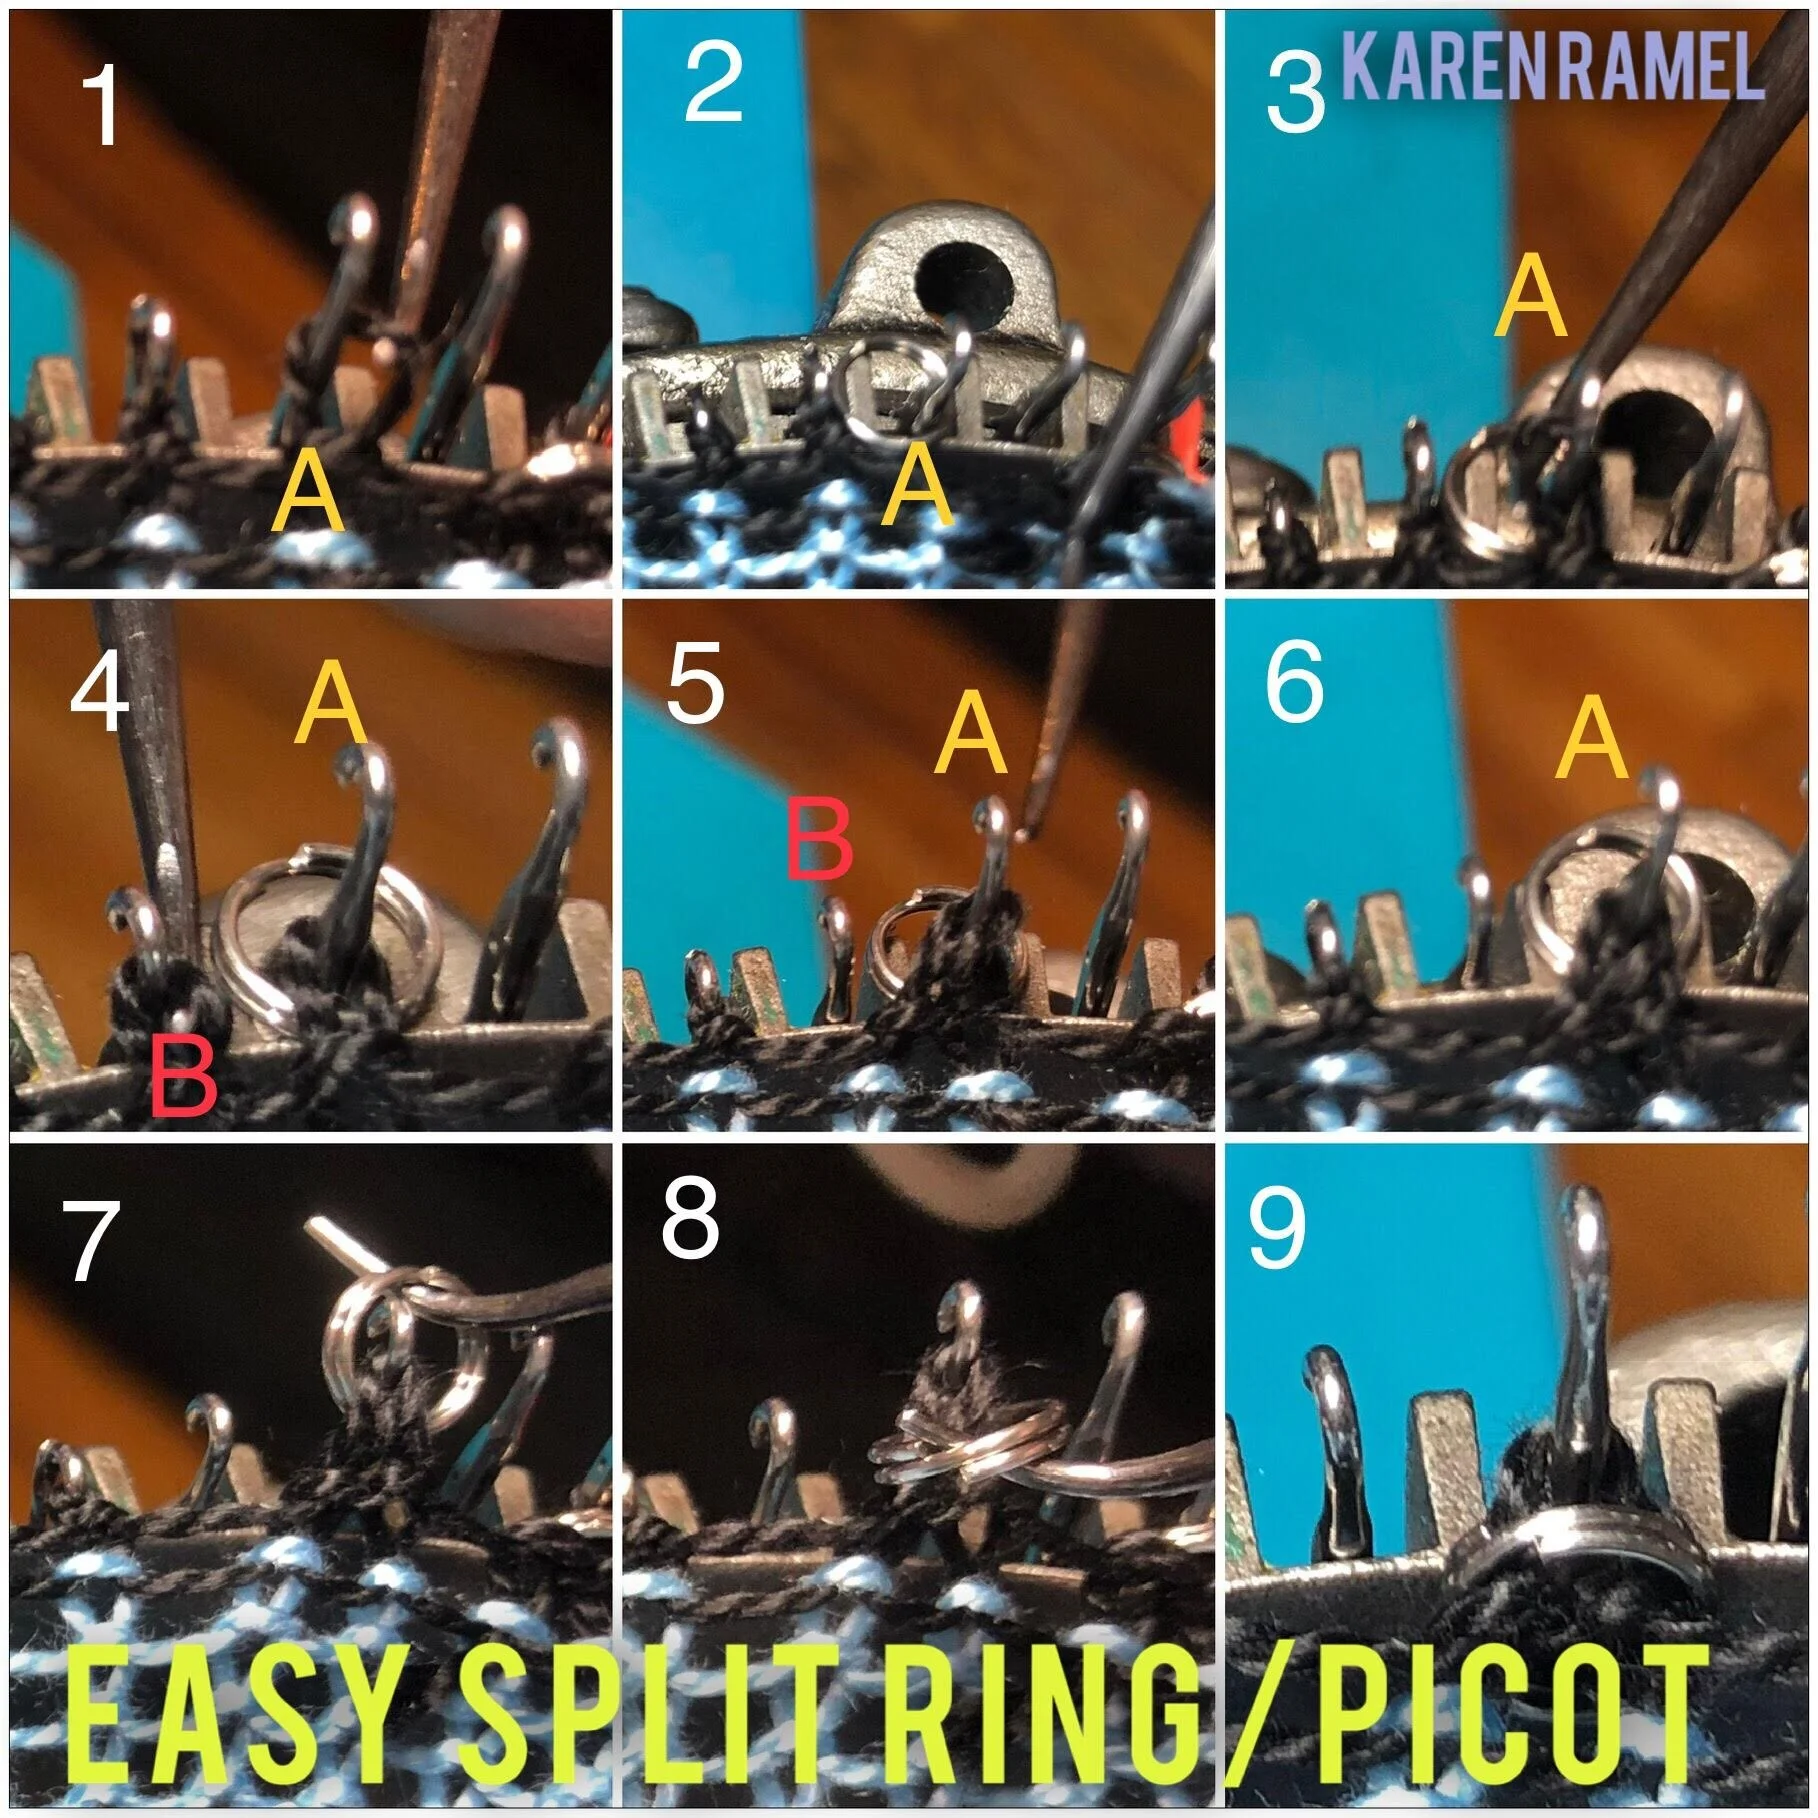
1) Lift stitch off needle A.
2) Put a single split ring on needle A.
3) Put held stitch back on needle A.
4) Lift stitch on needle B.
5) Put held stitch on needle A.
6) Should look like this.
7-9) Lift split ring up and over needle A and tuck inside cylinder.
Repeat til done row. Happy cranking.
Also on INSTAGRAM
SEE ALL BLOG ENTRIES ON THE BLOG INDEX PAGE | Follow us on a variety of social sites see TAPLINK | Interested in Circular Sock Machines? See the CSM START Menu first page. | Seek something specific? Checkout the Index page.
2018 Oct 10 - Legare Serial Numbers?

The numbers on my Legare 400.
My CSM is a Legare 400. It has a serial number 41645. The question as to what these sometimes printed numbers mean remains as of yet unanswered. Some machines have a number on the edge of their cam shell near the cylinder, some have a number on the base of the yarn mast like mine, and yet some don’t have any numbers at all visible.
Also on INSTAGRAM

An example of a different Legare with a number cam shell number
SEE ALL BLOG ENTRIES ON THE BLOG INDEX PAGE | Follow us on a variety of social sites see TAPLINK | Interested in Circular Sock Machines? See the CSM START Menu first page. | Seek something specific? Checkout the Index page.
2018 Oct 3 - Ridgid FlipTop Adjustable Tables

The original event table
I bought a wonderful table at the Spokane Crank In (Sep 20-23/18) but didn’t like the cut holes, the large base under the table top or the way the hook was anchored to the table. BUT Yes its a great table but I am picky - nothing against the seller or anything.
One can use this table to travel via plane using a secure case like a PELICAN CASE however note that the table top and width of the legs restrict you to what size case you can use. Also note if you over pack by weight and it causes the case to fail - you are on the hook for the damaged contents - not the case seller.
For all of my created and re-worked tables and more see here one can also see the gallery below.
For more info on supplies I like see here.
Also on INSTAGRAM

The UPGRADED table
Not all tables suit all persons. Not all setups make sense to all people.
I have two wooden table tops, one for everyday use and the second smaller size designed to be compact enough to fit into a future pelican airplane travel case with dismantled legs. Unlike the Erlbacher Gearheart Table with its tilting underside wood mount, this table top is now flat and perfect to pack away. There is nothing wrong with the Erlbacher table - I am just picky. :)
Things I modified for my own use:
-made table able to go lower by shortened vertical T-bar stem by 2”
-installed black end cap which doesn’t interfere with dismantling table
-removed tilt option by uninstalling flat grey plastic “Ridgid FlipTop” and cut off its two metal frame end mounts - patching as needed with KwikWeld adding “K”
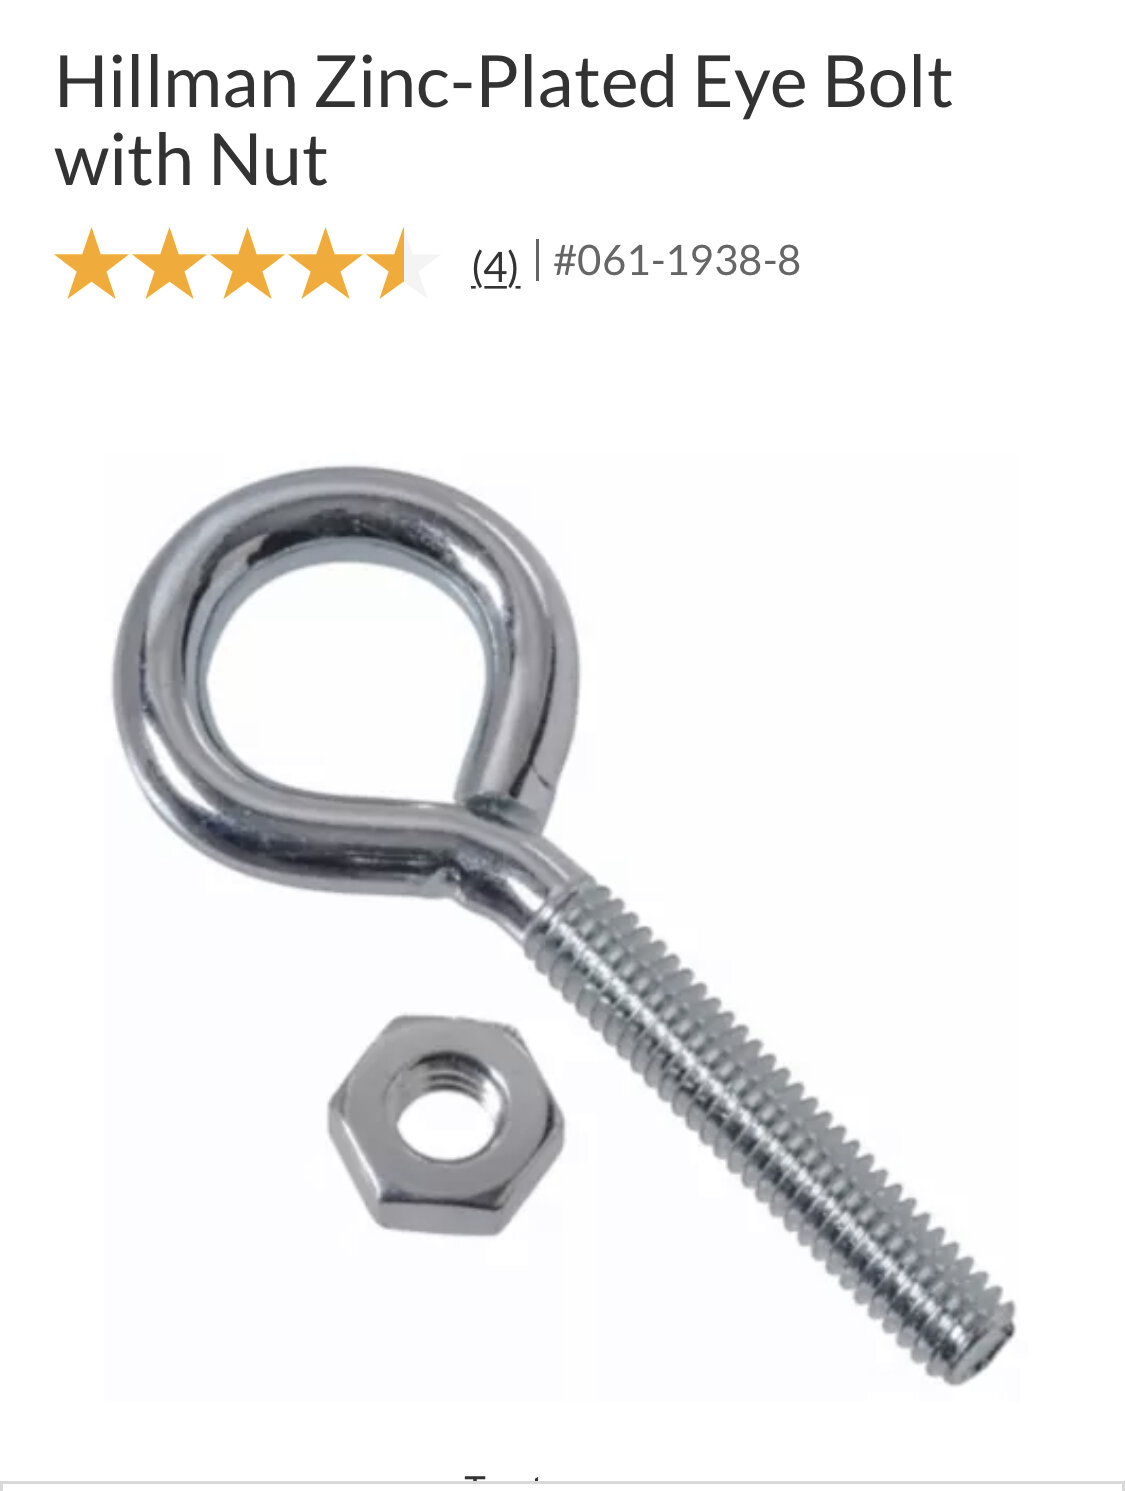
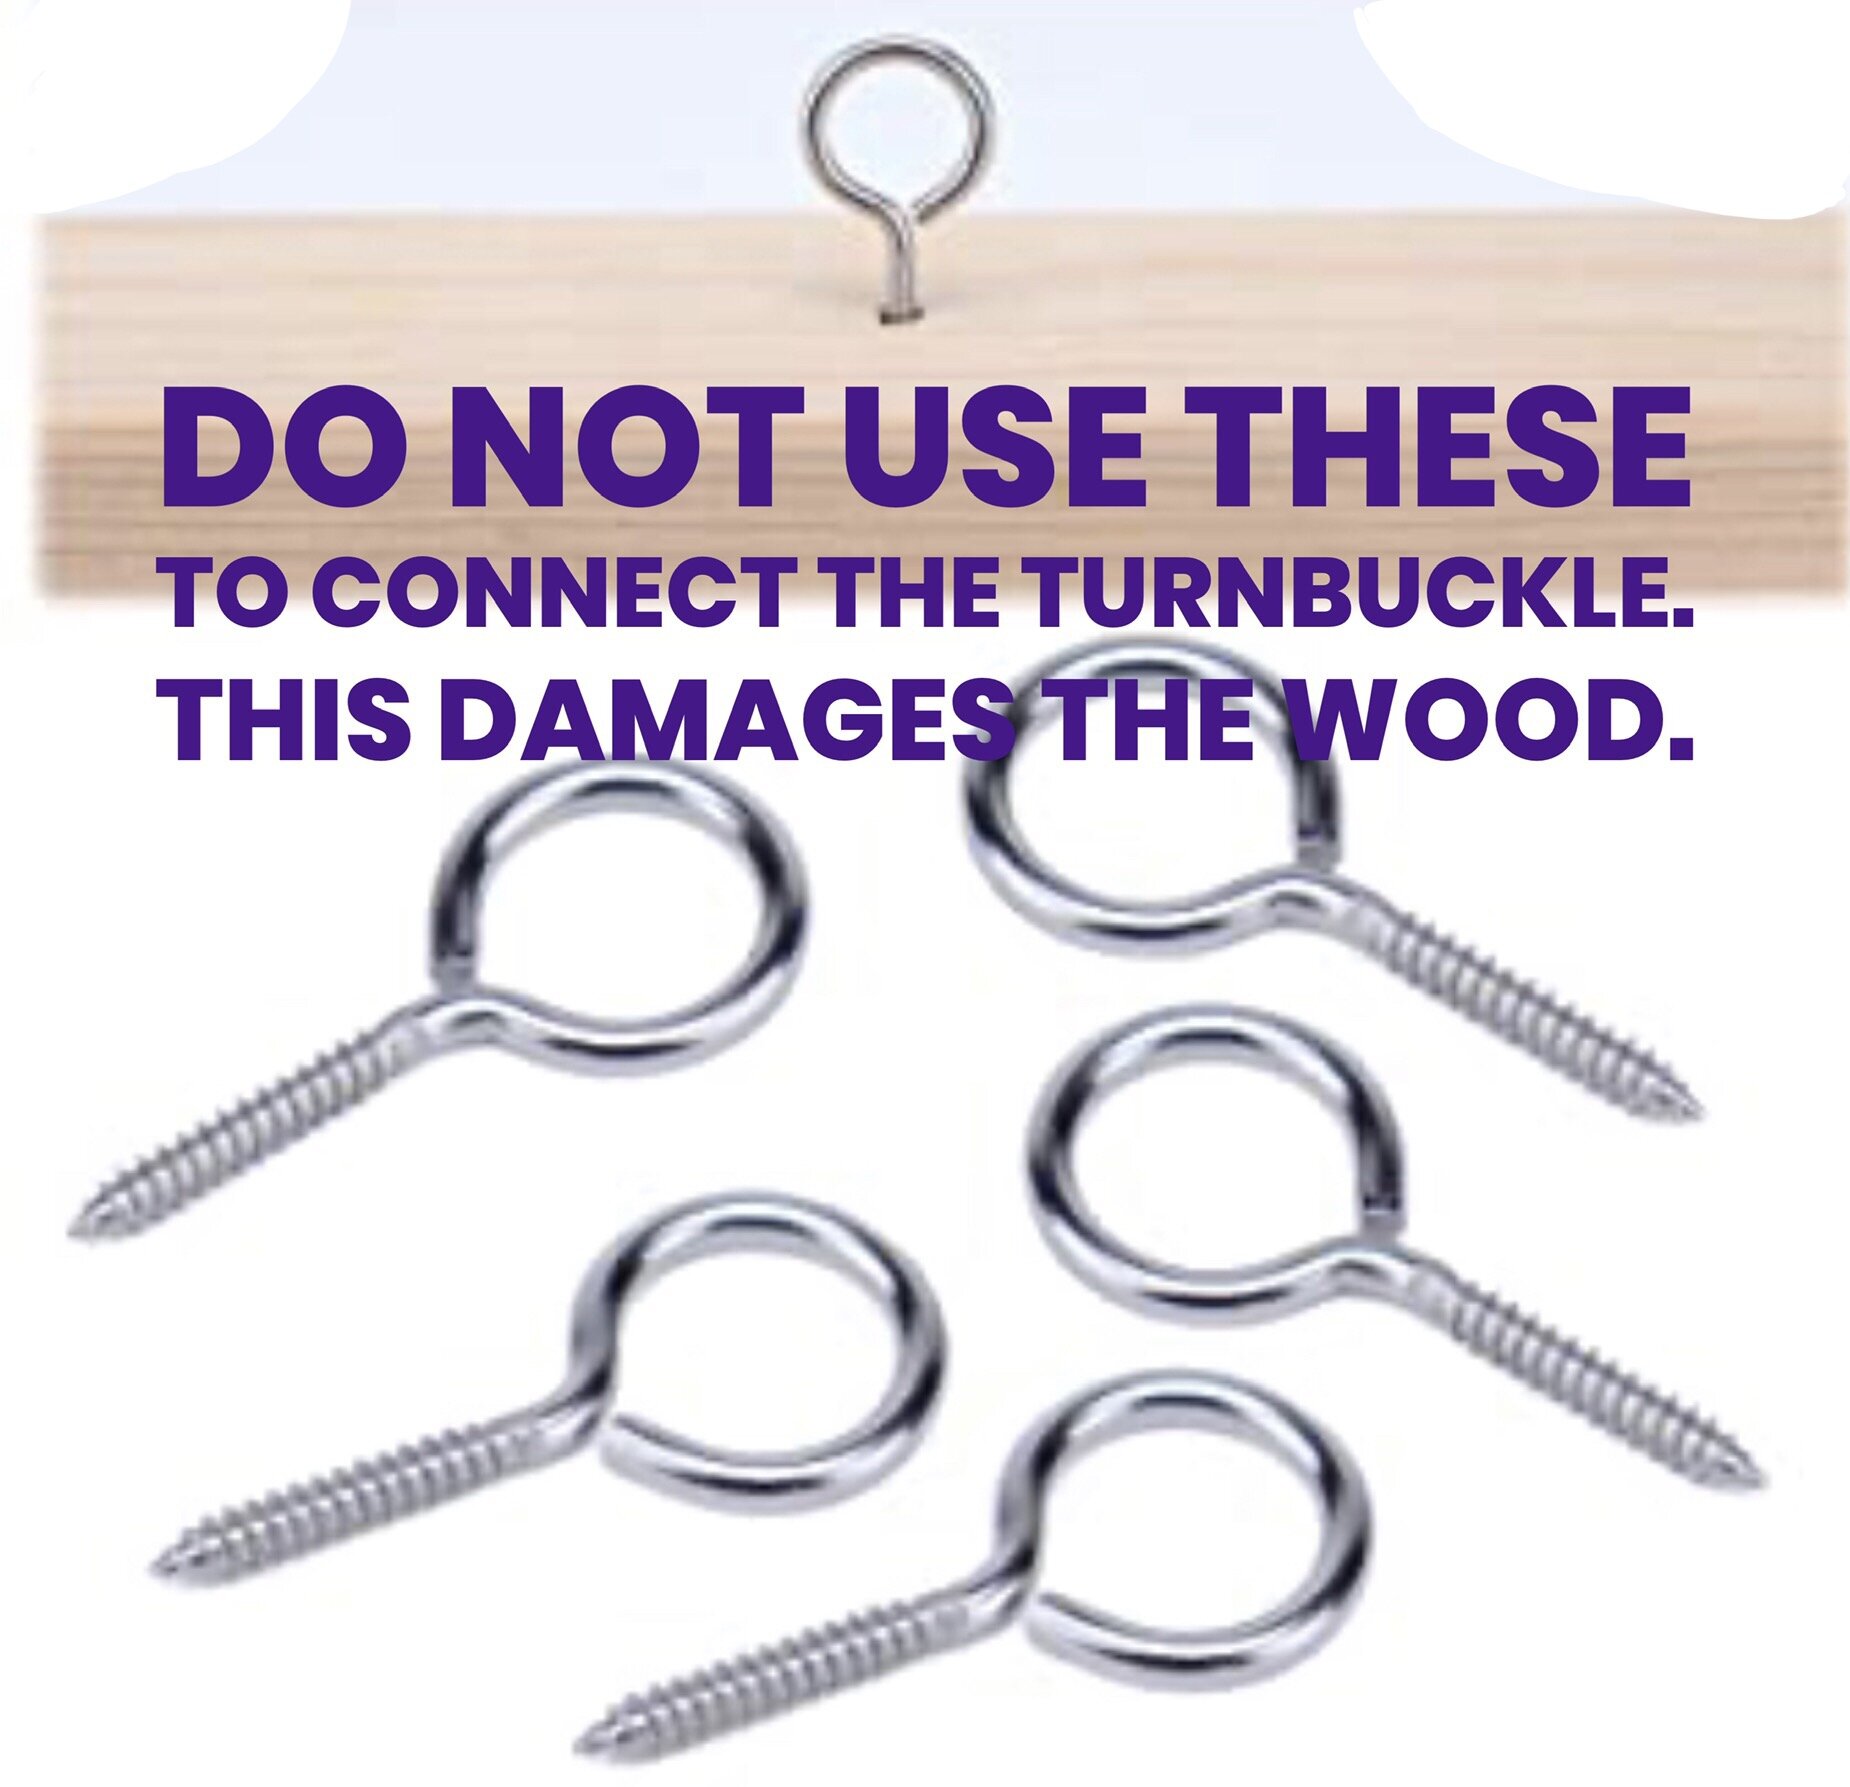
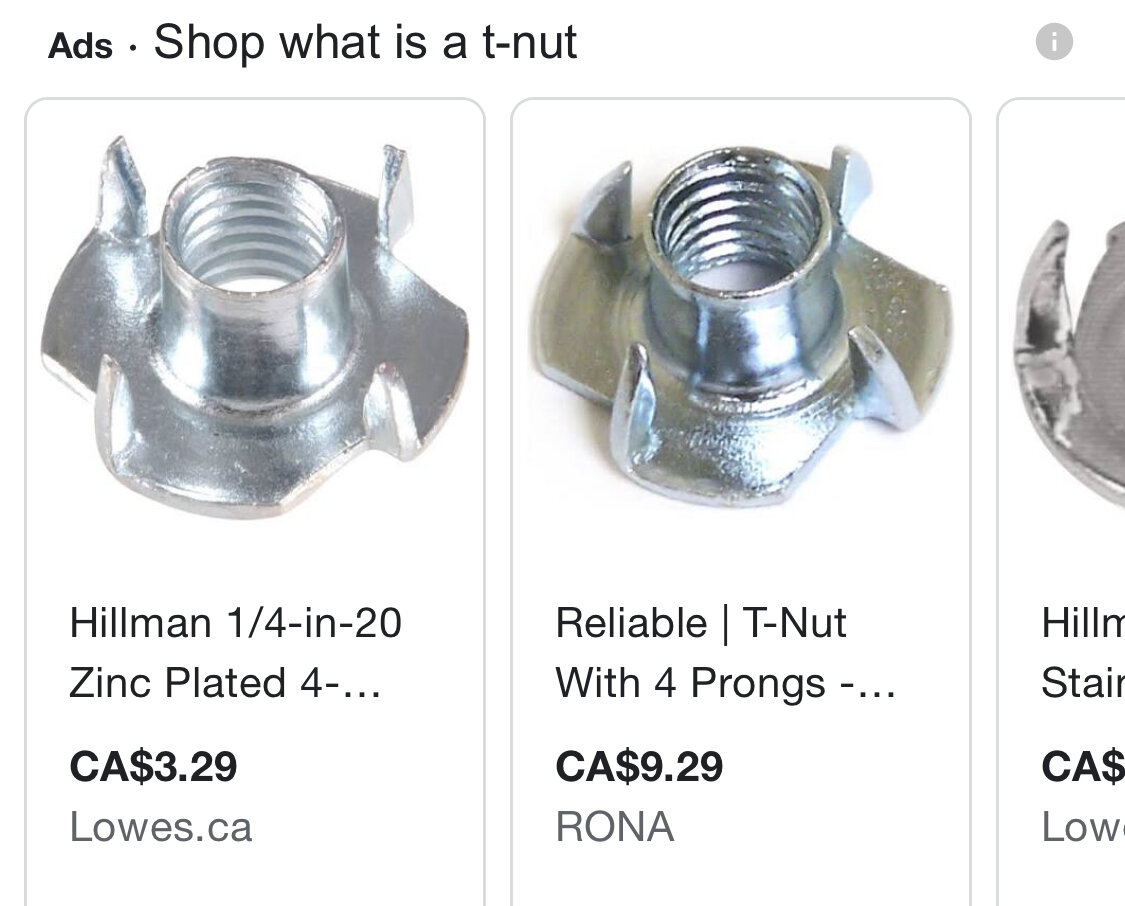
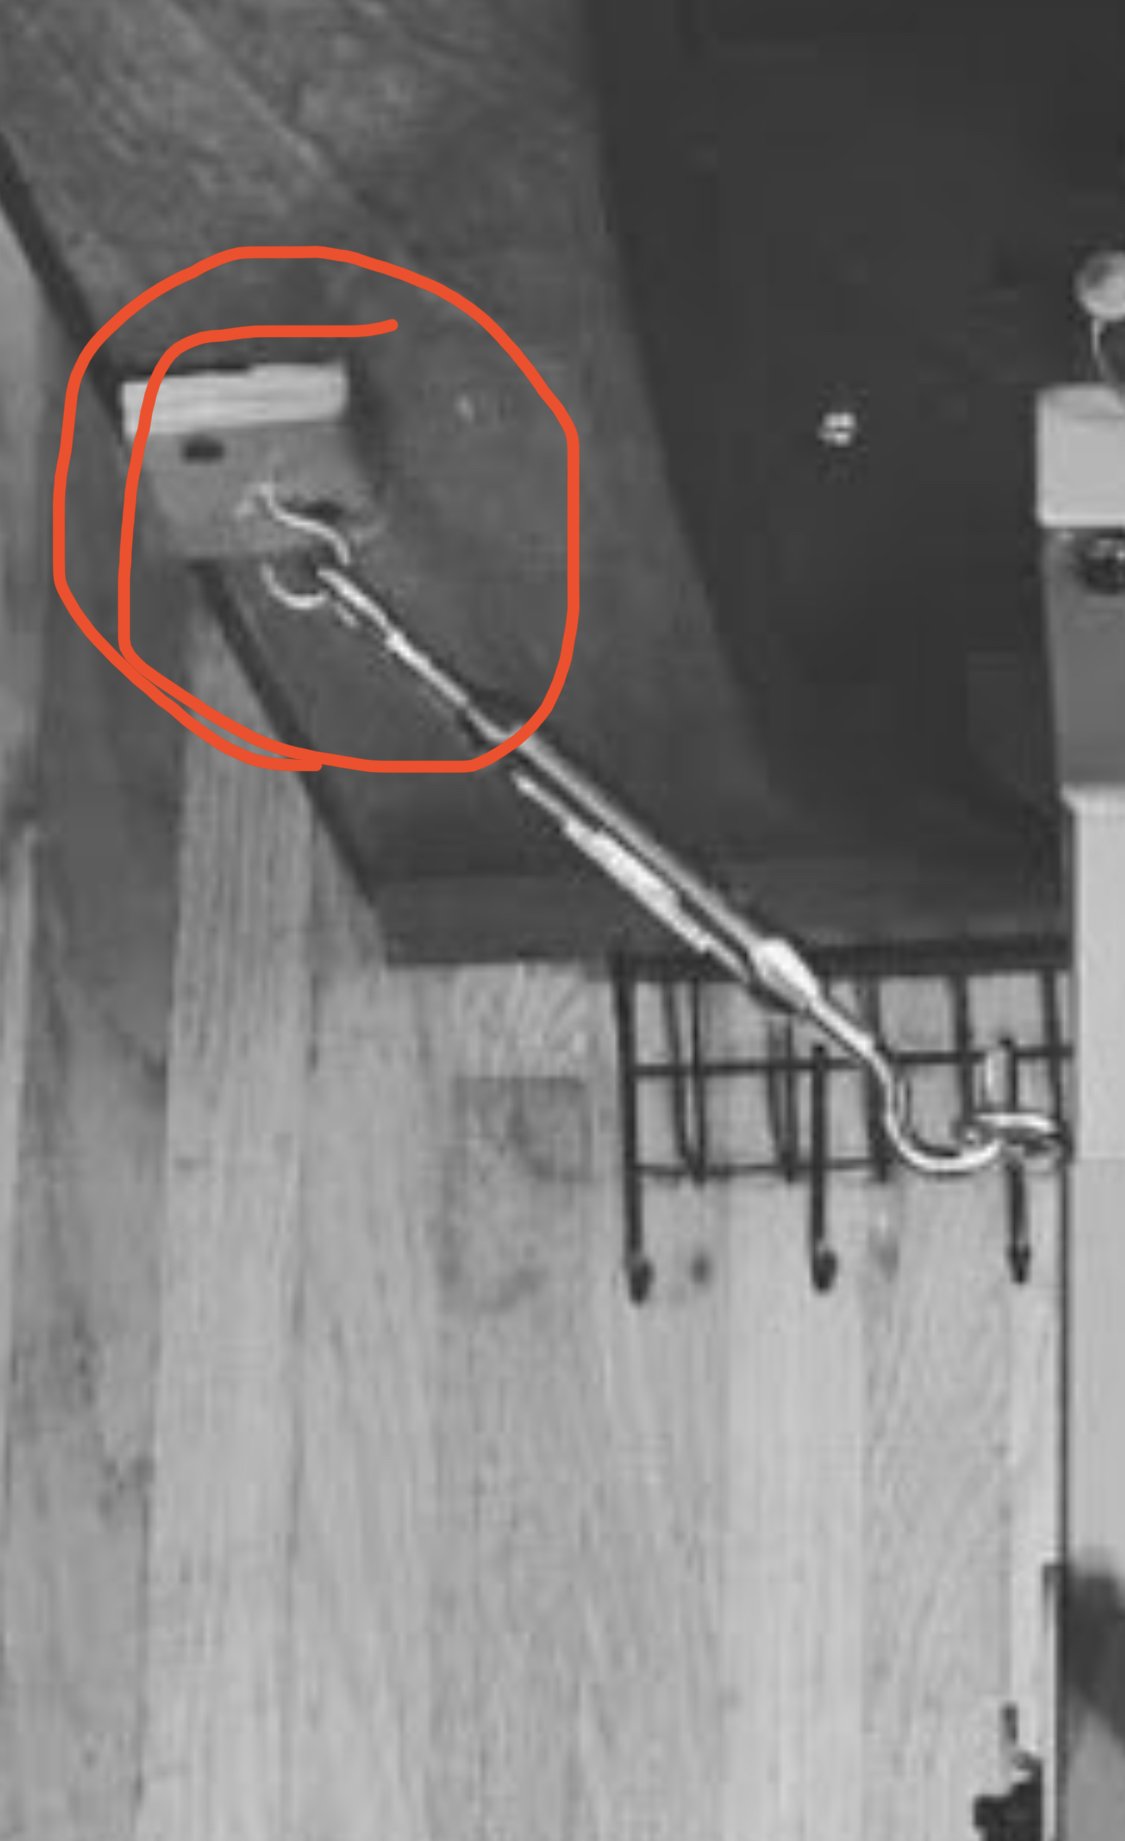
-removed screw hook installed into a small piece of wood (for previous single tension mount) kept metal eyelet in T-bar stem and replaced nuts with wing-nuts. -installed second metal eyelet on T-bar stem beneath current. -Drilled four holes into wood and installed T-nuts (two used as anchors for T-bar stem tension mounts, two used with longer eyelets to secure wood table top to frame from the bottom)
-Drilled two holes near leg extension where stem intersects legs as base reinforcing stabilization when table is much higher to be used with bigger/longer tension mounts to the table. -Reinforced the table underside with metal flashing to protect wood from machine clamps. -painted the table top teal and the underside and edges black. -Installed a T-nut for removable ball/cone holder near machine. *I chose 2.5” metal eyelets to screw table to legs to reduce table top clutter.
You *could* use the table with one tension mount by why not make it extra secure and balanced with two?
I share only to share not to insinuate or state that this is the only option out there. I sit in front of the table with the machine off to the right.
This is simply what I did for myself and I *love it* after all why not be surrounded by useful and pretty things?
Below is the gallery of ALL photos of upgrades I’ve done to this table setup. Clicking on an image to view larger.


You too can make yourself a wonderful csm table by picking up a board for the table and the legs from your hardware store or eBay ”Flip Top Portable Work Support”
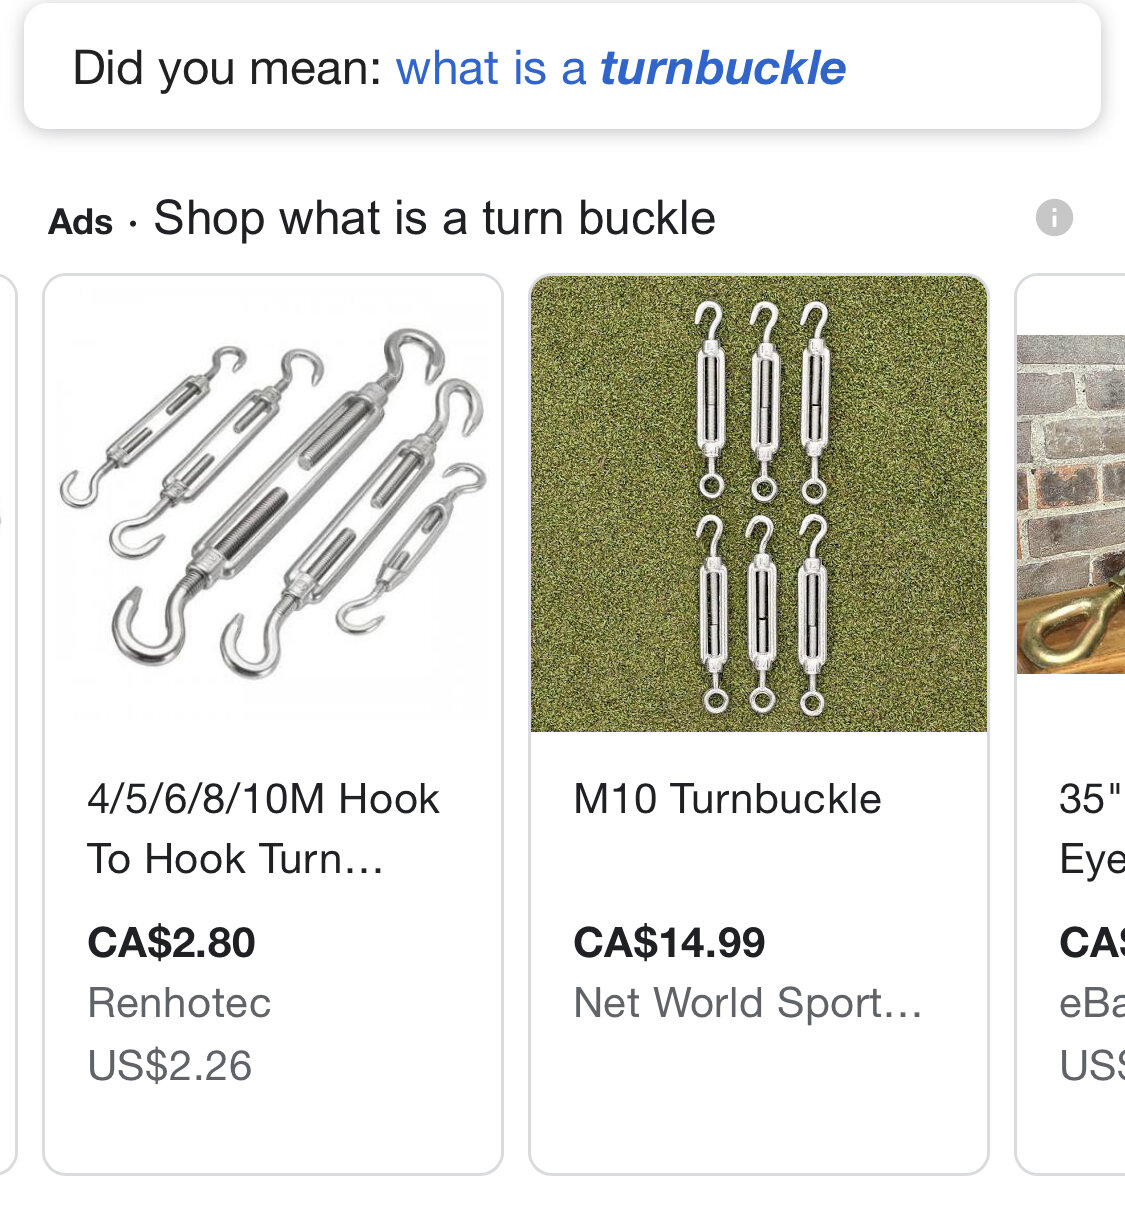
Essential hardware to connect your table top to your frame and the tension component (turnbuckle) to the table frame and table top itself.
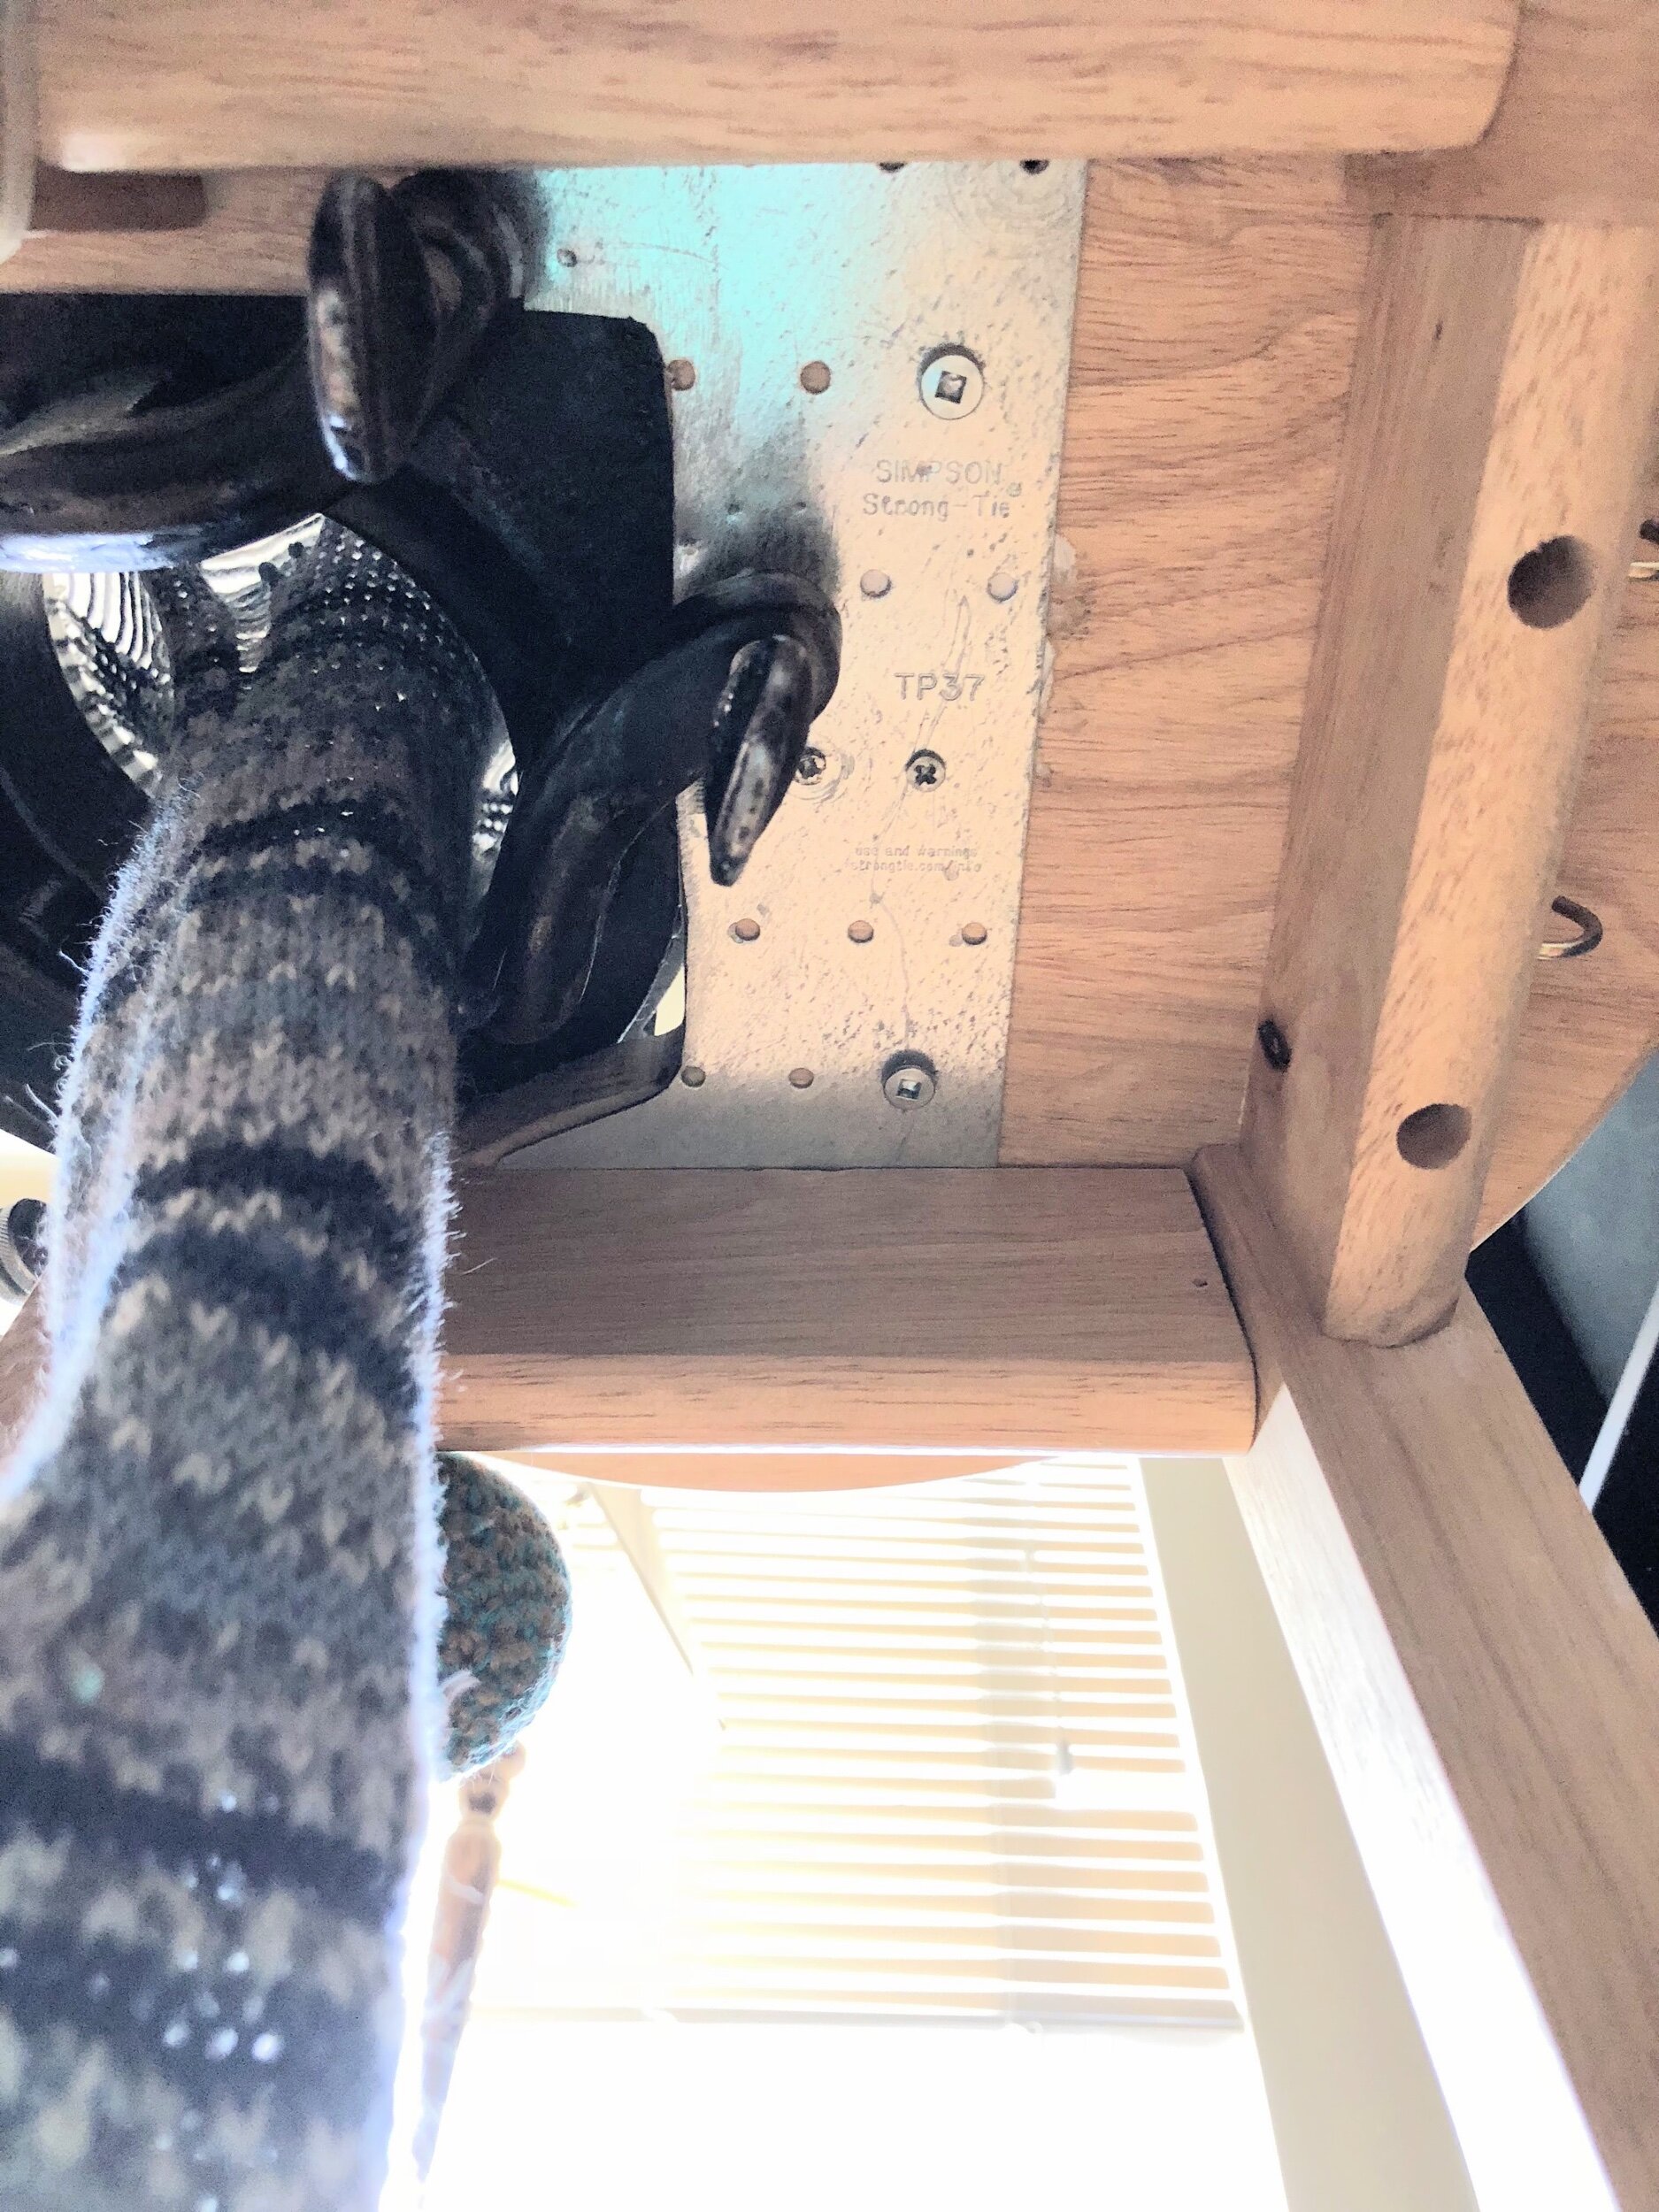
reinforce your wood table clamp area
Whenever using a wood table top it’s a good idea to reinforce the underside where the clamps will attach. This reduces wood wear and tear. I’ve used thin metal sheets that I drill holes into. The sheet is glued and screwed onto the underside of the clamped area of the wood table top. Be sure to place screws ideally outside of where the machine would clamp.


How to I WOULD upgrade a Erlbacher Gearheart Table
(if I were asked AGAIN…)

This table uses the *exact same* legs as the hardware store/amazon/eBay available “Ridgid FlipTop” table.
Why modify it? (There is nothing “wrong” with this table but if it can be better so why not?)
Removing the large wood mount increases table real estate, we don’t use the tilt ability so nothing lost (other than moving table in two pieces over one), and doing this makes the table top easier to transport truly flat. For more info on modifications see the other rigid fliptop table post or see this INSTAGRAM POST
This is a great table foundation offering height adjustment not otherwise available out there.

Keep you CSM table balanced by hanging your heel weights on a removable metal hanger under your table. Easy access!
Also on INSTAGRAM
ADDING A SHELF TO YOUR TABLE

Inspired some of the other CSM tables out there, this shelf can be completely disassembled.
Also on INSTAGRAM
UPGRADING THE TABLE TOP
This photo below is of the most recent paint - this table has been painted teal before and is now this color. I used a product called “Unicorn Spit” in a custom hand done technique to match the new handle upgraded by Dave Lord of Chambord CSM. Also posted on INSTAGRAM

See many other topics or tables by category on the quick lookup page INDEX
Another seller of these table legs:


SEE ALL BLOG ENTRIES ON THE BLOG INDEX PAGE | Follow us on a variety of social sites see TAPLINK | Interested in Circular Sock Machines? See the CSM START Menu first page. | Seek something specific? Checkout the Index page.
2018 Sep 28 - Using your tools in unexpected ways...
When working with heavier yarn sometimes its harder for the fiber to sit where it should on the cylinder - by placing your pastry blender heel forks on parts of your knitting it can help keep knitting where it needs to stay for all things to function correctly. Here I am creating a split ring regular cast on bonnet using the heel forks to continue to hold down the added split rings on the inside of the work.

Also posted on INSTAGRAM
SEE ALL BLOG ENTRIES ON THE BLOG INDEX PAGE | Follow us on a variety of social sites see TAPLINK | Interested in Circular Sock Machines? See the CSM START Menu first page. | Seek something specific? Checkout the Index page.
2018 Sep 25 - CSM Upgrades

Securing your yarn mast at the CSM base
Installed a tension screw to help secure the mast on my Legare 400 antique circular sock knitting machine. Highly recommended. Very easy to accomplish with a hardware store purchased “Tappet” a device used in the drill to create a threaded hole in a hole already drilled. Tappet and matching screw purchased at Home Depot.
Also posted on INSTAGRAM
HANDLE UPGRADE
The handle on my vintage CSM is gorgeous, however much thought I came to decide I wanted to upgrade it. These handles are permanently installed on the metal mount with a hammered rivet on both ends - in order to remove the wood handle - either one must cut the metal or one must cut the wood. After discussing with Dave Lord of Chambord CSM, it was decided to send my crank wheel to him in Quebec for a stem upgrade and unpainted Chambord CSM handle purchase.


The unpainted hand was gorgeous - having been cut from a tree from their property - it had a natural heart in the wood grain (see the lighter colored wood photo) that I decided long and hard to cover still with paint. And paint it I did - I used Unicorn Spit (this is the brand of paint) with a hand applied personal technique.
Extreme thanks and appreciation to Dave and Kathy for making the handle happen.


LOOSE CONNECTIONS - SECURE WITH A TENSION WASHER OR DOUBLE NUT
Sometimes while working on your machine a screw can work itself loose - this is a BIG deal if its the timing screw on the tappet (as shown). I locked my screw into place using a tension washer. I added nail polish to mark the standard UP side of the nut when timed.
NOTE: Timing can slightly change between different fibers - its not something set once and ignored.
Also on INSTAGRAM


A quick cover for your CSM... a (Panda) shower cap. ;)
Also posted on INSTAGRAM
2018 Sep 25 - Repairing Cylinder Fins

My cylinder arrived with two broken fins (the top area of two cylinder slots). While the cylinder works without those top parts in place, it will change the tension of the stitches there - which is very evident on the knitting when viewed off the machine.
However working with KwikWeld is an option. Be sure to degrease and roughen the surface where the repair is to happen. The bigger photo shown here is mid-fix.
Also posted on INSTAGRAM

SEE ALL BLOG ENTRIES ON THE BLOG INDEX PAGE | Follow us on a variety of social sites see TAPLINK | Interested in Circular Sock Machines? See the CSM START Menu first page. | Seek something specific? Checkout the Index page.
2018 Sep 25 - Yarn Carrier Upgrade
Want to see info on threading or slotting the Yarn Topper? SEE HERE.
SLOTTING YOUR VINTAGE YARN CARRIER
At the 2018 Spokane CSM event Steve Ashton slotted my antique yarn carrier by cutting a vertical access on the main component. In order for this part to still function correctly the yarn fed through this now open area, needs to be held down. In these versions shown here from initial to last update useing KwikWeld, using a variety of simple materials and measures one can make your own vintage yarn carrier into a slotted one! Works great!


2018 Sept 20 - CSM Event Spokane, WA
THIS IS MY VERY FIRST CSM EVENT EVER!
The event: “Kathy Howland's Spokane, WA Crank-In” Sep 20-23, 2018
The demonstrator at this event was Steve Ashton.
The event was AMAZING and only a possibility to me thanks to having had transport to and from the event (we didn’t have our own car at the time).
Indeed thanks to Steve Ashton’s generosity and open-mindedness, he changed his plans to include a night-before stop over (Wed Sep 19th) with use of our sofa bed for a very early morning commute start Sep 20th.

Steve came to town Wed Sep 19 to run some errands and then met up with my boyfriend and I after work that same day. We walked over to White Spot (a nearby restaurant) and then returned home to determine what I should bring. After much decision (ITS SO HARD TO PACK FOR YOUR FIRST EVENT - how much yarn is really enough after all?) finally compiled what I should bring (with Steve’s recommendations) and we packed his vehicle.
What to consider to bring to an event.
It was very very early Thursday Sept 20 (maybe 4am) that we set out for the 7 hour drive to Spokane.
At this awesome event among the many things I grew starry eyed over, I became introduced to my own ribber and learned not to fear it as I did. Steve also demonstrated another way to close the toes (kitchener) from the purl side of cuff down socks.
I will ever be appreciative for this very first event and thankful to Kathy Howland and Steve Ashton for making this happen for me.
Venue information: https://www.bearcreeklodgewa.com/ or https://www.facebook.com/bearcreeklodgewa/
SEE ALL BLOG ENTRIES ON THE BLOG INDEX PAGE | Follow us on a variety of social sites see TAPLINK | Interested in Circular Sock Machines? See the CSM START Menu first page. | Seek something specific? Checkout the Index page.
2018 Sep 18 - Heel Forks
Heel Forks
These are used to make a heel or toe on the CSM
NEW D.I.Y.: Ultra Compact Heel Forks!
I used eBay purchased “Silver Olive Seafood Crab Lobster Forks” CAD$3.80/5 pcs (includes S&H).
These heel forks are easy to manipulate due to their small profile. The fork itself is easy to determine orientation when inside the machine by the base - where its easy to tell which direction the tines are inside the machine - making it all the more easier to move as needed inside the machine.


Heel Forks using Pastry Blenders (Sep 18/18)
Sharing an idea I had with using Pastry Blenders - an idea that has been had by others - first perhaps by Pat Fly (see below).
Each heel fork is HALF of a pastry blender that was cut, each metal tine reinforced with gorilla glue due to the tines only being crimped in place. Each metal end is bent as shown. The weights you see were handmade crochet covered Walmart Fishing weights. The Pastry Blenders were purchased from Amazon.ca “Pastry Blenders”. Pat Fly reference

